From Saudi territory, the journey continues southwards into Yemen, to the far south-western corner of Arabia, home to the strategically important port of Aden, which was under British control at the time. This time, naval forces from both sides are also deployed. Due to the strait at the mouth of the Red Sea, sea minefields are also of some significance. In this ‘Yemen’ mission, the player achieves an MV by capturing all primary objectives, and a DV by additionally destroying two SAS training camps in the desert, which are constantly producing Arab sabotage units.
- Jemen-9.jpg (818.63 KiB) Viewed 809 times
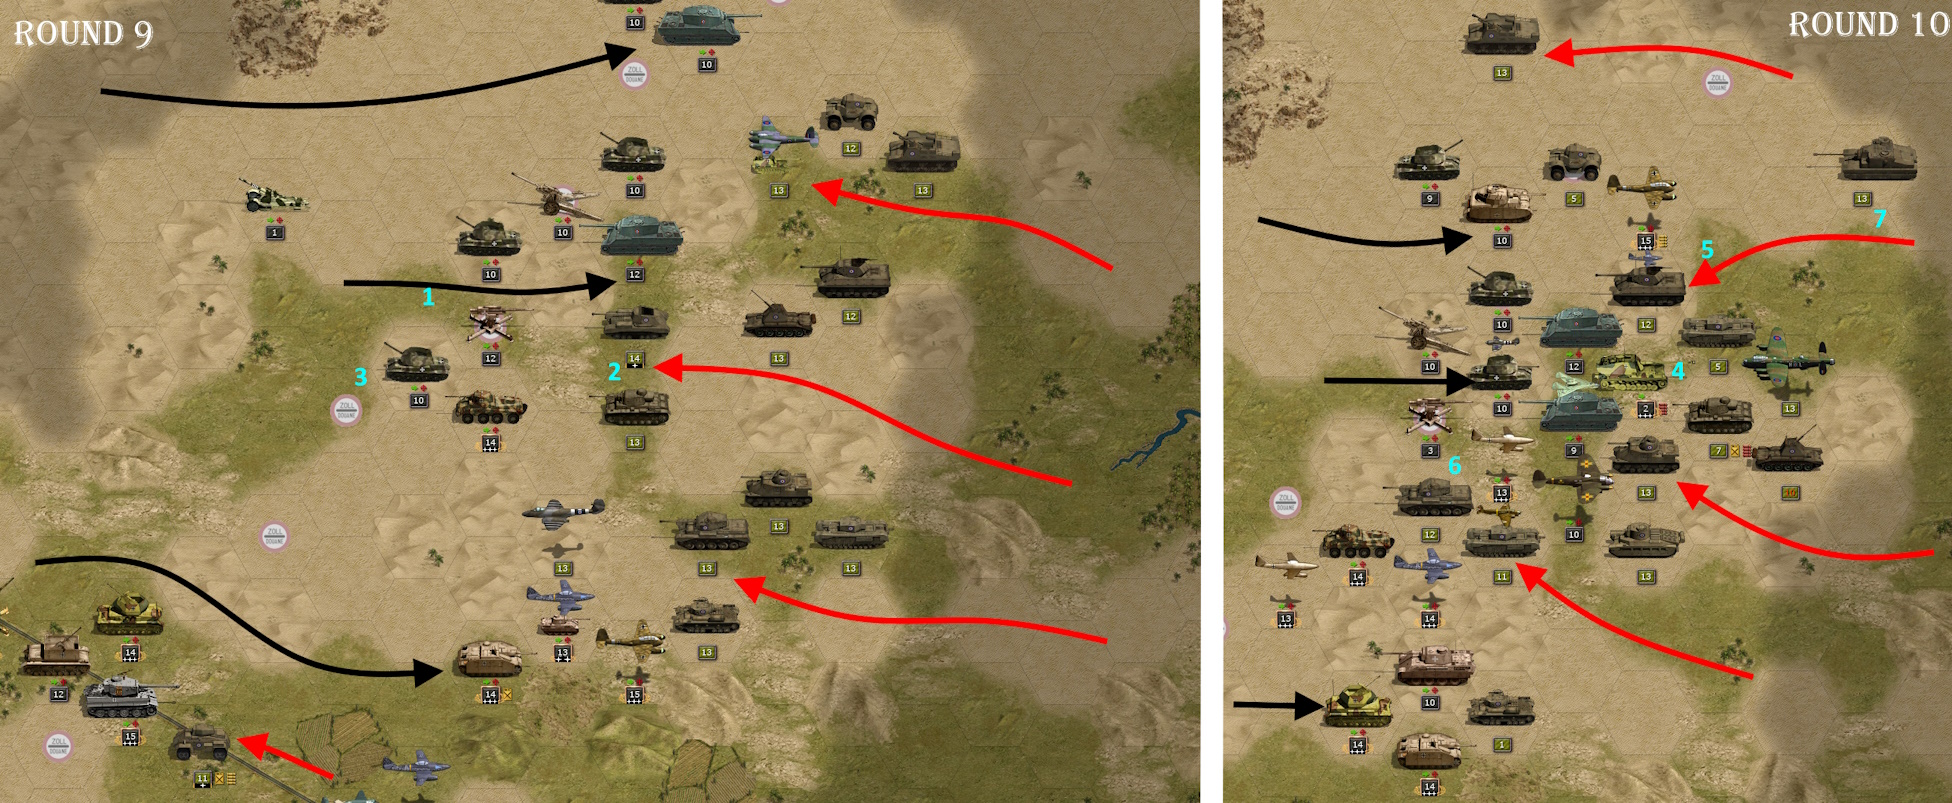
In the first image, you can see how I am mainly advancing auxiliary units eastwards into the desert region in a flanking manoeuvre (1). Somewhat unexpectedly, a larger British offensive force, parts of which are very strong, appears, advancing in the opposite direction (2). A skirmish ensues. As it quickly becomes apparent that my forces are unlikely to gain the upper hand in this area, I must try to buy time to bring in reinforcements. So I order a turn and run, run, run... (3).
One turn later, the situation came to a head. To cover the retreat, I had positioned my ‘Versuchsjäger 3001’ in the centre (4). Unfortunately, the unit was already running low on ammunition, which the enemy then exploited to the full. Several units pounced on the now defenceless unit, and finally an Achilles (5) appeared, which nearly destroyed my tank destroyer. Out of ammunition and pinned between two armoured enemy units, I now had to rescue the Versuchsjäger. Eliminating the British Grant would have been easier, but unfortunately a ‘Comet’, together with a ‘Churchill’, had broken through on the southern flank and had battered an Italian anti-tank gun (6). So I had to eliminate both the Grant and the Comet. Then it would be easier to concentrate on the Achilles. After all, I had the two heavy French AMX tanks at my disposal. By joining forces, I managed to free my Versuchsjäger from this deadly stranglehold and lead it to the rear. It survived the mission. In this engagement, during which further strong British forces were brought in (7), I lost a total of 5 Aux units (2 Panthers, 1 anti-tank gun, 1 anti-aircraft gun and an Italian reconnaissance vehicle).
- Jemen-18.jpg (963.97 KiB) Viewed 809 times
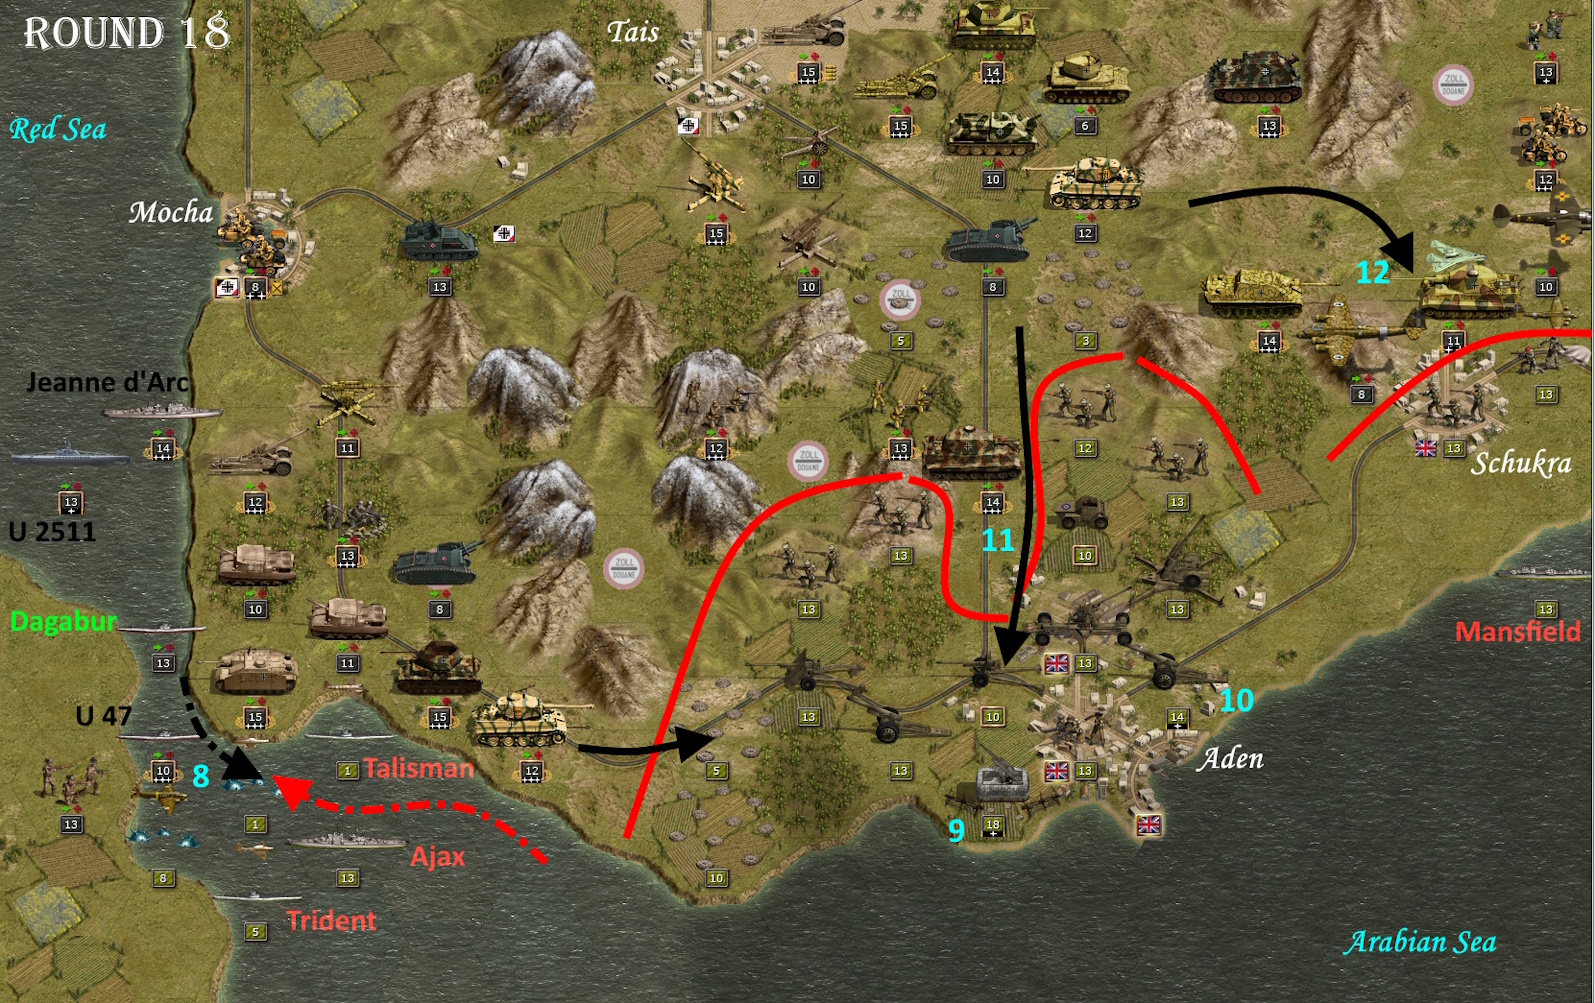
On the south-western side, at the other end of the map, a few turns later. I have fought my way southwards along the Red Sea coastline and have reached the defensive zone around Aden and the minefields at the strait (8). As my small minesweeper has already taken heavy damage, I am using my submarines, aircraft and ground forces to fight my way through the extensive minefield. Near Aden, there are also two very nasty enemy units that can inflict heavy casualties. The anti-aircraft defences (9) have a total range of 5 squares and provide reliable protection for the entire area against air attacks, as does the artillery (10) against infantry attacks across open terrain. In addition, powerful warships—not visible on the map—are positioned immediately off the coast, providing artillery cover. However, an SE Tiger II is slowly but inexorably advancing southwards (11) with sufficient ammunition. It will eventually reach and destroy the anti-aircraft defences, triggering the collapse of the defences. A flanking attack on Schukra also appears promising (12). However, behind the town are two camouflaged British snipers who are preventing an infantry assault on the town.
- Jemen-34.jpg (875.84 KiB) Viewed 809 times
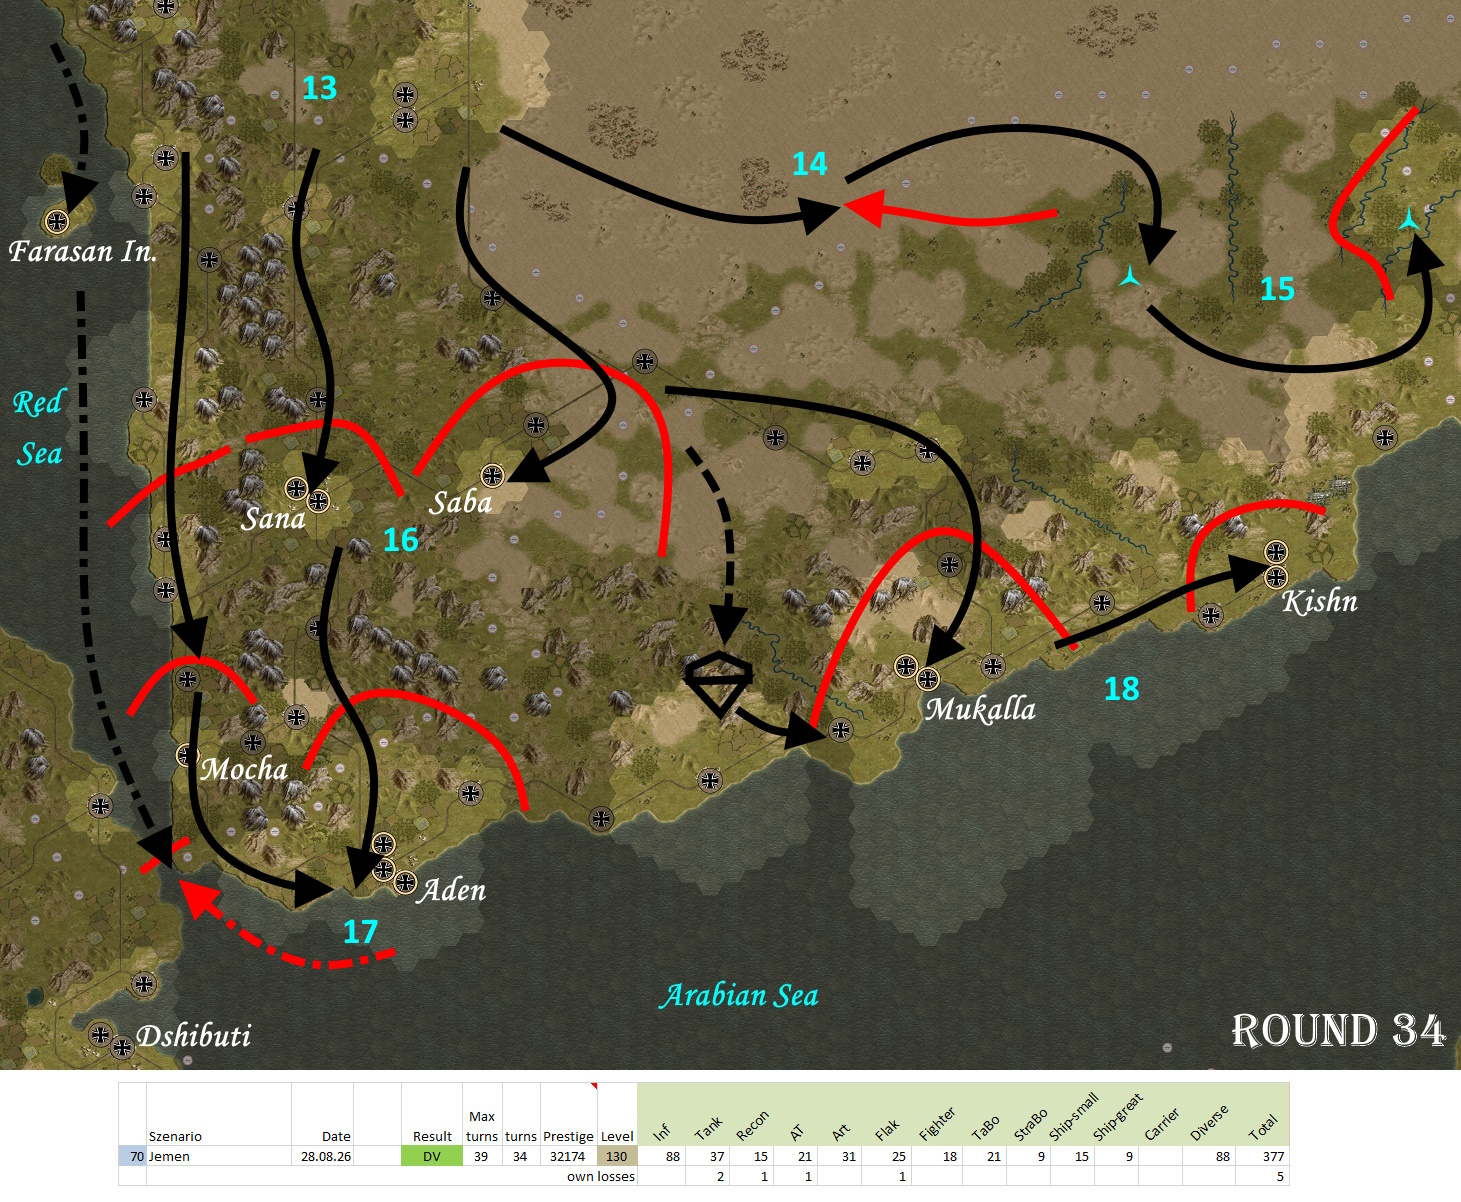
Strategic map: The attack begins from the north-west (13). During a flanking manoeuvre to the east, I encounter a stronger contingent of British armoured forces, resulting in some casualties (14). Nevertheless, this clears the way to fulfil the additional DV condition (15). My main forces break through the strong British lines at Sana’ and Saba’ and capture both towns (16). Moving further south along the coast and through the valleys of the mountainous region, I eventually capture Aden (17). The strait is opened. With an airborne assault and a flanking attack, I capture Mukalla and subsequently Kishn (18). It was a fierce scenario with the highest losses suffered by the opposing side to date, but with sufficient time to complete the objectives.





 . The L.13 movable Flaks cause 5 or 6 damage to my dear Fw.190s.

