

I was wondering if anyone had suggestions (or perhaps some sort of on-line how-to) for basing miniatures for historical wargames?
The two issues I am wondering about now are:
- The 'base' of the individual figure stands up off of the base. So, when I put several on, they are like they are standing on raised sections. Should I put some sort of modeling glue or something to 'raise' the base they are all on so that they blend in, or should I file the bottom of the model down so that it doesnt stand out?
- I understand the process of flocking (apply glue, put flock on, tap off what doesnt stick, repeat), but am more of a visual learner. Pictures would really help, close up. I have some basic woodland senics 'burnt grass' flock, but I have heard good things about static grass that stands up, or using ballast/gravel as well as flock.
Help?
Bases
Moderators: philqw78, terrys, hammy, Slitherine Core, Field of Glory Moderators, Field of Glory Design
-
philqw78
- Chief of Staff - Elite Maus

- Posts: 8843
- Joined: Tue Feb 06, 2007 11:31 am
- Location: Manchester
It all depends on the speed you want your figures on the table. If I were you, but I'm me.
1. Assemble the models and stick them to their gaming bases
2. Spray Matt black
3. Block paint
4. Dip in wood varnish, use a big (1") paint brush to take off the excess.
5. Mix PVA (white glue) and green paint, paint the bsases with it. Dip the bases in a pot of static grass. Leave to dry, or if you're really in a rush put in the oven.
6. Play
Dead easy. Super fast.

I paint my figures before I base them but can testify that Phil's approach works and is very quick.
To terrain my bases I use a multi step process.
Stick figures to base
Then paint the base with PVA (Elmers) glue, letting it gather next to the stand of the figures and getting some on top of the stands.
Dunk the base in builders sand (any sand would do but builders sand is really cheap and has tiny stones in it which gives better texture)
When this is dry gently shake off the excess
Get some cheap water based brown paint (I use a 1/2 litre sampler mixied to my requirements at the local DIY store which costs a couple o pounds)
Dilute the paint about 50/50 with water and slap it on the base, it will soak into the sand, colouring it and binding it well together
When dry drybrush the base with a yellow green
The lightly drybrush white
Finally put patches of PVA on the base and sprinkle static grass for colour.

I use textured paint (intended for painting ceilings, bought a huge tub from a DIY store). It comes in white, so I mix it with dark brown to give a light brown colour. I paint this on the bases, and it is thick enough to cover and blend in the metal bases of the figures. Whilst it is wet I sprinkle on a mixture of green scatter, sand and crushed cat litter. For ancients I leave the bases barer, for medieval I use more green scatter.
This is quick and effective. It doesn't look quite as good as the multi-stage processes (glue, sand, paint, dry-brush, flock) but it only one stage instead of 4 or 5.
This is quick and effective. It doesn't look quite as good as the multi-stage processes (glue, sand, paint, dry-brush, flock) but it only one stage instead of 4 or 5.
I am willing to spend some time on them, but yes, faster is better.
I have a tub of gravel/sand already (made the mistake of buying the Games Workshop brand stuff, but might as well use it). Does that tend to 'level out' the base, or should I file the bottom of the model down so that its nearly even with the base?
Thanks!
I have a tub of gravel/sand already (made the mistake of buying the Games Workshop brand stuff, but might as well use it). Does that tend to 'level out' the base, or should I file the bottom of the model down so that its nearly even with the base?
Thanks!
-
BrianC
- Sergeant First Class - Elite Panzer IIIL

- Posts: 427
- Joined: Wed Feb 27, 2008 10:57 pm
- Location: Spruce Grove, Alberta, Canada
thanks for the method Hammy. I like your stands. I apply ballast to glue as well then wash with dark brown, then dry brush green and then some yellow for contrast. But I think, I'll try your technique next time I base. I like the colours and use of static grass. I tried static grass before but the result looked silly so I stopped. I'll try again and use your pics as a guide.
Brian
Brian
-
Andy1972
- Staff Sergeant - Kavallerie

- Posts: 338
- Joined: Sun Mar 16, 2008 6:46 am
- Location: Columbus, Ohio
- Contact:
What i do for 15mm.. I glue the figs to penny's and paint them.. After that i cut them off the penny's and metal bases and paint them goblin green.. Glue the figs to the bases with Elmers glue.. Let them stand for 24 hours.. Then i put more elmers glue and spread it out with a tooth pic( i put it on quite thick) and sit them in flocking for 24 hours.(i have 3 different colored mixed up in a bin) take em out and blow off the excess and Seal them.. I have yet to have a fig pop off the stand doing this.. though the damn mounted guys pop off their horse from time to time.. I use elmers for that.. it dont work quite as well.. I don't like using super glue.. Because it leaves a white residue on the figs.(vapors)
Po-tae-toes! Mash 'em up and put 'em in a stew!
-
expendablecinc
- 2nd Lieutenant - Elite Panzer IVF/2

- Posts: 705
- Joined: Tue Aug 22, 2006 2:55 pm
high end method
If you want them to look really good you need to spend more time but there is a diminishing returns effect so it depends on how finnicky you are. I will spend 4 times as long basing to get them to look twice as good.
My method (for darker bases):
- glue a mix of three sizes of sand/cork, to the base
- paint the lot bubonic brown
- ink wash with watery dark brown
- dry brush light brown
- apply wood glue to 1/3 of the base in patches and drop grass flock onto the glue (tap the excess off when dry)
- apply spots of thick superglue to the base and drop static grass (tap excess off when dry)
- apply 1-2 spots of thick wood glue and attach a couple of shrubs/bushes to every second base.
- paint the sides of the base a slightly darker colour than the overall base calaour after drybrushing
anthony
-
philbagnall
- Corporal - 5 cm Pak 38

- Posts: 39
- Joined: Fri Jun 13, 2008 8:42 am
For my bases I always paint the figures before basing. One way to minimise the "standing on a rock" appearance of the moulded bases is to file these down thinner when you are preparing the figures before painting. My work colleagues are well used to me bringing a bag of figures & a big file with me to work on during breaks (the noise of the file really winds up my wife!)
Once on the base I disguise the individual figure bases further with some diluted readymix wall filler ("spackle" in the US, B+Q cheapie stuff here), paint over this with the same colour I used on the individual figs' moulded bases then PVA, sand (I'm currently using woodland scenics fine buff ballast from a model train shop), drip on dilute dark brown paint and add a bit of static grass when dry. voila..
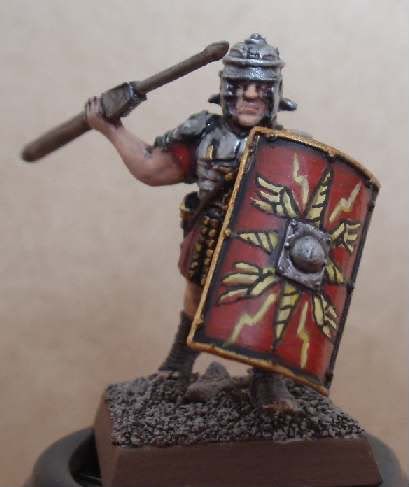
..similar to the above recipe on this Warlord figure
Once on the base I disguise the individual figure bases further with some diluted readymix wall filler ("spackle" in the US, B+Q cheapie stuff here), paint over this with the same colour I used on the individual figs' moulded bases then PVA, sand (I'm currently using woodland scenics fine buff ballast from a model train shop), drip on dilute dark brown paint and add a bit of static grass when dry. voila..
..similar to the above recipe on this Warlord figure
-
madaxeman
- Lieutenant-General - Do 217E

- Posts: 3002
- Joined: Thu Nov 16, 2006 5:15 am
- Location: London, UK
- Contact:
I glue the figures down, and then use wood filler (exactly like Polyfiller, but for wood!!) to build up the bases - it dries really quickly, is easy to spread and is rock hard when set - and then has the advantage that it is a sandy colour so can just can be drybrushed straight away
I have a painting and basing guide - with photos - showing how the bases are done here painting and basing guide
tim
www.madaxeman.com
I have a painting and basing guide - with photos - showing how the bases are done here painting and basing guide
tim
www.madaxeman.com
http://www.madaxeman.com
Holiday in Devon? Try https://www.thecaptainscottagebrixham.com
Holiday in Devon? Try https://www.thecaptainscottagebrixham.com

-
Mithridates
- Lance Corporal - SdKfz 222

- Posts: 25
- Joined: Fri Oct 31, 2008 12:00 am
-
nikgaukroger
- Field of Glory Moderator

- Posts: 10287
- Joined: Tue Aug 22, 2006 9:30 am
- Location: LarryWorld