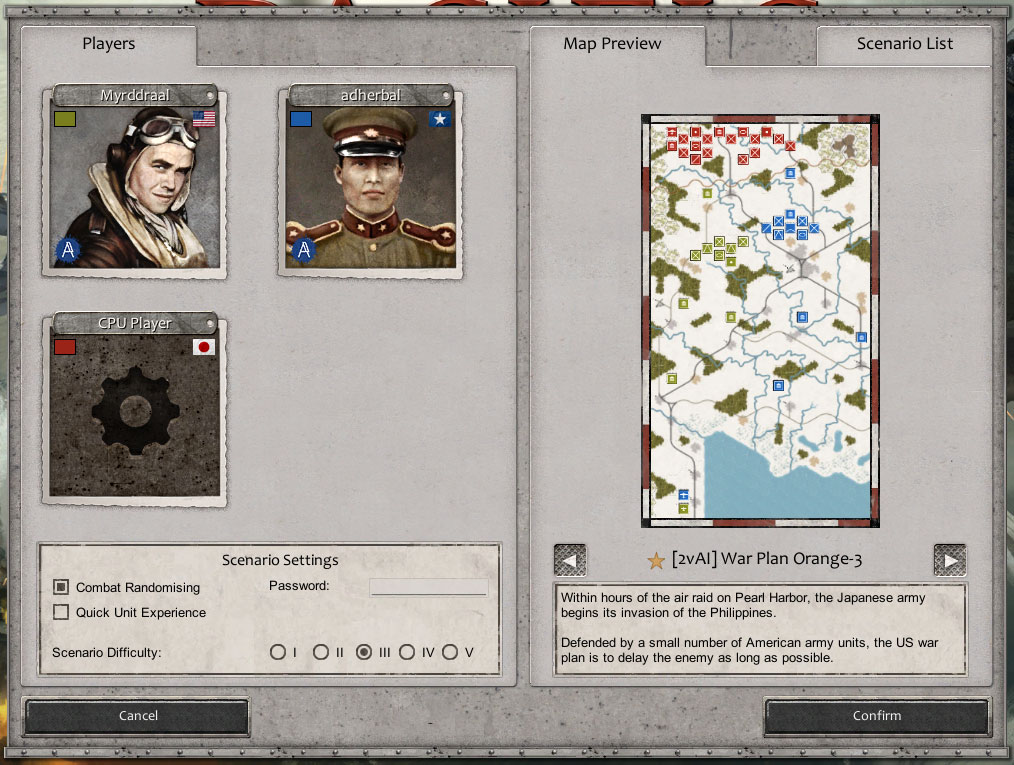
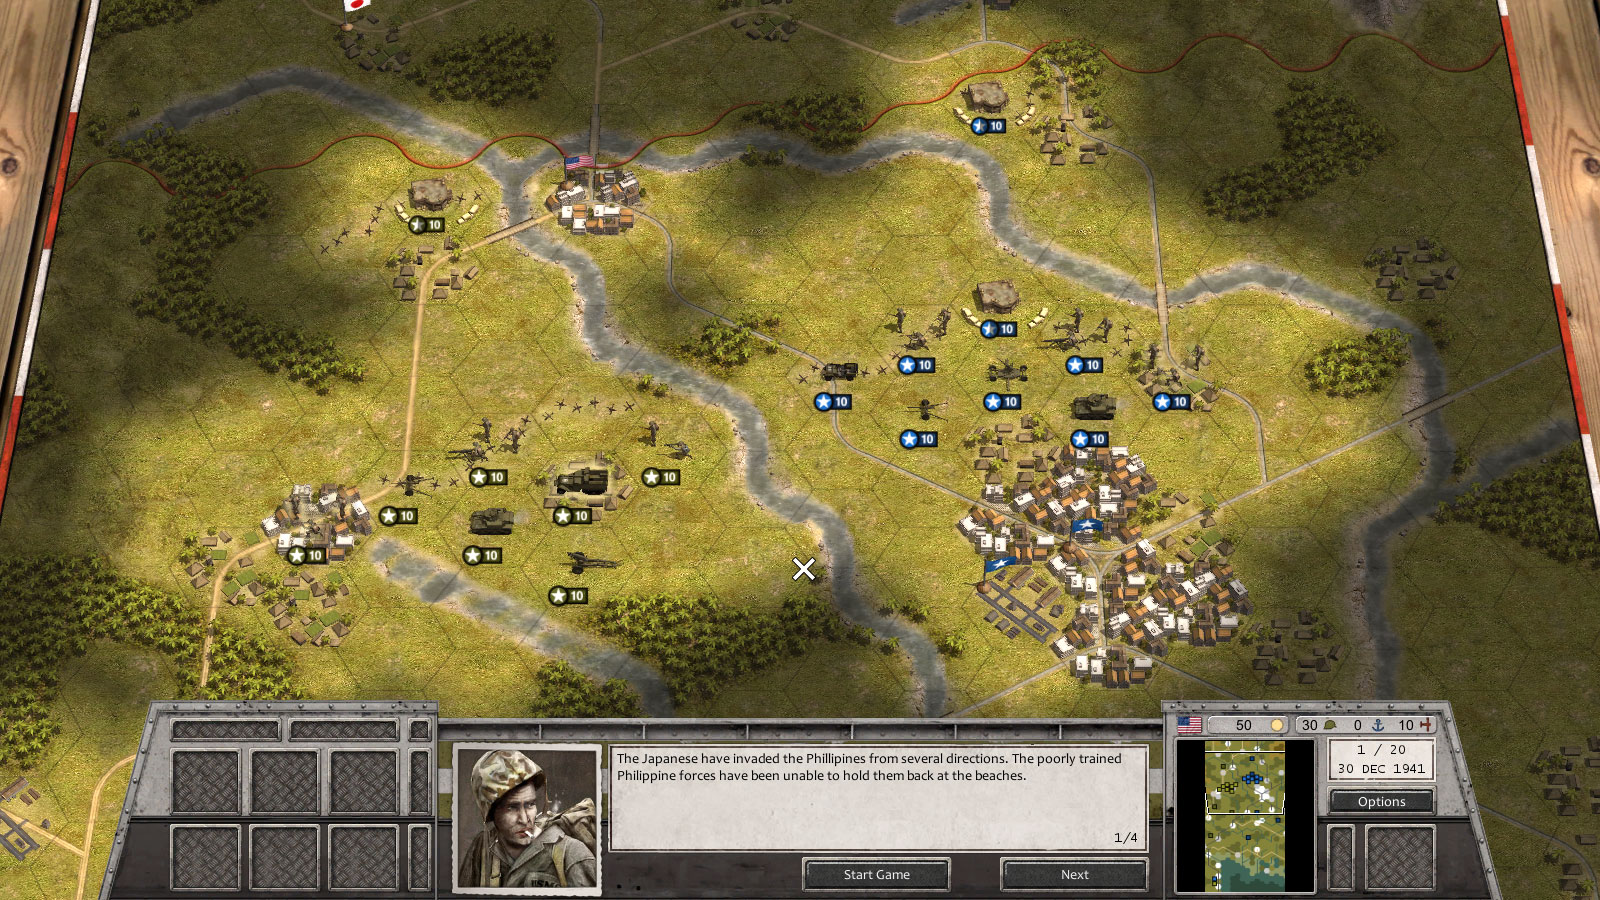
The scenario inspired by the Japanese invasion of the Philippines in December 1941. The American plan was to delay the Japanese invasion of the Luzon province by a series of defensive actions, while the majority of Allied forces retreated into Bataan peninsula. The objectives in the game scenario basically come down to surviving 20 turns against growing waves of Japanese attack forces.
From here on, we will let the players talk about their thoughts and strategies as the battle progresses:
Turn 1 – Dave
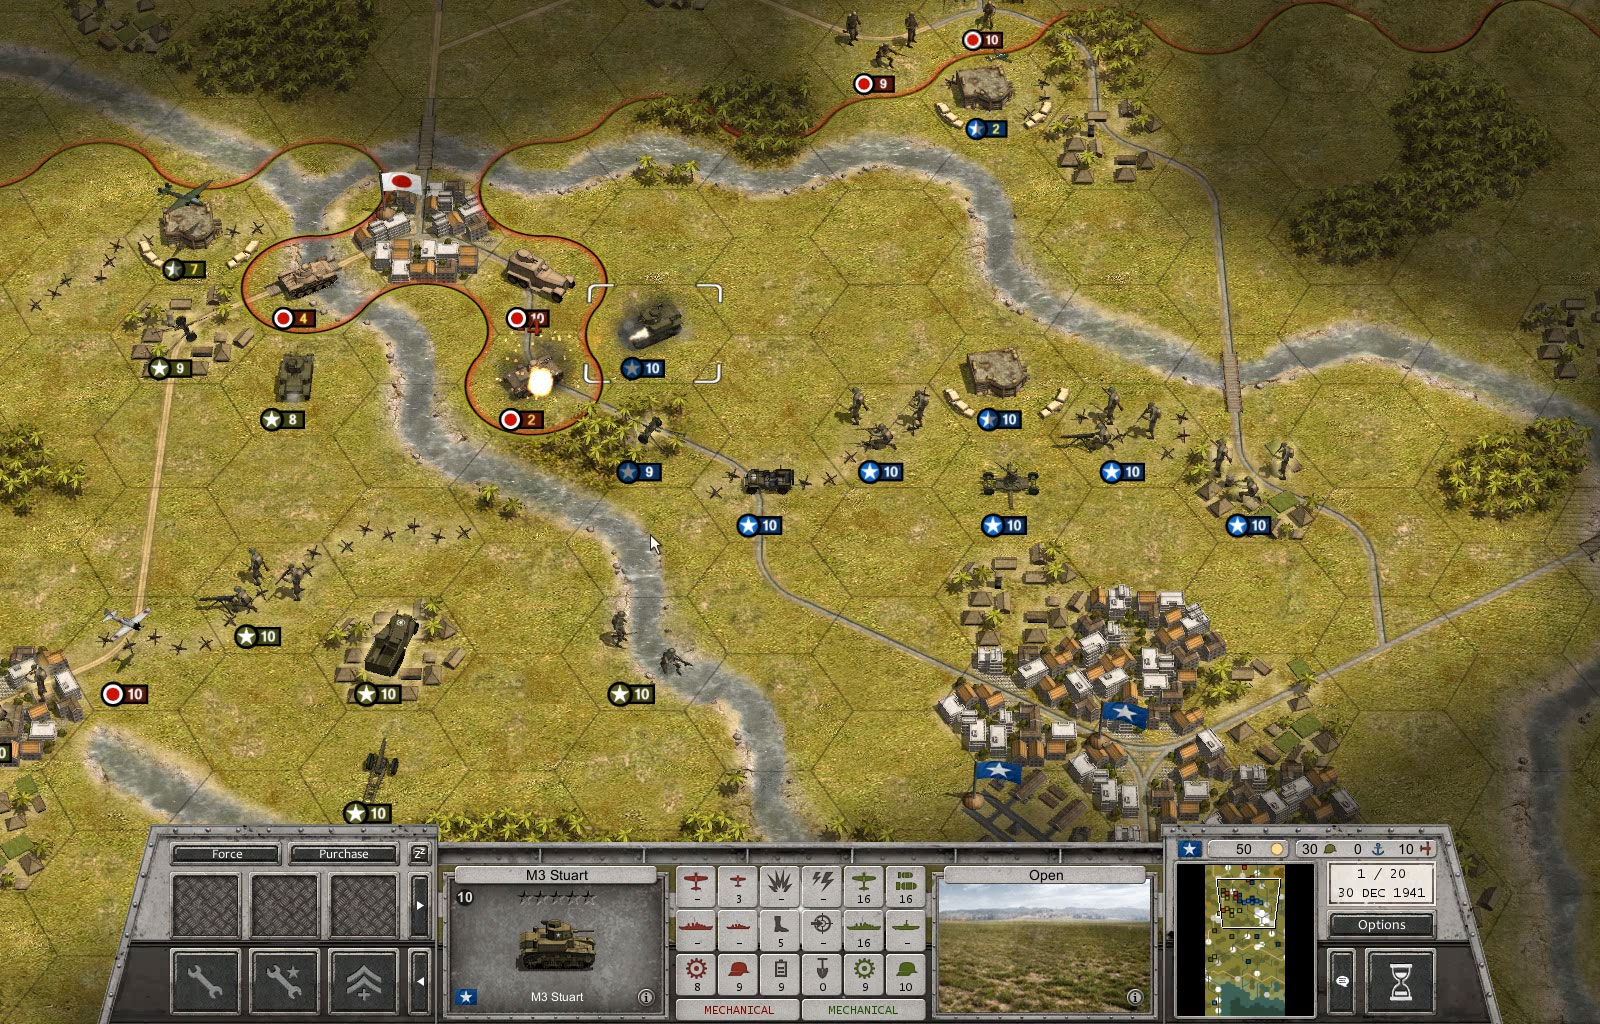
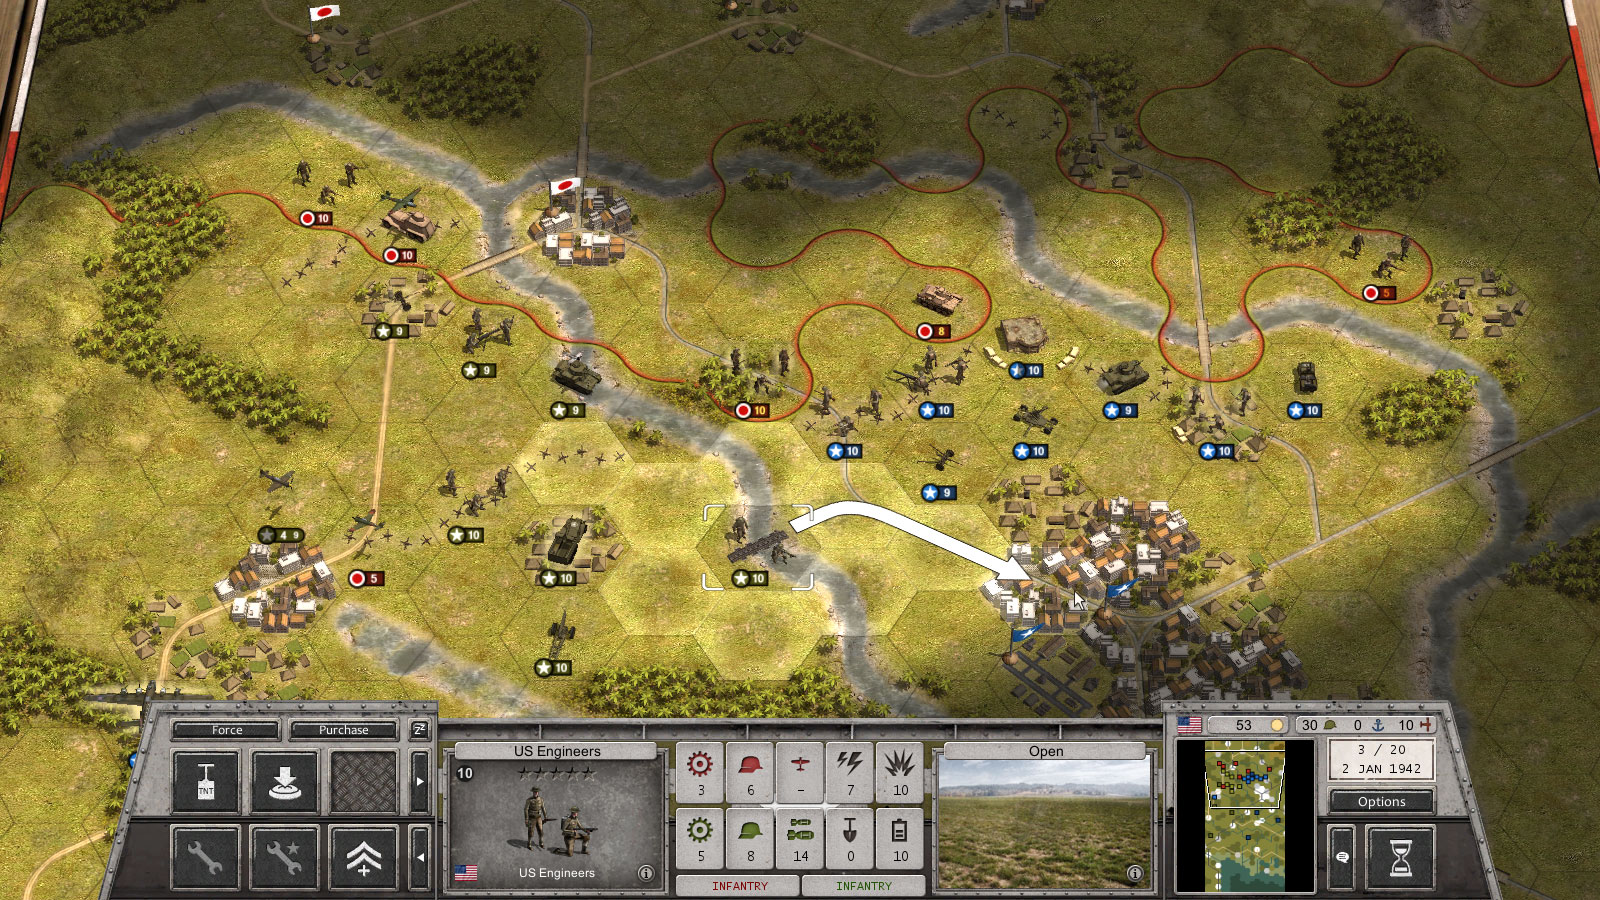
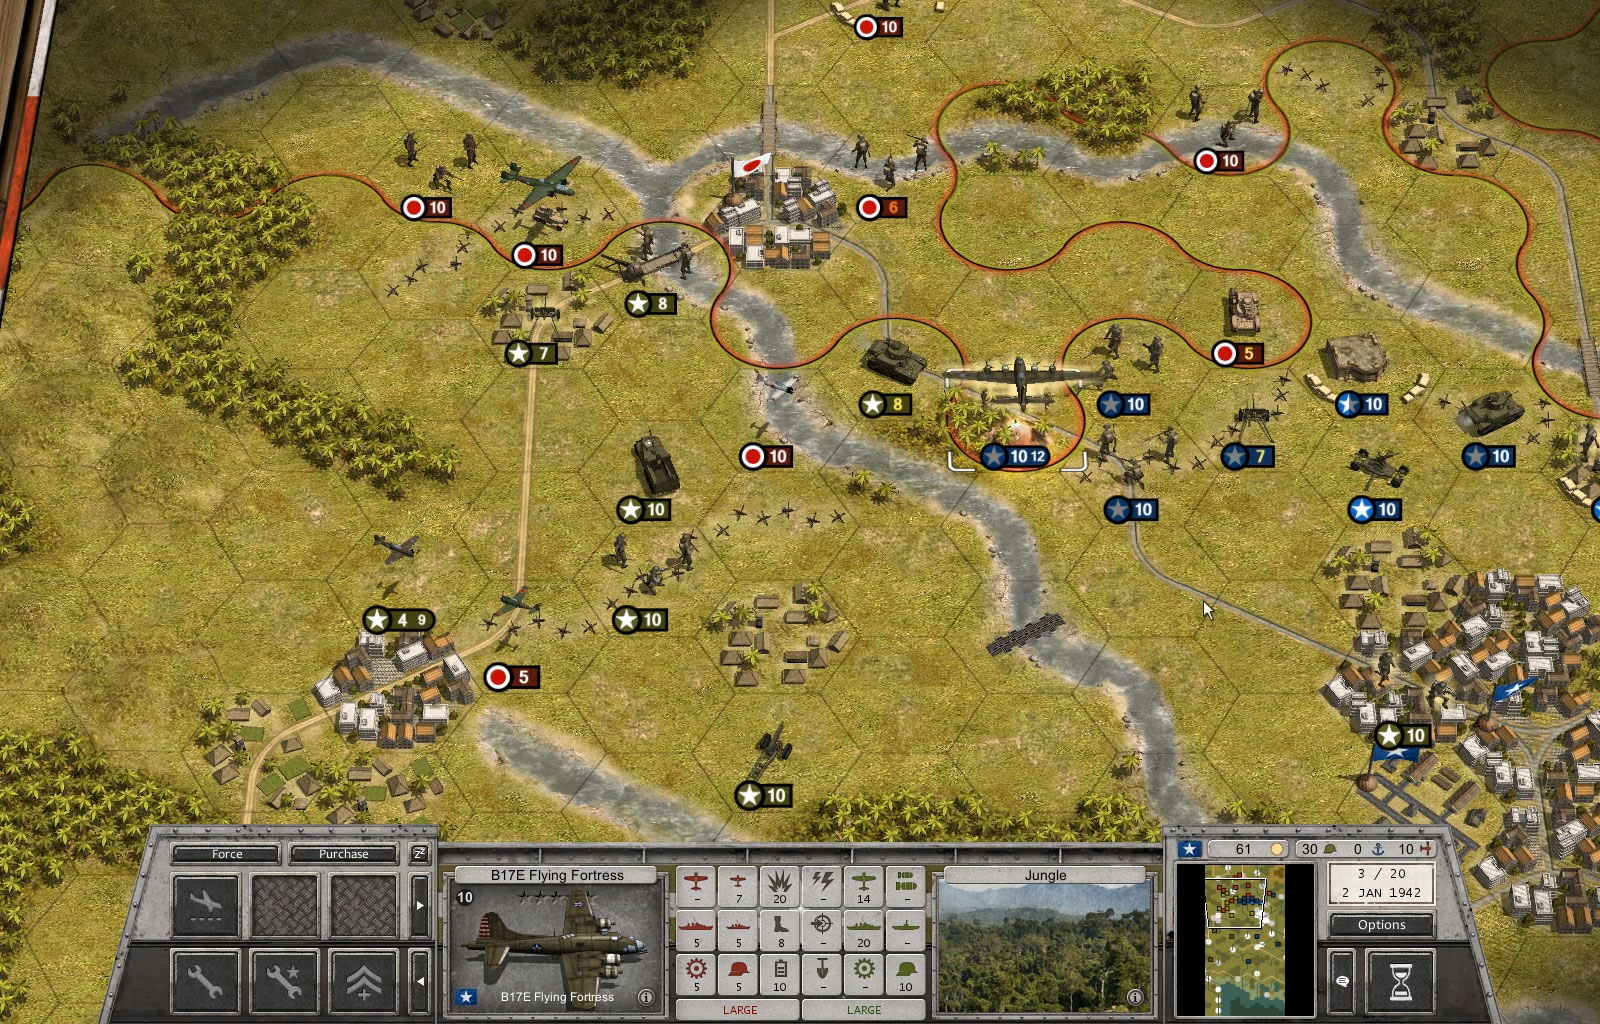
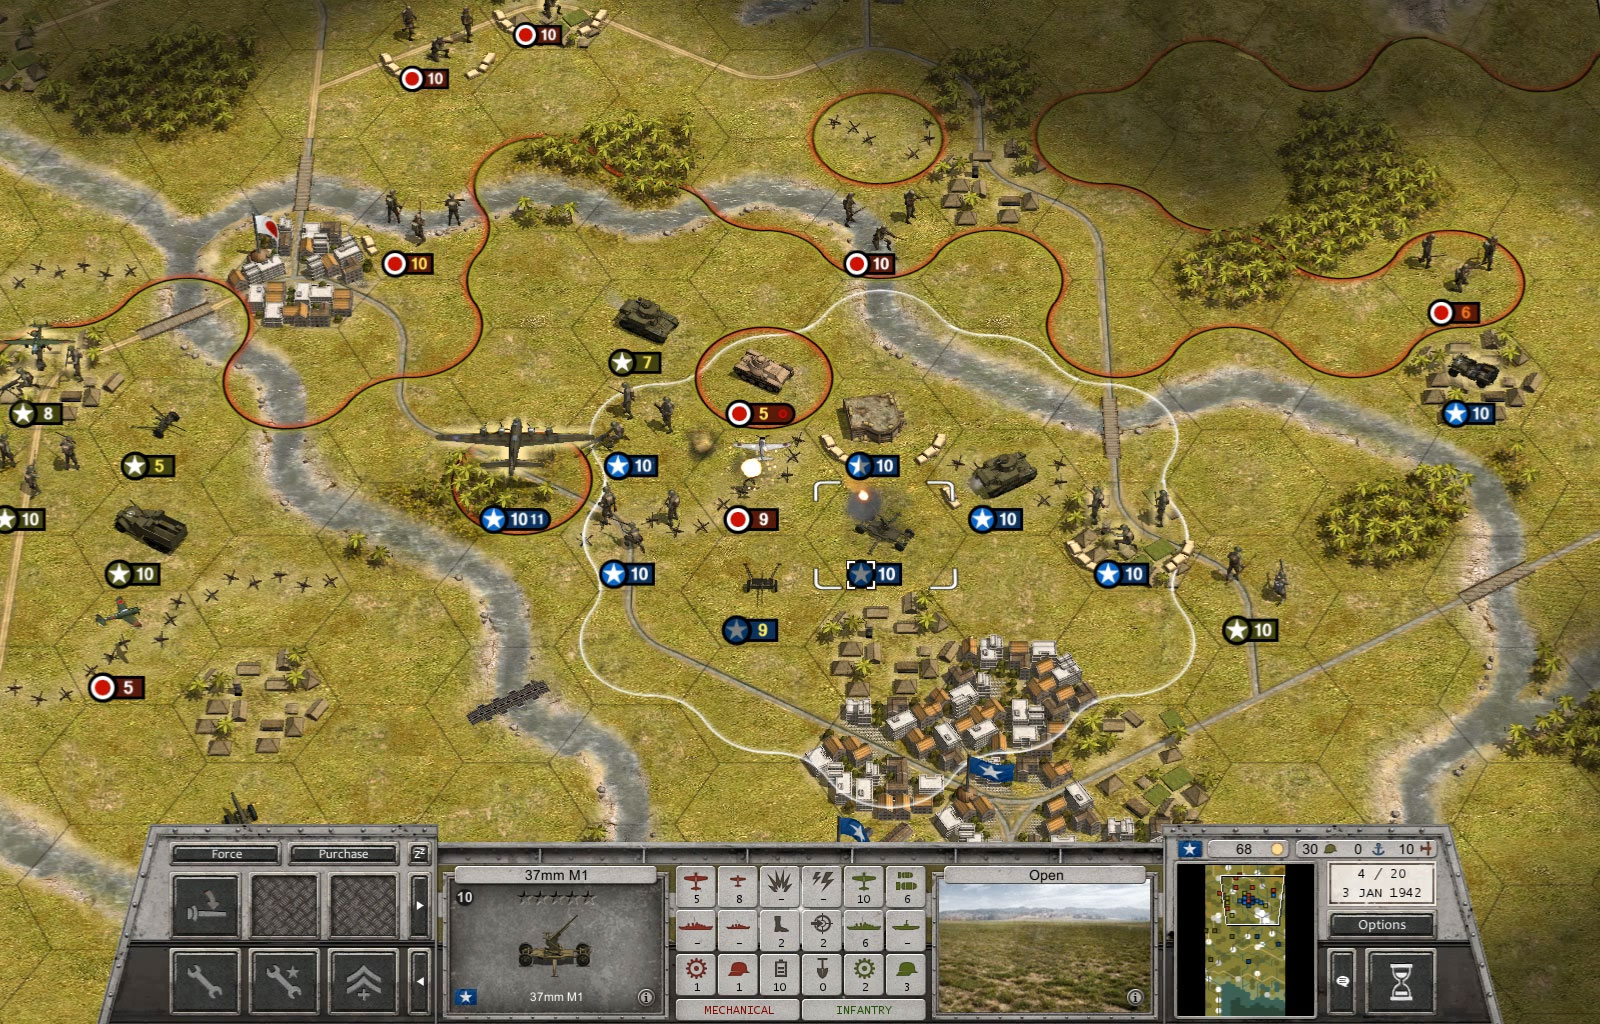
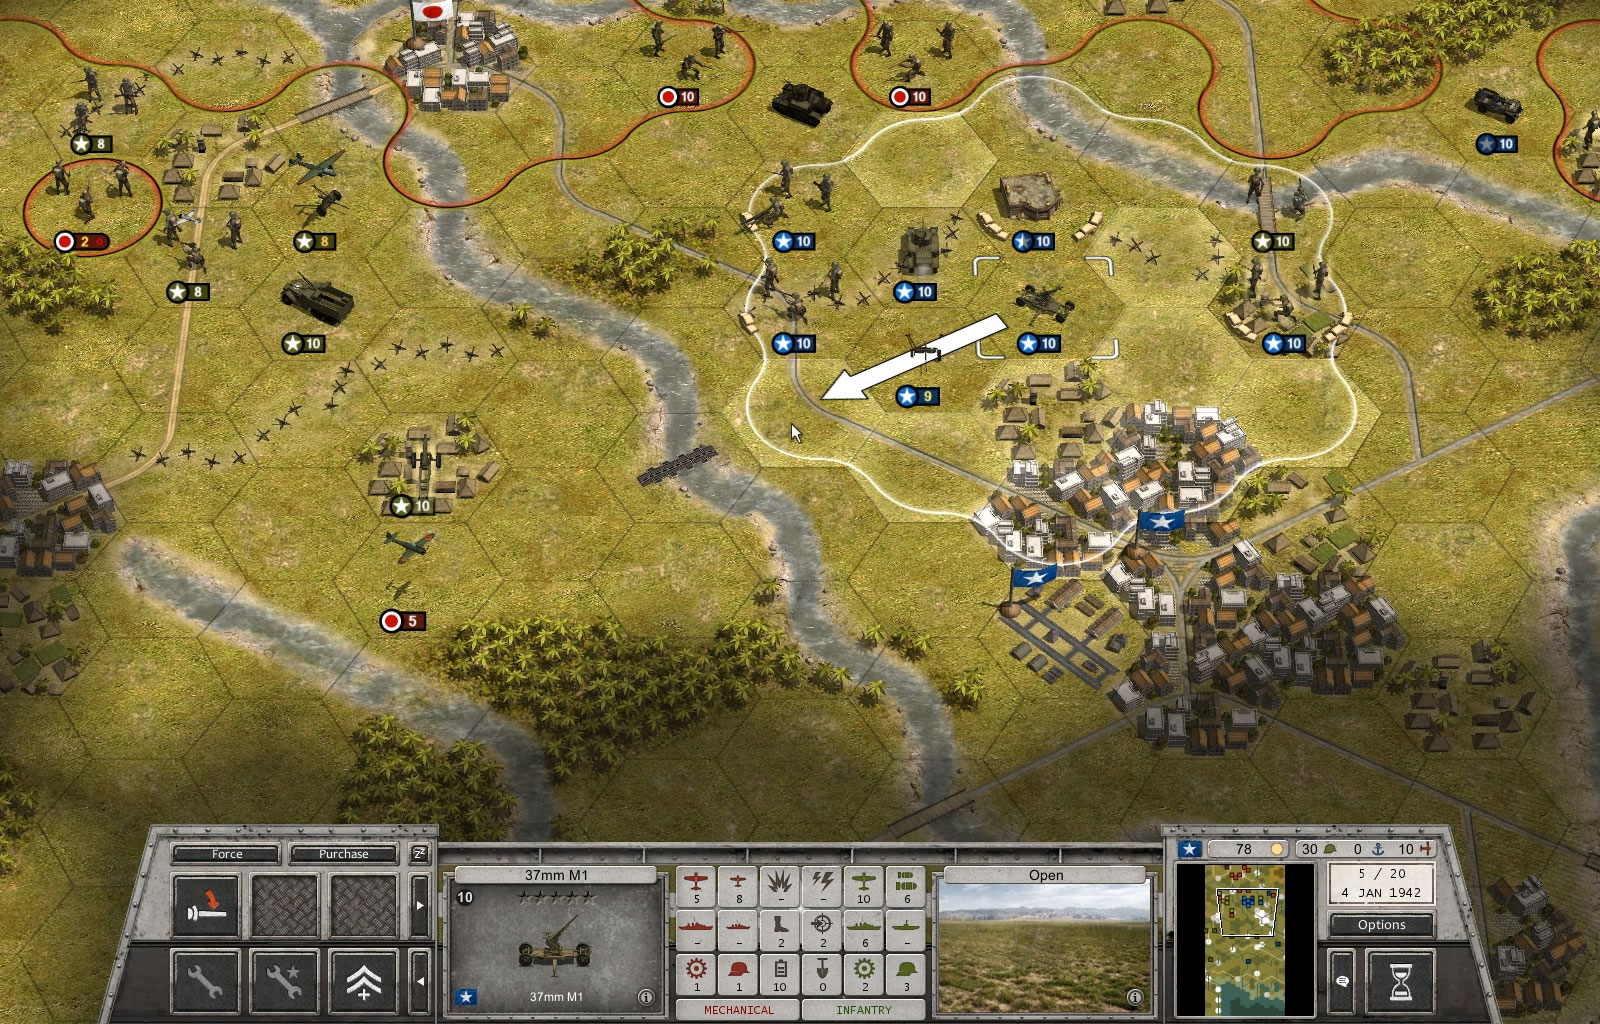
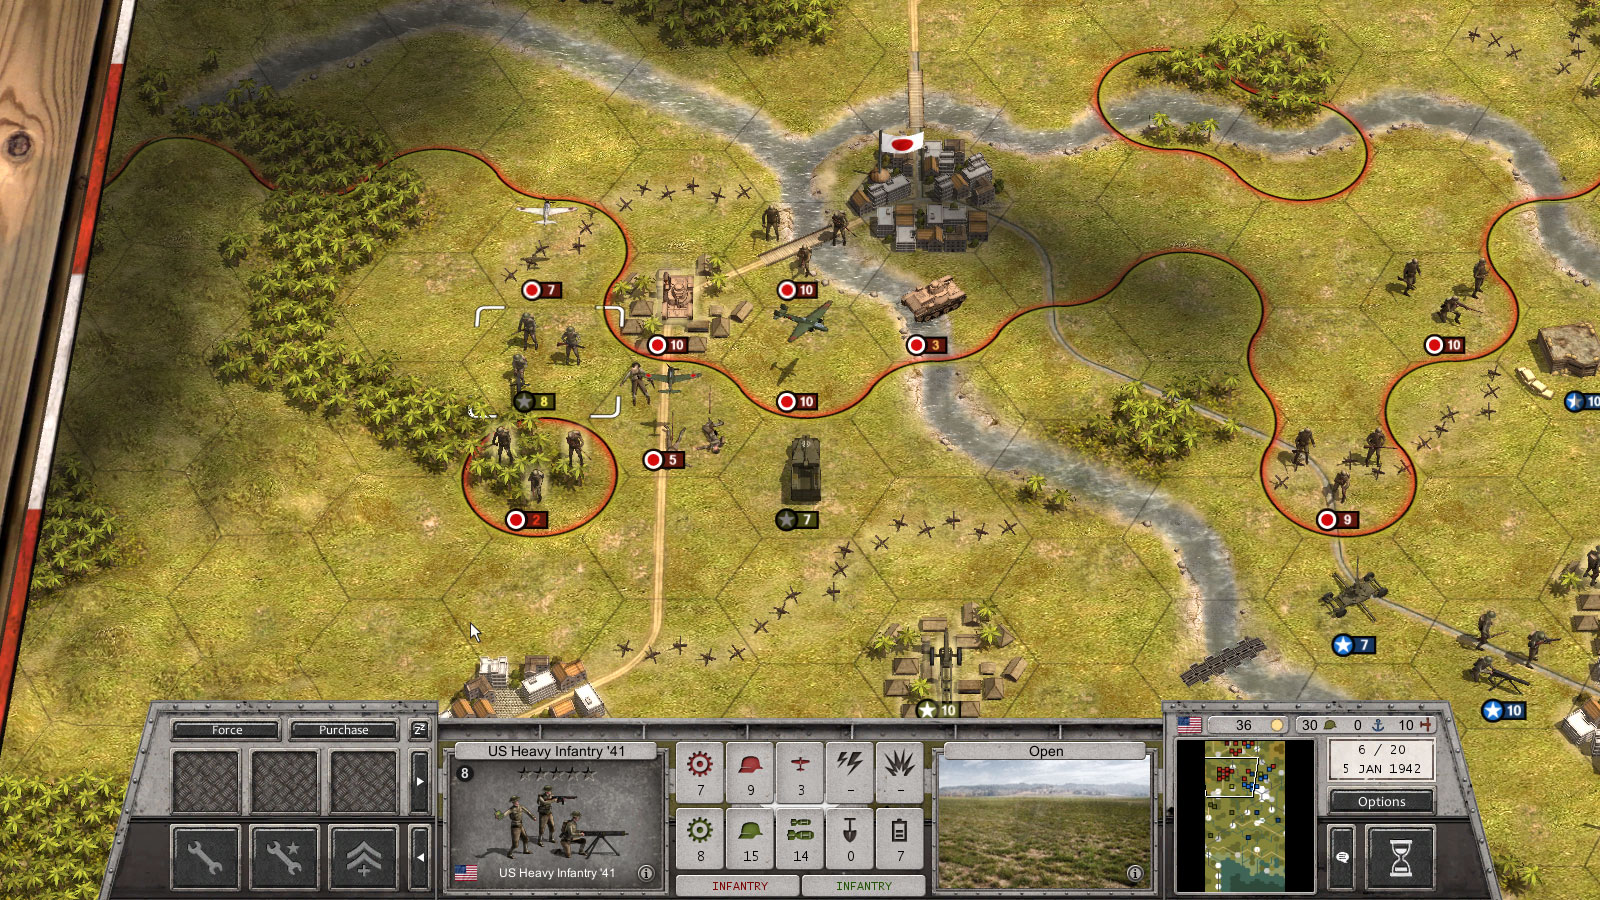
This is our starting position. I will be controlling the green team, and Lukas the blue team. We’ll be trying to hold back the Japanese invasion forces. Our plan is simple – we don’t have one… Well, that’s not quite true, we’ve agreed a couple of tactics beforehand. I will use my Engineers to build a pontoon bridge across the river that separates us, so that we can support each other and react to where the AI applies pressure.
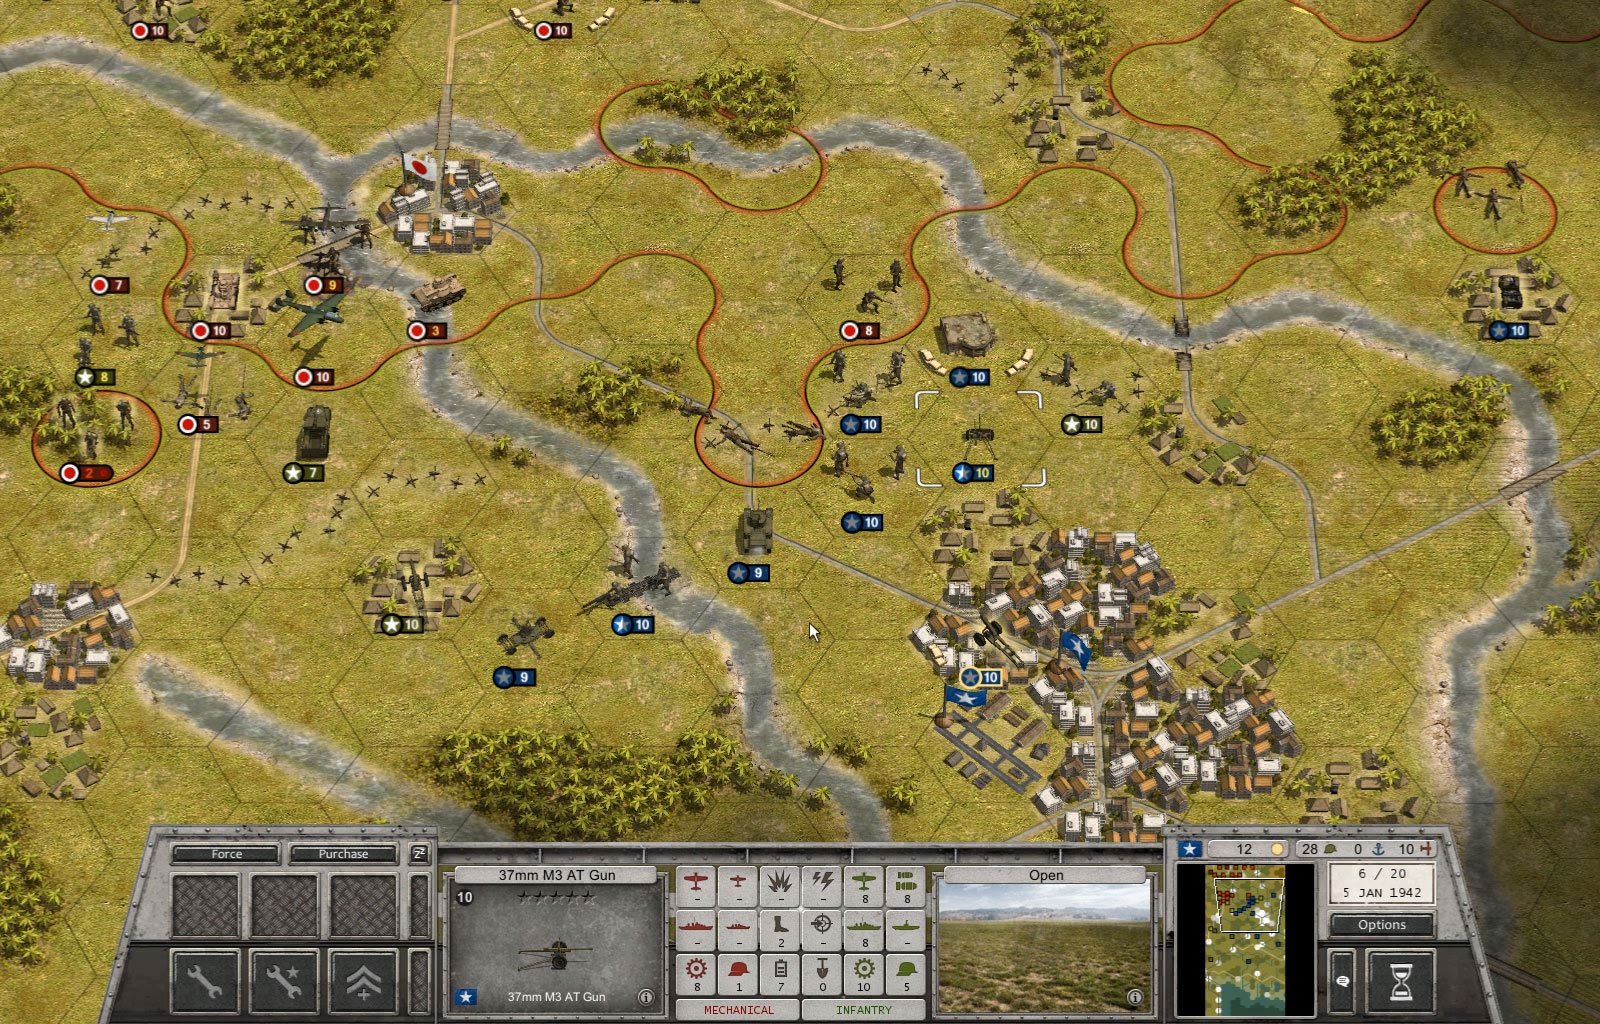
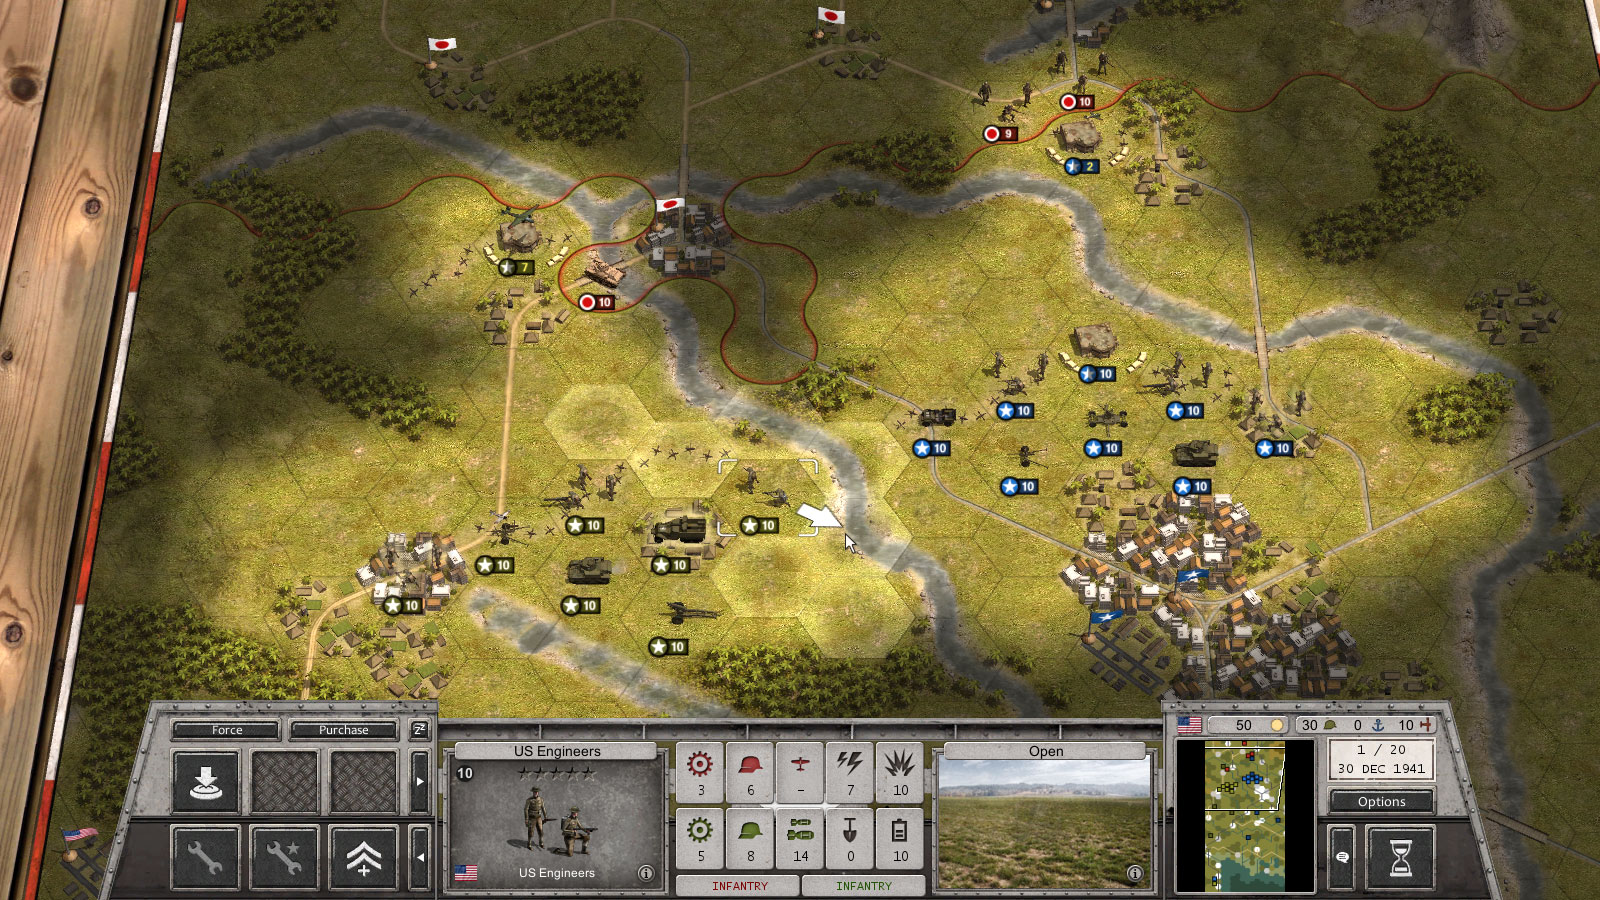
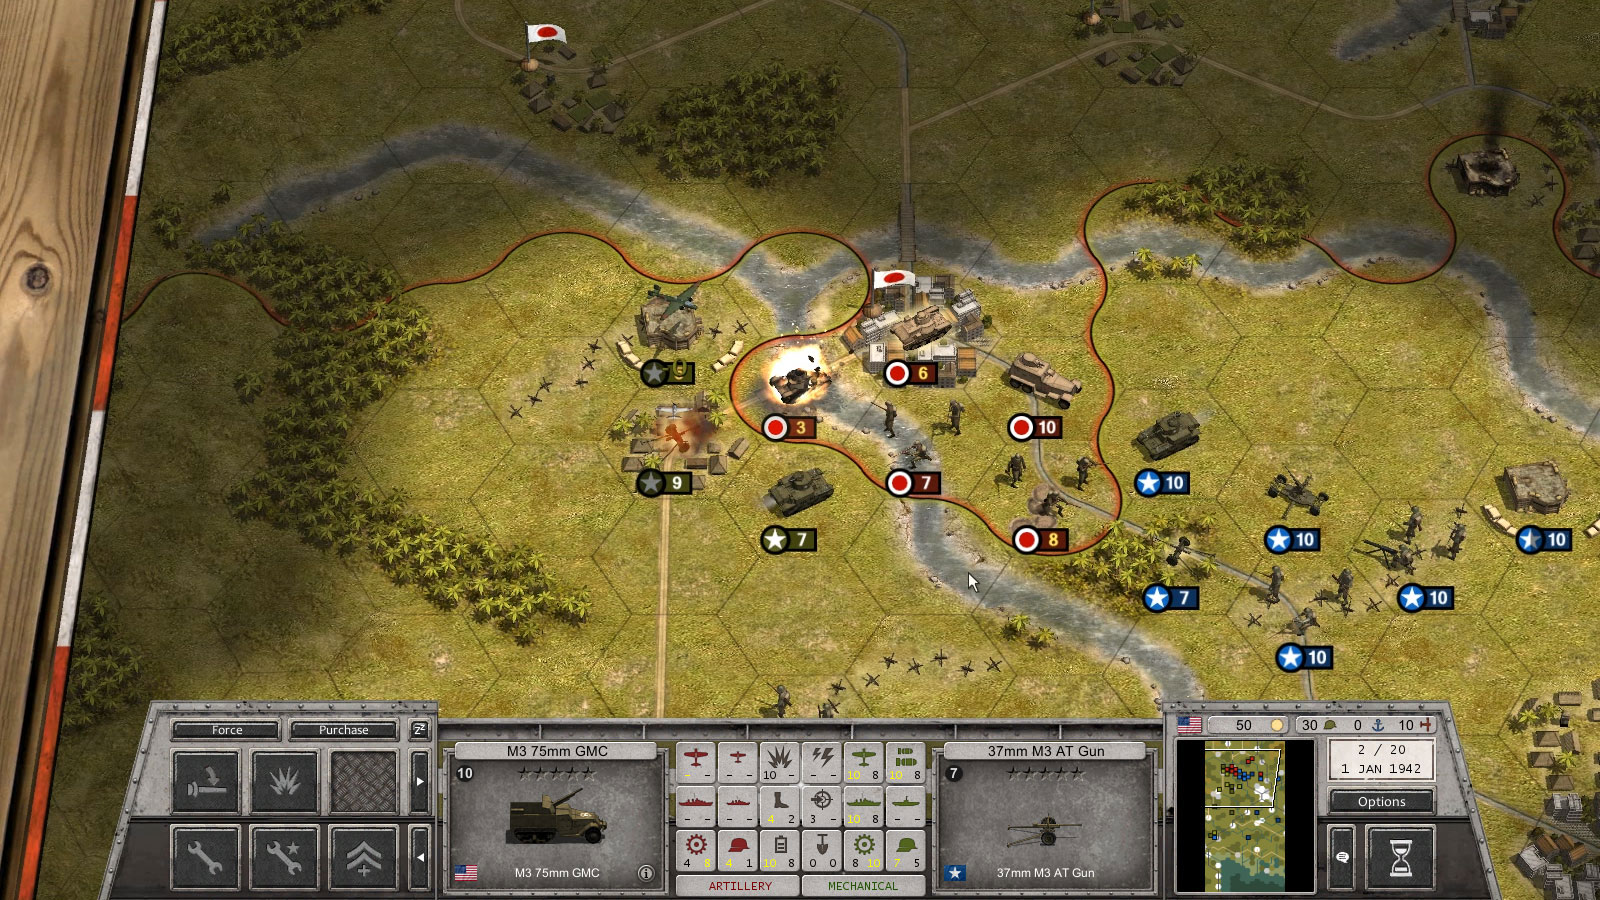
The (AI controlled) Japanese player move first and attacks our forward positions after softening them up with artillery bombardment. The screenshot below shows the state of play at the start of my turn. The enemy has started its advance, but the damage done is limited.
I start by moving my unit of engineers into position to build a pontoon bridge. Next turn they will link our forces together. Engineers are multi-talented units, able to lay minefields, blow bridges and build pontoons.
Another interesting unit in my force is the M3 75mm Gun Motor Carriage. It is a tank destroyer/self-propelled artillery piece that can be used for both direct and indirect fire. At this stage in the game, I want to use this unit to support my attacks from range, so I switch the gun to high elevation (the ability button in the bottom left of the screen).
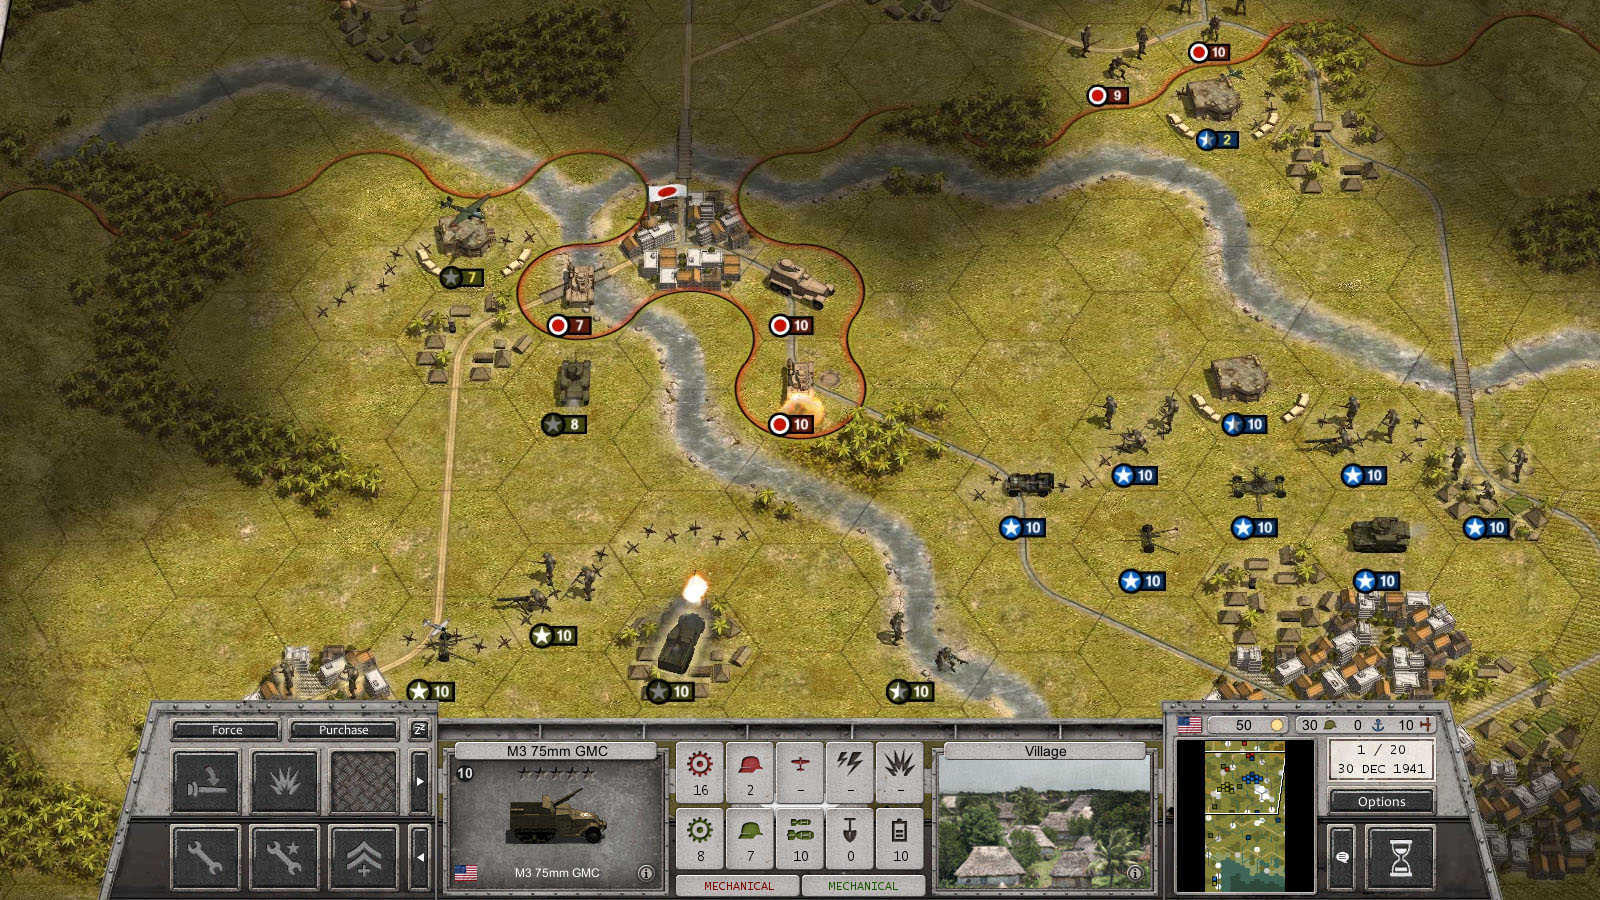
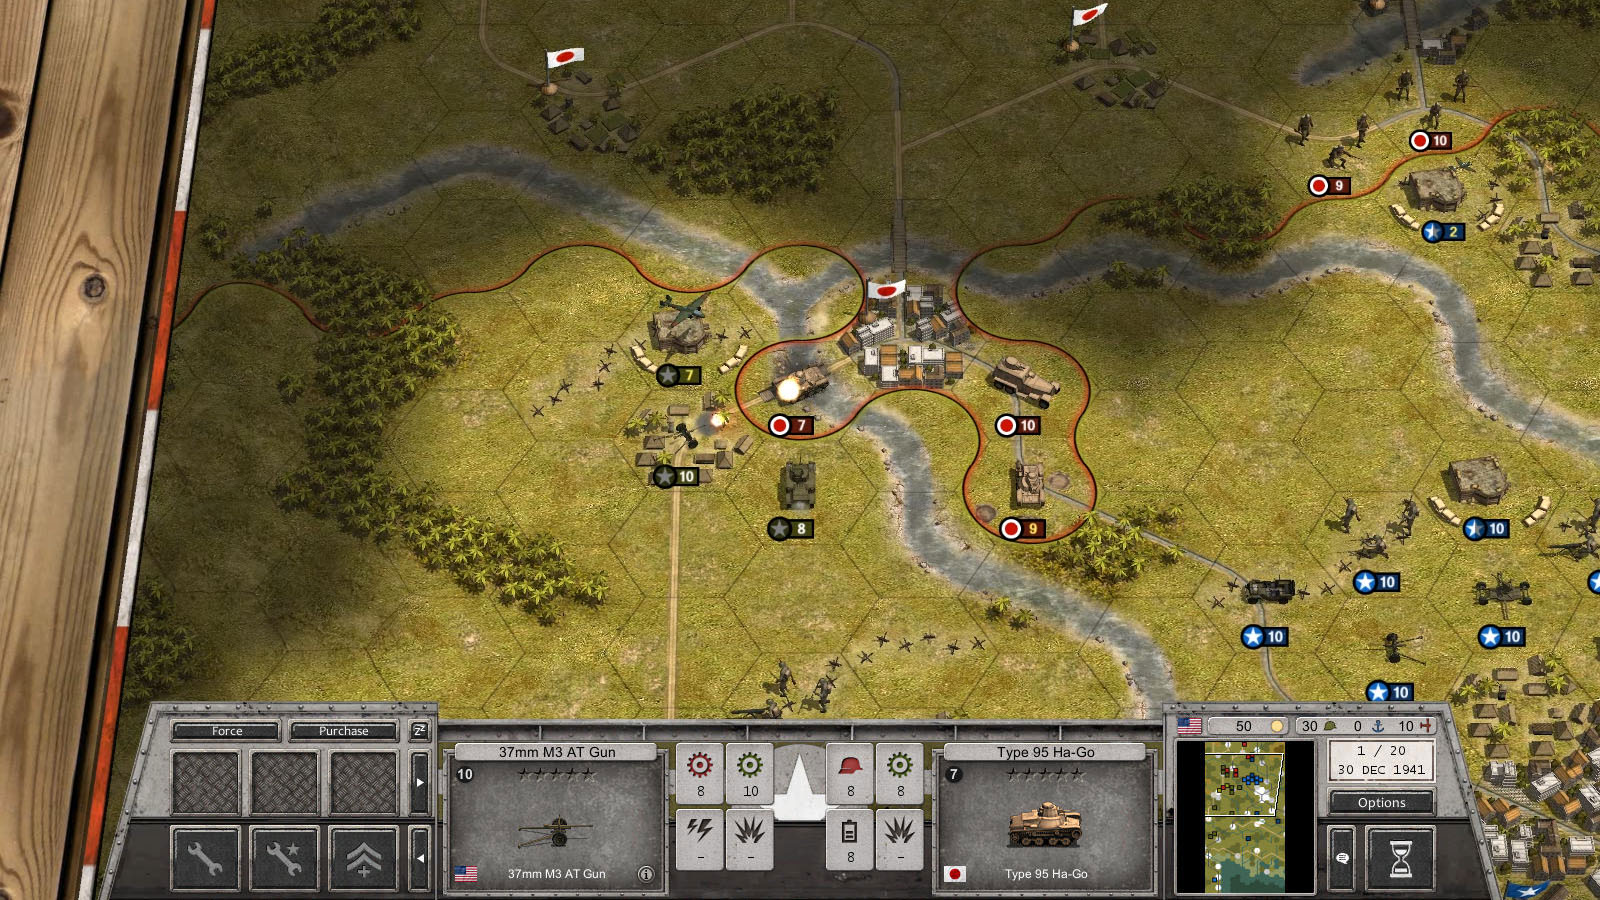
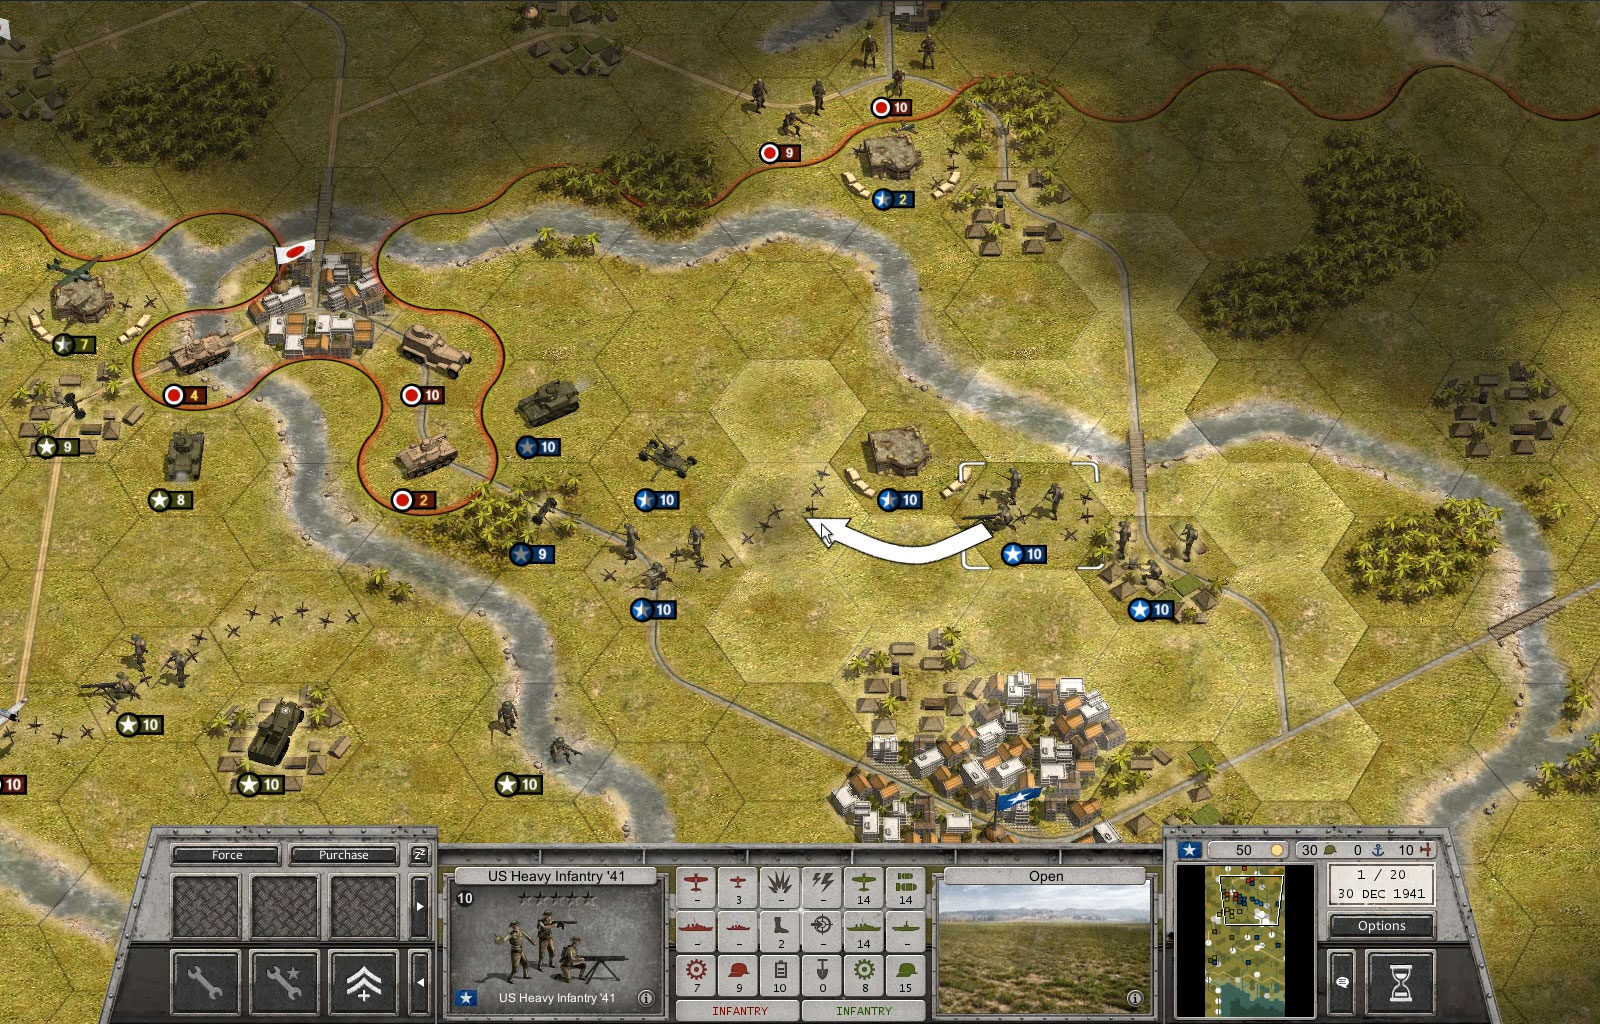
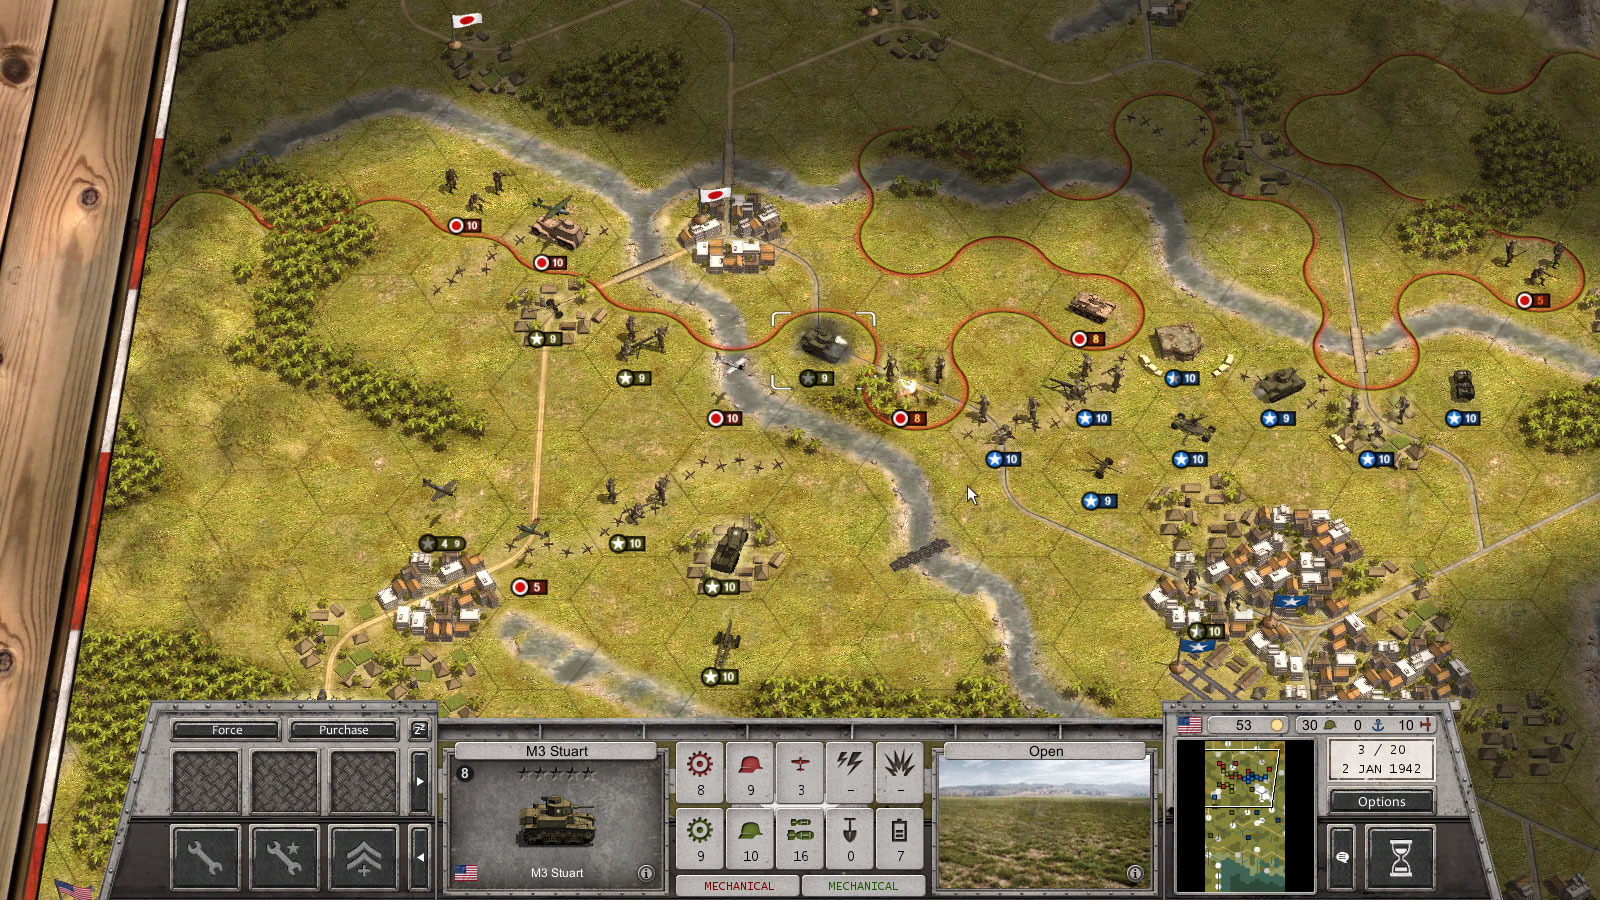
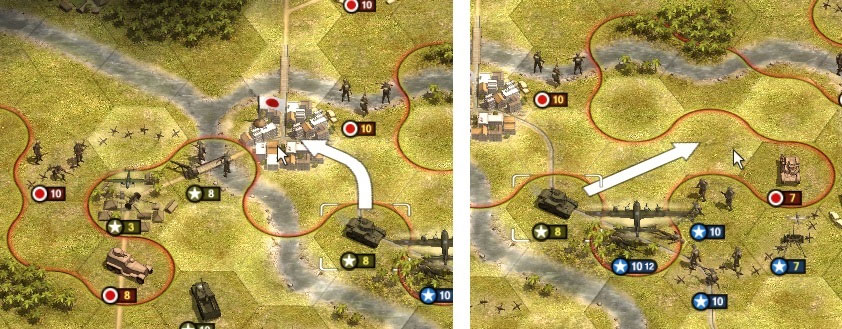
The exposed enemy tank to the north of my positions makes an appealing target. I know the Japanese have some artillery near the north of the map, and that this is a defensive mission, but I want to take advantage of the northern river crossing to make the Japanese forces bleed, at least whilst my bunker holds. So, after bombarding the enemy from range, I advance with my 37mm AT gun and armour to counter attack against the Japanese.
That’s it for my turn, over to Lukas
Turn 1 – Lukas

Since the objective is to hold out, not to conquer I’ll be taking a cautious defensive approach. However since the Japanese armoured units appear quite isolated, I’ll use the opportunity for a quick counter attack with the 37mm AT gun and Stuart tank.
I’ve sent my recon Jeep off to do some spotting in the east, while the infantry will take up defensive positions and entrench the perimeter. Idle units will automatically dig in and create entrenchments on their position. These fortifications improve over several turns and are visually represented by sandbags – the more sandbags, the better the entrenchment.
Turn 2 – Dave
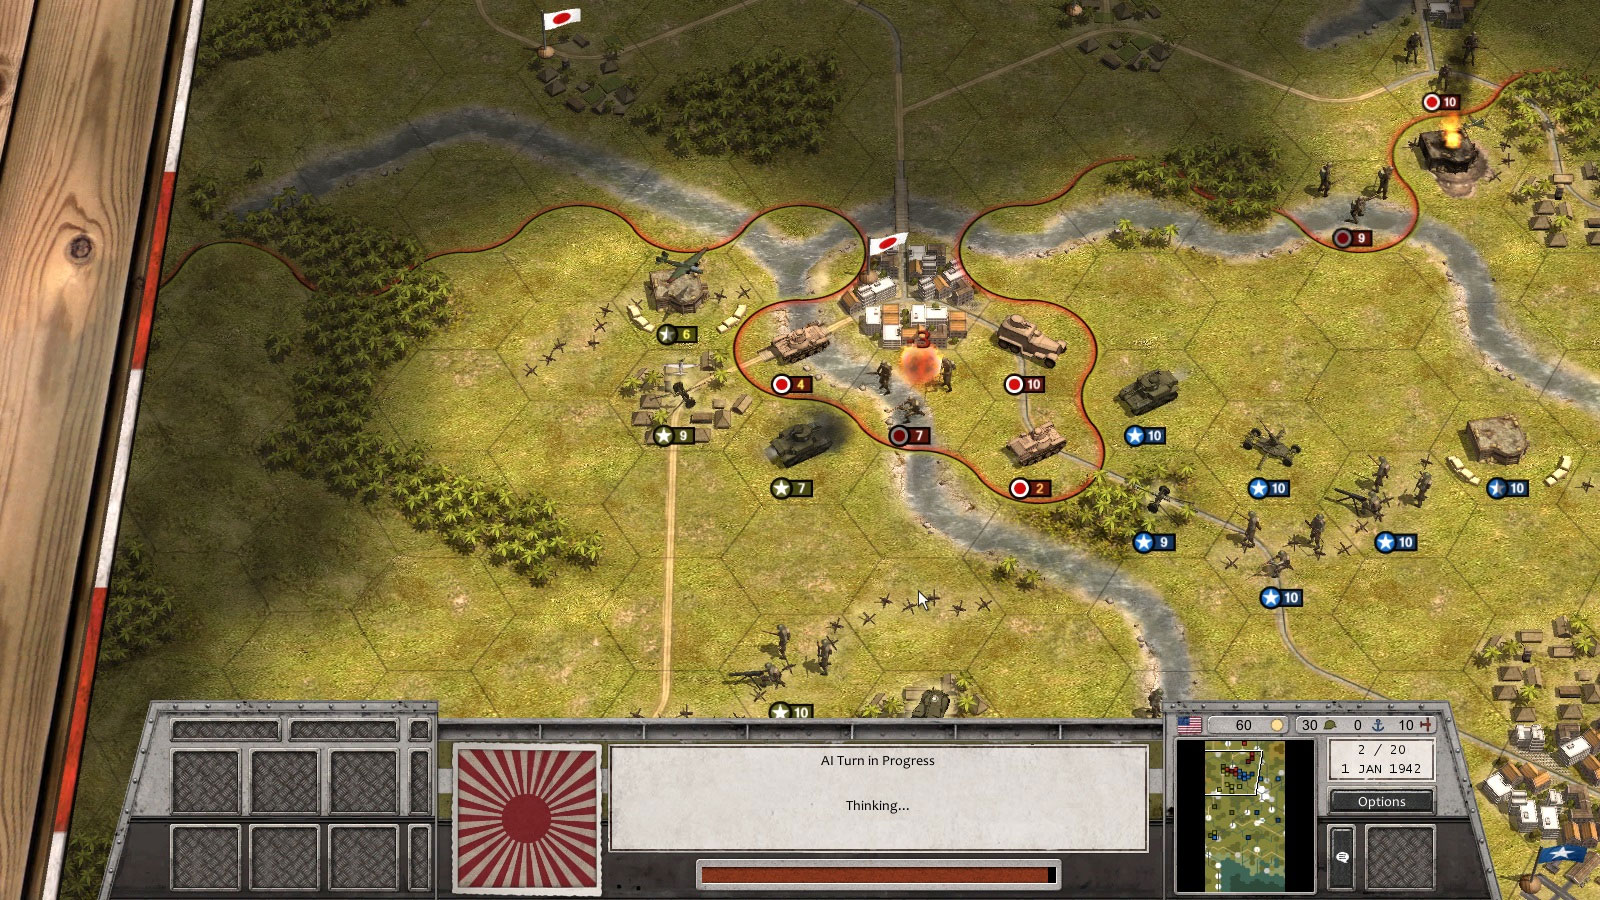
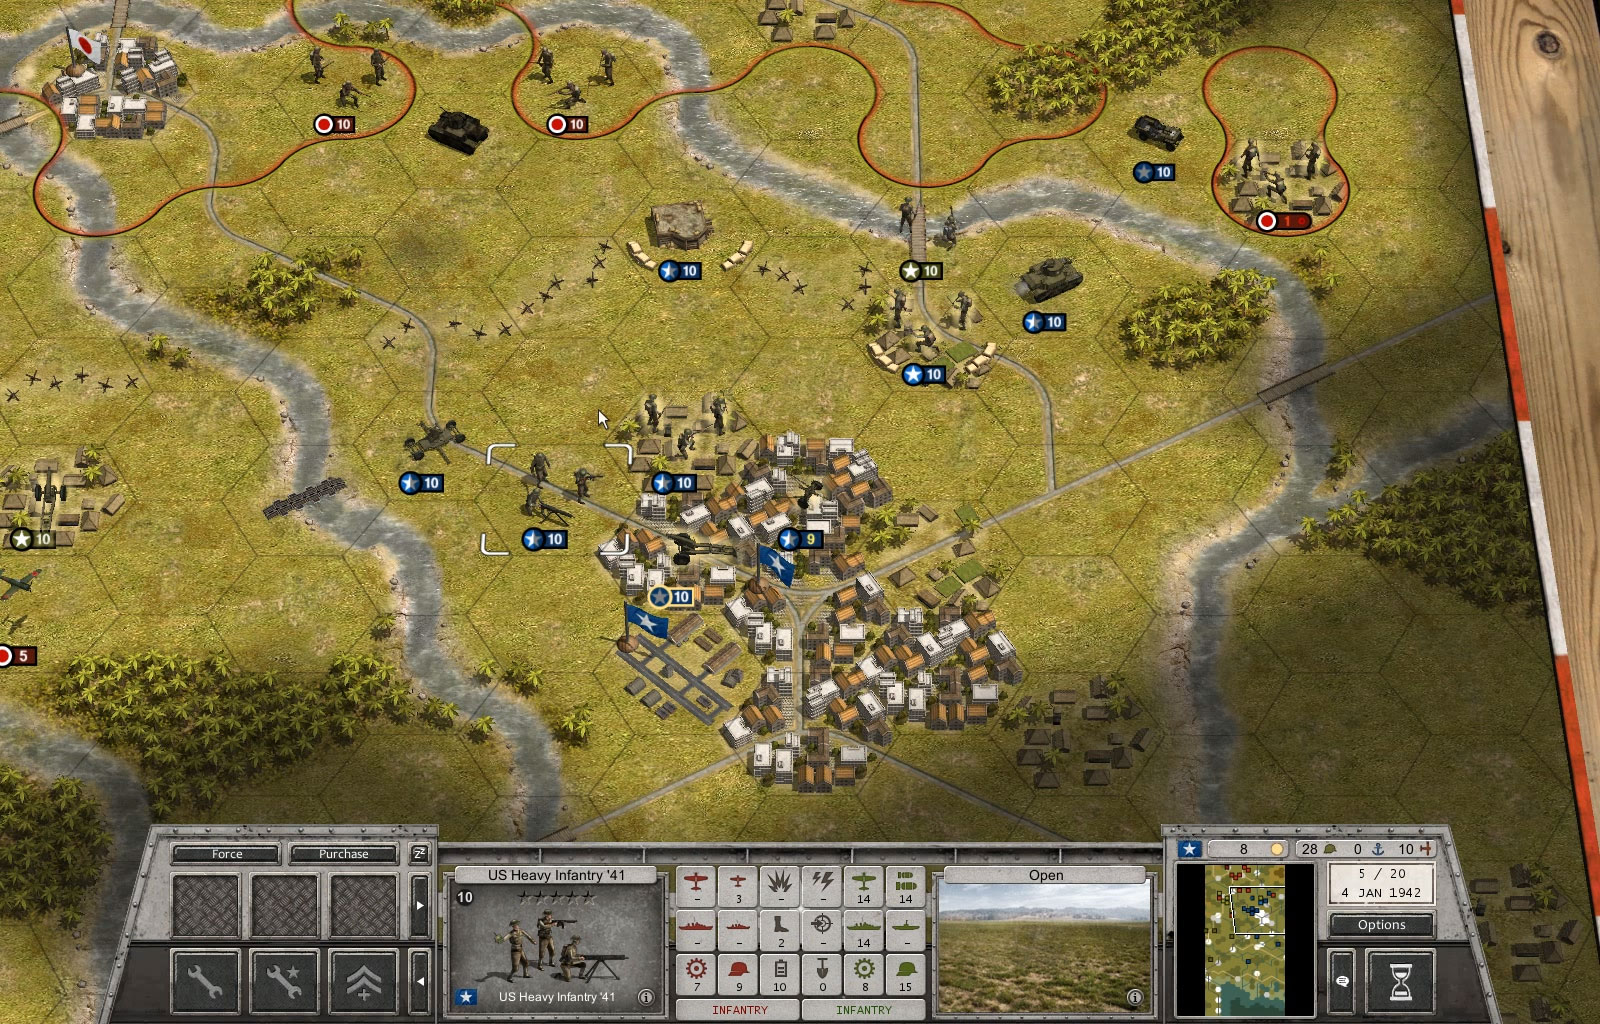
In multiplayer games, you start your turn with a full step by step replay of what has happened since your turn. In this case, I watch a replay of Lukas’ moves, followed by the Japanese’ second turn. They take out Lukas’ bunker in the North East and send an infantry unit racing ahead to hold the bridge in front of his front-line, then reinforce their attack across the river to the north of me.
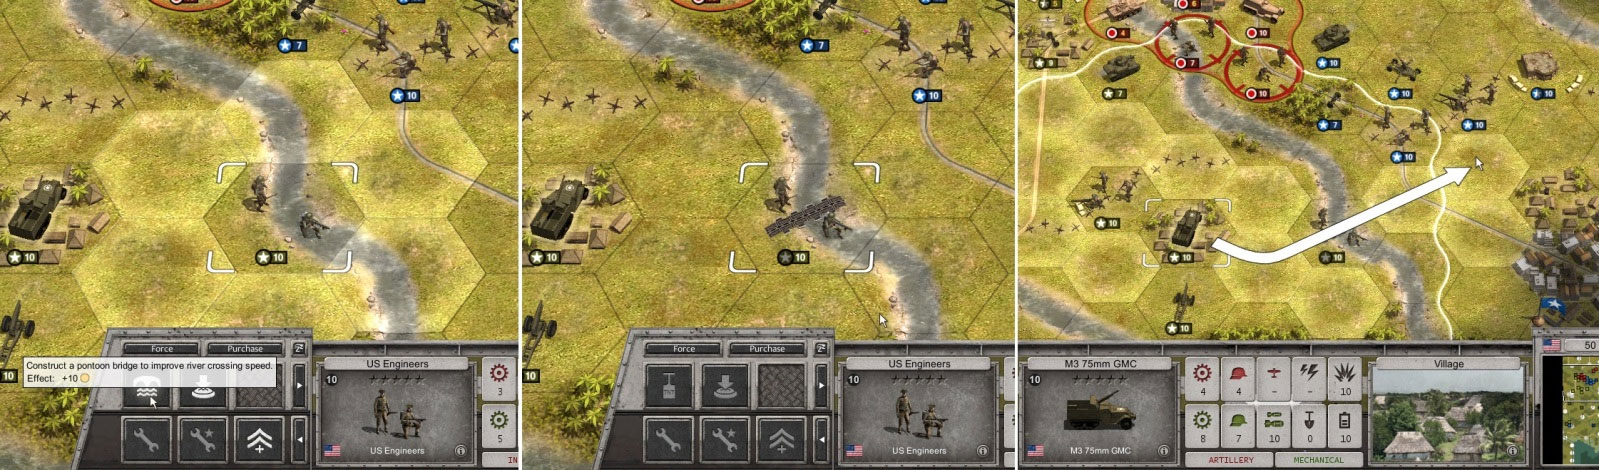
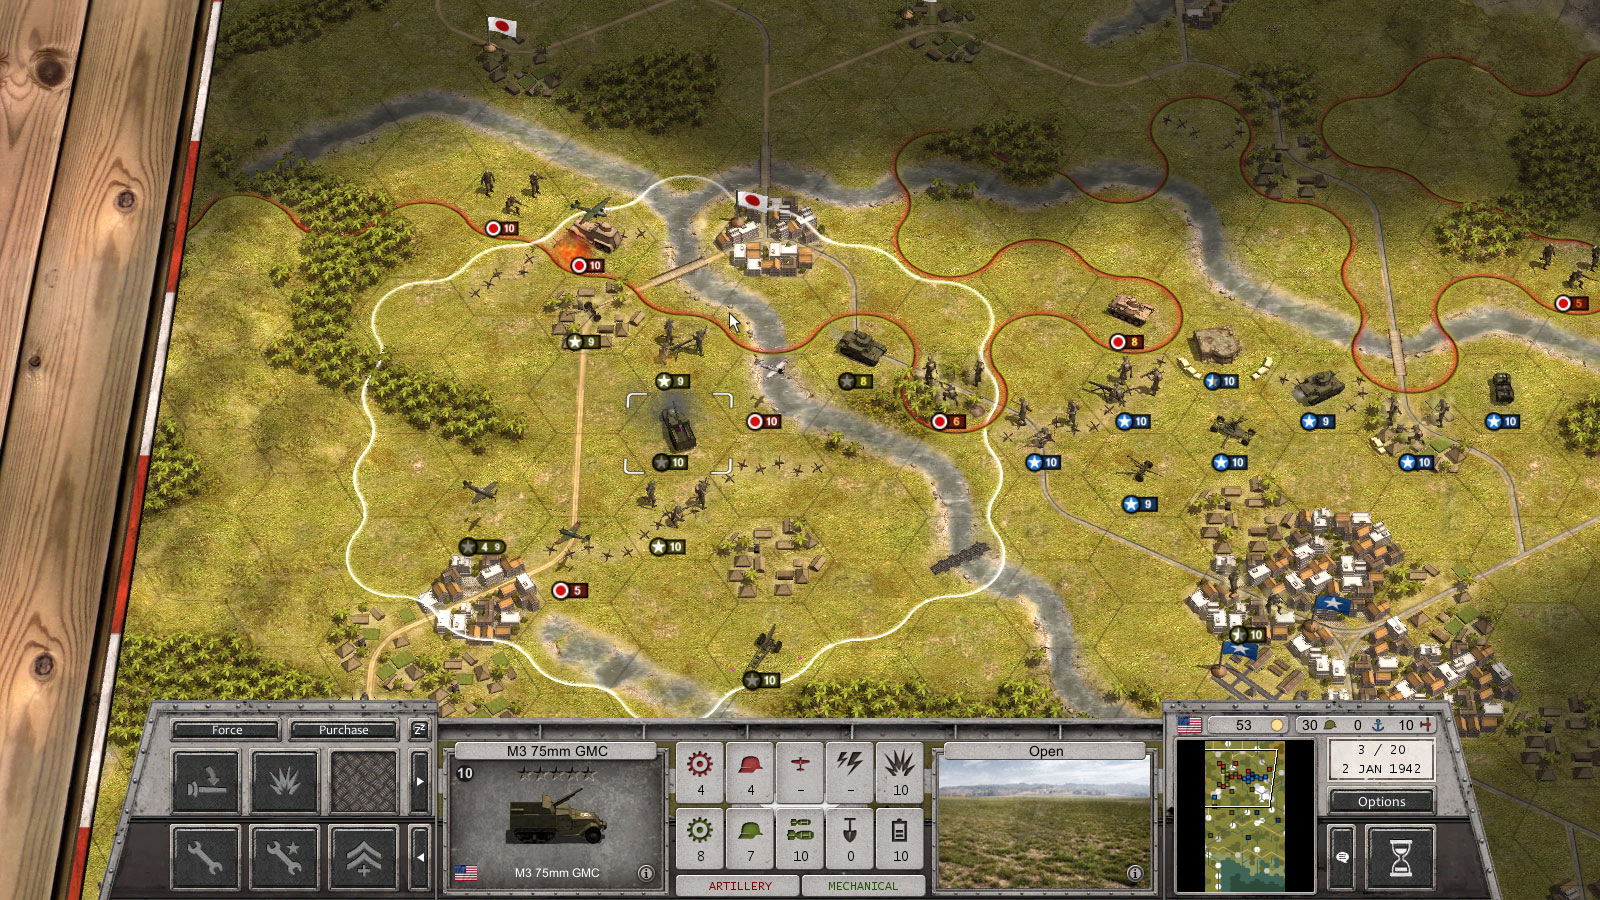
Now it’s my turn. First things first, it’s time to build that pontoon bridge. Engineers on river hexes can build pontoon bridges. It costs some Requisition points, but once done it allows units to cross the river much more easily. With this pontoon in place Lukas and I will be able to react quickly and support each other when the fighting gets fierce.
Next I use my artillery units again to bombard the enemy forces. My 37mm Anti-Tank gun then destroys the weakened enemy armoured unit on the bridge, and I reinforce my own weakened unit of M3 Stuarts. The game allows you to reinforce existing units so long as you have the Requisition points and Command points to buy the reinforcements. Units can only be reinforced when in supply.
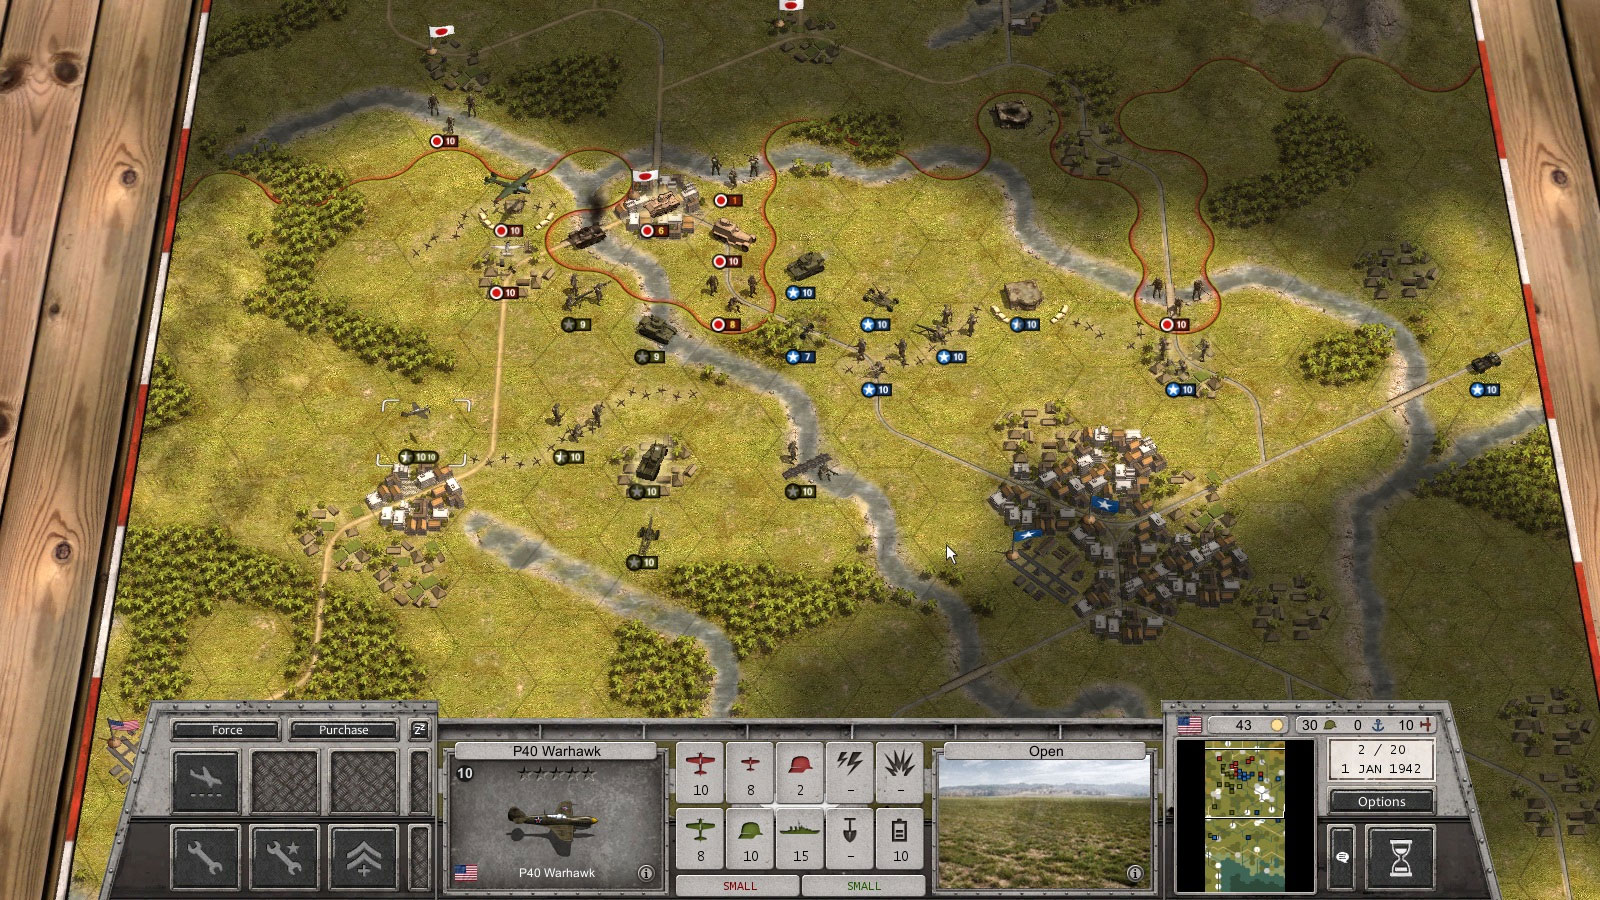
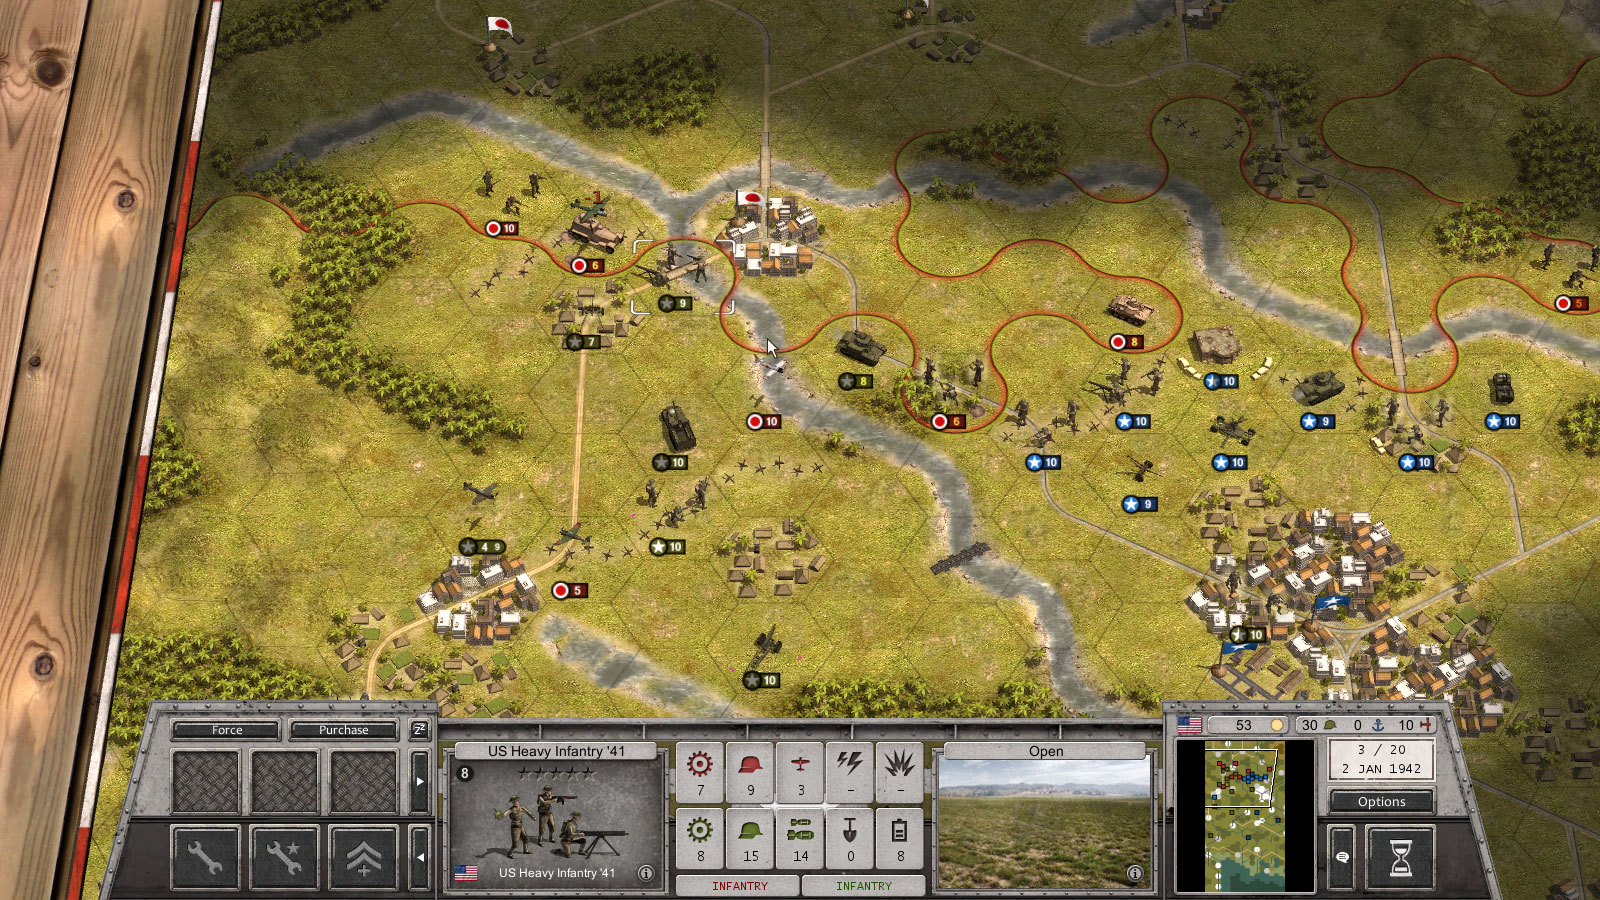
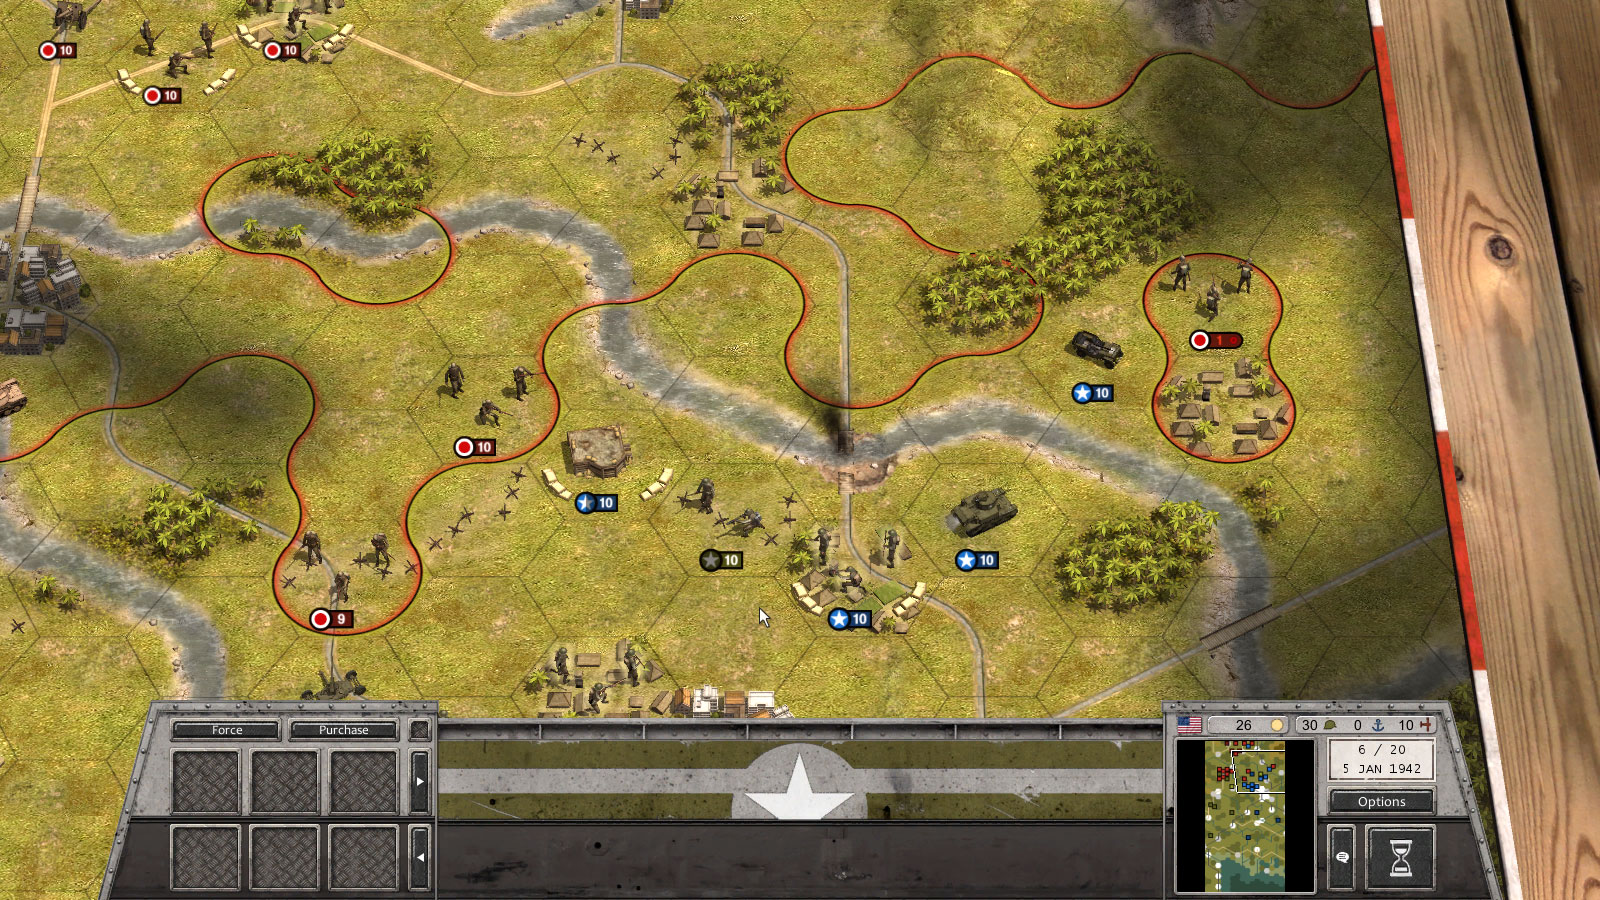
A couple of attacks later, I move my P40 Warhawk fighter unit up from the South, and I’m ready to end my turn. This screenshot shows the situation as I hand over to Lukas.
Turn 2 – Lukas
Japanese infantry are reaching our positions and air attacks are increasing. I have decided to pull my tank and AT gun back behind the infantry line.
The enemy has reached the northern bridge and is trying to cross it. A swift counter attack from my Stuart tanks – assisted by an outflanking bonus from the Jeep recon unit – throws them back in retreat. When expecting to take high damage, units will attempt to retreat to avoid some of it. The movement speed of the retreating unit compared to the attacker, as well as its exprience level affect the amount of casualties taken during retreat.
Turn 3 – Dave
It looks like my assertive defence of the bridge has deflected the enemy attacks. Most of the units which had gathered to attack me have fallen back, with a couple of them moving towards Lukas’ forces. Although the ground attack has eased, the Japanese have bombed and bombarded my bunker to destruction and continued their air attacks on my Stuarts. I’ve spotted an infantry unit fording the river to my left. The AI moves a fast armoured recon unit through the wreckage of my bunker to join up with this infantry unit.
This turn also sees the first dogfight of the game. The japanese Ki-43 Hayabusa attacking my Warhawk and coming off better than me.
At the start of my turn, I respond in kind, continuing the dogfight. The enemy unit is down to half strength, but my own fighter is now on 4 strength points, and feeling vulnerable.
Next I move my engineers across the newly built pontoon. My hope is that I can reach the two bridges to the North East and blow them up before the Japanese can capture them from Lukas. If I succeed, the advancing enemy army will be slowed and broken up fording the river.
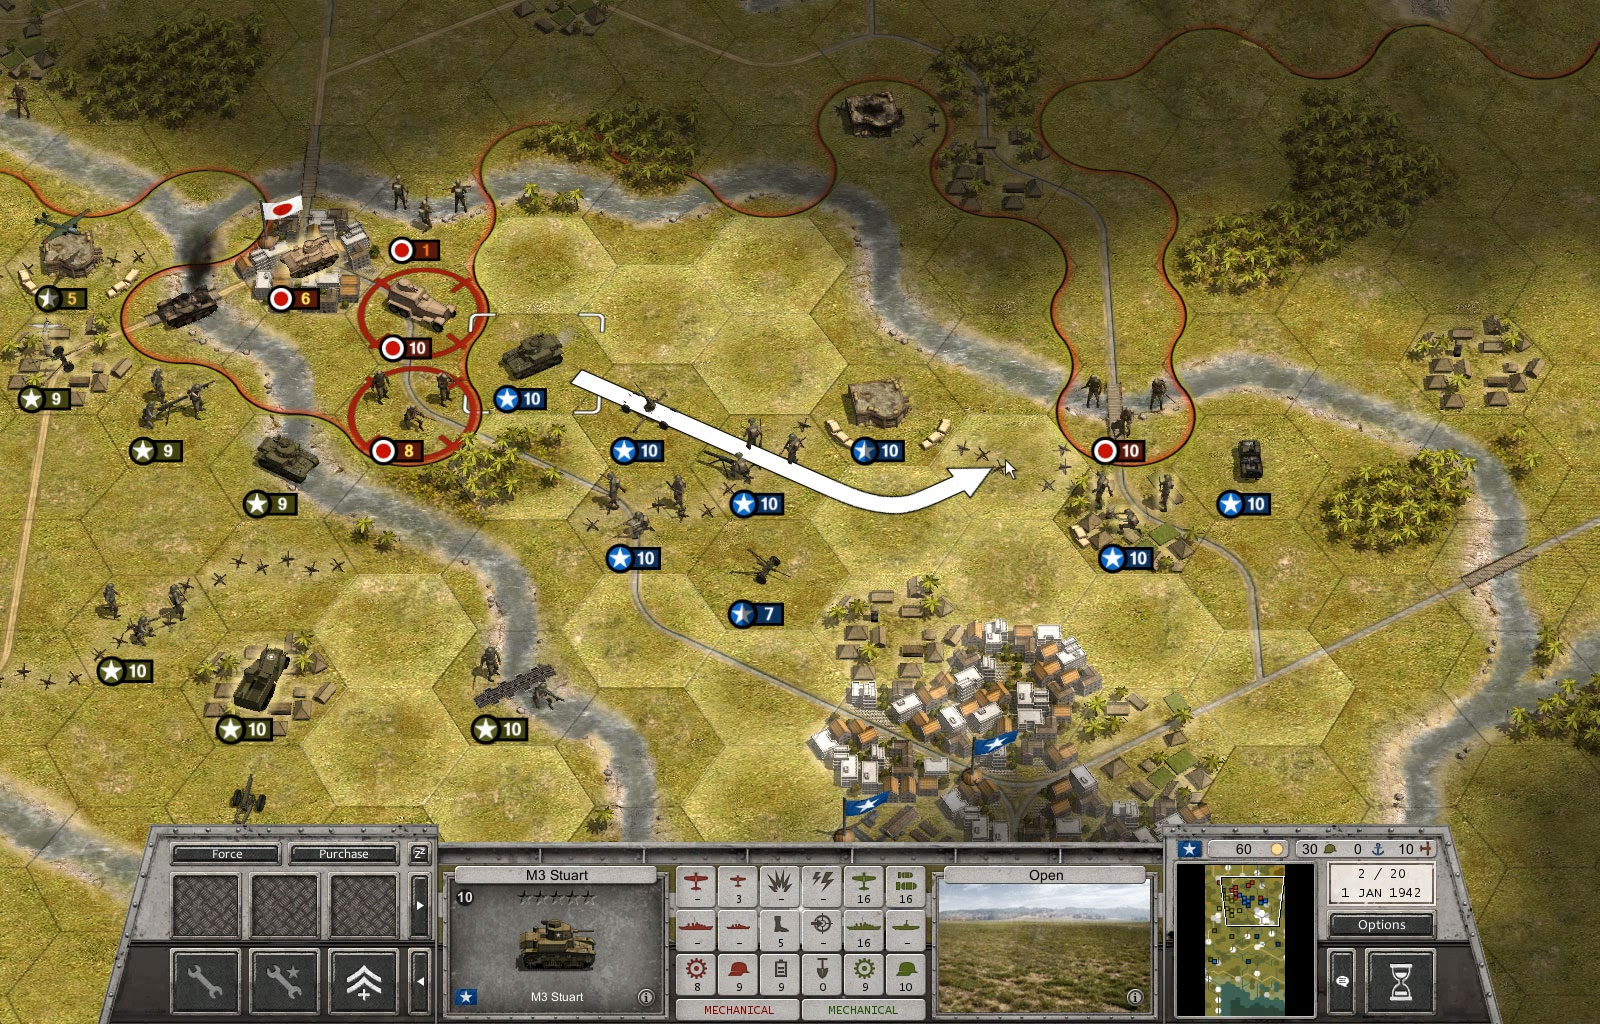
By moving away from the town and towards Lukas’ forces, the Japanese have exposed the flanks of an infantry unit and armoured units. I move my Stuarts across the river and, after bombardment from my M1 howitzer, attack the infantry unit. Hopefully Lukas should be able to deal the killing blow.
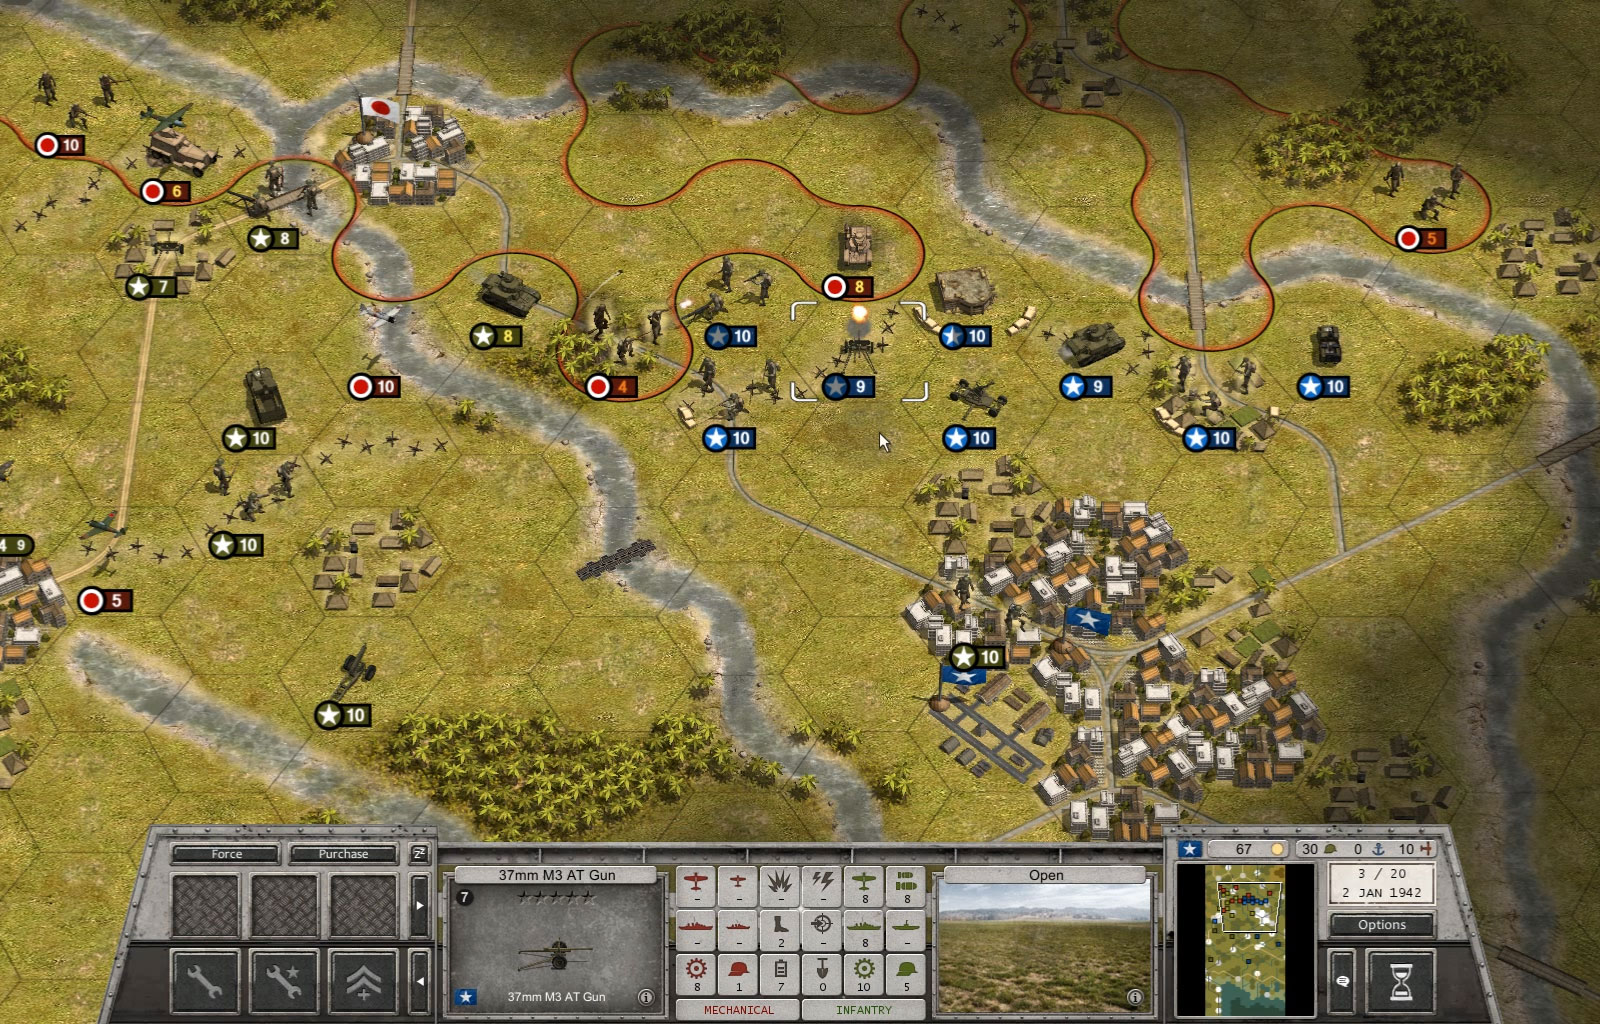
I use my M3 Gun Carriage to bombard the enemy recon unit, and follow up with attacks from my AT gun and Heavy Infantry, securing the bridge as I do so. I’m feeling fairly confident now. I’m on the offensive and it seems the Japanese just don’t have the necessary forces to break my hold of the river crossings.
Turn 3 – Lukas
The enemy has been fairly passive this turn, bringing their units closer to our position and giving them all a round of repairs. Since Dave’s tank has crossed the river to attack them from the rear and now sits in a fairly vulnerable position, I decide to launch another counter attack. This goes at the cost of abandoning my early stage entrenchments: attacking from an entrenched position decreases some of its effectiveness, while moving to another position clears it completely.
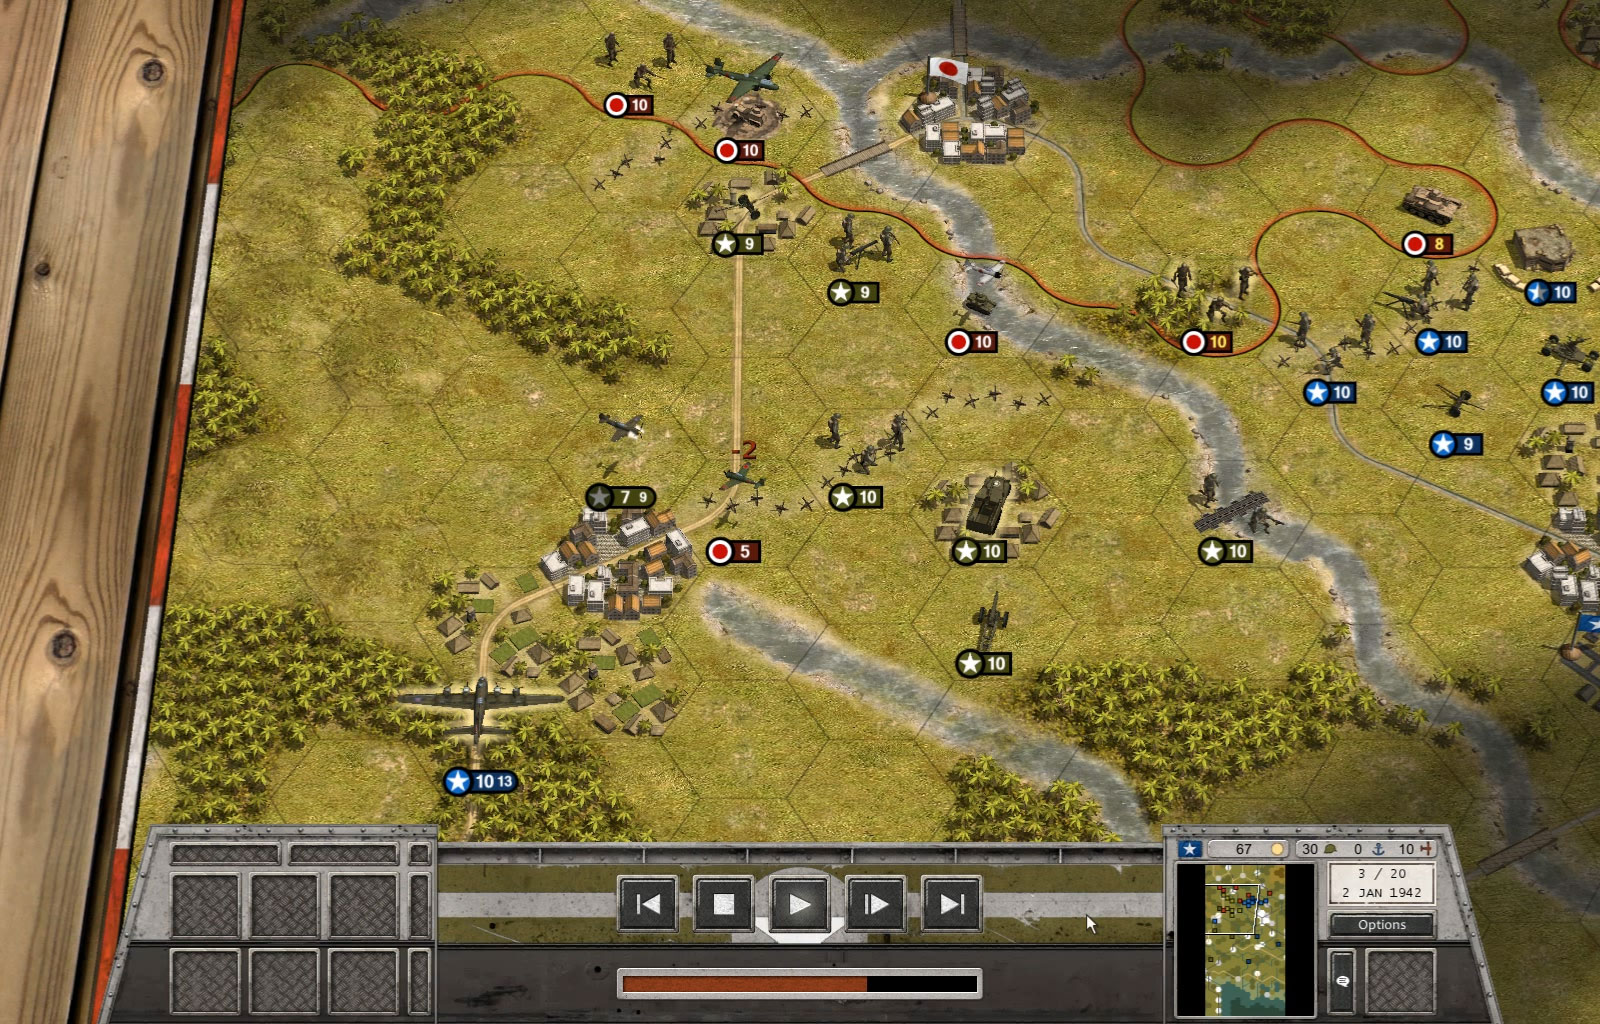
My B17 bomber has just reached the frontlines from the Southern airfields and immediately scores its first kill, delivering the final blow to the Japanese infantry my ground attacks failed to destroy.
Turn 4 – Dave
It seems the Japanese are hunkering down. Reinforcing their units and holding back from attacks. The recon unit has swung around my flank in the west. The enemy infantry, receiving flanking bonuses from the recon unit have done some serious damage to my anti-tank guns. Lukas has done as I hoped and attacked the enemy infantry that I have outflanked in the centre. Now I have a couple of interesting choices…
My forces are a bit scattered, but I still have the advantage over the enemy and I want to capitalise on it. My Stuarts have forded the river. I could capture the town which holds the bridges in the centre of the map, but at the same time I’m reluctant to stray into range of the enemy artillery. In the end, I decide to move further East, cutting the supply of the enemy armoured unit. Units which are separated from friendly supply sources become very vulnerable to attack. By cutting the supply of the enemy tank, this should make it easy for Lukas to close in and cause serious damage in his turn. I go for this option.
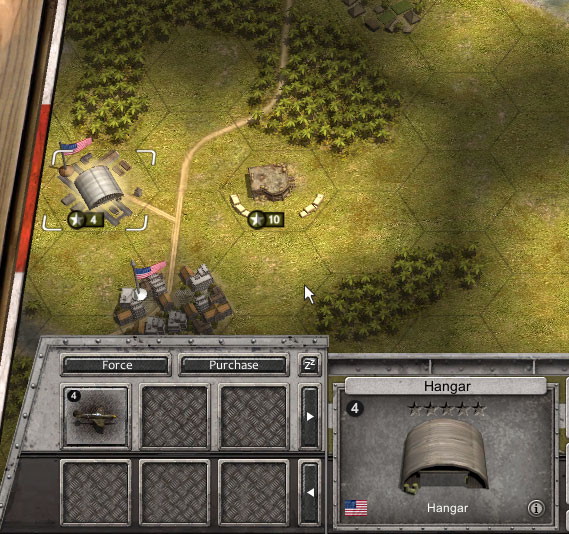
My Warhawk fighter is now on low strength, and vulnerable to attack. Lukas’ bomber will have to go without an escort for a bit. I fly my fighter back to the nearest airbase and land, ready to repair and refuel next turn.
I throw everything I’ve got at the recon unit in the west, bombarding it with howitzers and gun motor carriage. It retreats away from my infantry attack, but my follow up attacks from my heavy infantry finish it off. I pull my AT guns back from the front and reinforce them.
Turn 4 – Lukas
I’ve kept my light AA gun around my forward units, and it finally pays off. A Japanese A6M Zero fighter has been strafing my units and is now taking some flak fire. These light AA guns are most effective against small enemy aircraft while their heavy calibre brothers excel against slow, high altitude bombers. They can both target aircraft directly and provide AA support to any friendly unit in range during an enemy air attack.
In a series of attacks directed against another victim of Dave’s Stuart tank, my B17 bomber again gets the final kill. Strategic Bombers are generally not very good at dealing direct damage but are effective at crippling the enemy’s efficiency. While efficiency will recover gradually, a sustained bombardment can make a target highly vulnerable to consecutive ground attacks.
Turn 5 – Dave
My aggressive use of my unit of Stuarts has finally come back to bite me. Enemy infantry units fording the river have attacked me from two sides. As I feared, the enemy have been bringing forward their artillery. The bombardment, the outflanking bonuses and the already weakened state of my unit means they make short work of it, and soon my unit is just a charred wreak…

I repair my landed fighter, leaving it out of action for one turn more, but if I’m going to take on the enemy air force I’ll need all the strength I can get.
I cut-off the enemy units in the west, and attack them from both sides. The blue cross in the screenshot below shows that the highlighted unit will provide an outflanking bonus when I attack.
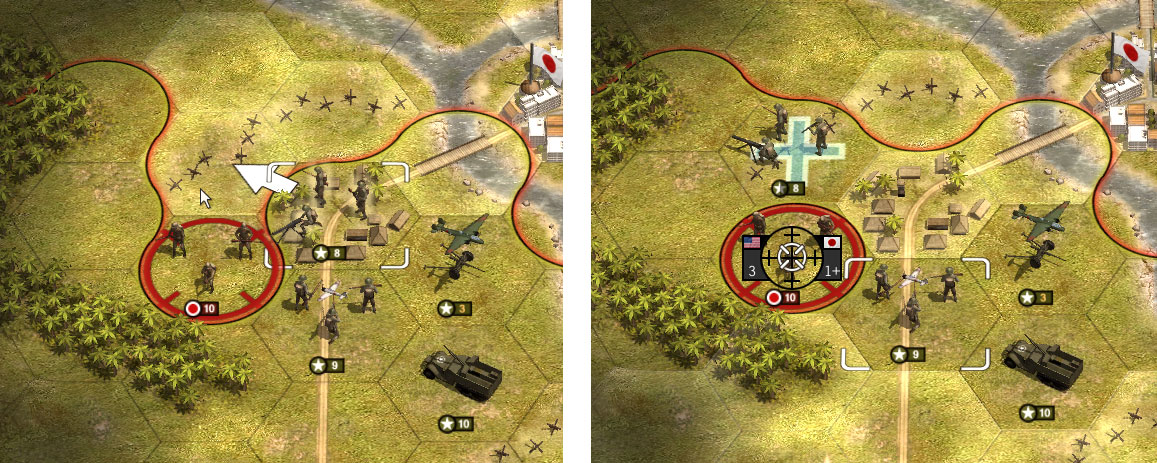
I reinforce my remaining units, and move my howitzer forward. My engineers have made it to the bridge north of Lukas’ positions. Next turn, it’ll be dust…
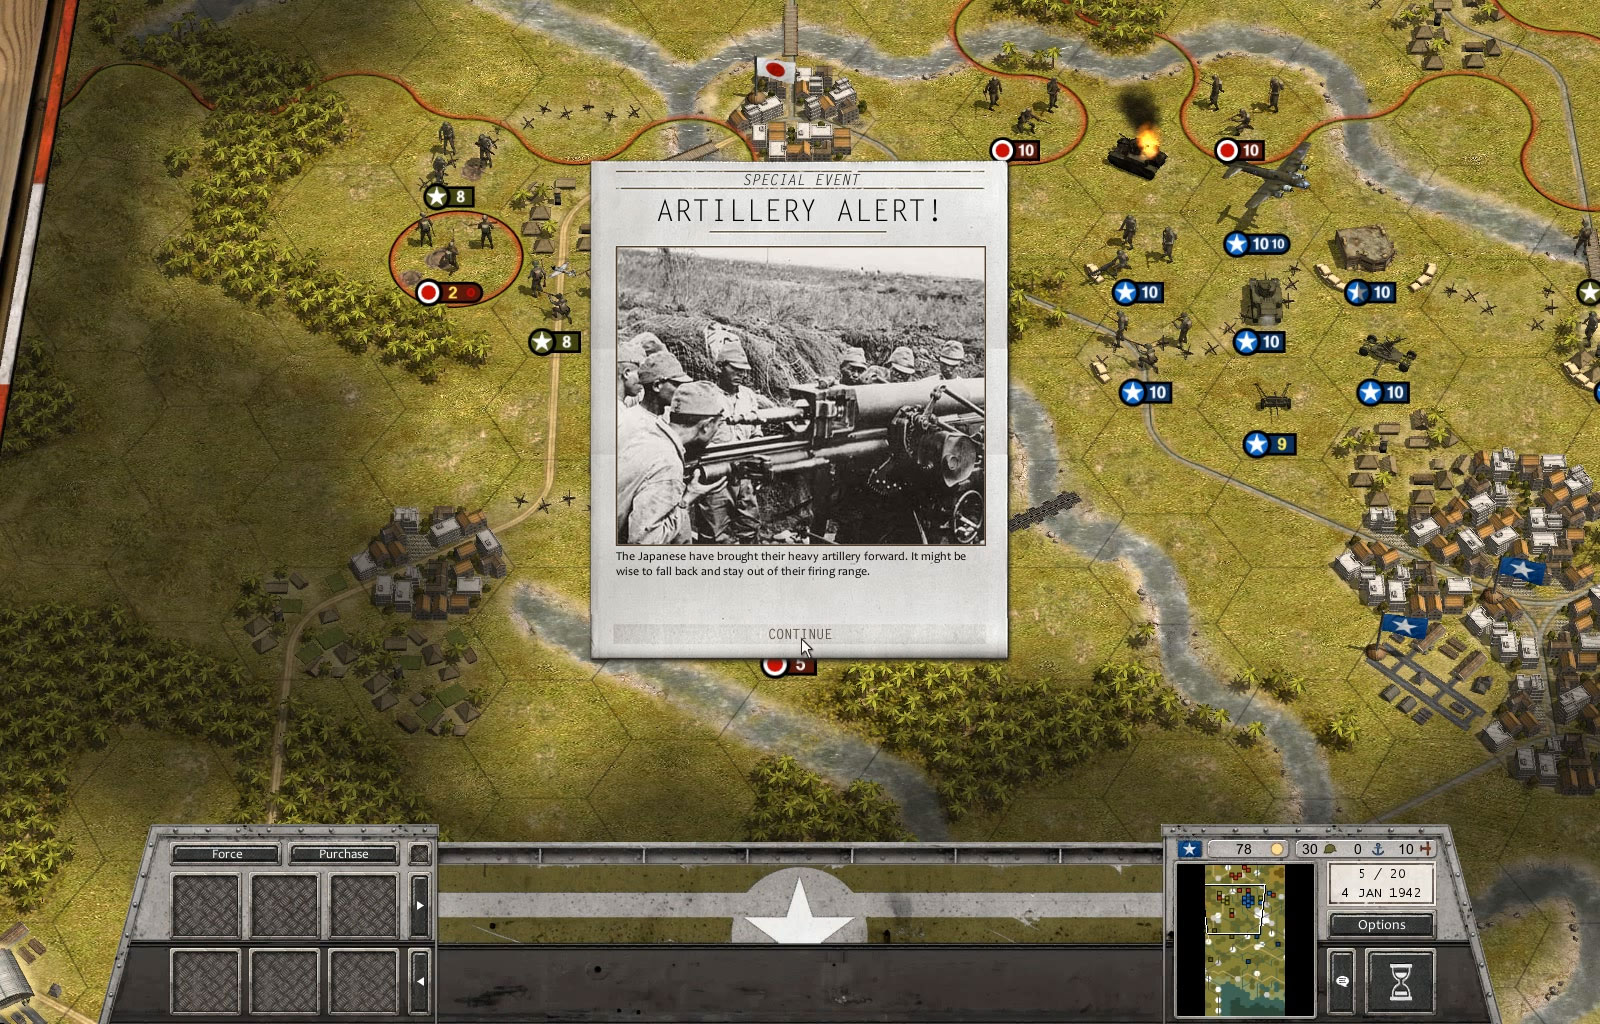
At the end of the turn I reflect that although I’ve been successful at repulsing these initial Japanese units, it has been at the cost of an armoured unit, and my forces are straying dangerously close to the enemy artillery. Next turn I’ll need to think about falling back and consolidating my defences.
Turn 5 – Lukas
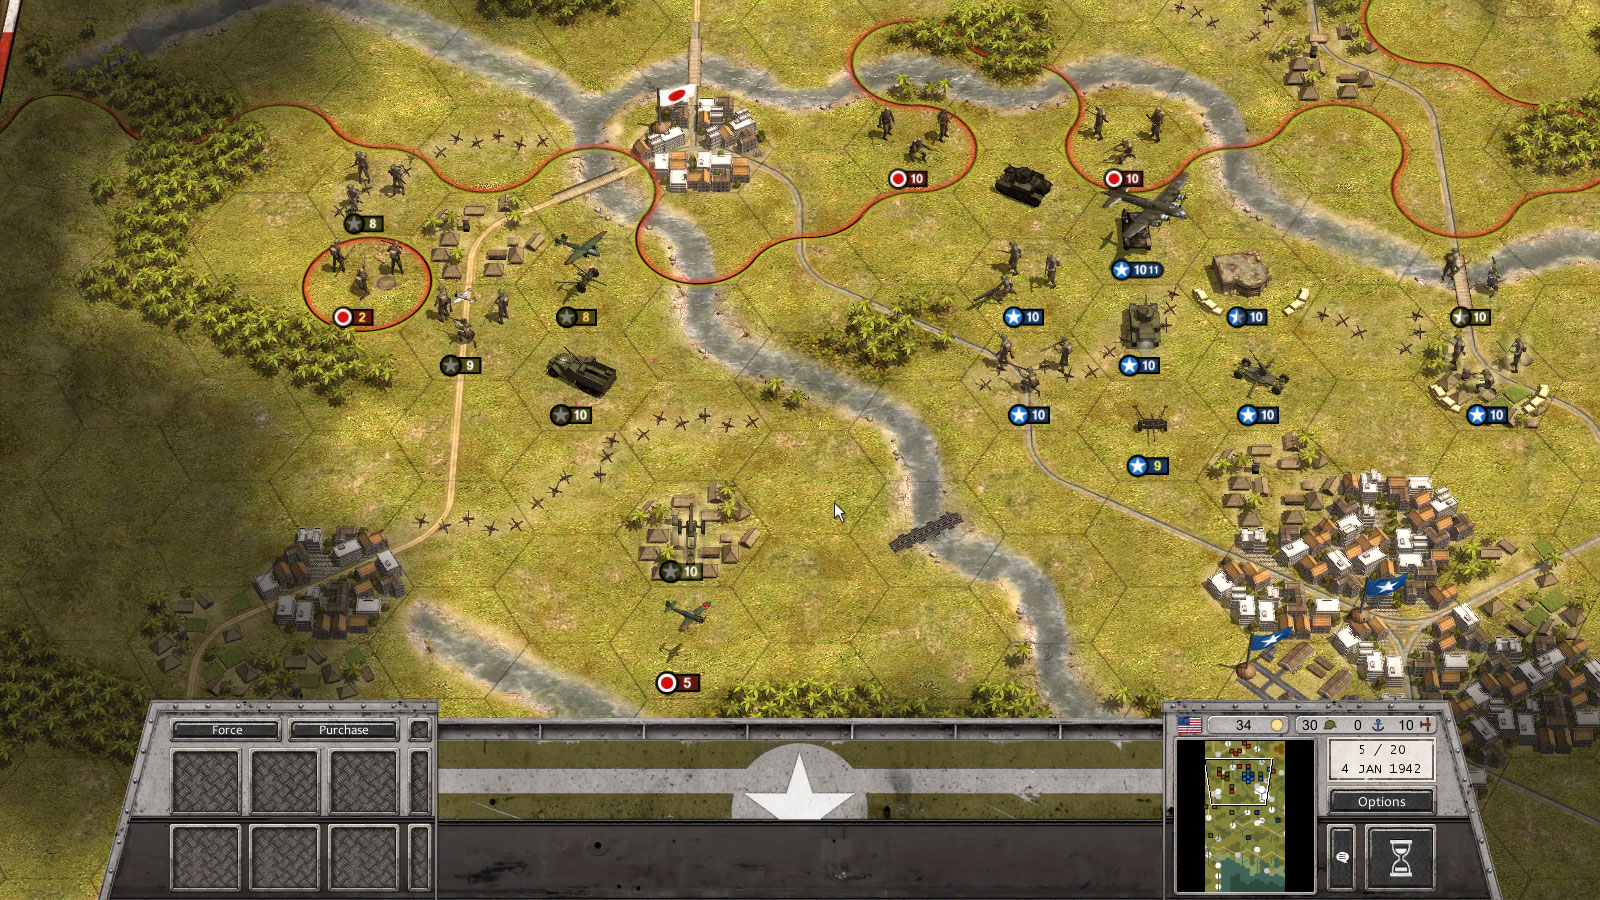
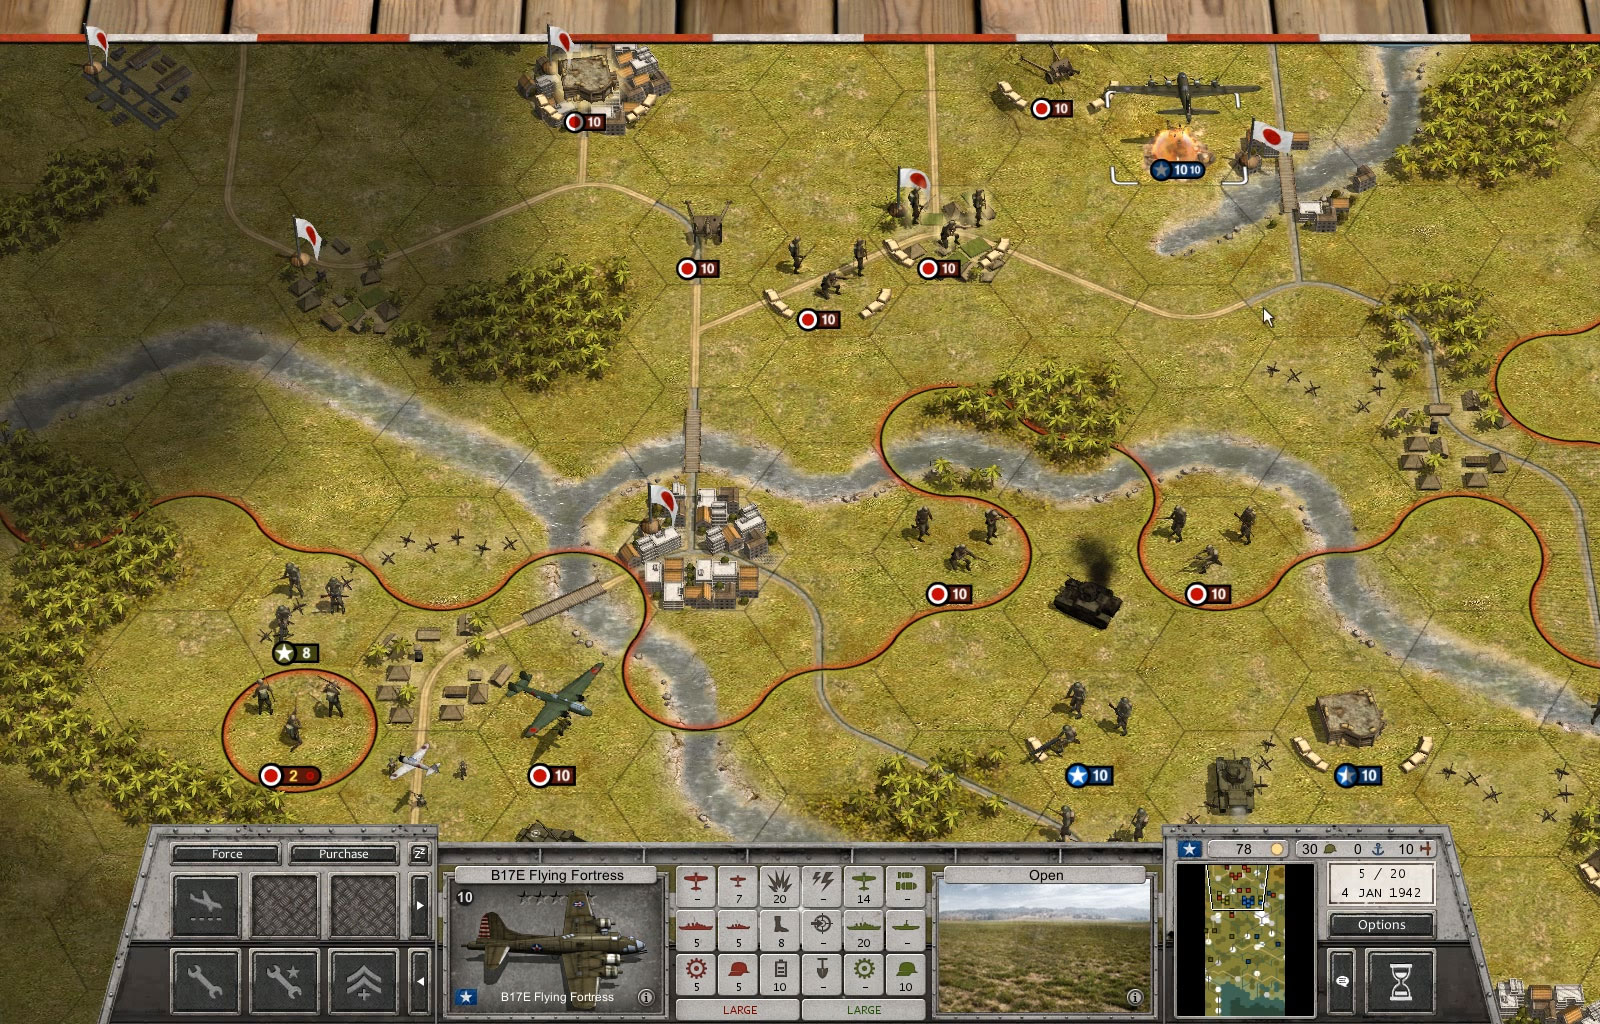
The Japanese have brought up their heavy artillery and Dave’s tanks get wiped out by the ensuing barrage and consecutive infantry attacks. I decide to hit these unprotected artillery position with my B17, but the bombing run results in little damage.
Watching Dave get pounded by the whole japanese air force, I decide to move my AA gun closer to the pontoon bridge. From there it will hopefully be able to cover a bit more ground.
Next it is time to use the resources I saved to purchase a new unit: A fresh and shiny artillery unit, including truck transportation to make it a bit more flexible – in attack and retreat.
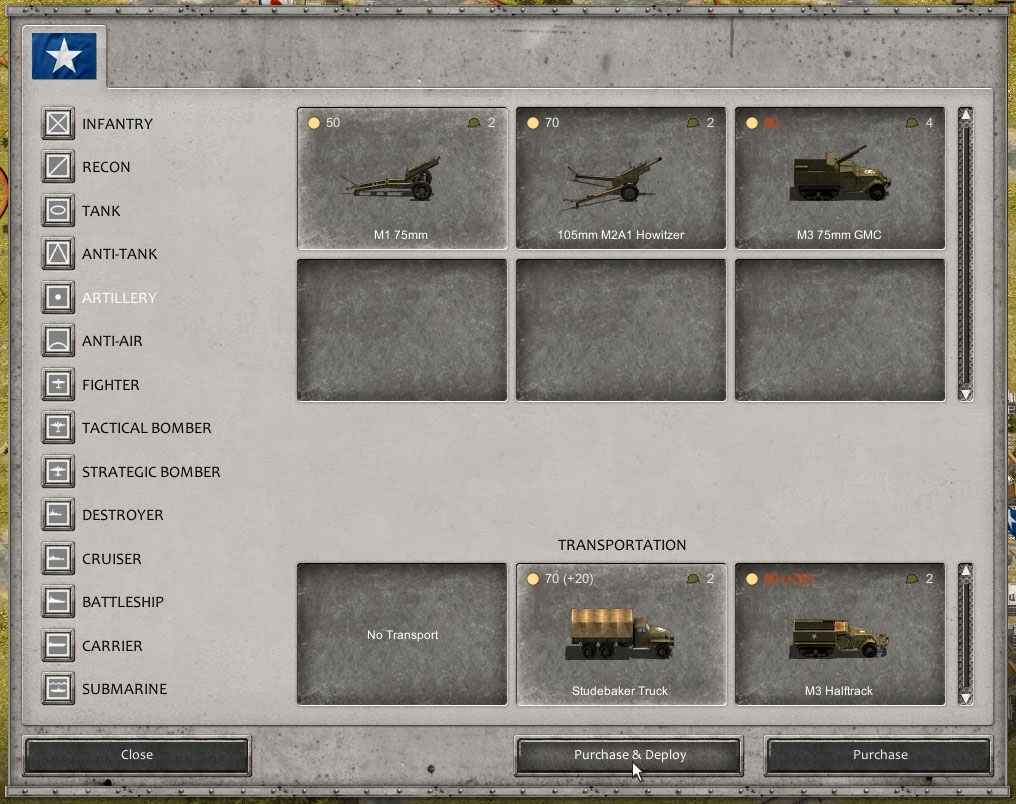
I deploy the new guns near the most Northern city under my control. The rest of my units are ordered to retreat out of enemy artillery range. Only the infantry guarding the bridge remains in place. They have completed maximum entrenchment of their position and will protect Dave’s engineers as they demolish the bridge. In the meantime my Willys jeeps continue to harass a now isolated Japanese infantry unit. Cut off from supply they will surely get cleaned up in the next turn.
Turn 6 – Dave
The next enemy waves strikes like lightning. The remaining enemy infantry units are suddenly joined by two fast moving Japanese light tanks. A quick succession of choice attacks sees the enemy infantry and aircraft take out my anti-tank guns leaving the enemy light tanks, with the outflanking support of a severely weakened Japanese infantry unit, to wipe out my own US infantry.
Suddenly my position seems very precarious. With my unit of engineers far off in the east, and my requisition points too low to purchase reinforcements, it looks like I’m going to have to rely on Lukas.
I lower the gun of my M3 GMC, switching from self propelled artillery to tank destroyer, and score a good hit against one of the units of light tanks, causing heavy damage and forcing the enemy unit to retreat.

I fall back with my infantry which are in danger of getting cut-off from supply, and come across the enemy infantry which had been hidden in the jungle. Infantry units in jungle hexes are camouflaged. This means that even if they aren’t covered by FoW, they will remain invisible unless adjacent to an enemy unit. The game also features pseudo-true LoS. Land units cannot see through jungle hexes and mountain ranges. All units can see very far over the open sea, but naval units cannot see very far inland.
Although I’ve stumbled on this weakened unit, I’m in a vulnerable position myself, so choose to reinforce this unit rather than attack.
My engineers in the east blow the bridge to the north of Lukas’ positions.Hopefully the destruction of this bridge will allow him to spare me some support.
My fighter is finally airborne. Hopefully now I can do something about the incessant air attacks. I finish my turn by bombarding the enemy infantry. My position is precarious. I’ve been over-ambitious and over aggressive in the early moves of the game, and it has cost me.
Turn 6 – Lukas
Dave has run into serious trouble. The Japanese have hit hard with new tanks, infantry, air and artillery bombardment, killing several of his men and threathening to overrun the whole flank. I’ll have to change my “dig in and defend” strategy and come to his aid.
Without that pontoon bridge, the game may have been lost right here! As my units advance to the bridge, I launch a counter attack against one of the Japanese infantry scouting my position. It takes several attacks to finish it off and my Willys jeeps finally destroy the isolated enemy infantry.
As my bomber pounds the enemy western attack force, it reveals no immediate threat to my position. I move my AT gun behind my infantry to provide support fire in case the Japanese tanks decide to switch targets and counter-attack my infantry. The heavy infantry unit and AA gun cross over the pontoon bridge to fill up the gaps in Dave’s defenses. Hopefully he’ll be able to afford some reinforcements soon because this is all can safely spare.