

Hi There
Which software would you use if you wanted to make your own paper flags for 15mm
Flag Making
Moderators: hammy, philqw78, terrys, Slitherine Core, Field of Glory Design, Field of Glory Moderators
-
lonehorseman
- Administrative Corporal - SdKfz 251/1

- Posts: 142
- Joined: Mon May 03, 2010 10:01 pm
- Location: Pretoria, South Africa
TBH I prefer tin foil flags, they appear much more natural as you can bend them nicely to look like wind is blowing them. Downside is you need to paint them yourself. Otherwise I have seen some nice flags made in Photoshop C4.
15mm: Painted: Late Republican Roman
Medieval Welsh
WIP: Ivan the Terrible's Russians
Later Ottoman Turkish
Medieval Welsh
WIP: Ivan the Terrible's Russians
Later Ottoman Turkish

Use white glue/PVA/Elmer's and it works fine. It will tend to warp a bit as it dries but it isn't too hard to flatten it out. Here is a terrible picture but I think you get the idea.david53 wrote:ethan wrote:I use Little Big Man transfers wherever possible. I use a composite of paper and aluminum foil as a a base made by gluing paper onto aluminum foil then flag onto paper.
Sounds good idea never thought of that will paper glue stick the paper to the foil?
ethan wrote:Use white glue/PVA/Elmer's and it works fine. It will tend to warp a bit as it dries but it isn't too hard to flatten it out. Here is a terrible picture but I think you get the idea.david53 wrote:ethan wrote:I use Little Big Man transfers wherever possible. I use a composite of paper and aluminum foil as a a base made by gluing paper onto aluminum foil then flag onto paper.
Sounds good idea never thought of that will paper glue stick the paper to the foil?
Looks great to me I'll give it a go, thanks for showing the picture.
Dave
Oh yeah, I use "heavy duty aluminum foil" instead of the normal stuff and it it wasn't obvious I use paper on one side of the foil and fold it over to get paper on both sides (I use super glue, slow curing kind, to put the two halves together. You can usually get very close to perfect and jsut edge around the outside with paint.
-
BlackPrince
- Staff Sergeant - StuG IIIF

- Posts: 269
- Joined: Mon Aug 25, 2008 12:34 pm
-
deadtorius
- Field Marshal - Me 410A

- Posts: 5291
- Joined: Mon Oct 20, 2008 12:41 am
In the past I have scanned flags from books, saved the image and resized it to what ever size you want. You can also copy and paste if you want multiples of the same flag on a single page. the flags I scanned would show both sides or you copy and flip the image and then paste it next to the 1 side so that you get a single long flag with both sides.
I would then print them off, I find that doing them in black and white and painting tended to look better then doing it in colour but it would depend on the quality of your printer.
Once they are painted or colour printed I cut them out applied white glue to them and then folded them over the wire, best way is to bring the open ends together first, then slowly press it in to the pole, while the glue is still wet you can bend the flag to give it that flapping look. Once the glue dries it will harden however you left it, flapping or flat. Cheap way to get flags if you have access to the images you are looking for
-
expendablecinc
- 2nd Lieutenant - Elite Panzer IVF/2

- Posts: 705
- Joined: Tue Aug 22, 2006 2:55 pm
I do exactly the same but use the metal from aroung the neck of champagne bottles. Its perfect but leads to odd behaviour at parties (pocketing the bottle wrappers.ethan wrote:Oh yeah, I use "heavy duty aluminum foil" instead of the normal stuff and it it wasn't obvious I use paper on one side of the foil and fold it over to get paper on both sides (I use super glue, slow curing kind, to put the two halves together. You can usually get very close to perfect and jsut edge around the outside with paint.
anthony
I have done that as well, but lately I find the quality of the wrappers (or perhaps just what I buy) has gone down. If you can find the really heavy foil wrappers it is great.expendablecinc wrote:
I do exactly the same but use the metal from aroung the neck of champagne bottles. Its perfect but leads to odd behaviour at parties (pocketing the bottle wrappers.
anthony
-
expendablecinc
- 2nd Lieutenant - Elite Panzer IVF/2
- Posts: 705
- Joined: Tue Aug 22, 2006 2:55 pm
Yes my Byzantine Emperor has a flag made from Moet.... Not Goon Juiceethan wrote:I have done that as well, but lately I find the quality of the wrappers (or perhaps just what I buy) has gone down. If you can find the really heavy foil wrappers it is great.expendablecinc wrote:
I do exactly the same but use the metal from aroung the neck of champagne bottles. Its perfect but leads to odd behaviour at parties (pocketing the bottle wrappers.
anthony
-
sergiomonteleone
- Master Sergeant - U-boat

- Posts: 505
- Joined: Tue Feb 05, 2008 3:26 pm
Re: Flag Making
On Internet you can find every kind of flags, except for (if I'm not wrong) Chinese ones.david53 wrote:Hi There
Which software would you use if you wanted to make your own paper flags for 15mm
You can copy flags with jpg format on your computer and then print them with a good quality of paper. The only problem is making some tests for the right size.
Some examples:


In any case, even if a little bit expensive, Little Big Men Studios are wonderful.
Some examples:


Sergio

I prefer to paint my own flags, but you could incorporate some my tricks with laser-printed flags also.
First, if you start with a decent weight paper, you needn't incorporate foil, etc. to stiffen or shape the flag. Instead brushing diluted PVA glue to fold it over will give plenty of strength and allows you to shape waves into the flag pretty easily.
I like to paint out the flags on graph paper. The grid helps keep the flag in the correct size (i.e., check the staff/spear for how many boxes you need for the vertical) and evenly split for the fold-over (remember to include a center file of the grid for rollover).
You could get the same result with pre-print flags as follows:
Use heavy bond paper.
Layout a grid in Excel/Word (5-6 squares per inch), set the borders for gray/dotted lines to keep them faint.
Print a few pages of said grid on 8 1/2" x 11" (or A4 if you are uncivilized).
Save a copy of the grid document.
Layout your flag images on the grid copy to align them with your grid.
Save the flag doc.
Remove the grid from the flag doc.
Print your flag doc on the reverse side of the grid paper.
Voila.
You might not even need to print them on the grid paper (since they will be aligned and sized already).
Finally, even when using pre-printed flags, make sure to paint the edges to match the flag border.
HTH
Spike
-
grahambriggs
- Lieutenant-General - Do 217E

- Posts: 3081
- Joined: Fri Sep 12, 2008 9:48 am
Hi, can someone give me advice how to use the LBM flags correctly?
I assume they have to stick to a piece of paper just like shield decals to the miniature?
But how exactly do you do it step by step? I don't want to ruin those expensive flags.
Do you completely cut them out first, stick them to paper and cut the paper too?
Or can you just stick the whole flag sheet to a paper and cut afterwards?
I wonder why there is a white gap between the two sides of the flag.
Is it intended that I have to cut out both sides and stick them together to close that gap or do you leave it white and paint it after applying to the pole?
For a pole 1mm thick, you will need at least 3mm that is only wrapped around, but the gaps are only 1mm (intended for wire poles?)
-
lonehorseman
- Administrative Corporal - SdKfz 251/1
- Posts: 142
- Joined: Mon May 03, 2010 10:01 pm
- Location: Pretoria, South Africa
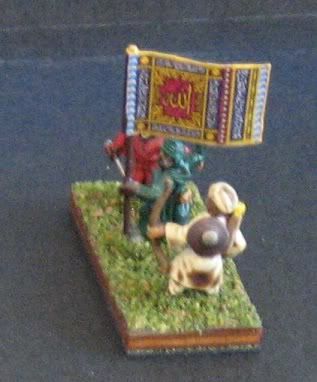
The white bit is for the pole, but what I so if my poles are thicker (and they always were) is cut out the 2 halfs of the flag and then do the whole paper flag type thing and stick the 2 halfs onto that...however that does not look as good as just replacing the flag pole with a needle. So if you have a pin vice rather drill a hole in the hand and replace with a needle ( I am just too lazy for that). I have started making my own flags so that I don't pay to have crappy looking flags (due to having to alter the LBMs)
15mm: Painted: Late Republican Roman
Medieval Welsh
WIP: Ivan the Terrible's Russians
Later Ottoman Turkish
Medieval Welsh
WIP: Ivan the Terrible's Russians
Later Ottoman Turkish
-
sergiomonteleone
- Master Sergeant - U-boat
- Posts: 505
- Joined: Tue Feb 05, 2008 3:26 pm
Hi,Mehrunes wrote:Hi, can someone give me advice how to use the LBM flags correctly?
I assume they have to stick to a piece of paper just like shield decals to the miniature?
But how exactly do you do it step by step? I don't want to ruin those expensive flags.
Do you completely cut them out first, stick them to paper and cut the paper too?
Or can you just stick the whole flag sheet to a paper and cut afterwards?
I wonder why there is a white gap between the two sides of the flag.
Is it intended that I have to cut out both sides and stick them together to close that gap or do you leave it white and paint it after applying to the pole?
For a pole 1mm thick, you will need at least 3mm that is only wrapped around, but the gaps are only 1mm (intended for wire poles?)
you are right, considering the price of these flags.
My first time was a little bit hard.
“I assume they have to stick to a piece of paper just like shield decals to the miniature?” YES, SIMILAR TO PLASTIC
“I wonder why there is a white gap between the two sides of the flag.” It’s for the spear where you place your flag on the miniature.
I’m used to buy 25mm flags for 15mm miniatures: the white gap is a little big but flags are great!!!!
MY ADVICE STEP BY STEP:
- cut flags with piece of paper BUT NOT EXACTLY ON THE LIMIT OF THE FLAG
- pick some paper, it could be better a good quality not too thick, similar to cardboard
- cut some paper BIGGER THAN FLAG
- take away the PIECE OF PAPER from the flag
- place the flag oh the cardboard WITH THE WHITE BACK SIDE OF THE FLAG ON THE TOP
- place some water NOT TOO MUCH on the white black side of the flag
- wait for some minute
- take away the white back side IT’S BETTER TO MAKE IT SLIDE SLOWLY ON THE FLAG. IF YOU ARE NOT ABLE TO DO IT THE FLAG IS NOT GLUED ON THE CARDBOARD YET
- now you should have a great LBMS flag glued on your cardboard
- cut exactly the cardboard close to the limit of the flag
- fold the glued flag with the white gap in the middle
- place some glue on the flag CARDBOARD SIDE
- place the flag on a spear and then fold both side
I hope it can help you
Sergio
-
sergiomonteleone
- Master Sergeant - U-boat
- Posts: 505
- Joined: Tue Feb 05, 2008 3:26 pm
You can check chinese flags on the top.Mehrunes wrote:It helps, thank you. I wonder if the white gap depicts reality accurate. Were the flags white where they were attached to the pole?
Or should it be painted in a color similar to the flag?
You shouldn't paint the white gap.
In my picture you can see the withe gap because I bought 25mm flags for 15mm miniatures.
But in the pole on the right side (where there are 3 Han Commanders) the white gap is not visible