First, high praise for the designing duo. My simple impression is Erik brings the welcome historicity and Bruce adds the twists and thorns that make it fun. I played this campaign once, and already need to go wash their company cars as small thanks for their large effort.
This second scenario , much like the first, starts with a real donnybrook. Your large air and naval assets must shepherd the invasion fleet to shore by eliminating their Japanese counterparts. Any wolves that make it through your screen will savage the transports. Here are a few tips that may help you get the upper hand.
The bulk of your ships go northeast to counter the main Japanese fleet. Add a few DDs to screen the northwest flank against the smaller Japanese vessels steaming north. It helps to compress your transports away from the northern flanks. Deploy a pair of DDs at the Arawe port to provide supply and fire support.
Your air assets go in the north: Thunderbolts to the east, followed by the Lightnings, then the less useful Mitchells around the western map edge. When possible, I upgraded some of these to DBs- shorter range but ship killers. These attrit the northbound Japanese who are finished off by your western DDs. Your fighters are better quality than their opponents, and come out on top trading blows. Targeting the enemy DBs with your first strike, then absorbing the enemy fighter riposte, yields the best hit / loss ratio. The Lightnings can hold their own against weakened fighters, and any spares are useful against ships. Enemy level bombers are the last priority. Use the withdrawal hexes to repair damage.
You land a marine division in the north. A regiment lands center taking advantage of opportunity openings. Land a regiment eastward as the naval & air battle is won, and one southwest to turn that flank.
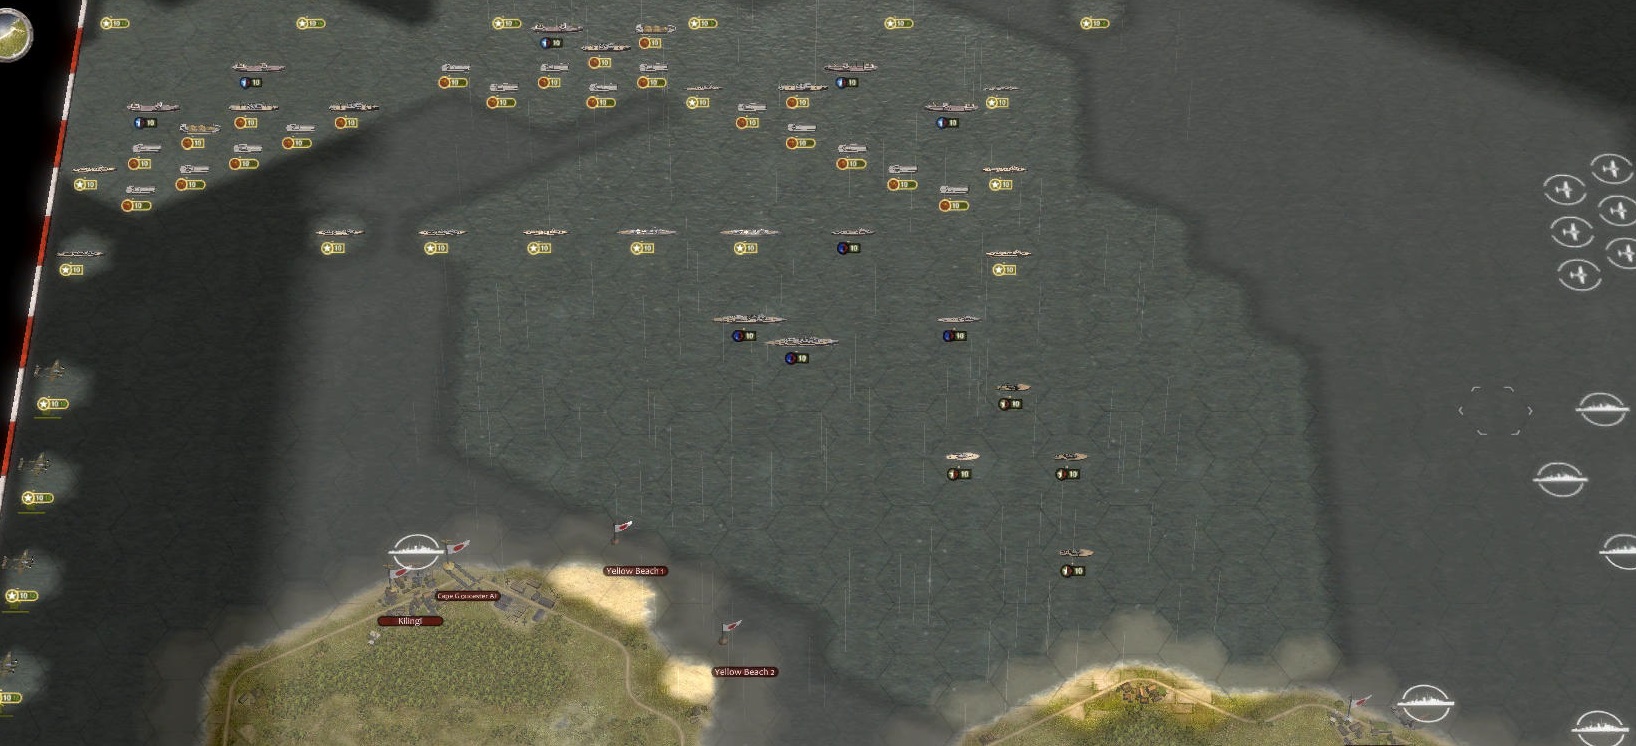
- north.jpg (319.39 KiB) Viewed 3392 times
Marine units can’t be deployed in the Arawe perimeter, but they can be used as reinforcements beginning turn 2. Add at least a heavy and light AA: the heavy goes in the port hex to maintain supply, and may need to go into AT mode a turn or two. You’re right- it’s all hands to maintain the perimeter until your air can come south. It can help to seize extra hexes, but holding on to them is another fight.
It’s very important to manage your engineers as the marines advance, particularly along the southern coast road. This relief column is supported by the DDs deployed in the NW, and they can be used for supply if the bridge repair falls behind the lead elements.
This campaign is highly recommended to players liking air-sea-land operations. The final scenario flips the deployment script (lots of RPs for an open roster) and is a nail biter.
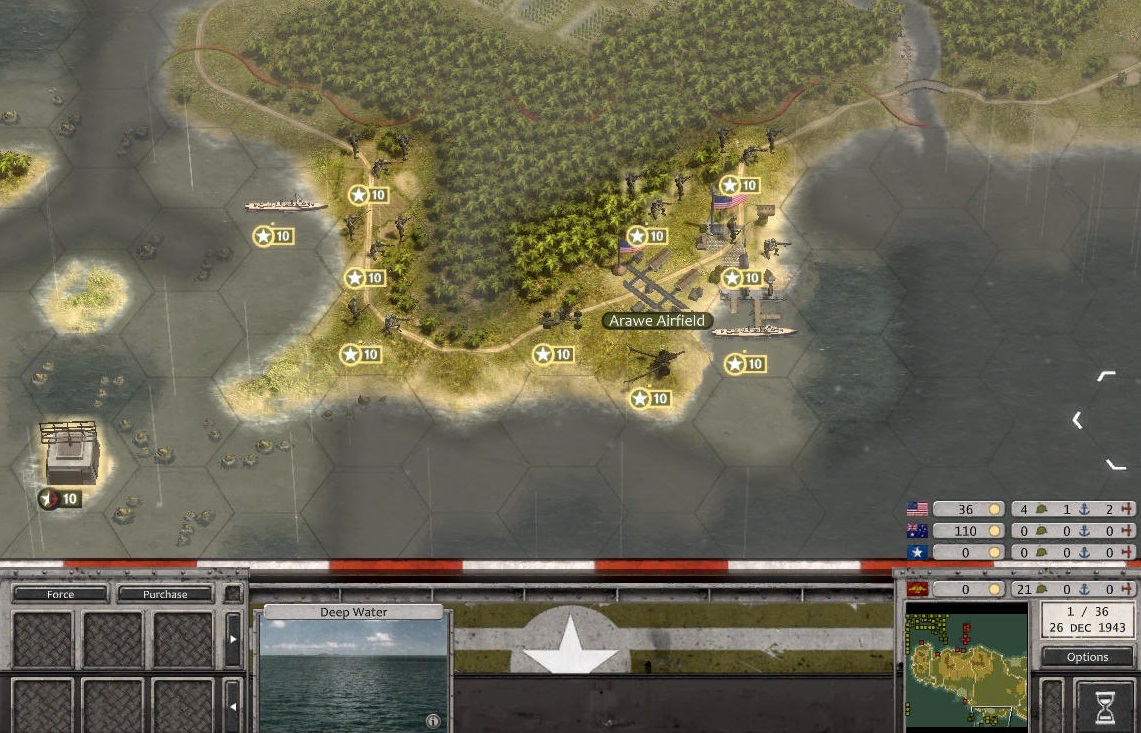
- arawe.jpg (309.67 KiB) Viewed 3392 times


