D2R - Das 2. Reich - The Second Empire

A forum to discuss custom scenarios, campaigns and modding in general.

Moderators: Slitherine Core, Panzer Corps Moderators, Panzer Corps Design

Sonja89_1
Sergeant - 7.5 cm FK 16 nA
Posts: 217
Joined: Sun Jul 04, 2021 4:27 pm
Location: Holstein, Germany

Re: D2R - Das 2. Reich - The Second Empire

Post by Sonja89_1 »

bondjamesbond wrote: Mon Mar 06, 2023 8:12 am Hi ! With coming Happy International Women's Day to you dear author ! Tell me , are you planning an add - on or add - ons about the German colonies during the Second Reich ?
Thank you very much for your kind greeting.

I had been thinking about a campaign path that included the colonial war for some time. However, implementing this part of WW1 in Panzer Corps is not very rewarding.

(1) Some of the German colonies had very few troops available and produced little in the way of resistance. Togo and Samoa surrendered in August 1914, New Guinea in September 1914, Tsingtau in November 1914, Namibia in July 1915, Cameroon in February 1916, and only in East Africa did the fighting continue beyond the end of the war in Europe.
(2) Many of the battles in the colonies had more the character of skirmishes, which would be somewhat insufficient for an entire campaign trail. In addition, one would have to jump back and forth from one isolated colony to the next, which does not exactly make the game flow more coherently. In one of the paths to the continuation of D2R, I also jump between several theatres of war (Italy, Balkans, Palestine). But at least these positions were not isolated.
(3) The strategic importance of the fighting in the colonies was extremely low. Although some Entente troops were tied up in East Africa in particular, it remains doubtful whether they would have been used effectively at all on other fronts.

In summary, I see the cost of such an addition as greater than the benefit. And time can only be spent once. If you use it for that, it will be lacking elsewhere.

In this context, I would like to add that the loss of the German colonies was one of the few positive outcomes for the German Empire from World War 1. They were an economic as well as a political handicap and would have been lost 40 years later anyway, with probably even more misery and suffering.
fgiannet
Administrative Corporal - SdKfz 251/1
Administrative Corporal - SdKfz  251/1
Posts: 131
Joined: Wed Mar 11, 2020 1:31 am

Re: D2R - Das 2. Reich - The Second Empire

Post by fgiannet »

Sonja, you are an awesome modder with an incredibly deep understanding of strategy. You are that one musician the conductor points to while telling the orchestra “THERE, Right THERE, She UNDERSTANDS!!!”

I played your big map for 1914 Ost Front and was consumed for 3 days. You are like a great chef who knows to get the best ingredients and let them shine in their own special way. That huge map was very interesting to analyze. It is so fascinating to recon your work and find areas of opportunity (rather than line upon line of the same static defenses). Some times I began to wonder “did she finish this map....why is this area unguarded...” only to run into another army further on.

The battle of Lemberg had a very historical back-and-forth feeling. I would focus on collapsing a line with surrenders only to find a fresh wave doing the same to my own troops. It is incredible the way you create complete armies, the way they were actually organized/equipped, and let them function on their own. I had immense respect when I eventually fought my way through the infantry at Lemberg and was confronted with a wall of Russian artillery (“outstanding, she put everything in those armies” I thought). Many people would begin to overthink things (“well the infantry will move first and crowd out the artillery so I do not need much artillery...”, etc.). You had everything in those armies and it was amazing.

It was very intelligent to provide an option to win on that front (if the player’s results were good enough) but not tell the player what those conditions were. It was very exciting to keep driving without knowing how close I was to ultimate victory.

Finally, that Red Cross addition is one of the greatest improvements to the game. What an incredible mechanic to force the player to take badly mauled units back home for reconstitution. One of the all time greatest innovations for big scenarios. Those rail lines were running at 100% (playing on Rommel).

The consistency of your skill/vision is remarkable. I could engage and enjoy this mod just as much as with the earlier mod (sometimes companies/modders change due to feedback, make things more challenging, “the Czar has invested in tanks, KV-1s appear!”). Sometimes people mistake higher difficulty for greater strategy. They just dump more of the same things until it becomes an ahistorical grind. Strategy is a rare fine wine. There is no mistaking it when you experience it, it is amazing every time, and nothing needs to be added to it. Sonja89 is like a label for a great dignified vineyard that knows how to do things perfectly and does not need to change anything in order to please lesser tastes. Truly a platinum standard in the rarefied world of strategy.

You also keep creating new mods while many people seem focused on making minor changes to previous creations. You are making huge mods of previously unexplored time periods (creating new units, large numbers of maps, meticulous historical research, etc.). You are really an exceptionally hardworking/sophisticated modder and I thank you for the great experiences.
Sonja89_1
Sergeant - 7.5 cm FK 16 nA
Posts: 217
Joined: Sun Jul 04, 2021 4:27 pm
Location: Holstein, Germany

Re: D2R - Das 2. Reich - The Second Empire

Post by Sonja89_1 »

fgiannet wrote: Sun Mar 12, 2023 12:58 am
.....
You are making huge mods of previously unexplored time periods (creating new units, large numbers of maps, meticulous historical research, etc.). You are really an exceptionally hardworking/sophisticated modder and I thank you for the great experiences.
I am very pleased that you have also started the campaign on the First World War. Interestingly, you started with the battle in the east, which many people don't think about as much as the western front. But as I was pleased to read, you handled it very well. This doesn't surprise me so much, though, as you are obviously a seasoned and good player. By the way, I also did the two test runs for this campaign on the "Rommel" level. I do that also to see if the prestige values are still sufficient for inexperienced players on the default setting. It also seems to me that the way we both play is quite similar, which is obviously why I hit your taste so well.

Whereby I am aware that quite a number of other players also find certain things about my settings on the scenarios disturbing or inappropriate. In German there is a saying about this - "was dem einen seinen Uhl, ist dem anderen sein Nachtigall". So everyone sees a thing from their own perspective and with their own experiences and feelings.

Your wonderful compliments are very uplifting for me and act as important motivation, although they are certainly a good deal exaggerated. But don't stop there, it feels good. :)

Continue to stay true to the game of Panzer Corps and the love of history. There's a lot to learn from it.
Sonja89_1
Sergeant - 7.5 cm FK 16 nA
Posts: 217
Joined: Sun Jul 04, 2021 4:27 pm
Location: Holstein, Germany

Re: D2R - Das 2. Reich - The Second Empire

Post by Sonja89_1 »

This time I have screens for the scenario "Romani", which takes place in the summer of 1916 in the northern area of the Sinai. It deals with the last attack attempt in the direction of the Suez Canal by the Ottomans against the British Egyptian Expeditionary Force (EEF). The Ottoman forces had been insufficient for the far-flung objectives at the time, causing the offensive to fail.


Image

Turn 1 (Strategic Map) - In the start phase you see your own core troops as well as the Ottoman 3rd Division of the 4th Army coming from the east. They are approaching the British positions. On the British side, three divisions are ready to defend. In the centre are the ANZAC troops of the Australians and New Zealanders. The main base is in Romani, the place that gave the name to this battle. The British have already laid the railway line to this point in order to guarantee extensive supplies for later offensives.


Image

Turn 2 - In this picture you can see the situation from the point of view of the British defenders. Especially the fortifications east of Romani (1), occupied by the 52nd Division, will not be easy to overcome. Further south are the ANZAC troops, which can be easily recognised by their respective emblems (2). Meanwhile, the first fighting is already taking place near Katia, where a British outpost is located (3). This place is especially interesting because of the airfield to give our planes (4) an improved range. Our own anti-aircraft gun covers the attack, which is always recommended (5).


Image

Turn 5 - This picture shows a clearly ahistorical part with two strong German surface ships advancing west (1). Here the player has the choice of deploying one or two ships of the core troops. This is not decisive, however, since the mission can be won without their participation. In the resulting battle with two British ships and a French destroyer, the own light cruiser receives considerable damage. On the other hand, I try to take the British light cruiser "Dartmouth" out of the game as quickly as possible (2), since these figures have a visual range of 4 hexes and can inflict nasty losses in interaction with dreadnoughts. What is decisive, however, is what happens further south, where the own infantry moves against Bir Abu Hambra (3). There are some enemy counterattacks (4).


Image

Turn 10 - In the meantime, a broad penetration of the enemy's fortification line has succeeded (1). In the historical course, there was a southern bypass attack, which then failed. Since I have plenty of good artillery (2), I can afford the luxury of a massive frontal attack that drills straight through enemy front lines. Own air forces also support the attack (3). Not surprisingly, my own losses are also not absent (4).


Image

Turn 16 - Romani, Mahemdia and Abu Diyuk are taken. All that remains is the decisive advance on Pelusium Station, the last primary objective (1). On the coast, a British heavy infantry is still defending and has switched to mortar mode to inflict losses on my infantry (2). It will not survive the counterattack. From the south, however, British attacks are now coming from their 42nd Division, which had hardly intervened in the fighting so far. It becomes critical again (3). At least there is good flank cover ready to intercept this thrust. At the important connecting road to Katia, there is an own heavy infantry with an additional Austrian artillery as cover (4). No one can get through there. It looks good for our own troops.
rubyjuno
Sergeant First Class - Elite Panzer IIIL
Posts: 427
Joined: Mon Sep 21, 2015 1:18 pm
Location: Northumberland

Re: D2R - Das 2. Reich - The Second Empire

Post by rubyjuno »

Excellent screens and fascinating descriptions as always.
Sonja89_1
Sergeant - 7.5 cm FK 16 nA
Posts: 217
Joined: Sun Jul 04, 2021 4:27 pm
Location: Holstein, Germany

Re: D2R - Das 2. Reich - The Second Empire

Post by Sonja89_1 »

Today I want to present some screens from the scenario "Messines". The battles on which this mission is based took place in Flanders in June 1917. It was a long prepared offensive by the British, who placed over 20 mines under the German positions over many months. The detonation, which took place on 7 June 1917, is said to have been heard as far away as London. It is considered one of the largest non-nuclear explosions of all time. It is precisely on this powder keg that the player is allowed to place his units at the beginning. That simply has to be fun.


Image

Turn 1 (Strategic Map) - The Wytschaet Arch can be clearly seen, jutting west into the British front. To the north is Ypres, which is no longer visible on this map. The British, as already described, have detonated a number of mines under the German lines. In this mission it means that quite a number of the own units suffer strength losses at the beginning. The aim of the mission is to move back to the shortened line to the east as quickly as possible. This sounds easier than it actually is. In order to avoid heavier losses, it is necessary to retreat slowly in an orderly manner and as well covered as possible.


Image

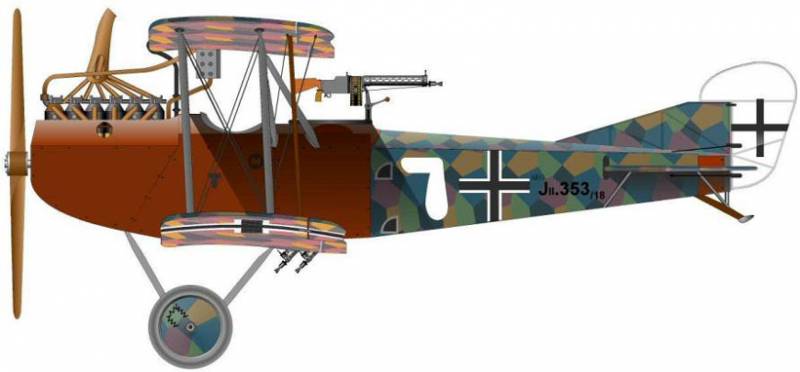
Turn 1 - Already with the first turn, the enemy succeeds in breaking through the front in several places (1). In addition, there are fierce air attacks (2). However, our own flak is already waiting at a safe distance (3). Besides, there are our Jastas (fighter groups) (4). You can't miss the Albatros planes with their pink paint - pretty, isn't it? The Albatros D3 has a good grip on the enemy planes, except for the very strong SE5. That's why I reduced this unit to a strength of 8 with the first anti-aircraft fire, otherwise my own aircraft would be too battered. On the right edge you can see the B-line, which has to be occupied at the end (5).


Image

Turn 3 - The enemy has also completely pushed through the main front in the southern section and is in front of Messines (1). An advanced New Zealand infantry has been hit considerably and will probably not survive the round (2). Our fighters try to shoot down an SE5 at Messines (3). On the lower edge, the objective line has already been occupied (4). In this somewhat quieter area, a separate armoured unit, which does not yet have much experience, has also been deployed (5). While the area is not particularly favourable for tanks, further north the pressure is simply too strong for such a fresh unit.


Image

Turn 5 - At Oosttaverne, a garrison still defends itself valiantly and covers the retreat of the remaining units (1). It will probably not survive the further attacks. The first tanks appear at the British (2). Here, there is even one with overstrength, but it has already suffered losses. However, losses are also occurring on the own side. A very strong heavy infantry in "trench mode", which can withstand a lot, was attacked in a concentrated way (3). There is hardly anything left and total loss is imminent. Fortunately, there are our excellent snipers who keep surprising the enemy (4). But the British also have snipers who can be unpleasant, and the AI knows how to use them well.


Image

Turn 7 - Further north, 2 British tank units appear, which at that time were still part of the Heavy Section of Machine Gun Corps (1). Fortunately, these Mark IVs were quite slow. The British Royal Flying Corps attacked our troops until the end (2). Further south, Messines fell (3). However, this is no longer of importance, because the finish line is completely occupied by the own ground units (4). The mission objective is completely achieved at the end of this turn. This was once a very short scenario, but it had plenty of action. The player should not underestimate it and be very alert.
bondjamesbond
Brigadier-General - 8.8 cm Pak 43/41
Posts: 1854
Joined: Mon Jun 27, 2022 10:10 pm

Re: D2R - Das 2. Reich - The Second Empire

Post by bondjamesbond »

As usual just delightful ) When can we play your work respected author ?
Image
http://www.wio.ru/ww1a.htm
http://www.wio.ru/simbols/s-ww1.htm
http://www.wio.ru/tank/ww1tank.htm
https://mynickname.com/id73473
Image
Sonja89_1
Sergeant - 7.5 cm FK 16 nA
Posts: 217
Joined: Sun Jul 04, 2021 4:27 pm
Location: Holstein, Germany

Re: D2R - Das 2. Reich - The Second Empire

Post by Sonja89_1 »

bondjamesbond wrote: Sun Apr 16, 2023 11:25 pm As usual just delightful ) When can we play your work respected author ?
As soon as the leaves that are just sprouting from the trees will fall from these same trees again, it should be time. So always keep an eye on the trees. :)
bondjamesbond
Brigadier-General - 8.8 cm Pak 43/41
Posts: 1854
Joined: Mon Jun 27, 2022 10:10 pm

Re: D2R - Das 2. Reich - The Second Empire

Post by bondjamesbond »

Sonja89_1 wrote: Sun Apr 23, 2023 5:59 pm
bondjamesbond wrote: Sun Apr 16, 2023 11:25 pm As usual just delightful ) When can we play your work respected author ?
As soon as the leaves that are just sprouting from the trees will fall from these same trees again, it should be time. So always keep an eye on the trees. :)
Your hint for autumn is clear))) Moss always points to the north)))
https://www.strategium.ru/forum/topic/9 ... -iron-sai/
https://pixeldrain.com/u/7b3onRcr
https://nord-ursus.livejournal.com/26511.html
https://www.suomesta.ru/2014/11/28/nase ... ny-statya/
https://el-tolstyh.livejournal.com/5638681.html
https://en.topwar.ru/45566-finlyandiya- ... ossii.html
Image
https://en.topwar.ru/98324-letayuschie- ... yzera.html

Image
Kaiser General

K.u.k. General
https://forum.axishistory.com/viewforum.php?f=26
https://alliedgeneralworkshop.blogspot. ... paign.html
https://mynickname.com/id73473
Image
Sonja89_1
Sergeant - 7.5 cm FK 16 nA
Posts: 217
Joined: Sun Jul 04, 2021 4:27 pm
Location: Holstein, Germany

Re: D2R - Das 2. Reich - The Second Empire

Post by Sonja89_1 »

This time, the presentation of a scenario is about Operation "Albion" from October 1917 in the Baltic Sea against Russia immediately before the October Revolution. This was a very extensive amphibious undertaking by the German Empire's army and navy, which was also completely successful and led to the conquest of the Baltic islands. Such a mixed scenario including landing operations requires good coordination between all branches of arms and is also particularly interesting in strategy games.


Image

Round 1 (strategic map) - The situation on 11 October 1917 before the landing. Riga had been conquered the previous month (1). The mainland, however, plays no role in this mission. Our landing fleet is forming up southwest of Ösel (2). Air forces are also very important in this mission and are represented in large numbers (3). Everything is ready to make the big jump.


Image

Round 2 - The own landing fleet slowly approaches the main island of Ösel (1). In the process, care must be taken that the enemy does not recognise your own ships too early. The Russian naval units are no longer very numerous and are mostly limited to destroyers and small ship types (2). The German navy is clearly superior in this operation. Something that was rarely the case in the North Sea. But the enemy coastal batteries are a strong hurdle (3). Although these units only have a low visibility, with observation balloons (4) and a high range of fire they can cause heavy losses. It is therefore advisable to destroy the balloons as quickly as possible with your own aircraft (5).


Image

Round 4 - In the meantime, lively air battles have started. Especially the southern tip of Ösel is being attacked (1). Our own bombers are even hunting down Russian ships in the Bay of Riga (2). Escorting fighter planes attack a coastal battery on the small island of Runö. Also involved in this is the Jasta 11 with Richthofen, who comes into play in the summer of 1917 and whom one does not have to do without in the eastern campaign path (3). At the small offshore island of Abro, there is a Russian counterattack with air forces (4). The own fighter pilots get work.


Image

Round 8 - The Russian coastal defences at Zerel on the southern tip are fought down. The own fleet turns in on the coast (1) and covers the landing in two places (2). Zerel is already taken, thus clearing the way through the Irben Strait into Riga Bay for surface ships. There is a first advance towards Arensburg, which is taken under fire by a battered Russian coastal artillery on Abro (2). There is a valiant counterattack by two Russian destroyers on our light cruiser 'Strassburg' (4). Although such counter-attacks are seldom effective, they always cause light losses which add up. Our own seaplanes are also ready to defend against such attacks (5).


Image

Round 16 - A little further jump to the end of the mission. The fleet is now further north off the island of Dagö. After launching the observation balloons, the own ships approach the island (1). However, caution is still required. Two shots at a transport ship can lead to total loss even with 12 strength points and the AI is very good at hitting the weakest and most rewarding point. The 'Kronprinz' and 'Markgraf' show how even strong battleships can take losses. On Ösel, the landing troops proceed on Orissar (2). Furthermore, it is also possible to cross over from there in the direction of Dagö (3), as soon as the coastal batteries are destroyed (4), which are still a dangerous obstacle. The own air forces now control the airspace completely (5). There is still sporadic resistance, but the two Jastas with the Fokker Dr1 alone clear away everything the enemy throws at them. The Russian flak can still be dangerous, but it is attacked primarily (6). On the separate picture on the right you can see that the mission is not a walk in the park (7). I have returned heavily damaged ships to the coast of Courland in order to avoid a total loss.
rubyjuno
Sergeant First Class - Elite Panzer IIIL
Posts: 427
Joined: Mon Sep 21, 2015 1:18 pm
Location: Northumberland

Re: D2R - Das 2. Reich - The Second Empire

Post by rubyjuno »

Excellent work again Sonja, thank you for sharing.
Sonja89_1
Sergeant - 7.5 cm FK 16 nA
Posts: 217
Joined: Sun Jul 04, 2021 4:27 pm
Location: Holstein, Germany

Re: D2R - Das 2. Reich - The Second Empire

Post by Sonja89_1 »

This time I have screens for the "Karfreit" scenario of the battle of the same name in October 1917 in northern Italy. In English it is usually called the Battle of Caporetto. Since May 1915, the front between Italy and Austria-Hungary was almost unchanged at this point, despite massive efforts by the Italians under their commander-in-chief Cadorna. In autumn 1917, extensive German troop contingents were sent to this front and, for the first time, a preponderance of the Central Powers emerged here and surprisingly went on the offensive. It was one of the few offensives during World War I that was more successful than originally planned. In the end, several Italian armies were crushed and the front was pushed forward to the Piave River. Italy was on the brink of defeat and had to be supported by the British and French.


Image

Turn 1 (Strategic Map) - The front line runs from the foothills of the Alps in the north along the Isonzo to the coast of the Adriatic in the south. On the flanks in the north and south are Austro-Hungarian Aux units, while the core force lies in front of Karfreit and Görz. The objective, as in the historical course, is to seek the breakthrough at Karfreit, push through the Italian line and roll up the entire Italian front from the north. The other sections serve mainly to tie up the enemy at the positions there.


Image

Turn 3 - We are at the decisive section near Karfreit. Here my best troops are in action, capable of breaking even hard resistance. The Italian bridgehead on the east side of the Isonzo has been pushed in and the village of Trnovo has been captured (1). The first attack begins on Karfreit, where a heavy Italian infantry unit has dug in (2). Own air forces massively support the attack (3). But the Italians also use their air reserves and attack (4). However, a bomber group of the enemy has positioned itself directly in front of my strongest fighter group (5). Nothing more will be left of these fellows in the following turn.


Image

Turn 8 - Further south on the central section, the city of Gorizia, which had been hard-fought in many Isonzo battles, was captured after the Italian main battle line was widely broken through (1). Almost the entire length of the Isonzo was reached, on which an enemy river boat still opposes us (2). These boats can be very stubborn and are best sunk with level bombers. My air groups have gathered over the old front line (3) and are waiting to be deployed. On the other side of the Isonzo lurks a mean flak of the enemy (4). It is about to receive a few artillery hits and then an air group will swoop down on it like a chicken hawk. Here too, however, there are still enemy air forces flying counterattacks (5).


Image

Turn 10 - Far to the south on the Adriatic, the Austrian aux units are slowly but steadily advancing and drilling their way towards Monfalcone (1). A few of our own air forces are also in action here, supporting the attack (2). Completely ahistorically, I have the option of inserting naval units (3). The heavy ships support the ground attack with their artillery. To compensate for this, I have also included Italian ships that did not appear in the historical battle. So it will not be an easy walk. The SMS Weser also had to realise this when it wanted to enter the Isonzo and came across a minefield in the estuary (4).


Image

Turn 18 - Here we come to a decisive phase of the scenario. The northern group that broke through at Karfreit has taken Cividale on the one hand (1) and set across the river Torre with a second group. This group is now advancing from the north towards the important Udine (2), where the Italian headquarters are located (3). However, there are some strong enemy troops at this location, who are putting up vehement resistance to my units. My armoured car detachment is caught in the flank and suffers heavy losses. At least I can also attack here with extensive air forces and soften up the defences (4). In a wooded area on the left edge of the picture is a mountain unit that the player receives at the beginning of the scenario. Part of the unit is also a special hero (5). Usually you only see photos of this man taken about 30 years after the picture above. Does anyone recognise him?
rubyjuno
Sergeant First Class - Elite Panzer IIIL
Posts: 427
Joined: Mon Sep 21, 2015 1:18 pm
Location: Northumberland

Re: D2R - Das 2. Reich - The Second Empire

Post by rubyjuno »

Entertaining descriptions as always, and beautiful maps. I'm thinking that the hero unit has a French flag... could it be de Gaulle?
Sonja89_1
Sergeant - 7.5 cm FK 16 nA
Posts: 217
Joined: Sun Jul 04, 2021 4:27 pm
Location: Holstein, Germany

Re: D2R - Das 2. Reich - The Second Empire

Post by Sonja89_1 »

I am always pleased that you find the scenarios interesting and that you always give nice feedback, thank you very much. However, your tip about de Gaulle is not correct. He was a German prisoner at the time (October 1917). The flag, which can be seen somewhat small there, shows the German imperial flag from 1871-1919. So we are dealing with a German "hero", or more precisely a man from Württemberg. It was a man who fought against the Italians in World War 1, and fought intensively with the Italians in World War 2, becoming famous in the process. So which man are we talking about...?
rubyjuno
Sergeant First Class - Elite Panzer IIIL
Posts: 427
Joined: Mon Sep 21, 2015 1:18 pm
Location: Northumberland

Re: D2R - Das 2. Reich - The Second Empire

Post by rubyjuno »

Your knowledge of history is much greater than mine! For some reason, all the images have disappeared from the page so i can't take another look at his photo. The only German I can think of who fought with the Italians in World War 2 and became famous was Field Marshall Rommel, although I don't know where he was from or what he did in World War 1. I was confused for a while as I was thinking of the fighting in Italy and then I thought of the Afrika Korps and the legendary leader Rommel. Even though I'm British, I would definitely consider him a German hero.
Sonja89_1
Sergeant - 7.5 cm FK 16 nA
Posts: 217
Joined: Sun Jul 04, 2021 4:27 pm
Location: Holstein, Germany

Re: D2R - Das 2. Reich - The Second Empire

Post by Sonja89_1 »

That's right, it's Erwin Rommel. He came from Württemberg in south-west Germany and was first in the infantry, then artillery and finally with the mountain troops. He was deployed on the Western Front, then in Romania and in 1917 in Italy. There he also won the coveted Order Pour le Mérite, also known as the "Blue Max". The deployment of this unit in the scenario "Karfreit" refers to this.
Further information on Rommel can be found on Wikipedia. https://en.wikipedia.org/wiki/Erwin_Rommel
rubyjuno
Sergeant First Class - Elite Panzer IIIL
Posts: 427
Joined: Mon Sep 21, 2015 1:18 pm
Location: Northumberland

Re: D2R - Das 2. Reich - The Second Empire

Post by rubyjuno »

Thanks for the information. When I was younger, I was fascinated with the fight for Africa in World War 2, and read about Rommel and Montgomery, but have forgotten most of it. In those days before home computers (the 1970s), I had models of Panzers and Matildas with model soldiers that I played wargames with, which eventually led me to Panzer Corps I suppose. I'll follow the link you posted and educate myself.
Sonja89_1
Sergeant - 7.5 cm FK 16 nA
Posts: 217
Joined: Sun Jul 04, 2021 4:27 pm
Location: Holstein, Germany

Re: D2R - Das 2. Reich - The Second Empire

Post by Sonja89_1 »

You can spend hours on history topics on Wikipedia alone, not to mention more advanced books. When I get into strategy games (most recently Panzer Corps almost continuously), I usually accompany it with books and films at the same time. It makes for a more complete overall experience.

By the way, I also made a few models in my childhood. In my home office there is still a small "Fiat CR.42" with a desert paint scheme in 1:72 scale, which I made quite well back then almost 50 years ago. I think the company that was selling them intensively at that time was called Airfix. I think they still exist today.

As far as the desert war is concerned, I can tell you that the 1916-18 campaign for 1918, which is currently in production, will also include a path with 8 scenarios with battles in Palestine alone. You will get a bit of an "Africa Corps feeling". In addition, there will even be units with camels and you will have the opportunity to fight against Lawrence of Arabia. World War I has its adventurous sides and consists of more than just trench warfare in northern France.
rubyjuno
Sergeant First Class - Elite Panzer IIIL
Posts: 427
Joined: Mon Sep 21, 2015 1:18 pm
Location: Northumberland

Re: D2R - Das 2. Reich - The Second Empire

Post by rubyjuno »

I've used Wikipedia to find information on many topics, it's a great tool. The models I made were also by Airfix, armour, aircraft and even the occasional ship. It sounds like we are around the same age (I'm 60 years old this year). The desert section you describe sounds fascinating, especially the camel units and Lawrence of Arabia. More great work no doubt!
rubyjuno
Sergeant First Class - Elite Panzer IIIL
Posts: 427
Joined: Mon Sep 21, 2015 1:18 pm
Location: Northumberland

Re: D2R - Das 2. Reich - The Second Empire

Post by rubyjuno »

Hi Sonja, I thought you might be interested to see the display in the window of our village model shop/art gallery. A recreation of "The Battle of Rorke's Drift" I believe. Note the model kit in the background for a World War One tank!
Post Reply

Return to “Panzer Corps : Scenario Design”