
Thanks, and welcome on board!MickMannock wrote: Wed Apr 29, 2020 12:39 pm A very nice AAR. I enjoy reading it a lot. Keep up the good work!
A Certain Panzer General's Adventures -- Generalissimus (No Trophies of War / Heroes)
Moderator: Panzer Corps 2 Moderators
-
SineMora
- Sergeant Major - SdKfz 234/2 8Rad

- Posts: 641
- Joined: Thu Apr 02, 2020 4:20 pm
- Location: Sweden
Re: A Certain Panzer General's Adventures -- Generalissimus (No Liberator / Trophies of War / Heroes)
Mildly pretentious Swede. Goes by Path on most platforms, including Steam.
http://www.slitherine.com/forum/viewtopic.php?f=596&t=98034 -- Generalissimus AAR (no Trophies / Heroes)
http://www.slitherine.com/forum/viewtopic.php?f=596&t=98034 -- Generalissimus AAR (no Trophies / Heroes)
-
SineMora
- Sergeant Major - SdKfz 234/2 8Rad
- Posts: 641
- Joined: Thu Apr 02, 2020 4:20 pm
- Location: Sweden
Re: A Certain Panzer General's Adventures -- Generalissimus (No Liberator / Trophies of War / Heroes)
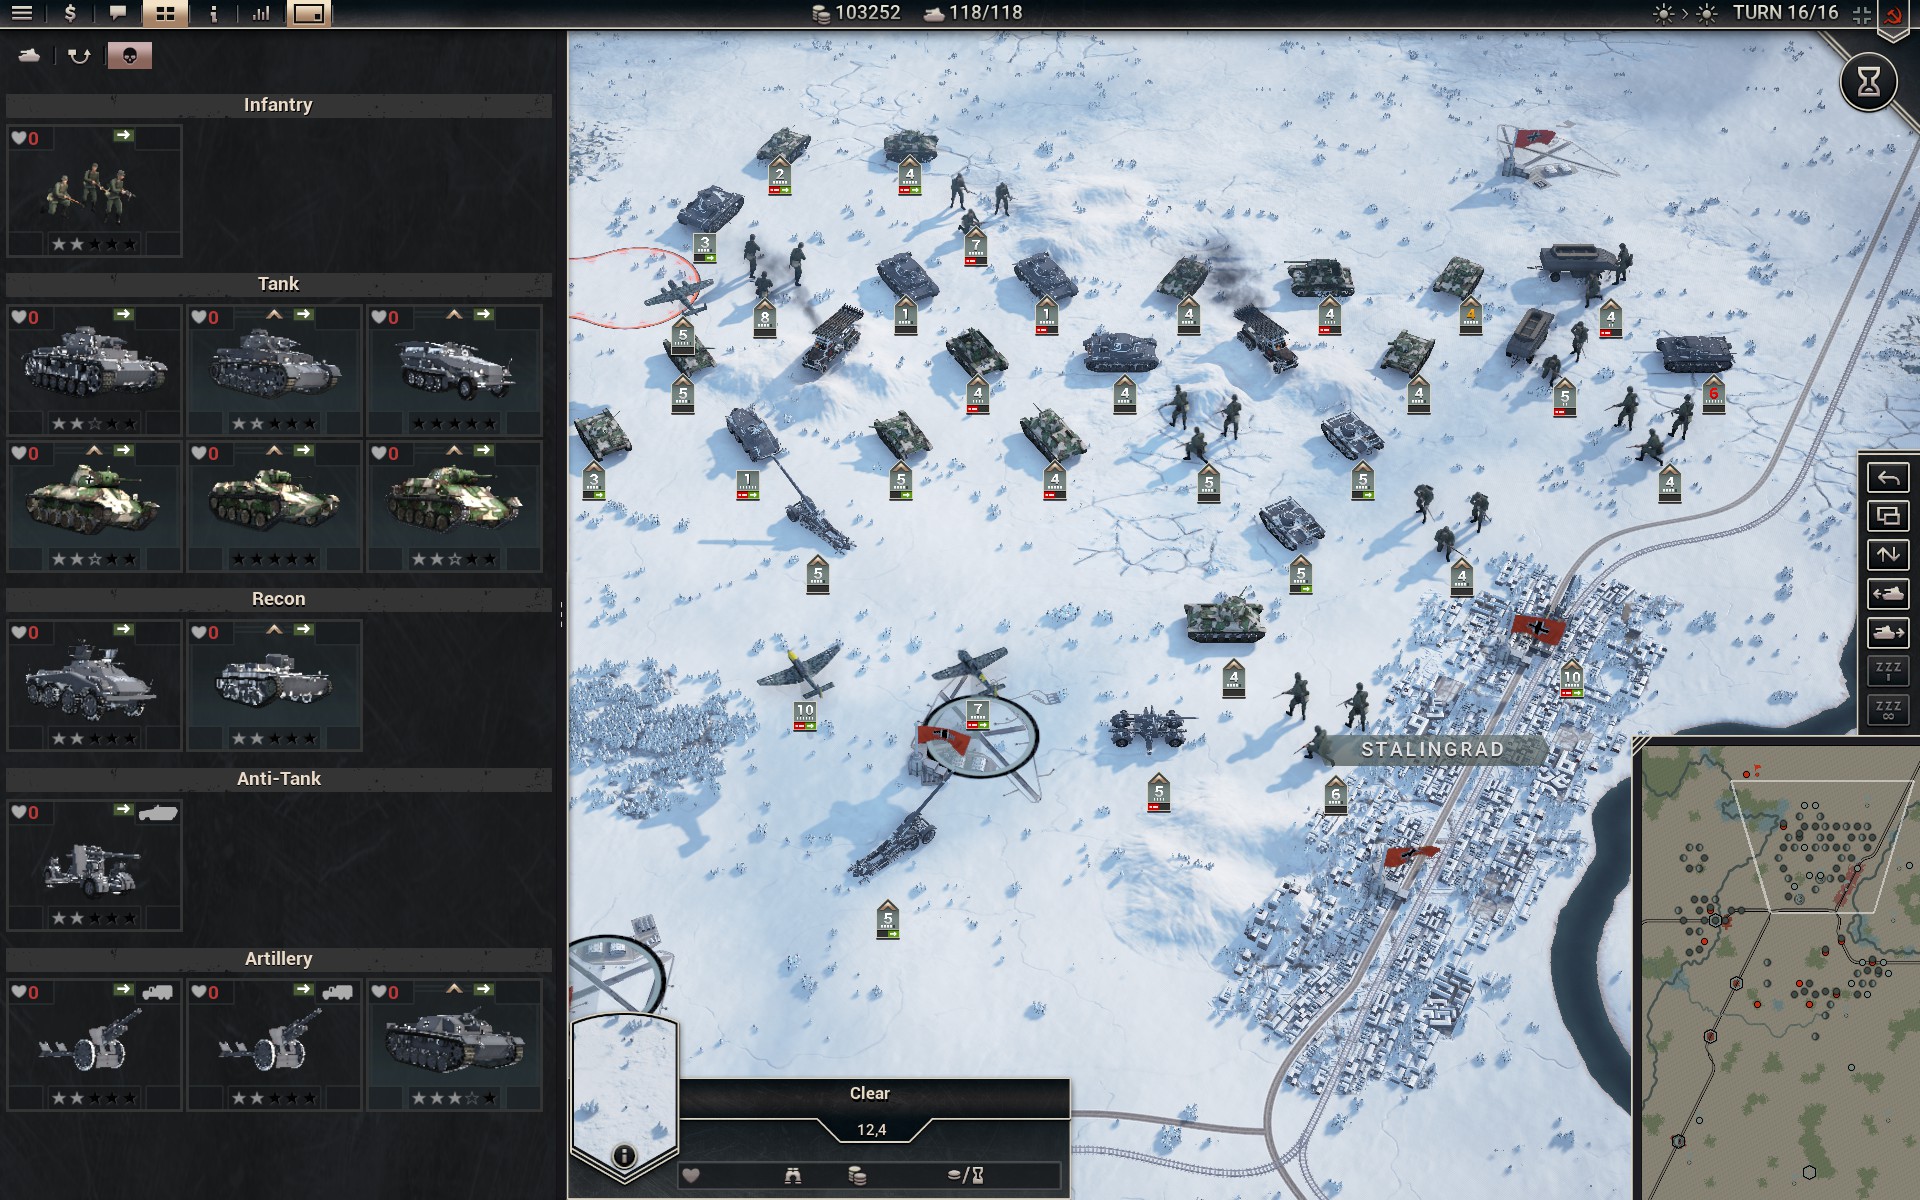
Scenario XV -- Escape from Stalingrad
Initial Prestige: 82205
Final Prestige: 103252
Core
This scenario presents a very different challenge to Stalingrad, prompting a drastic overhaul of the core. The task seems deceptively easy as my forces will be deploying close to the objectives, giving me ample time to capture them. The devil is in the details, however, as I am required to hold the objectives at the end of the scenario, not merely capture them. This suggests that the main threat will come from the north or east in the form of a Soviet counterattack; given the terrain and conditions on the ground, I expect a heavy concentration of Soviet armour. 3 battalions of Wehr Infanterie will be deployed in the woodlands to anchor the defensive line; once entrenched they should prove nigh impossible to dislodge for Soviet armour, and with some artillery support they should be able to see off infantry as well. Due to the snow they are significantly faster than Grenadiers while also being cheaper, and as they will primarily serve to block the enemy their lack of firepower is less of a problem.
Two Brücken -- one Pioniere and one SdkFz 251/7 -- will be deployed to allow my forces to quickly cross the Volga; having done some hex counting I'm confident I need both of them for the plan to work. The Panzer IVFs will be tasked with subduing Soviet infantry while the faster Soviet Panzers look for openings to exploit. While cost-efficient, the lack of ground defence is really starting to hurt the T-60s, and they will probably be retired once the Soviet infantry receive their increased hard attack in '43; it's bad enough that T-34s can take out a detached unit in a single salvo, but once regular infantry can easily damage them in the open they'll be a liability. However, for this scenario they will provide a low-cost way to sustain multiple fronts should it become necessary.
The Recons have been outfitted the T-38s, which are sadly garbage tanks. Their one redeeming feature is being a tracked vehicle that uses only 2 core slots, so at least I can bring 3. They are likely to suffer heavy losses if anything more dangerous than Conscripts as much as looks their way, but I'll make it up to them. Maybe. There's a sort of twisted satisfaction to be derived from using scrap metal as opposed to the best hardware that prestige can buy.
If I am to stop a counterattack consisting of heavy Soviet armour I'm going to need artillery, and lots of it. In the words of a wise man, one can never have too much firepower. With 4 15 cm to provde all-purpose support and 3 K 18 to provide long-range anti-tank support and counterbattery options I'm confident my line will hold even against the Soviet behemoths, especially as the AA guns can be converted should it prove necessary. Gustav will handle Strongpoints and other fortifications, while the StuGs will see more action in the south as they'll need to dig out the entrenched defenders there. I'll have to pivot my line carefully though as the halftracks are slow in snow, and redeploying could prove difficult.
No fewer than 6 Do 217E will be providing strategic bombardment, and along with the 11 units of artillery there should be more than enough firepower to suppress anything. Of course, the Russian winter is unpredictable and it's possible they will be grounded at the most inopportune time, which is part of the reason the artillery contingent is so large. The trusty old Storch has been upgraded to a Bf 109 PR, making it more resilient, and another Bf 110F brings up the rear. This should be enough for the Luftwaffe to handle the Soviet air force, even though the latter are now fielding fighters that clearly outclass mine. This is still an offensive scenario, and as a general rule the AI has limited air assets in these; it's in the defensive scenarios you have to worry about the numbers of the Soviet air force. The auxiliaries also sport a Focke-Wulf Fw 190, a fighter I can't even field yet due to Retrograde.
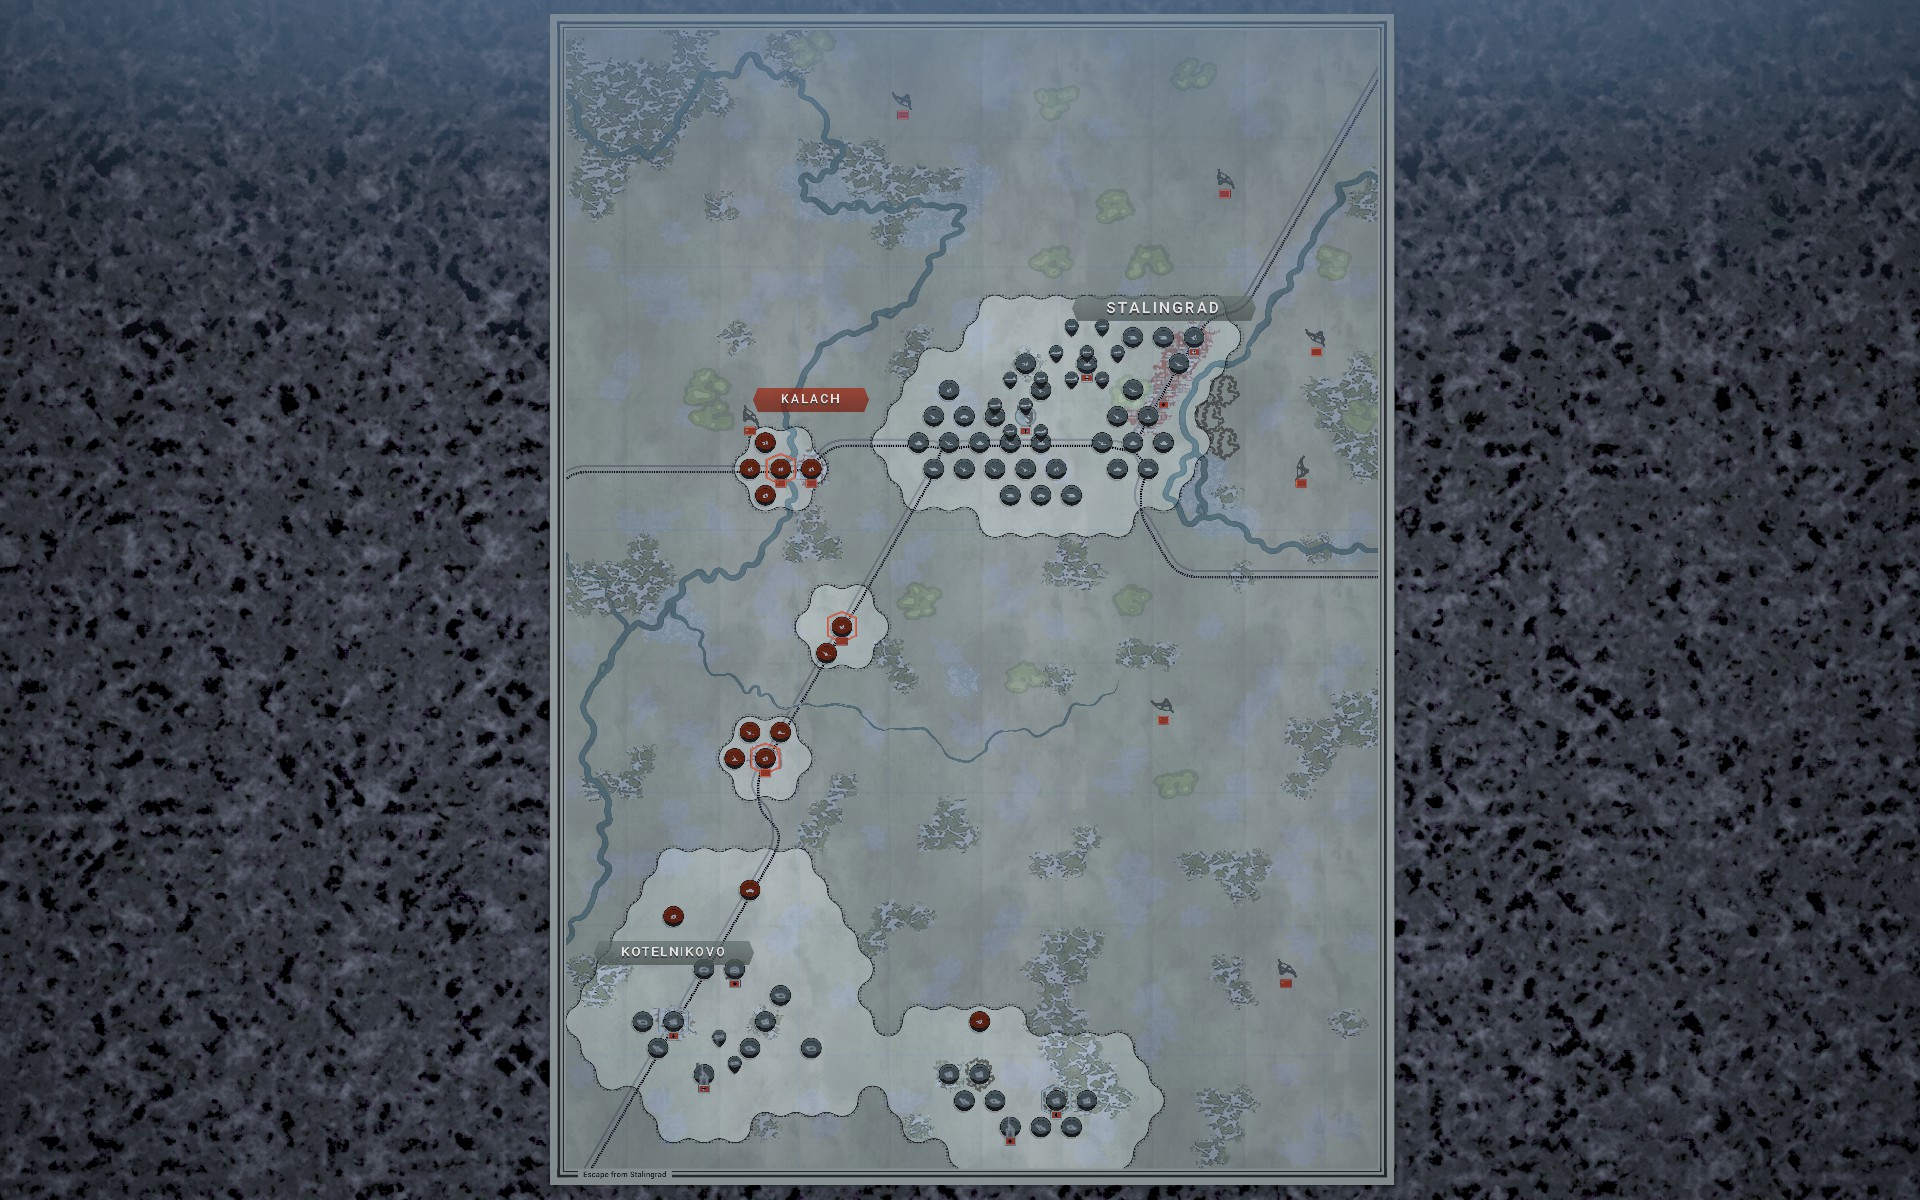
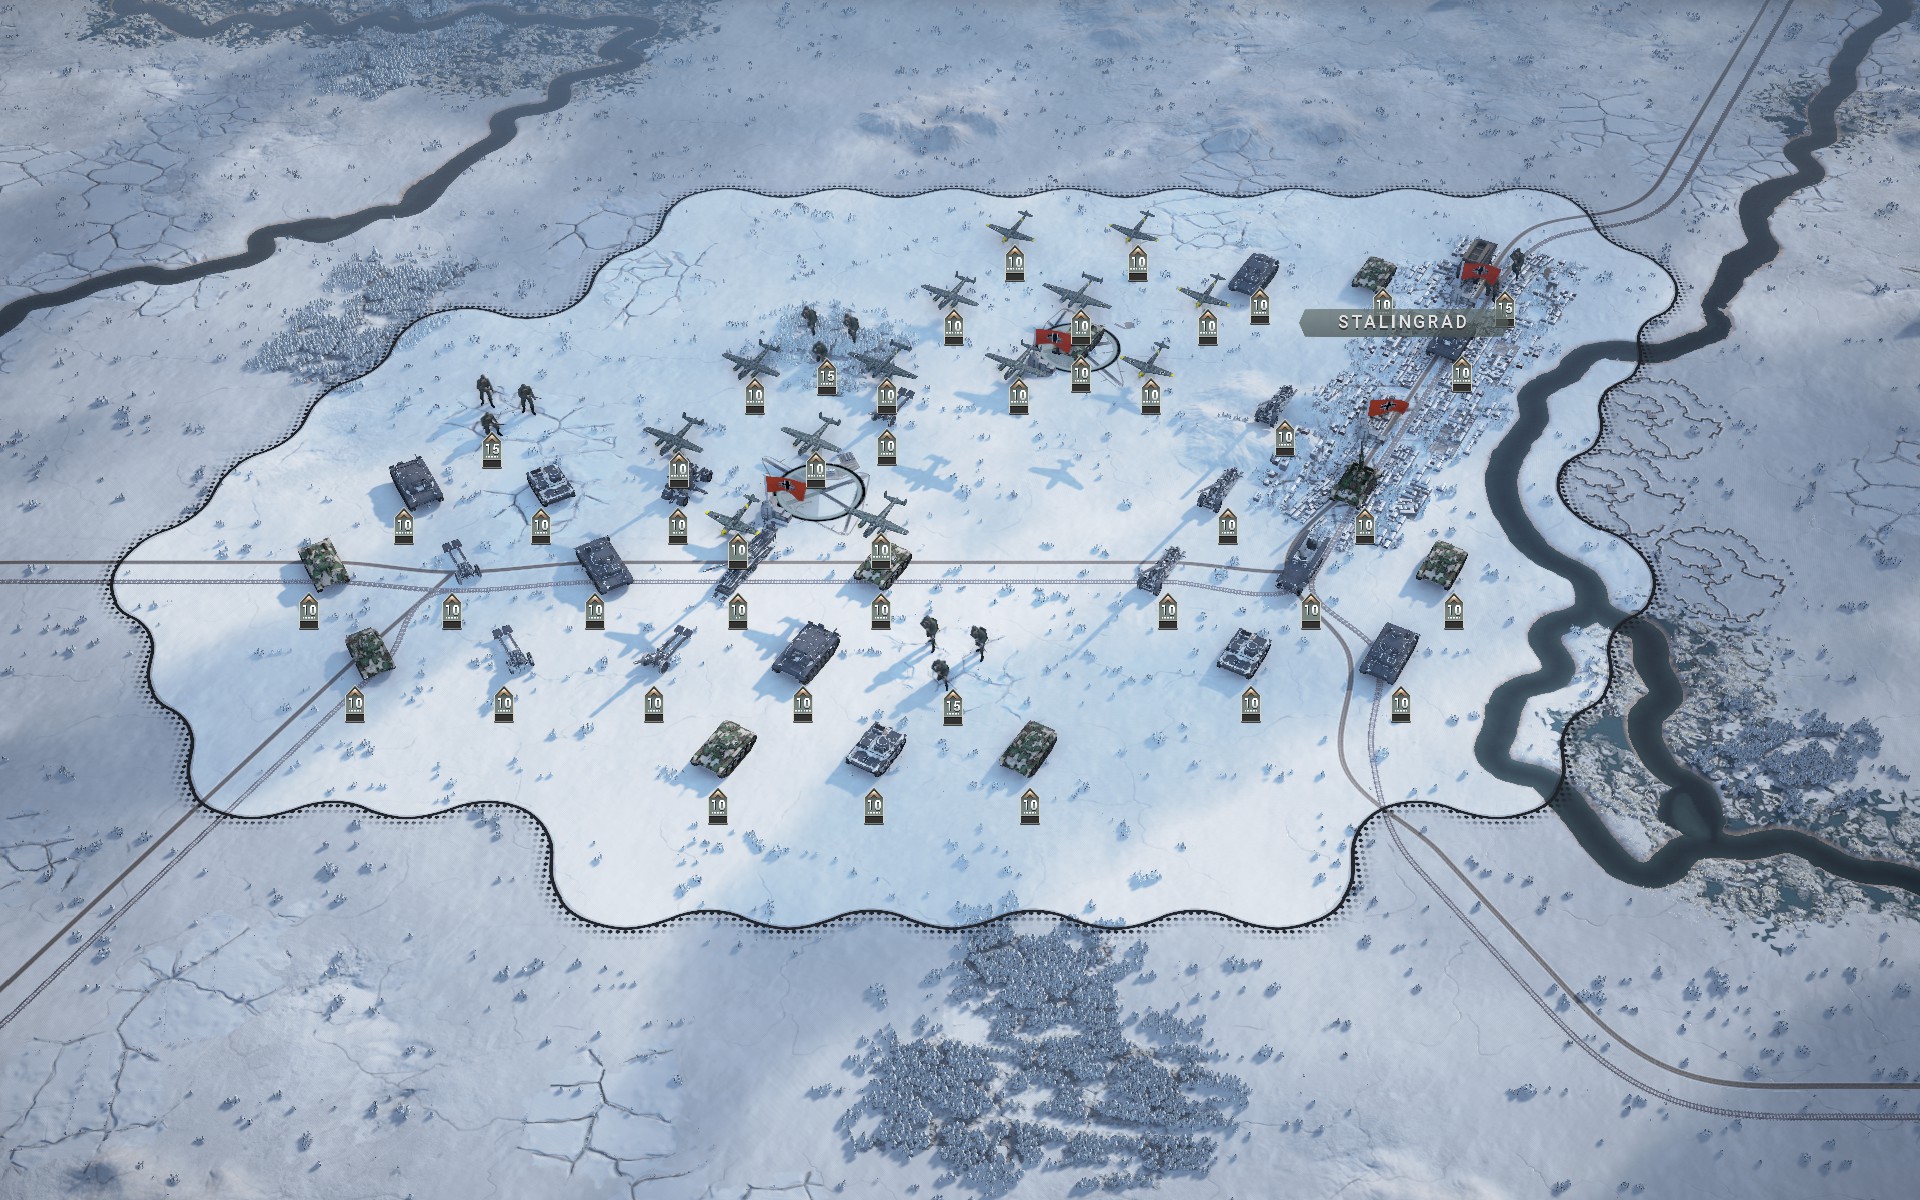
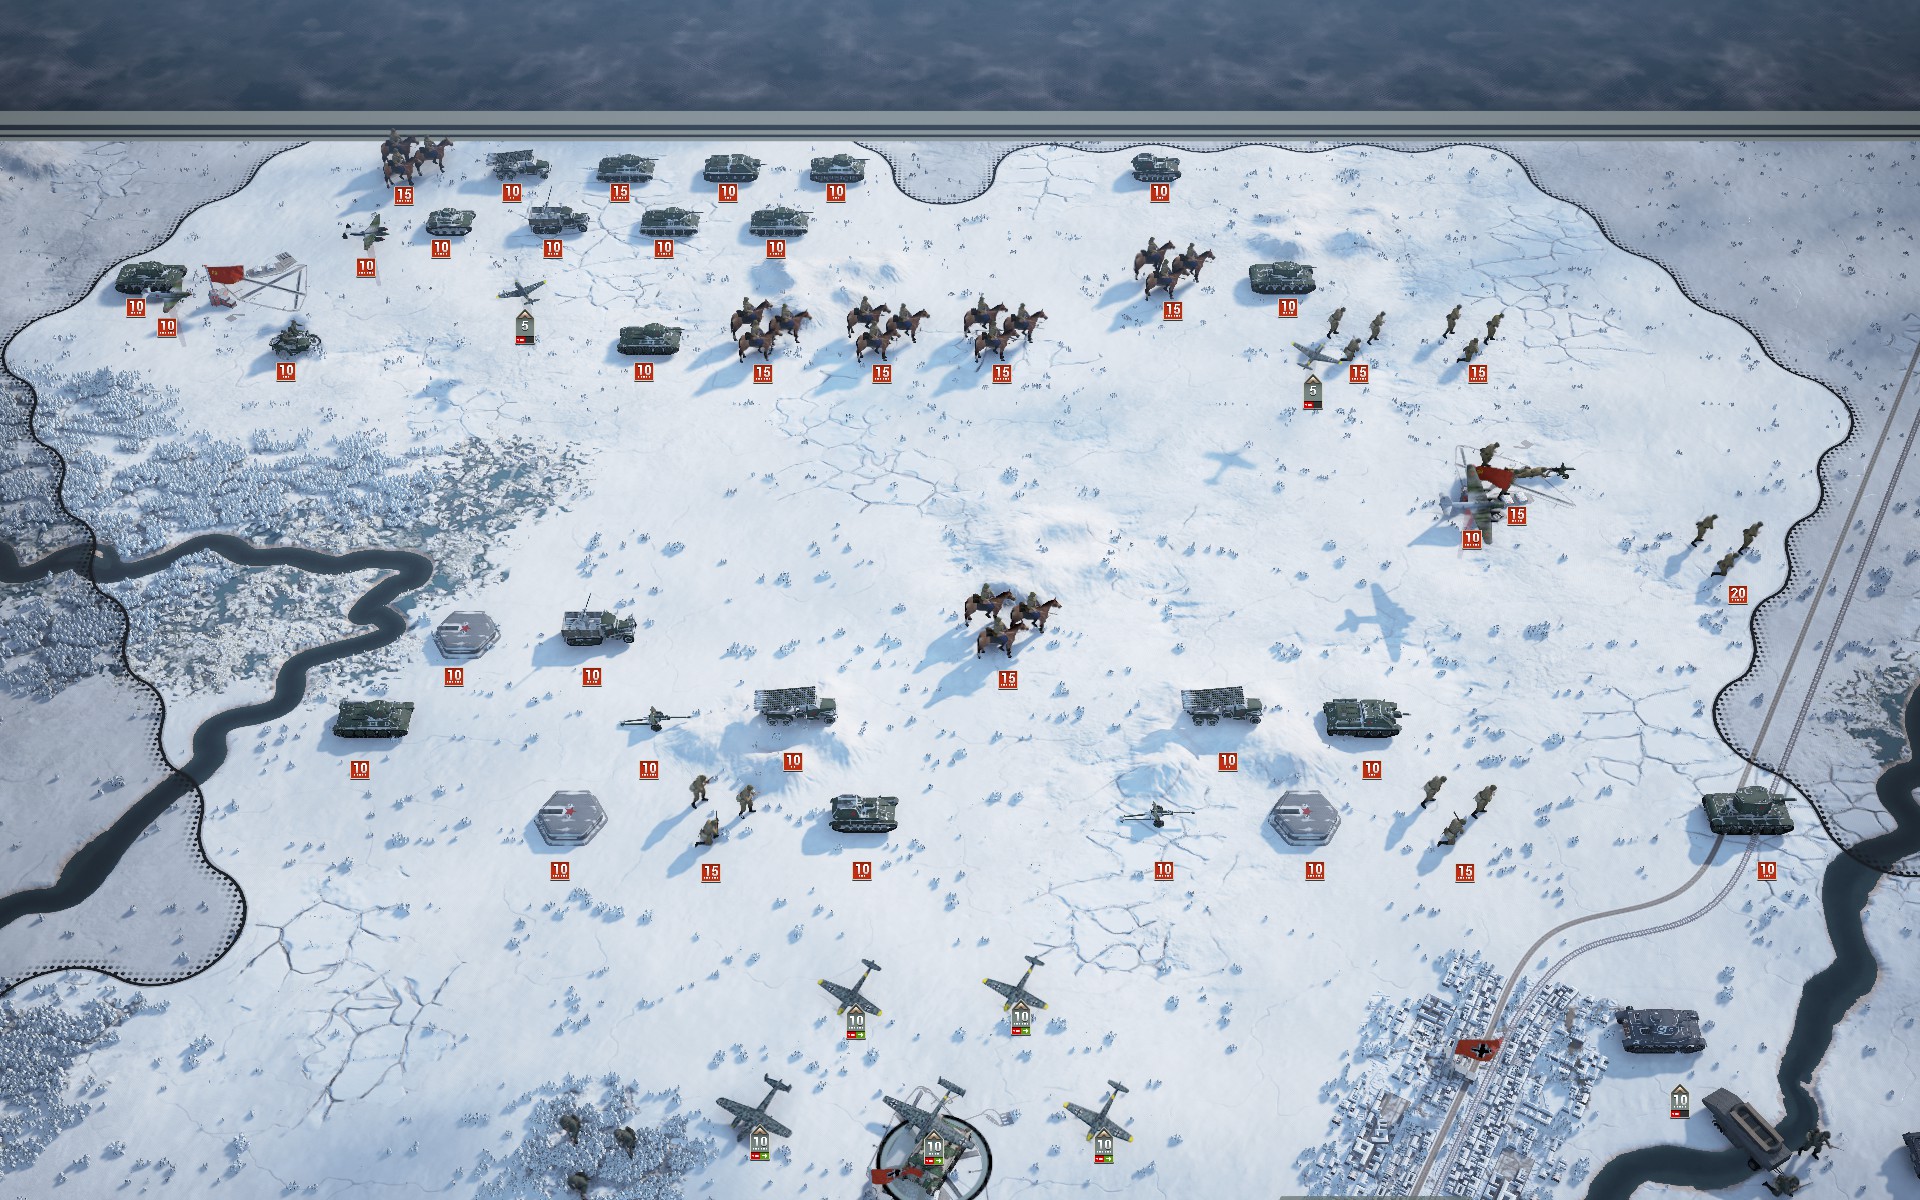
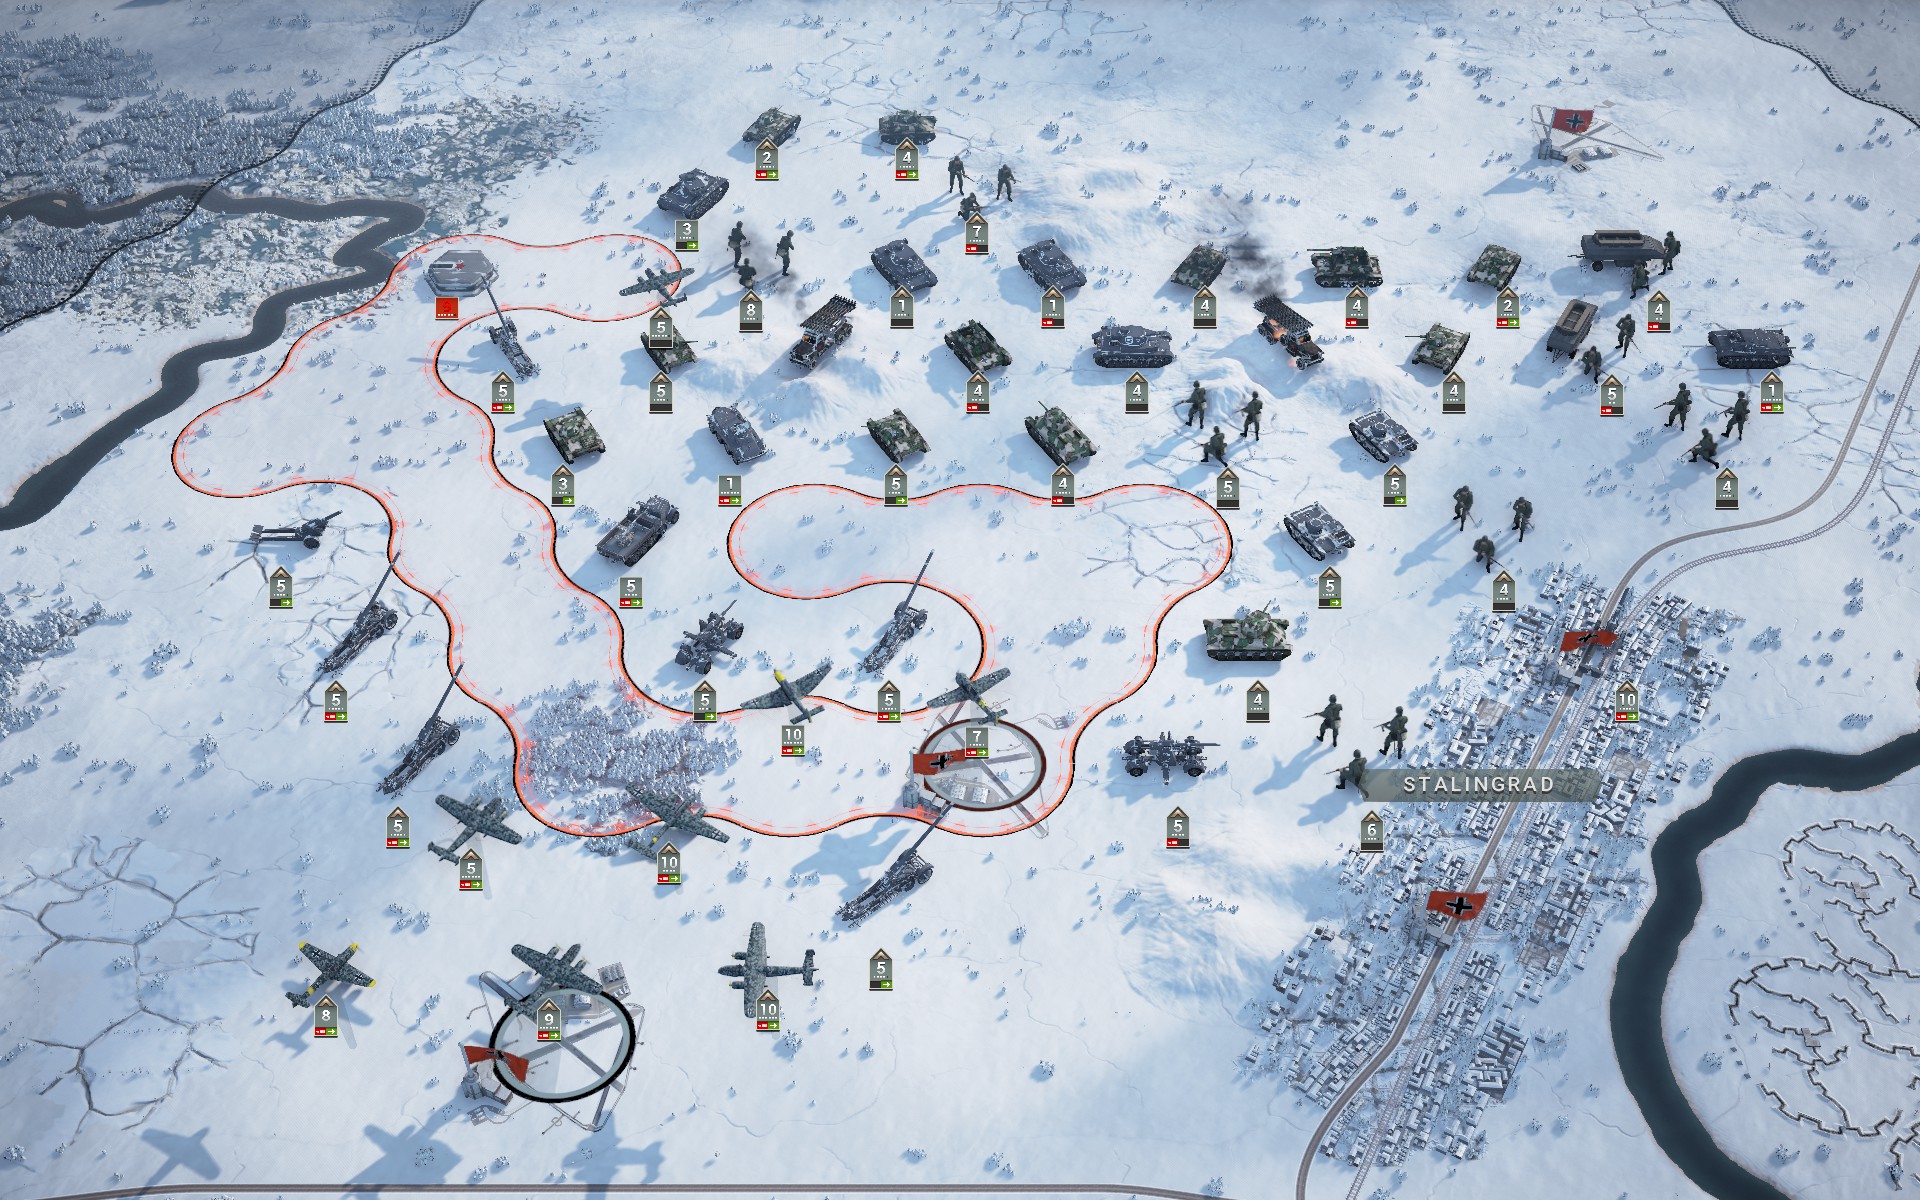
As the scenario simulates a breakout from Stalingrad, the entire corps has to be deployed in the vicinity of the city. The two airfields west of the city are supply hexes, and without them my forces would likely already be encircled. As I don't know whether I'll be able to hold the airfields -- or how long -- the most immediate concern is securing an alternative source of supplies. One battlegroup will therefore head towards the objectives to the south, aiming to link up with the auxiliaries there. It's possible that the capture of these locations will trigger a Soviet counterattack, and so I will initially settle for securing supplies and instead encircling the Soviet forces defending the objectives.
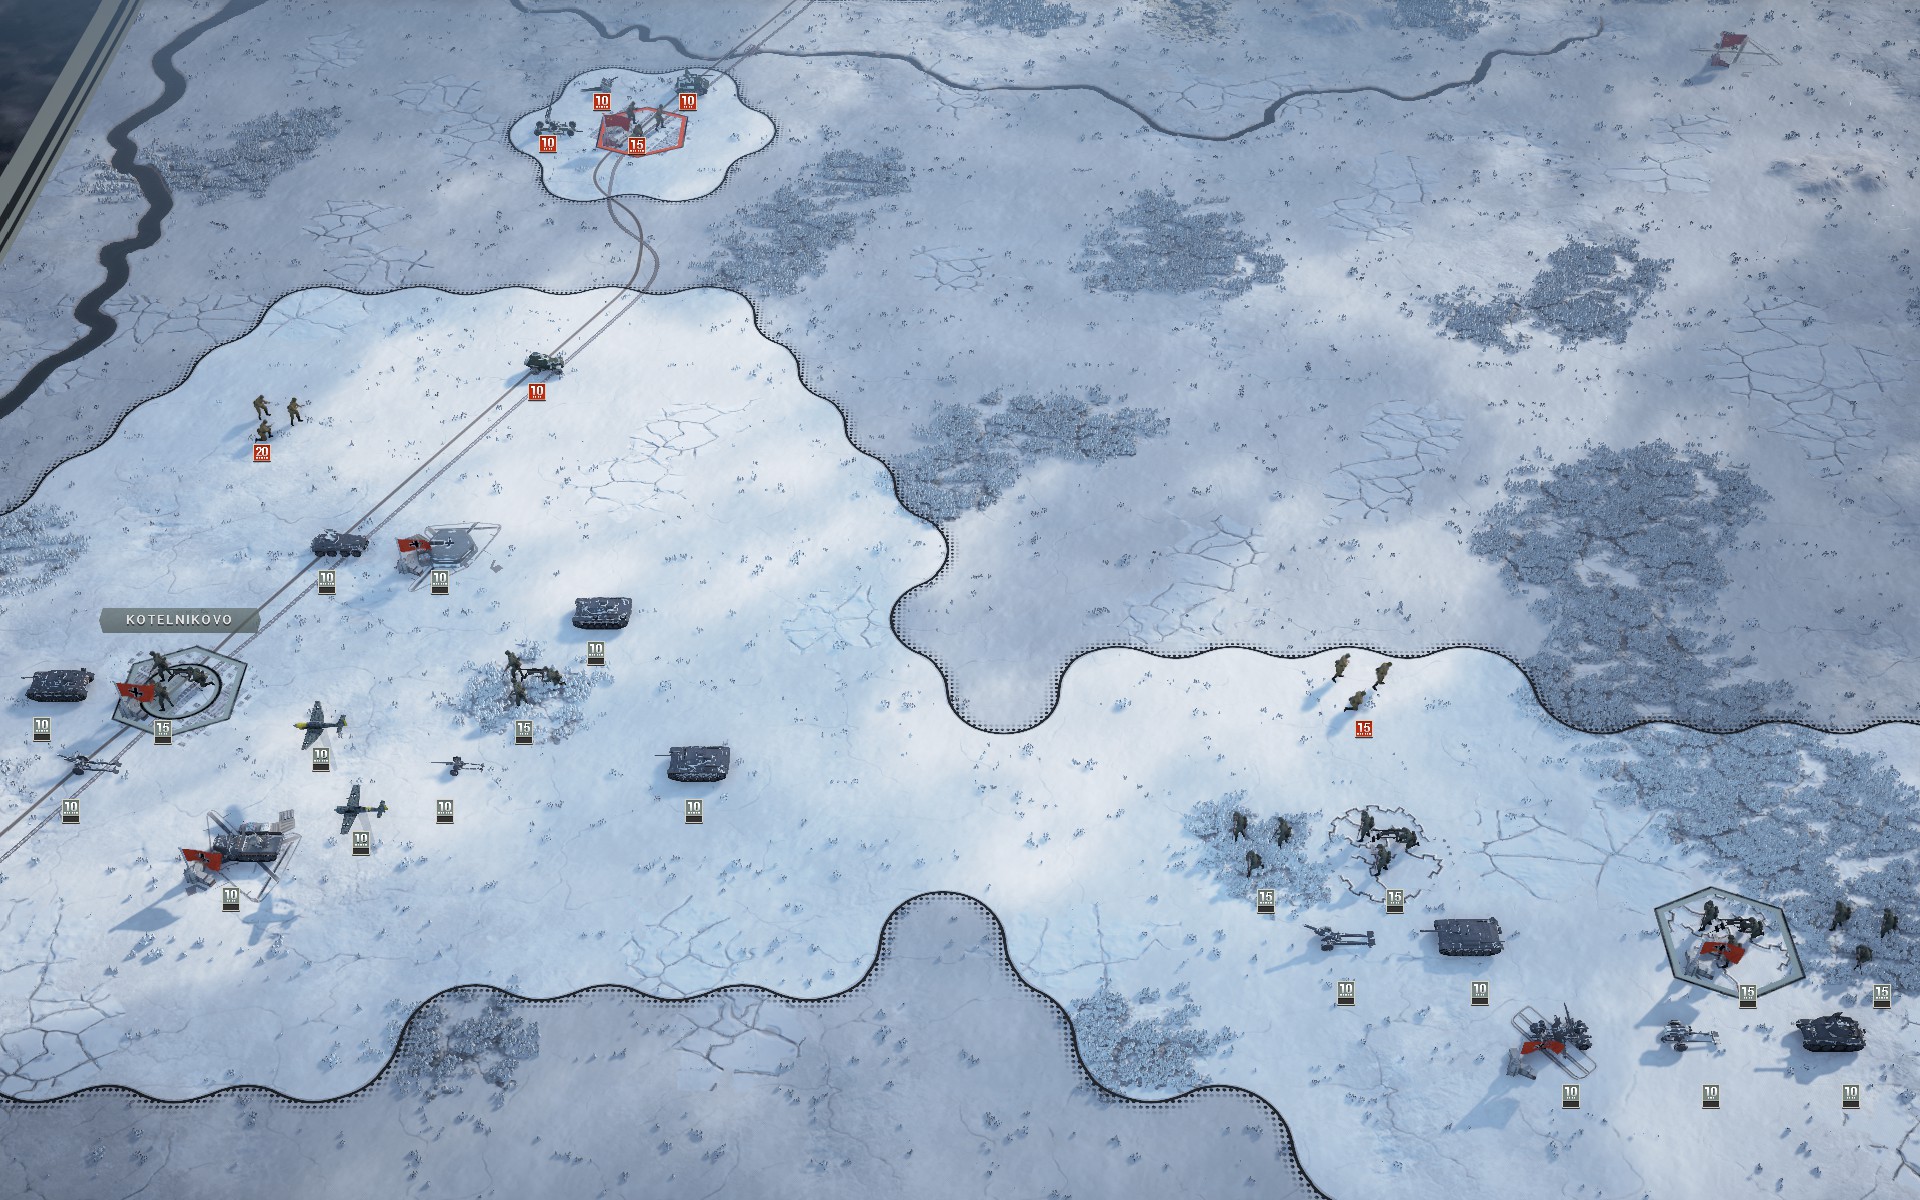
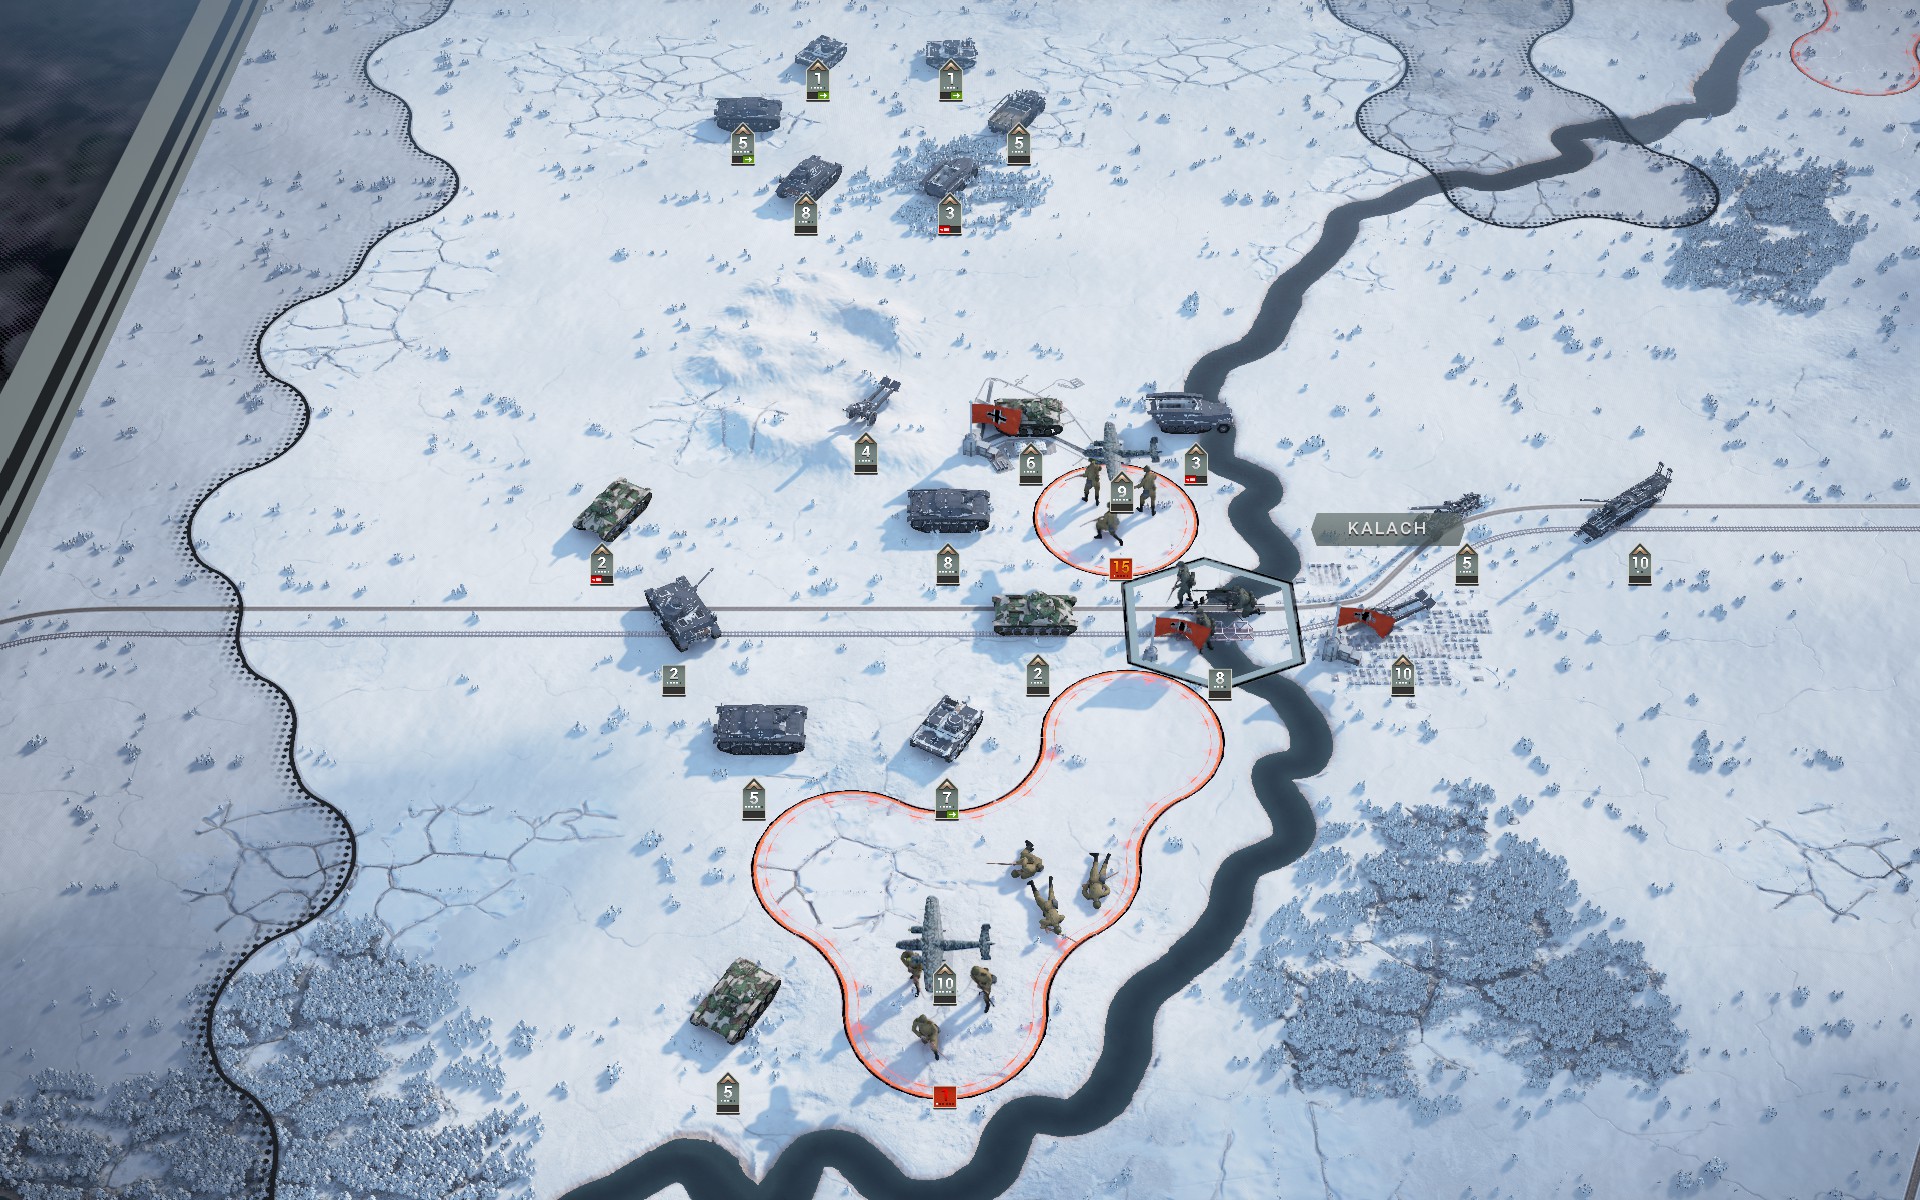
While it will initially benefit from being able to draw supplies from the map edges, the Red Army does not control any supply hexes. This means that it should be possible to encircle and suppress any possible Soviet counterattack, especially as the Don and the Volga are both major rivers and thus impassable. To take advantage of this, a separate battlegroup will immediately cross the Volga and secure the airfields on the other side of the river -- the fortifications along the banks of the river make it clear the Red Army has a presence there, but it's likely to be only soft targets that can be easily destroyed. Once this has been accomplished the battlegroup will look for an opportunity to trap any Soviet forces encroaching on Stalingrad by crossing back over the Volga. Kalach and the bridge over the Don will have to wait; it's likely I'll only move to secure these locations towards the end of the scenario unless my forces are forced back from Stalingrad.
The rest of my corps will prepare for the inevitable Soviet onslaught, giving up ground if necessary to keep losses at an acceptable level. The Wehr Infanterie should prove useful here in limiting the mobility of the Soviet armour; due to conditions on the ground the mobility of the half-track transports of my artillery is severly reduced, making it necessary to likewise limit the mobility of the Soviet armour or risk a breakthrough at a position unsupported by artillery. The auxiliary force is quite strong and equipped with several models that I don't yet have access to, so I'm hopeful that they'll at least be able to hold their own with only limited air support from my forces. Admittedly it'd probably be easier and more efficient to just push the entire corps towards the objectives and then establish a defensive line there, but I have every intention of controlling Stalingrad by the end of the battle -- my corps might be retreating, but it'll do so on my terms, not those of the Red Army. Vanity will be the end of me yet.

The 17 cm artillery will provide fire support for the initial assault across the Volga and then fall back from Stalingrad; I don't have enough infantry to hold the city and attempting to do so would stretch my lines. This also means that I intend to temporarily give up control of the northern airfield once the artillery has been safely withdrawn and the battlegroup has crossed over the Volga, as the bulk of my Panzers will need to secure a supply line to the south. This should stretch the Soviet lines while giving my Panzers enough time to return to the north, and with the airfields across the Volga secured my aircraft can rebase there. Once the artillery has been redeployed the battlegroup will recapture the airfield to deny the Soviet forces the supply hex. Once the Soviet forces to the south have been encircled a small number of weaker units should be enough to capture them.
The auxiliary force consists of quality troops, including an SdKfz 234/1 8Rad, a Panzer IIIN and an Fw 190A, none of which I have access to yet. The Panzer IIIN is possibly the most cost-efficient German tank, at least if you are using Panzer General, but I'll go into that once I have access to it myself. The eastern auxiliaries will dig in and defend the objective while the western attempt to link up with my battlegroup to the north and establish a cordon around the Soviet forces. They will then spend the rest of the battle either defending or capturing suppressed targets unless the Soviet counterattack proves to be weaker than expected, in which case I might have them take more aggressive action.
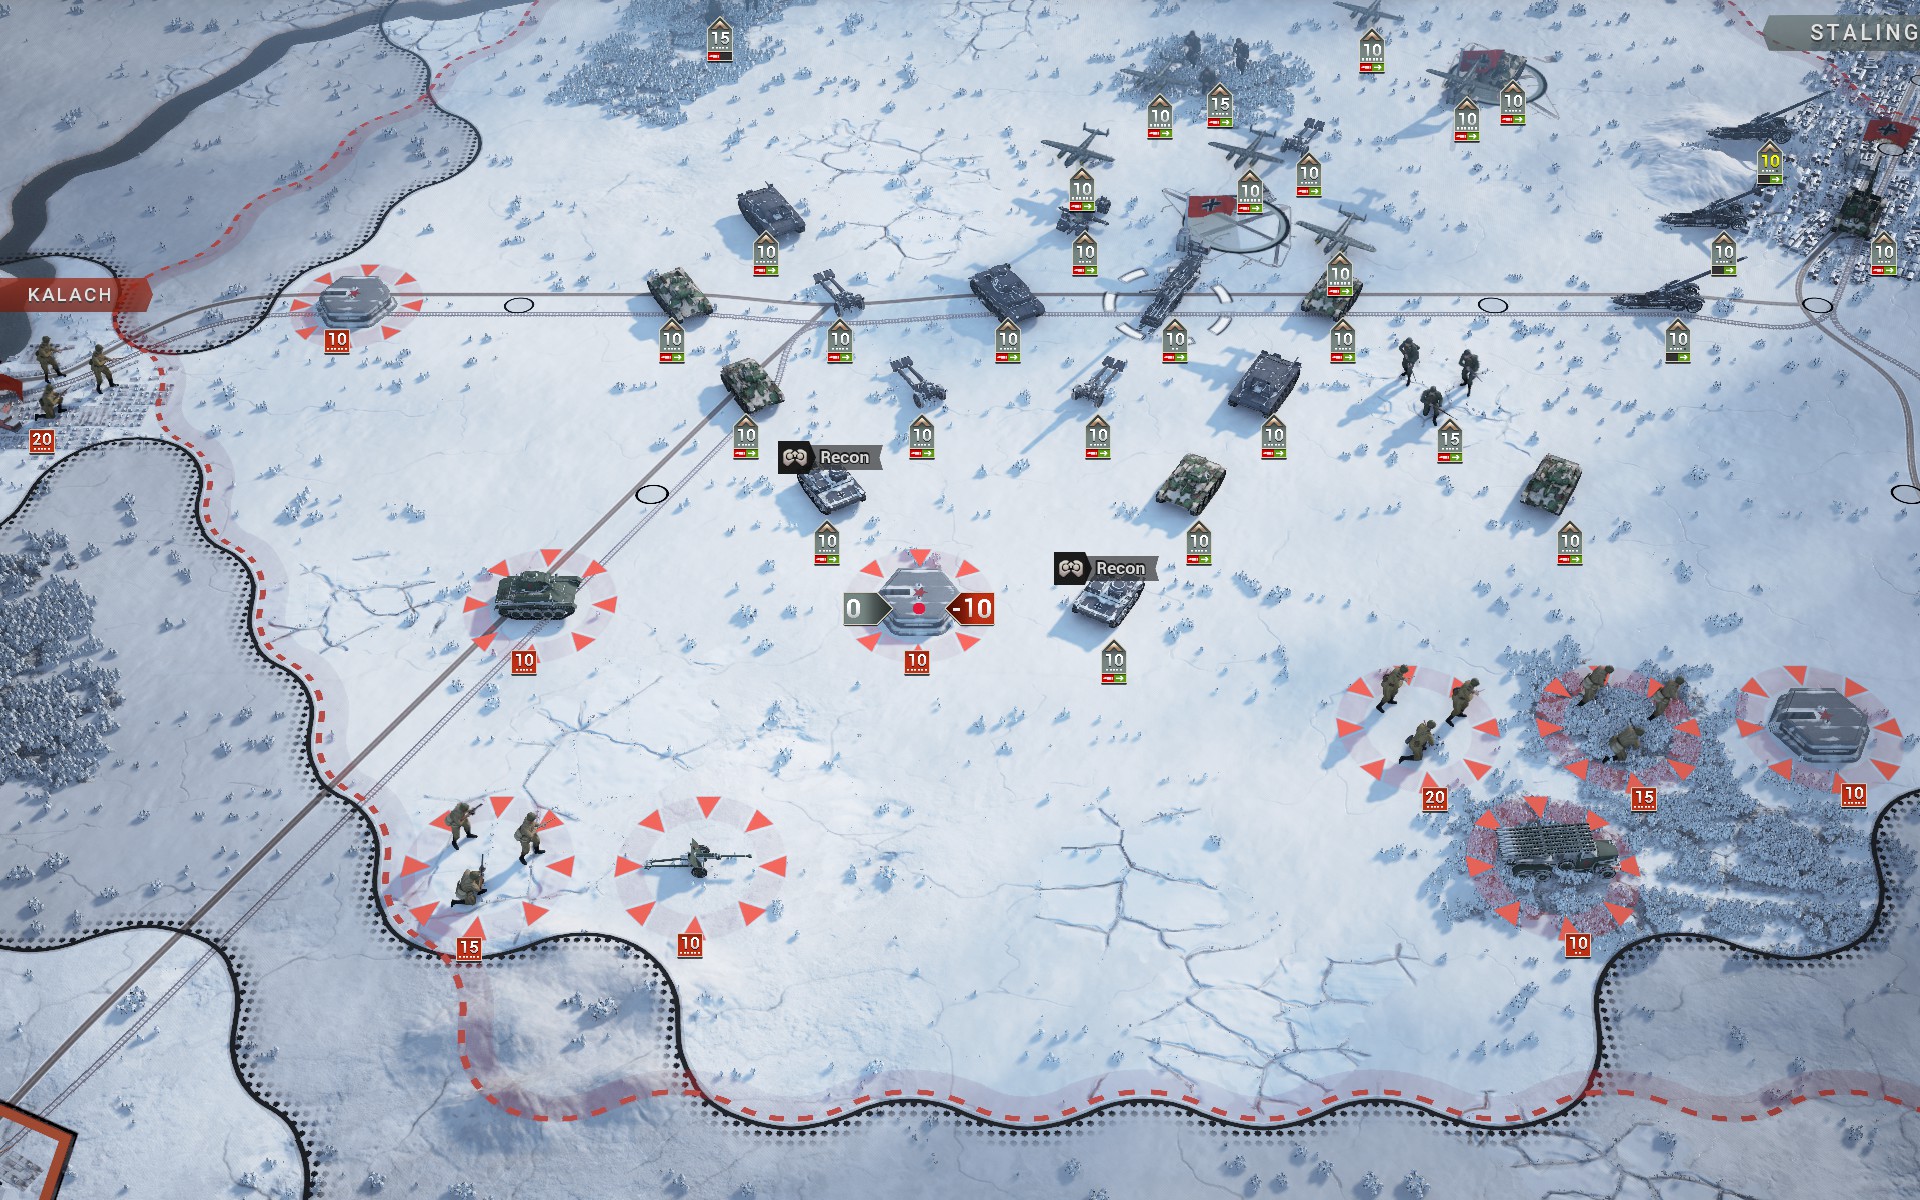
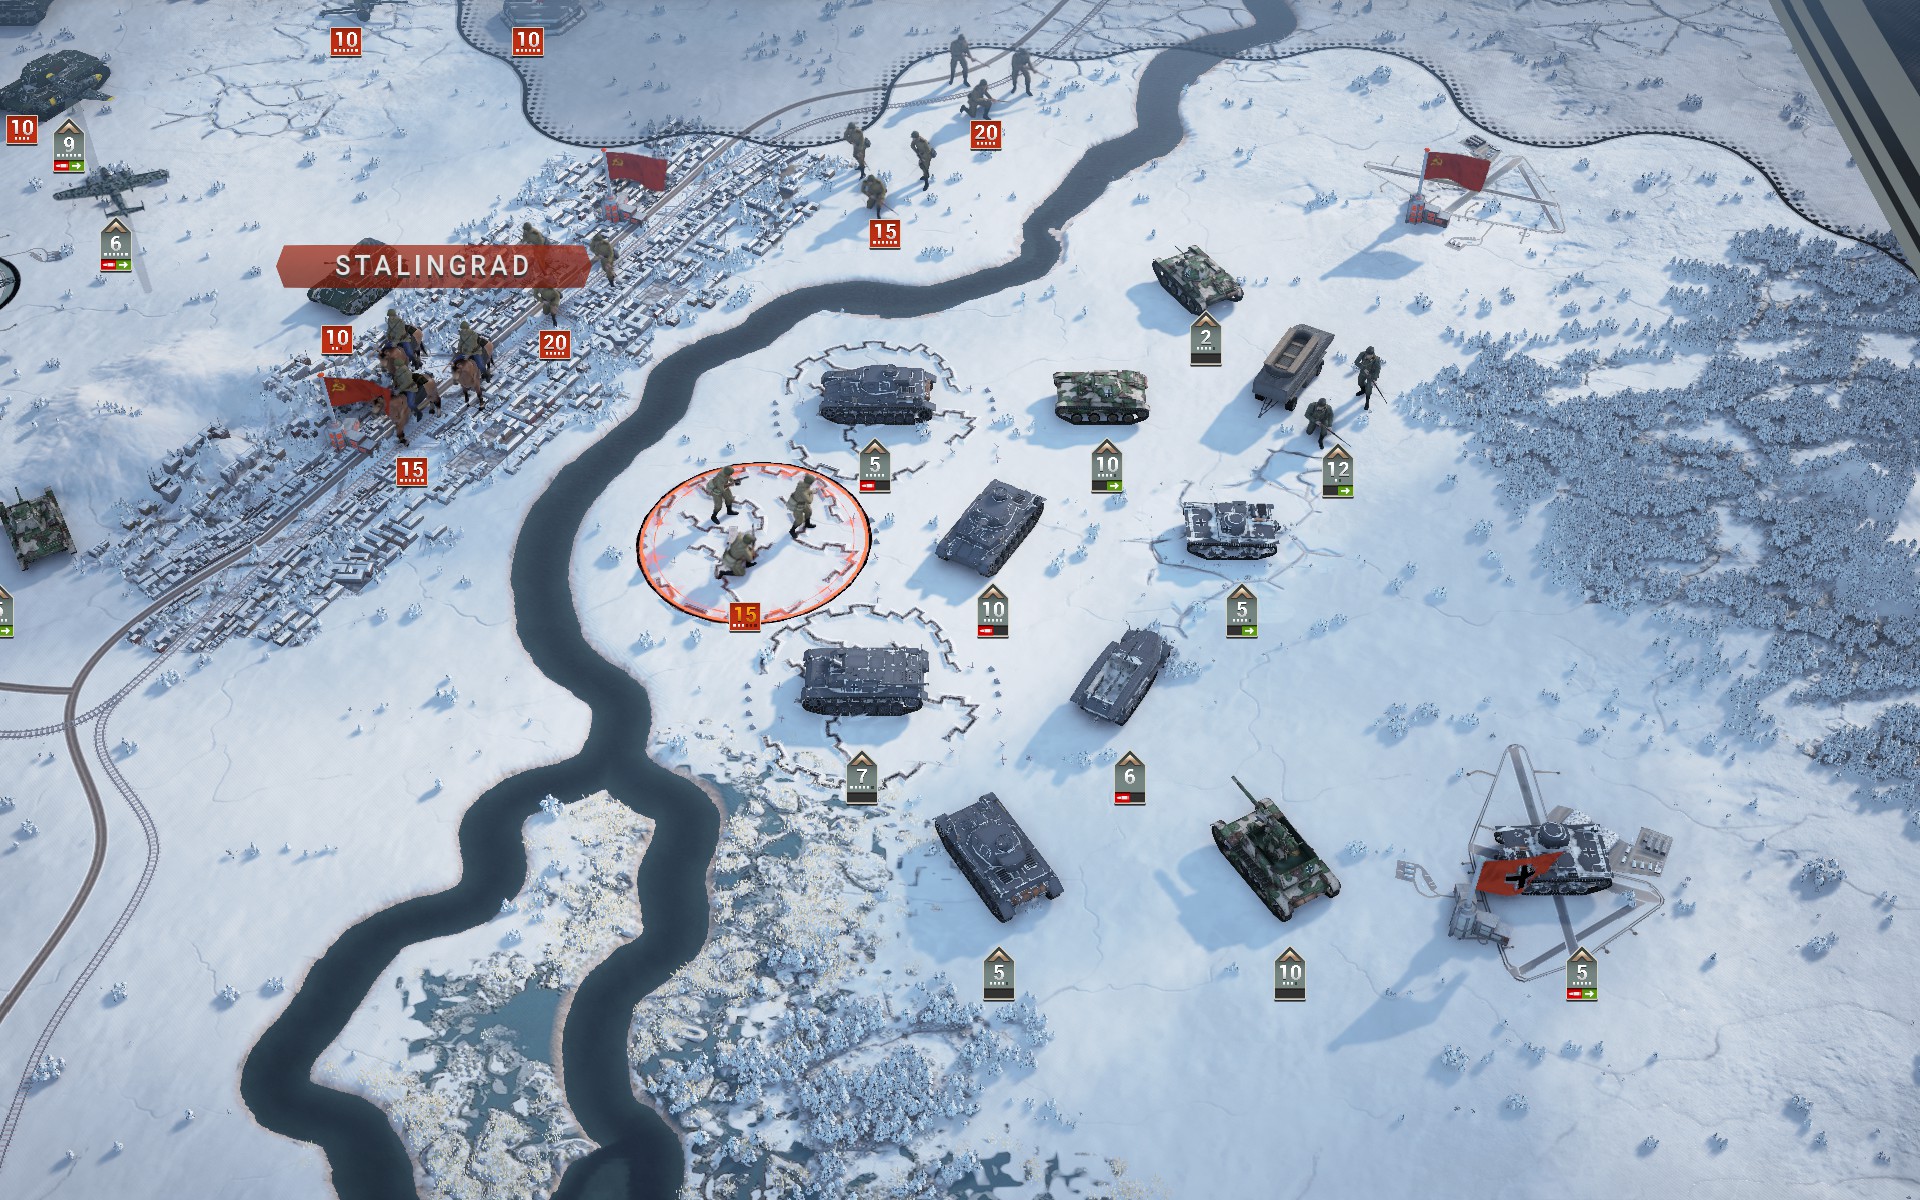
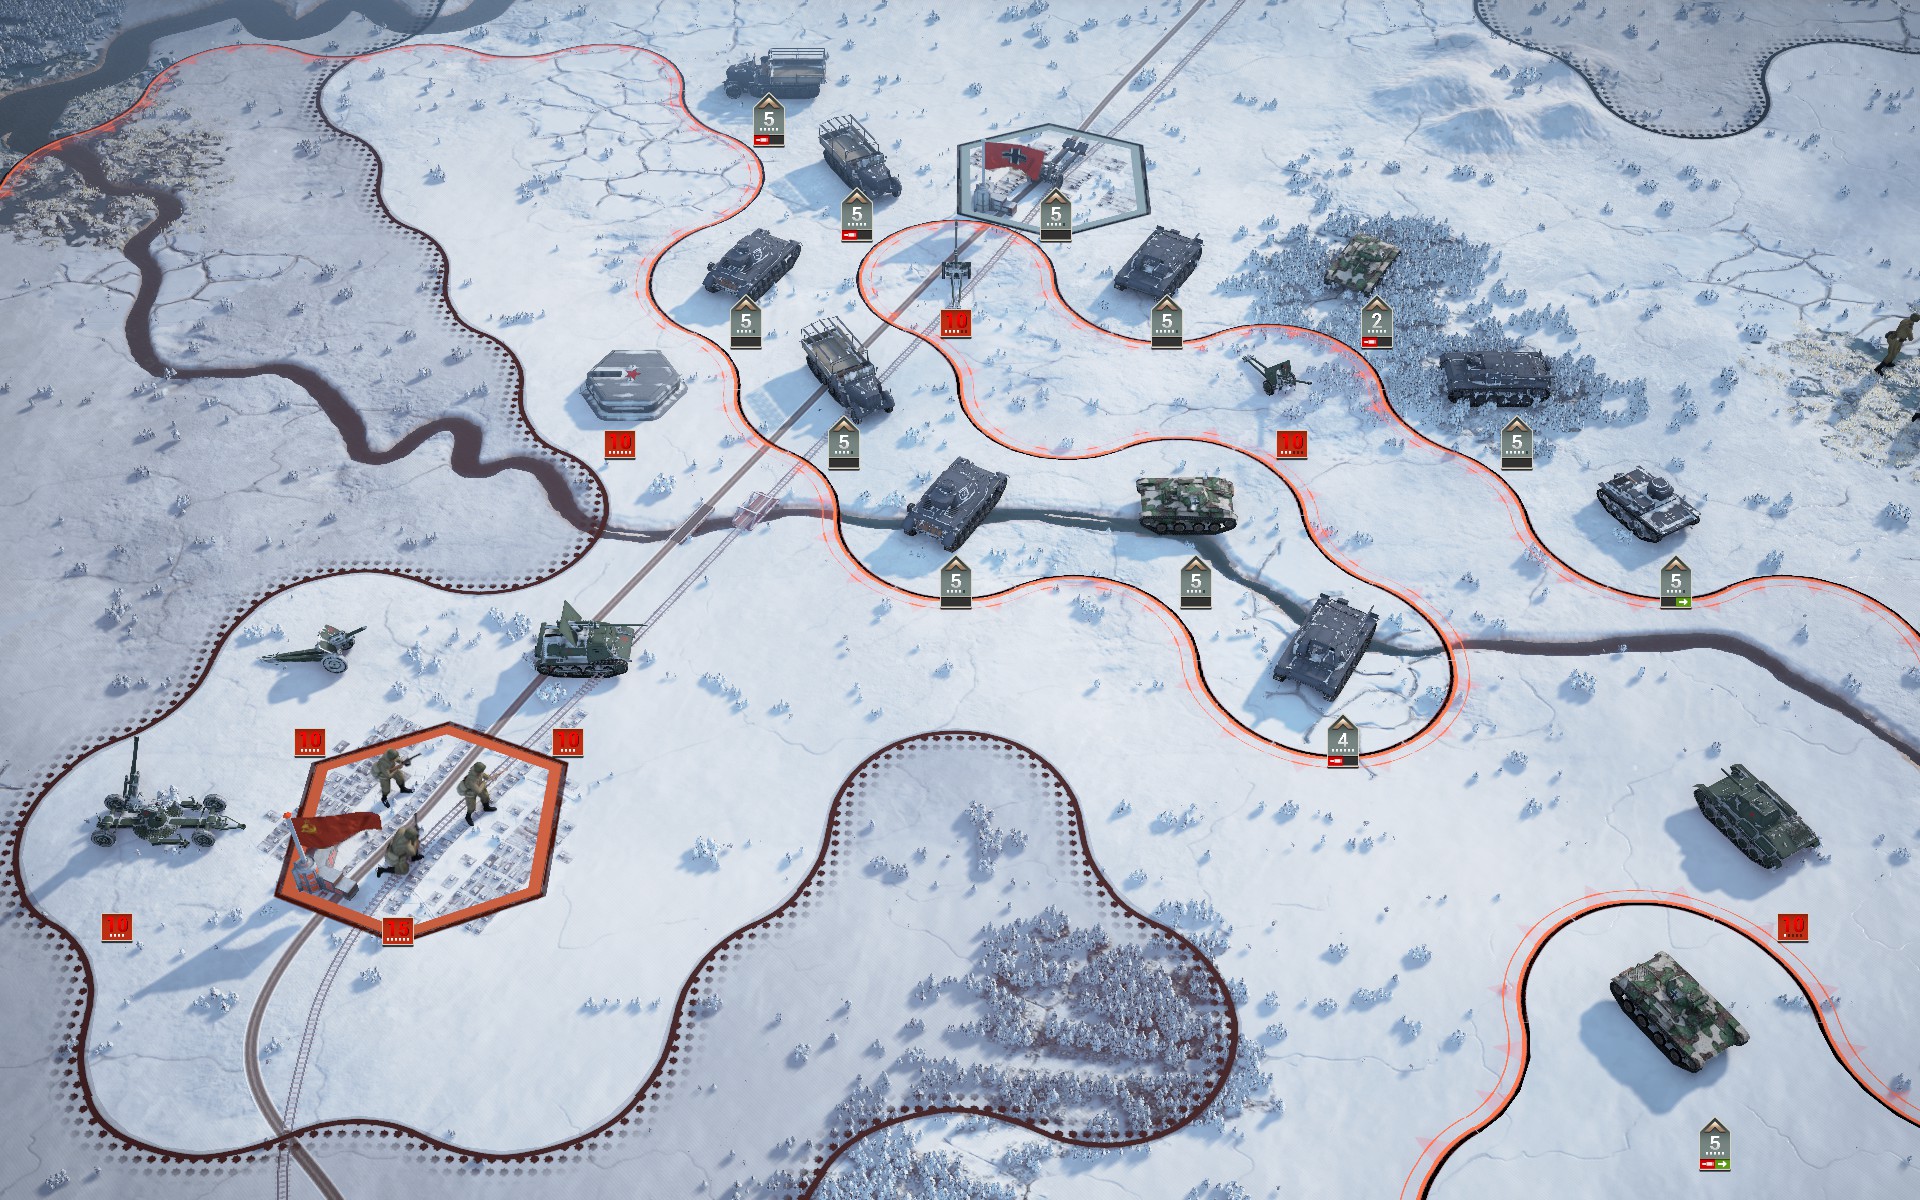
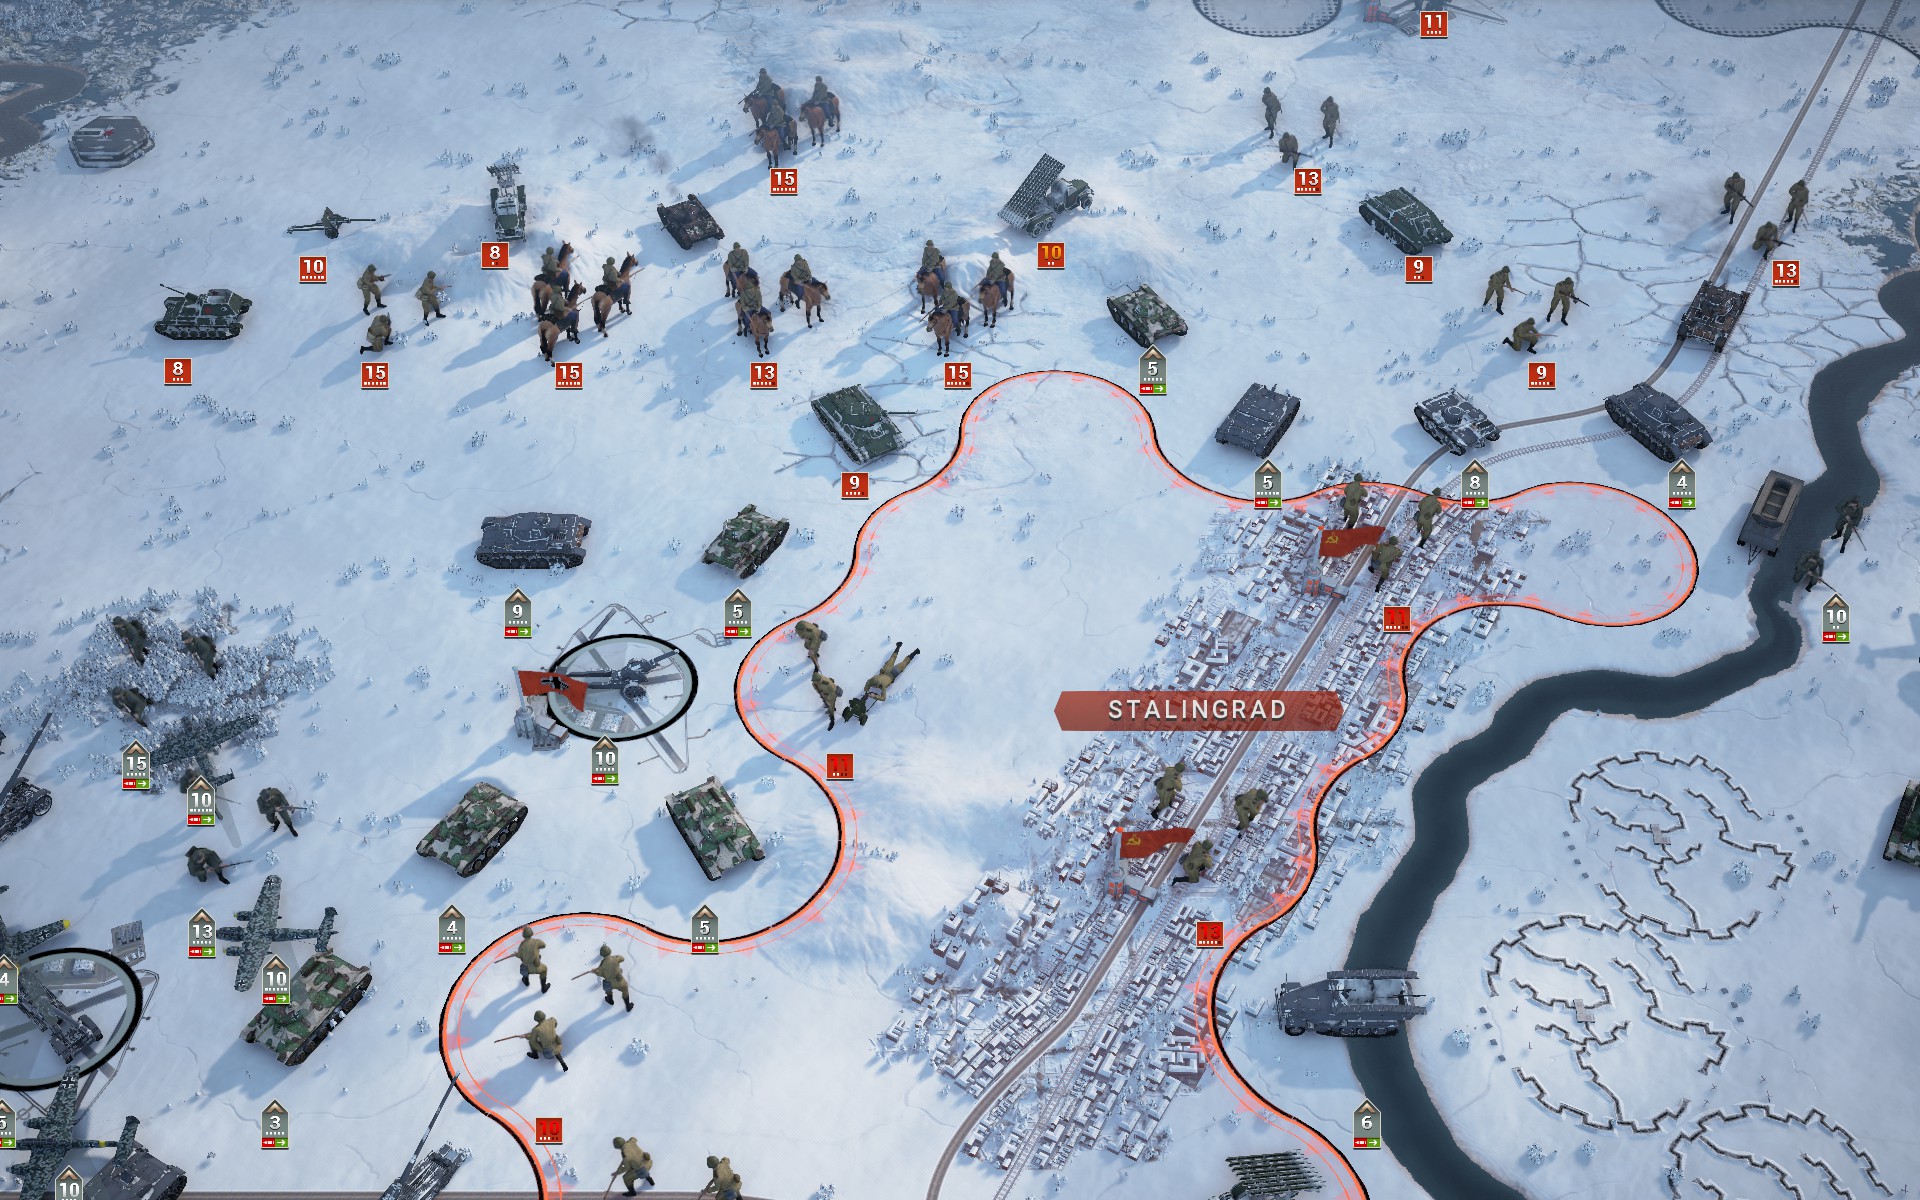
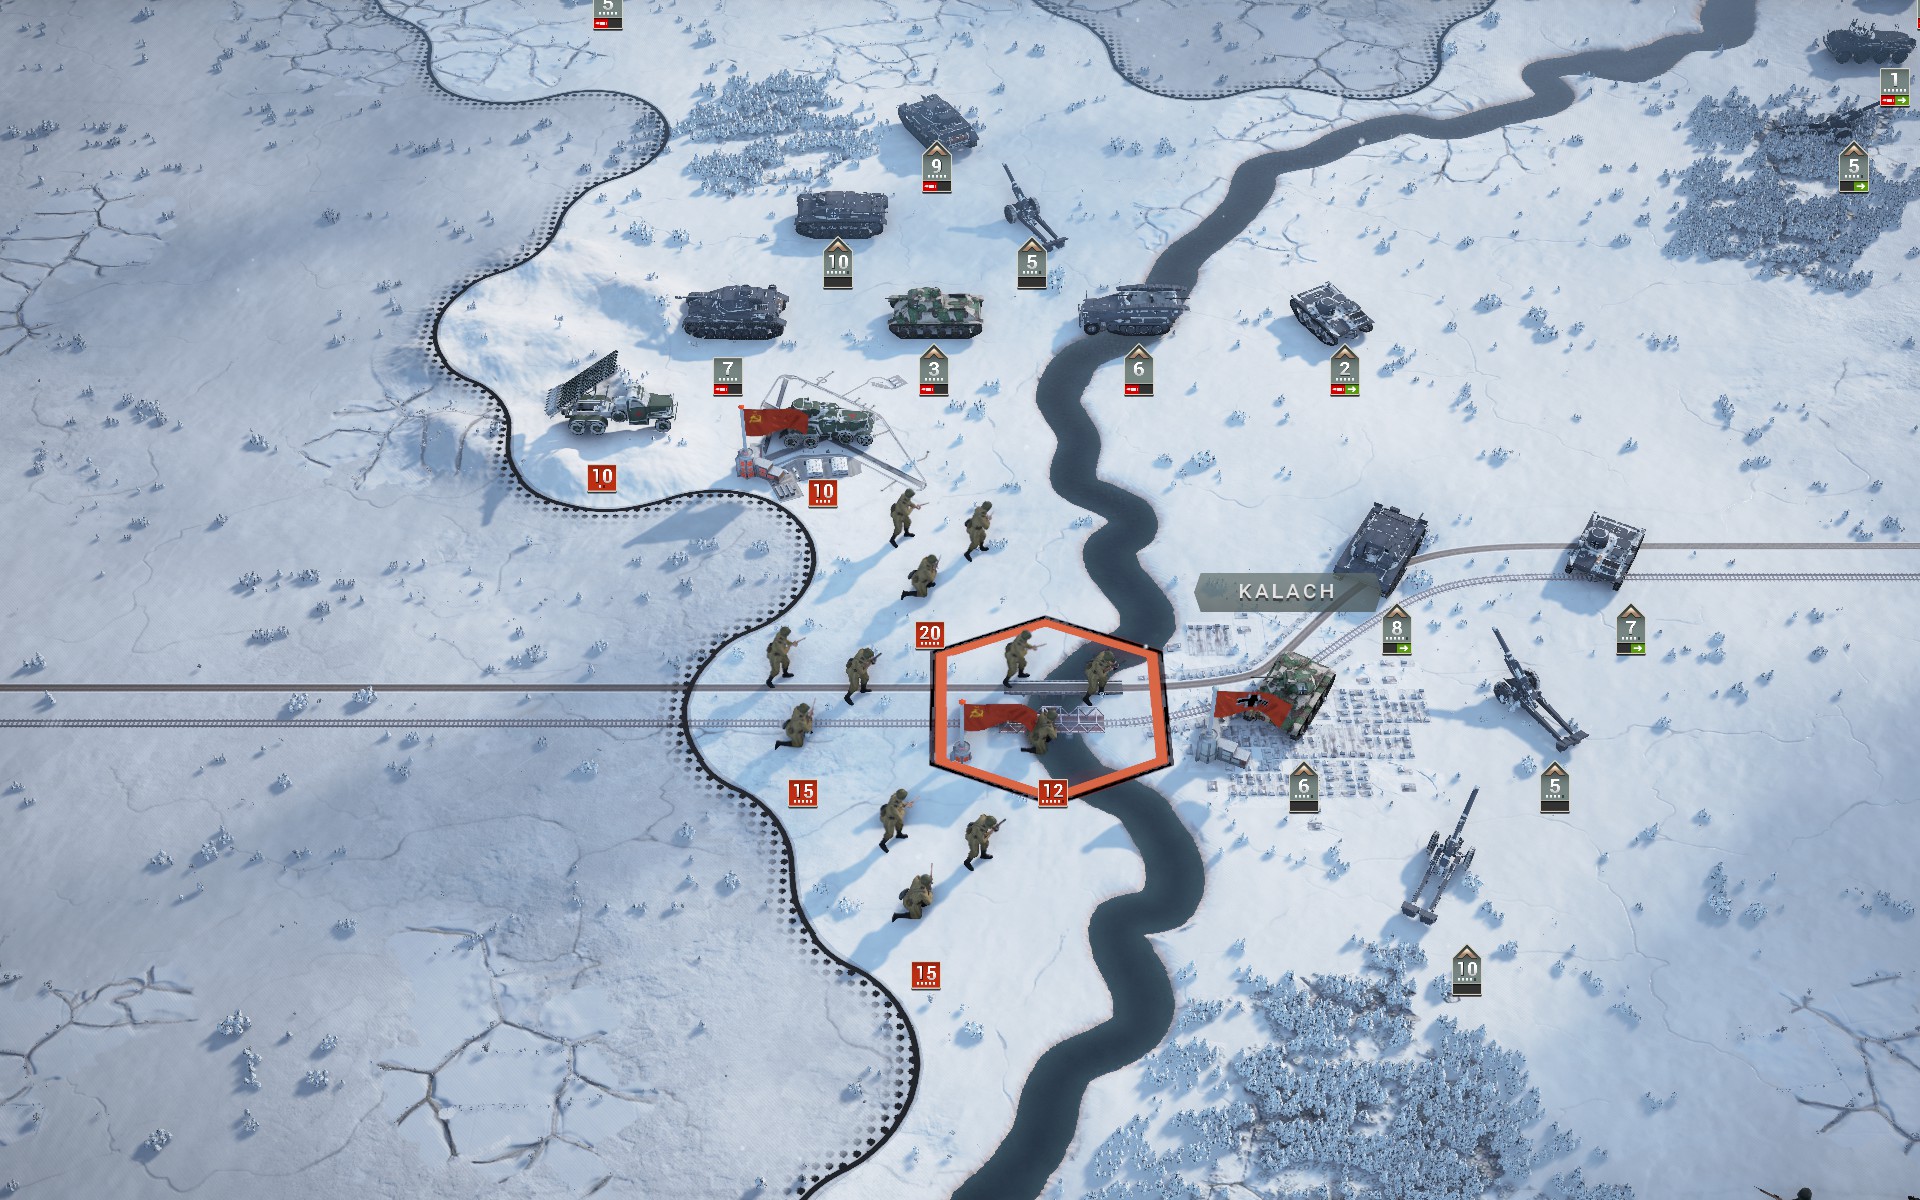
The battlegroup crosses the Volga and successfully encircles the Soviet forces on the other side; there are more of them than I anticipated, but as they are hemmed in on all sides it shouldn't matter.
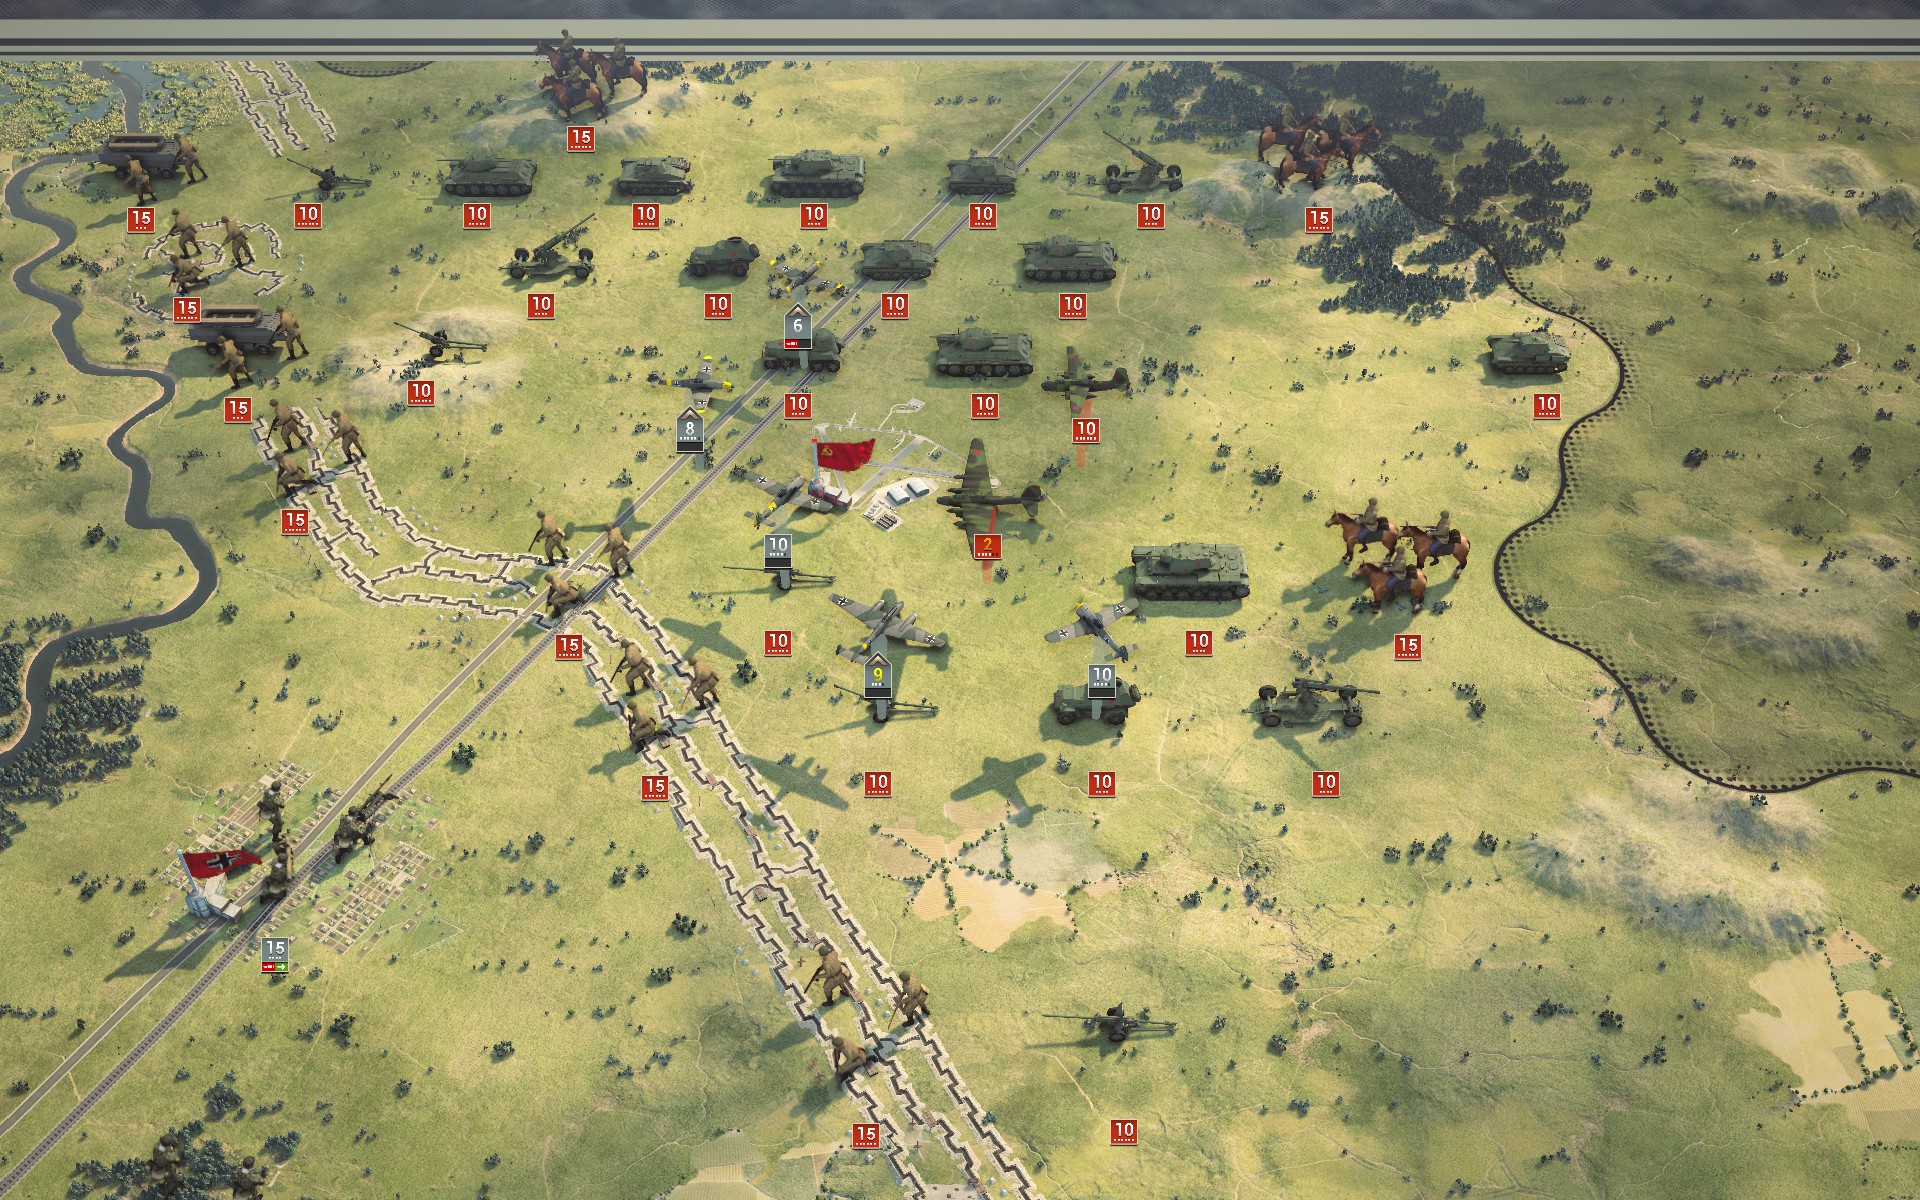
Aerial recon reveals that the Red Army is massing to the north, with an armoured contingent including at least six T-34s.
With the help of two Recons, Gustav obliterates a Strongpoint in a single salvo. It reminds me of my first campaign when I played with heroes and would regularly oneshot multiple units a turn.
The Panzers and StuGs move to surround the Soviet forces while the Do 217Es pummel them from the skies.

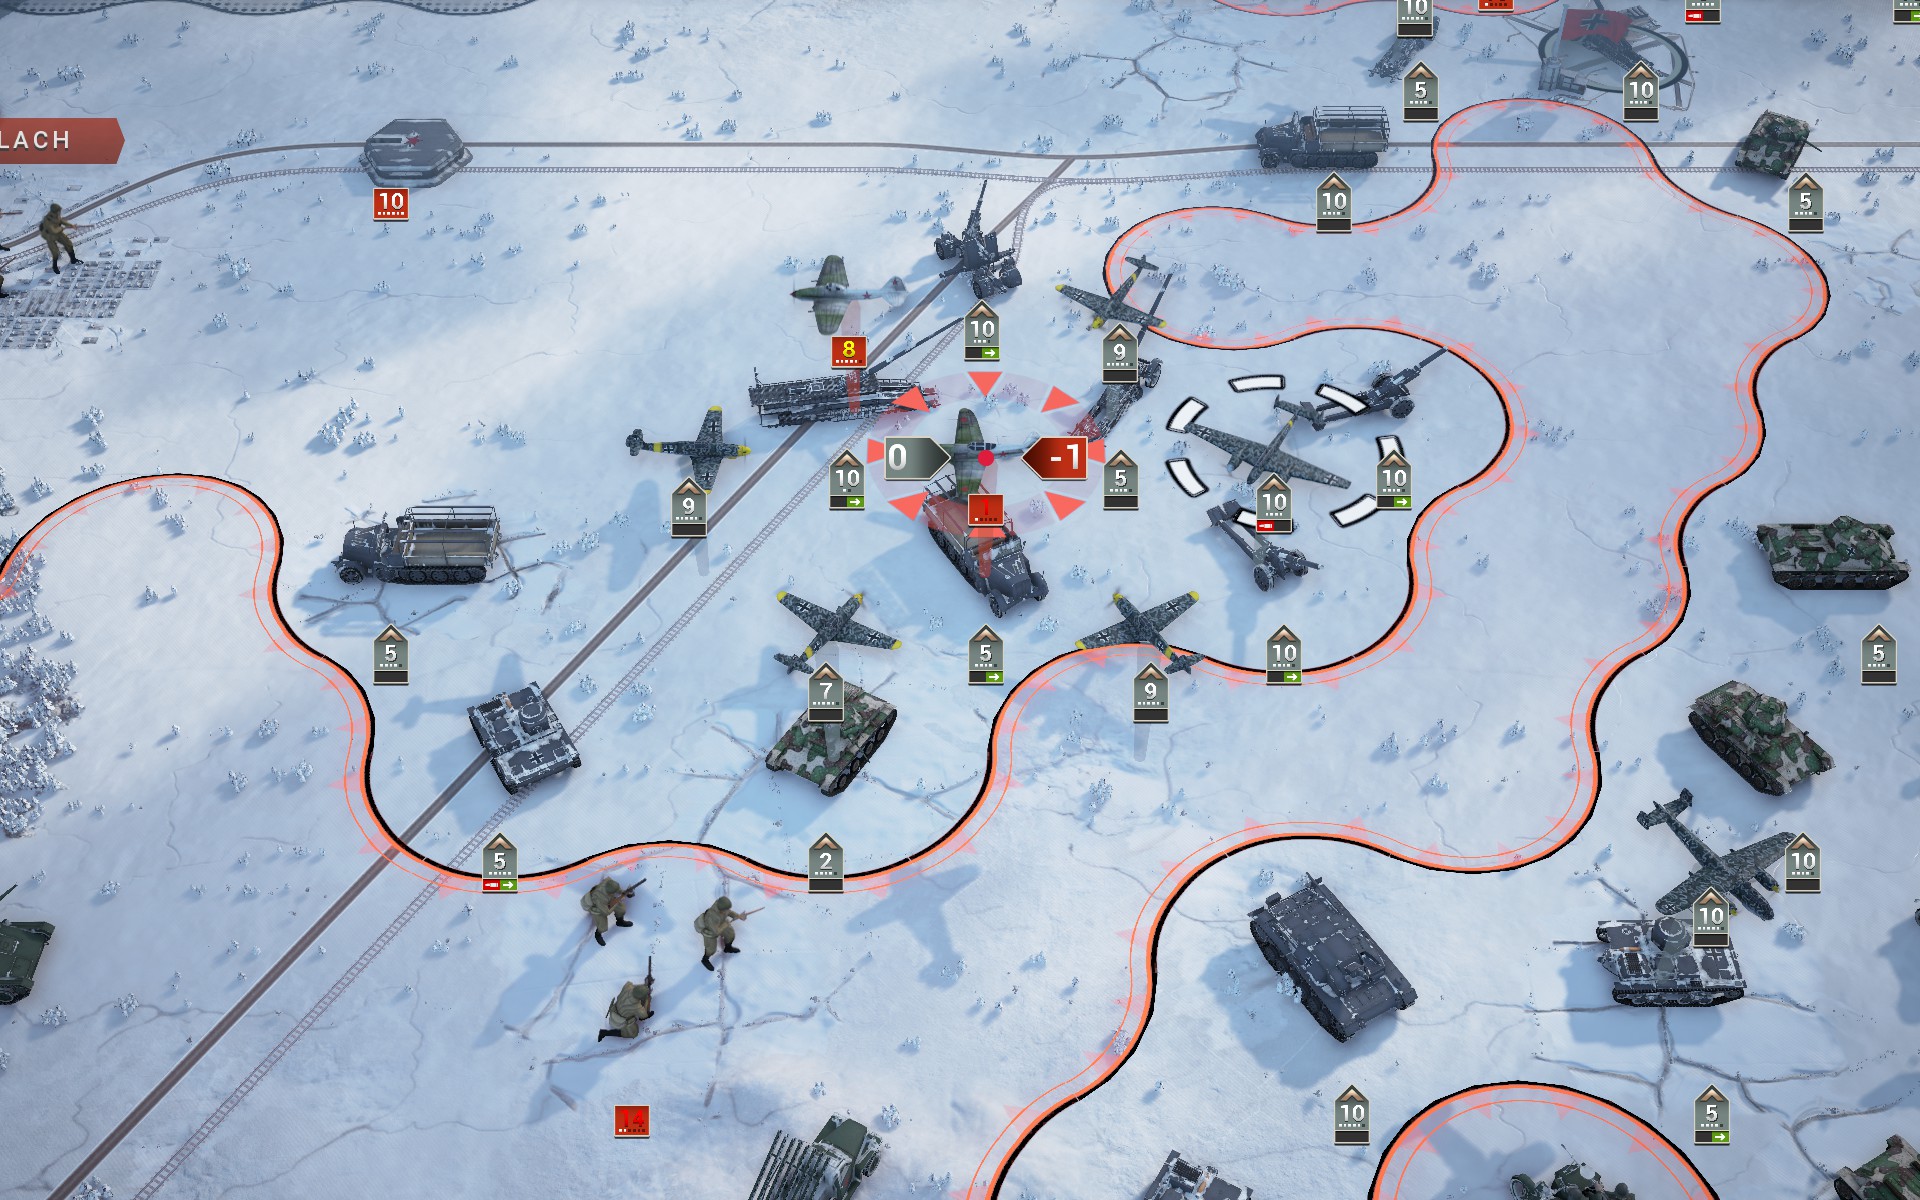
My forces suffer minor damage as the Red Army attempts to break the encirclement, but Gustav has a lucky escape with the help of the nearby 8.8.

Across the Volga, my forces suffer heavy damage as the Soviet AA guns switch to AT mode and pummel two detached units. I haven't played since the last patch so perhaps this was introduced then -- if so it's a good change, as it makes AA guns more of a threat to weak armoured vehicles.
The auxiliaries link up with my forces without any difficulties. The Soviet forces south of the Aksay are strangely passive.
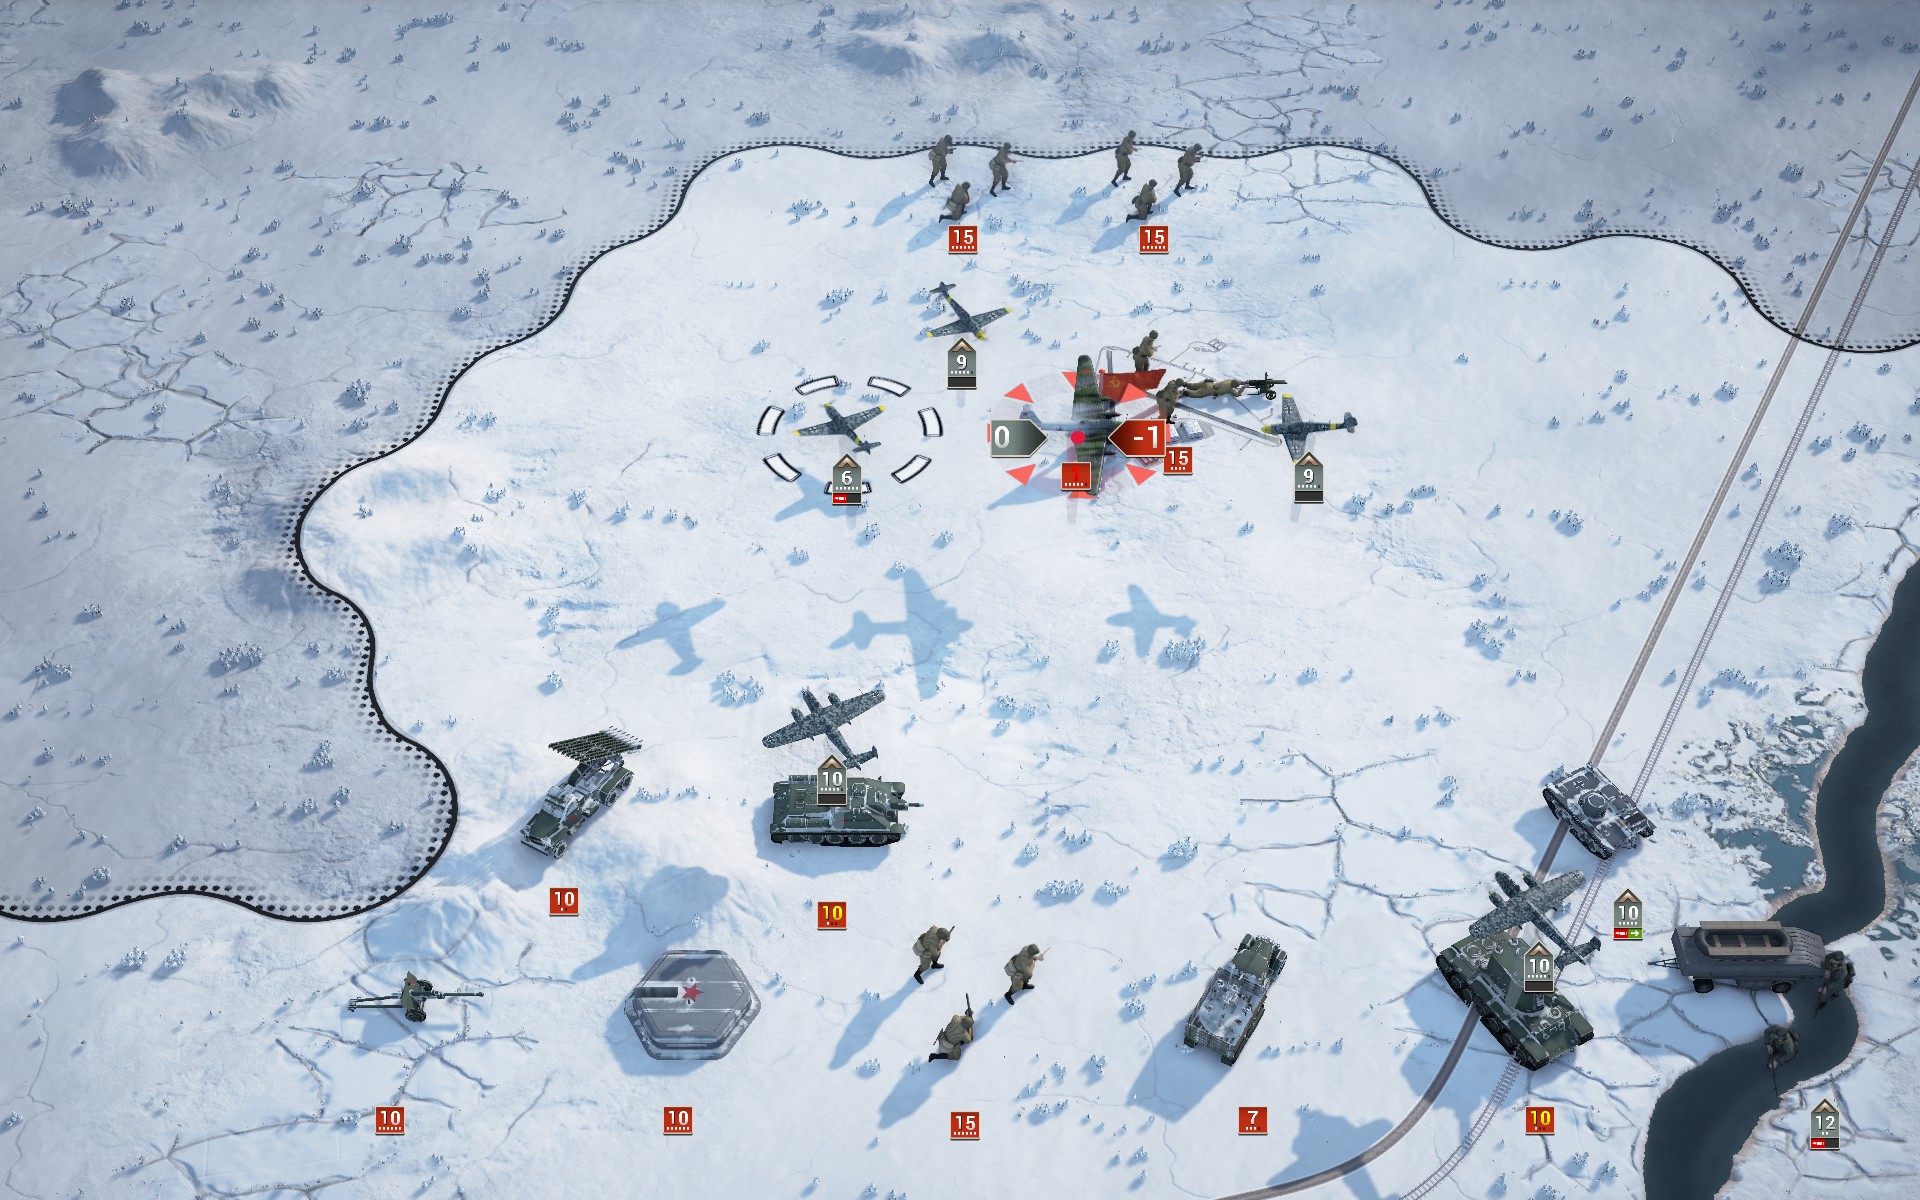
With the weather taking a turn for the worse the bulk of the Luftwaffe is required to bring down the Soviet La-5.
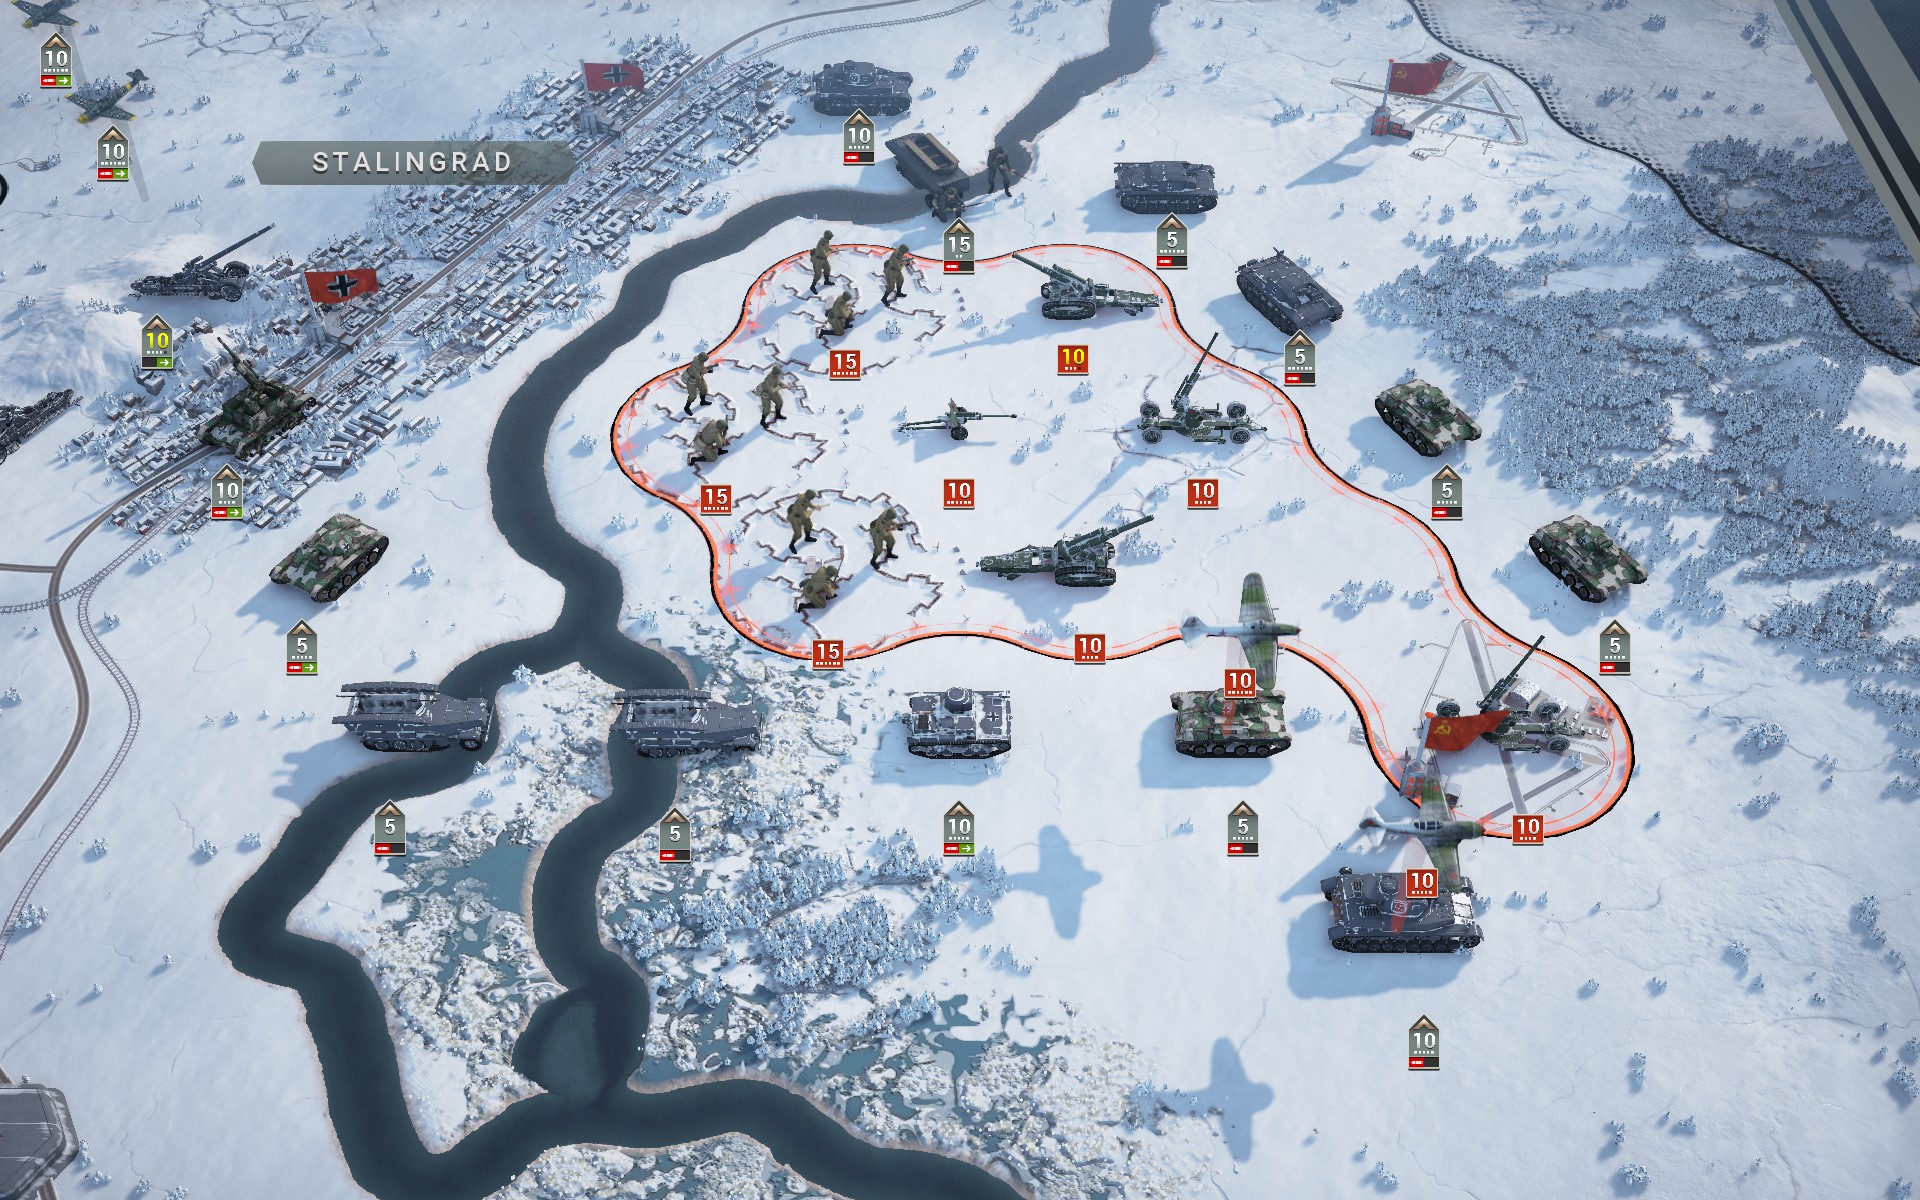
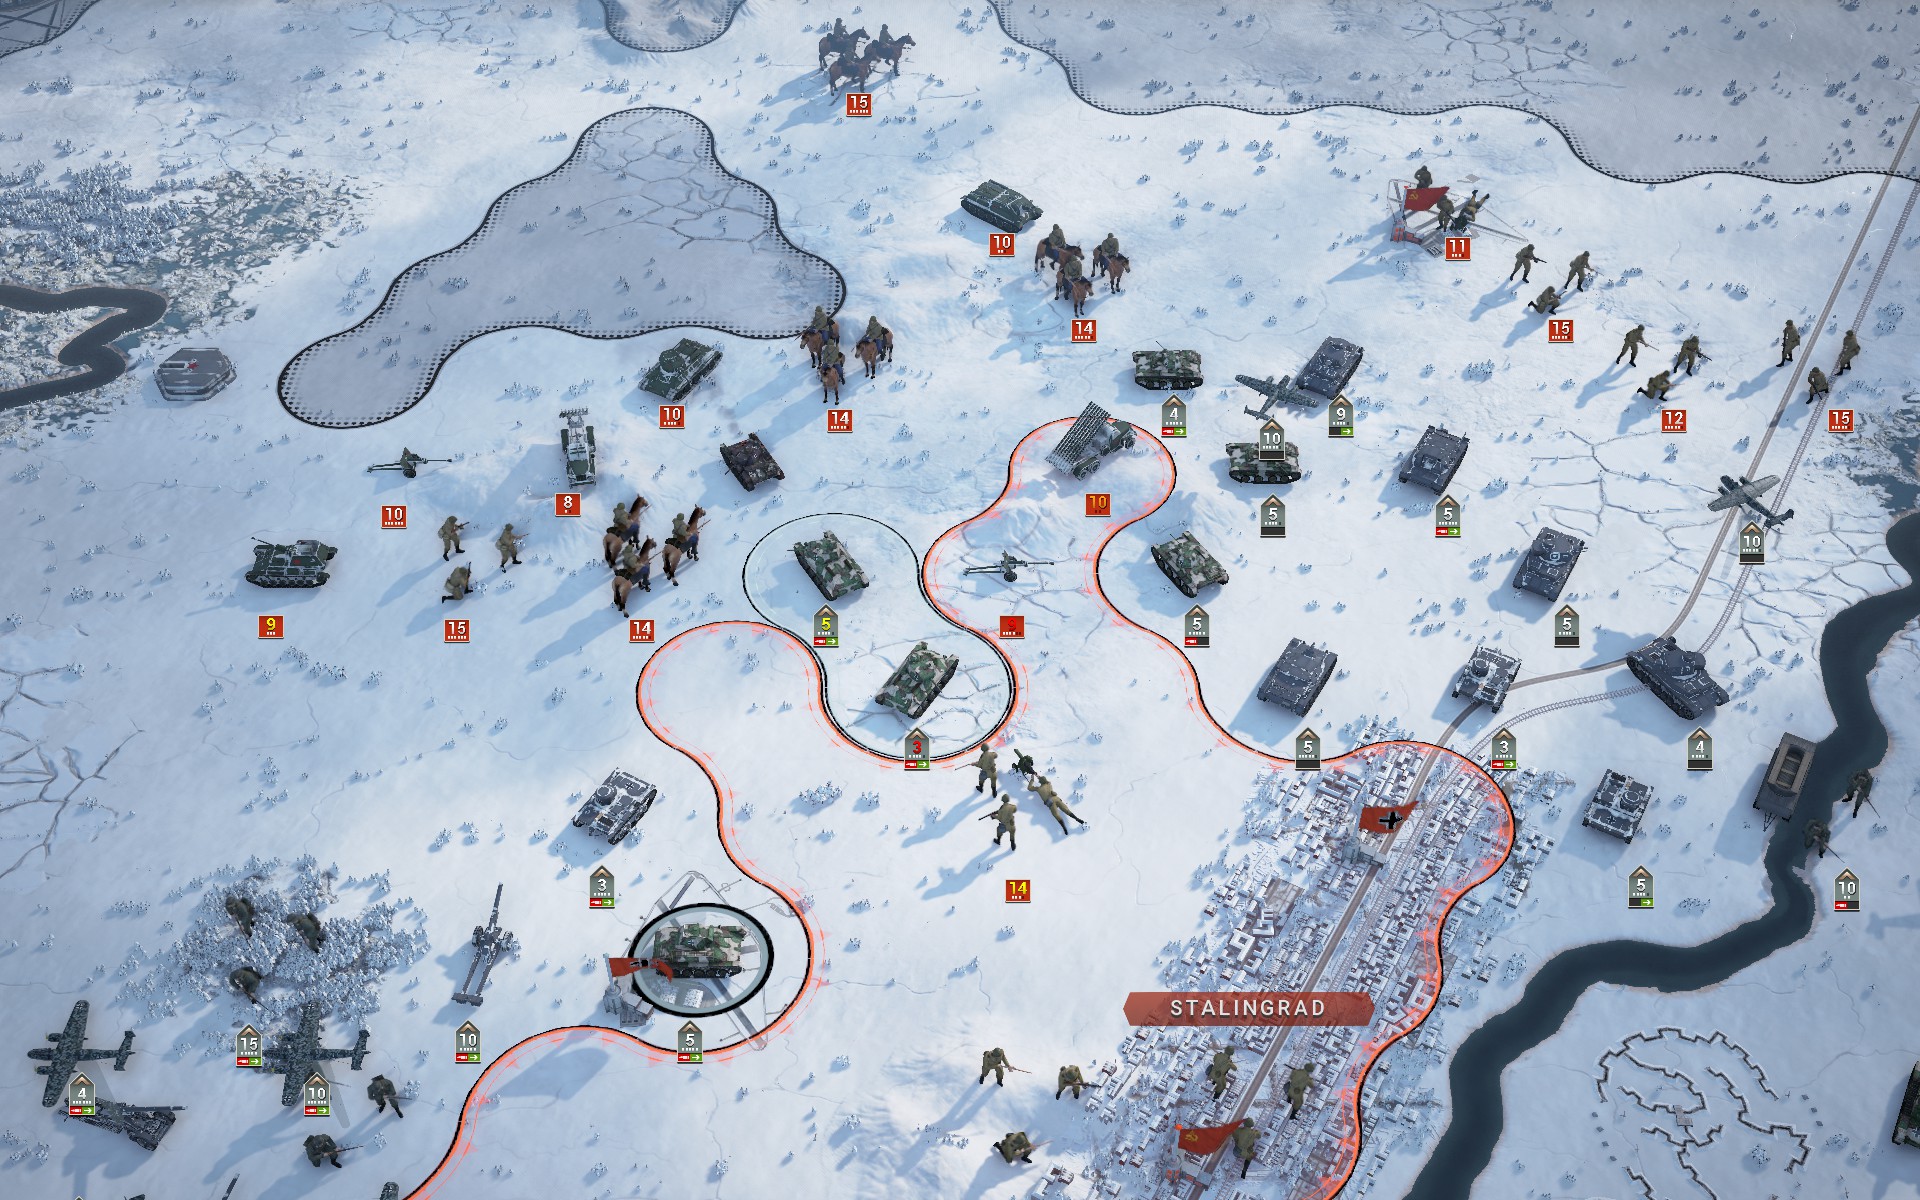
Soviet forces liberate Stalingrad, but can only look on as their compatriots east of the Volga are captured.

There are few Soviet forces west of Kalach, so my plans remain unchanged.
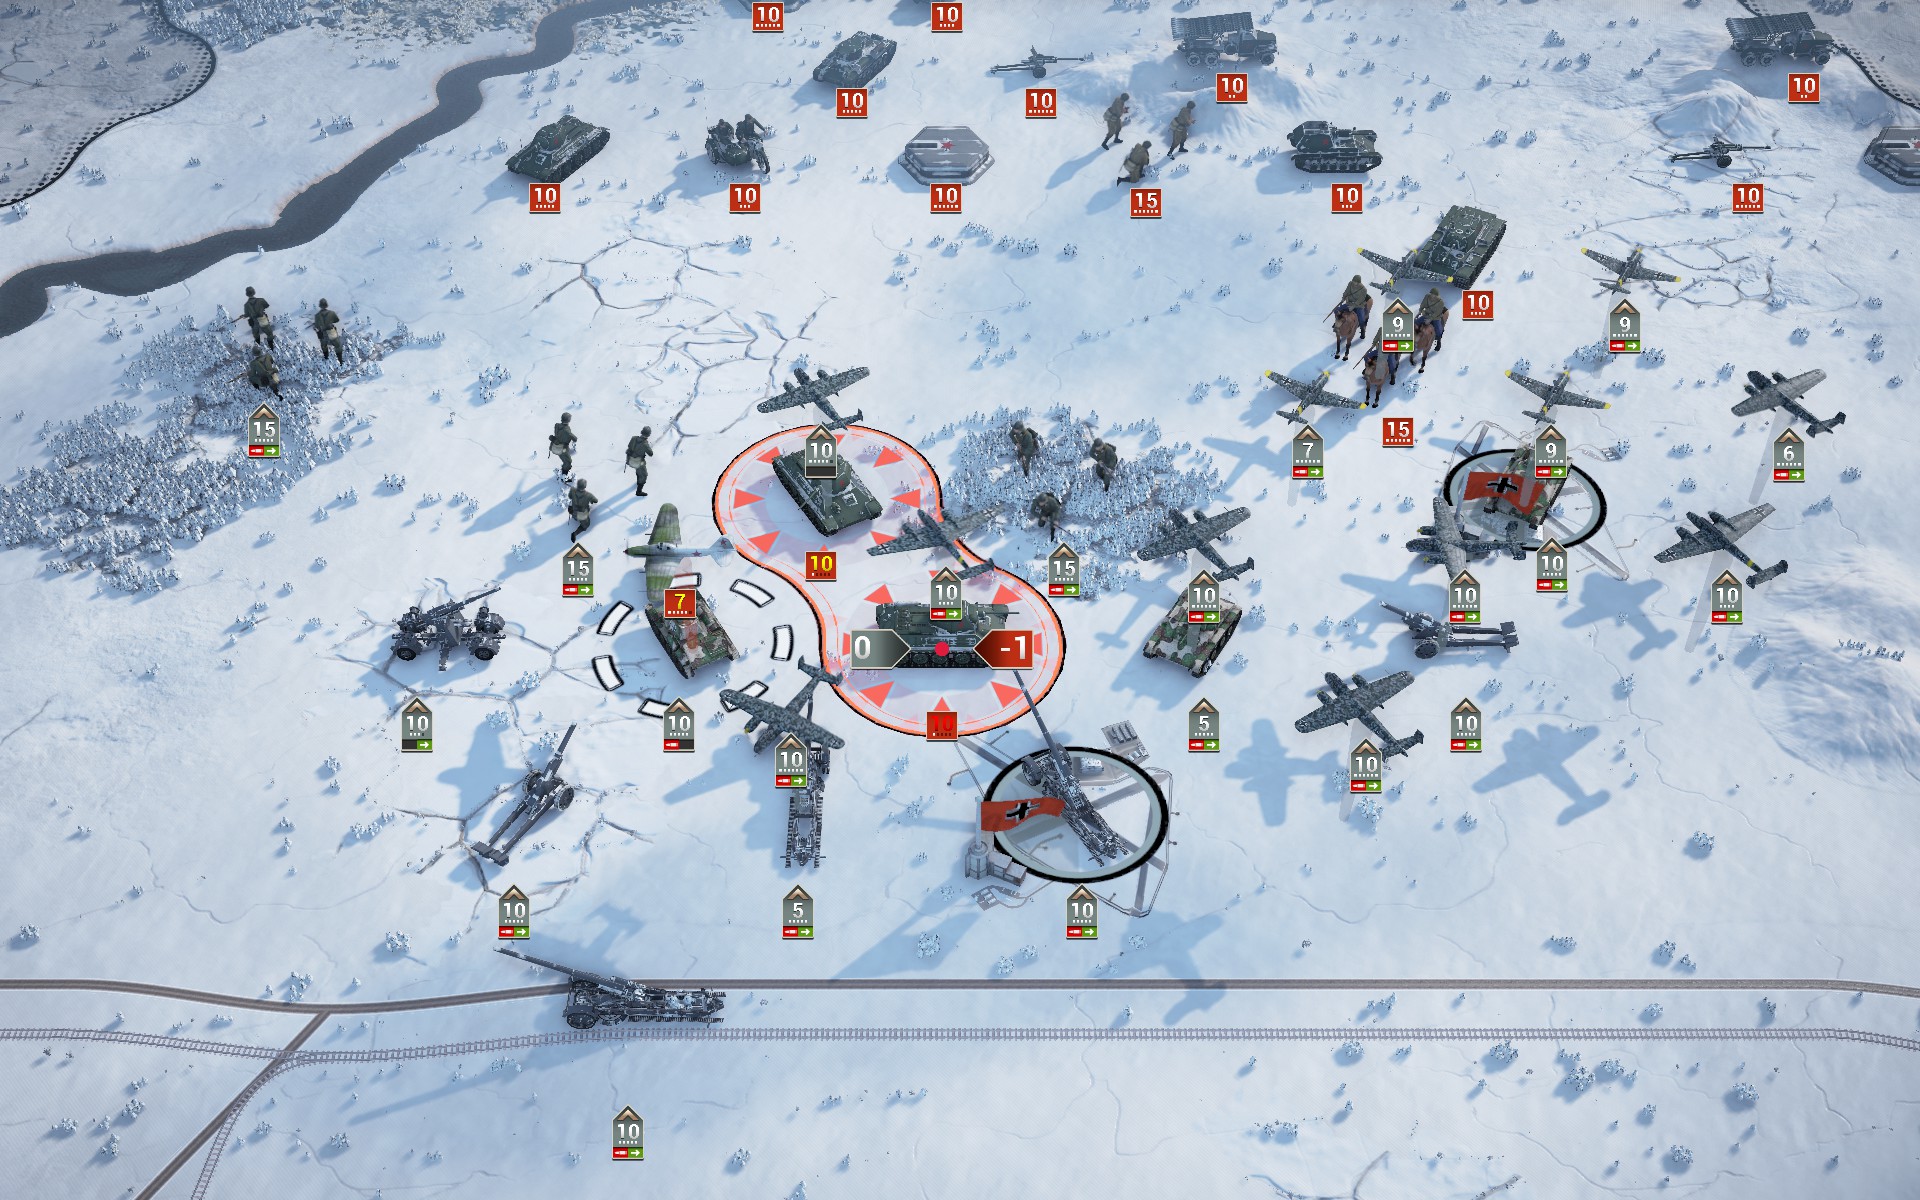
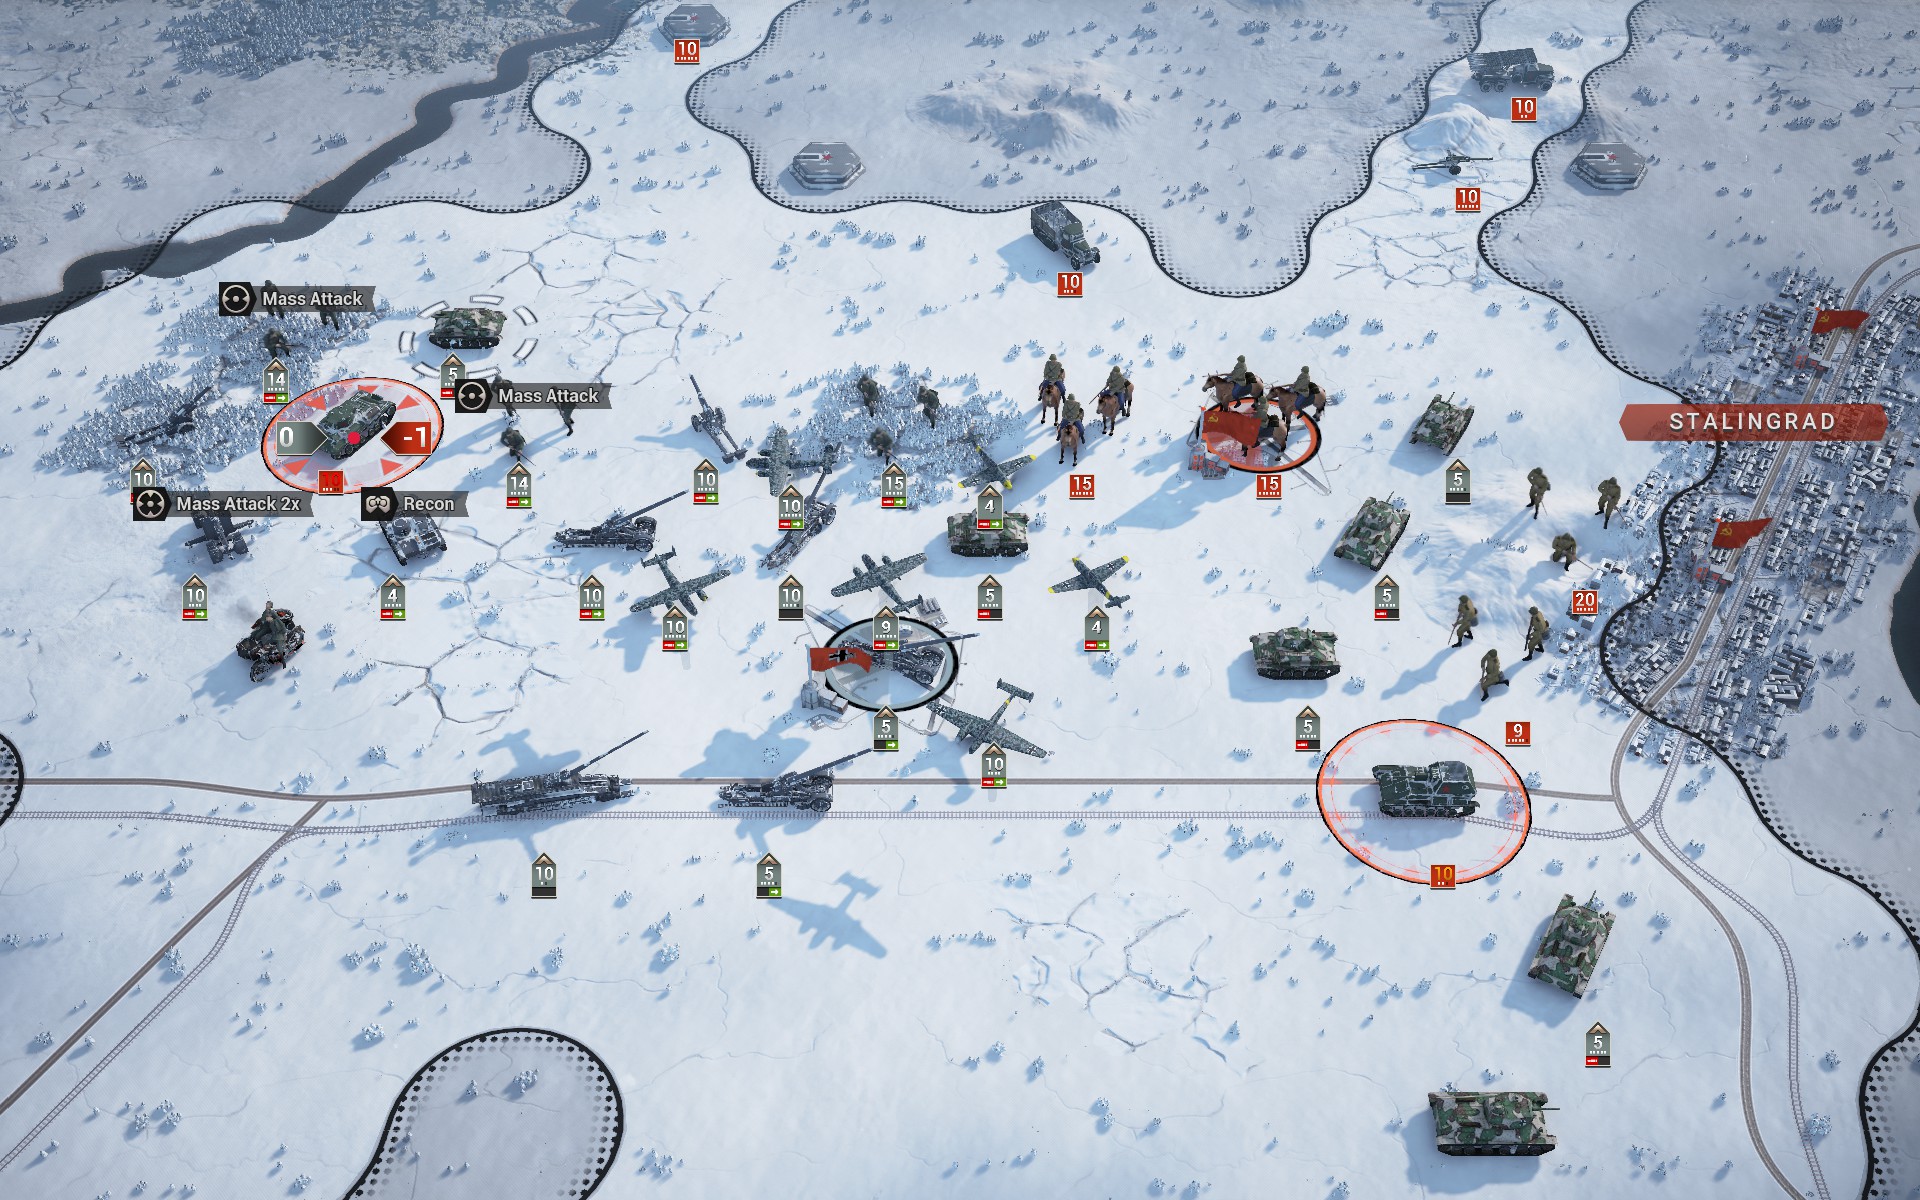
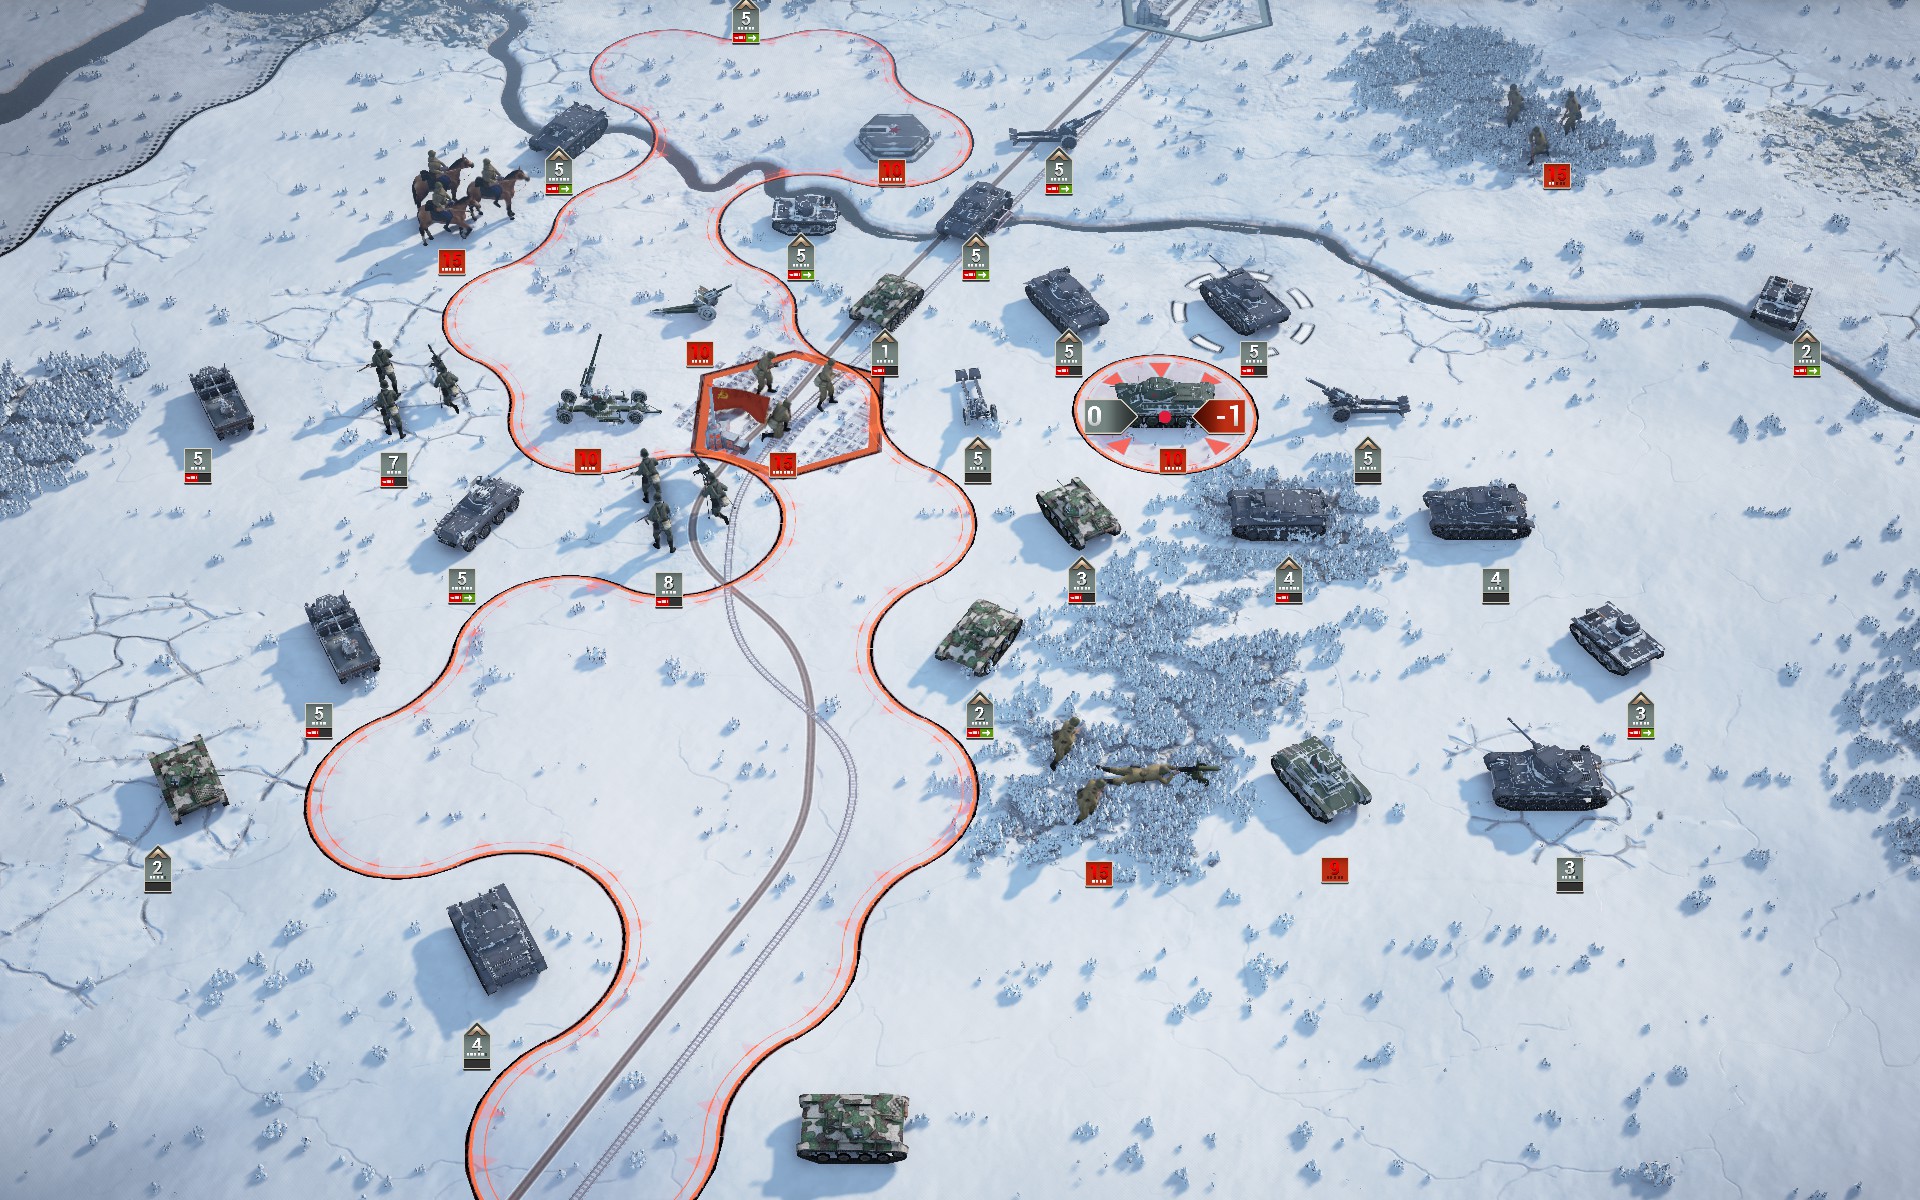
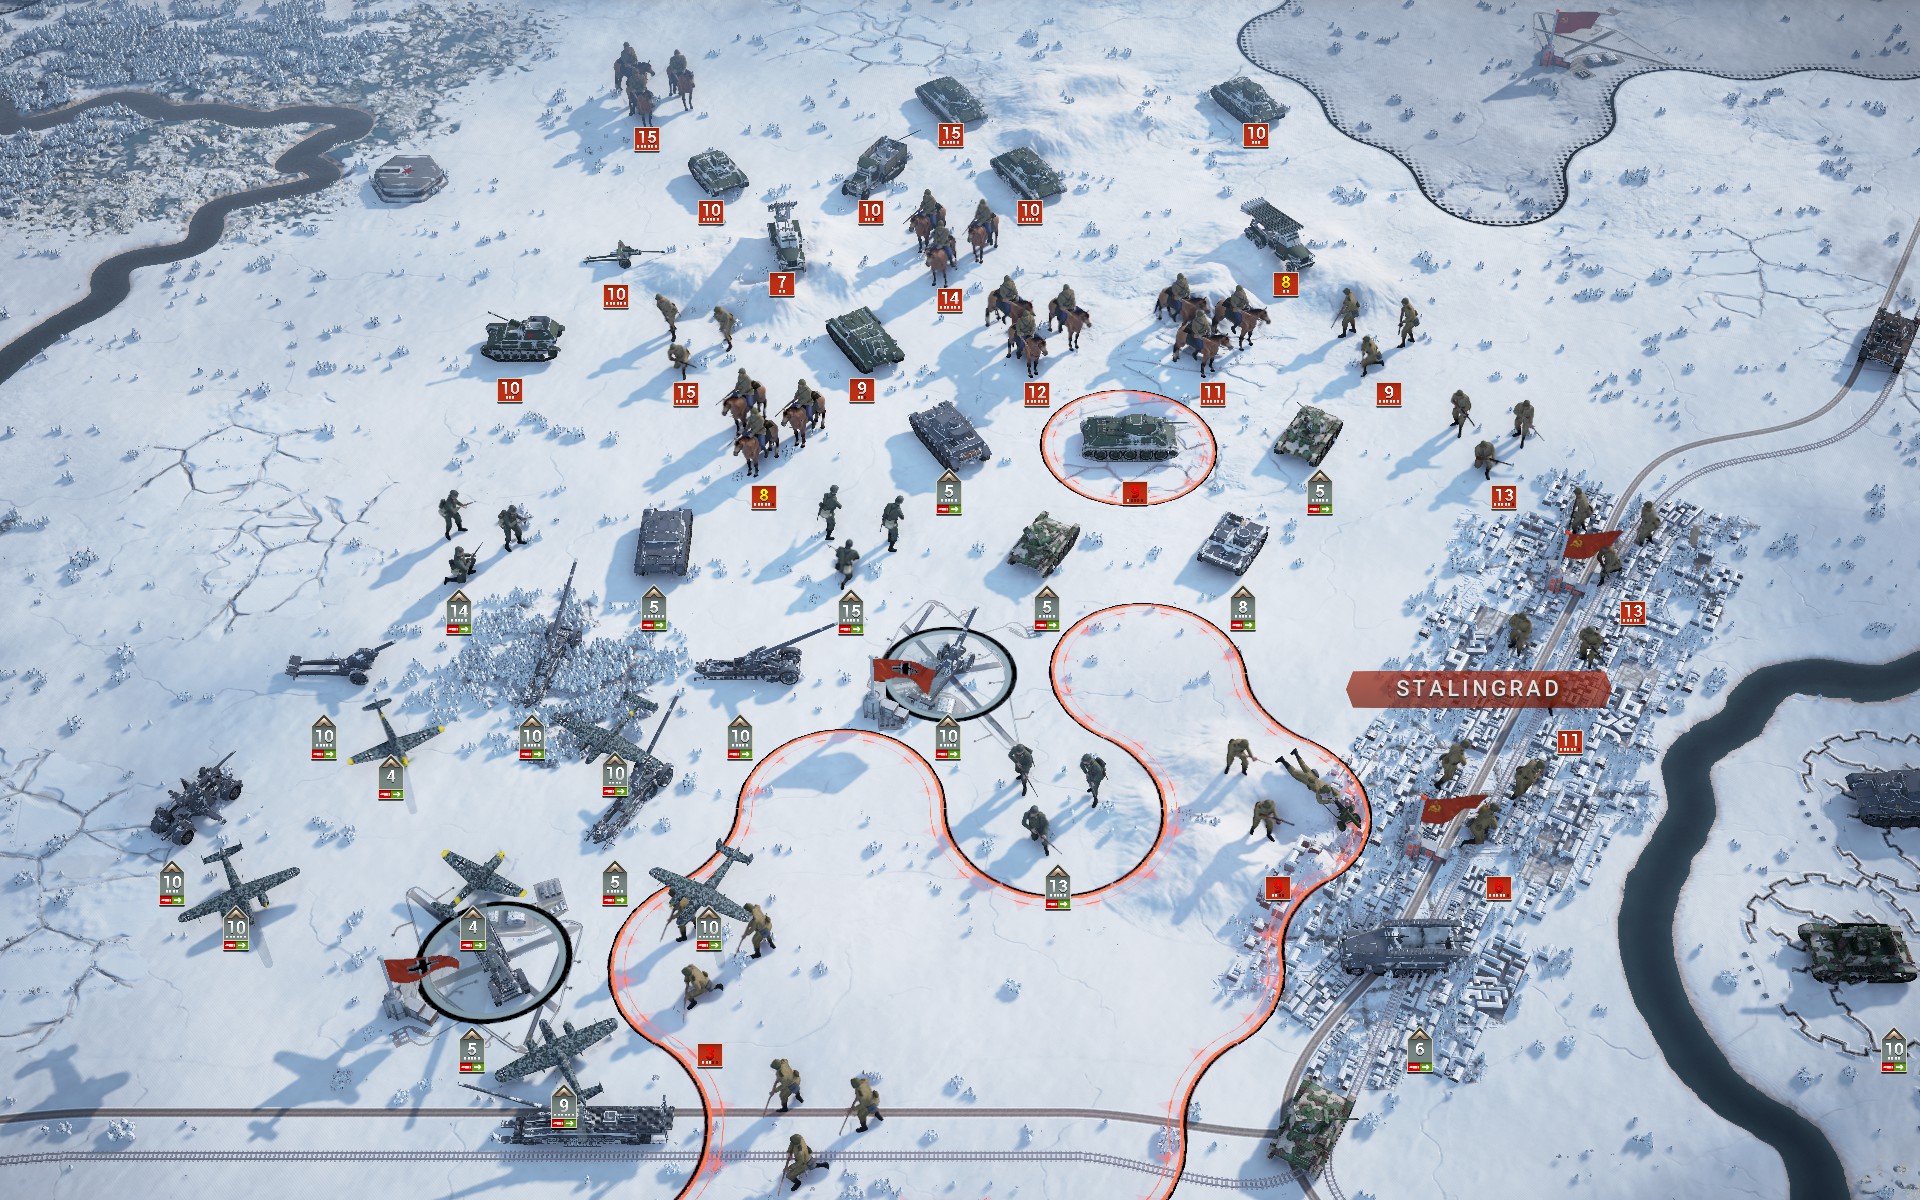
The first wave of Soviet armour crashes into my lines as the heavy artillery is redeployed.

Soviet forces capture the northern airfield, forcing half of my aircraft to rebase across the Volga.
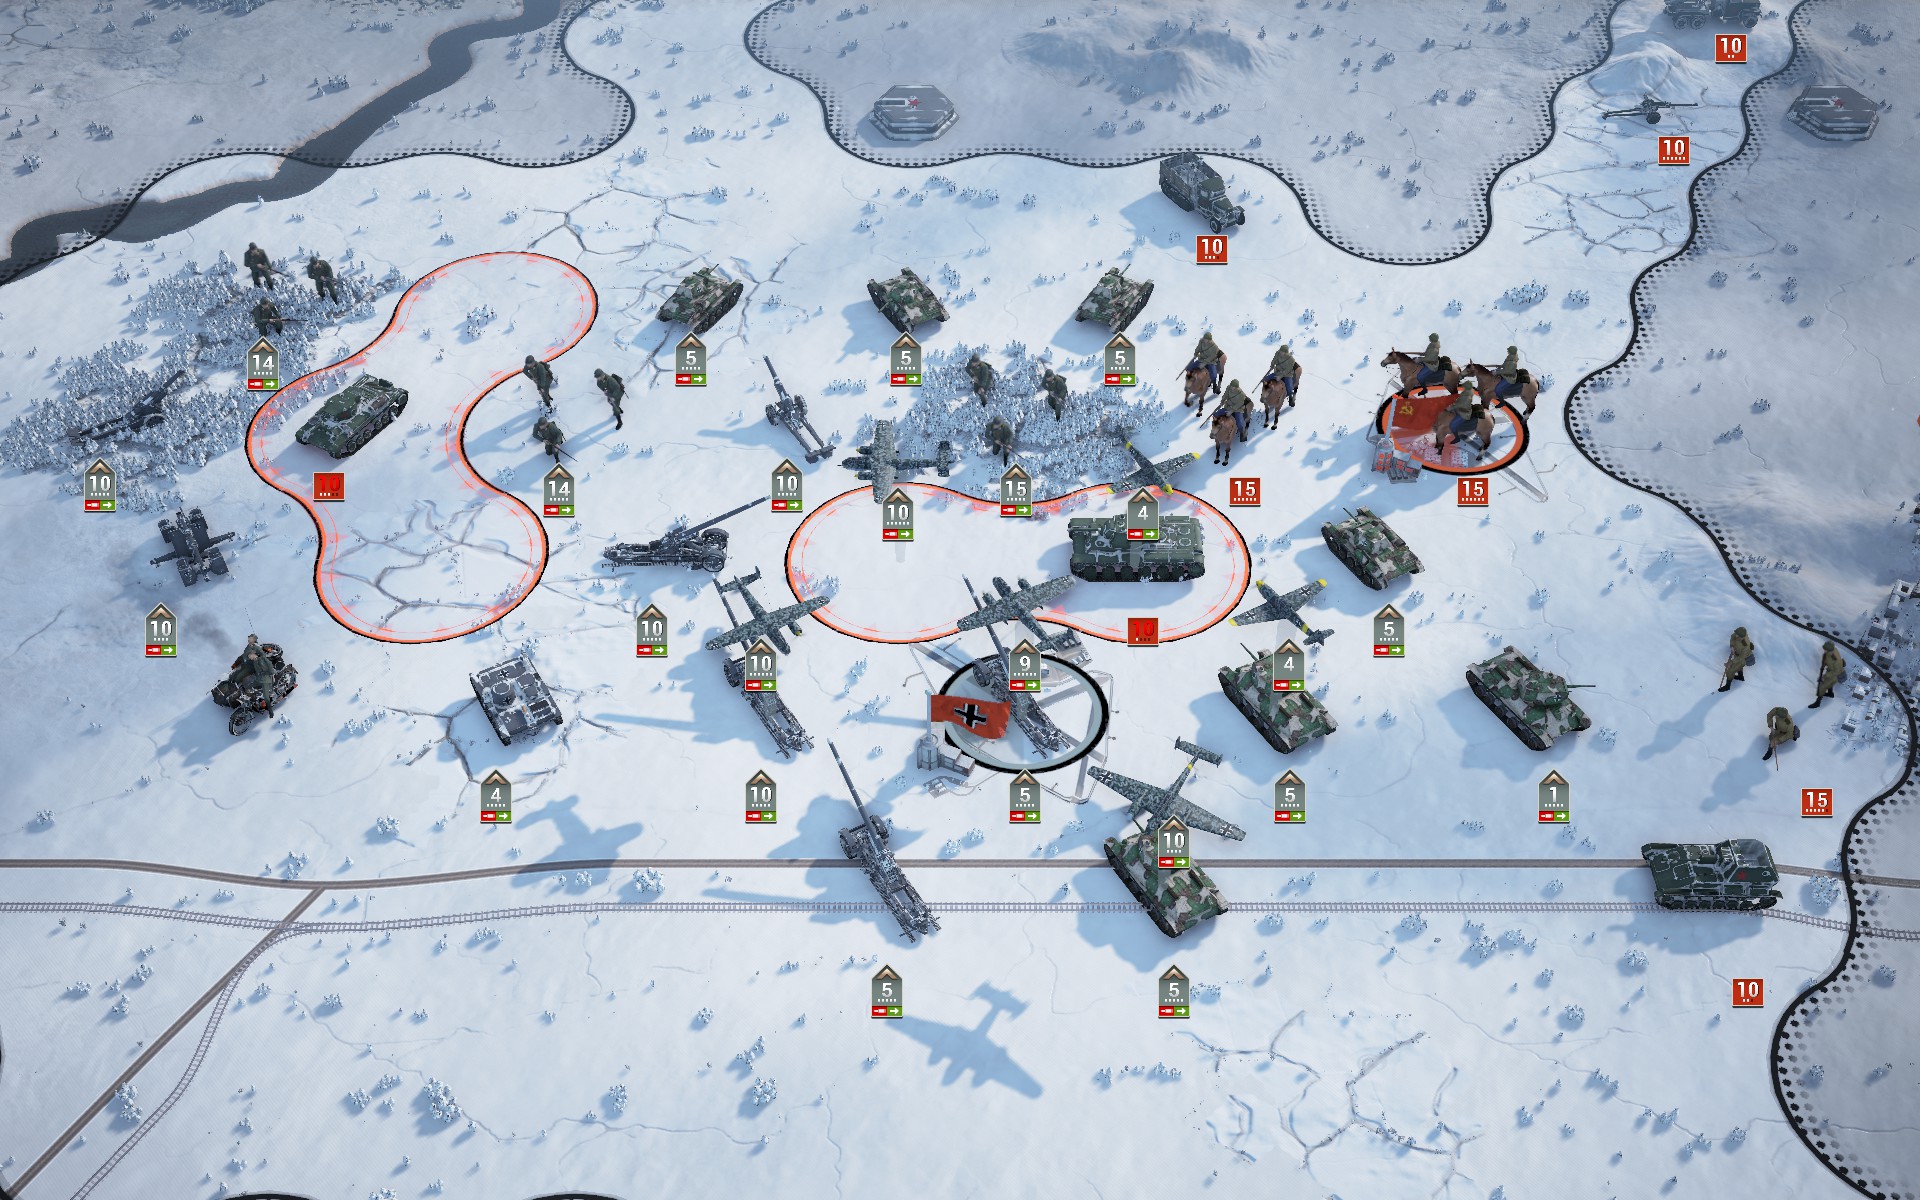
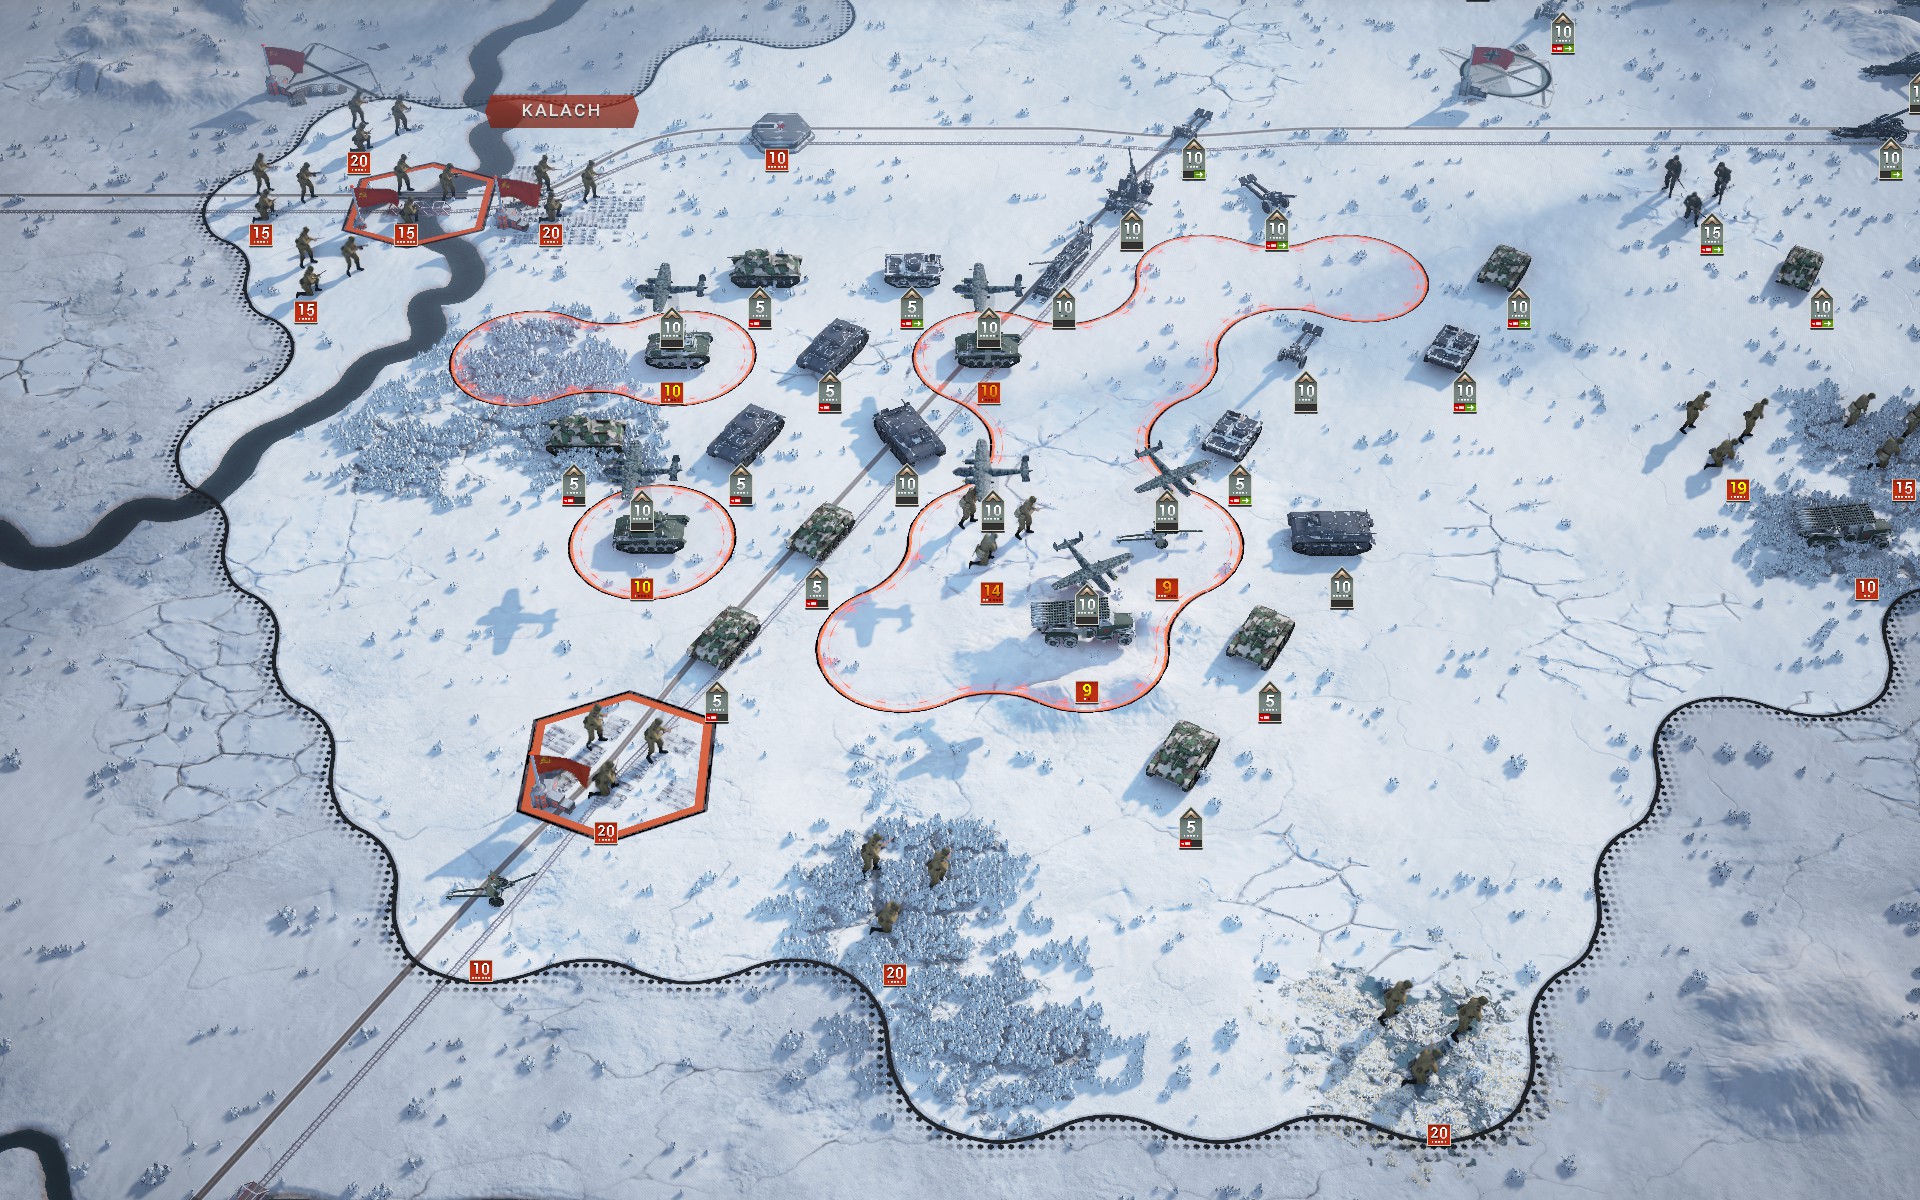
The Panzers exploit the gaps in the stretched Soviet lines to trap the lead elements of the Red Army.
The southern battlegroup, consisting mainly of weaker panzers and StuGs, begins to cross the Aksay.
With snow predicted it's up to my ground forces to recapture the airfield and deny the Red Army the supply hex.
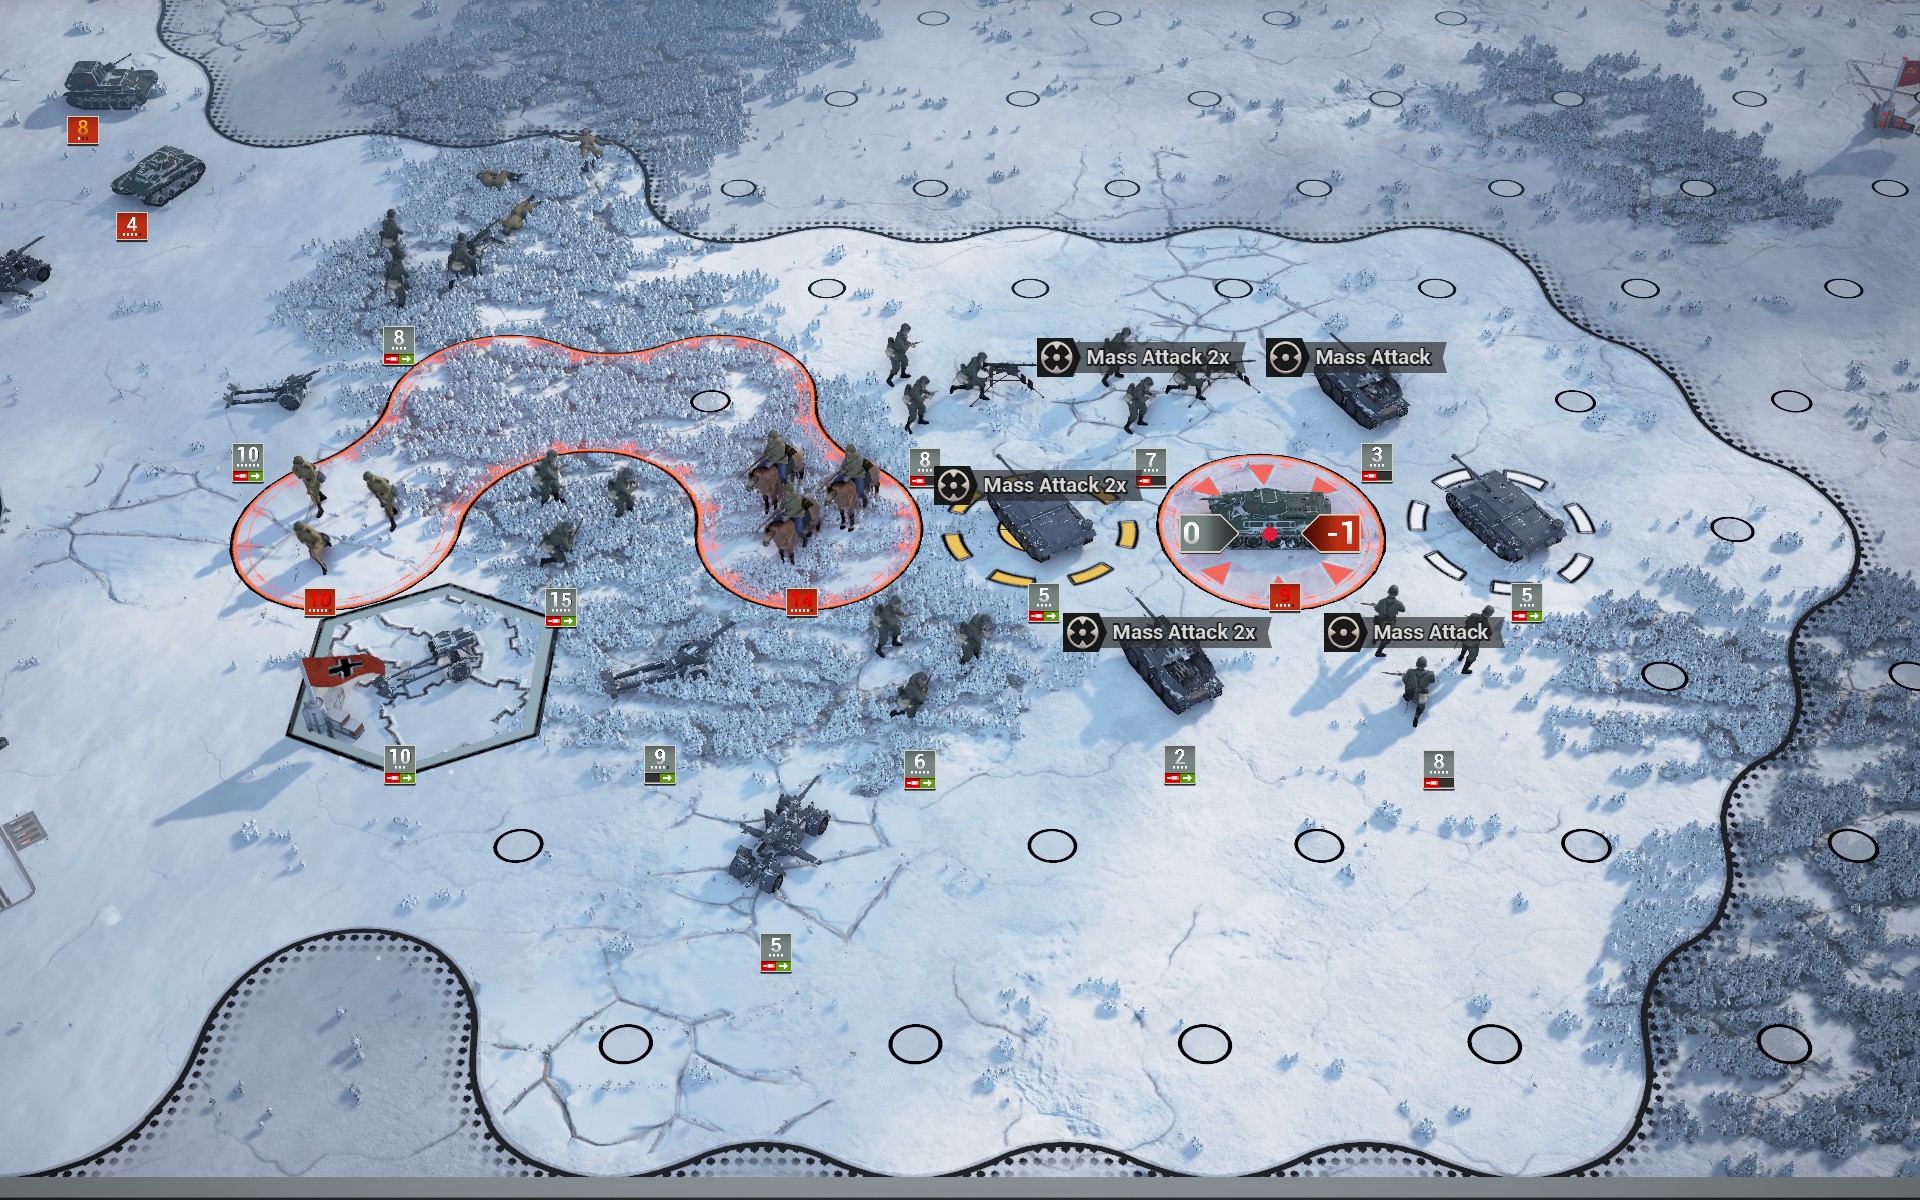
In the south, the auxiliaries smash the Soviet counterattack and prepare to advance east.
The remnants of the Soviet counterattack are encircled. The auxiliaries are performing above expecations.
Oktybarsky is about to fall, ensuring that my forces will remain well supplied. Some of the auxiliary units will be rerouted north, as the Panzers are stronger than my own and will be of more use against Soviet T-34s than against Conscripts.
The remaining encircled Soviet forces are captured.
After three days of snow the Luftwaffe can finally bring down the last Soviet aircraft.

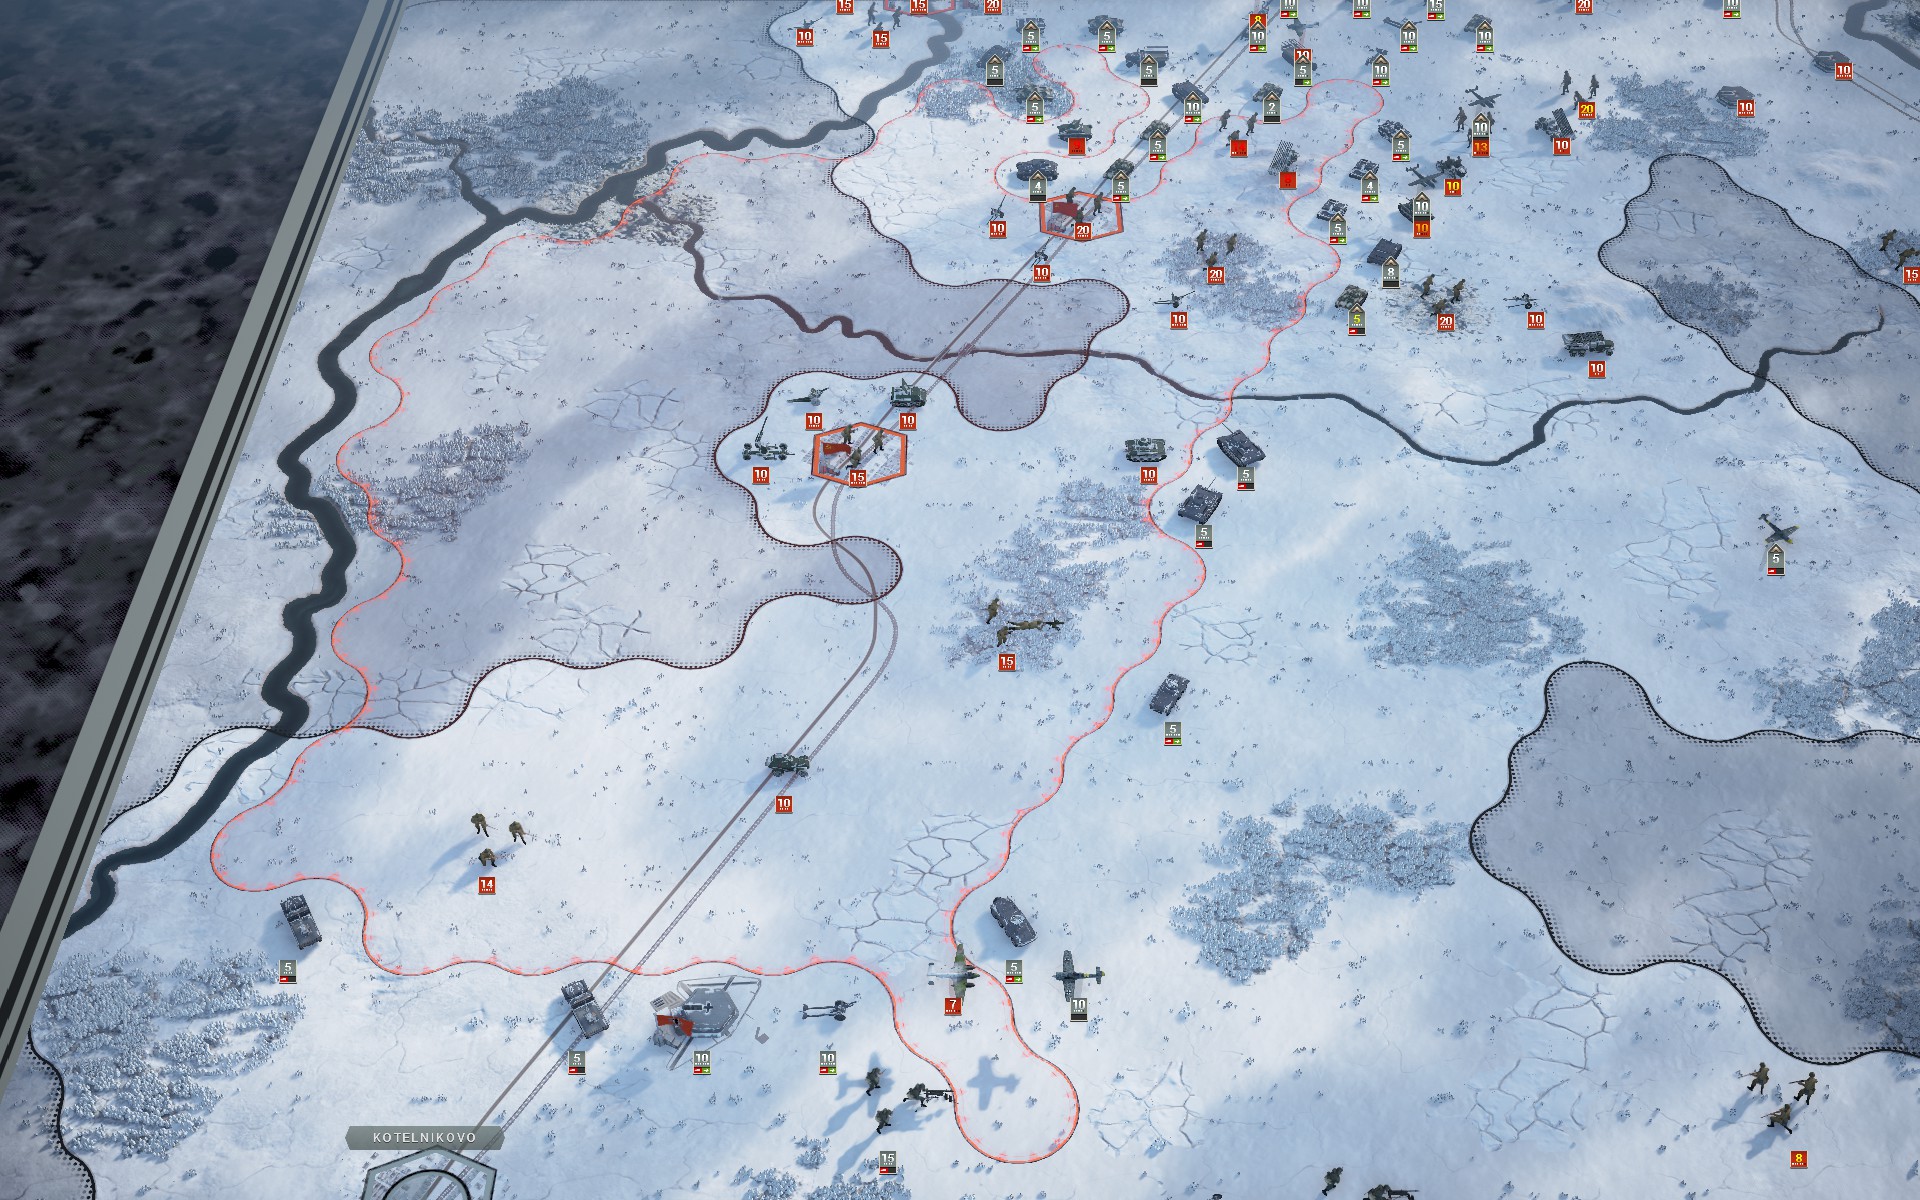
With the south secured, the auxiliaries move north to engage the Soviet reinforcements to the east.
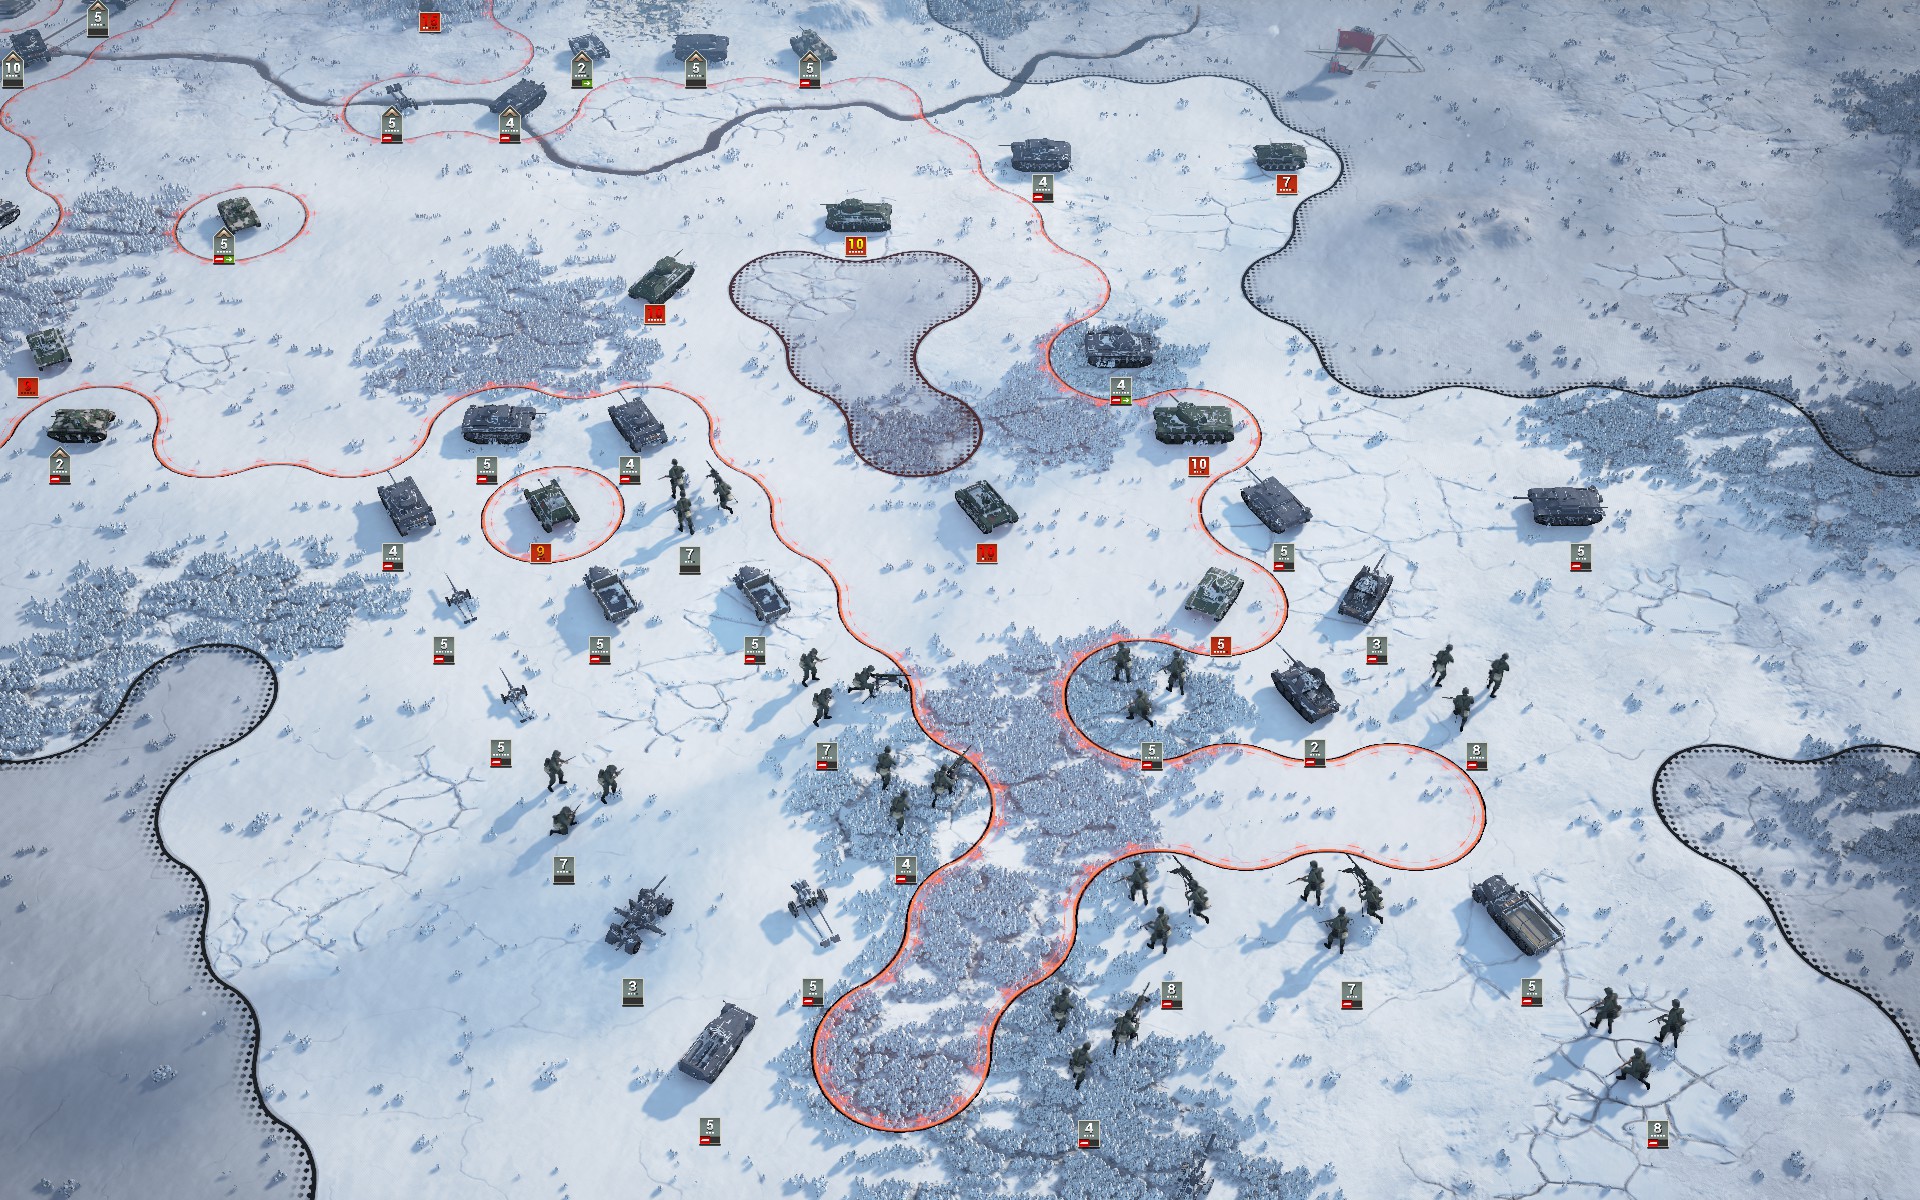
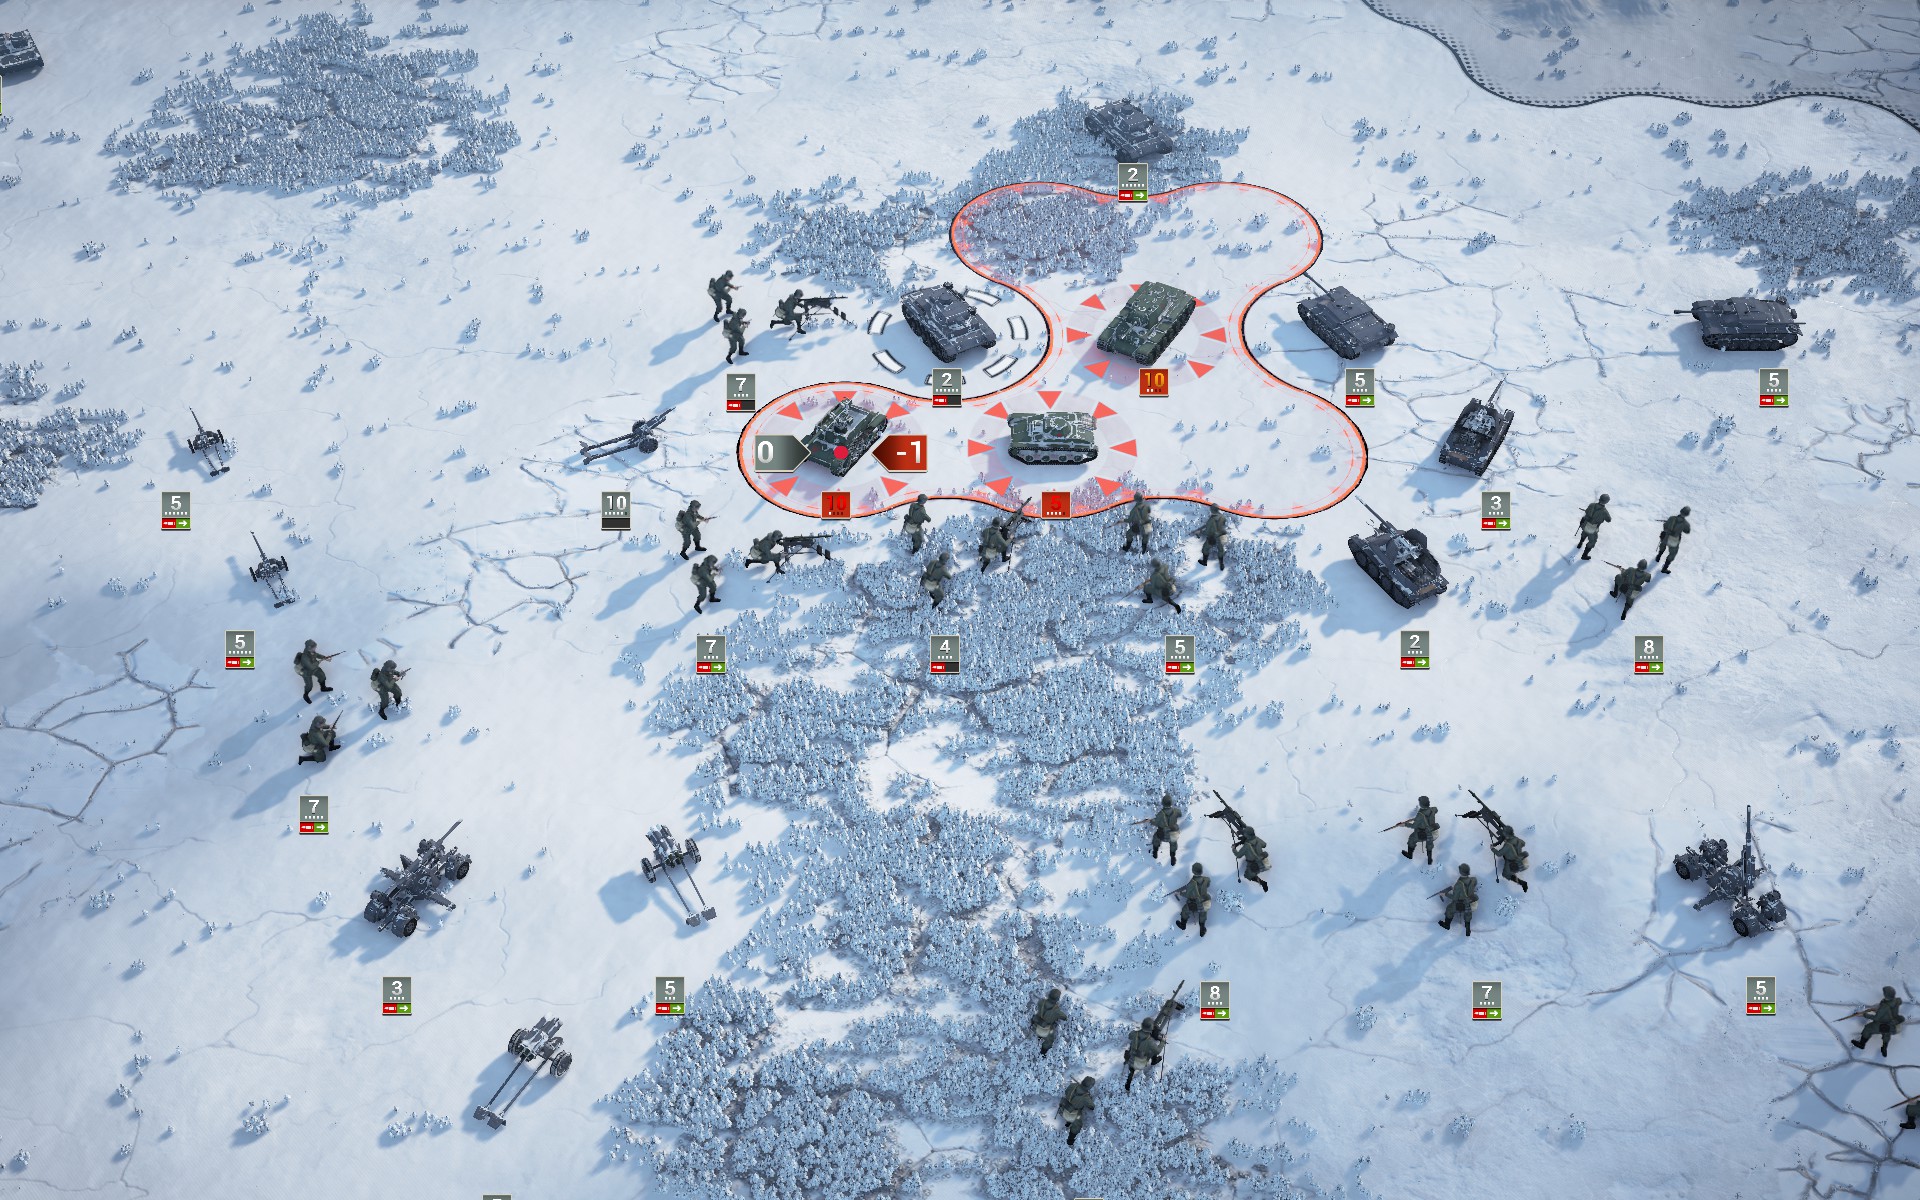
My forces cross back over the Volga in an attempt to flank the Red Army, but encounter fierce resistance.
Heavy losses force the battlegroup to withdraw to the relative safety across the Volga.
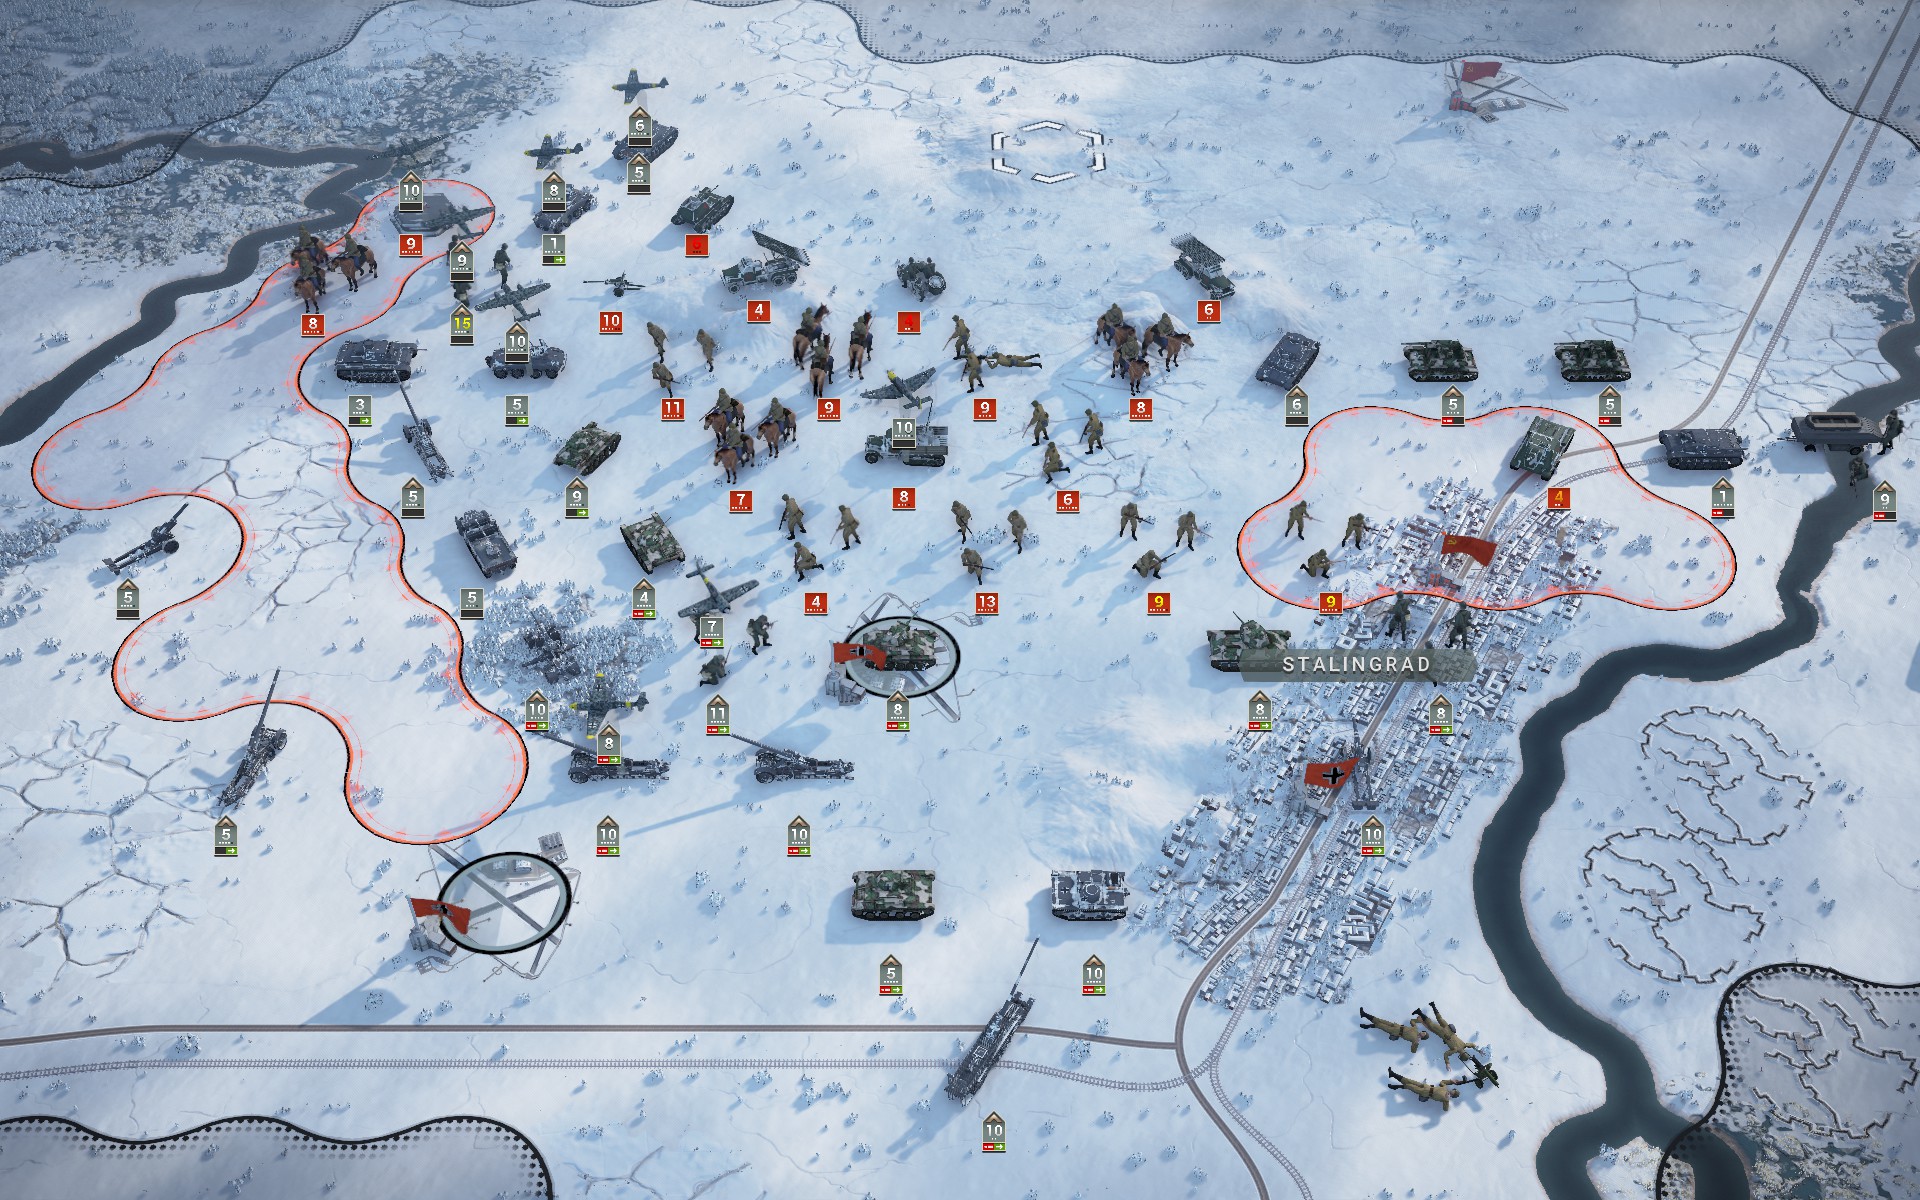
More Soviet armour pours in from the north as weather conditions continue to hamper Luftwaffe operations. To make matters worse, a 15-strength T-34 is spotted at the back of the Soviet forces.
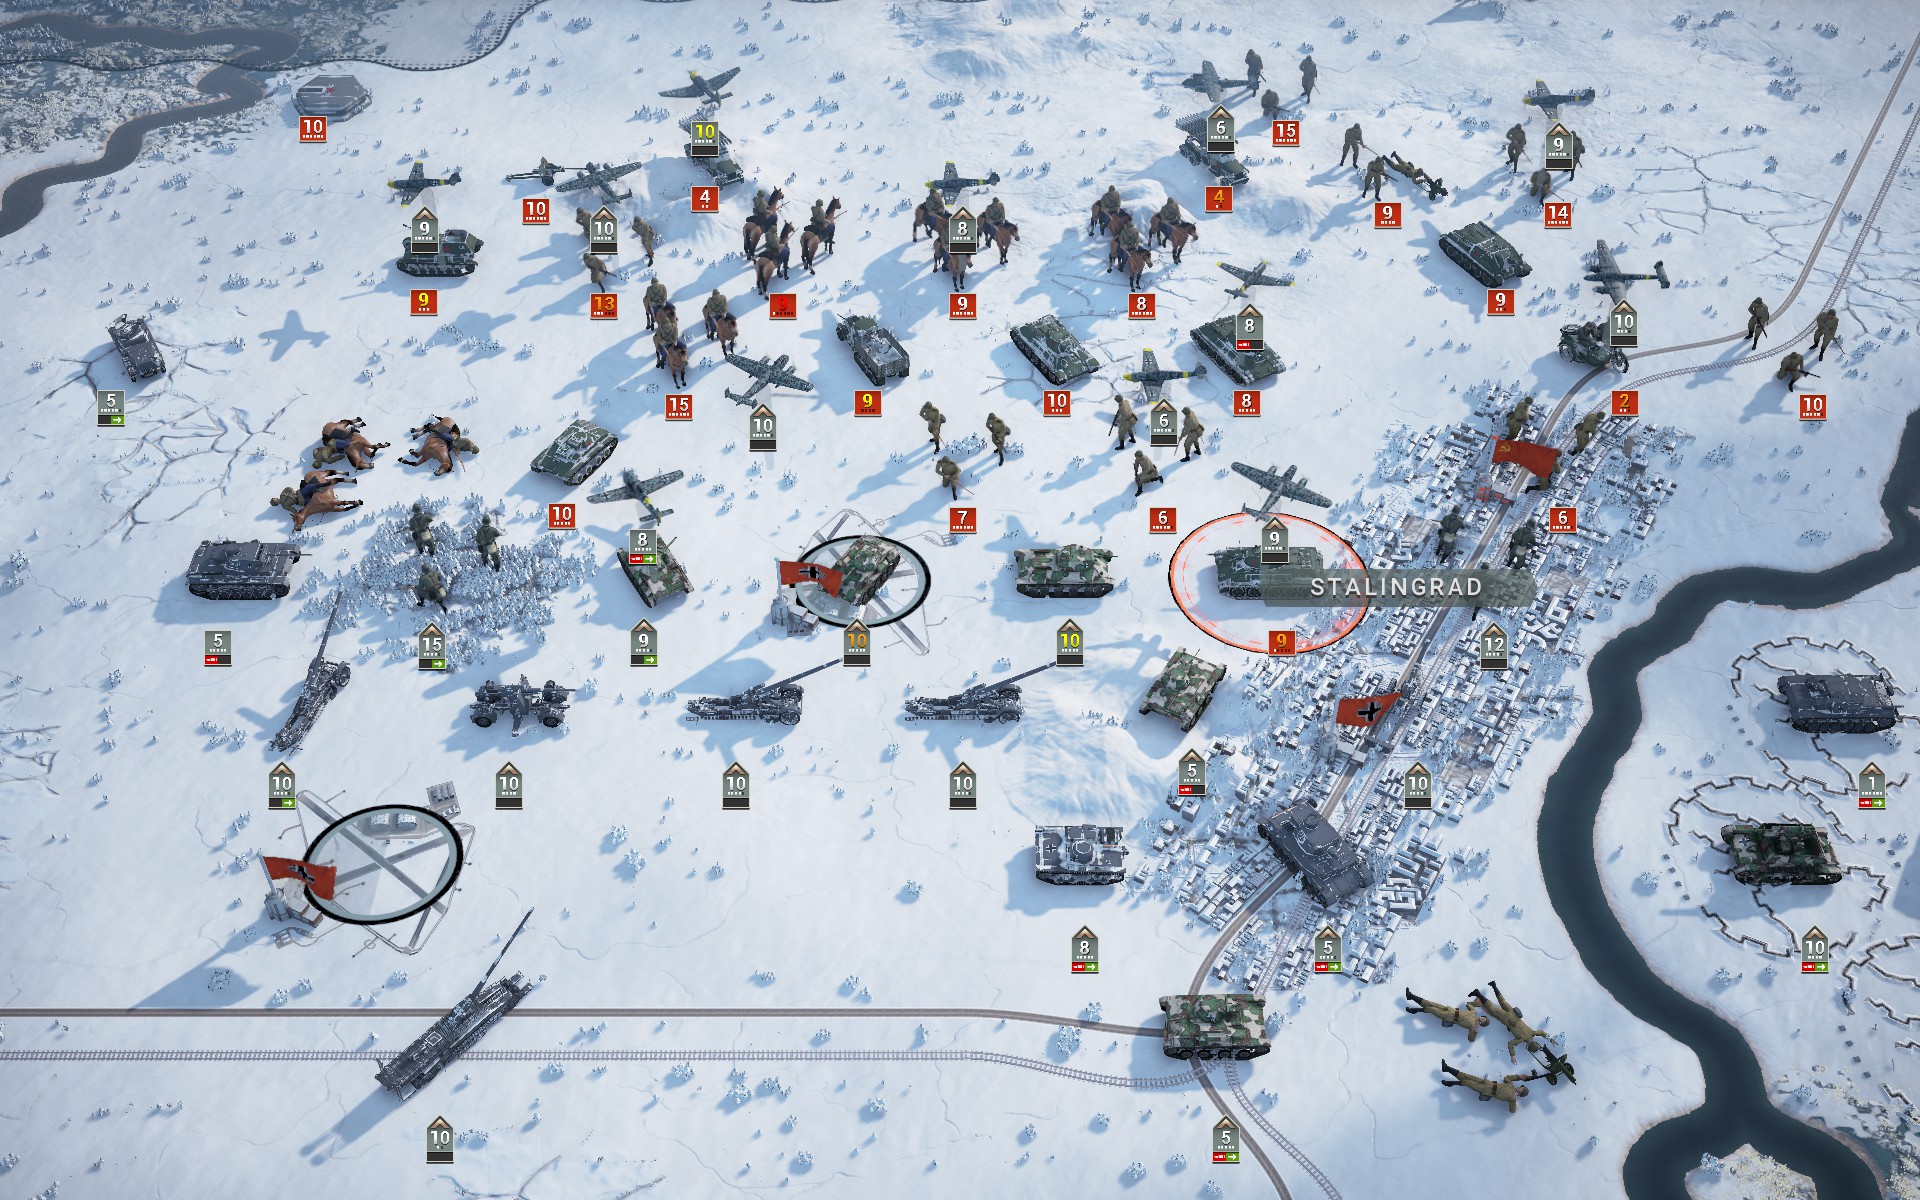
With the skies clearing at last and the Red Army having committed its northern reserves, the time has come to push back. With fire support from the 15 and 17 cm batteries, my Panzers have held the line against the significantly stronger Soviet armour.
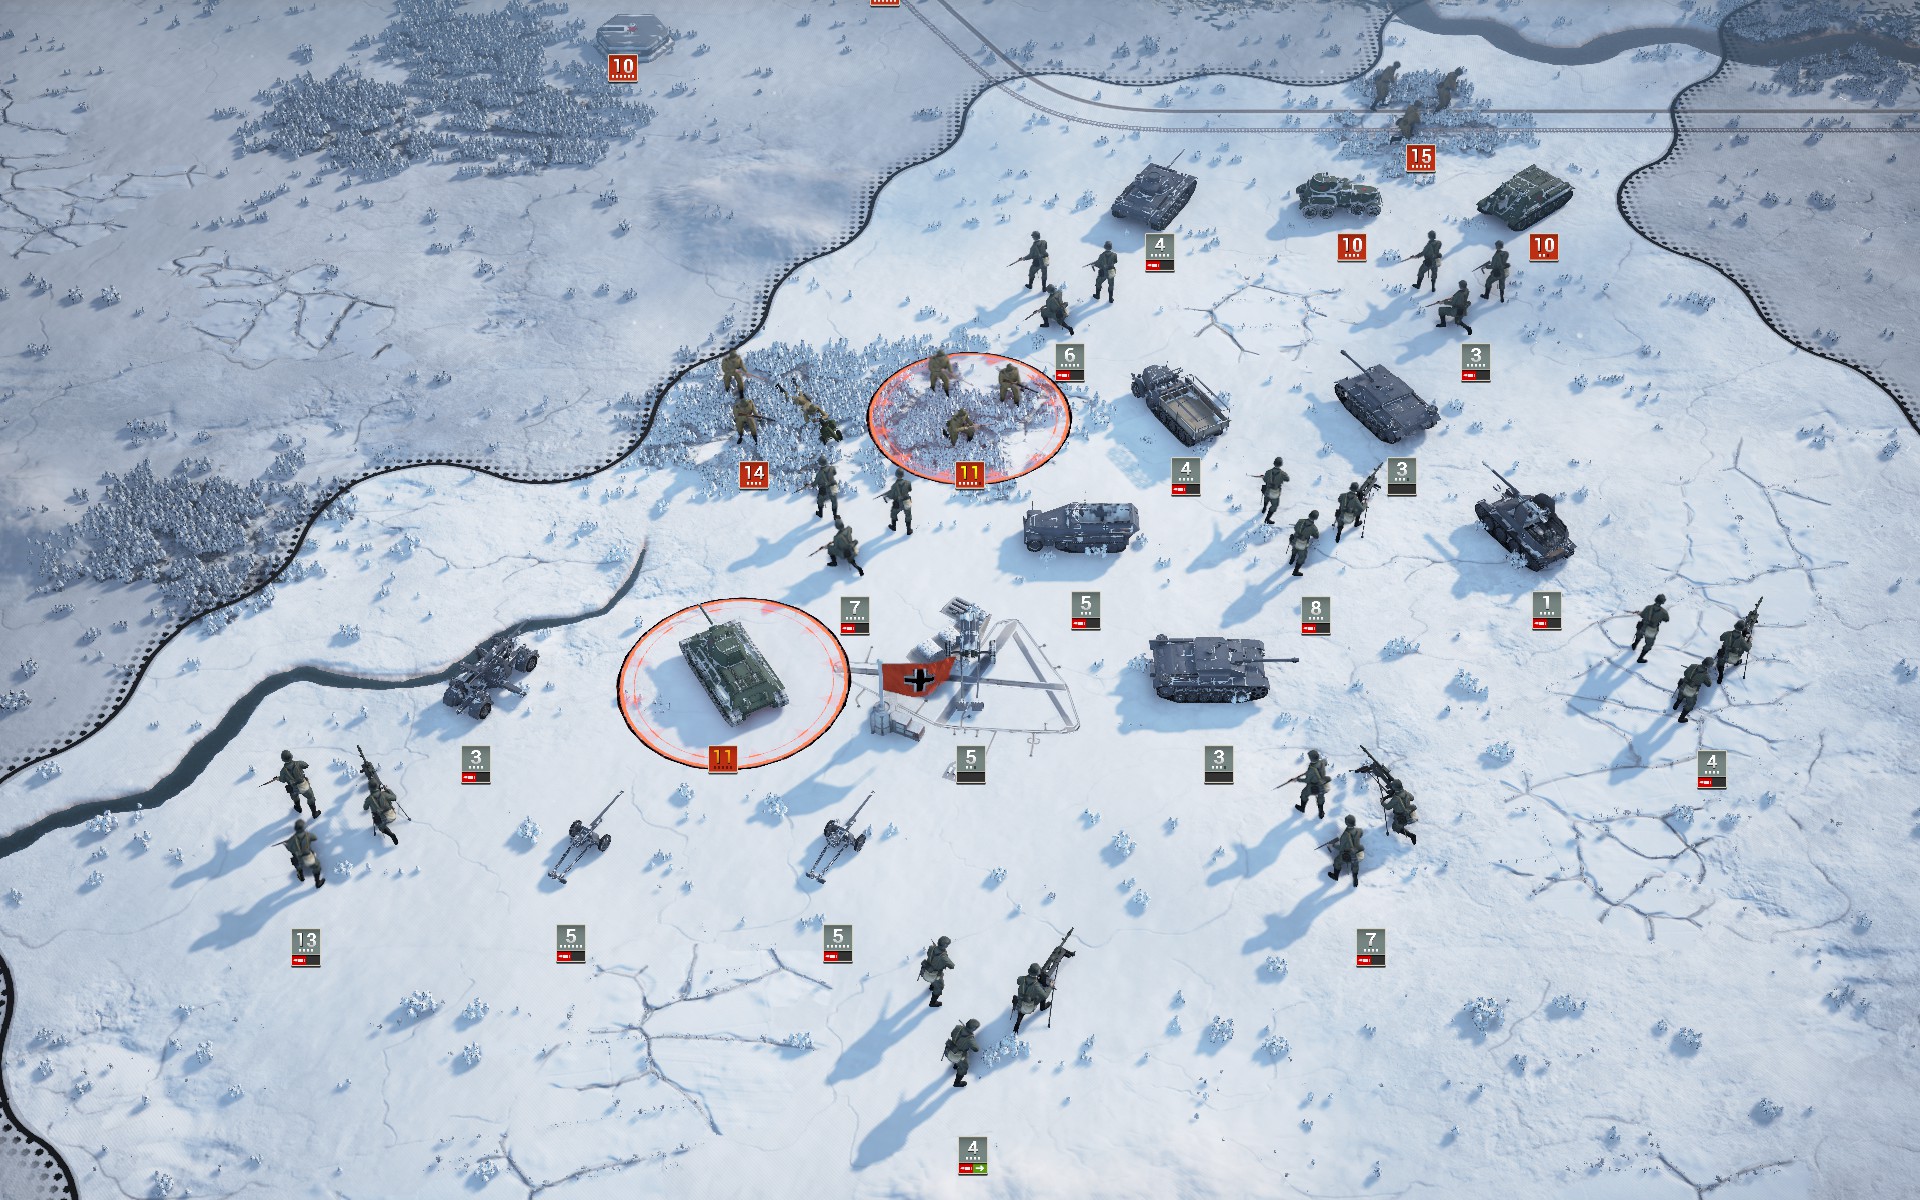
A 12-strength T-34 destroys a number of detached auxiliaries, owing to my being a little too careless with them. Nevertheless the Soviet forces to the east have been largely neutered.
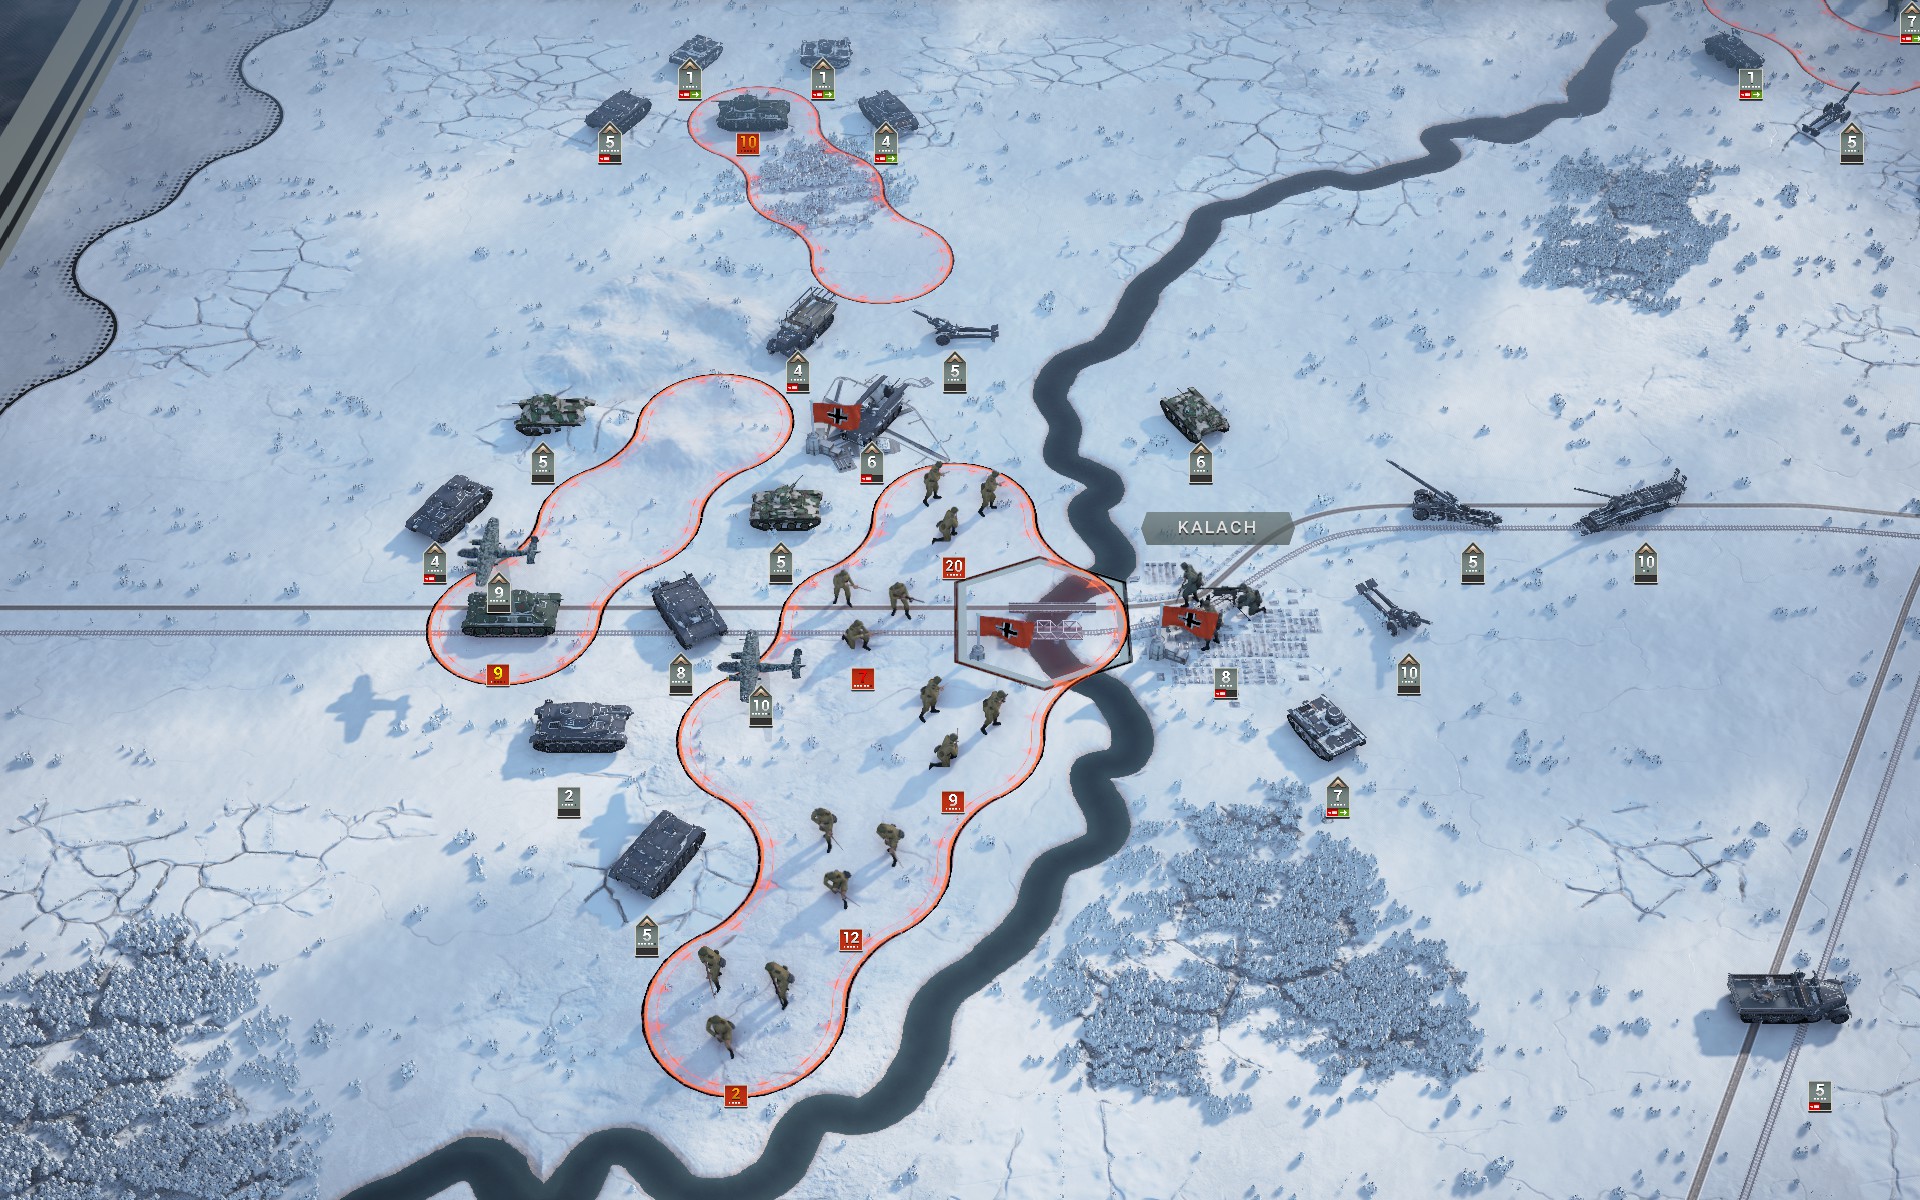
My forces begin to cross the Don to flank the Soviet positions at Kalach.
A Fallschirmjäger, a Fallschirmjäger! My kingdom for a Fallschirmjäger! So close, yet so far away -- a single battalion of Fallschirmjäger on that hills would trap virtually all of the remaining Soviet forces in the north. As access to air transports is likely to be limited in future scenarios, I suspect I will come to miss the tactical options they provide.
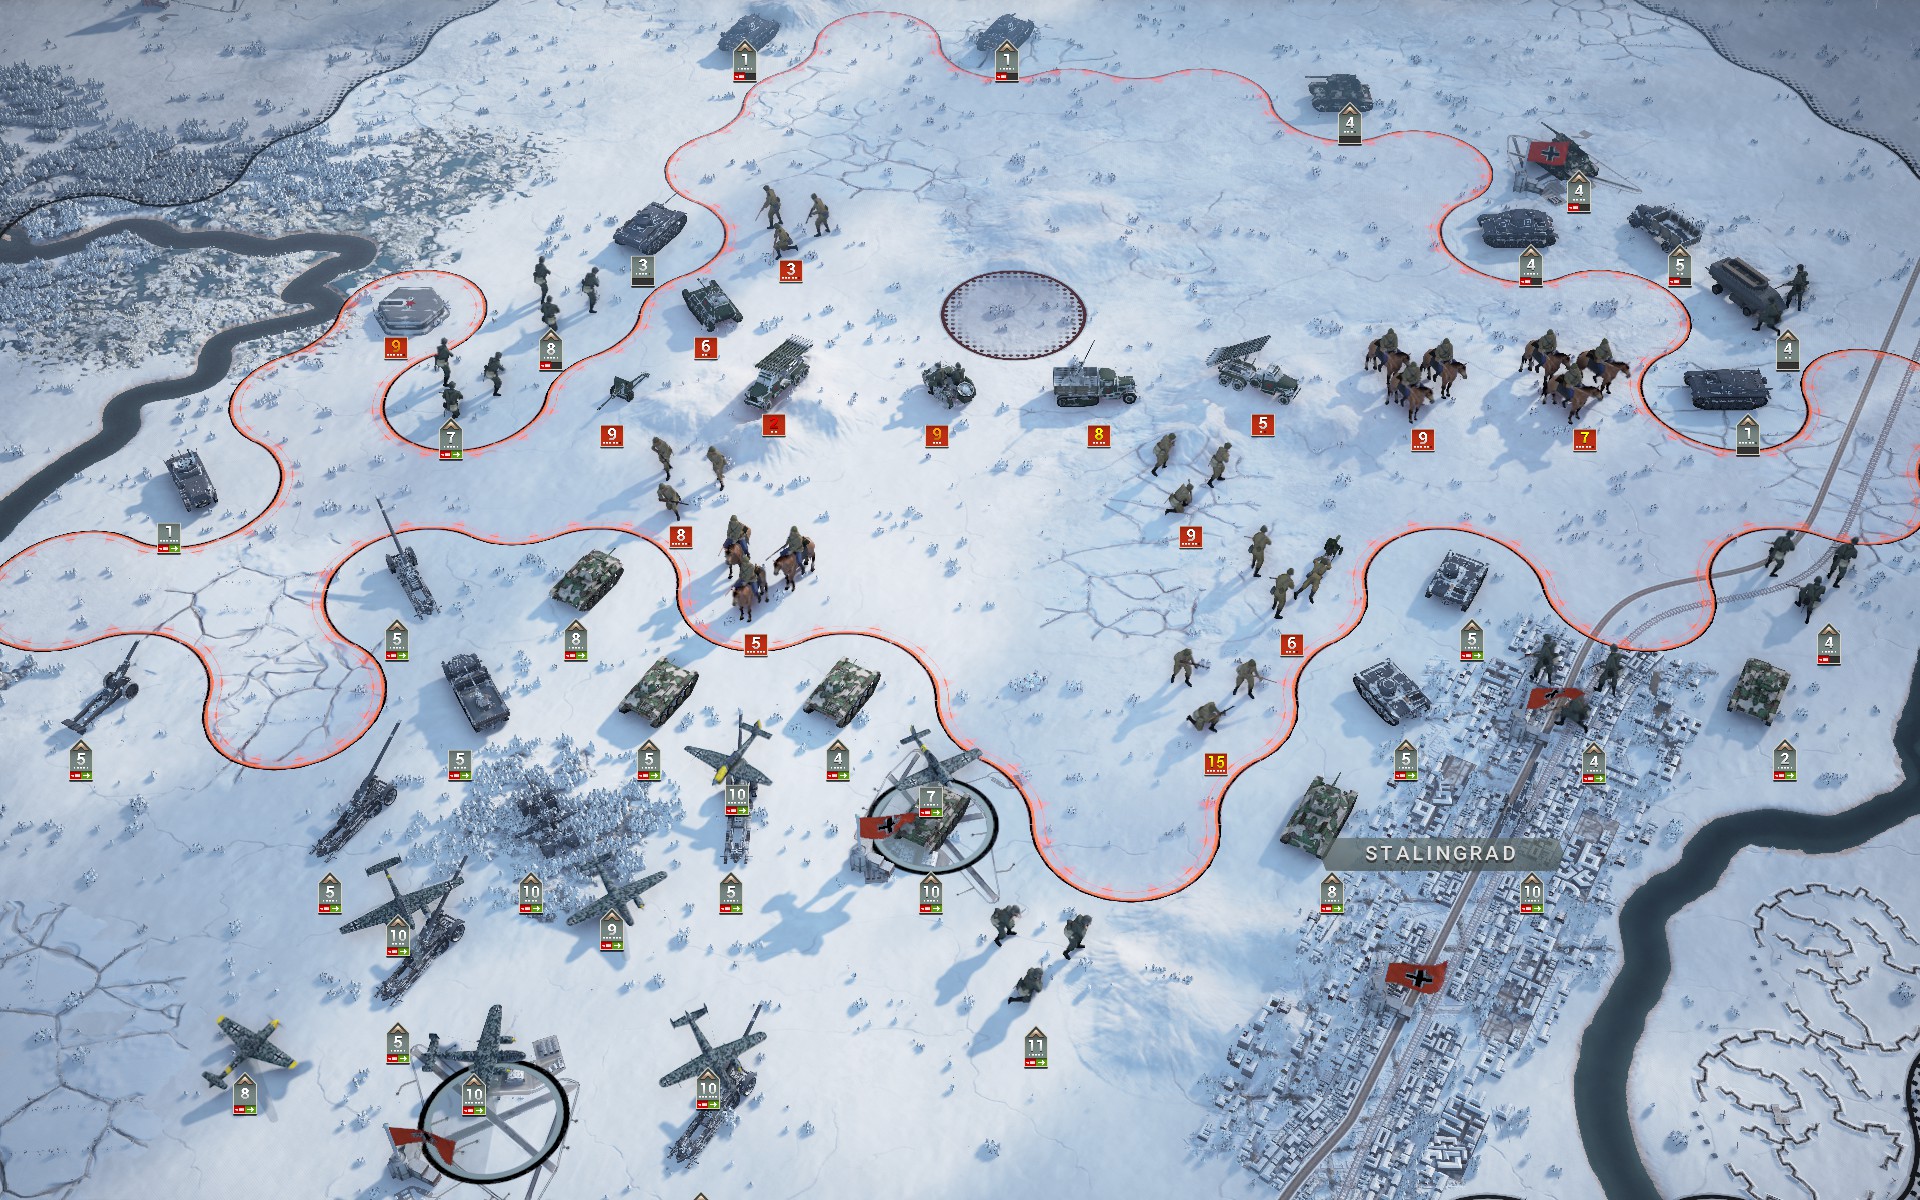
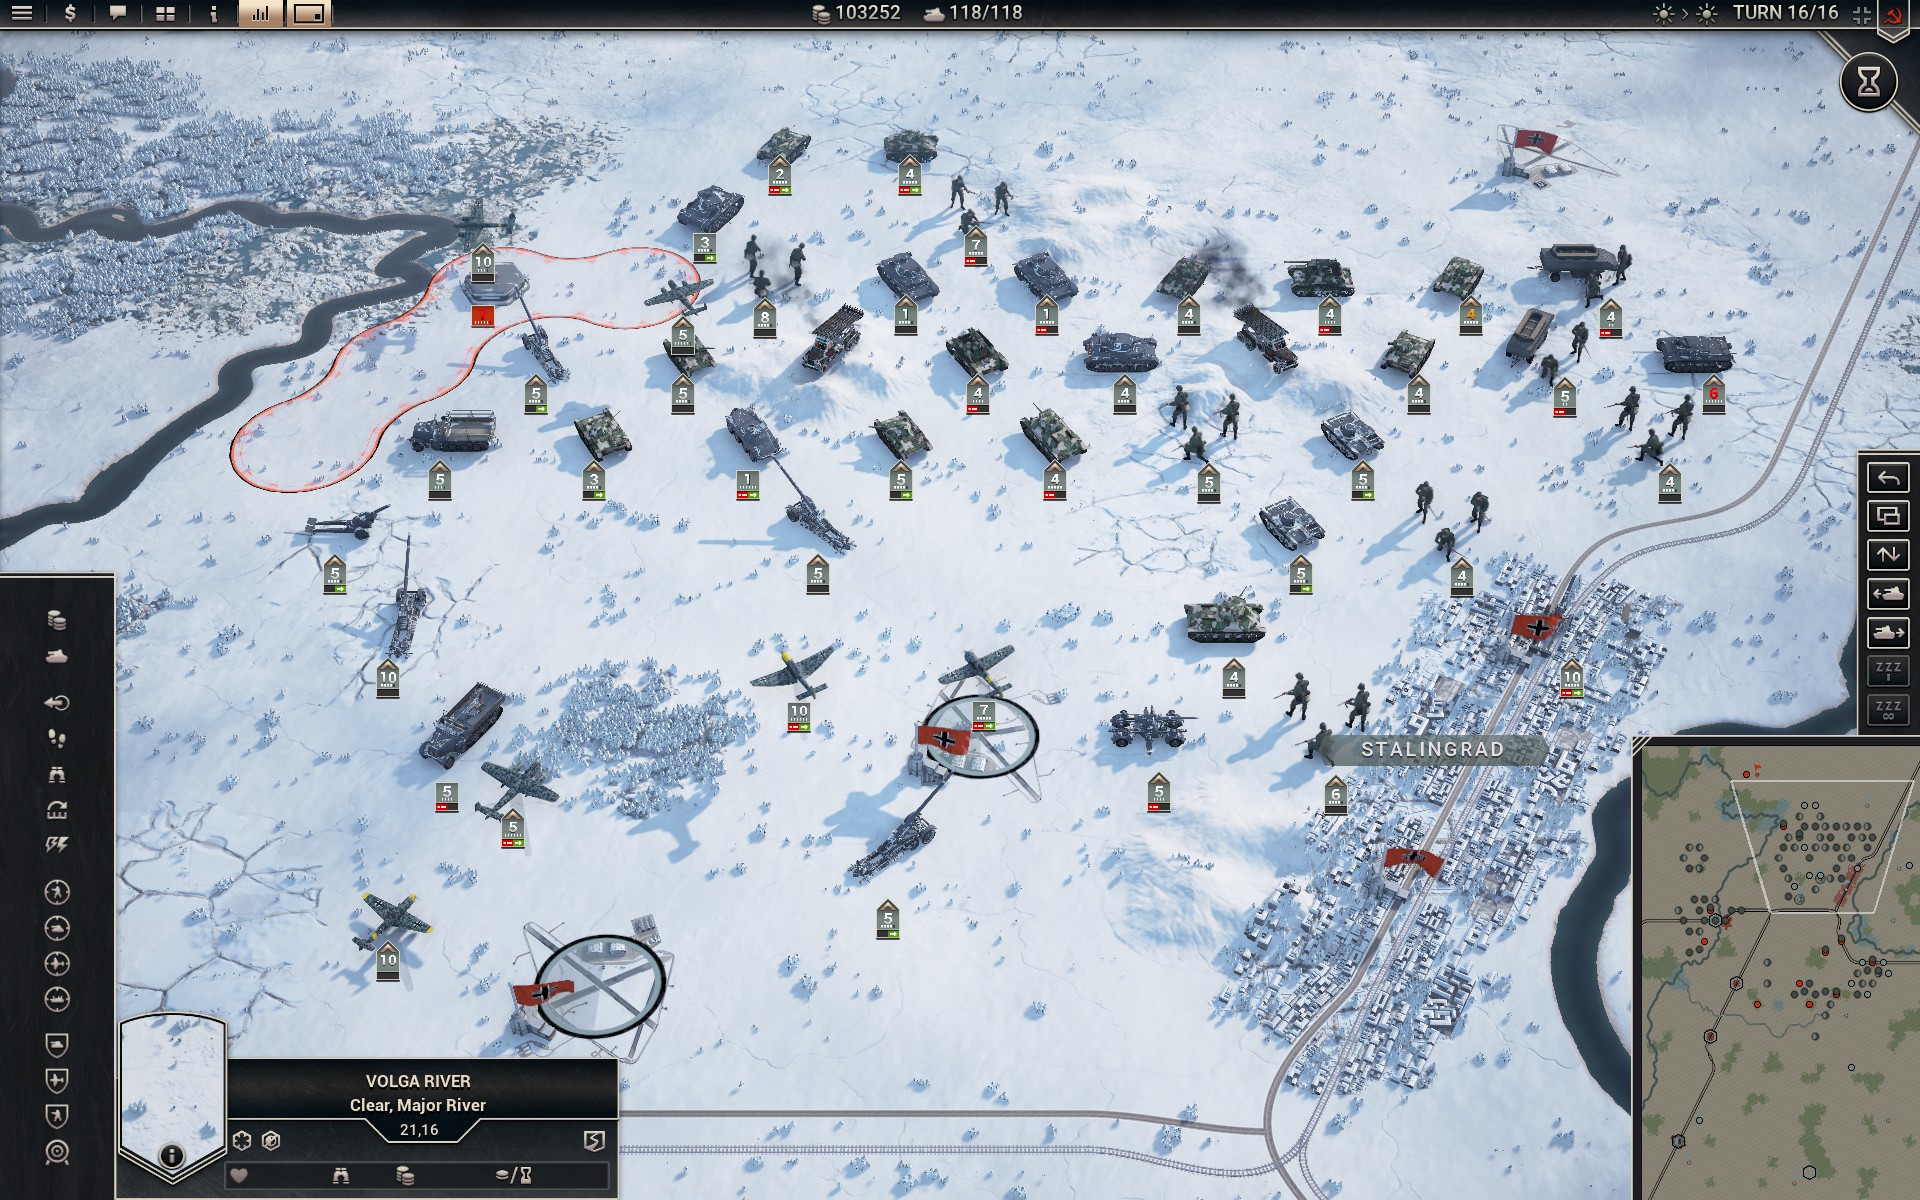
The encirclement is finally complete, but by now the Red Army has been reduced to half a dozen infantry battalions and a few support vechicles.
My forces secure the remaining objective and suppress the last T-34s.
The Soviet forces between the Don and the Volga have been annihilated, and Stalingrad remains in German hands. As my corps begins to withdraw across the Don, my men can do so safe in the knowledge that no Soviet forces remain to harass them.
A few Conscripts are saved by the bell as I run out of time to deal with them.
Well, that was interesting. I hadn't played for a while and almost felt rusty, especially as the patch has clearly changed how the AI behaves in some situations, as evidenced by my early losses to the AA guns. In hindsight I should probably have committed more troops to the Volga crossing, so as to ensure that the battlegroup would be strong enough to breach the Soviet lines later. As it were the tactical value of the operation was rather limited, but at least the prestige gains were substantial. Heavy snow prevented me from fully utilizing the Do 217Es, but I knew that was always likely to be the case, and in any event they still proved useful as the snow made the towed artillery too immobile to adapt.
The auxiliary force is almost too strong, and the scattered Soviet forces in the south are no match for them. It's probably intentional as to make sure the player can focus on the very real threat to the north, but they ended up sweeping aside the eastern reinforcements as well. Then again the scenario is not likely to be balanced based on how the average Generalissimus player would use the auxiliaries. Despite investing heavily into artillery I ended up suffering catastrophic losses at one point and eventually had to spend thousands of prestige to fully restore the core, including what I spent during the battle itself, because the Soviet armour rolled over my cheap Panzers without a care. I suspect the time has come to retire the cheap and versatile Panzers, especially as the Soviet infantry is about to receive a substantial upgrade to hard attack across the board.
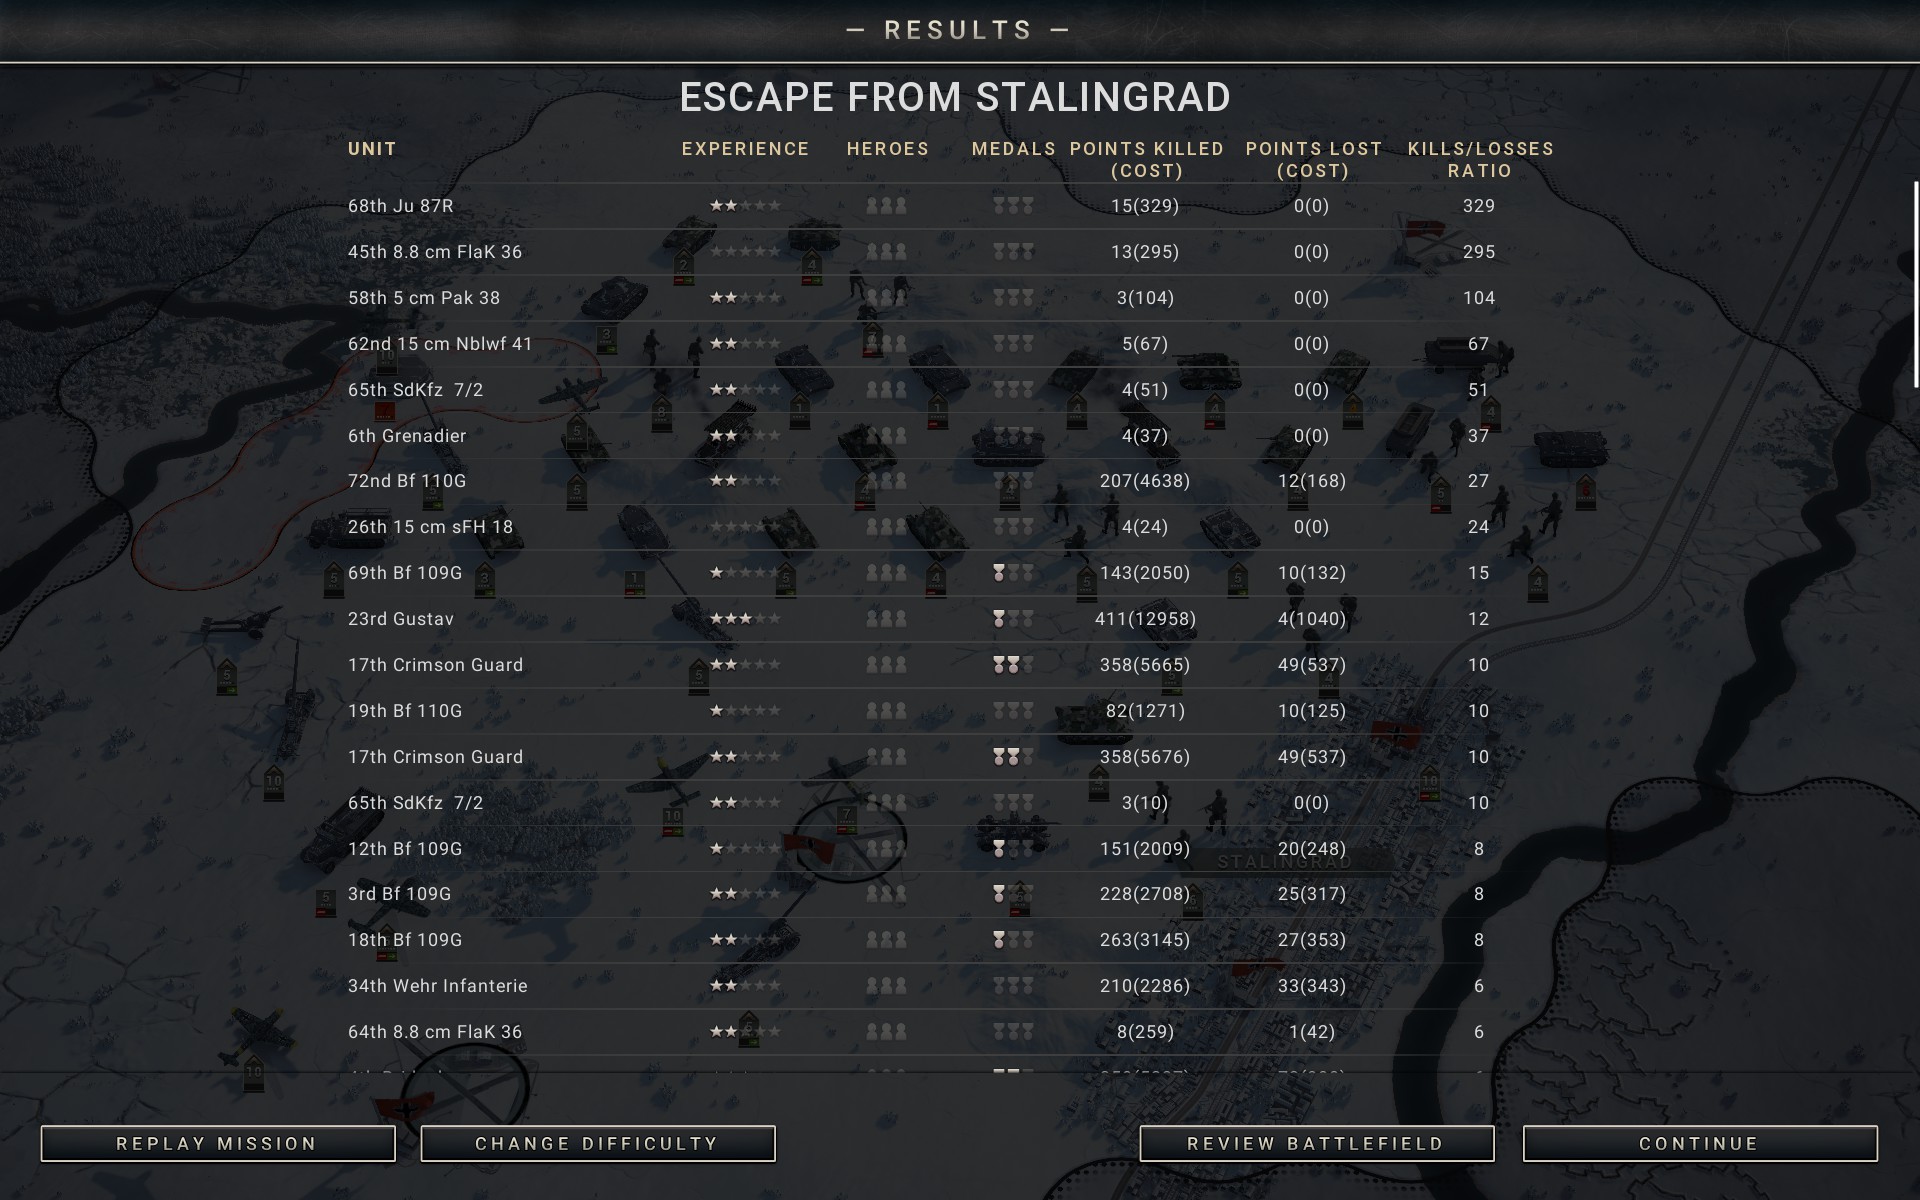
I still ended up making a ton of prestige, however, which isn't surprising considering the value of the units involved -- a T-34 is worth over 400 prestige, which means that they alone accounted for over 6500 prestige. It certainly makes it easier to swallow the losses. It'd probably have been better to simply head west with my entire core and set up a strong defensive line there, despite their numbers the Soviet armour proved manageable as they didn't arrive en masse; I'm not sure whether that was because I staggered the capture of the objectives or if it's part of the scenario design. All in all it was one of the better scenarios, and it has given me a few things to consider as the rest of the campaign will likely force me to defend against similarly armour-heavy Soviet forces, not the least because it confirmed that the AI is loath to attack heavily entrenched infantry.
A large number of detached units were destroyed.
To illustrate my point about the T-34s, I have captured over 30 complete tanks -- I've lost a few points of strength of T-34/40s in battle -- and as there were at least 16 in this scenario alone, the Soviet armoured forces were rather intimidating; to put it in perspective, I believe there were 5 of them in the Battle of Moscow, and while that was a very different kind of battle the difference was noticeable, not the least because I've made extensive use of cheaper and weaker units.
Initial Prestige: 82205
Final Prestige: 103252
Core
- Infantry
- Wehr Infanterie [NEW]
- Wehr Infanterie [NEW]
- Wehr Infanterie [NEW]
- Brückenpioniere w/ Opel Blitz [NEW]
- Tanks
- SdKfz 251/7 Brücken [NEW]
- T-50
- T-50 [NEW]
- T-60 [NEW]
- T-60 [NEW]
- T-60
- T-60
- T-70 [NEW]
- T-70 [NEW]
- Panzer IVF
- Panzer IVF
- Panzer IVF
- Recon
- T-38 [NEW]
- T-38 [NEW]
- T-38 [NEW]
- Artillery
- Schwerer Gustav
- 17 cm K 18 w/ SdKfz 7
- 17 cm K 18 w/ SdKfz 7
- 17 cm K 18 w/ SdKfz 7 [NEW]
- 15 cm sFH w/ SdKfz 7
- 15 cm sFH w/ SdKfz 7 [NEW]
- 15 cm sFH w/ SdKfz 7 [NEW]
- 15 cm sFH w/ SdKfz 7 [NEW]
- StuG IIIB
- StuG IIIB
- StuG IIIB
- Anti-Aircraft
- 8.8 cm FlaK 36 w/ SdKfz 7
- SU-6
- Fighters
- Bf 109F
- Bf 109F
- Bf 109F
- Bf 109F
- Tactical Bombers
- Bf 109 PR [NEW]
- Bf 110F
- Bf 110F [NEW]
- Strategic Bombers
- Do 217E
- Do 217E
- Do 217E
- Do 217E
- Do 217E [NEW]
- Do 217E [NEW]
This scenario presents a very different challenge to Stalingrad, prompting a drastic overhaul of the core. The task seems deceptively easy as my forces will be deploying close to the objectives, giving me ample time to capture them. The devil is in the details, however, as I am required to hold the objectives at the end of the scenario, not merely capture them. This suggests that the main threat will come from the north or east in the form of a Soviet counterattack; given the terrain and conditions on the ground, I expect a heavy concentration of Soviet armour. 3 battalions of Wehr Infanterie will be deployed in the woodlands to anchor the defensive line; once entrenched they should prove nigh impossible to dislodge for Soviet armour, and with some artillery support they should be able to see off infantry as well. Due to the snow they are significantly faster than Grenadiers while also being cheaper, and as they will primarily serve to block the enemy their lack of firepower is less of a problem.
Two Brücken -- one Pioniere and one SdkFz 251/7 -- will be deployed to allow my forces to quickly cross the Volga; having done some hex counting I'm confident I need both of them for the plan to work. The Panzer IVFs will be tasked with subduing Soviet infantry while the faster Soviet Panzers look for openings to exploit. While cost-efficient, the lack of ground defence is really starting to hurt the T-60s, and they will probably be retired once the Soviet infantry receive their increased hard attack in '43; it's bad enough that T-34s can take out a detached unit in a single salvo, but once regular infantry can easily damage them in the open they'll be a liability. However, for this scenario they will provide a low-cost way to sustain multiple fronts should it become necessary.
The Recons have been outfitted the T-38s, which are sadly garbage tanks. Their one redeeming feature is being a tracked vehicle that uses only 2 core slots, so at least I can bring 3. They are likely to suffer heavy losses if anything more dangerous than Conscripts as much as looks their way, but I'll make it up to them. Maybe. There's a sort of twisted satisfaction to be derived from using scrap metal as opposed to the best hardware that prestige can buy.
If I am to stop a counterattack consisting of heavy Soviet armour I'm going to need artillery, and lots of it. In the words of a wise man, one can never have too much firepower. With 4 15 cm to provde all-purpose support and 3 K 18 to provide long-range anti-tank support and counterbattery options I'm confident my line will hold even against the Soviet behemoths, especially as the AA guns can be converted should it prove necessary. Gustav will handle Strongpoints and other fortifications, while the StuGs will see more action in the south as they'll need to dig out the entrenched defenders there. I'll have to pivot my line carefully though as the halftracks are slow in snow, and redeploying could prove difficult.
No fewer than 6 Do 217E will be providing strategic bombardment, and along with the 11 units of artillery there should be more than enough firepower to suppress anything. Of course, the Russian winter is unpredictable and it's possible they will be grounded at the most inopportune time, which is part of the reason the artillery contingent is so large. The trusty old Storch has been upgraded to a Bf 109 PR, making it more resilient, and another Bf 110F brings up the rear. This should be enough for the Luftwaffe to handle the Soviet air force, even though the latter are now fielding fighters that clearly outclass mine. This is still an offensive scenario, and as a general rule the AI has limited air assets in these; it's in the defensive scenarios you have to worry about the numbers of the Soviet air force. The auxiliaries also sport a Focke-Wulf Fw 190, a fighter I can't even field yet due to Retrograde.
As the scenario simulates a breakout from Stalingrad, the entire corps has to be deployed in the vicinity of the city. The two airfields west of the city are supply hexes, and without them my forces would likely already be encircled. As I don't know whether I'll be able to hold the airfields -- or how long -- the most immediate concern is securing an alternative source of supplies. One battlegroup will therefore head towards the objectives to the south, aiming to link up with the auxiliaries there. It's possible that the capture of these locations will trigger a Soviet counterattack, and so I will initially settle for securing supplies and instead encircling the Soviet forces defending the objectives.
While it will initially benefit from being able to draw supplies from the map edges, the Red Army does not control any supply hexes. This means that it should be possible to encircle and suppress any possible Soviet counterattack, especially as the Don and the Volga are both major rivers and thus impassable. To take advantage of this, a separate battlegroup will immediately cross the Volga and secure the airfields on the other side of the river -- the fortifications along the banks of the river make it clear the Red Army has a presence there, but it's likely to be only soft targets that can be easily destroyed. Once this has been accomplished the battlegroup will look for an opportunity to trap any Soviet forces encroaching on Stalingrad by crossing back over the Volga. Kalach and the bridge over the Don will have to wait; it's likely I'll only move to secure these locations towards the end of the scenario unless my forces are forced back from Stalingrad.
The rest of my corps will prepare for the inevitable Soviet onslaught, giving up ground if necessary to keep losses at an acceptable level. The Wehr Infanterie should prove useful here in limiting the mobility of the Soviet armour; due to conditions on the ground the mobility of the half-track transports of my artillery is severly reduced, making it necessary to likewise limit the mobility of the Soviet armour or risk a breakthrough at a position unsupported by artillery. The auxiliary force is quite strong and equipped with several models that I don't yet have access to, so I'm hopeful that they'll at least be able to hold their own with only limited air support from my forces. Admittedly it'd probably be easier and more efficient to just push the entire corps towards the objectives and then establish a defensive line there, but I have every intention of controlling Stalingrad by the end of the battle -- my corps might be retreating, but it'll do so on my terms, not those of the Red Army. Vanity will be the end of me yet.
The 17 cm artillery will provide fire support for the initial assault across the Volga and then fall back from Stalingrad; I don't have enough infantry to hold the city and attempting to do so would stretch my lines. This also means that I intend to temporarily give up control of the northern airfield once the artillery has been safely withdrawn and the battlegroup has crossed over the Volga, as the bulk of my Panzers will need to secure a supply line to the south. This should stretch the Soviet lines while giving my Panzers enough time to return to the north, and with the airfields across the Volga secured my aircraft can rebase there. Once the artillery has been redeployed the battlegroup will recapture the airfield to deny the Soviet forces the supply hex. Once the Soviet forces to the south have been encircled a small number of weaker units should be enough to capture them.
The auxiliary force consists of quality troops, including an SdKfz 234/1 8Rad, a Panzer IIIN and an Fw 190A, none of which I have access to yet. The Panzer IIIN is possibly the most cost-efficient German tank, at least if you are using Panzer General, but I'll go into that once I have access to it myself. The eastern auxiliaries will dig in and defend the objective while the western attempt to link up with my battlegroup to the north and establish a cordon around the Soviet forces. They will then spend the rest of the battle either defending or capturing suppressed targets unless the Soviet counterattack proves to be weaker than expected, in which case I might have them take more aggressive action.
The battlegroup crosses the Volga and successfully encircles the Soviet forces on the other side; there are more of them than I anticipated, but as they are hemmed in on all sides it shouldn't matter.
Aerial recon reveals that the Red Army is massing to the north, with an armoured contingent including at least six T-34s.
With the help of two Recons, Gustav obliterates a Strongpoint in a single salvo. It reminds me of my first campaign when I played with heroes and would regularly oneshot multiple units a turn.
The Panzers and StuGs move to surround the Soviet forces while the Do 217Es pummel them from the skies.
My forces suffer minor damage as the Red Army attempts to break the encirclement, but Gustav has a lucky escape with the help of the nearby 8.8.
Across the Volga, my forces suffer heavy damage as the Soviet AA guns switch to AT mode and pummel two detached units. I haven't played since the last patch so perhaps this was introduced then -- if so it's a good change, as it makes AA guns more of a threat to weak armoured vehicles.
The auxiliaries link up with my forces without any difficulties. The Soviet forces south of the Aksay are strangely passive.
With the weather taking a turn for the worse the bulk of the Luftwaffe is required to bring down the Soviet La-5.
Soviet forces liberate Stalingrad, but can only look on as their compatriots east of the Volga are captured.
There are few Soviet forces west of Kalach, so my plans remain unchanged.
The first wave of Soviet armour crashes into my lines as the heavy artillery is redeployed.
Soviet forces capture the northern airfield, forcing half of my aircraft to rebase across the Volga.
The Panzers exploit the gaps in the stretched Soviet lines to trap the lead elements of the Red Army.
The southern battlegroup, consisting mainly of weaker panzers and StuGs, begins to cross the Aksay.
With snow predicted it's up to my ground forces to recapture the airfield and deny the Red Army the supply hex.
In the south, the auxiliaries smash the Soviet counterattack and prepare to advance east.
The remnants of the Soviet counterattack are encircled. The auxiliaries are performing above expecations.
Oktybarsky is about to fall, ensuring that my forces will remain well supplied. Some of the auxiliary units will be rerouted north, as the Panzers are stronger than my own and will be of more use against Soviet T-34s than against Conscripts.
The remaining encircled Soviet forces are captured.
After three days of snow the Luftwaffe can finally bring down the last Soviet aircraft.
With the south secured, the auxiliaries move north to engage the Soviet reinforcements to the east.
My forces cross back over the Volga in an attempt to flank the Red Army, but encounter fierce resistance.
Heavy losses force the battlegroup to withdraw to the relative safety across the Volga.
More Soviet armour pours in from the north as weather conditions continue to hamper Luftwaffe operations. To make matters worse, a 15-strength T-34 is spotted at the back of the Soviet forces.
With the skies clearing at last and the Red Army having committed its northern reserves, the time has come to push back. With fire support from the 15 and 17 cm batteries, my Panzers have held the line against the significantly stronger Soviet armour.
A 12-strength T-34 destroys a number of detached auxiliaries, owing to my being a little too careless with them. Nevertheless the Soviet forces to the east have been largely neutered.
My forces begin to cross the Don to flank the Soviet positions at Kalach.
A Fallschirmjäger, a Fallschirmjäger! My kingdom for a Fallschirmjäger! So close, yet so far away -- a single battalion of Fallschirmjäger on that hills would trap virtually all of the remaining Soviet forces in the north. As access to air transports is likely to be limited in future scenarios, I suspect I will come to miss the tactical options they provide.
The encirclement is finally complete, but by now the Red Army has been reduced to half a dozen infantry battalions and a few support vechicles.
My forces secure the remaining objective and suppress the last T-34s.
The Soviet forces between the Don and the Volga have been annihilated, and Stalingrad remains in German hands. As my corps begins to withdraw across the Don, my men can do so safe in the knowledge that no Soviet forces remain to harass them.
A few Conscripts are saved by the bell as I run out of time to deal with them.
Well, that was interesting. I hadn't played for a while and almost felt rusty, especially as the patch has clearly changed how the AI behaves in some situations, as evidenced by my early losses to the AA guns. In hindsight I should probably have committed more troops to the Volga crossing, so as to ensure that the battlegroup would be strong enough to breach the Soviet lines later. As it were the tactical value of the operation was rather limited, but at least the prestige gains were substantial. Heavy snow prevented me from fully utilizing the Do 217Es, but I knew that was always likely to be the case, and in any event they still proved useful as the snow made the towed artillery too immobile to adapt.
The auxiliary force is almost too strong, and the scattered Soviet forces in the south are no match for them. It's probably intentional as to make sure the player can focus on the very real threat to the north, but they ended up sweeping aside the eastern reinforcements as well. Then again the scenario is not likely to be balanced based on how the average Generalissimus player would use the auxiliaries. Despite investing heavily into artillery I ended up suffering catastrophic losses at one point and eventually had to spend thousands of prestige to fully restore the core, including what I spent during the battle itself, because the Soviet armour rolled over my cheap Panzers without a care. I suspect the time has come to retire the cheap and versatile Panzers, especially as the Soviet infantry is about to receive a substantial upgrade to hard attack across the board.
I still ended up making a ton of prestige, however, which isn't surprising considering the value of the units involved -- a T-34 is worth over 400 prestige, which means that they alone accounted for over 6500 prestige. It certainly makes it easier to swallow the losses. It'd probably have been better to simply head west with my entire core and set up a strong defensive line there, despite their numbers the Soviet armour proved manageable as they didn't arrive en masse; I'm not sure whether that was because I staggered the capture of the objectives or if it's part of the scenario design. All in all it was one of the better scenarios, and it has given me a few things to consider as the rest of the campaign will likely force me to defend against similarly armour-heavy Soviet forces, not the least because it confirmed that the AI is loath to attack heavily entrenched infantry.
A large number of detached units were destroyed.
To illustrate my point about the T-34s, I have captured over 30 complete tanks -- I've lost a few points of strength of T-34/40s in battle -- and as there were at least 16 in this scenario alone, the Soviet armoured forces were rather intimidating; to put it in perspective, I believe there were 5 of them in the Battle of Moscow, and while that was a very different kind of battle the difference was noticeable, not the least because I've made extensive use of cheaper and weaker units.
Last edited by SineMora on Sun May 17, 2020 12:19 am, edited 2 times in total.
Mildly pretentious Swede. Goes by Path on most platforms, including Steam.
http://www.slitherine.com/forum/viewtopic.php?f=596&t=98034 -- Generalissimus AAR (no Trophies / Heroes)
http://www.slitherine.com/forum/viewtopic.php?f=596&t=98034 -- Generalissimus AAR (no Trophies / Heroes)
-
SineMora
- Sergeant Major - SdKfz 234/2 8Rad
- Posts: 641
- Joined: Thu Apr 02, 2020 4:20 pm
- Location: Sweden
Re: A Certain Panzer General's Adventures -- Generalissimus (No Liberator / Trophies of War / Heroes)
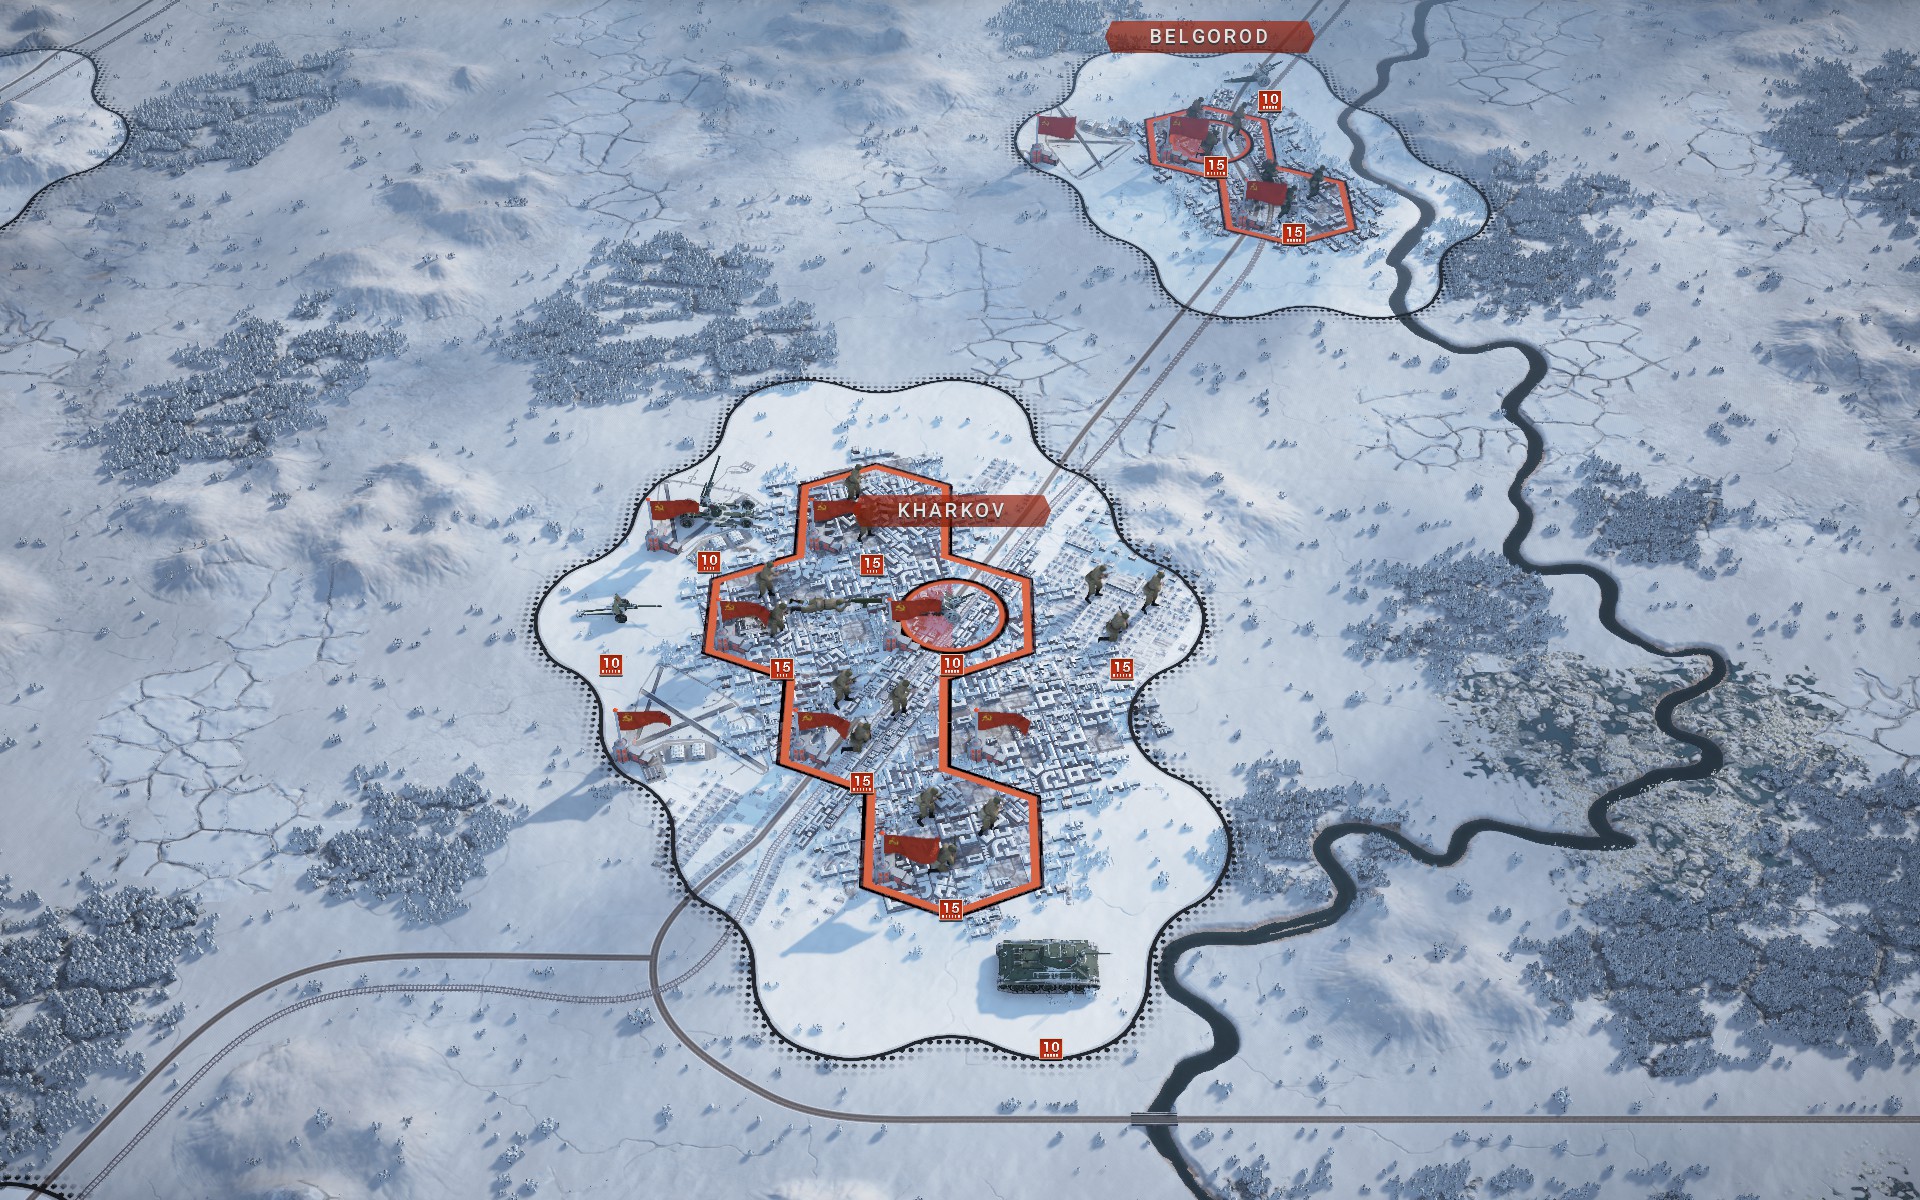
Scenario XVI -- Kharkov '43
Initial Prestige: 97986
Final Prestige: 111165
Core
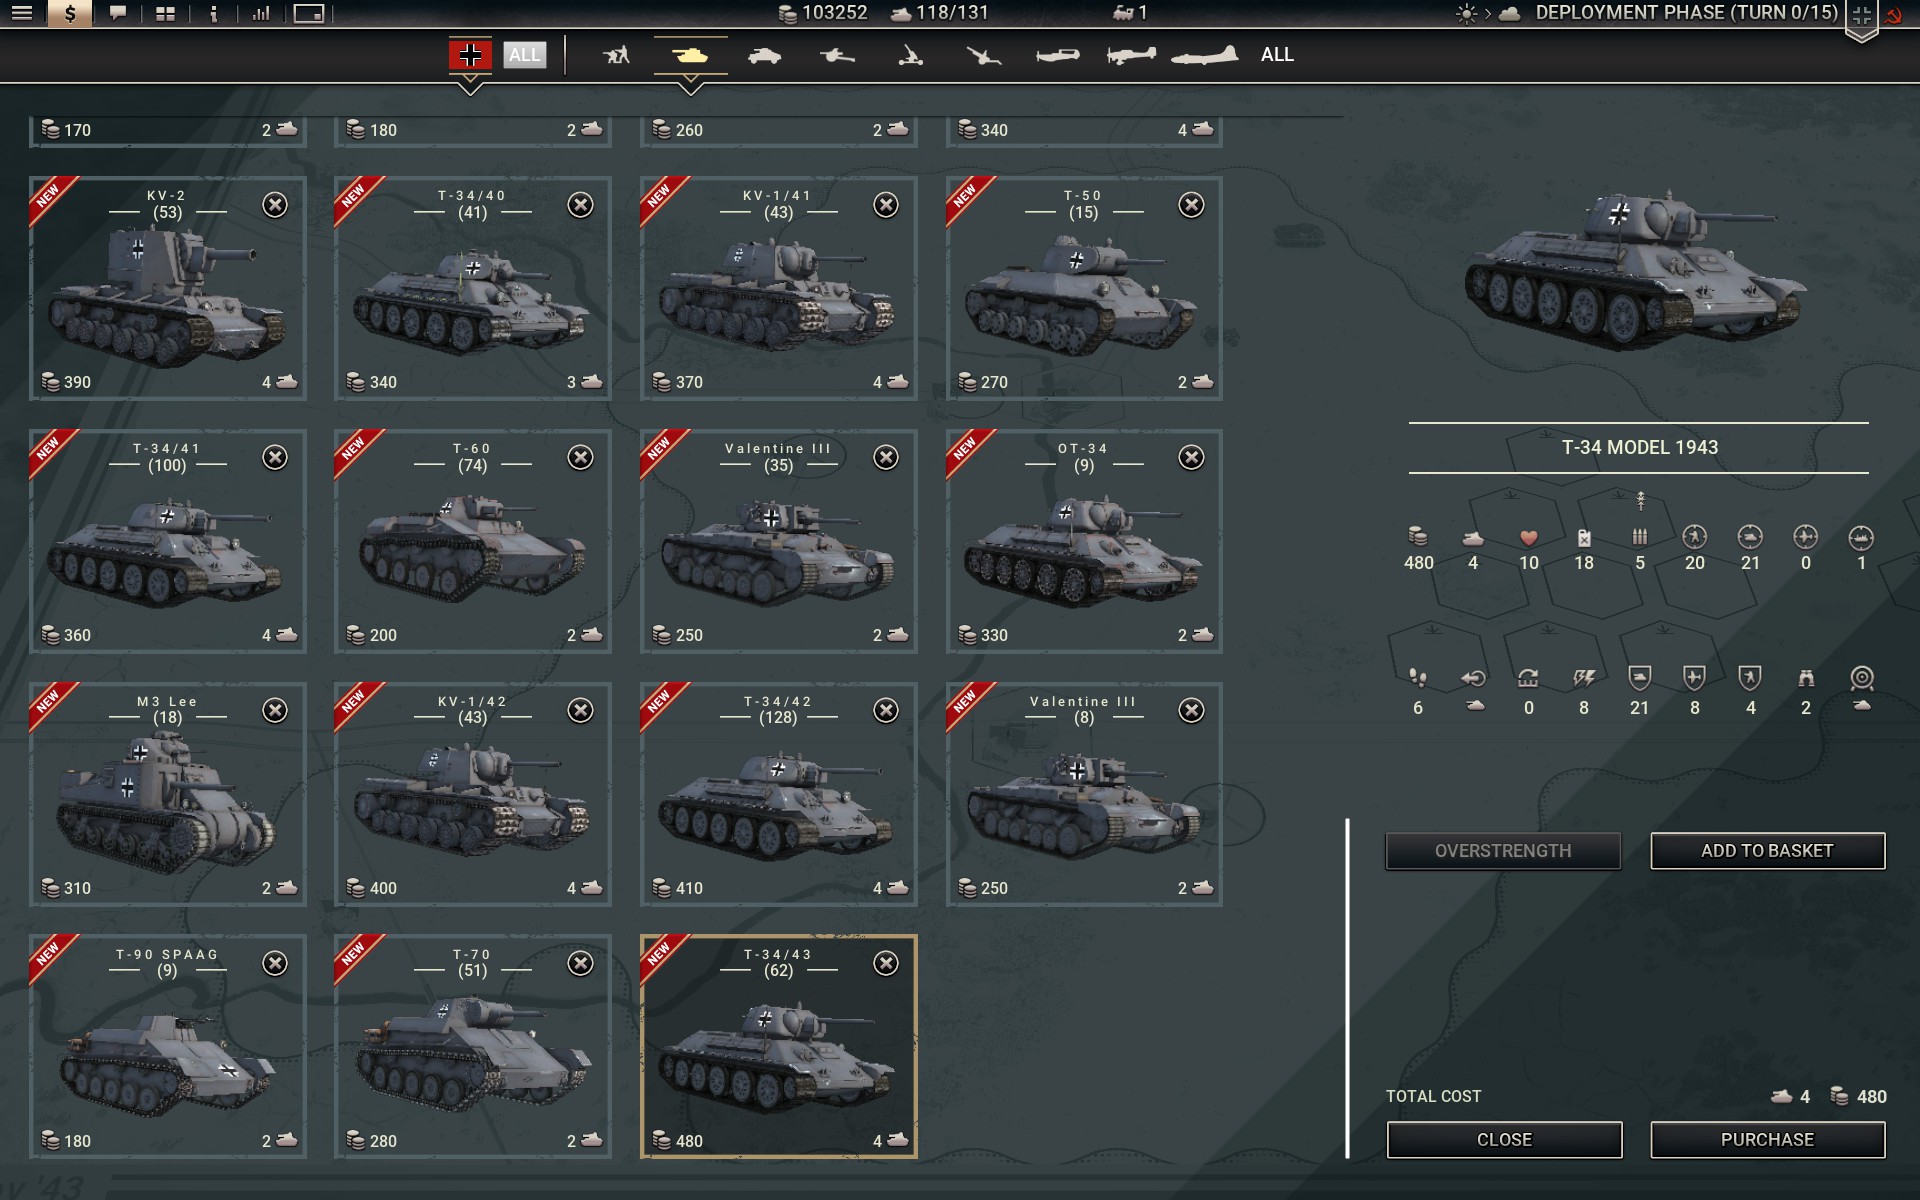
Despite the fact that this is set to be a smaller engagement than the Escape from Stalingrad, my corps has received a substantial increase in core slots. This is likely due to the number of new units that become available in '43 -- especially as infantry is upgraded across the board -- but of course I can't access them yet. For once I found myself at a loss as to what to do with them all, so I brought in a few spare units from the reserve that I wouldn't normally use to get them some experience for upcoming scenarios. As per the briefing I suspect the Soviet forces on the plains south of Kharkov will be the main threat, and so a single battalion of Pioniere should be enough to cover any close assaults.
Three battalions have been outfitted with T-34/43 to serve as my armoured spearhead, as they are simply superior to their German counterparts. The rest have been outfitted with the newly available Panzer IIIN, which I consider to be the most cost-efficient German tank. The IIIN offers 19 ground defence, which renders it impervious to most Soviet infantry (only HW Infantry and Engineers can even hope to hurt it), and with 20 soft attack and 15 hard attack it's strong enough to easily destroy infantry while still being able to cause the crucial 1 kill on enemy armour to capture them. The cheap and reliable models have served me well so far, but with Soviet infantry being upgraded across the board anything stronger than Conscripts can now cause serious damage to them, and of course unsuppressed T-34s will simply destroy a detached Panzer in a single salvo. The trusty StuGs will be retired for the same reason once the StuH 42 becomes available, as they are no longer able to survive on the frontline.
The IIIN is, I believe, the only unit in the game that you can get down to a cost of only two slots -- with Panzer General -- with such a high ground defence, which is what makes it so efficient. Even if you don't have Panzer General it's still a great tank, but then there are other options you could consider (such as the more advanced StuGs, which have even better armour). The close defence is a nice bonus but not terribly useful as you shouldn't be using this tank in close terrain anyway. It is rather expensive in terms of prestige and is very vulnerable to tactical bombers, but prestige shouldn't really be a factor by the time you can field it.
The recons have been upgraded to SdKfz 234/1 8Rads, which is also my favourite of the all-terrain vehicles. While somewhat lacking in firepower compared to later models, the SdKfz 234/1 retains the Rapid Fire trait and has an impressive 18 ground defence, which makes it relatively resilient even towards the end of the war. The artillery contingent has been strengthened with an extra 17 cm K, as while I'm not sure I'll be able to afford using so many slots on 4-range artillery later on, the extra range goes a long way to alleviate the poor mobility of the towed guns in winter. With no pressing need anywhere I allocated the remaining core slots to reserve units, bringing in an SU-6, a Bf-109, a a Bf 109 PR and a Bf 110F. Some of these units are likely to see more action once I am forced to go on the defensive, so it won't hurt to get them some experience.
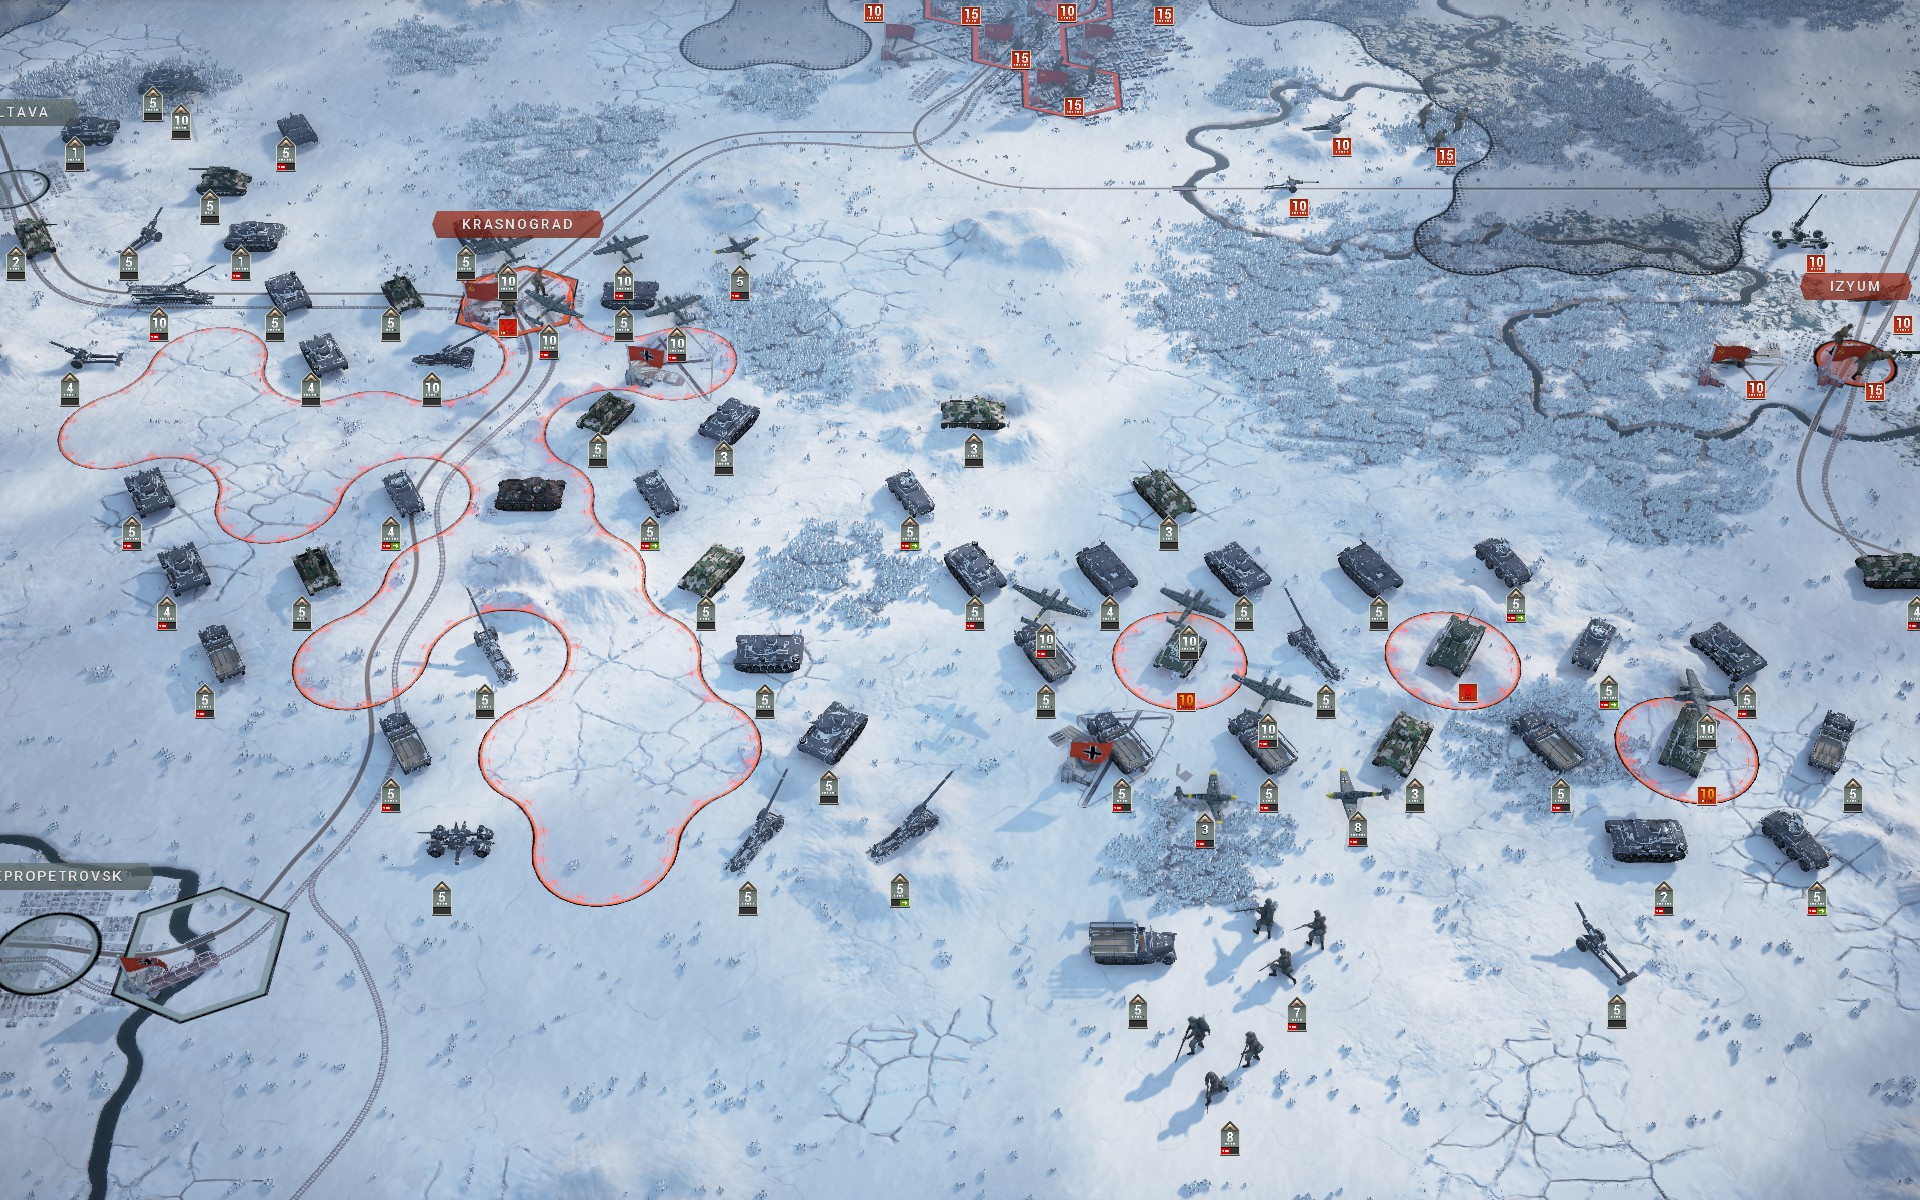
The briefing has made it clear that the Red Army is advancing across the plains south of Kharkov, which makes its supply lines vulnerable. The bulk of my forces have been deployed to the south to exploit this, but whether I have them push north or adopt a defensive formation will depend on the results of the aerial reconnaissance. With so many fighters deployed I'm hopeful that the Soviet air force will be defeated in three turns at the most, weather permitting, which should give my Do 217Es a free rein. Once the south is secure one battlegroup will head east to capture Izyum while the other heads north towards Krasnograd.
A smaller battlegroup has been deployed at Poltava to protect the Gustav and to make sure that the Red Army does not attempt to outflank my forces by heading west. It will advance slowly towards Krasnograd, eventually linking up with the sourthern forces. Should the Soviet presence in the south prove larger than anticipated the Panzers will move ahead of the rest of the battlegroup to support the southern forces. Kharkov and Belgorod are both heavily defended, but as the terrain does not pose any difficulties the amount of firepower at my disposal should allow my corps to overrun them. The Bridgeburners will bring up the rear, ready to assault the cities should it prove necessary. All in all I expect it to be a by-the-book operation.
As I expect the plains east of Dnepropetrovsk to see heavy fighting, the bulk of the Panzers and heavy artillery have been deployed there. The hills offer strong position should I need to adopt a defensive formation, as well as exceptional range for the artillery. The Luftwaffe will provide reconnaissance and close air support to take full advantage of the proximity of the airfields.
The battlegroup at Poltava will advance slowly towards Krasnograd. In the event that the Red Army has enough forces near the city to threaten the battlegroup, it'll instead take up positions in the hills south of Poltava and await reinforcements from the south.
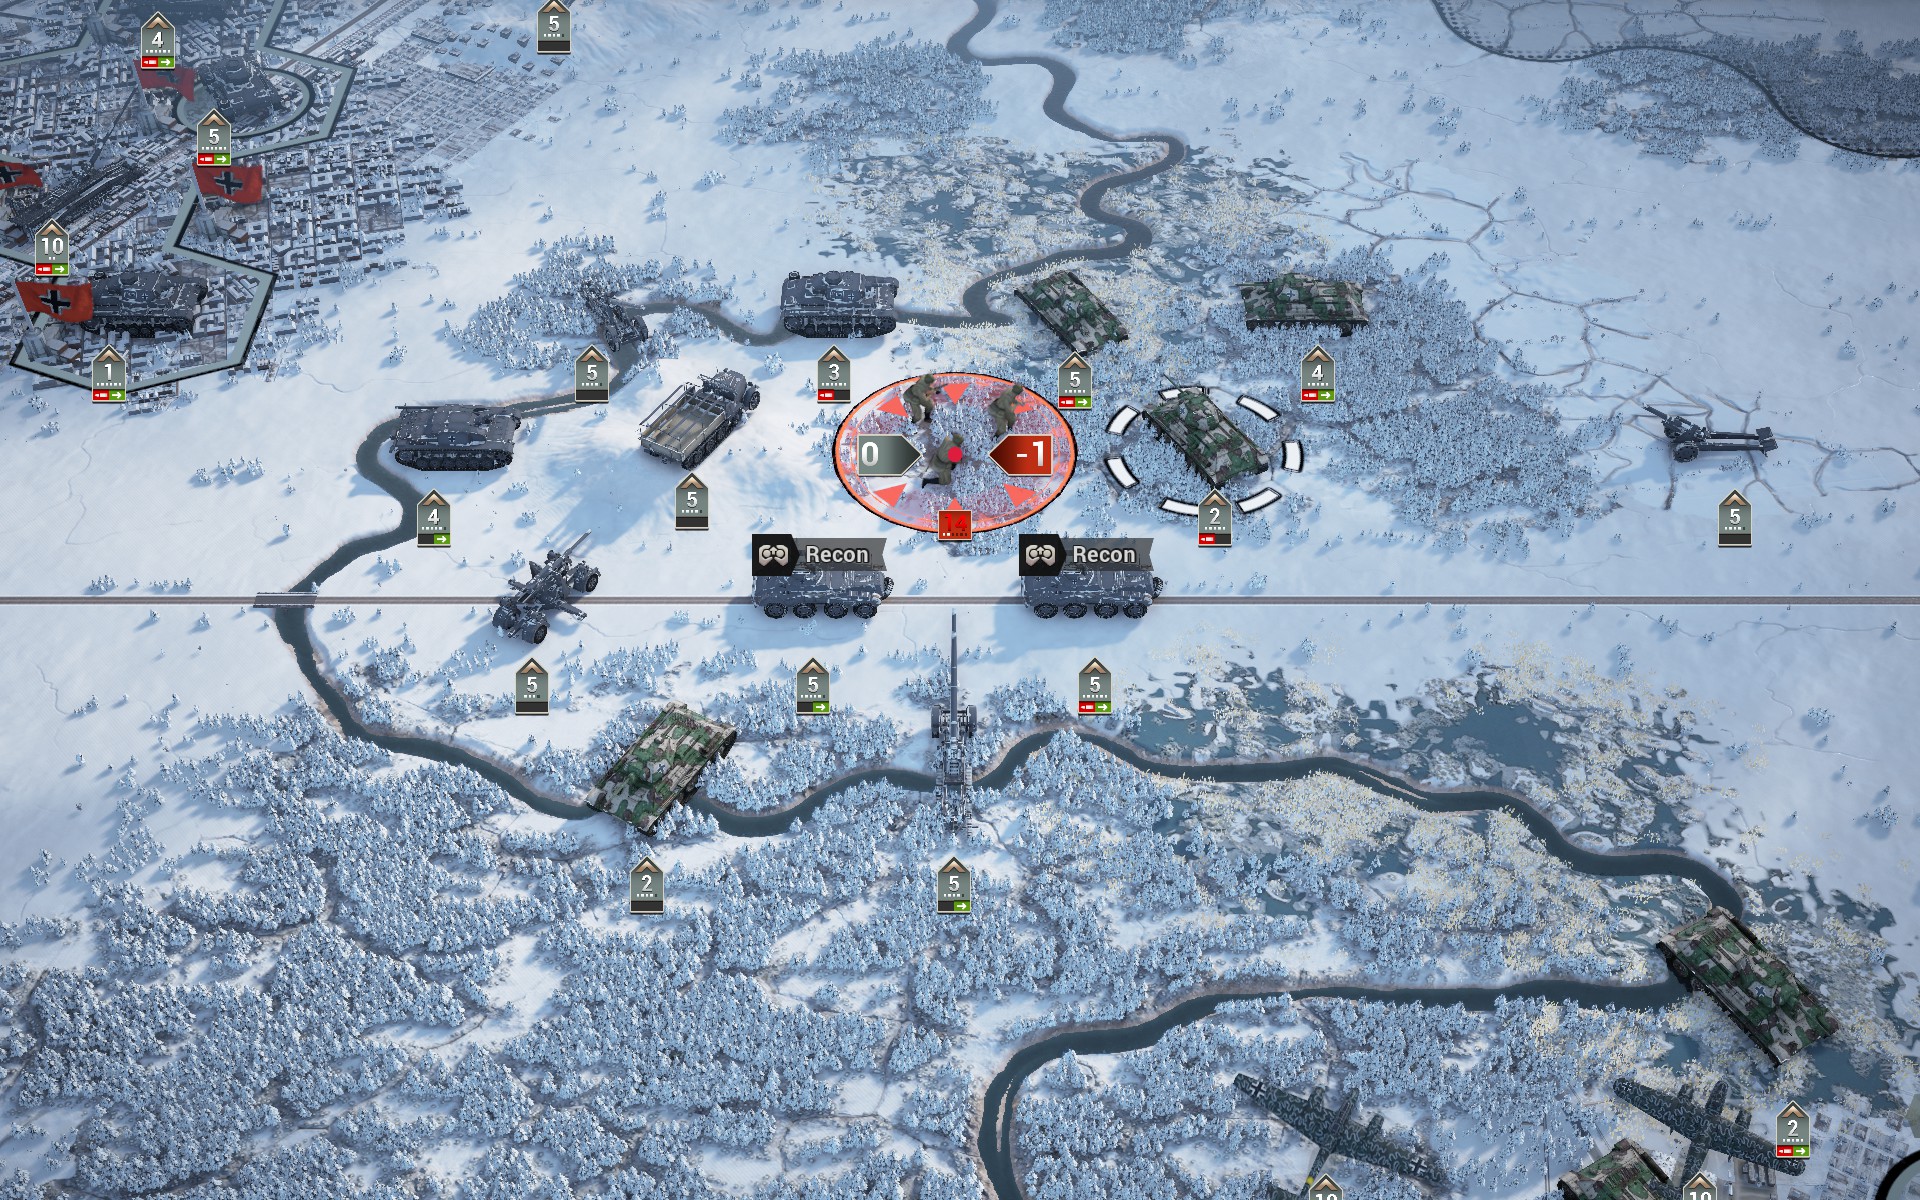
Even with overcast skies two Bf 109 PRs can cover a lot of ground. The Soviet forces are scattered, with the only strong concentration between Kharkov and Izyum. As the skies will clear next turn, I decide to adopt a defensive position to see how the Soviet forces will react. The initial positions offer few clues as to how they will move, so I'm reluctant to commit my forces.
The Soviet forces all move aggressively towards my positions, with an Il-2M3 negotiating both an 8.8 and an SU-6 to target an exposed IIIN. It certainly does make you question the value of AA batteries. On a more positive note, the AI is now escorting its bombers; note the La-5 protecting the Il-2M3.
The Il-2M3 is a threat, but the La-5 fighters could seriously hurt my Do 217Es and so they are priority targets.
The Panzers advance to cut off the Soviet forces as the Do 217Es sortie. Between them and the artillery, the Soviet armour is largely suppressed.

The fool who decided to build a Strongpoint on top of a river crossing should be shot; the Soviet Cavalry nearly destroyed it after it was struck by a Tupolev Tu-2. In order to ensure I don't lose a supply hex, I move a detached Panzer to block enemy movement west.
The battle intensifies as more Soviet armour arrives. My forces suffer a few heavy blows, culminating with the Il-2M3 destroying a detached T-34 outright. I'm paying the price for ignoring it last turn.
My forces reestablish the broken cordon as the Luftwaffe takes down the Il-2M3, bringing an end to the Soviet air force.
In the south, my forces begin to capture Soviet armour.
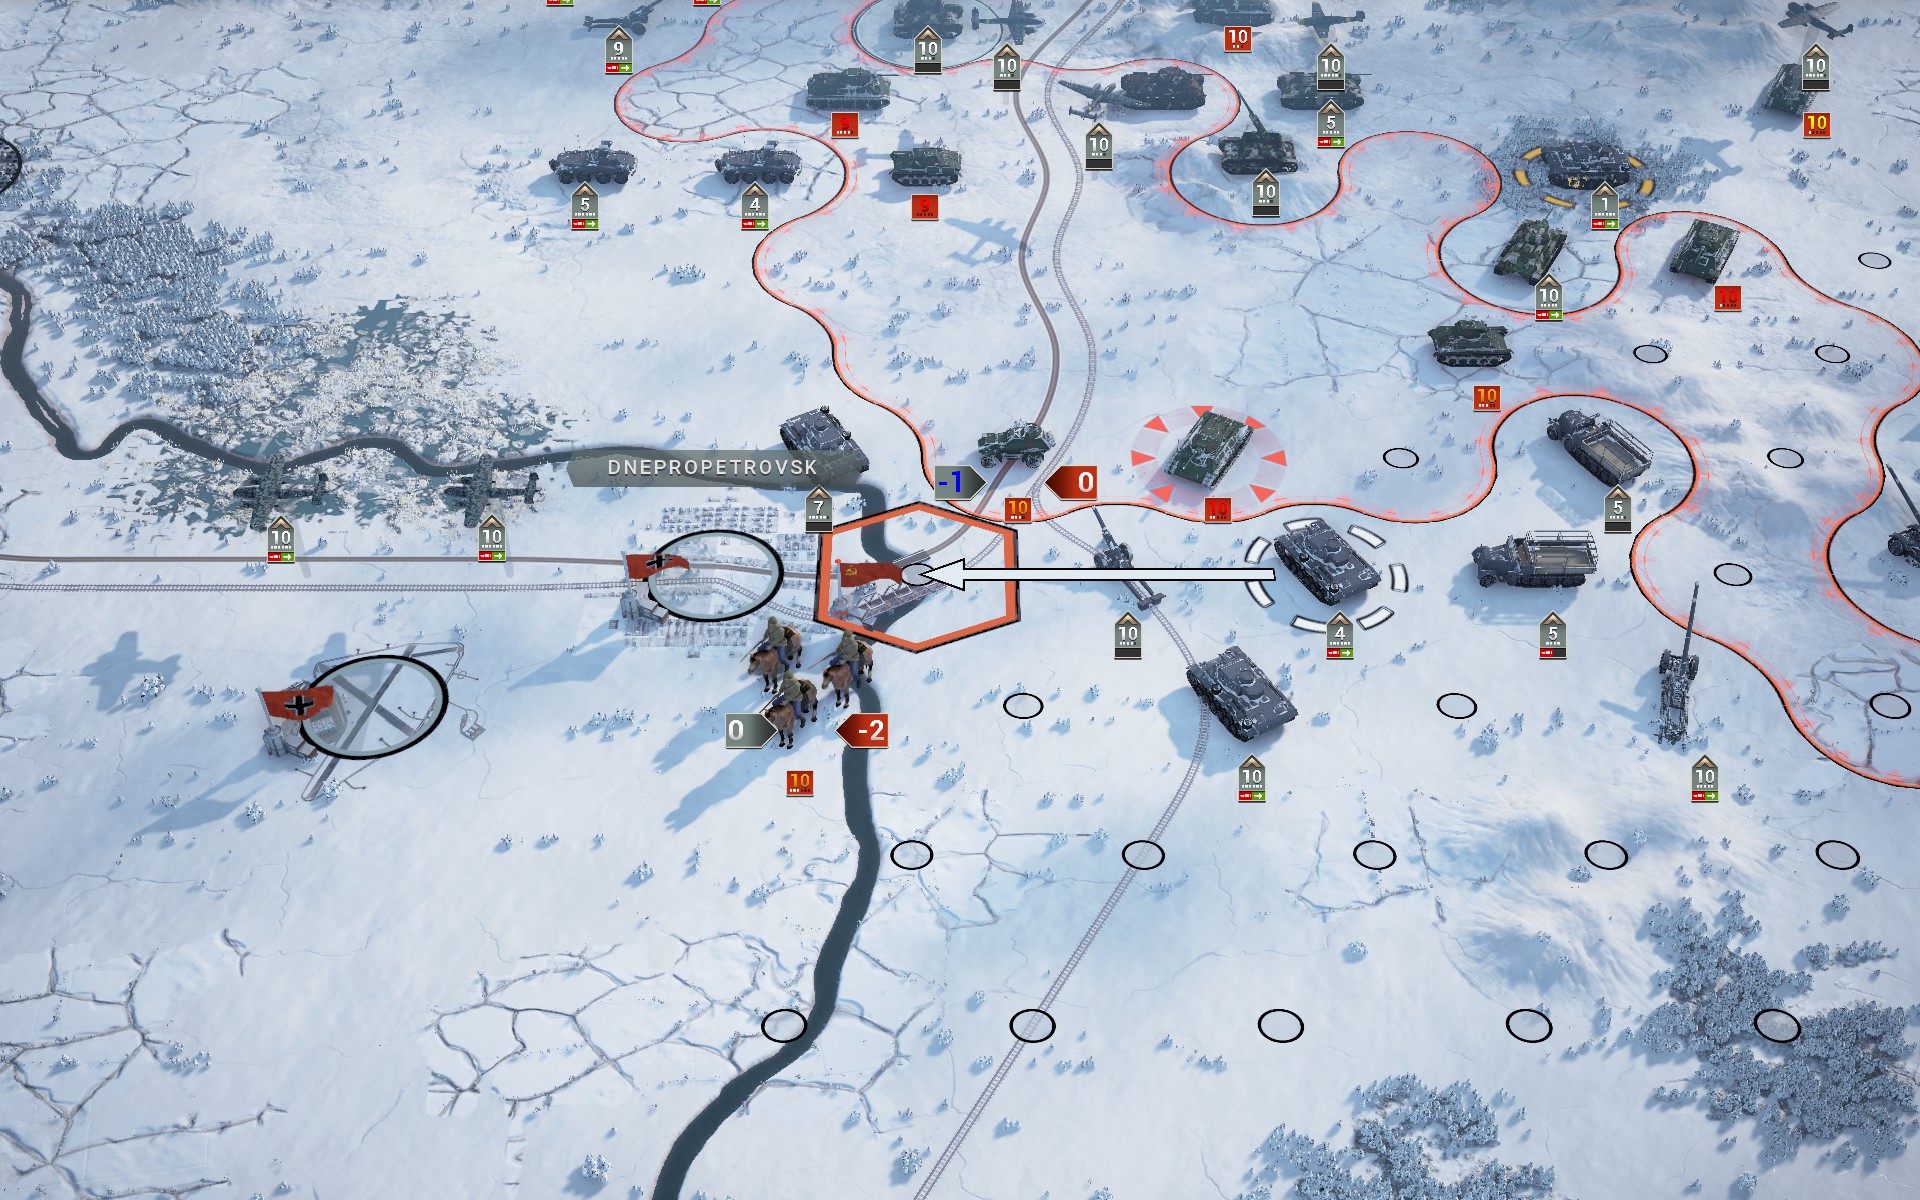
Panzers rout the Soviet Cavalry and secure the crossing at Dnepropetrovsk.
It seems the Red Army rolled the dice and lost; after the initial onslaught, the Soviet reserves appear to be spent, with the few remaining battalions fortifying their positions.
The Soviet forces are fully suppressed.
My forces consolidate their positions in preparation for the assault on Kharkov.
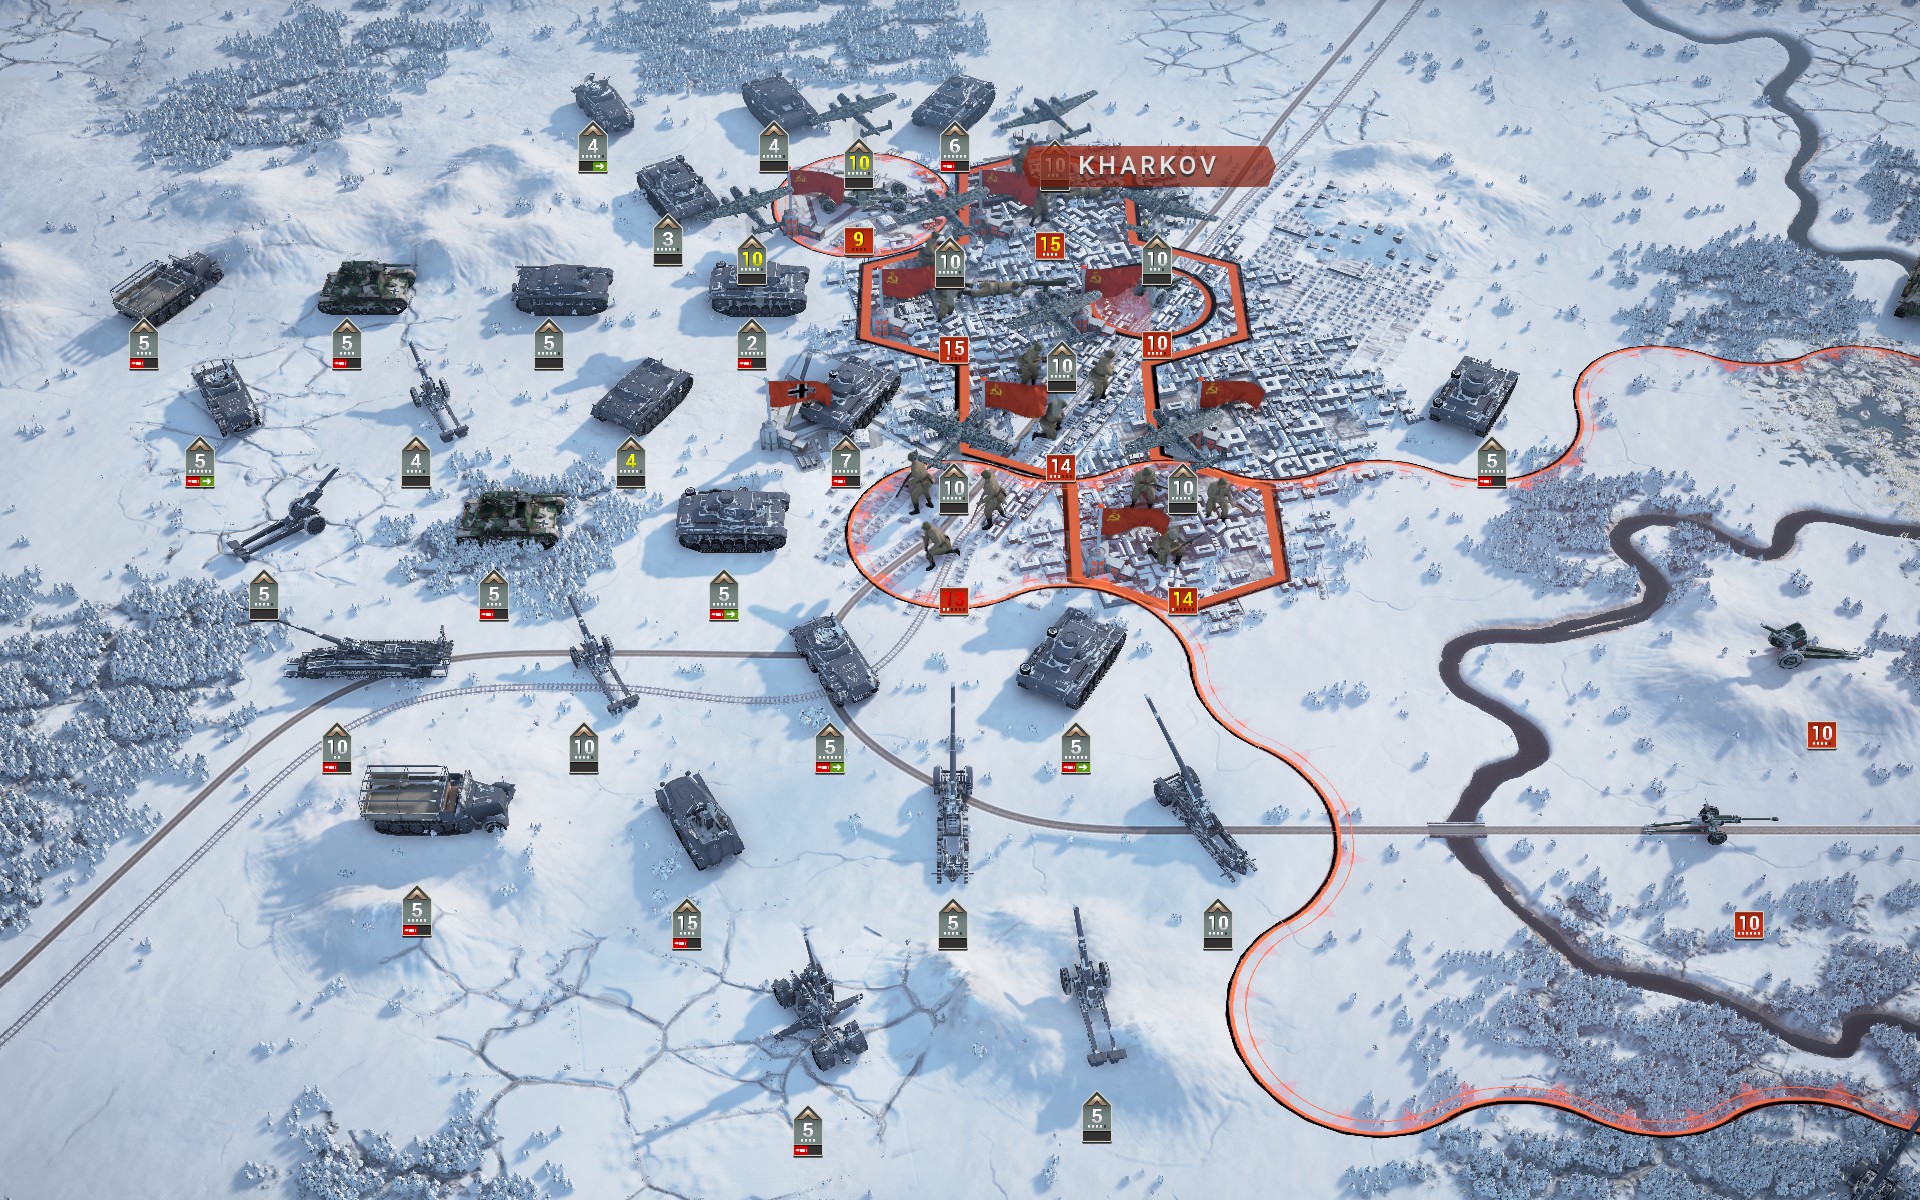
The Do 217Es reduce much of Kharkov to rubble as my forces close in on the city.
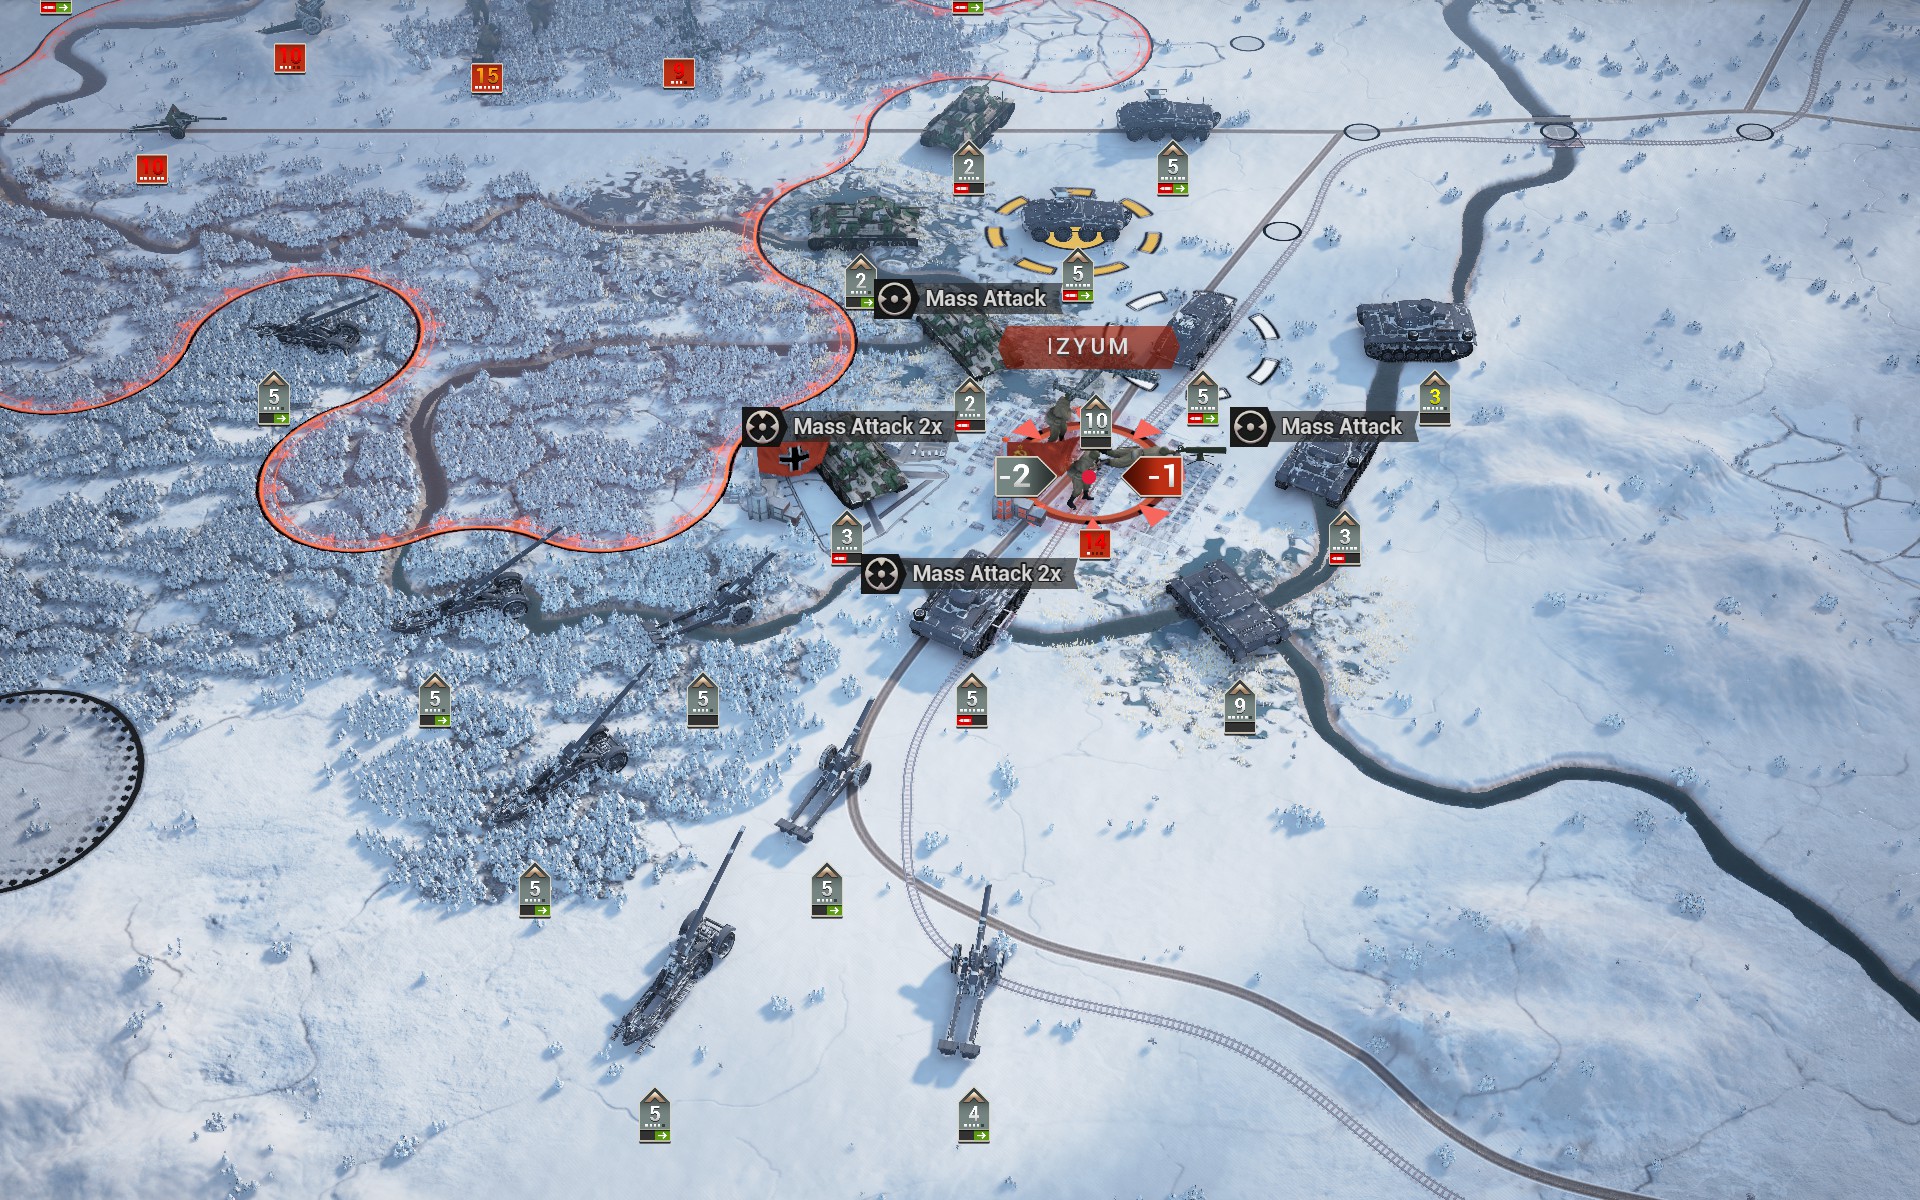
Izyum proves difficult to capture due to the terrain and the absence of Pioniere, but eventually the artillery brings the defenders to their knees.

Kharkov falls to my forces.
The last Soviet forces in the pocket between Kharkov and Izyum are captured.
The Bridgeburners rout the last Soviet forces in Belgorod, but there are still a few battalions holding on in the northeast.

With the collapse of the Red Army, I take the opportunity to capture the remaining stragglers east of the Oskol.

After the intensity of the last two scenarios, this one felt rather pedestrian. The first few rounds saw heavy fighting as the Red Army came out with guns blazing, but after that there were no more mobile forces left, reducing the rest of the scenario to a mop-up operation. It didn't help that I received a substantial increase in core slots while the Soviet forces were effectively cut in half. I'm not oppossed to some variation as far as the scope of the scenarios is concerned, but the amount of core slots allotted to the player should probably be revised to balance this.
AA batteries remain disappointingly weak, but I intend to test the performance of low-calibre guns; the patch notes suggest the bug with them has been fixed, which should make them more effective against tactical bombers. It's also good to see that the AI is now escorting its bombers, so it's not quite so easy to shoot them down anymore. The IIINs proved as resilient as I'd expected, with the caveat that they can't handle unsuppressed T-34s without fire support, but then few things can. The StuGs have been loyal workhorses, but as even Regulars can inflict heavy damage on them now it's time to retire them; assault guns need to be able to function on the frontlines, and the StuG IIIB no longer can.
While I'm tempted to fight the Allies in Italy, I'll stick to the eastern front for this campaign. That means that the next stop will be the Battle of Kursk, the largest armoured clash in history. I have high expectations for it, but unfortunately a scenario with such a scope is bound to require more time than I have at the moment. Fortunately an AAR is a marathon, not a sprint.
Initial Prestige: 97986
Final Prestige: 111165
Core
- Infantry
- Pioniere w/ SdKfz 250/1 [NEW]
- Tanks
- T-34/43 [NEW]
- T-34/43 [NEW]
- T-34/43 [NEW]
- Panzer IIIN [NEW]
- Panzer IIIN [NEW]
- Panzer IIIN [NEW]
- Panzer IIIN [NEW]
- Panzer IIIN [NEW]
- Panzer IIIN [NEW]
- Panzer IIIN [NEW]
- Recon
- SdKfz 234/1 8Rad [NEW]
- SdKfz 234/1 8Rad [NEW]
- SdKfz 234/1 8Rad [NEW]
- Artillery
- Schwerer Gustav
- 17 cm K 18 w/ SdKfz 7
- 17 cm K 18 w/ SdKfz 7
- 17 cm K 18 w/ SdKfz 7
- 17 cm K 18 w/ SdKfz 7 [NEW]
- 15 cm sFH w/ SdKfz 7
- 15 cm sFH w/ SdKfz 7
- 15 cm sFH w/ SdKfz 7
- 15 cm sFH w/ SdKfz 7
- StuG IIIB
- StuG IIIB
- StuG IIIB
- Anti-Aircraft
- 8.8 cm FlaK 36 w/ SdKfz 7
- SU-6
- SU-6 [NEW]
- Fighters
- Bf 109F
- Bf 109F
- Bf 109F
- Bf 109F
- Bf 109F [NEW]
- Tactical Bombers
- Bf 109 PR
- Bf 109 PR [NEW]
- Bf 110F
- Bf 110F
- Bf 110F [NEW]
- Strategic Bombers
- Do 217E
- Do 217E
- Do 217E
- Do 217E
- Do 217E
- Do 217E
Despite the fact that this is set to be a smaller engagement than the Escape from Stalingrad, my corps has received a substantial increase in core slots. This is likely due to the number of new units that become available in '43 -- especially as infantry is upgraded across the board -- but of course I can't access them yet. For once I found myself at a loss as to what to do with them all, so I brought in a few spare units from the reserve that I wouldn't normally use to get them some experience for upcoming scenarios. As per the briefing I suspect the Soviet forces on the plains south of Kharkov will be the main threat, and so a single battalion of Pioniere should be enough to cover any close assaults.
Three battalions have been outfitted with T-34/43 to serve as my armoured spearhead, as they are simply superior to their German counterparts. The rest have been outfitted with the newly available Panzer IIIN, which I consider to be the most cost-efficient German tank. The IIIN offers 19 ground defence, which renders it impervious to most Soviet infantry (only HW Infantry and Engineers can even hope to hurt it), and with 20 soft attack and 15 hard attack it's strong enough to easily destroy infantry while still being able to cause the crucial 1 kill on enemy armour to capture them. The cheap and reliable models have served me well so far, but with Soviet infantry being upgraded across the board anything stronger than Conscripts can now cause serious damage to them, and of course unsuppressed T-34s will simply destroy a detached Panzer in a single salvo. The trusty StuGs will be retired for the same reason once the StuH 42 becomes available, as they are no longer able to survive on the frontline.
The IIIN is, I believe, the only unit in the game that you can get down to a cost of only two slots -- with Panzer General -- with such a high ground defence, which is what makes it so efficient. Even if you don't have Panzer General it's still a great tank, but then there are other options you could consider (such as the more advanced StuGs, which have even better armour). The close defence is a nice bonus but not terribly useful as you shouldn't be using this tank in close terrain anyway. It is rather expensive in terms of prestige and is very vulnerable to tactical bombers, but prestige shouldn't really be a factor by the time you can field it.
The recons have been upgraded to SdKfz 234/1 8Rads, which is also my favourite of the all-terrain vehicles. While somewhat lacking in firepower compared to later models, the SdKfz 234/1 retains the Rapid Fire trait and has an impressive 18 ground defence, which makes it relatively resilient even towards the end of the war. The artillery contingent has been strengthened with an extra 17 cm K, as while I'm not sure I'll be able to afford using so many slots on 4-range artillery later on, the extra range goes a long way to alleviate the poor mobility of the towed guns in winter. With no pressing need anywhere I allocated the remaining core slots to reserve units, bringing in an SU-6, a Bf-109, a a Bf 109 PR and a Bf 110F. Some of these units are likely to see more action once I am forced to go on the defensive, so it won't hurt to get them some experience.
The briefing has made it clear that the Red Army is advancing across the plains south of Kharkov, which makes its supply lines vulnerable. The bulk of my forces have been deployed to the south to exploit this, but whether I have them push north or adopt a defensive formation will depend on the results of the aerial reconnaissance. With so many fighters deployed I'm hopeful that the Soviet air force will be defeated in three turns at the most, weather permitting, which should give my Do 217Es a free rein. Once the south is secure one battlegroup will head east to capture Izyum while the other heads north towards Krasnograd.
A smaller battlegroup has been deployed at Poltava to protect the Gustav and to make sure that the Red Army does not attempt to outflank my forces by heading west. It will advance slowly towards Krasnograd, eventually linking up with the sourthern forces. Should the Soviet presence in the south prove larger than anticipated the Panzers will move ahead of the rest of the battlegroup to support the southern forces. Kharkov and Belgorod are both heavily defended, but as the terrain does not pose any difficulties the amount of firepower at my disposal should allow my corps to overrun them. The Bridgeburners will bring up the rear, ready to assault the cities should it prove necessary. All in all I expect it to be a by-the-book operation.
As I expect the plains east of Dnepropetrovsk to see heavy fighting, the bulk of the Panzers and heavy artillery have been deployed there. The hills offer strong position should I need to adopt a defensive formation, as well as exceptional range for the artillery. The Luftwaffe will provide reconnaissance and close air support to take full advantage of the proximity of the airfields.
The battlegroup at Poltava will advance slowly towards Krasnograd. In the event that the Red Army has enough forces near the city to threaten the battlegroup, it'll instead take up positions in the hills south of Poltava and await reinforcements from the south.
Even with overcast skies two Bf 109 PRs can cover a lot of ground. The Soviet forces are scattered, with the only strong concentration between Kharkov and Izyum. As the skies will clear next turn, I decide to adopt a defensive position to see how the Soviet forces will react. The initial positions offer few clues as to how they will move, so I'm reluctant to commit my forces.
The Soviet forces all move aggressively towards my positions, with an Il-2M3 negotiating both an 8.8 and an SU-6 to target an exposed IIIN. It certainly does make you question the value of AA batteries. On a more positive note, the AI is now escorting its bombers; note the La-5 protecting the Il-2M3.
The Il-2M3 is a threat, but the La-5 fighters could seriously hurt my Do 217Es and so they are priority targets.
The Panzers advance to cut off the Soviet forces as the Do 217Es sortie. Between them and the artillery, the Soviet armour is largely suppressed.
The fool who decided to build a Strongpoint on top of a river crossing should be shot; the Soviet Cavalry nearly destroyed it after it was struck by a Tupolev Tu-2. In order to ensure I don't lose a supply hex, I move a detached Panzer to block enemy movement west.
The battle intensifies as more Soviet armour arrives. My forces suffer a few heavy blows, culminating with the Il-2M3 destroying a detached T-34 outright. I'm paying the price for ignoring it last turn.
My forces reestablish the broken cordon as the Luftwaffe takes down the Il-2M3, bringing an end to the Soviet air force.
In the south, my forces begin to capture Soviet armour.
Panzers rout the Soviet Cavalry and secure the crossing at Dnepropetrovsk.
It seems the Red Army rolled the dice and lost; after the initial onslaught, the Soviet reserves appear to be spent, with the few remaining battalions fortifying their positions.
The Soviet forces are fully suppressed.
My forces consolidate their positions in preparation for the assault on Kharkov.
The Do 217Es reduce much of Kharkov to rubble as my forces close in on the city.
Izyum proves difficult to capture due to the terrain and the absence of Pioniere, but eventually the artillery brings the defenders to their knees.
Kharkov falls to my forces.
The last Soviet forces in the pocket between Kharkov and Izyum are captured.
The Bridgeburners rout the last Soviet forces in Belgorod, but there are still a few battalions holding on in the northeast.
With the collapse of the Red Army, I take the opportunity to capture the remaining stragglers east of the Oskol.
After the intensity of the last two scenarios, this one felt rather pedestrian. The first few rounds saw heavy fighting as the Red Army came out with guns blazing, but after that there were no more mobile forces left, reducing the rest of the scenario to a mop-up operation. It didn't help that I received a substantial increase in core slots while the Soviet forces were effectively cut in half. I'm not oppossed to some variation as far as the scope of the scenarios is concerned, but the amount of core slots allotted to the player should probably be revised to balance this.
AA batteries remain disappointingly weak, but I intend to test the performance of low-calibre guns; the patch notes suggest the bug with them has been fixed, which should make them more effective against tactical bombers. It's also good to see that the AI is now escorting its bombers, so it's not quite so easy to shoot them down anymore. The IIINs proved as resilient as I'd expected, with the caveat that they can't handle unsuppressed T-34s without fire support, but then few things can. The StuGs have been loyal workhorses, but as even Regulars can inflict heavy damage on them now it's time to retire them; assault guns need to be able to function on the frontlines, and the StuG IIIB no longer can.
While I'm tempted to fight the Allies in Italy, I'll stick to the eastern front for this campaign. That means that the next stop will be the Battle of Kursk, the largest armoured clash in history. I have high expectations for it, but unfortunately a scenario with such a scope is bound to require more time than I have at the moment. Fortunately an AAR is a marathon, not a sprint.
Last edited by SineMora on Mon May 18, 2020 1:02 am, edited 1 time in total.
Mildly pretentious Swede. Goes by Path on most platforms, including Steam.
http://www.slitherine.com/forum/viewtopic.php?f=596&t=98034 -- Generalissimus AAR (no Trophies / Heroes)
http://www.slitherine.com/forum/viewtopic.php?f=596&t=98034 -- Generalissimus AAR (no Trophies / Heroes)

Re: A Certain Panzer General's Adventures -- Generalissimus (No Liberator / Trophies of War / Heroes)
Nice job - I liked how you dealt with Stalingrad. I was dubious your approach would work due to the high number of supply hexes but you managed to show your adaptability.
Hopefully you'll have more time soon as I looking forward to seeing this campaign unfold.
Hopefully you'll have more time soon as I looking forward to seeing this campaign unfold.
-
SineMora
- Sergeant Major - SdKfz 234/2 8Rad
- Posts: 641
- Joined: Thu Apr 02, 2020 4:20 pm
- Location: Sweden
Re: A Certain Panzer General's Adventures -- Generalissimus (No Liberator / Trophies of War / Heroes)
Yes, if there's one major weakness to this strategy it's the difficulty of dealing with entrenched positions on supply hexes, especially if situated on choke points. Stalingrad is a special scenario in that the AI has so little prestige it can't afford to reinforce its units, which did make it much easier than it could've been -- normally you need to destroy or at least heavily damage units on supply hexes lest the AI bring them back up to full strength next turn, but that doesn't happen in that scenario. It's interesting because I recall reading that the game was balanced around using heroes, but it seems to me the designers went out of their way to make sure it was possible to beat Stalingrad without relying on super units despite the terrain.Horseman wrote: Tue May 05, 2020 10:59 am Nice job - I liked how you dealt with Stalingrad. I was dubious your approach would work due to the high number of supply hexes but you managed to show your adaptability.
Hopefully you'll have more time soon as I looking forward to seeing this campaign unfold.
I prefer to play scenarios in a single sitting, and a scenario like Kursk is bound to take several hours; it looks absolutely massive. I'm itching to play it, though.
Mildly pretentious Swede. Goes by Path on most platforms, including Steam.
http://www.slitherine.com/forum/viewtopic.php?f=596&t=98034 -- Generalissimus AAR (no Trophies / Heroes)
http://www.slitherine.com/forum/viewtopic.php?f=596&t=98034 -- Generalissimus AAR (no Trophies / Heroes)
-
MickMannock
- Staff Sergeant - Kavallerie

- Posts: 331
- Joined: Fri Jul 22, 2011 8:09 am
Re: A Certain Panzer General's Adventures -- Generalissimus (No Liberator / Trophies of War / Heroes)
Regarding your opinion that you have too many core slots at this point. I don't really agree there, cause if you don't take your approach (and traits) to the game, you probably upgrade your units a lot around this time to more expensive units pretty much across the board. If you do that, the core slots gets spent quite swiftly. It would hamper a more "normal" playstyle quite significantly if the core slots were reduced.
-
SineMora
- Sergeant Major - SdKfz 234/2 8Rad
- Posts: 641
- Joined: Thu Apr 02, 2020 4:20 pm
- Location: Sweden
Re: A Certain Panzer General's Adventures -- Generalissimus (No Liberator / Trophies of War / Heroes)
The problem with that is that while you receive around 20 additional core slots, the Red Army is effectively cut in half, thus neutering any challenge in Kharkov '43. I'm firmly in the camp that the number of core slots should vary from scenario to scenario and not just increase, because the latter inevitably means that either every scenario ends up being a large-scale battle, or the smaller ones end up being trivial (as in the case of Kharkov '43). If this forces a player to consider whether he actually needs 5 Tigers, so much the better.MickMannock wrote: Wed May 06, 2020 8:20 am Regarding your opinion that you have too many core slots at this point. I don't really agree there, cause if you don't take your approach (and traits) to the game, you probably upgrade your units a lot around this time to more expensive units pretty much across the board. If you do that, the core slots gets spent quite swiftly. It would hamper a more "normal" playstyle quite significantly if the core slots were reduced.
Mildly pretentious Swede. Goes by Path on most platforms, including Steam.
http://www.slitherine.com/forum/viewtopic.php?f=596&t=98034 -- Generalissimus AAR (no Trophies / Heroes)
http://www.slitherine.com/forum/viewtopic.php?f=596&t=98034 -- Generalissimus AAR (no Trophies / Heroes)
-
BaronVonWalrus
- Administrative Corporal - SdKfz 251/1

- Posts: 145
- Joined: Tue Apr 28, 2020 8:07 pm
Re: A Certain Panzer General's Adventures -- Generalissimus (No Liberator / Trophies of War / Heroes)
Enjoying seeing how a wily veteran makes use of split units and overwhelming artillery.......good luck at Kursk!
-
MickMannock
- Staff Sergeant - Kavallerie
- Posts: 331
- Joined: Fri Jul 22, 2011 8:09 am
Re: A Certain Panzer General's Adventures -- Generalissimus (No Liberator / Trophies of War / Heroes)
I don't think it's fair to base the whole core slot system on the Kharkov 43 mission, since that was historically a significant win for the Germans. I don't think that particular scenario should be a major challenge to the player. It would be more fair to judge it based on the Bagration scenario perhaps?SineMora wrote: Wed May 06, 2020 3:21 pm The problem with that is that while you receive around 20 additional core slots, the Red Army is effectively cut in half, thus neutering any challenge in Kharkov '43. I'm firmly in the camp that the number of core slots should vary from scenario to scenario and not just increase, because the latter inevitably means that either every scenario ends up being a large-scale battle, or the smaller ones end up being trivial (as in the case of Kharkov '43). If this forces a player to consider whether he actually needs 5 Tigers, so much the better.
But besides that, I find you being a very skilled player, based in what I see from the AAR, so even if you feel it being too easy (with too many core slots), I'm not sure that's representative for the average player.
-
SineMora
- Sergeant Major - SdKfz 234/2 8Rad
- Posts: 641
- Joined: Thu Apr 02, 2020 4:20 pm
- Location: Sweden
Re: A Certain Panzer General's Adventures -- Generalissimus (No Liberator / Trophies of War / Heroes)
If firepower isn't solving your problems, you're simply not using enoughBaronVonWalrus wrote: Wed May 06, 2020 9:47 pm Enjoying seeing how a wily veteran makes use of split units and overwhelming artillery.......good luck at Kursk!
The issue isn't so much Kharkov '43 itself as it is that the devs have painted themselves into a corner by strictly increasing the number of core slots every scenario -- it's inevitable that it leads to every smaller scenario being a pushover. The PzC GC East "solved" that by just making every scenario a massive battle, but that gets tiring too. Greater flexibility in core slots would allow for greater flexibility in scenario design as well.MickMannock wrote: Thu May 07, 2020 6:20 am I don't think it's fair to base the whole core slot system on the Kharkov 43 mission, since that was historically a significant win for the Germans. I don't think that particular scenario should be a major challenge to the player. It would be more fair to judge it based on the Bagration scenario perhaps?
But besides that, I find you being a very skilled player, based in what I see from the AAR, so even if you feel it being too easy (with too many core slots), I'm not sure that's representative for the average player.
Mildly pretentious Swede. Goes by Path on most platforms, including Steam.
http://www.slitherine.com/forum/viewtopic.php?f=596&t=98034 -- Generalissimus AAR (no Trophies / Heroes)
http://www.slitherine.com/forum/viewtopic.php?f=596&t=98034 -- Generalissimus AAR (no Trophies / Heroes)
-
MickMannock
- Staff Sergeant - Kavallerie
- Posts: 331
- Joined: Fri Jul 22, 2011 8:09 am
Re: A Certain Panzer General's Adventures -- Generalissimus (No Liberator / Trophies of War / Heroes)
I get your point, but some of the later scenarios, even if they are a bit smaller, are still difficult because of the numbers thrown at you (and also how good some units are, I'm looking at you IS-2). Granted, with the heroes I had, it wasn't super difficult, but if I had played without heroes, I would have been in big trouble and I would have needed all the core slots I could get my hands on. I know I'm not a good player, but I don't think I would have been able to win the campaign if I had had lesser core slots during the final 4 or 5 scenarios (eastern front).SineMora wrote: Thu May 07, 2020 4:39 pm The issue isn't so much Kharkov '43 itself as it is that the devs have painted themselves into a corner by strictly increasing the number of core slots every scenario -- it's inevitable that it leads to every smaller scenario being a pushover. The PzC GC East "solved" that by just making every scenario a massive battle, but that gets tiring too. Greater flexibility in core slots would allow for greater flexibility in scenario design as well.
-
SineMora
- Sergeant Major - SdKfz 234/2 8Rad
- Posts: 641
- Joined: Thu Apr 02, 2020 4:20 pm
- Location: Sweden
Re: A Certain Panzer General's Adventures -- Generalissimus (No Liberator / Trophies of War / Heroes)
I suppose I'll see when I get to that point. Bagration especially seems to be causing a lot of consternation among players, so it should prove interesting at least.MickMannock wrote: Fri May 08, 2020 6:02 am I get your point, but some of the later scenarios, even if they are a bit smaller, are still difficult because of the numbers thrown at you (and also how good some units are, I'm looking at you IS-2). Granted, with the heroes I had, it wasn't super difficult, but if I had played without heroes, I would have been in big trouble and I would have needed all the core slots I could get my hands on. I know I'm not a good player, but I don't think I would have been able to win the campaign if I had had lesser core slots during the final 4 or 5 scenarios (eastern front).
Mildly pretentious Swede. Goes by Path on most platforms, including Steam.
http://www.slitherine.com/forum/viewtopic.php?f=596&t=98034 -- Generalissimus AAR (no Trophies / Heroes)
http://www.slitherine.com/forum/viewtopic.php?f=596&t=98034 -- Generalissimus AAR (no Trophies / Heroes)
-
SineMora
- Sergeant Major - SdKfz 234/2 8Rad
- Posts: 641
- Joined: Thu Apr 02, 2020 4:20 pm
- Location: Sweden
Re: A Certain Panzer General's Adventures -- Generalissimus (No Liberator / Trophies of War / Heroes)
Scenario XVII -- Kursk
Initial Prestige: 107002
Final Prestige: 154694
Core
The Kursk salient is heavily fortified with extensive earthworks and minefields, and it is believed that elements of the Red Army present there number in the hundreds of thousands. The plan as conceived by the OKW is to cut off the salient from the east with a coordinated pincer attack through Maloarkhangelsk in the north and Prokhorovka in the south, which would allow the armoured spearhead of the Wehrmacht to bypass the fortifications. Unfortunately, it is clear that the Soviets are aware of these plans, and it would be foolish to think they have been idle while preparations were made for Operation Citadel. It is likely that the seemingly weak spots in the Kursk salient are in fact a trap, and therefore I have decided to modify the plan; while I intend to achieve the strategic objectives of Operation Citadel, I have no intention of playing into the Red Army's hands.
Infantry support will be limited to the veterans of the Bridgeburners and the Crimson Guard, who will provide an option for close assault should it prove necessary during the initial phase of the operation. Once the objectives east of Belgorod have been secured they will form a rearguard to protect the hills and woodlands while the Panzers move north. Two elite battalions have been outfitted with the Panzer VI Tiger, a powerful heavy tank that finally provides a platform capable of challenging the Soviet armour directly. These Panzers will provide the necessary firepower to penetrate the Soviet lines while the remaining Panzer IIINs provide the numbers and resilience to hold the Red Army in check.
The StuG IIIBs have been replaced with StuH 42s, as these workhorses have begun to show their age; assault guns have proved a valuable asset, but they need to be able to function on the frontlines, and the armour of the StuG IIIB is simply not up to the task at this point. They have been in dire need of an upgrade for some time now, but Retrograde has kept me from replacing them. Two Flakvierlings will provide additional AA defence, as the scale of the battle makes it difficult to gauge what kind of presence the Soviet air force has; now that the bug that affected them has been fixed they are great value at only a single core slot each, and they will hopefully allow the Luftwaffe to focus on offensive operations. The latter has been strengthened by the addition of three squadrons of Fw 190A fighters, which provide a welcome upgrade to the Bf 109F. Under the sweltering sun, the heavy overcast skies of the Russian winter have faded to a distant memory, and two additional Do 217Es and a Bf 110G have been requisitioned to make the most of the clear skies.
Despite the daunting task ahead, I am in good spirits, as these are perfect conditions under which to make good use of my preferred combination of armour, artillery and strategic bombers. As expected of the Battle of Kursk, the scenario is massive in scale, and having finally found the time to play it, I have no doubt it'll prove entertaining.
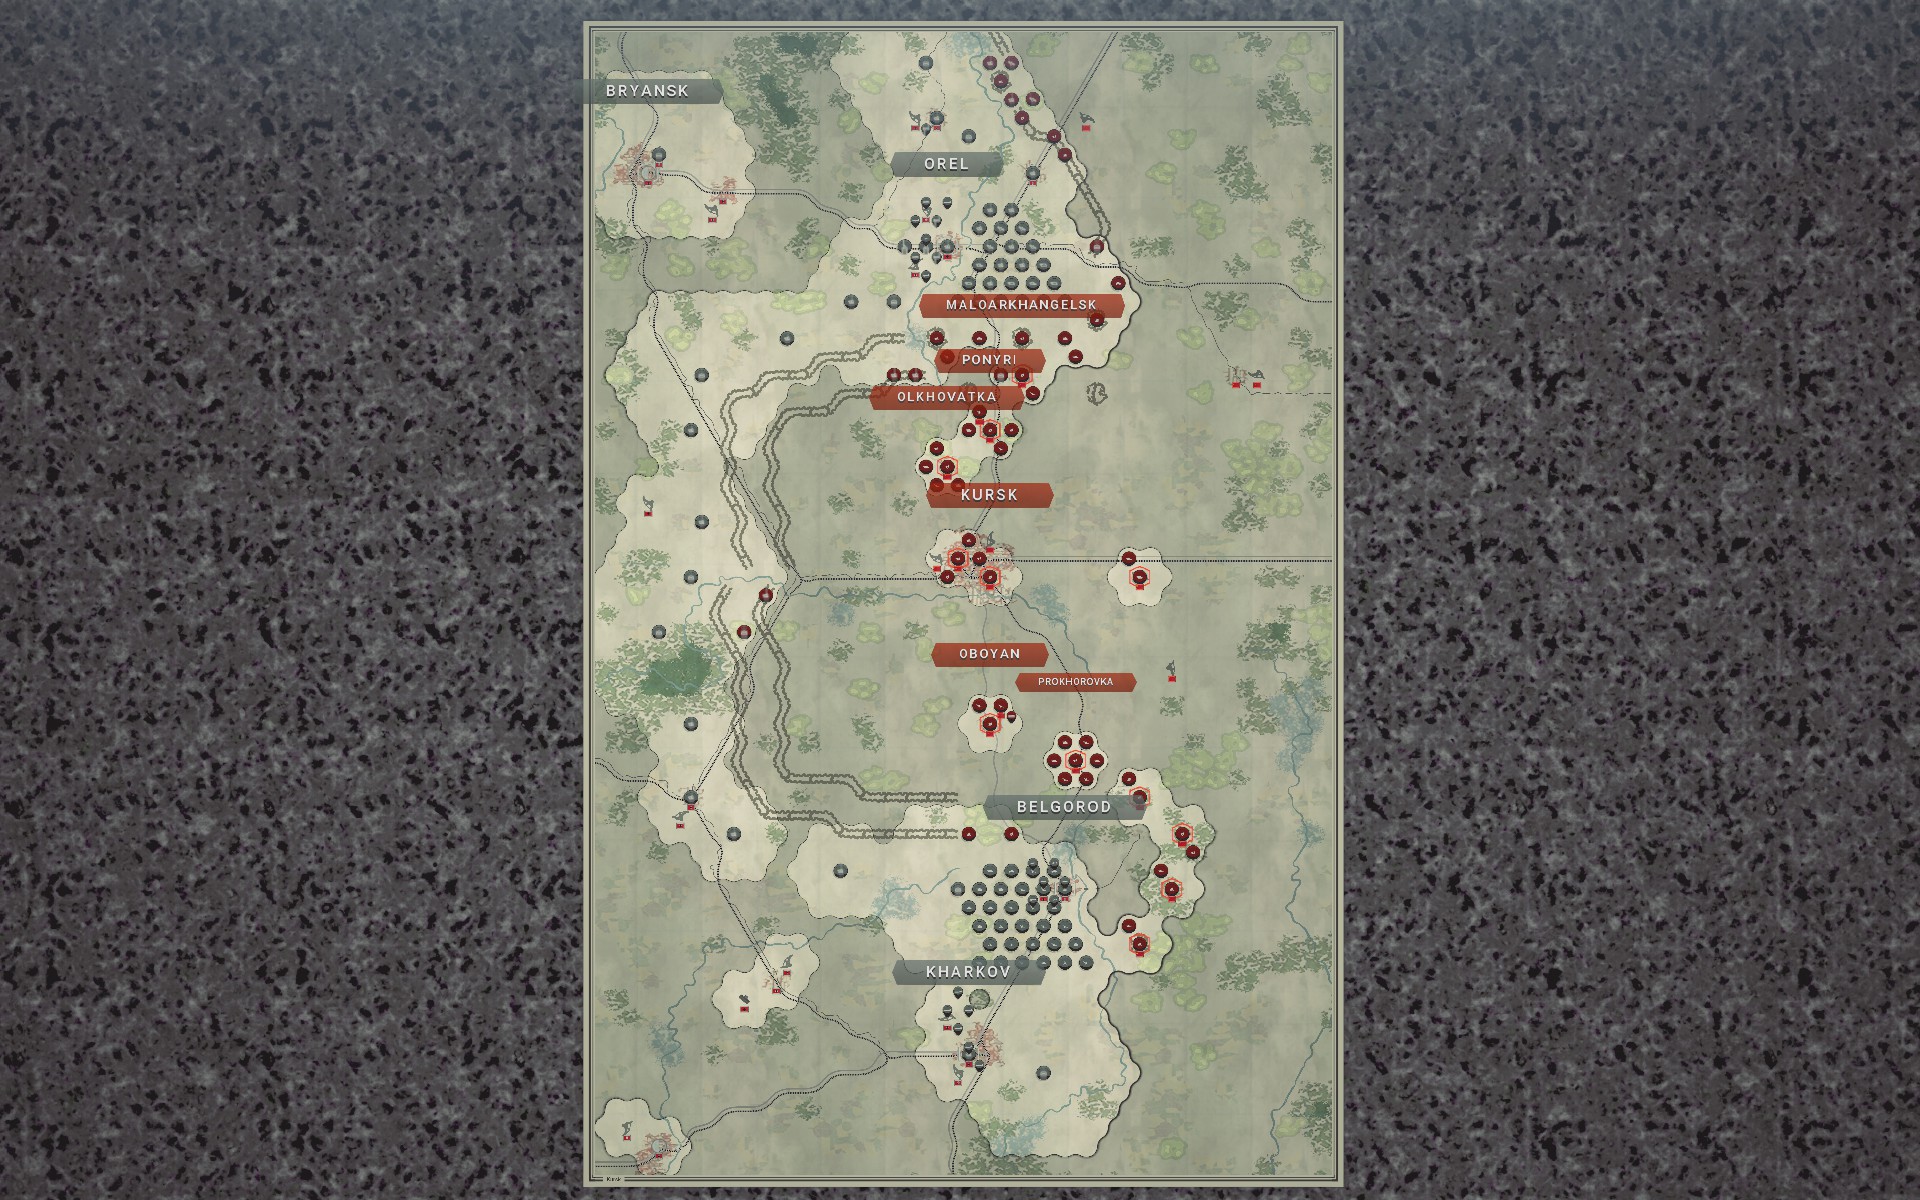
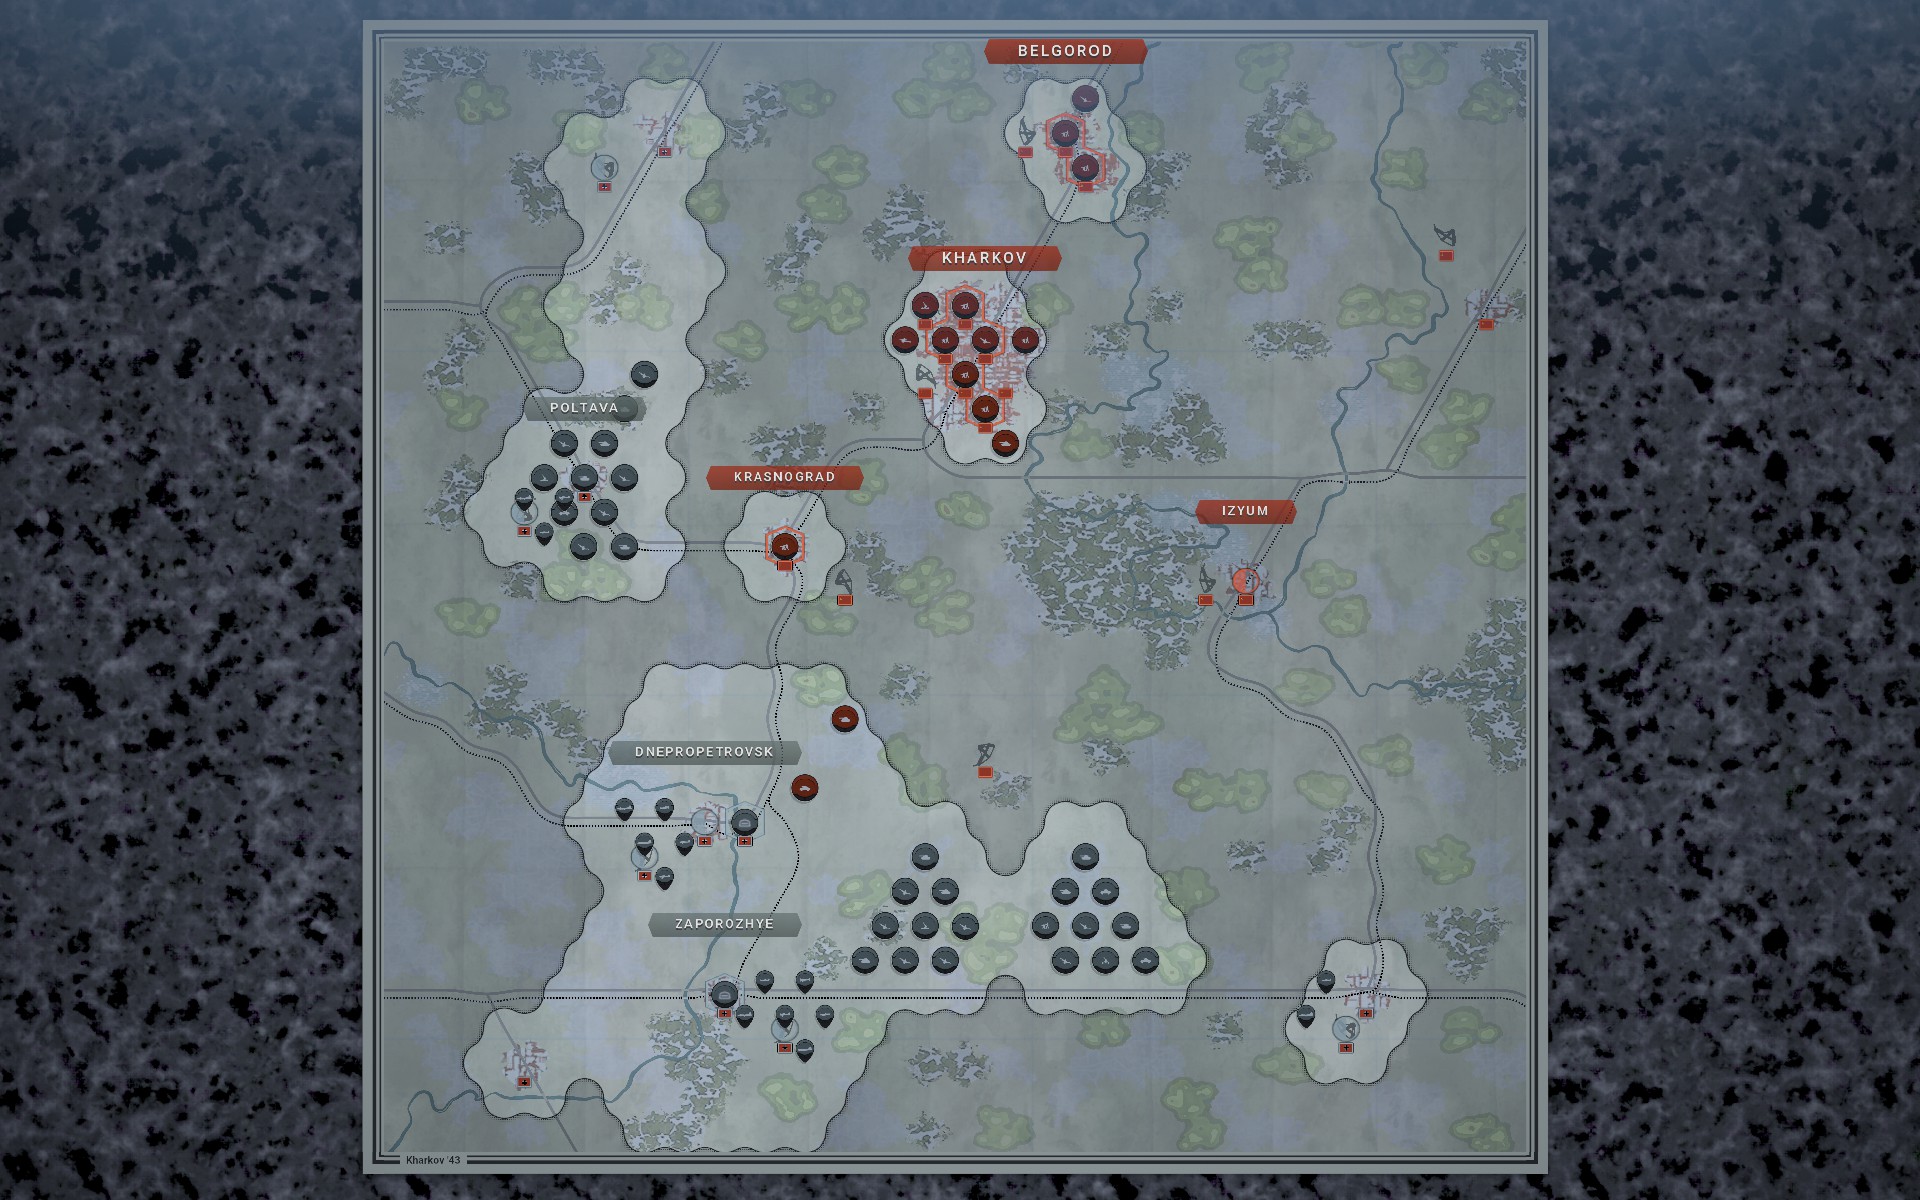
The western part of the Kursk salient is completely sealed off with earthworks and minefields, but while these would make any attempt to penetrate the Soviet lines difficult, the Red Army is likewise unable to break out. The perimeter is already surrounded by a number of German Strongpoints and auxiliary infantry battalions, so I won't need to split my forces. Despite months of preparations the Red Army has foolishly centralised supplies to a single depot due east of the city of Kursk; while this simplifies their logistics, it also leaves them vulnerable to a flanking maneuver, and it is this supply depot that is the objective of the first phase of my plan.
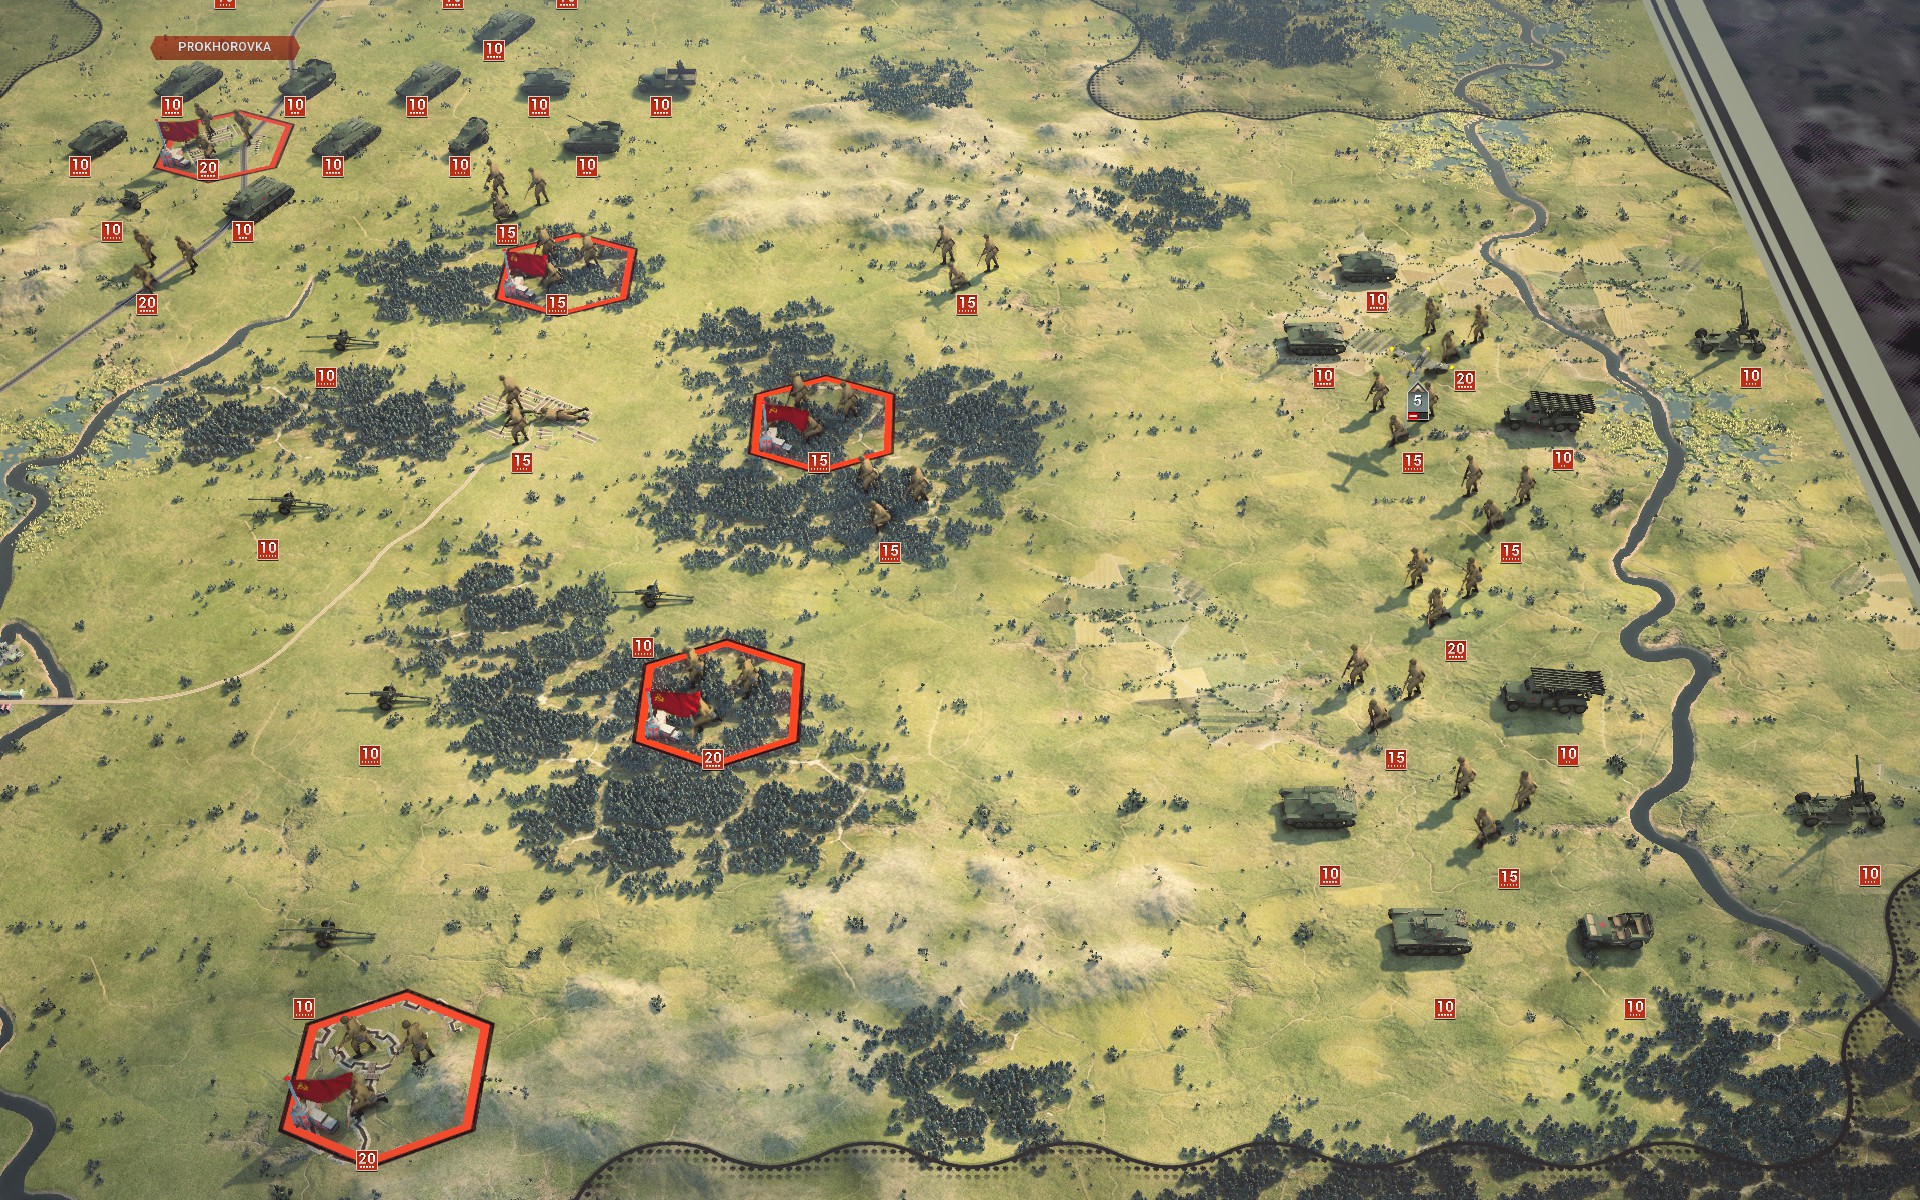
Intelligence suggests that the Red Army has massed armour near Prokhorovka, and Deep Recon reveals that this is indeed the case. No doubt these forces are meant to ambush my Panzers as they breach the first line of the Soviet defences, but the Red Army has overplayed its hand by weakening the flanks of the Kursk salient. They shall have their armoured battle at Prokhorovka, but on my terms. My forces will cross the Donets to secure the objectives east of Belgorod and then push north through the hills east of Prokhorovka. Ideally the Panzers will be able to advance unchallenged, but if not then the Pioniere and artillery will provide valuable support in repelling the Soviet armour, as the close terrain will hamper their operations. They will then close in on and secure the supply depot and link up with the auxiliary force in the north, cutting off all supplies to the Kursk salient.
The auxiliary force has a trickier position, as they have deployed too close to the Soviet lines to safely disengage due to the low speed of the Elefants. The infantry and a few Panzers will be deployed along the perimeter of the Soviet fortifications to the north to guard against the possibility of a counterattack, while the bulk of the forces will slowly advance east. Their orders are to restrict any contact with Soviet forces to skirmishing in as much as this is possible, as I do not want the Red Army to commit its reserves at this stage of the battle. They will then head south to link up with my corps at the supply depot. The Luftwaffe will conduct aggressive operations targetting Soviet fighters and bombers to clear the way for the Do 217Es during the next phase of the operation.
Once the Kursk salient has been encircled the second phase of the operation will commence. My corps will advance on Prokhorovka and Oboyan to defeat the Soviet armour massing there. If all goes well these forces should offer little resistance, allowing my Panzers to quickly sweep through them. The StuH 42s will provide the fire support necessary to break down the heavy Soviet fortifications to the west and allow me to capture all forces south of Kursk. The auxiliary force will advance northwest towards the rear of the Soviet forces at Maloarkhangelsk and capture these. The heavy support will then be rerouted north to strengthen the defences there while the lighter vehicles push west to clear the salient of any remaining Soviet forces outside of Kursk itself. I suspect the Red Army would react swiftly to the fall of the city, and so I intend to leave it surrounded initially.
Finally, for the third phase of Operation Citadel my forces will return to the objectives east of Belgorod and take up positions west of the Donets to repel any Soviet forces attempting to break into the Kursk salient. With complete air supremacy and the elite Bridgeburners and Crimson Guard to hold the hills, this should not prove difficult. Timing is critical, however -- should my forces be out of position the Red Army could potentially threaten Belgorod and Kharkov, leading to a costly and protracted battle. The auxiliaries will return north to Orel, with a smaller battlegroup heading east to flank the Soviet fortifications. They will repel any attempt to break through my lines and then flank and destroy the remaining Soviet forces. A bold and ambitious plan, Operation Citadel will see all Soviet forces in the Kursk salient and the surrounding areas captured should it prove successful, but war is rarely that simple.
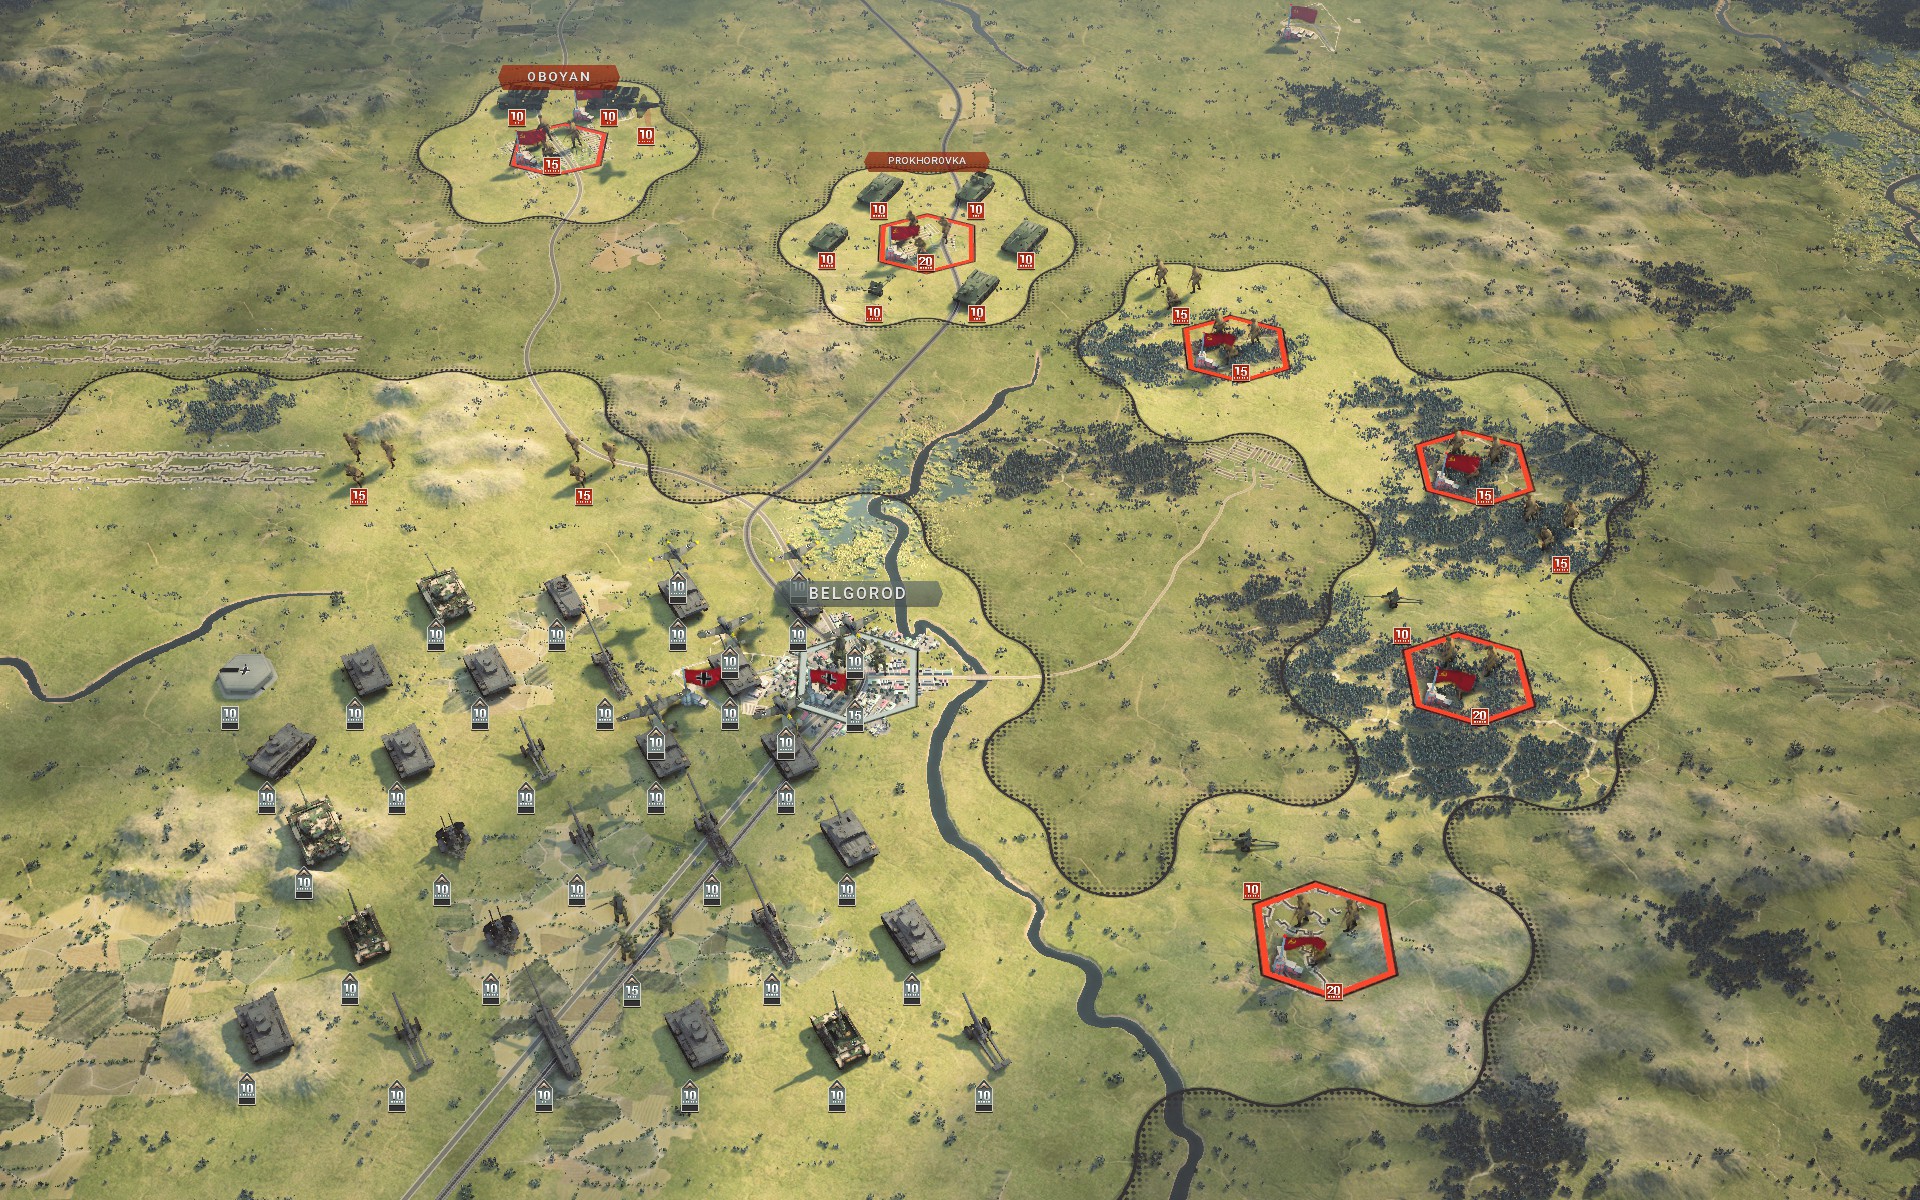
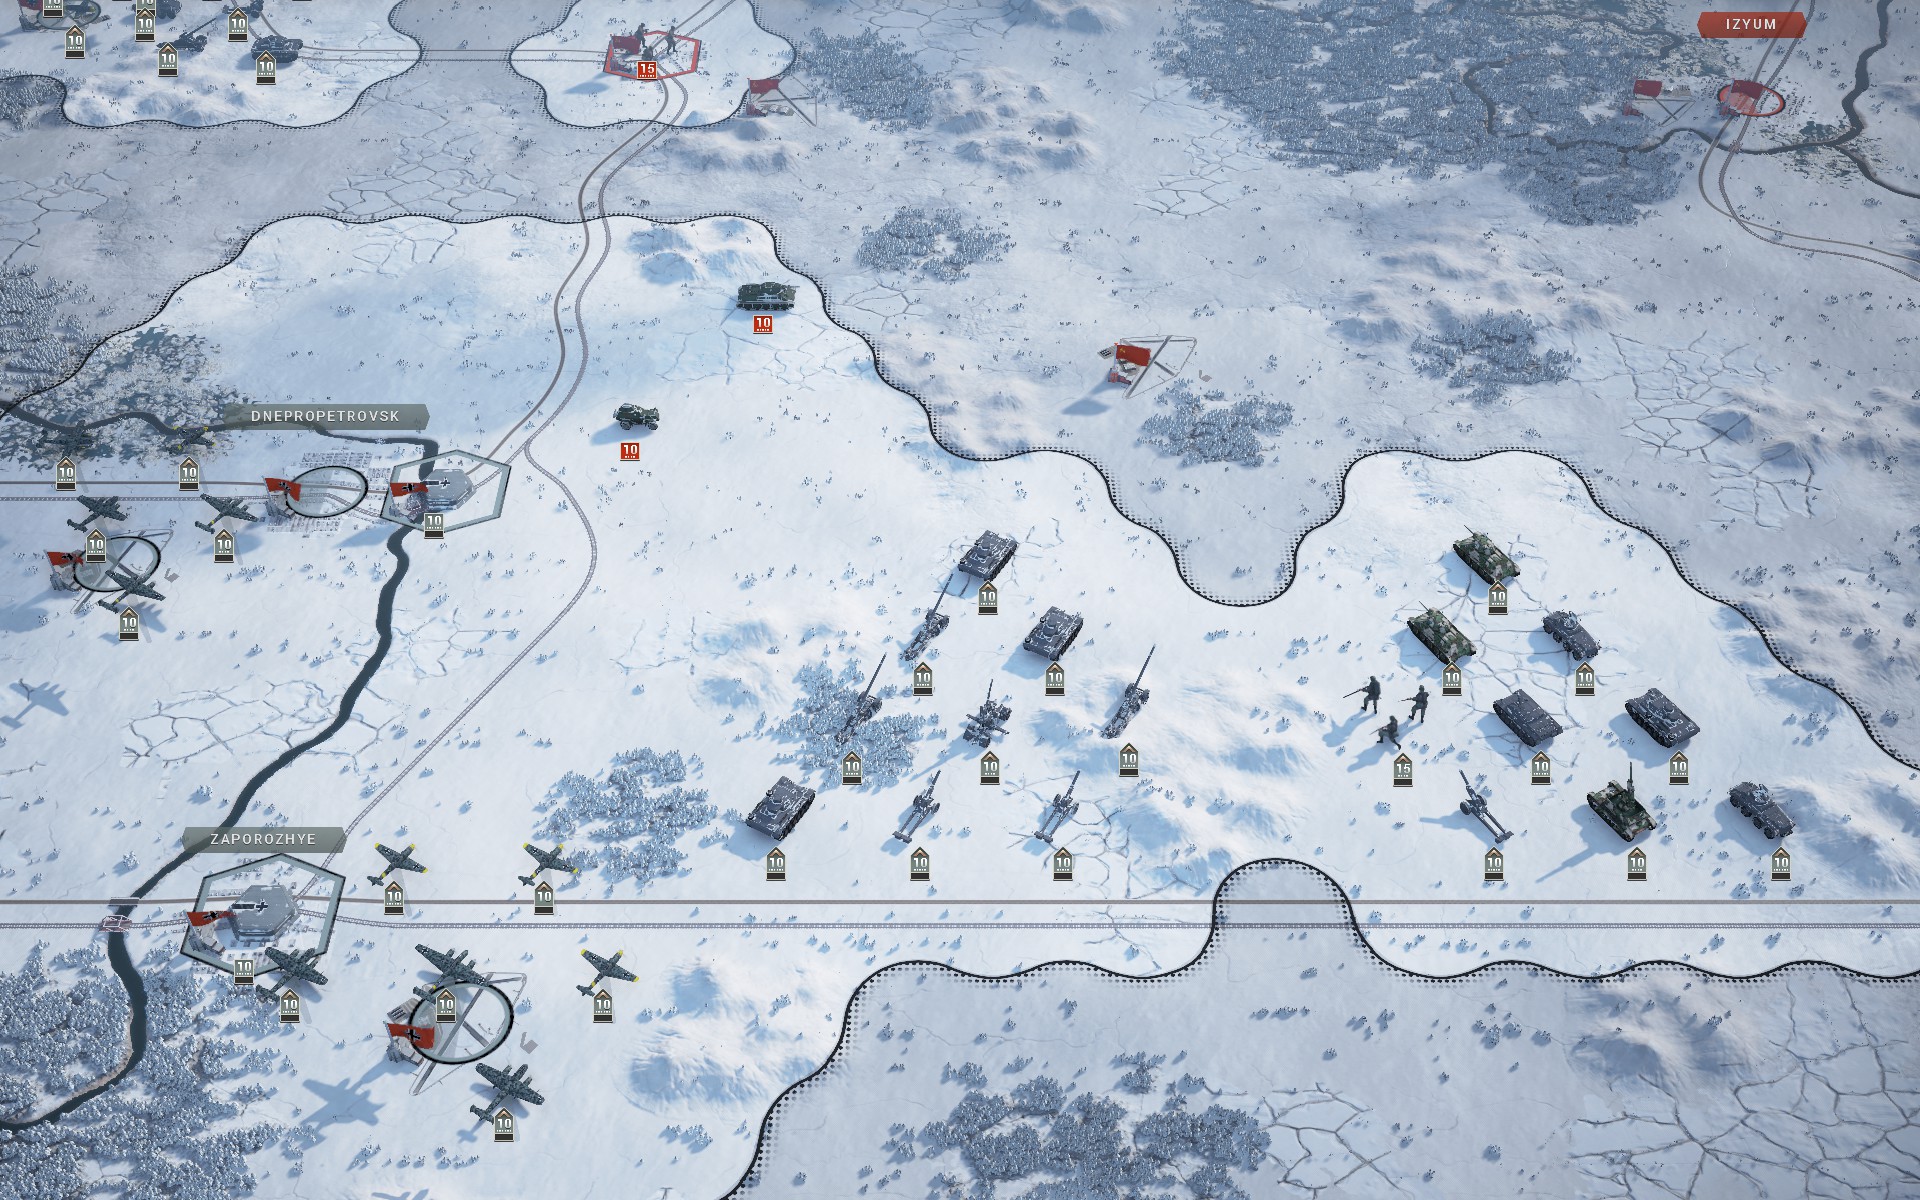
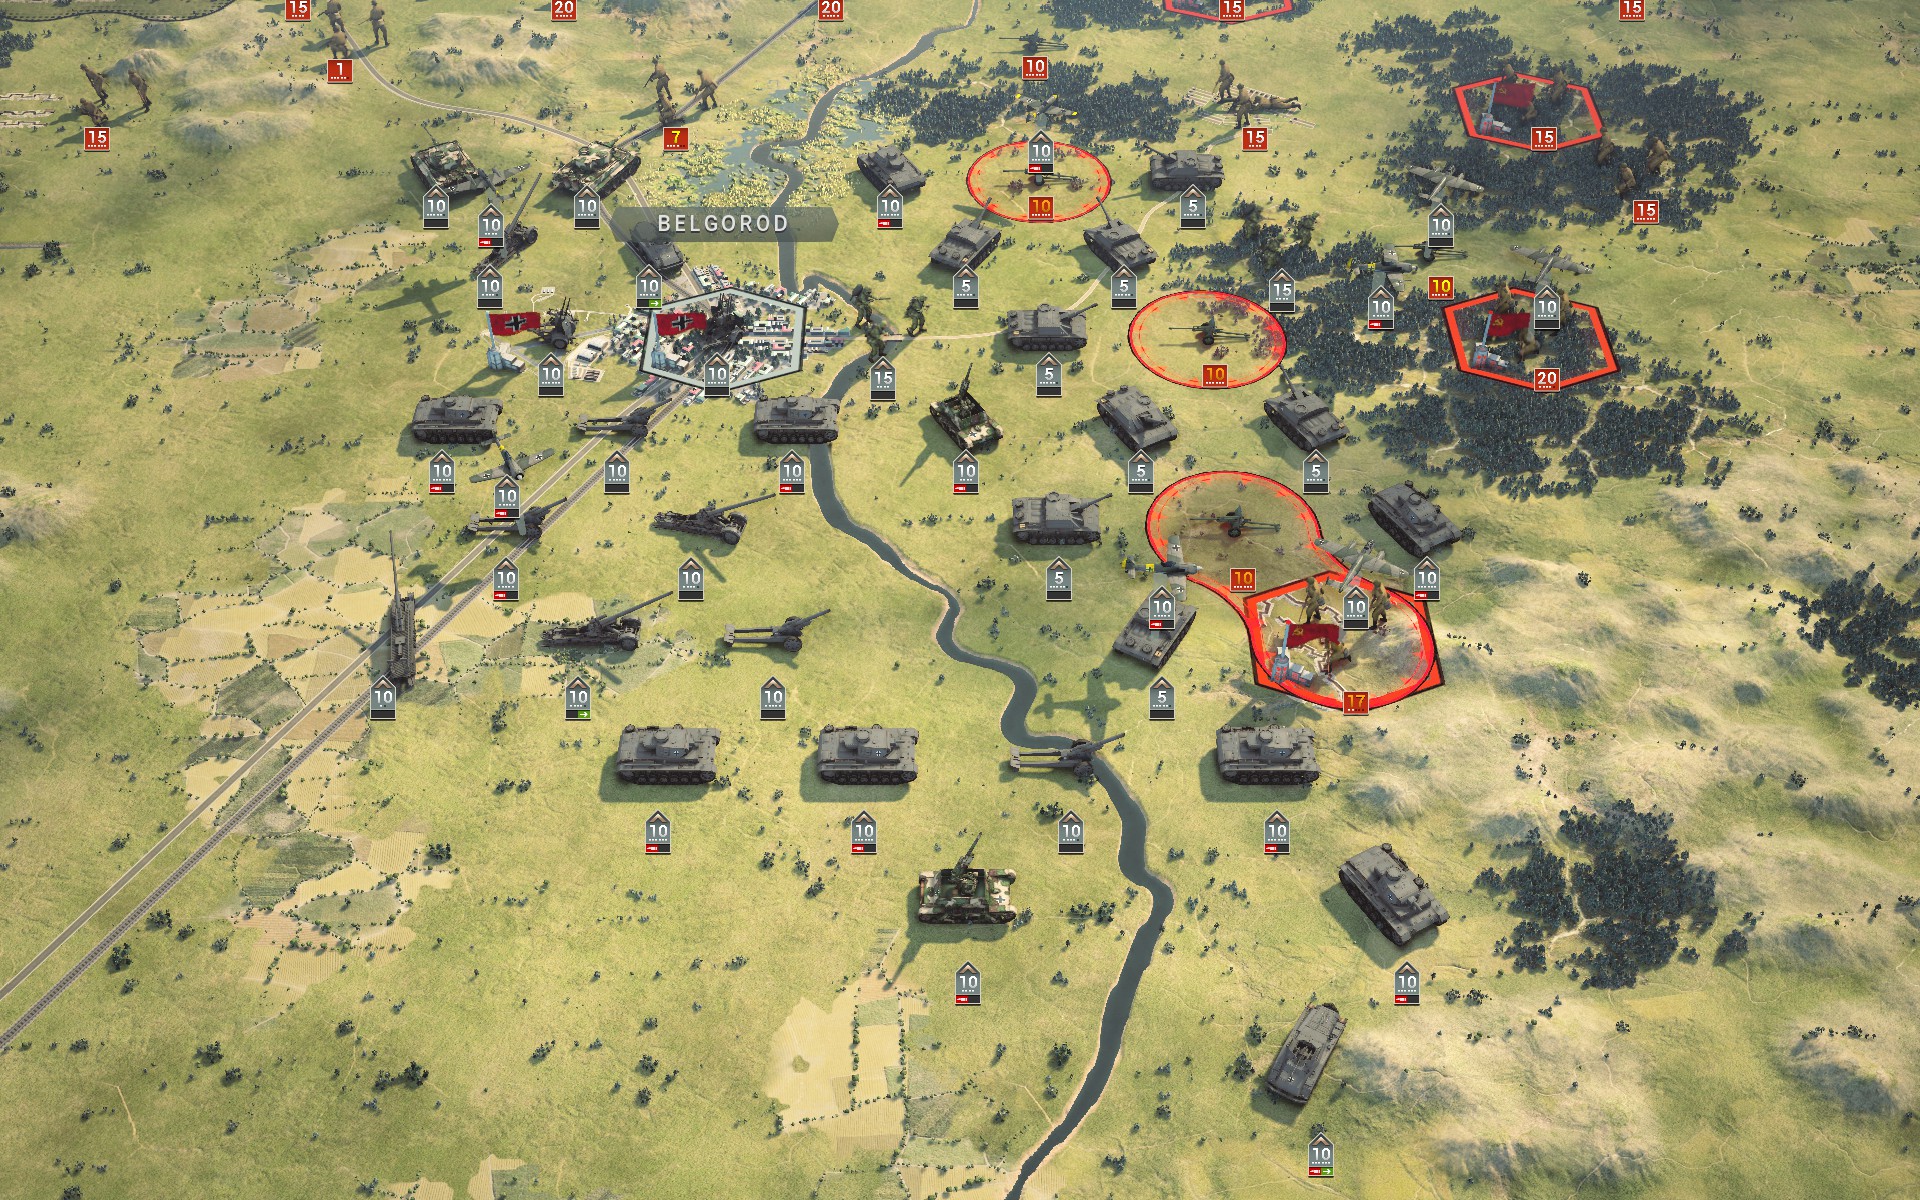
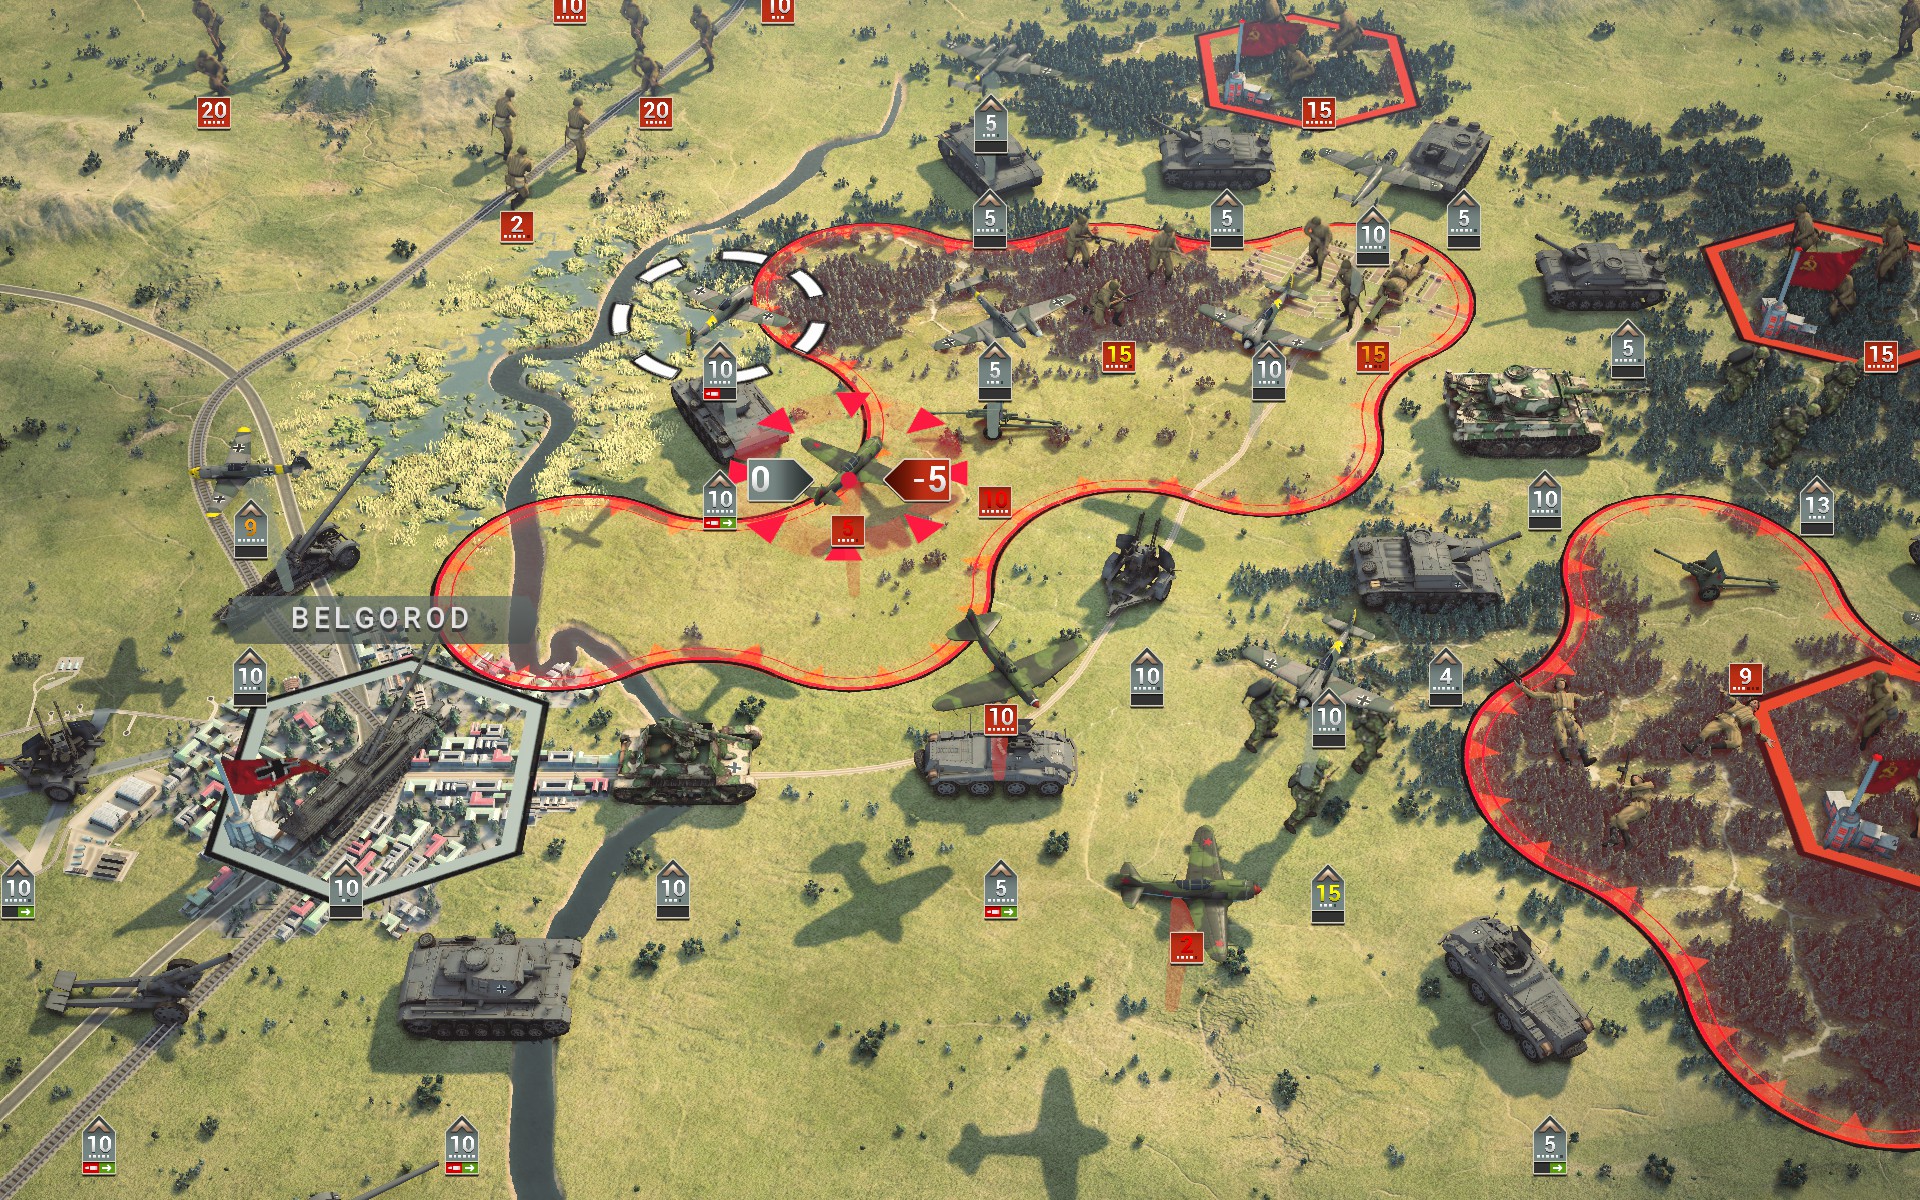
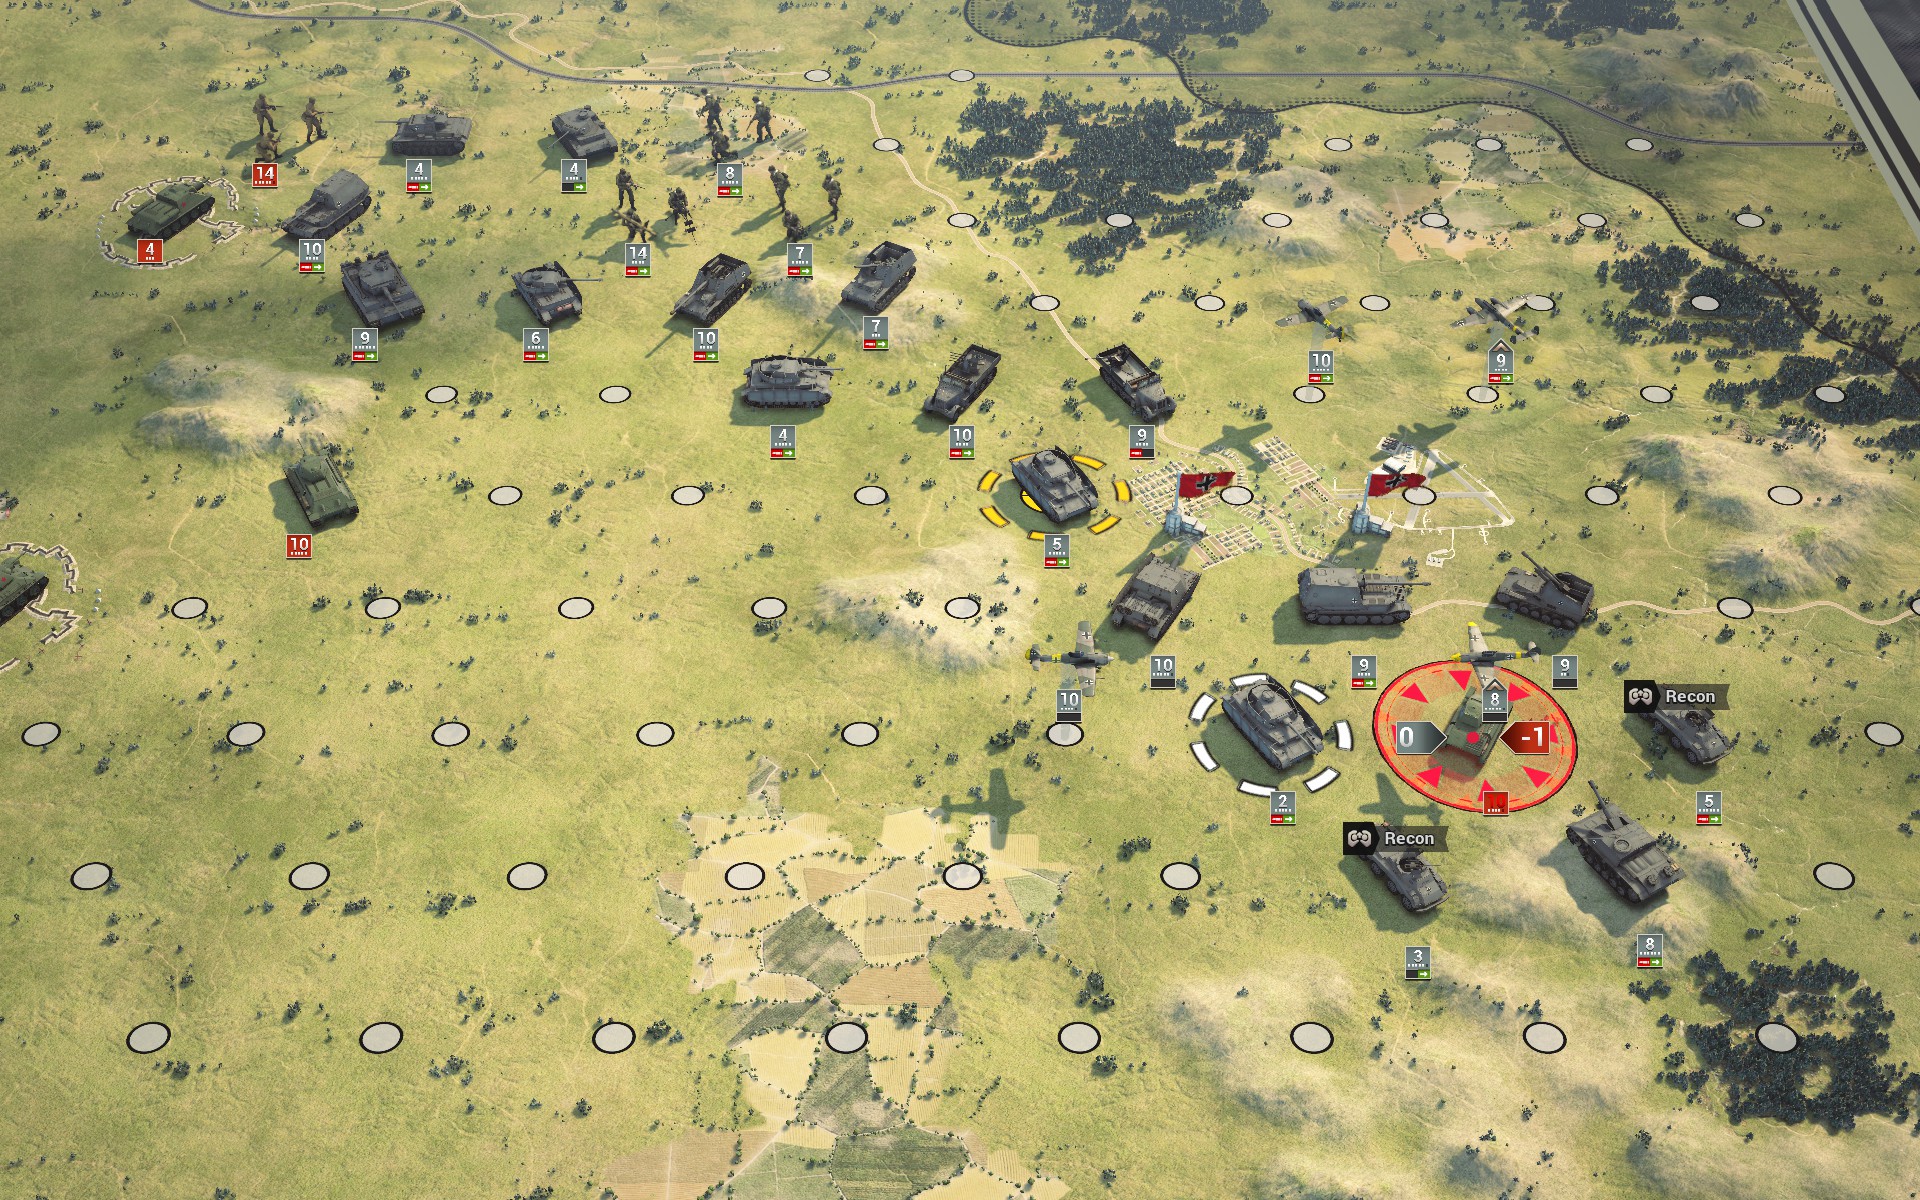
Deep Recon confirms intelligence reports of Soviet armour massing at Prokhorovka, while the objectives east of Belgorod appear to be lightly defended by a few infantry battalions and AT guns. The bulk of my forces will cross the Donets and capture the objectives before heading north over the hills east of Prokhorovka, while Gustav and a token force remain at Belgorod to protect the flank.
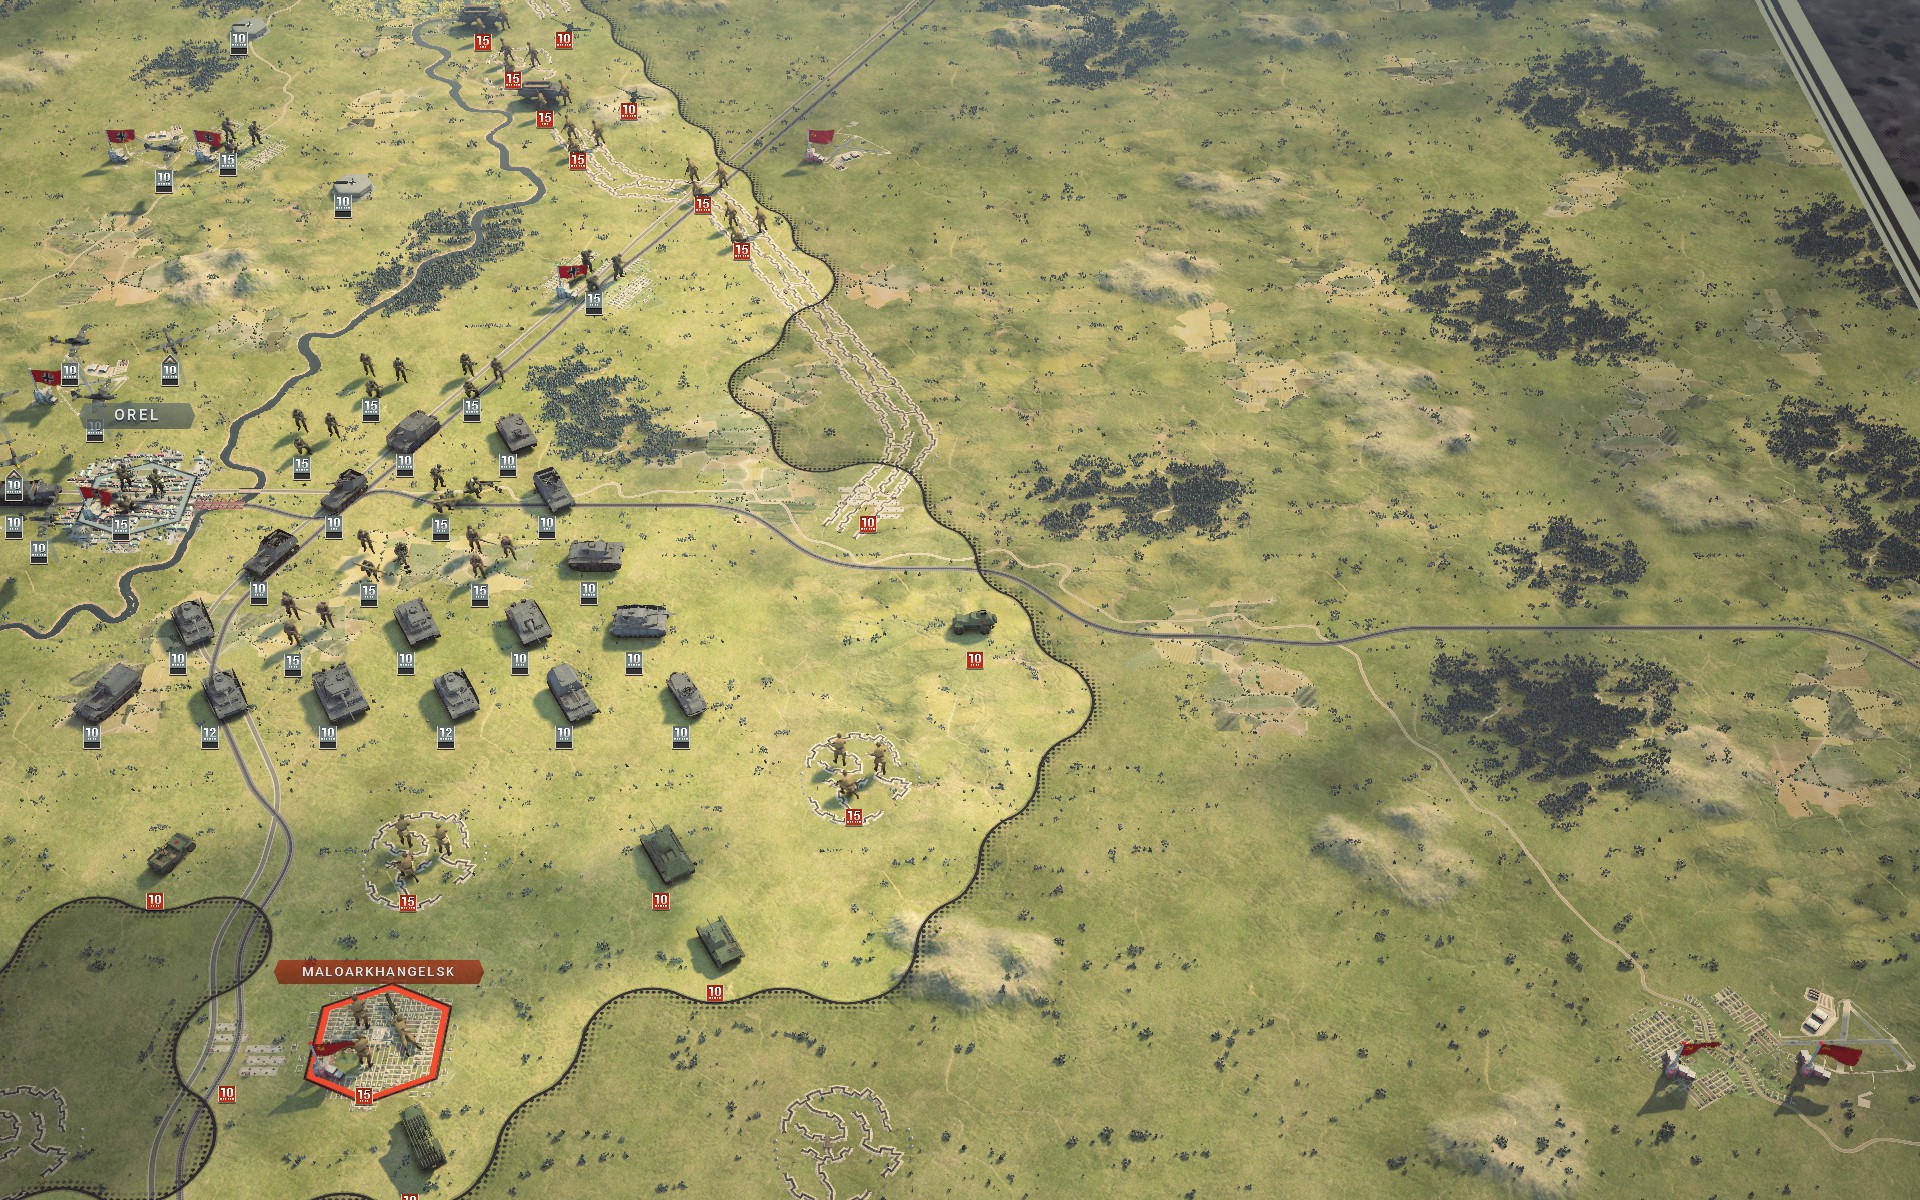
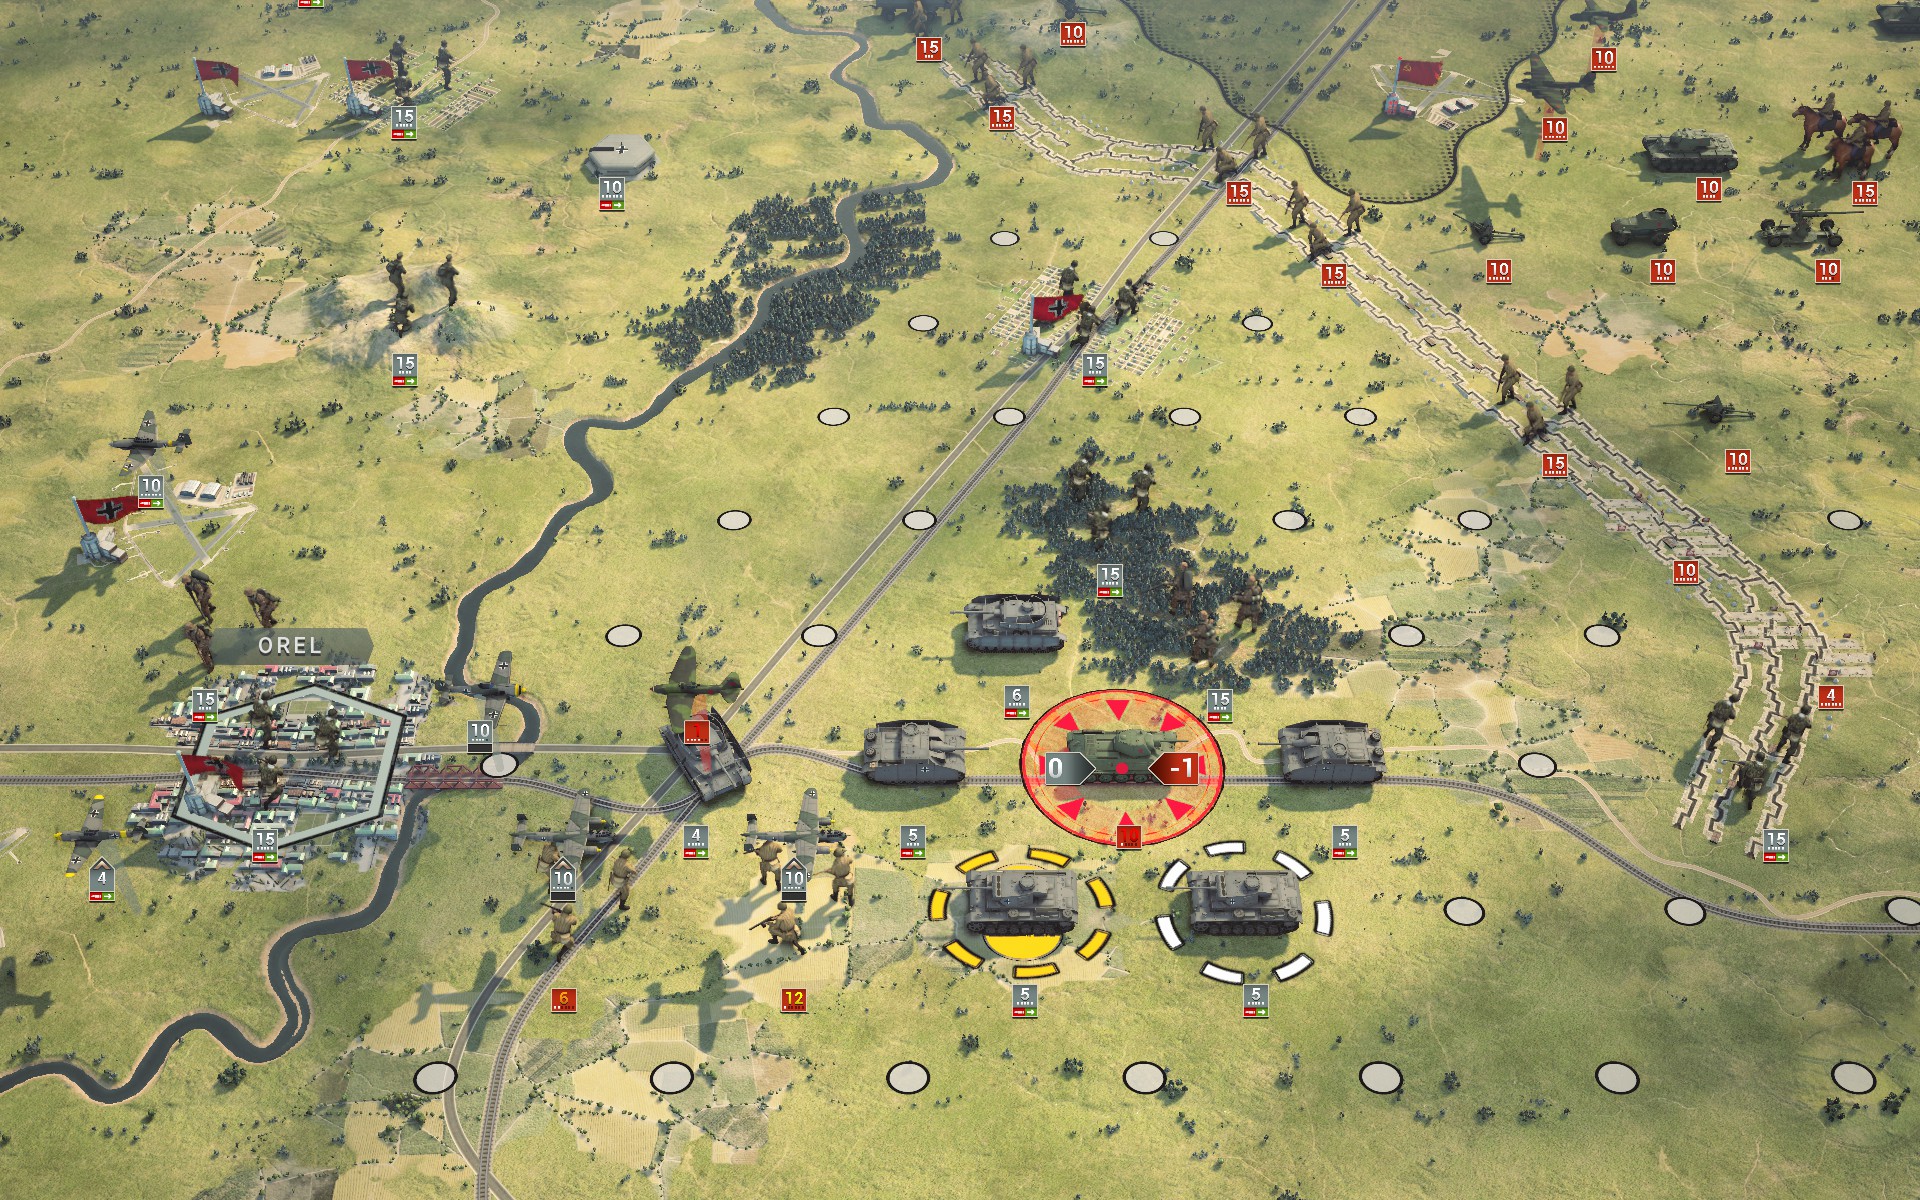
The bridge engineers in the north suggest that the Red Army is planning to cross the Oka at some point, so I will leave the infantry and a few Panzers behind to fortify the region around Orel; by using the terrain to their advantage they should be able to buy enough time for the auxiliary force to reposition should it prove necessary. The rest of the battlegroup will make their way east through the gap between the Kursk salient and the northern earthworks, and then turn south towards the town of Livny.
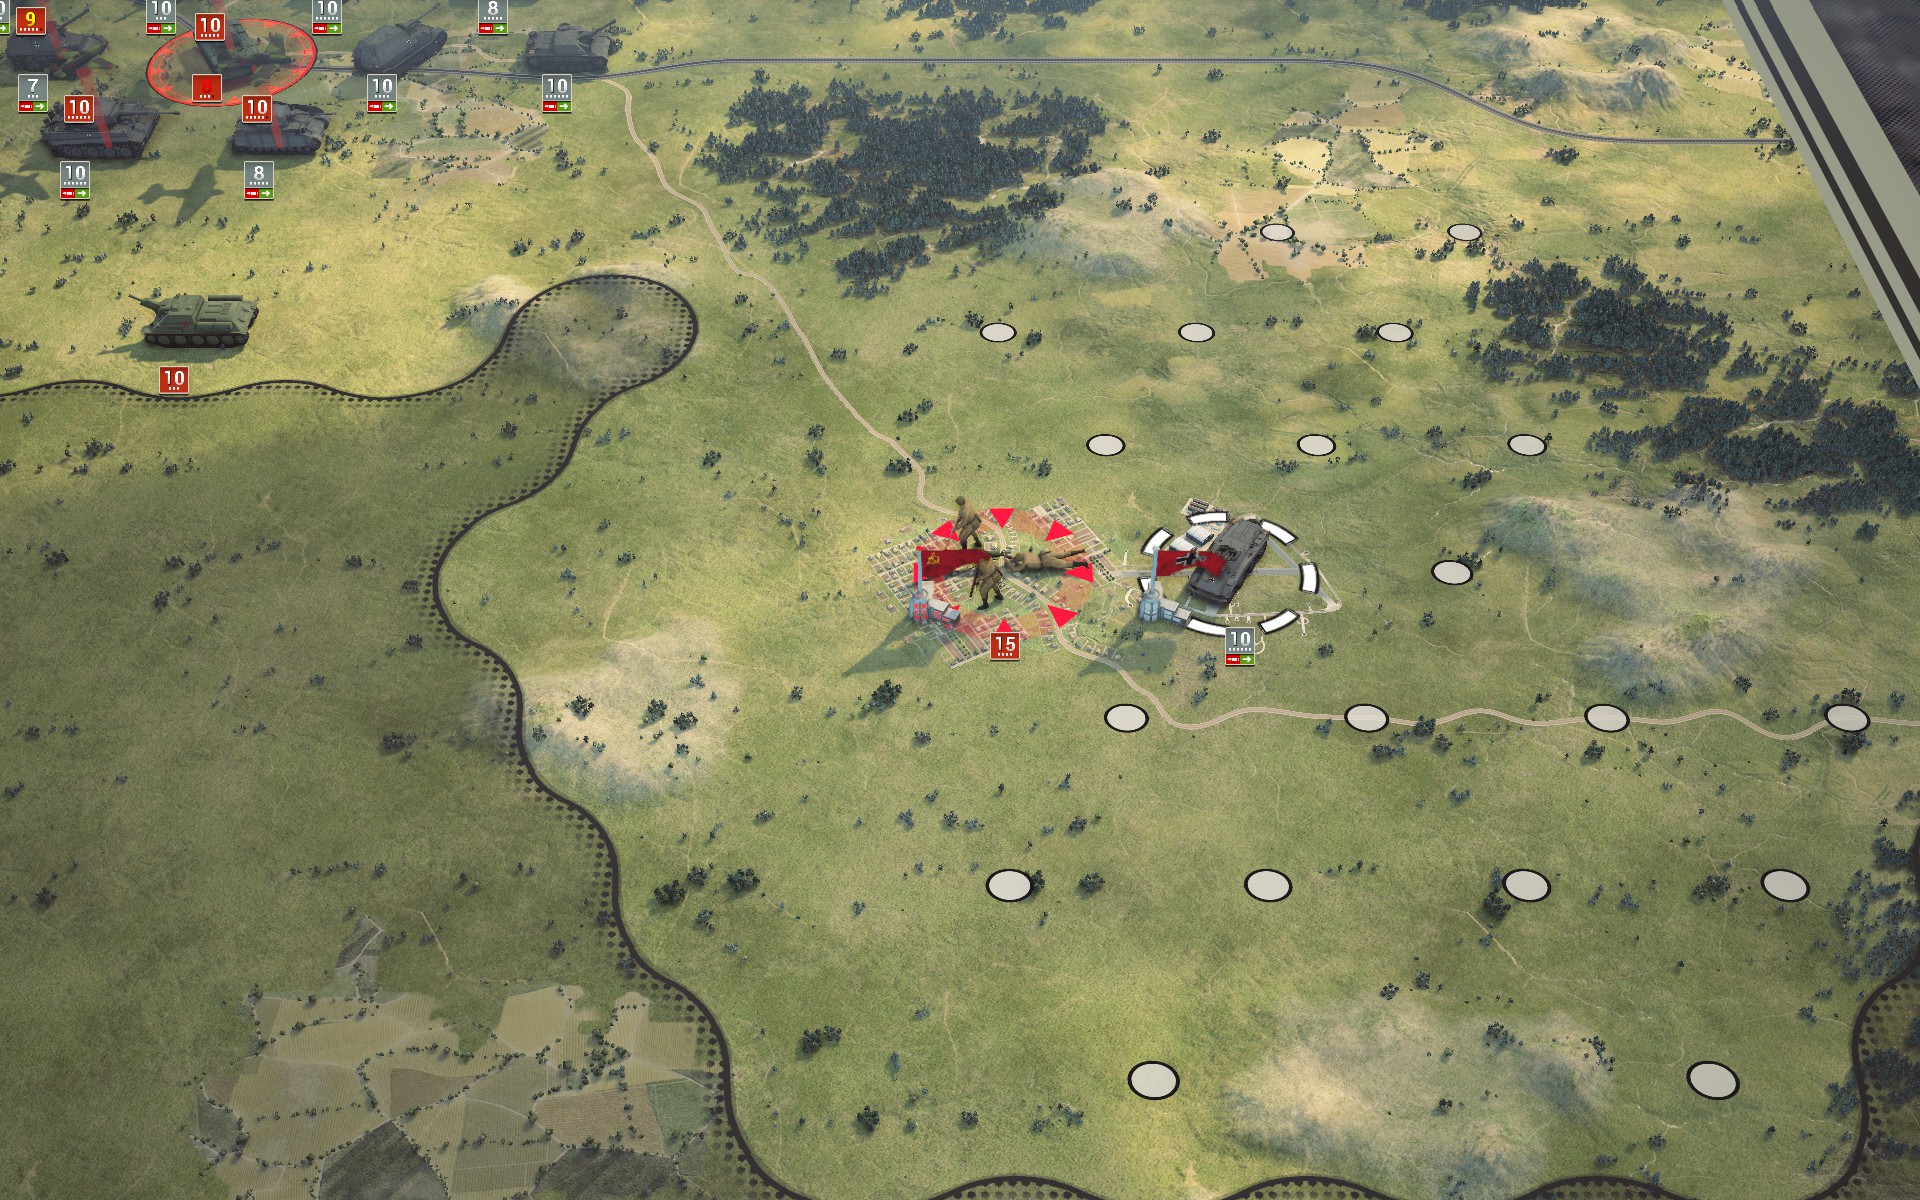
The supply depot due east of Kursk is the main objective of the first phase of Operation Citadel.
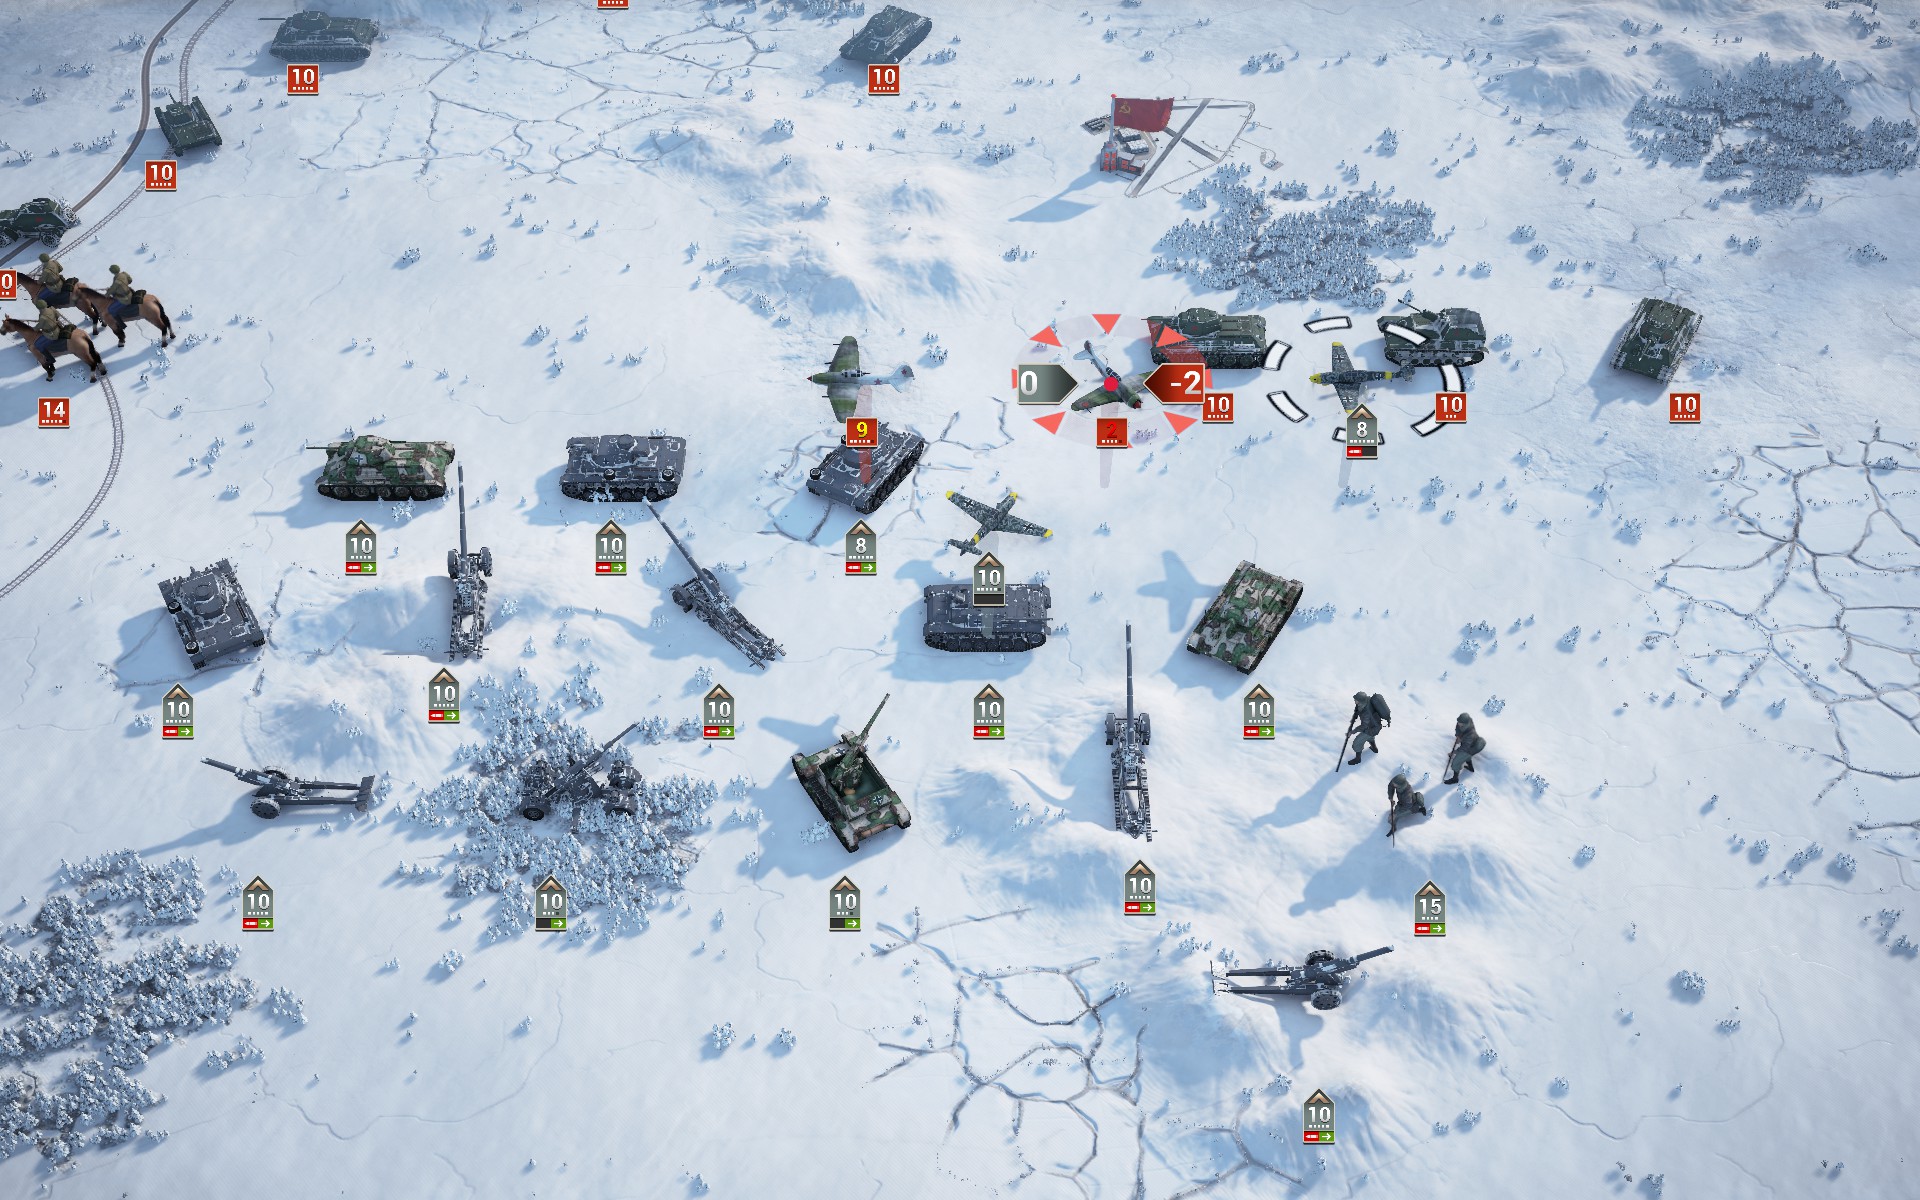
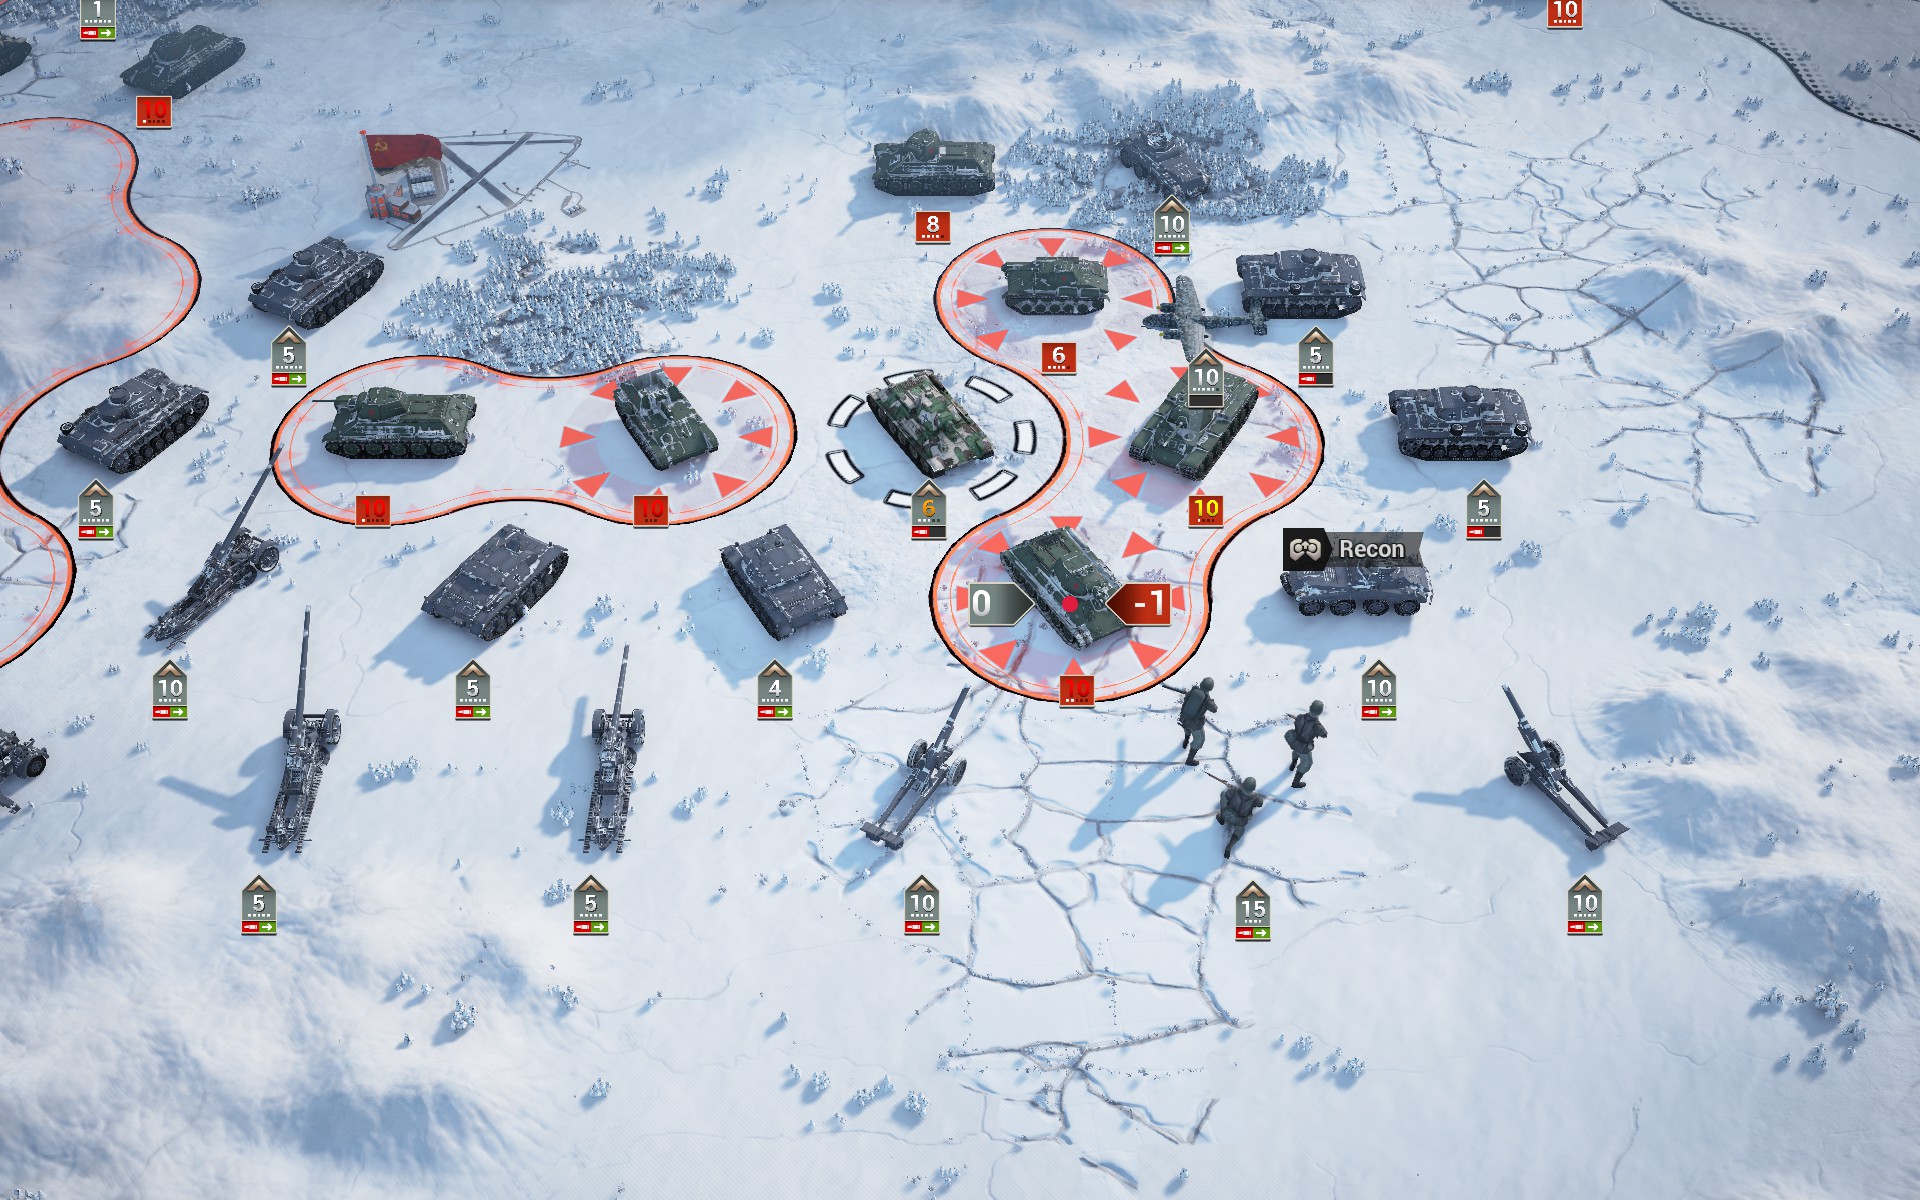
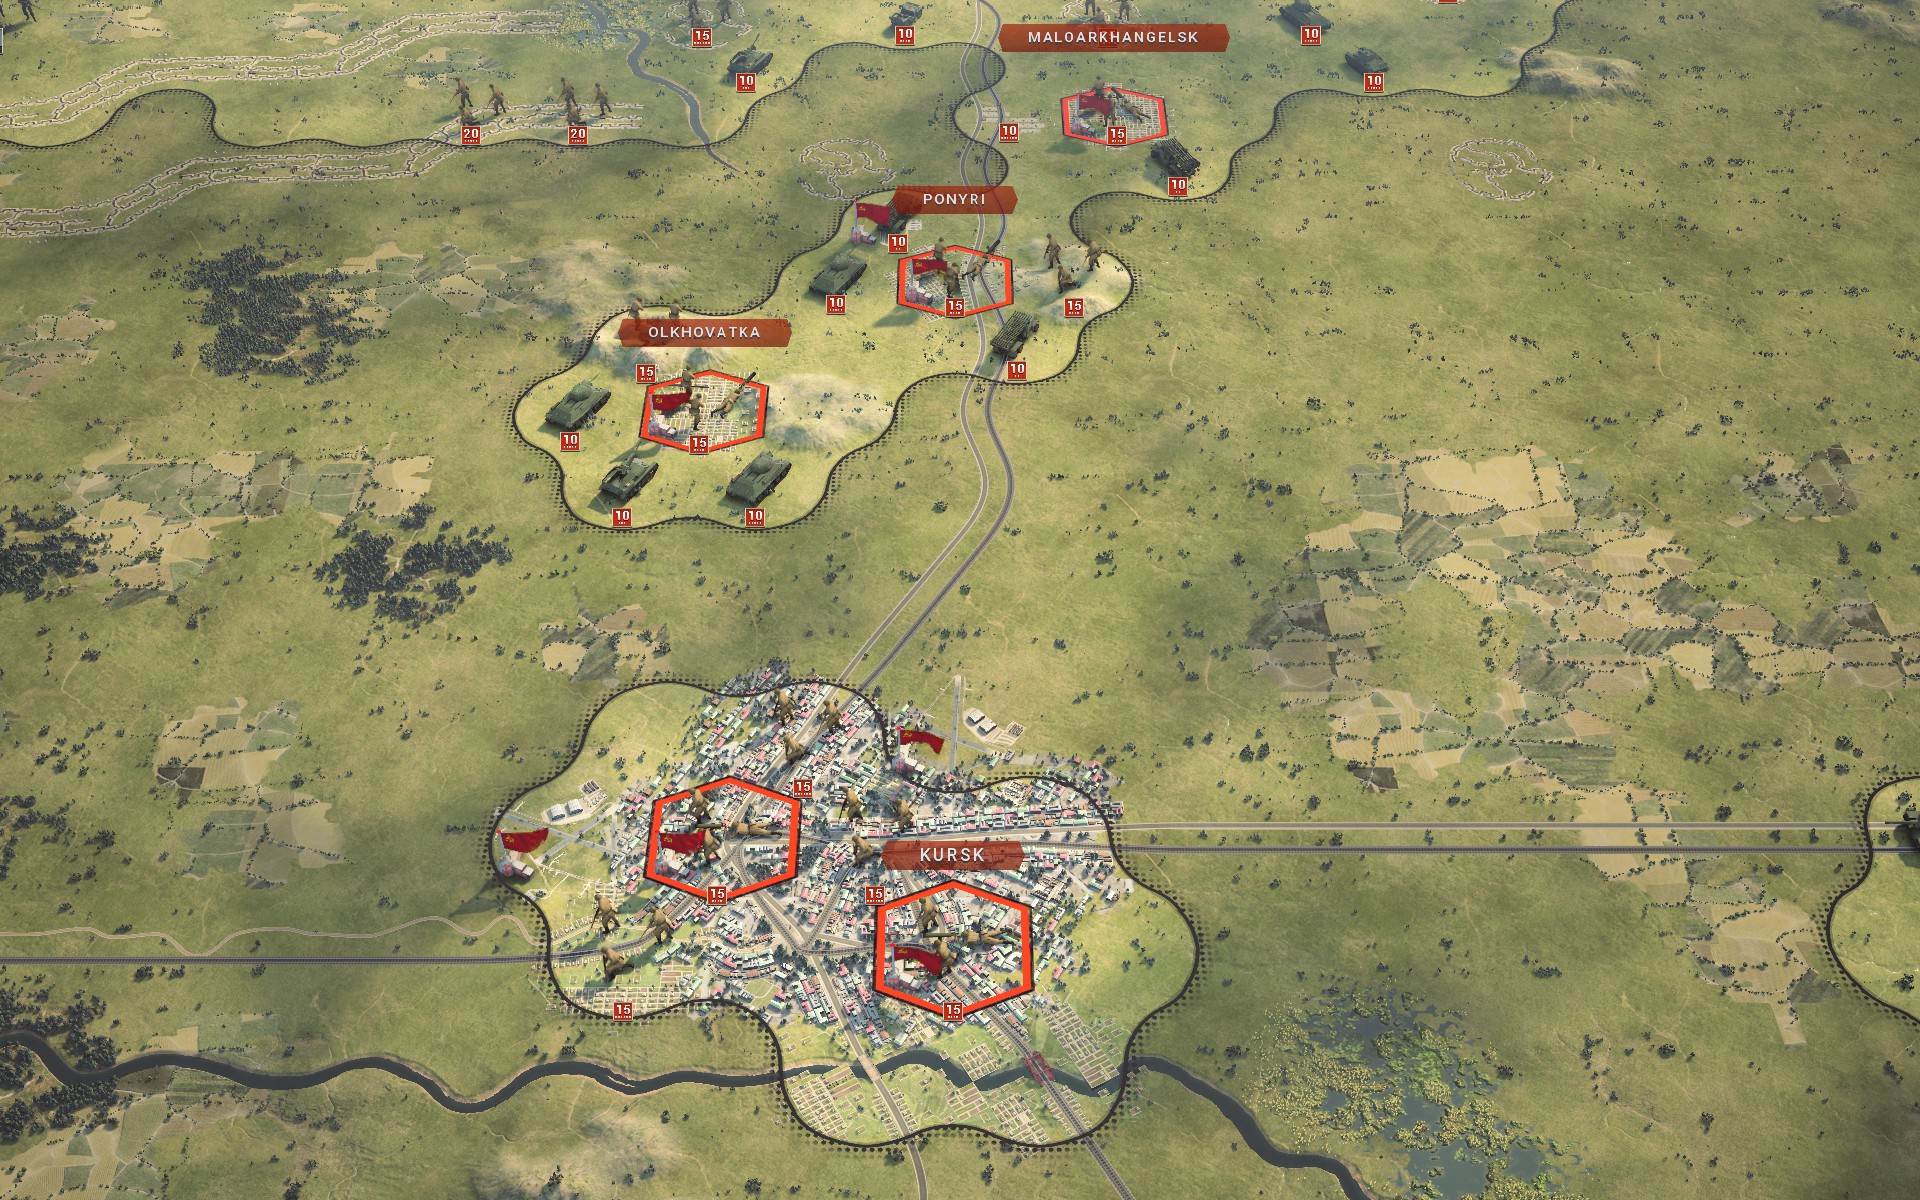
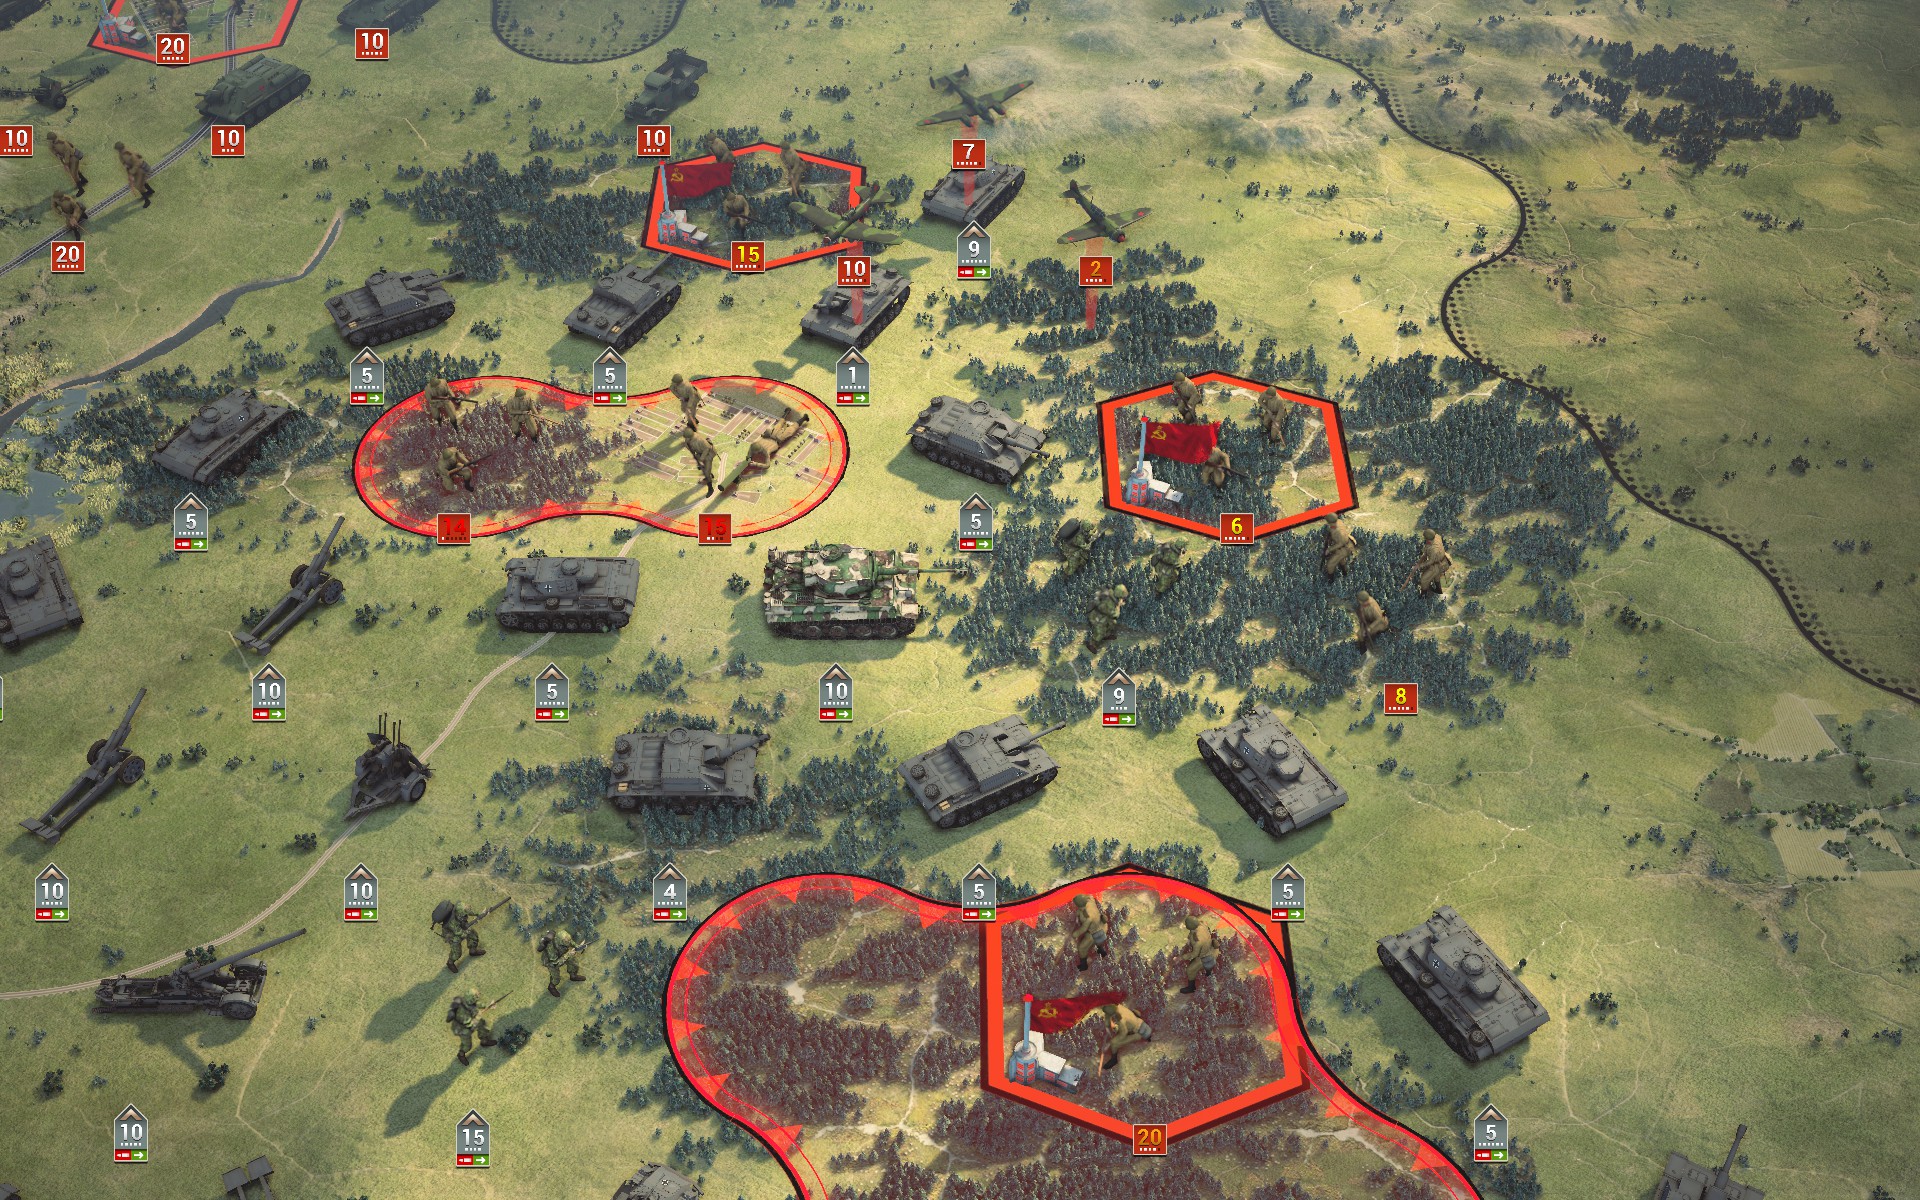
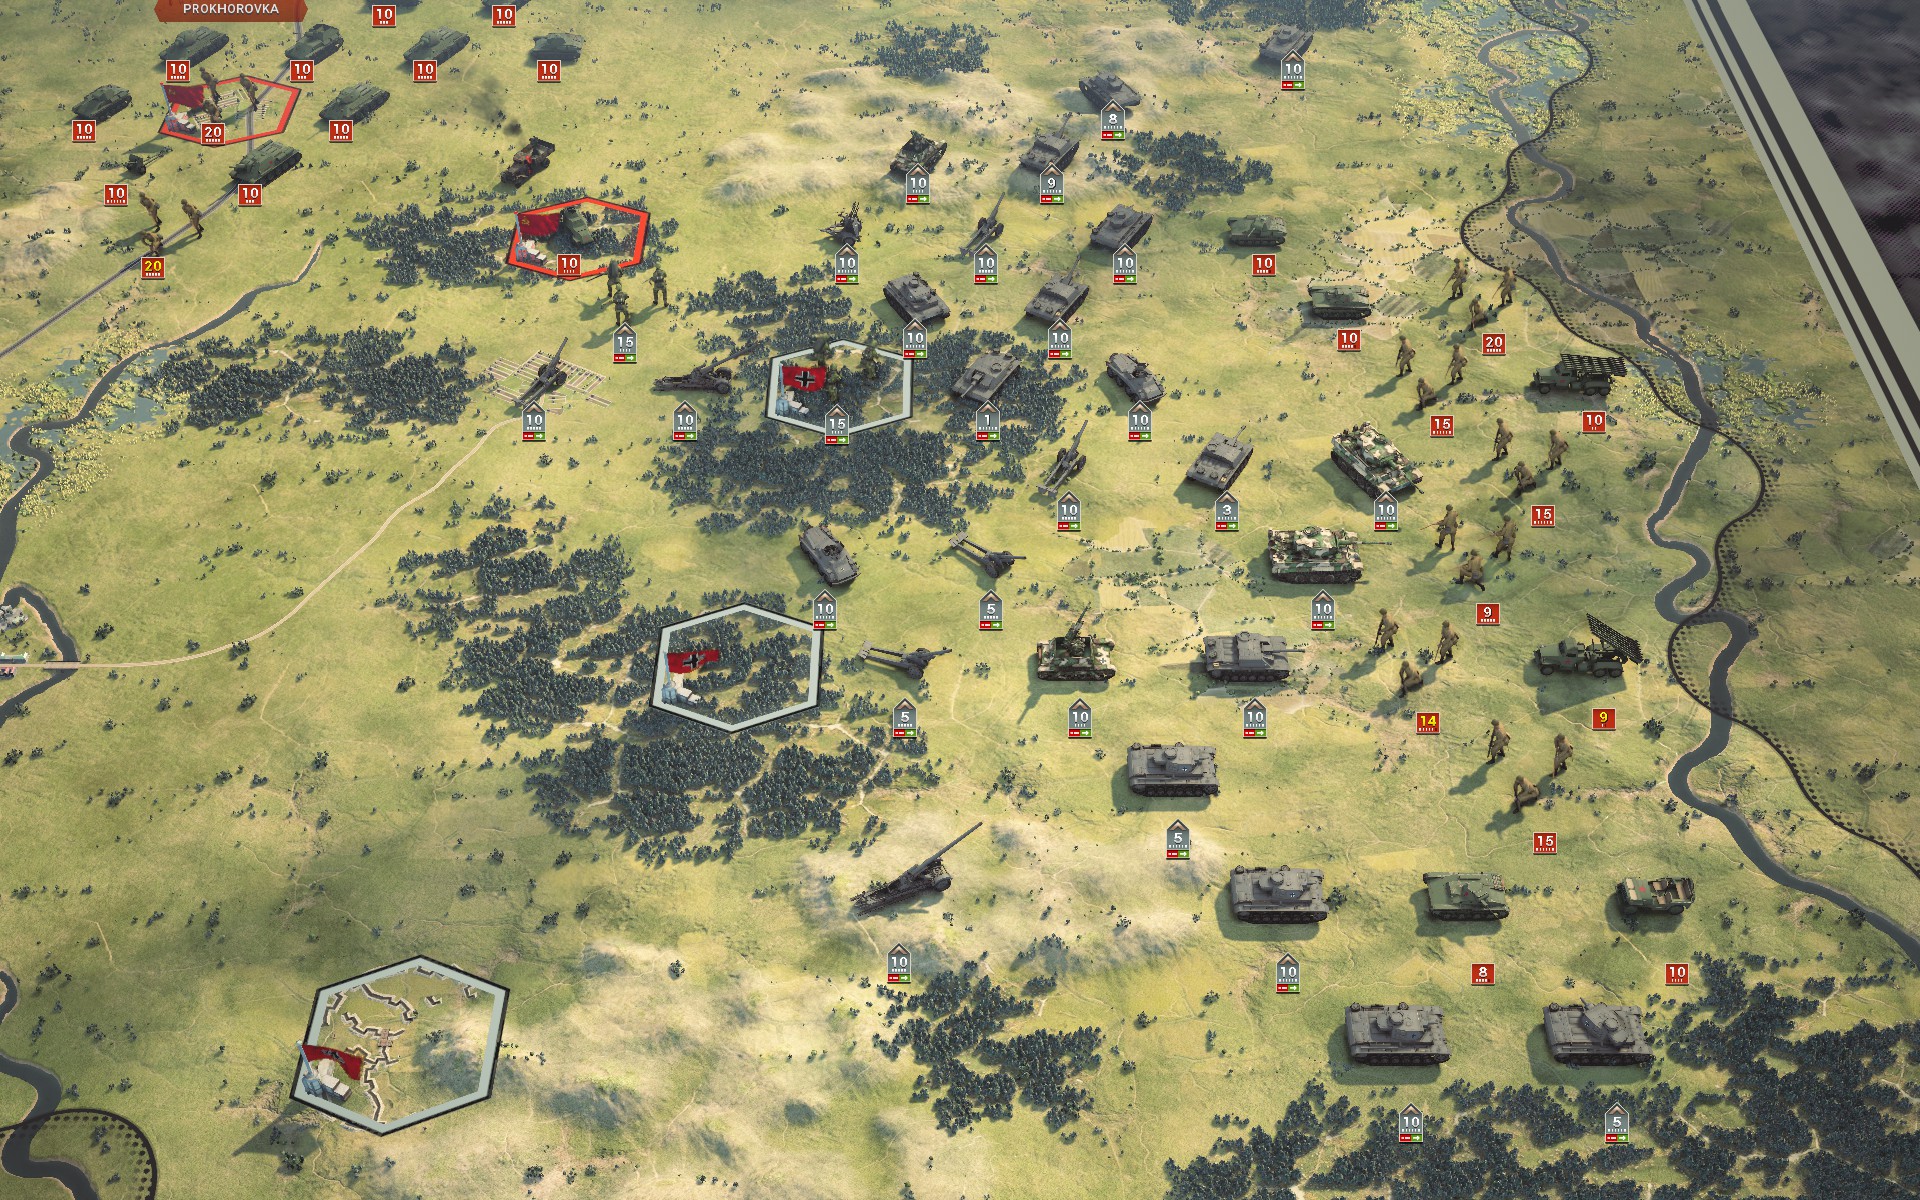
Aerial reconnaissance reveals that the seemingly weak spot in the Kursk salient is indeed a trap, with heavy concentrations of Soviet armour massing around Prokhorovka.
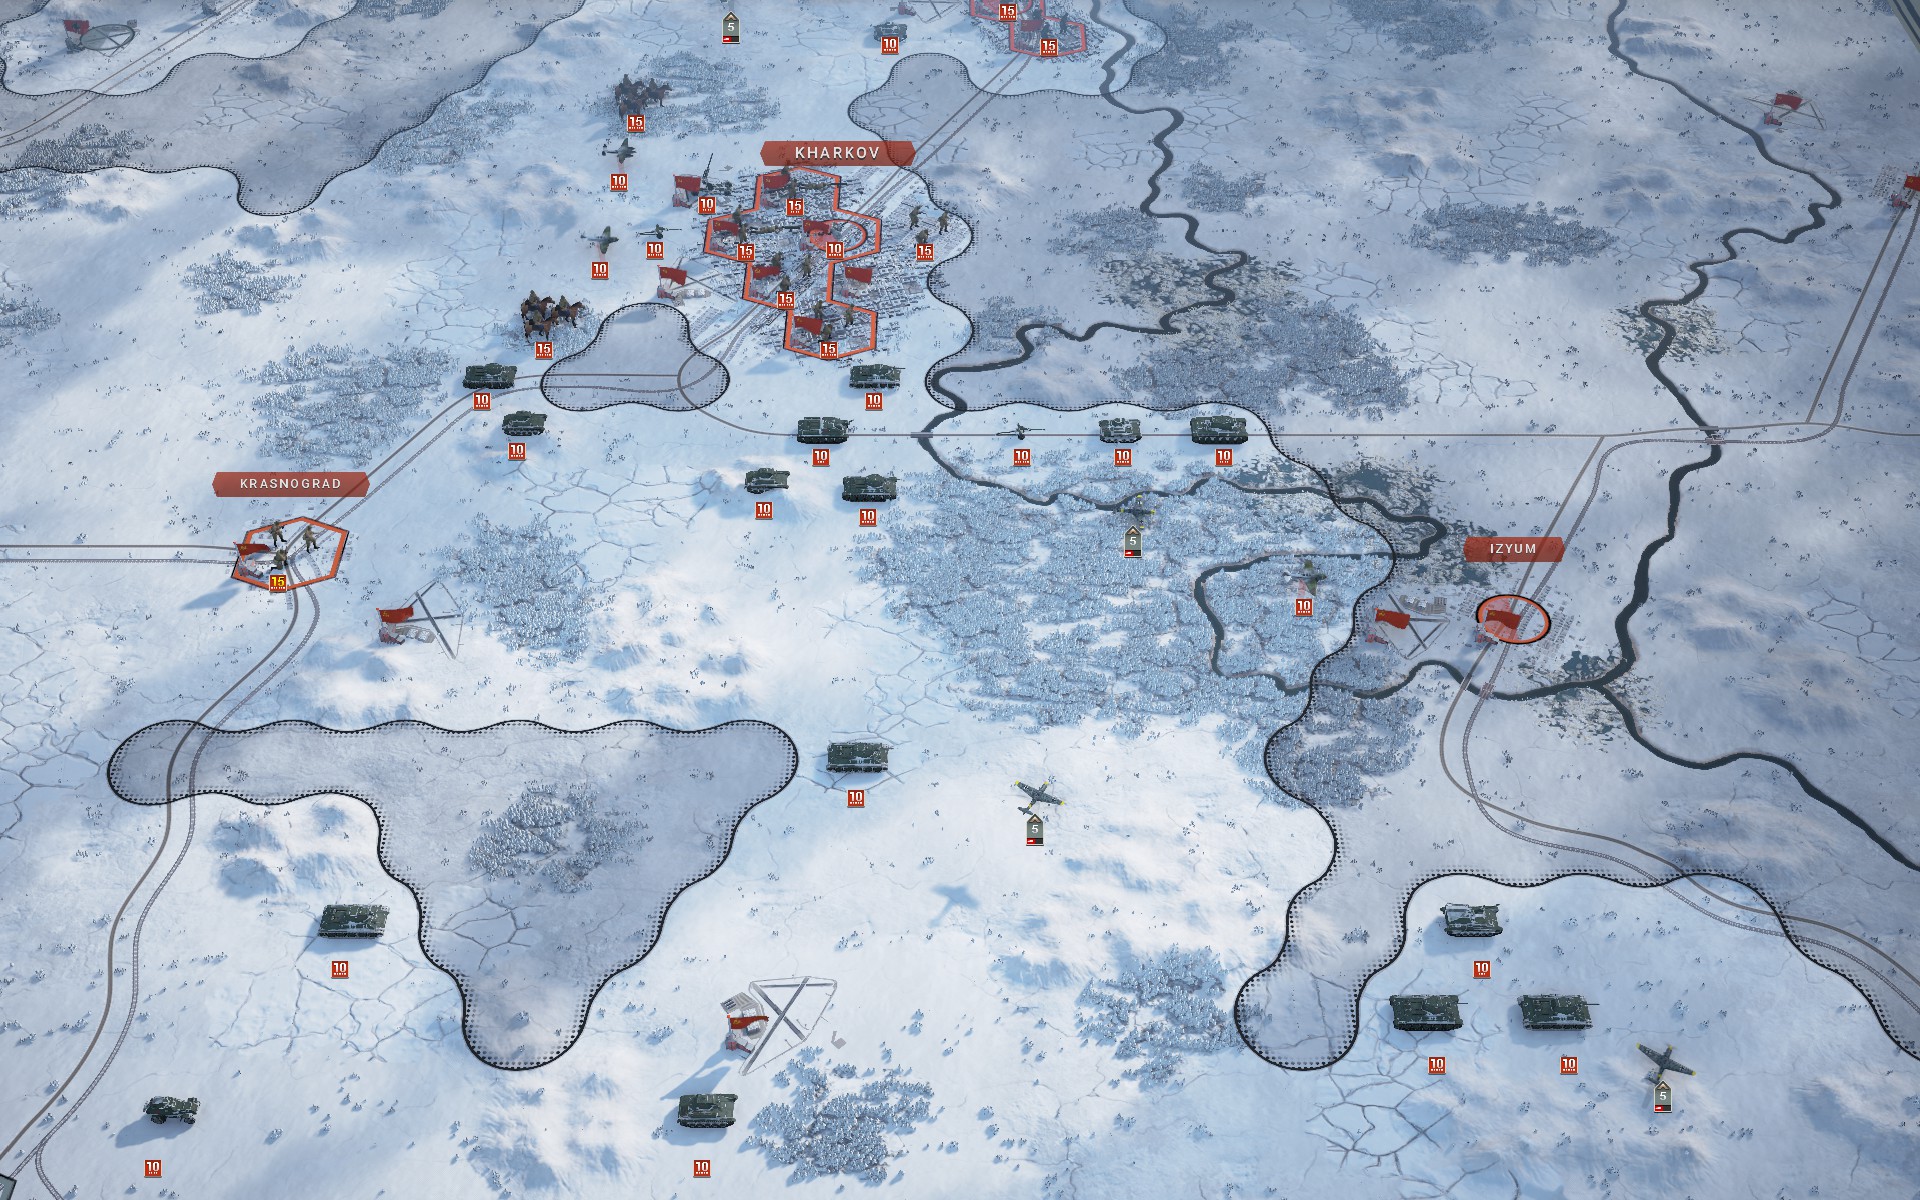
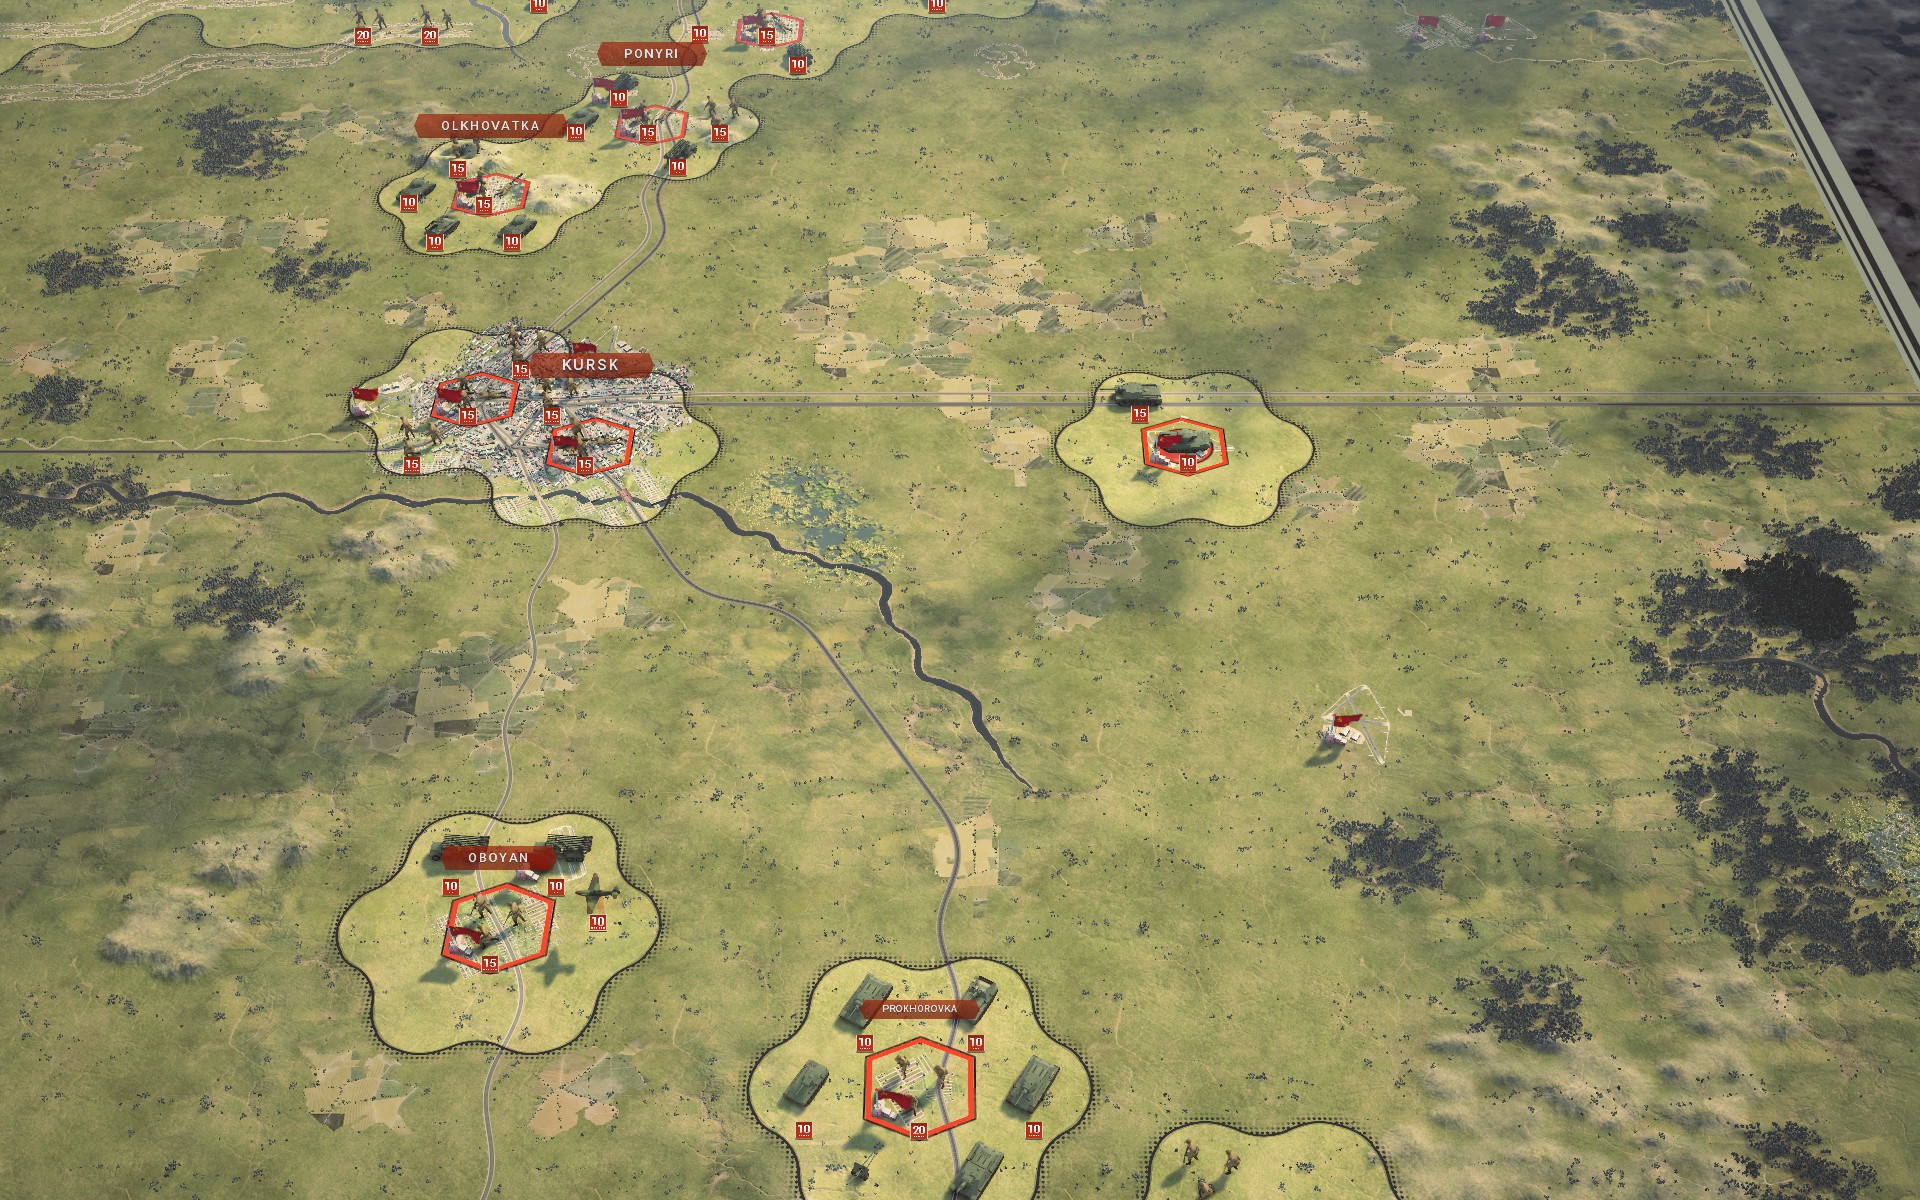
The Red Army is massing infantry and light armour to the east. As these forces could prove difficult to deal with should they reach the woodlands around the objectives, I decide to delay the advance north and instead eliminate this threat.
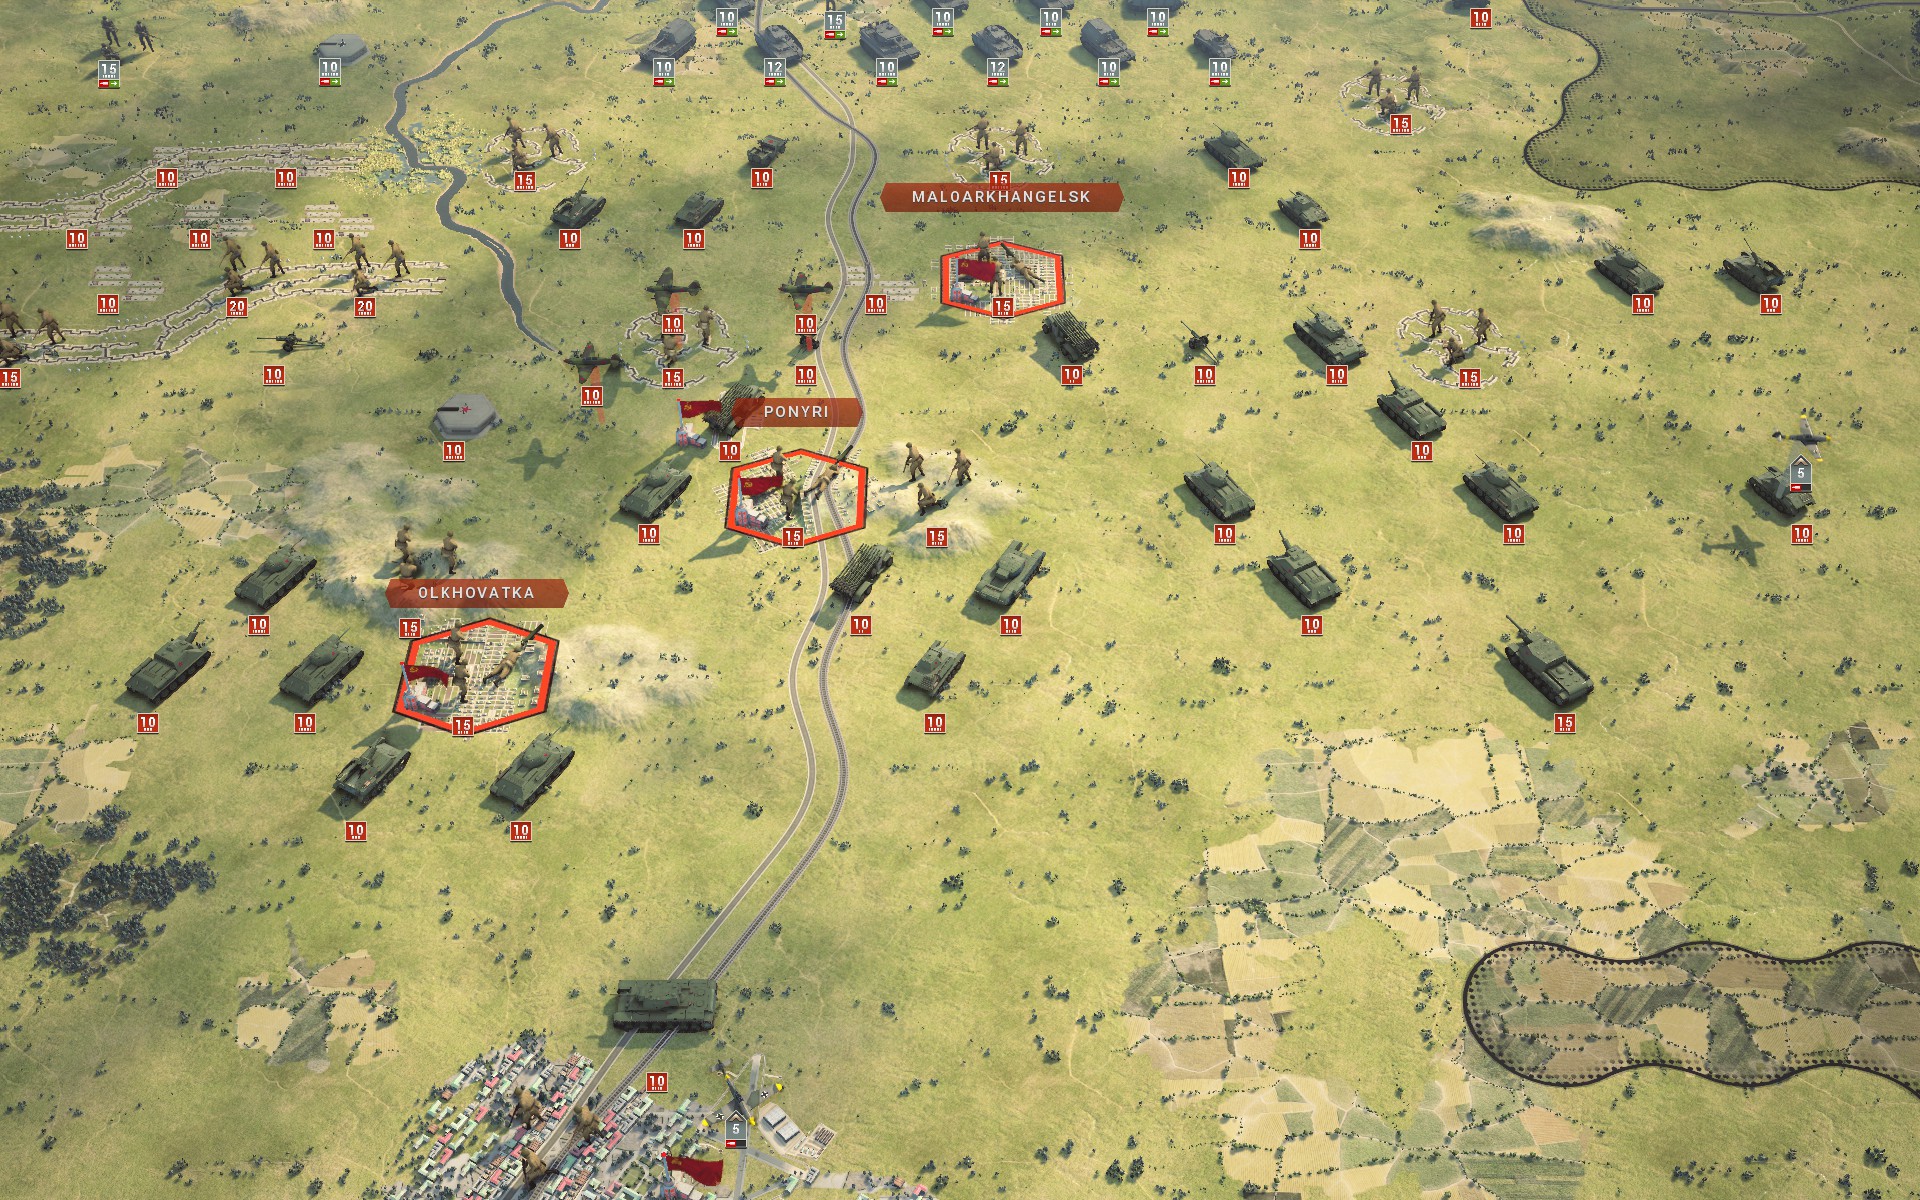
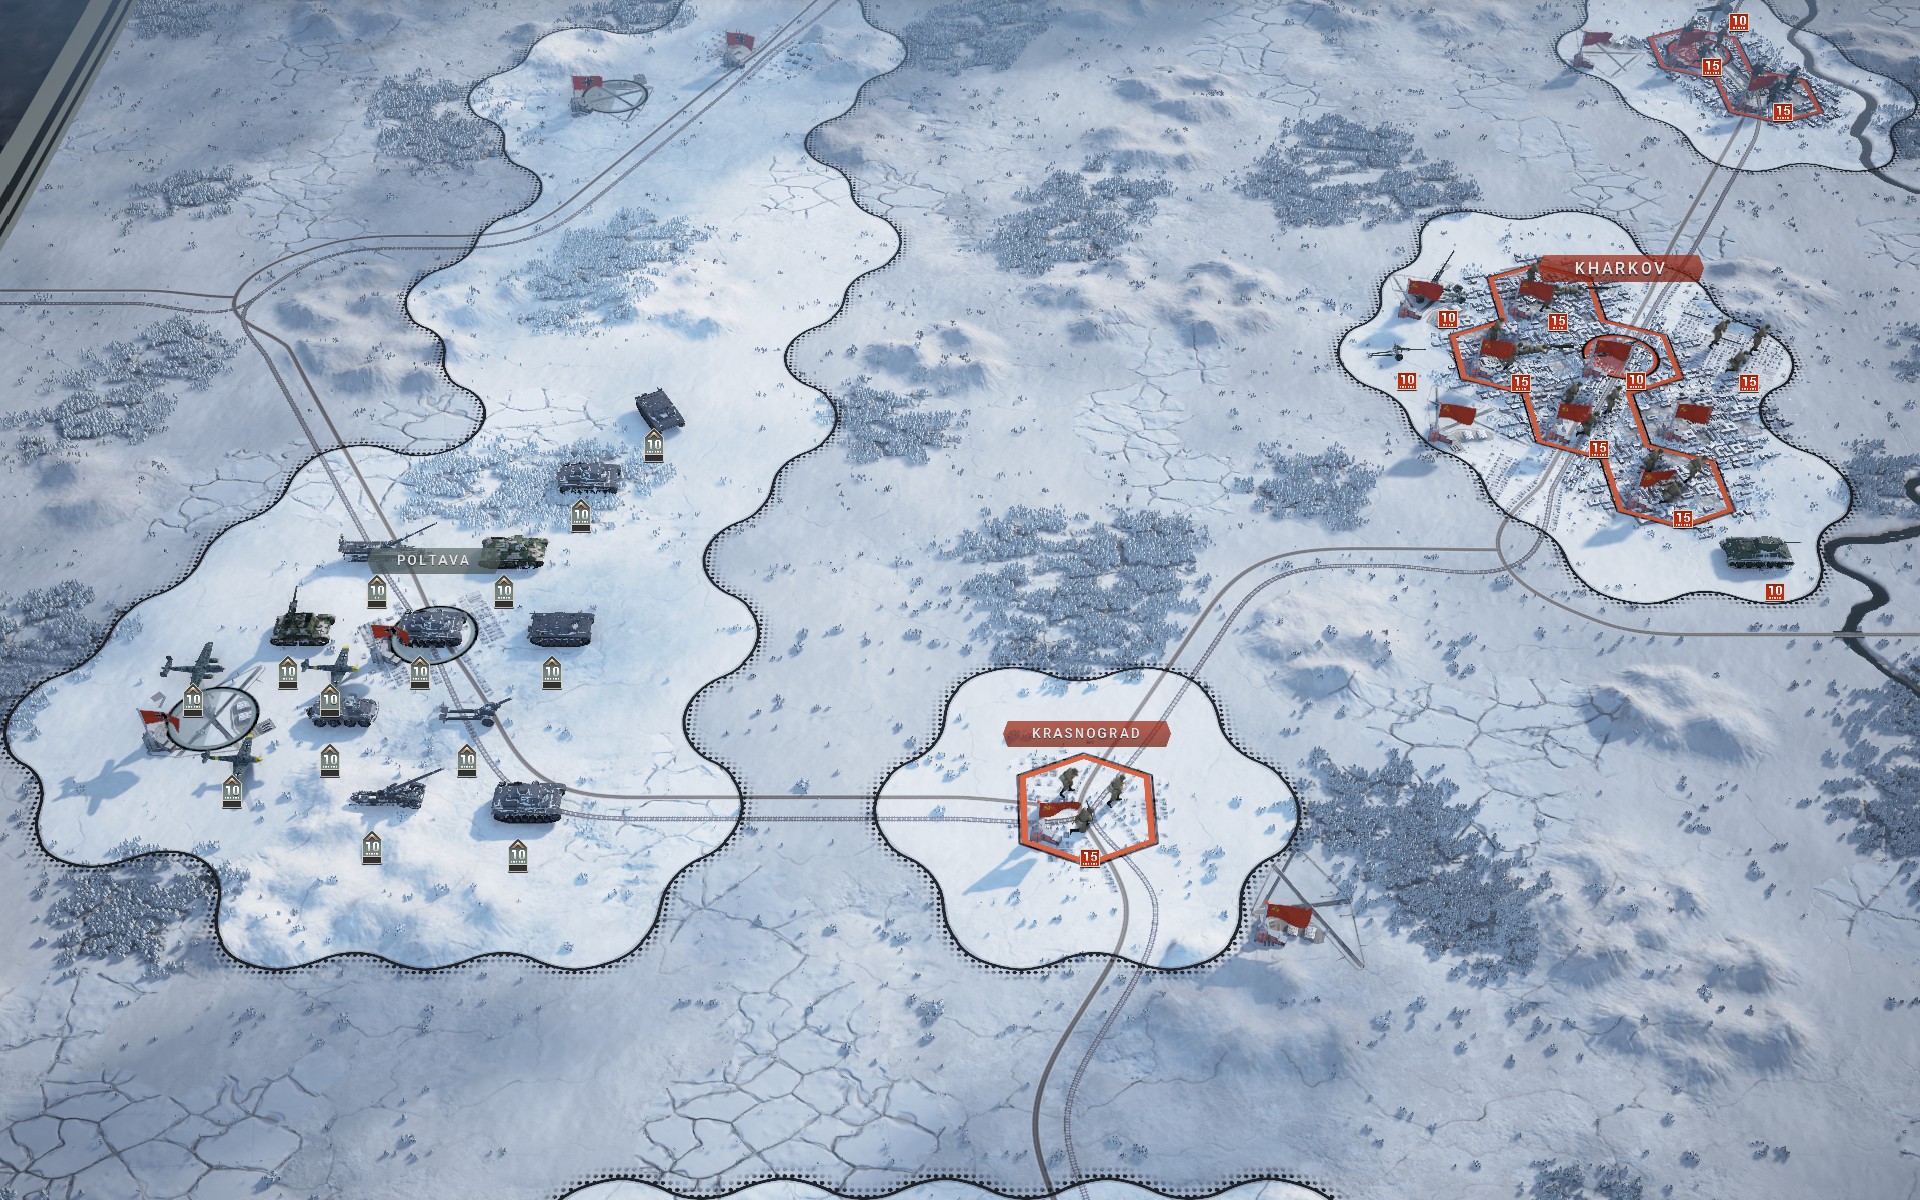
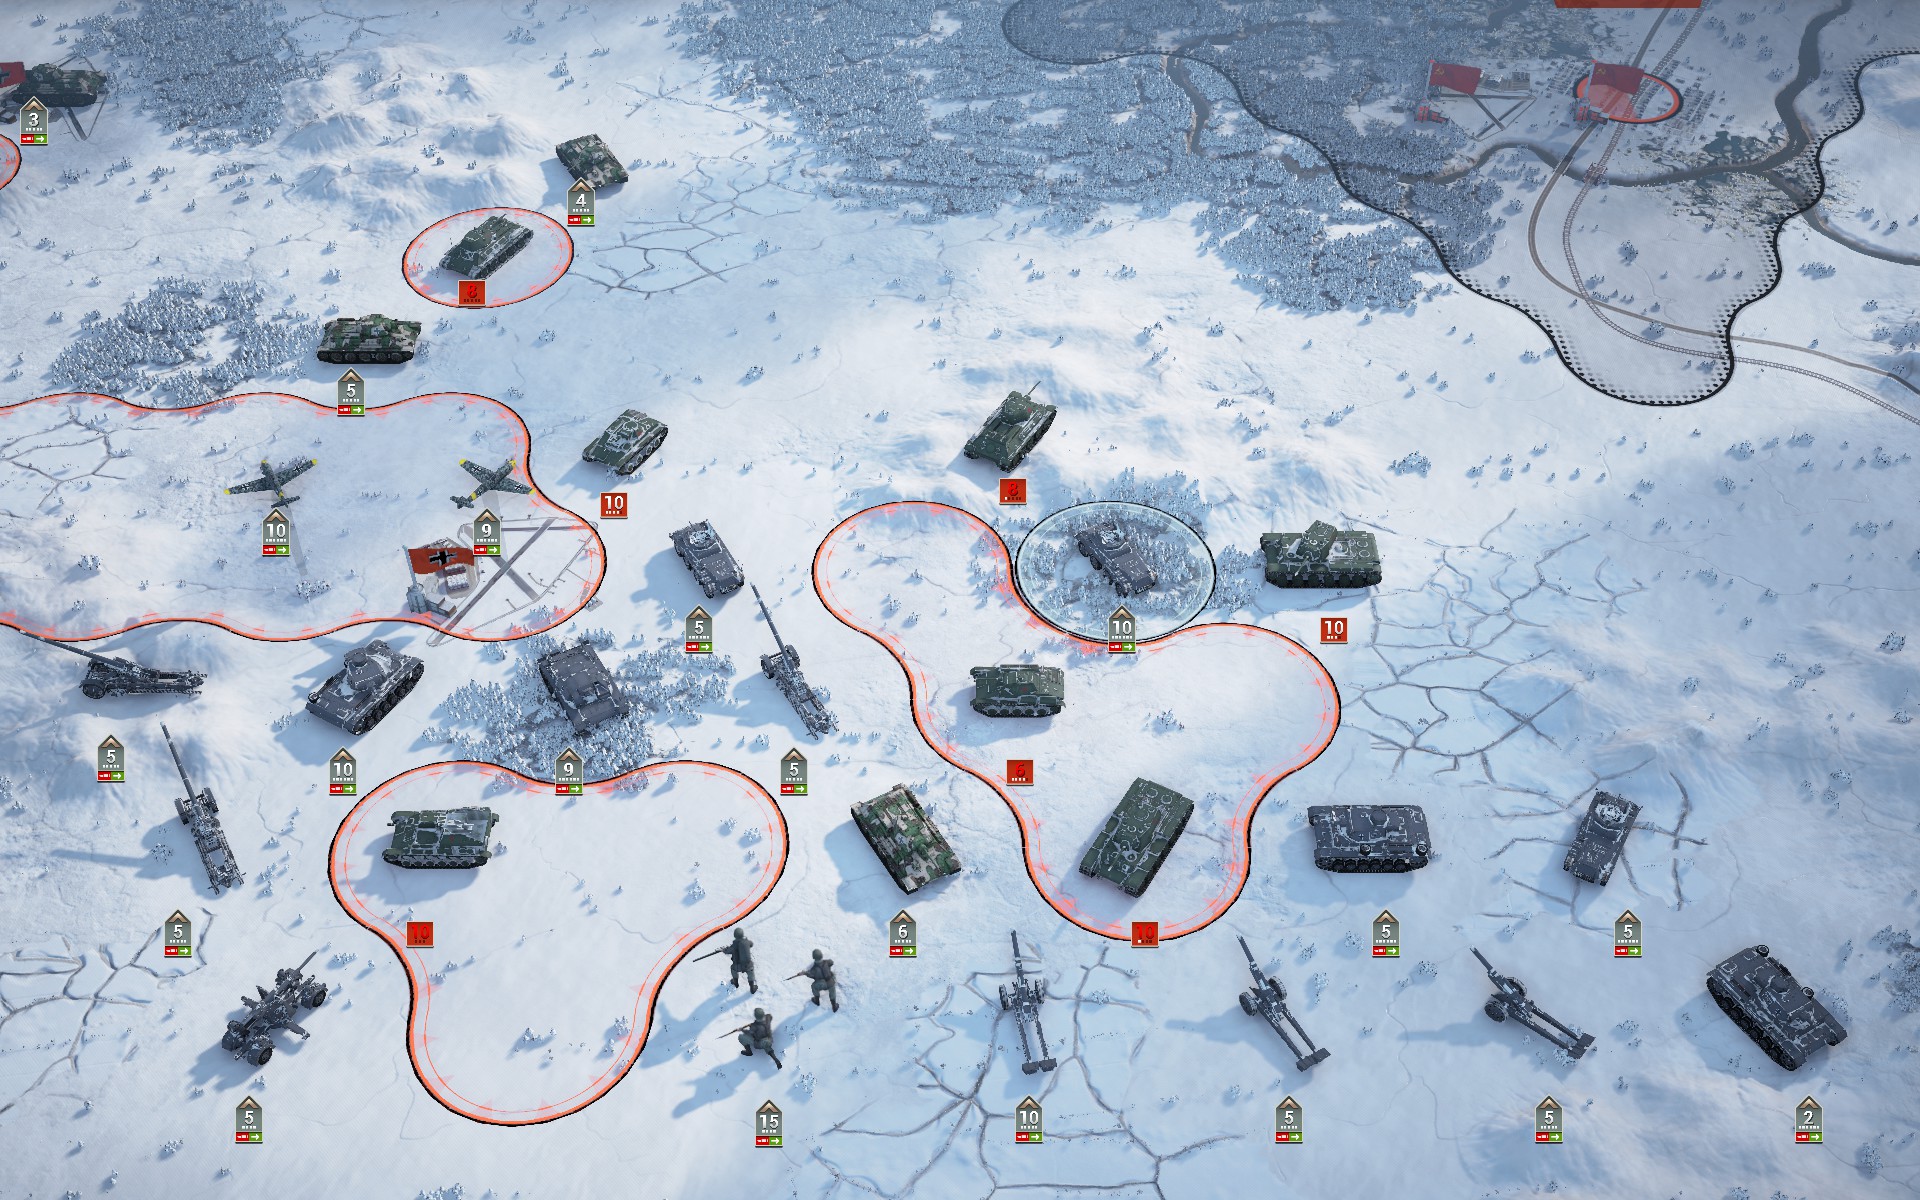
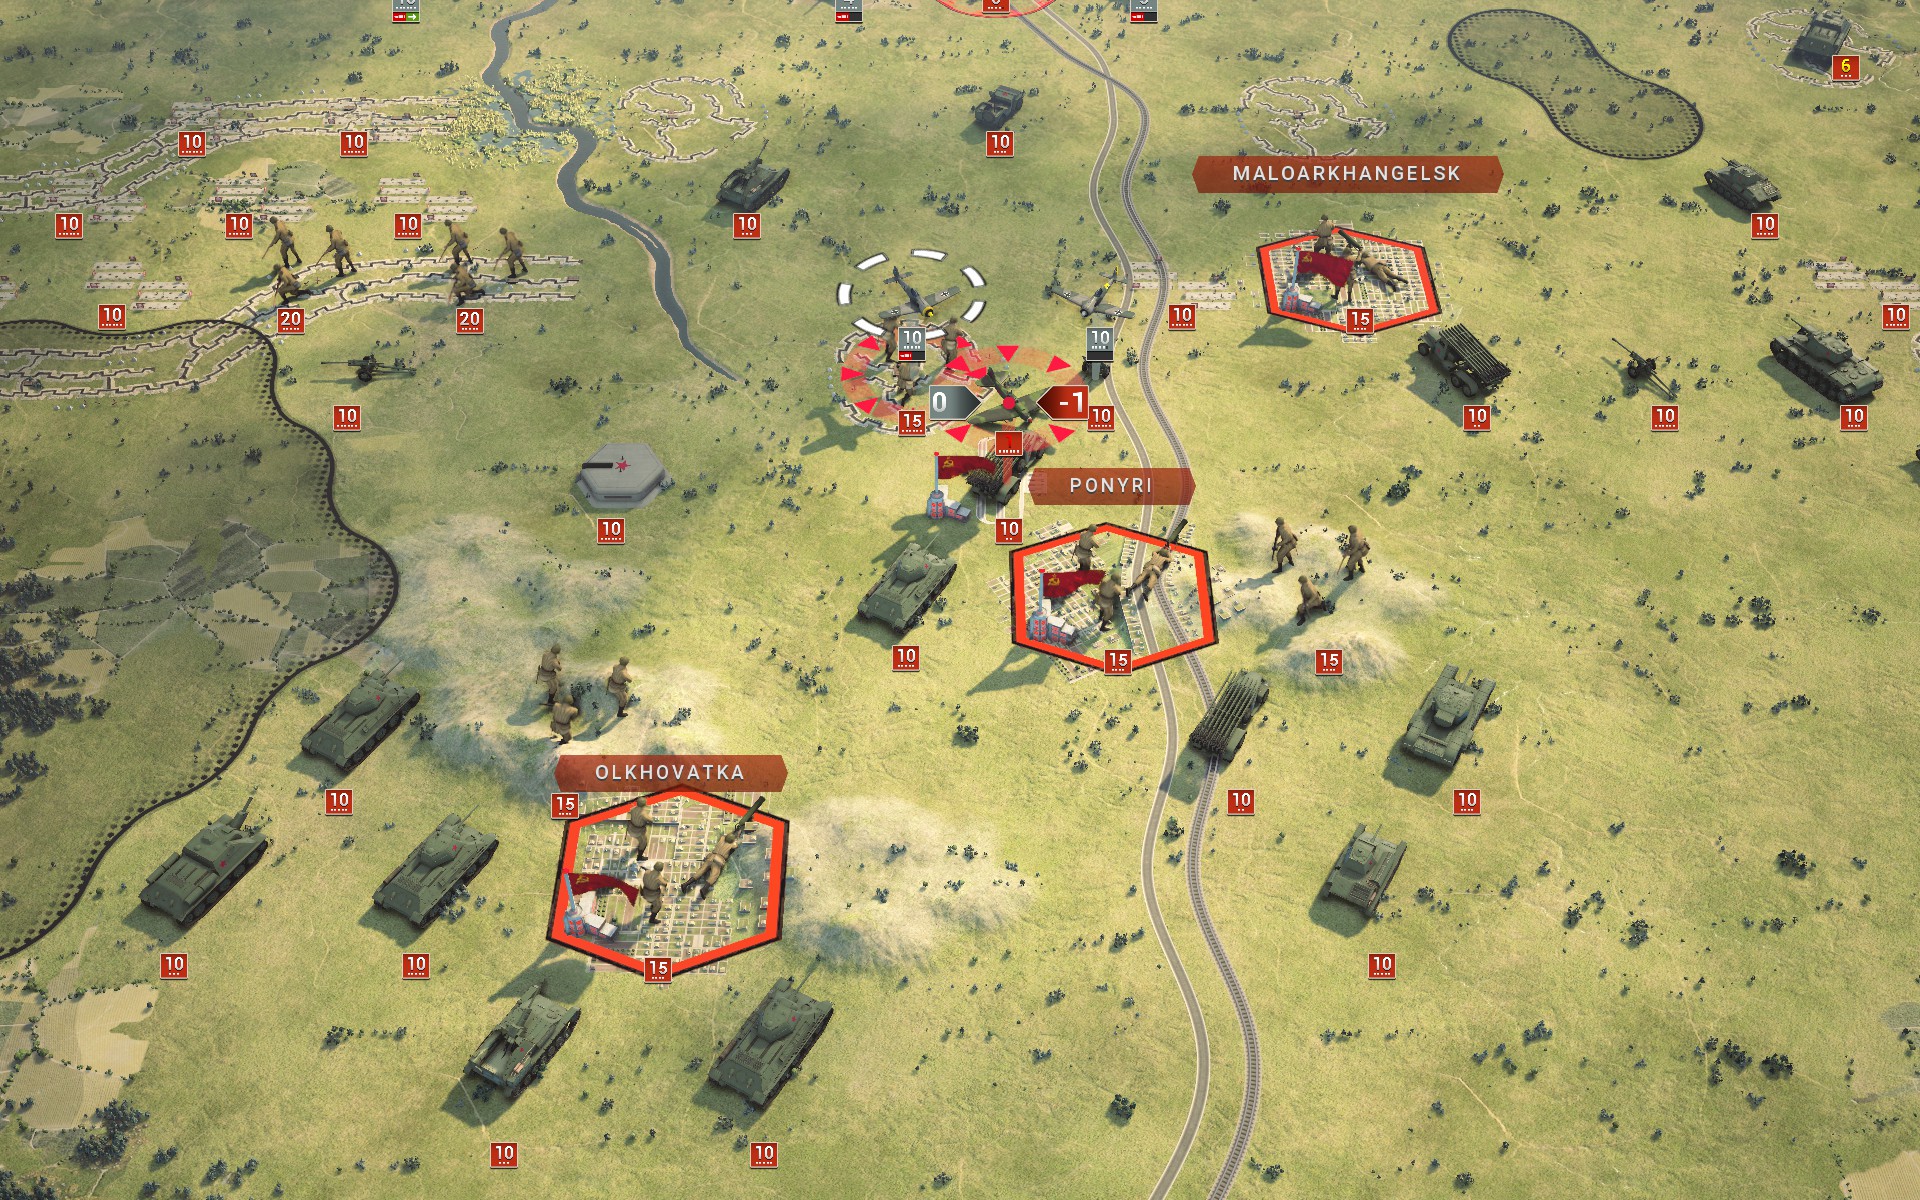
In the north the Soviet forces are more evenly distributed, forming multiple lines of defence. This works to my advantage as the auxiliaries won't need to engage them all.
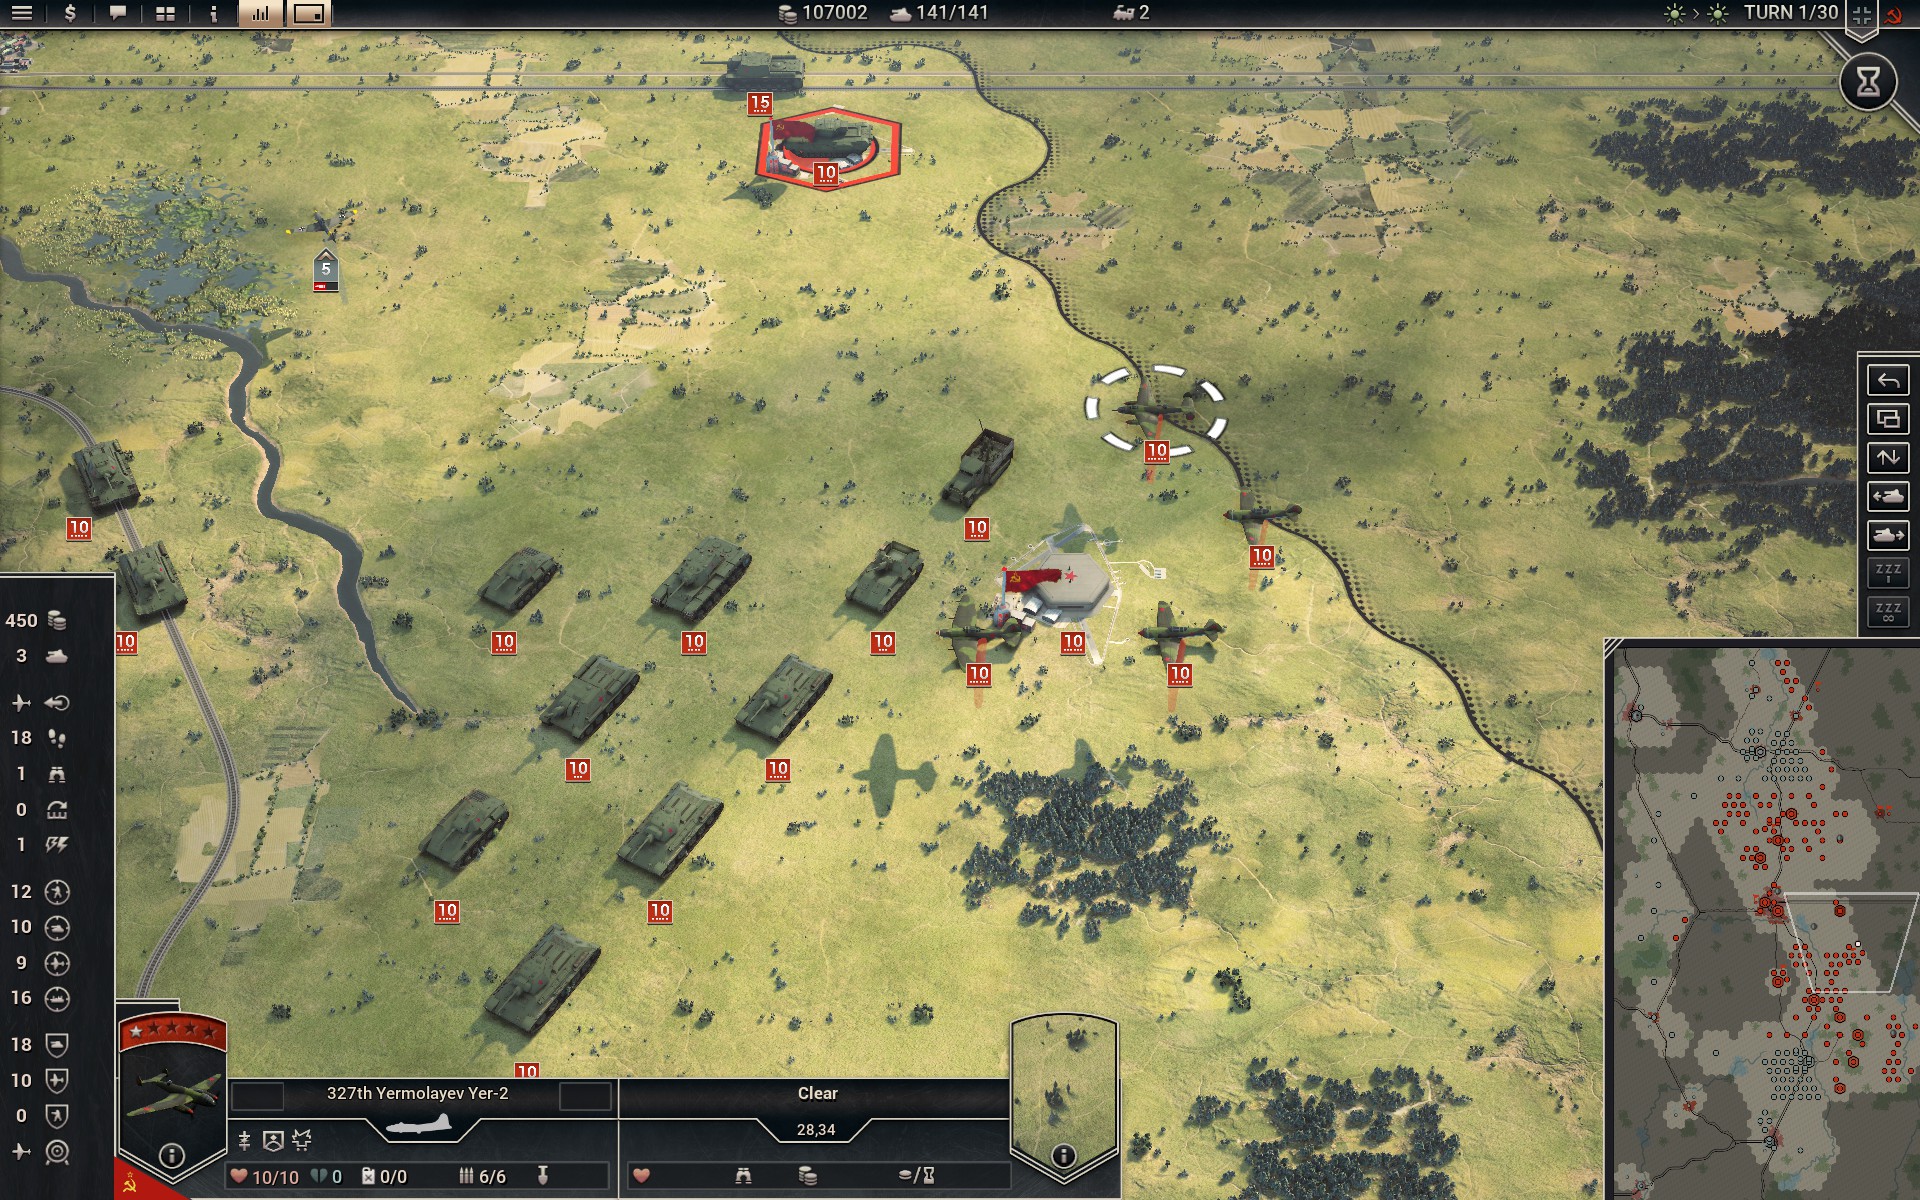
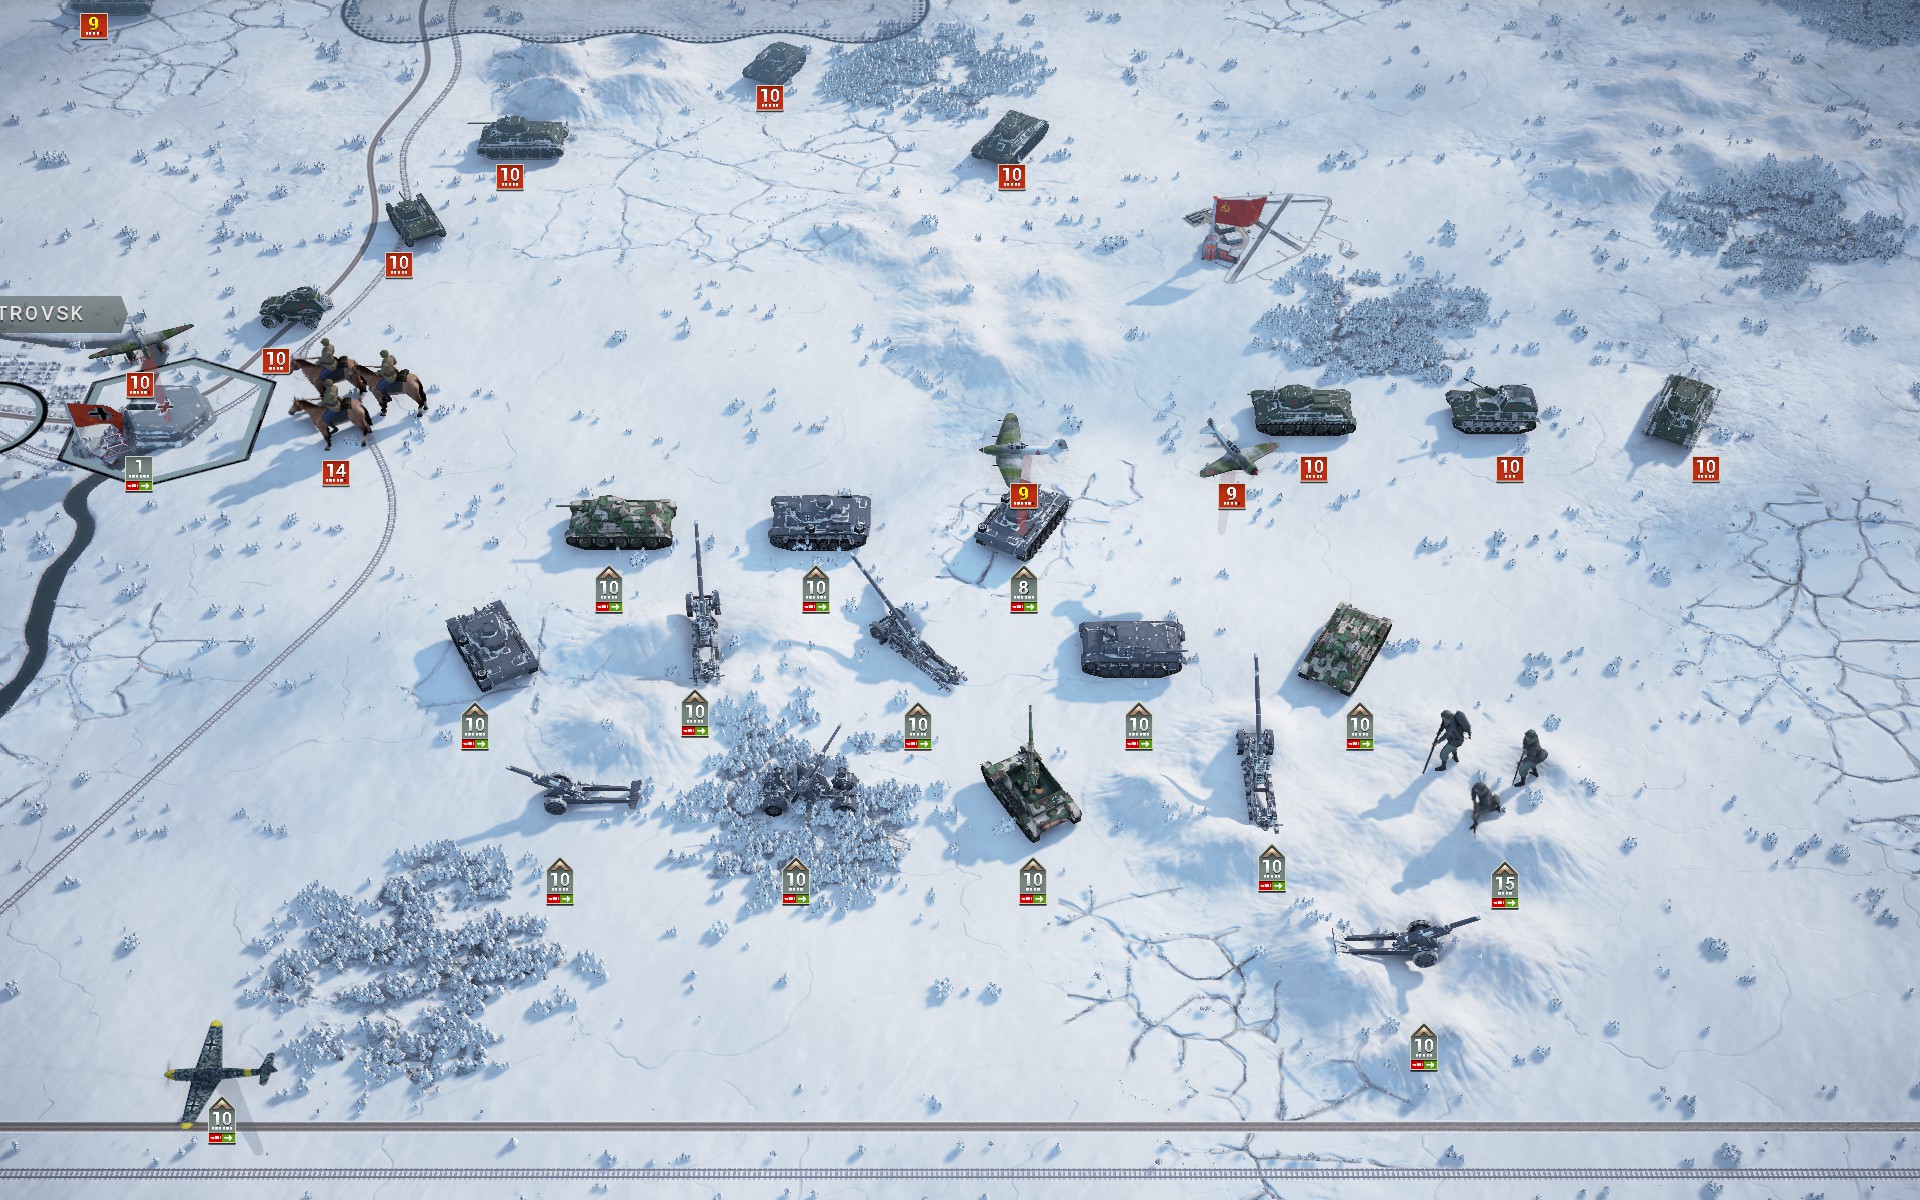
Strategic bombers are the last units to be numbered, so by looking at them you can get an idea of what kind of numbers you are facing. While a significant part of these will be minefields, this is by far the largest force I have faced to date. Even with a powerful auxiliary force at my disposal, I am heavily outnumbered, and a combination of guile and defeat in detail will be necessary to prevail; it'd be foolish to engage the Red Army directly.
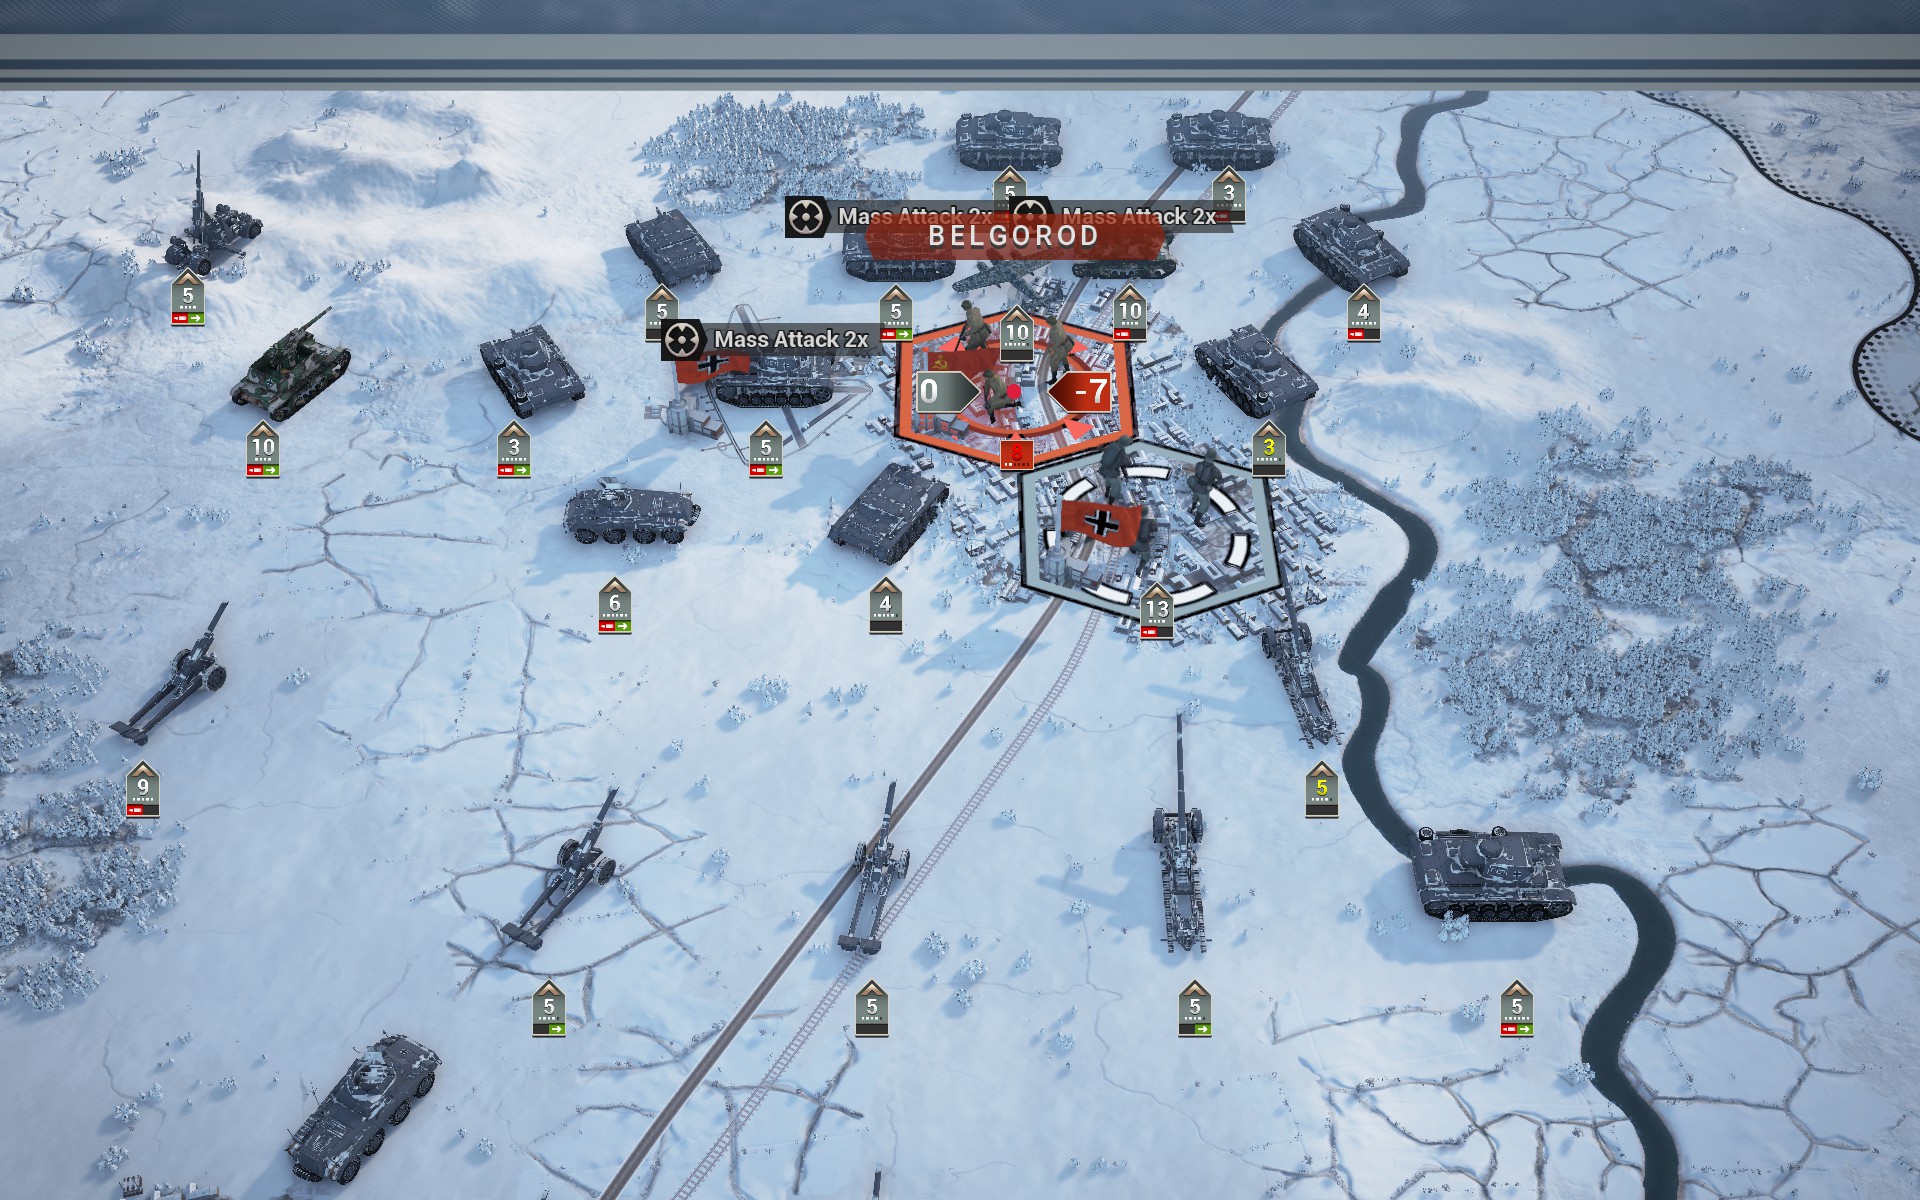
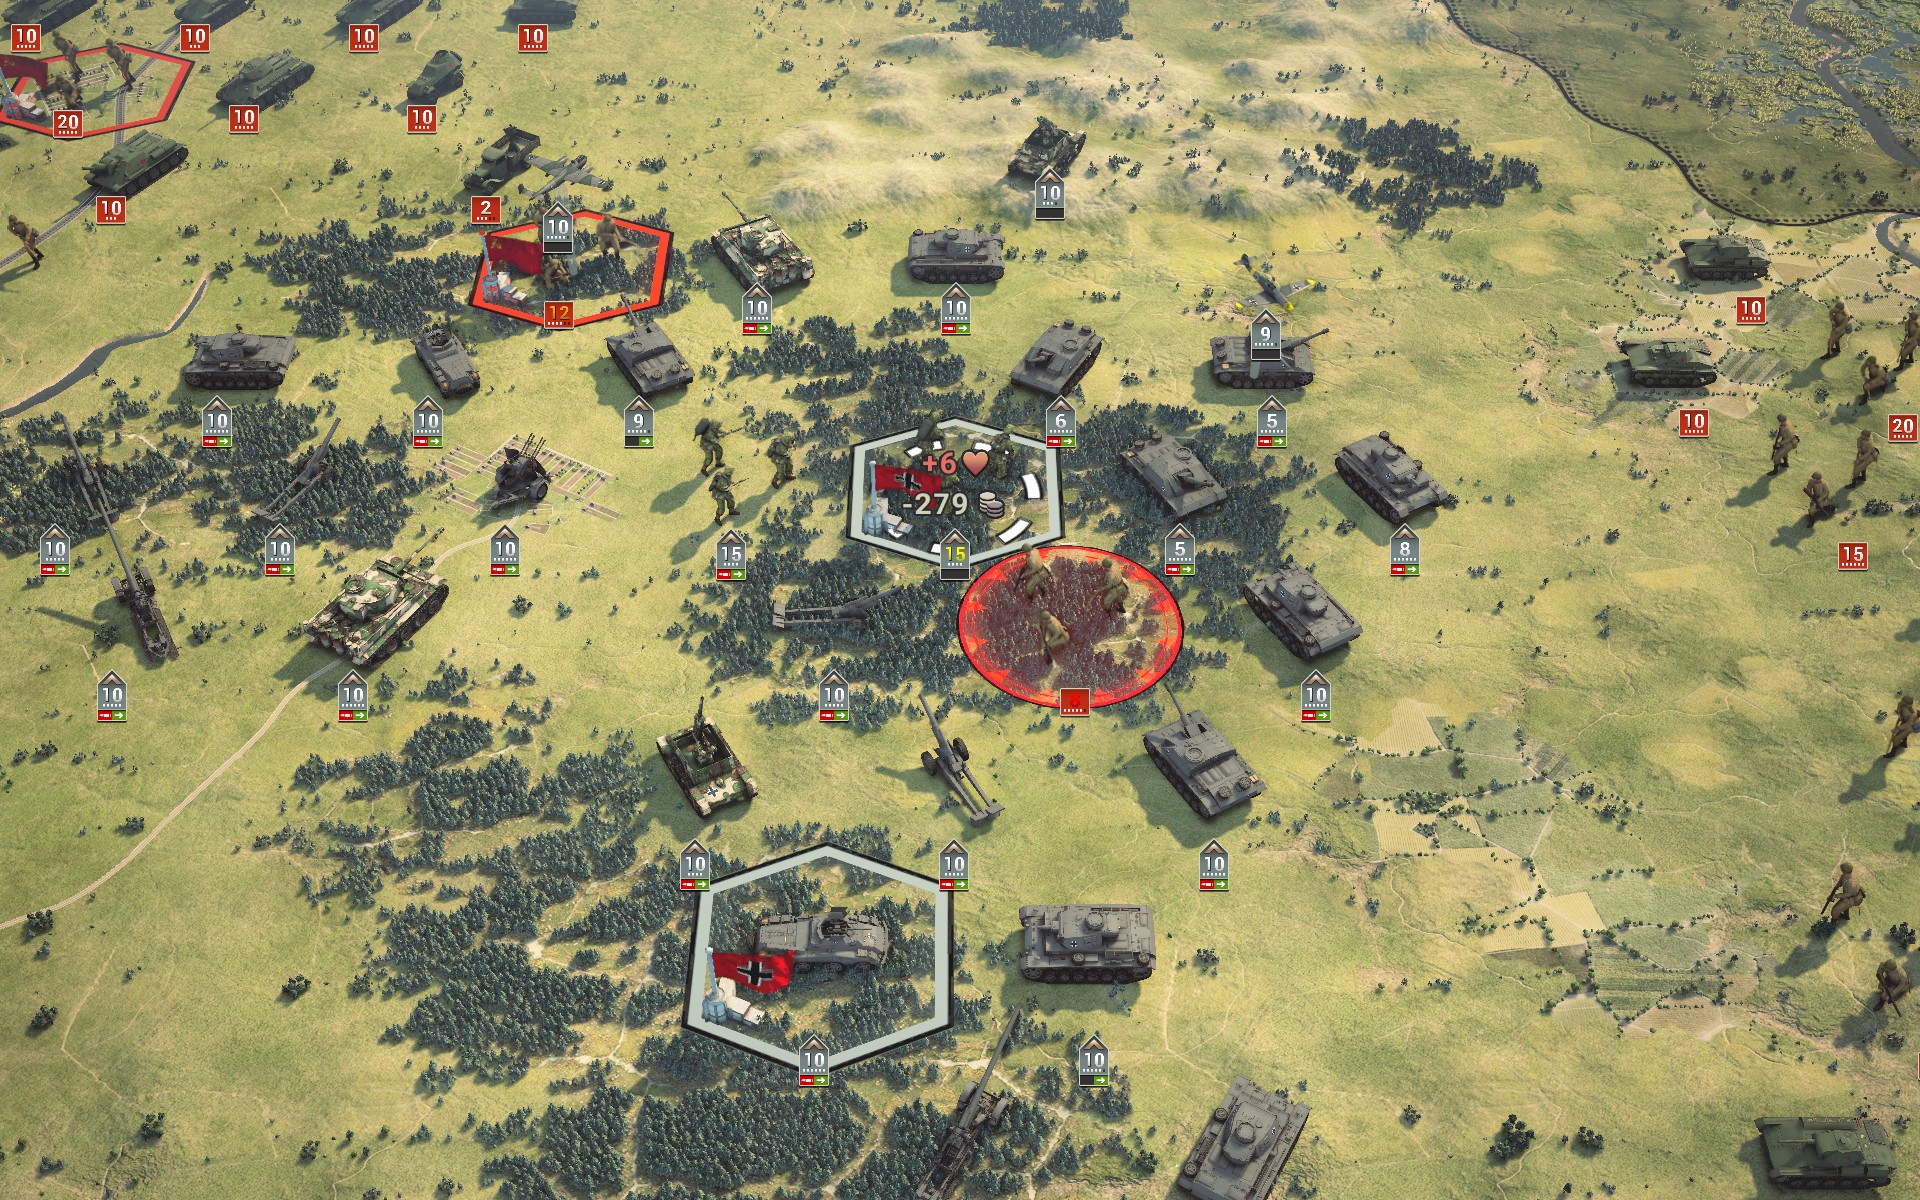
Supported by the IIINs, the StuH 42s cross the Donets to suppress the AT guns while the Tigers drive off the Soviet Guard.

The auxiliaries begin to make their way east, with the Nashorns and Elefants protecting the Panzers.
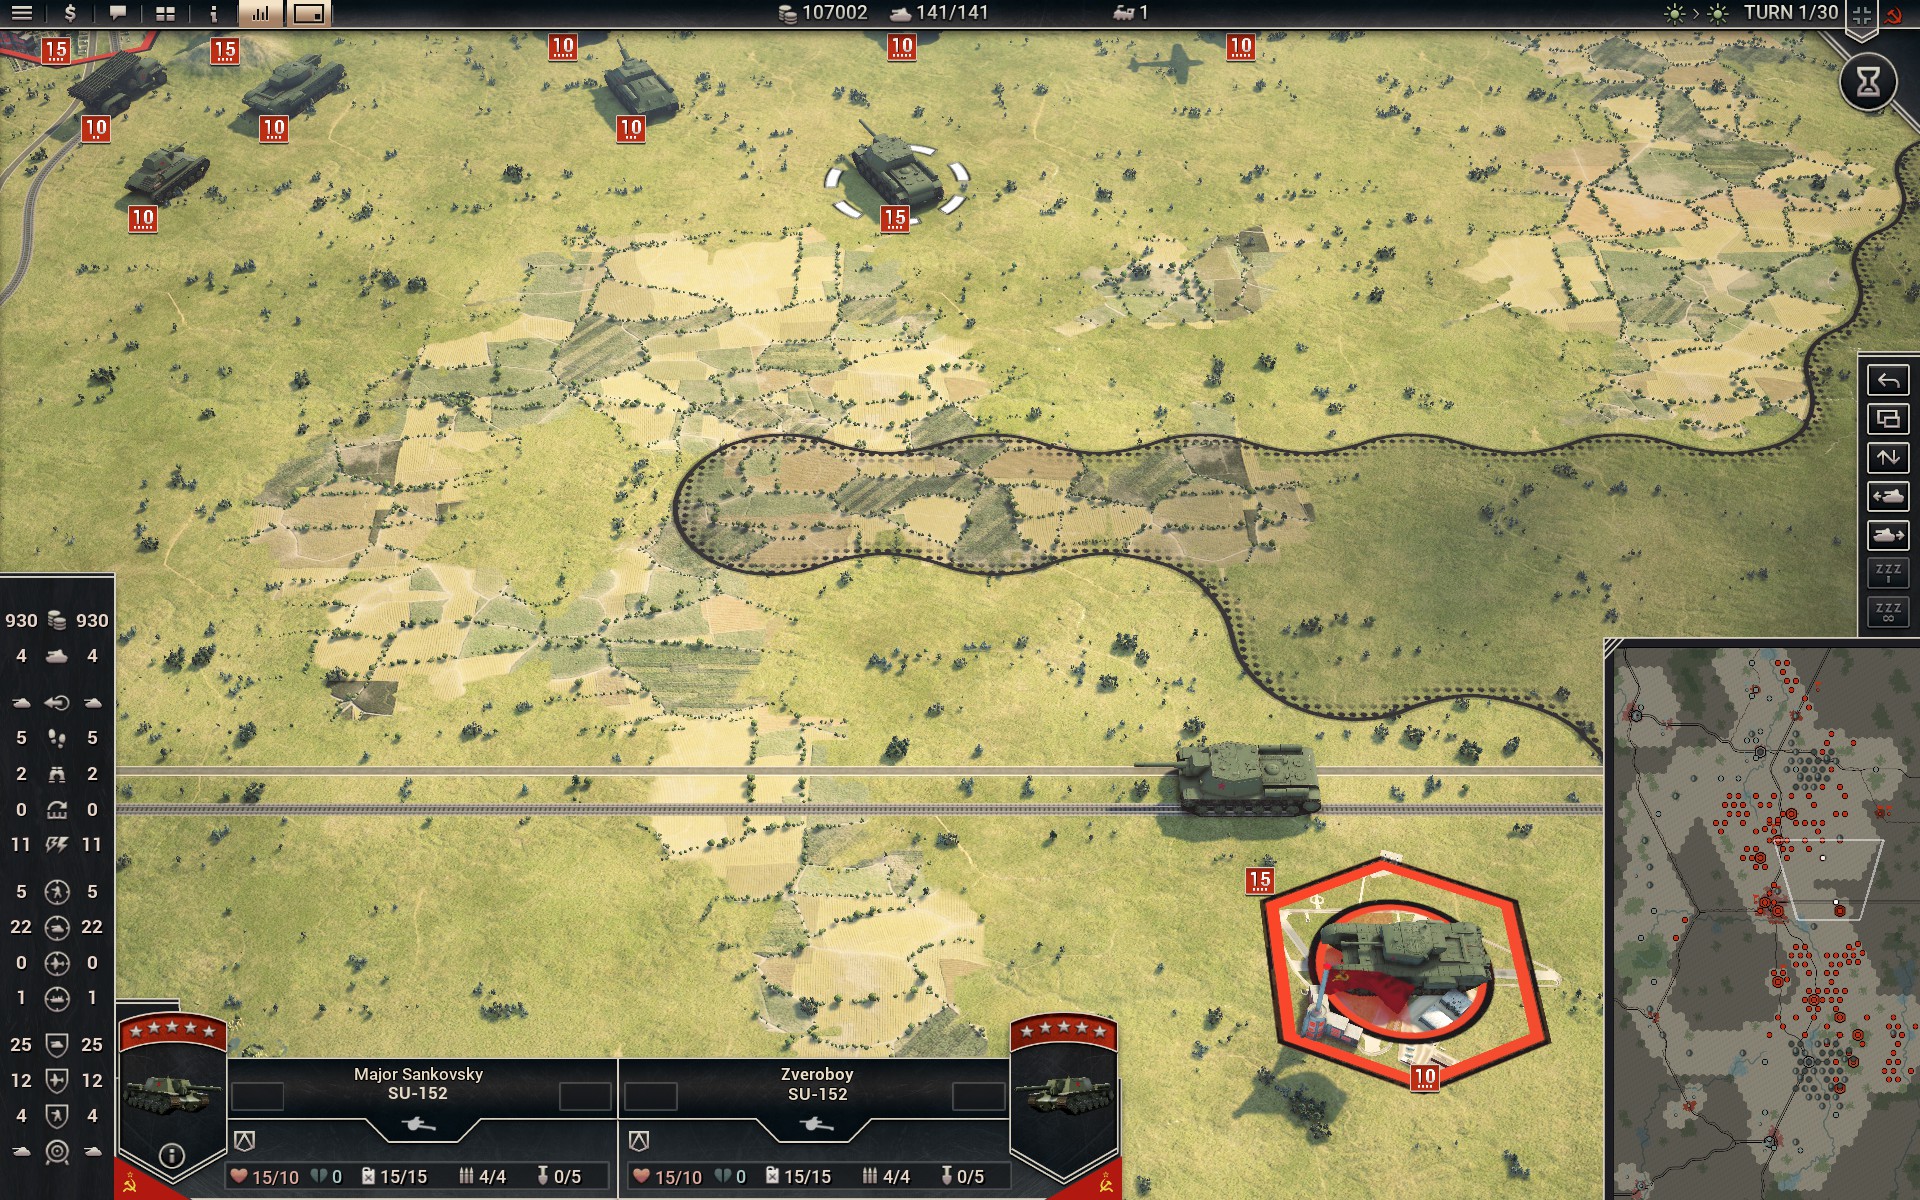
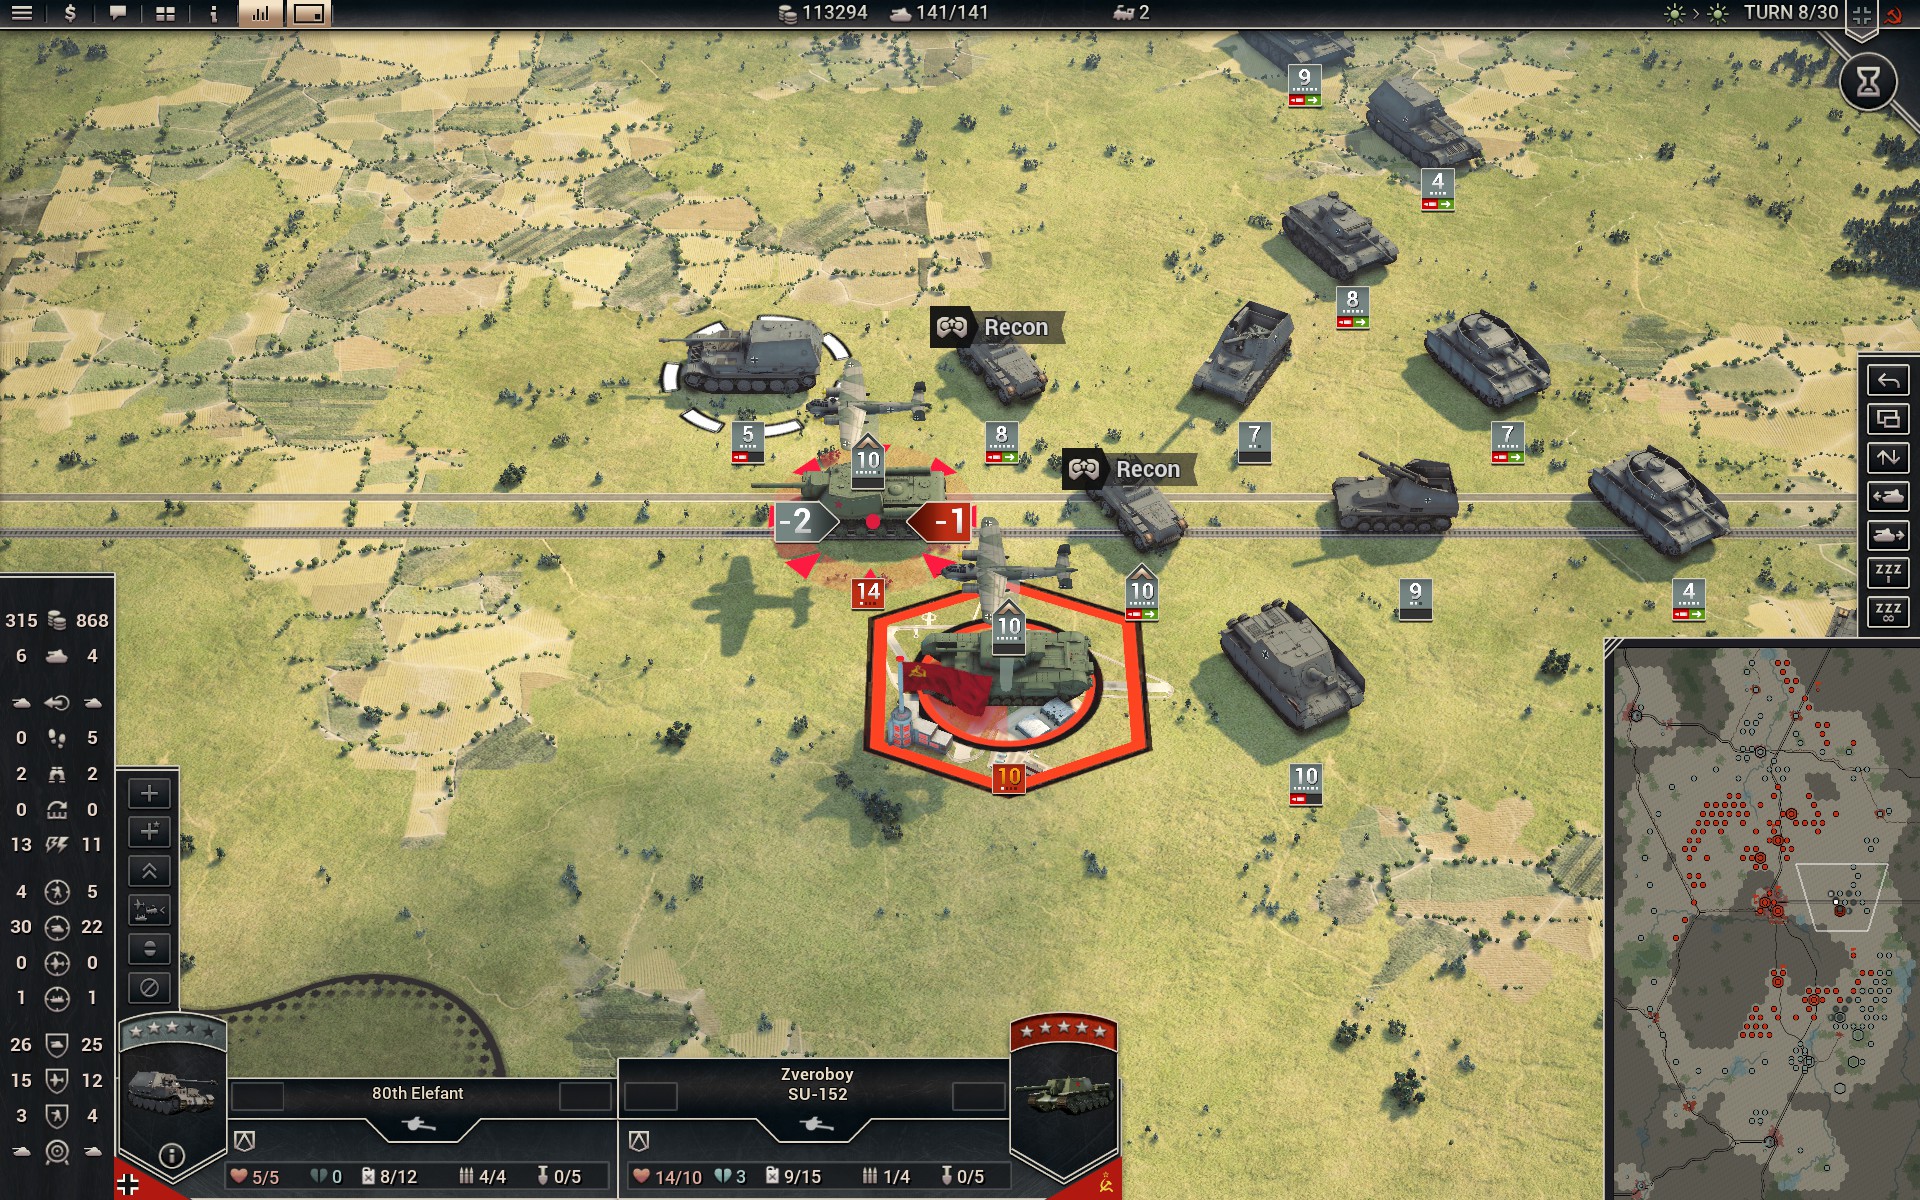
There are two 15-strength SU-152s near the supply depot. These units are rare and very powerful -- more on that here -- so I definitely want to capture them.

The Soviet air force attempts to stall my advance, but between the AA guns and the Fw 190As damage is minimal.
The Luftwaffe retaliates, shredding the Soviet fighters.
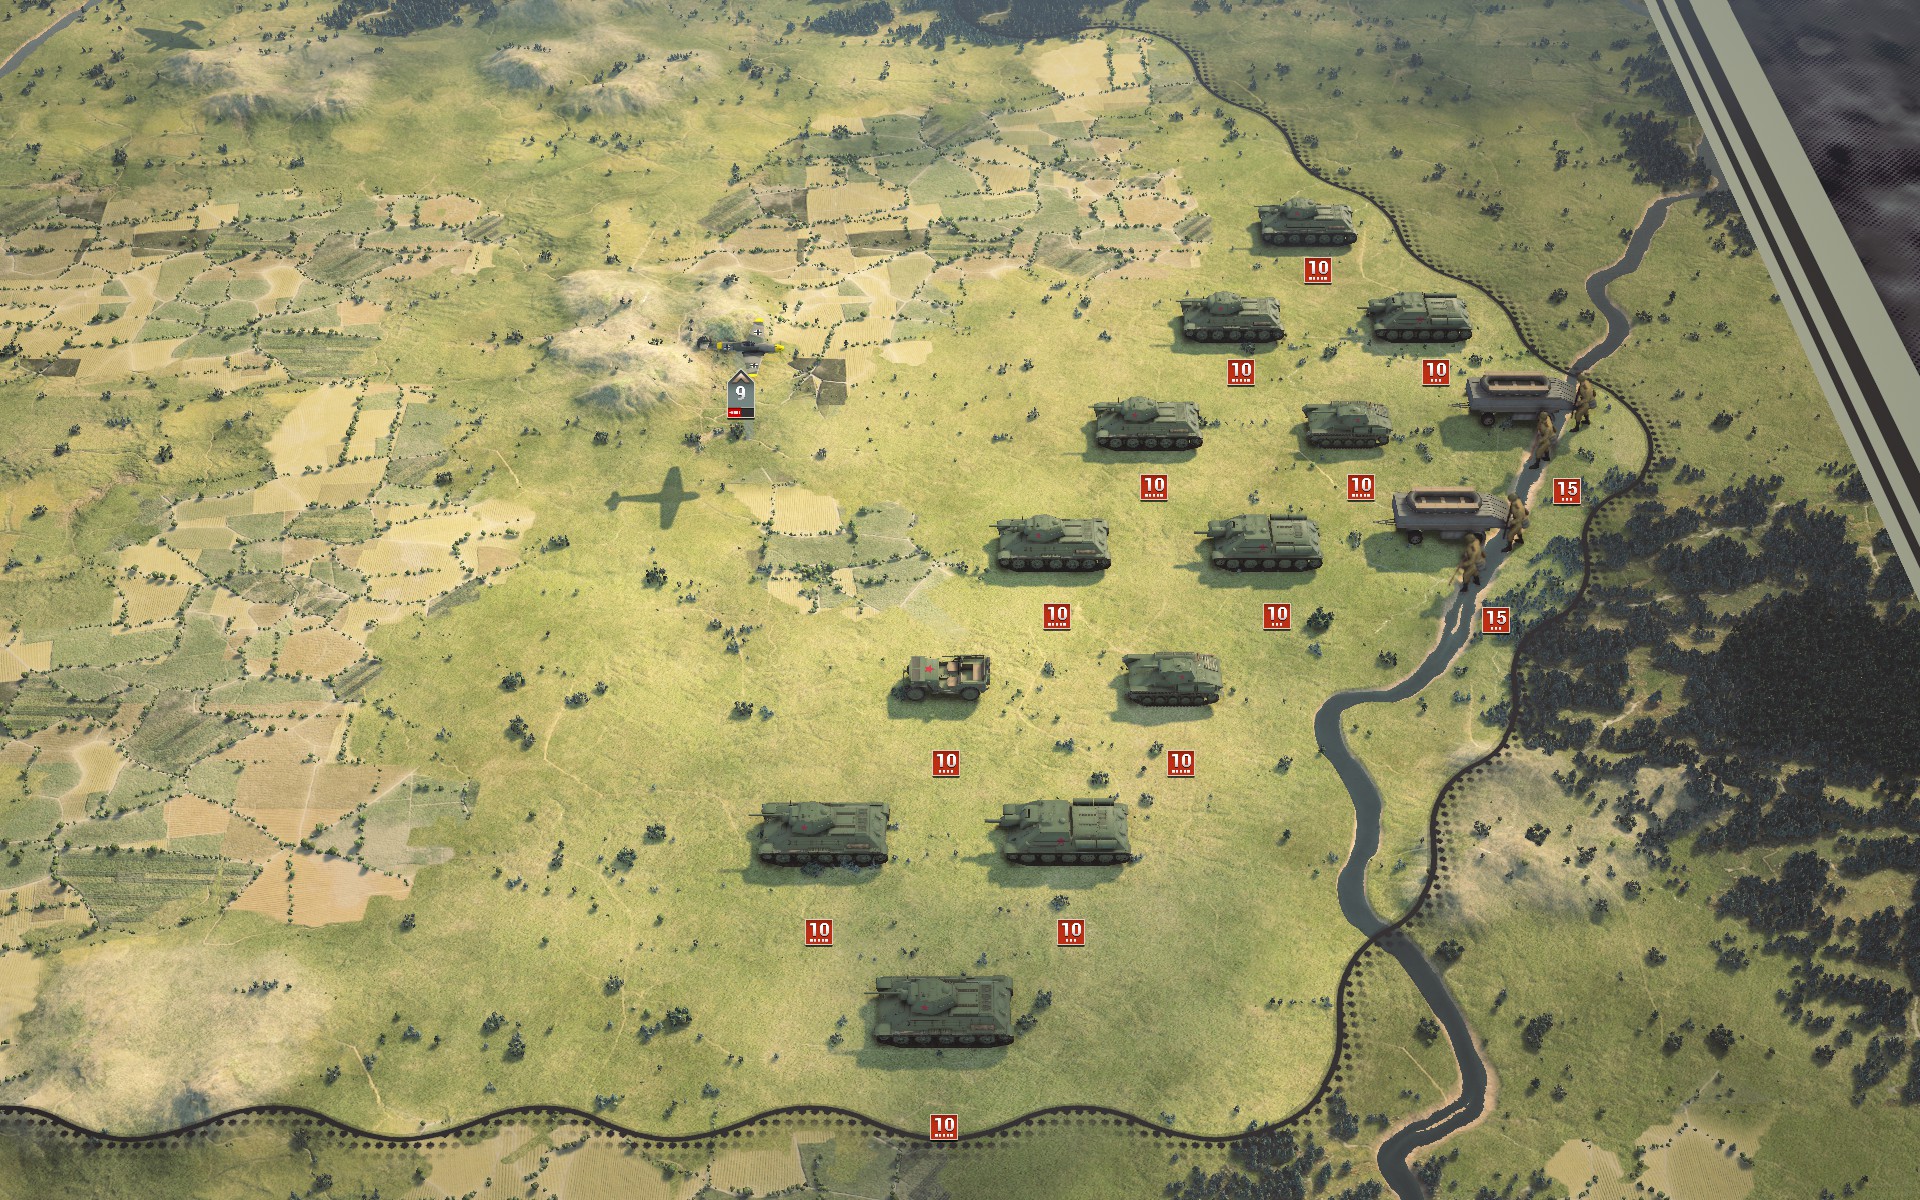
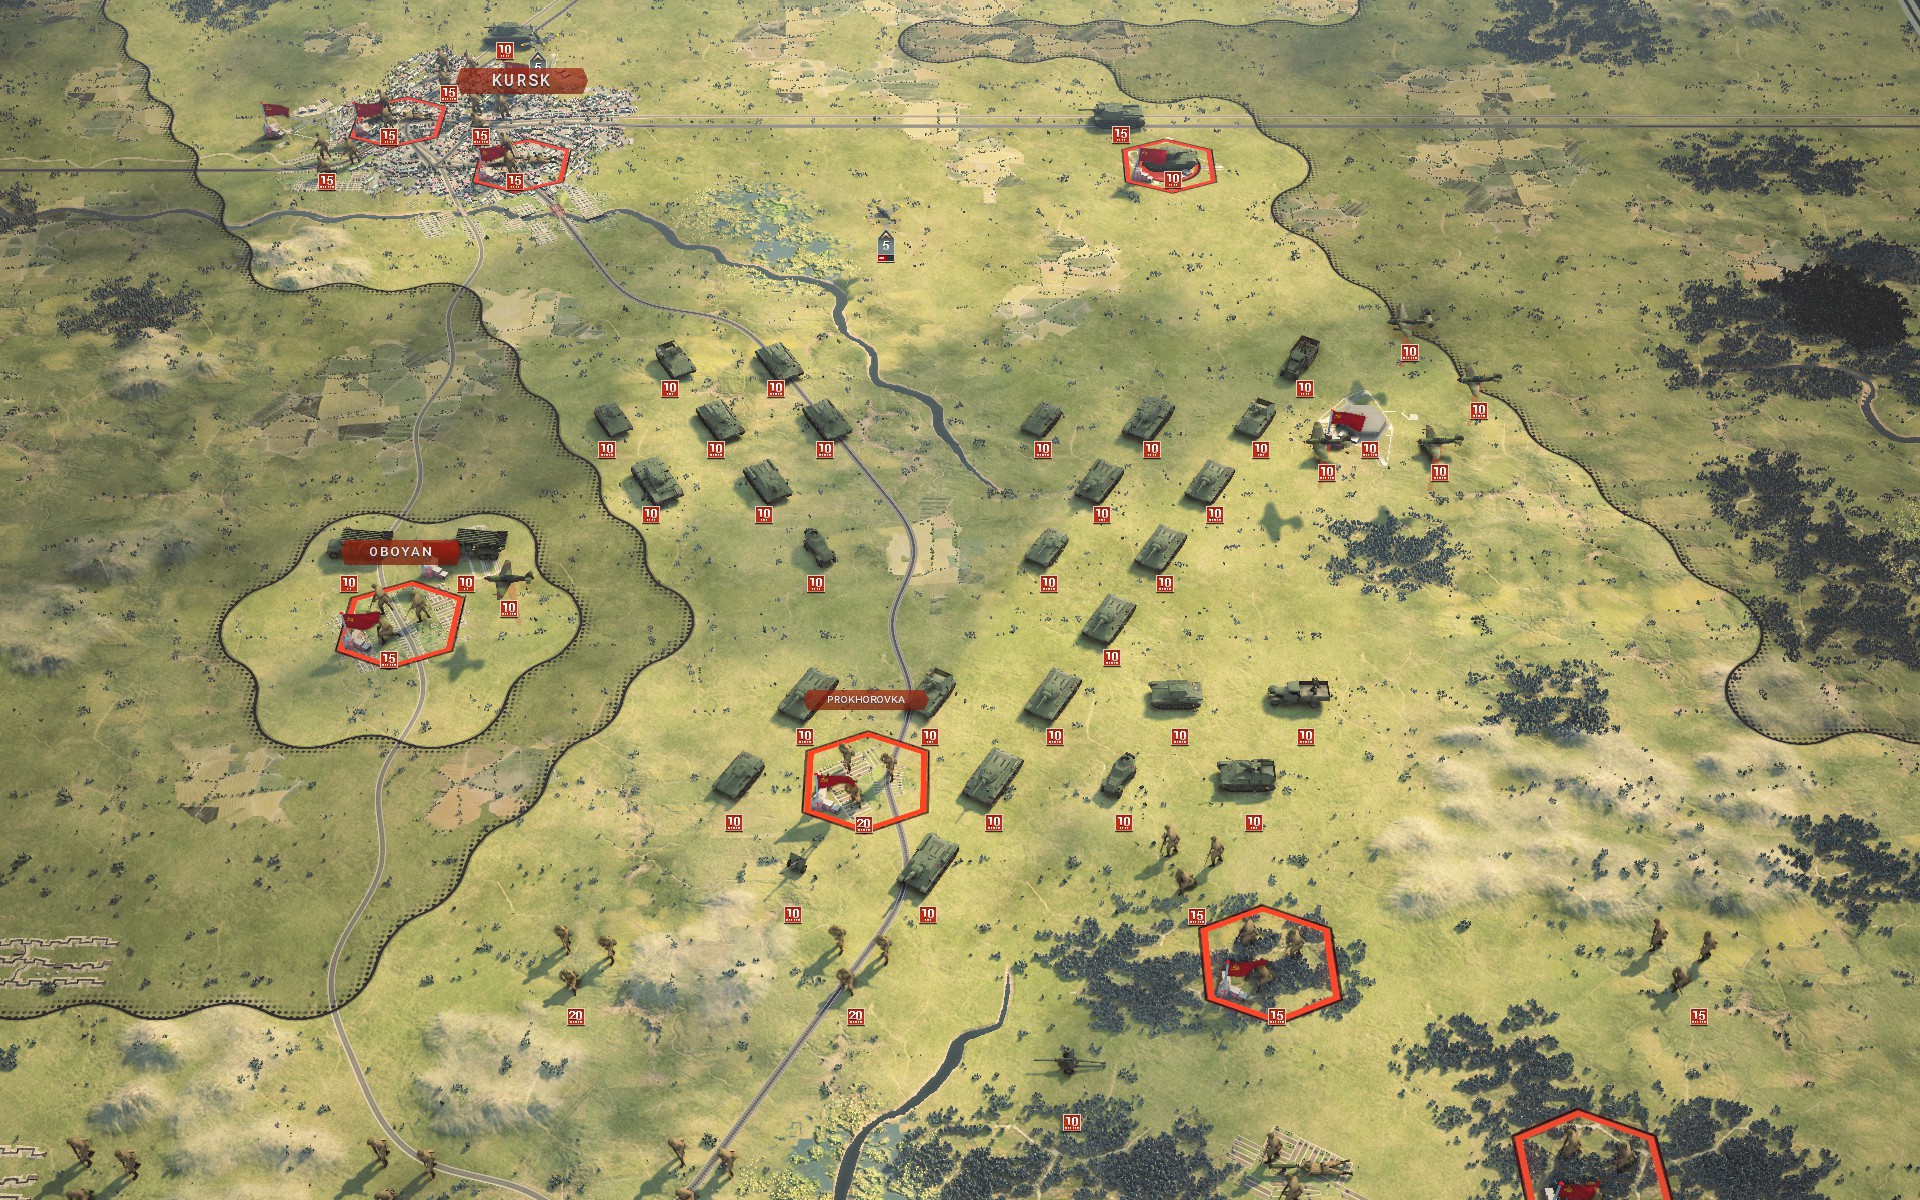
There is yet another large concentration of Soviet armour in the southeast. I suspect they will be ordered to advance once my forces capture Prokhorovka or Kursk, but I will keep an eye on them to ensure I am not caught unawares.
The StuH 42s and IIINs surround the objectives.

The auxiliaries come under heavy fire from SU-122s as they advance east, but damage is fortunately limited.
The Bridgeburners see off two battalions of Soviet infantry.
A recon captures the airfield near Livny, forcing the remaining Soviet aircraft in the north to rebase.
My forces consolidate their positions around the objectives.
The Luftwaffe hunts down the last Soviet bomber in the south.
The Bridgeburners receive reinforcements to bring them back up to full operational capacity.

The Crimson Guard storm the last objective; Soviet Regulars are no match for the elite mechanized Pioniere.
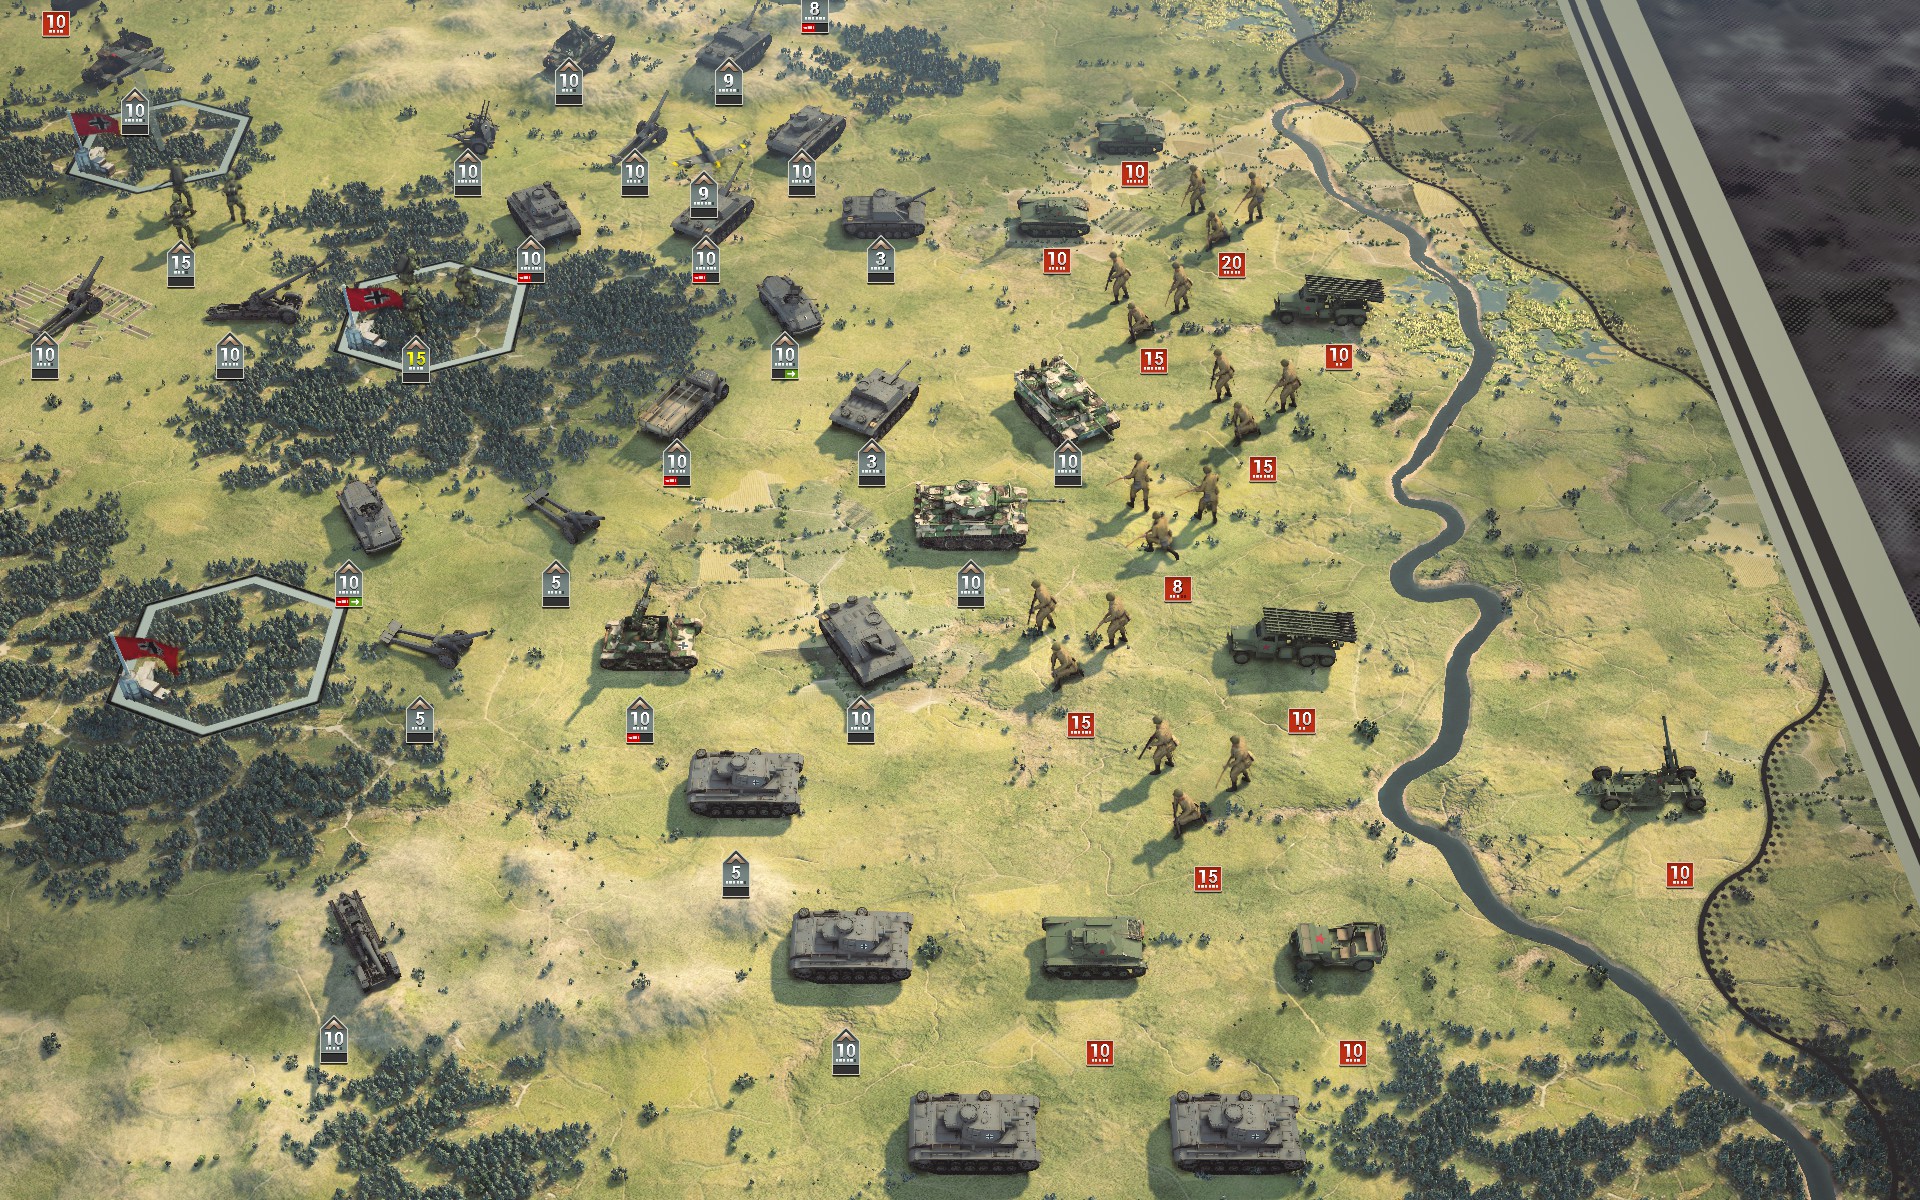
The Tigers strike the centre of the Soviet formation while the IIINs advance along the flanks.
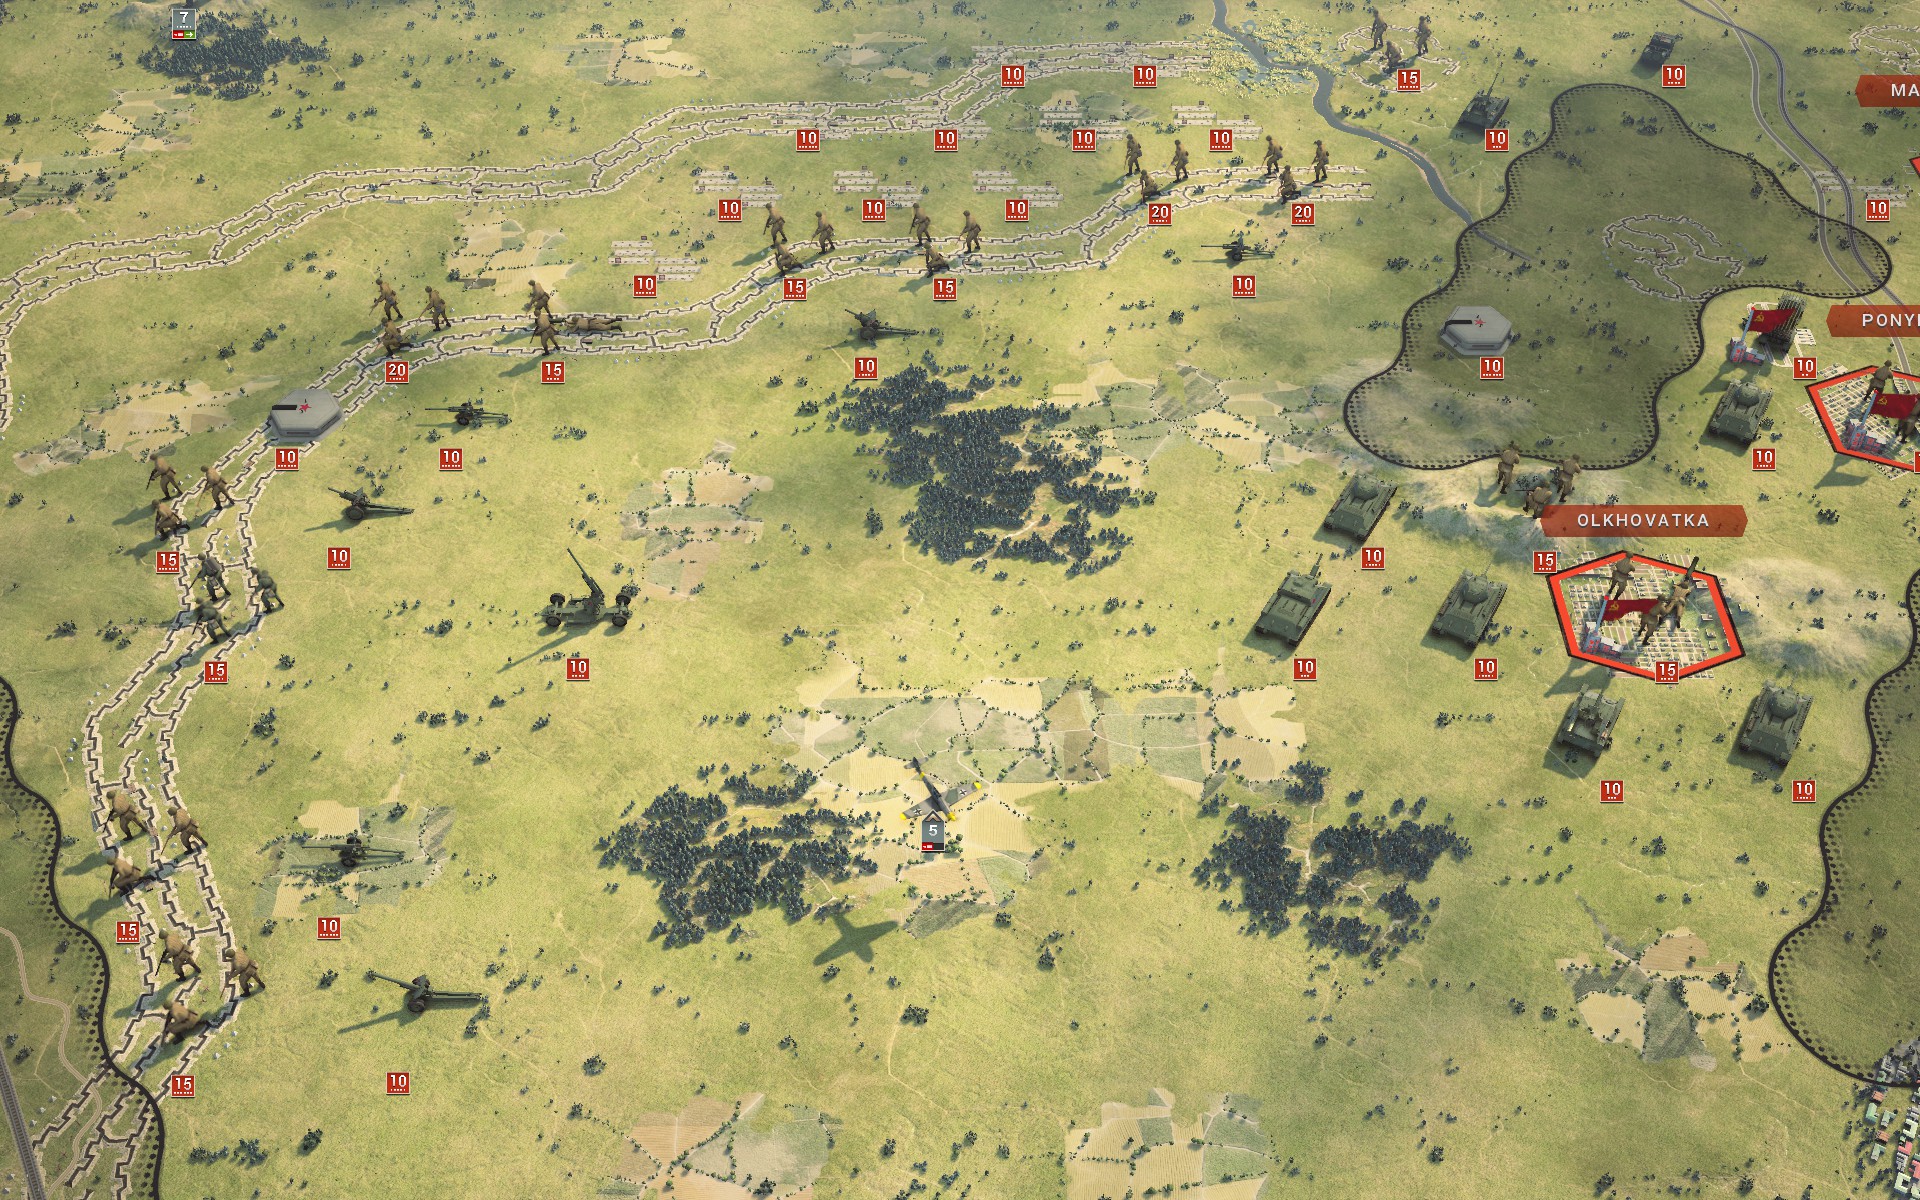
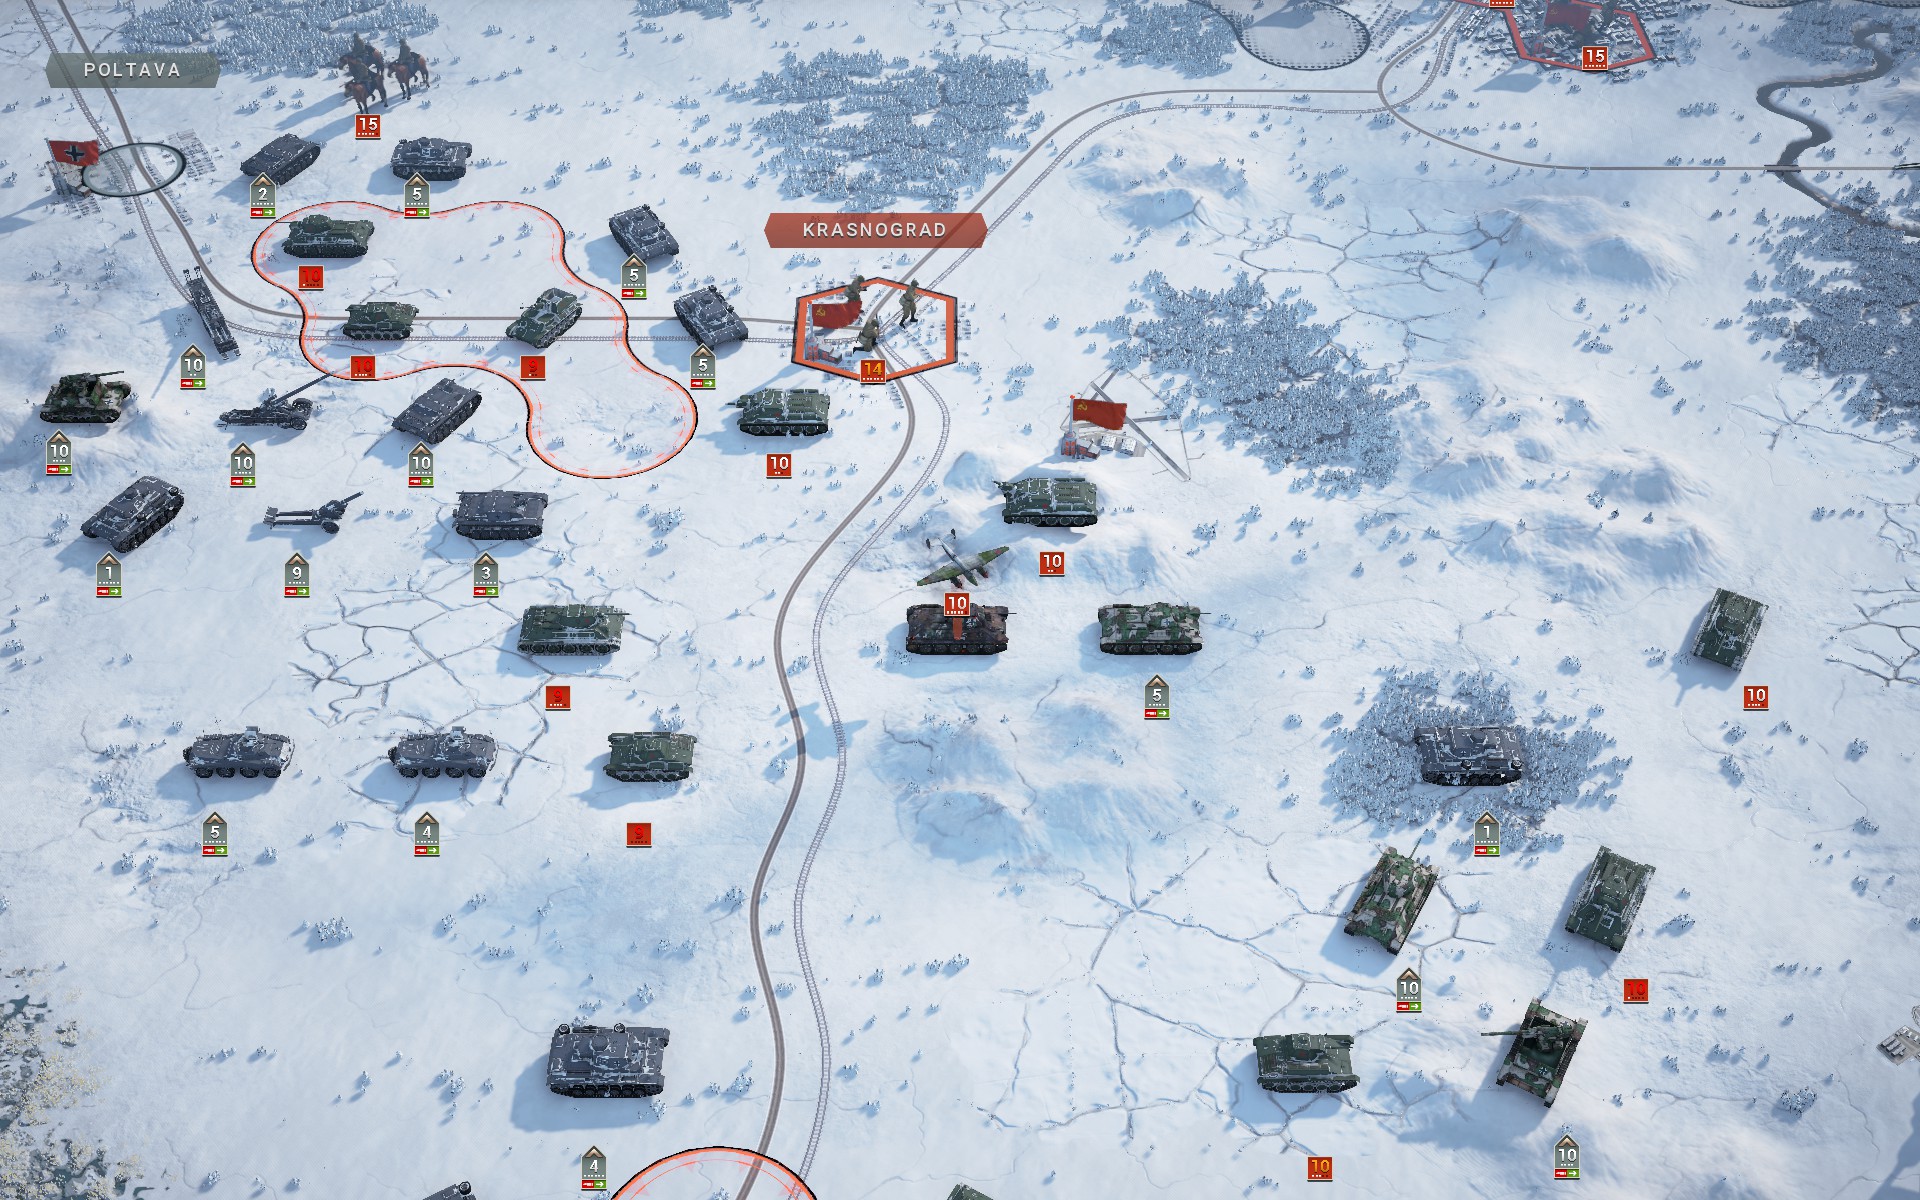
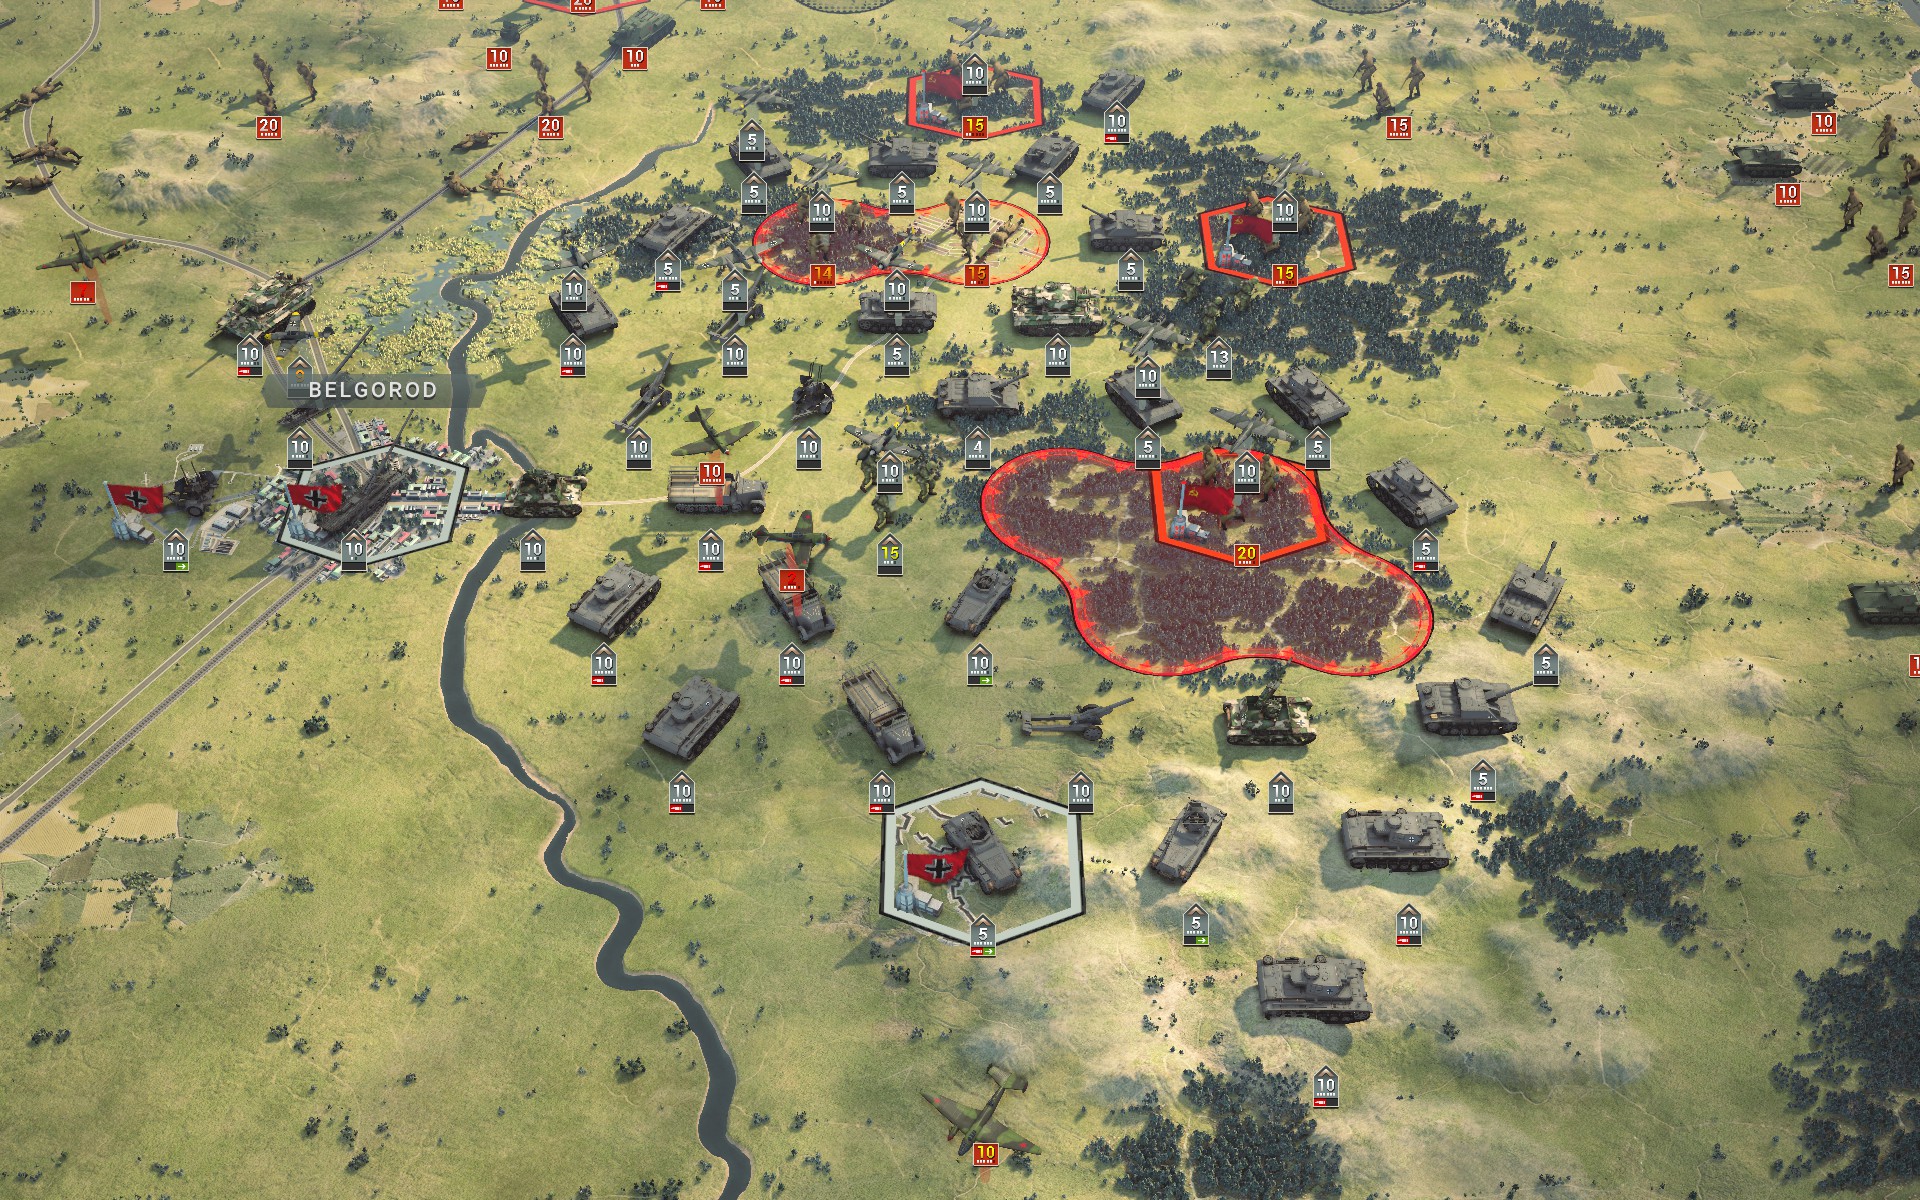
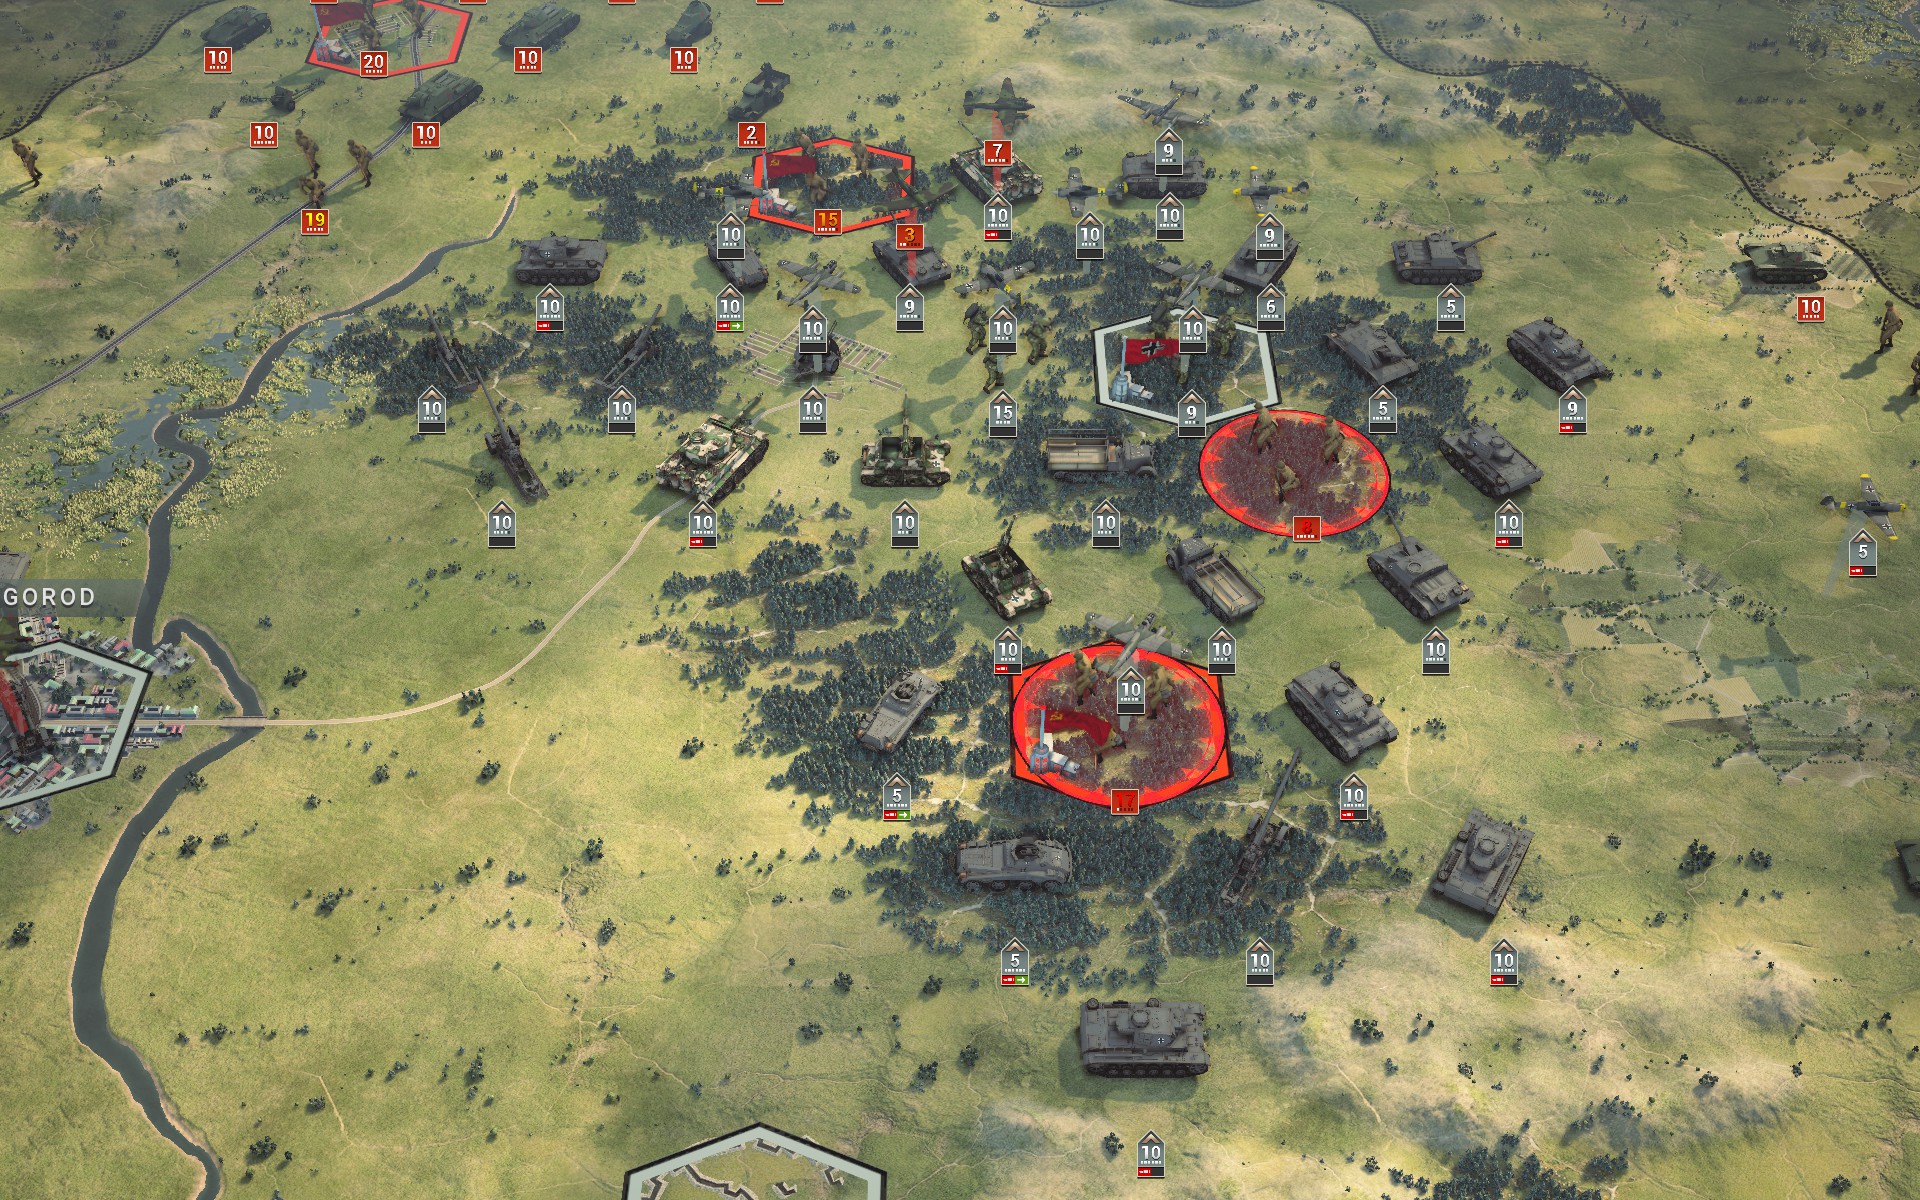
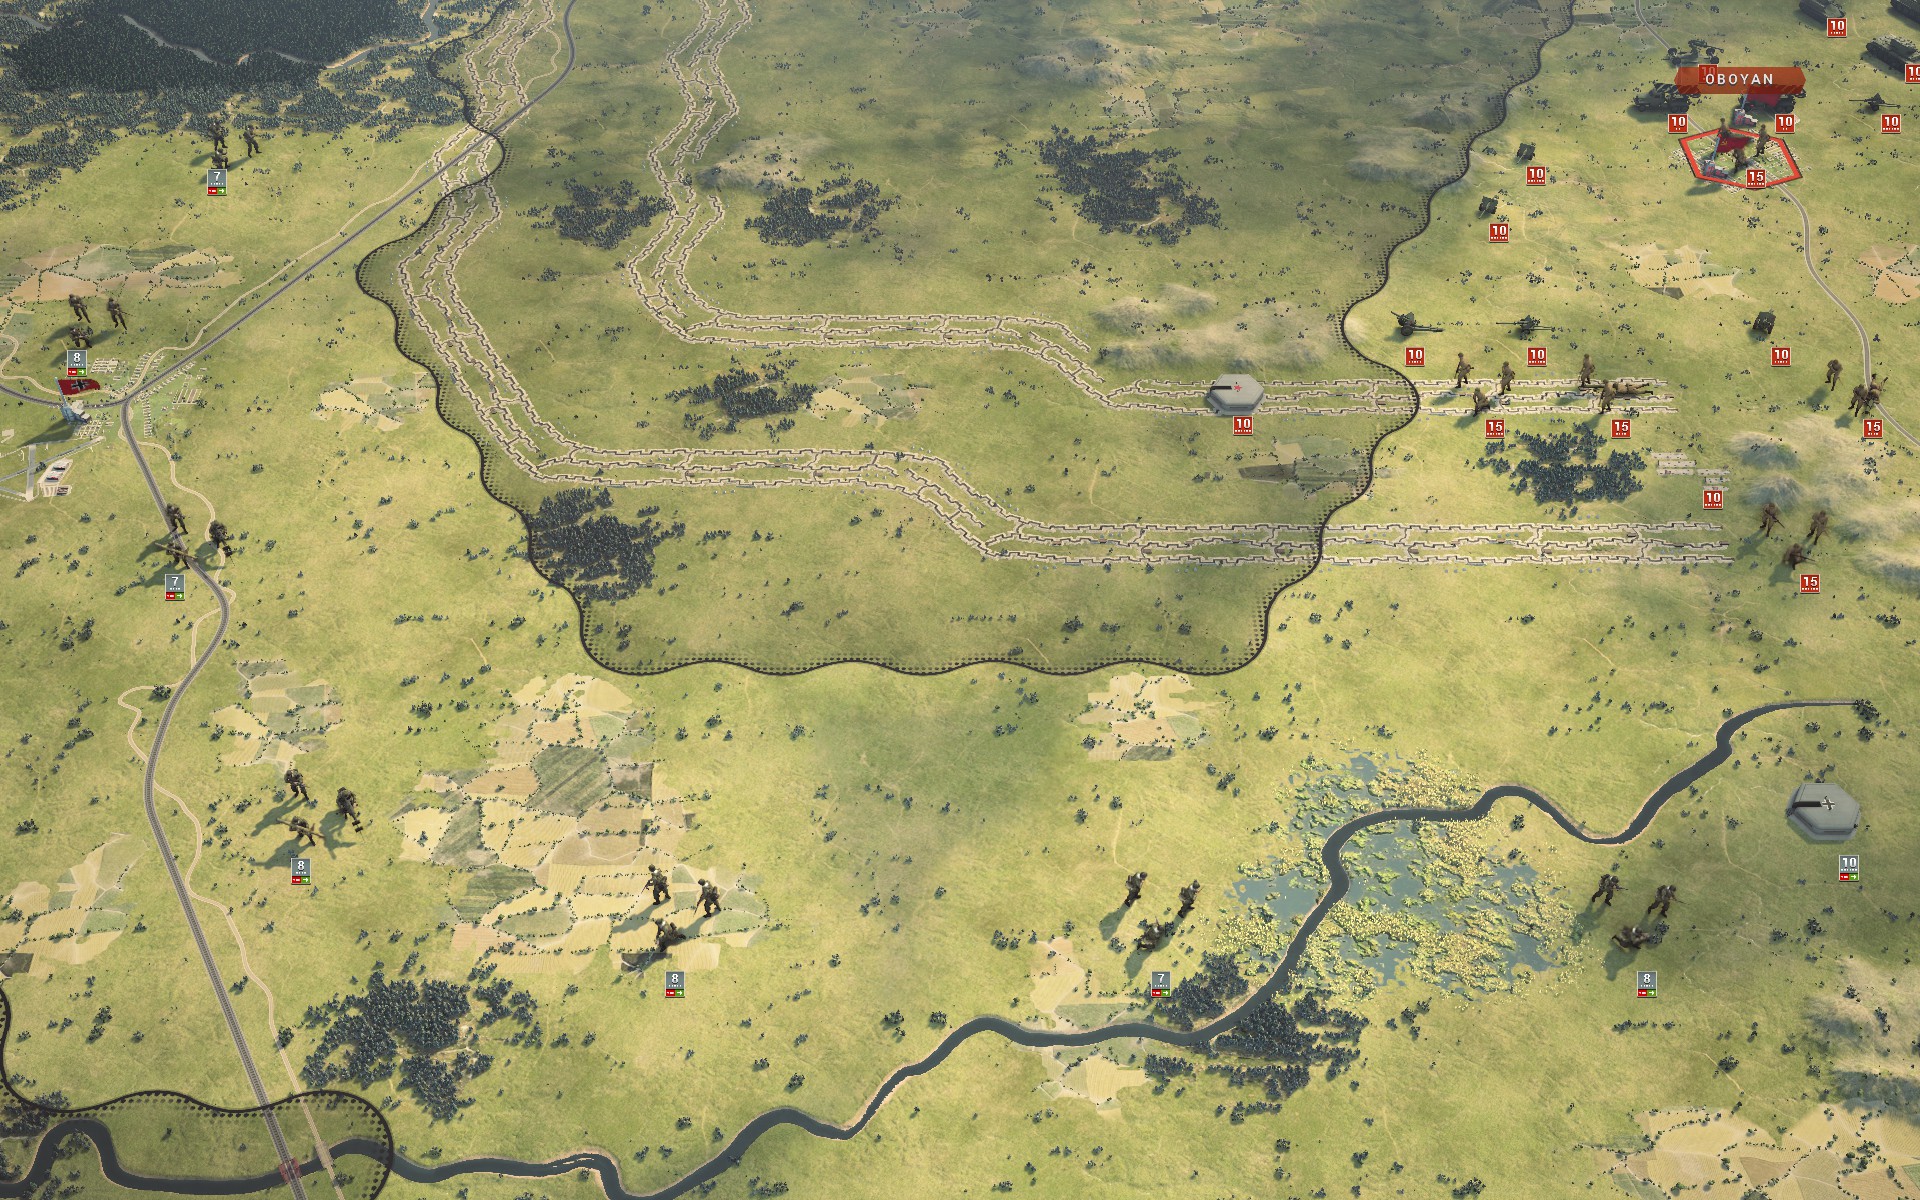
The fortified earthworks to the west are defended by large numbers of Soviet infantry, supported by artillery and AT guns.

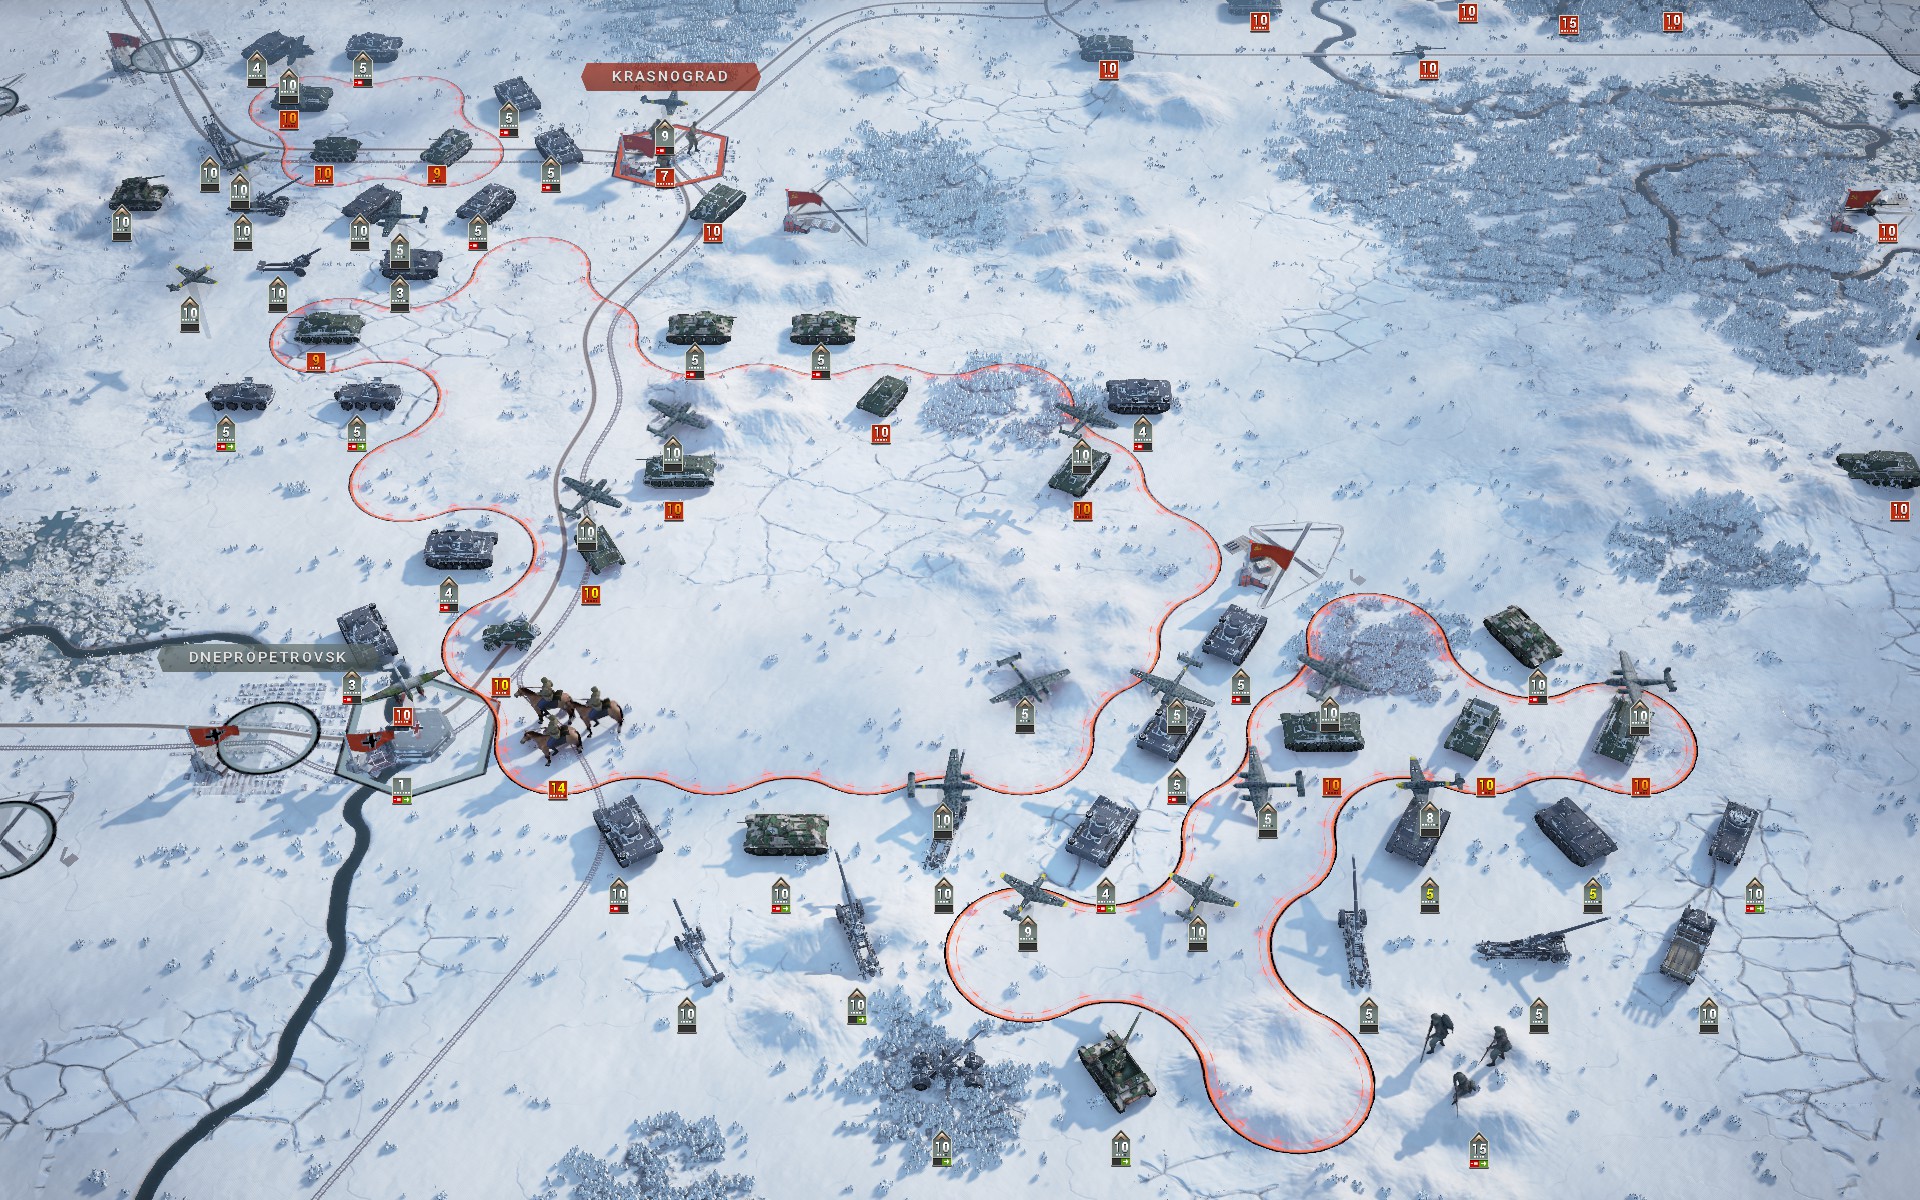
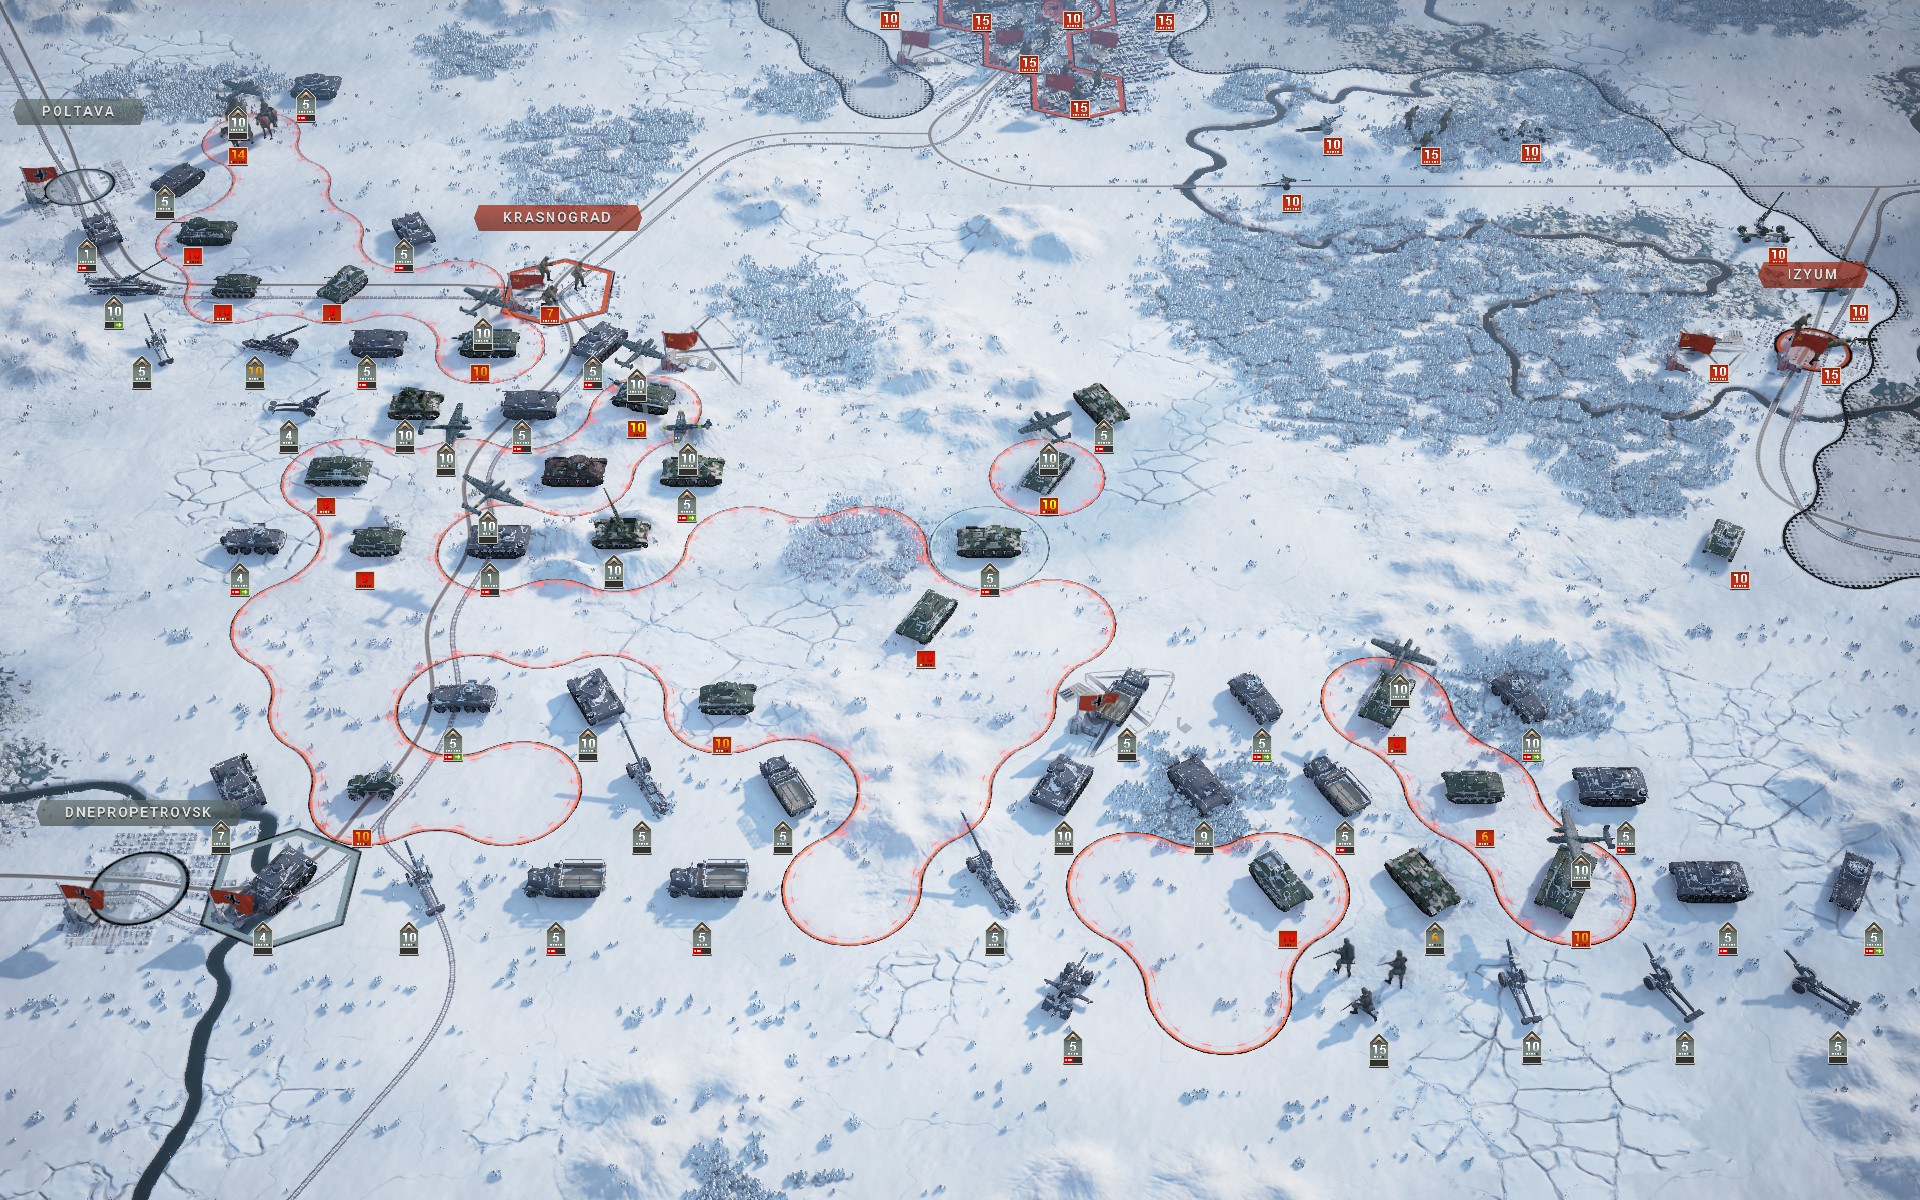
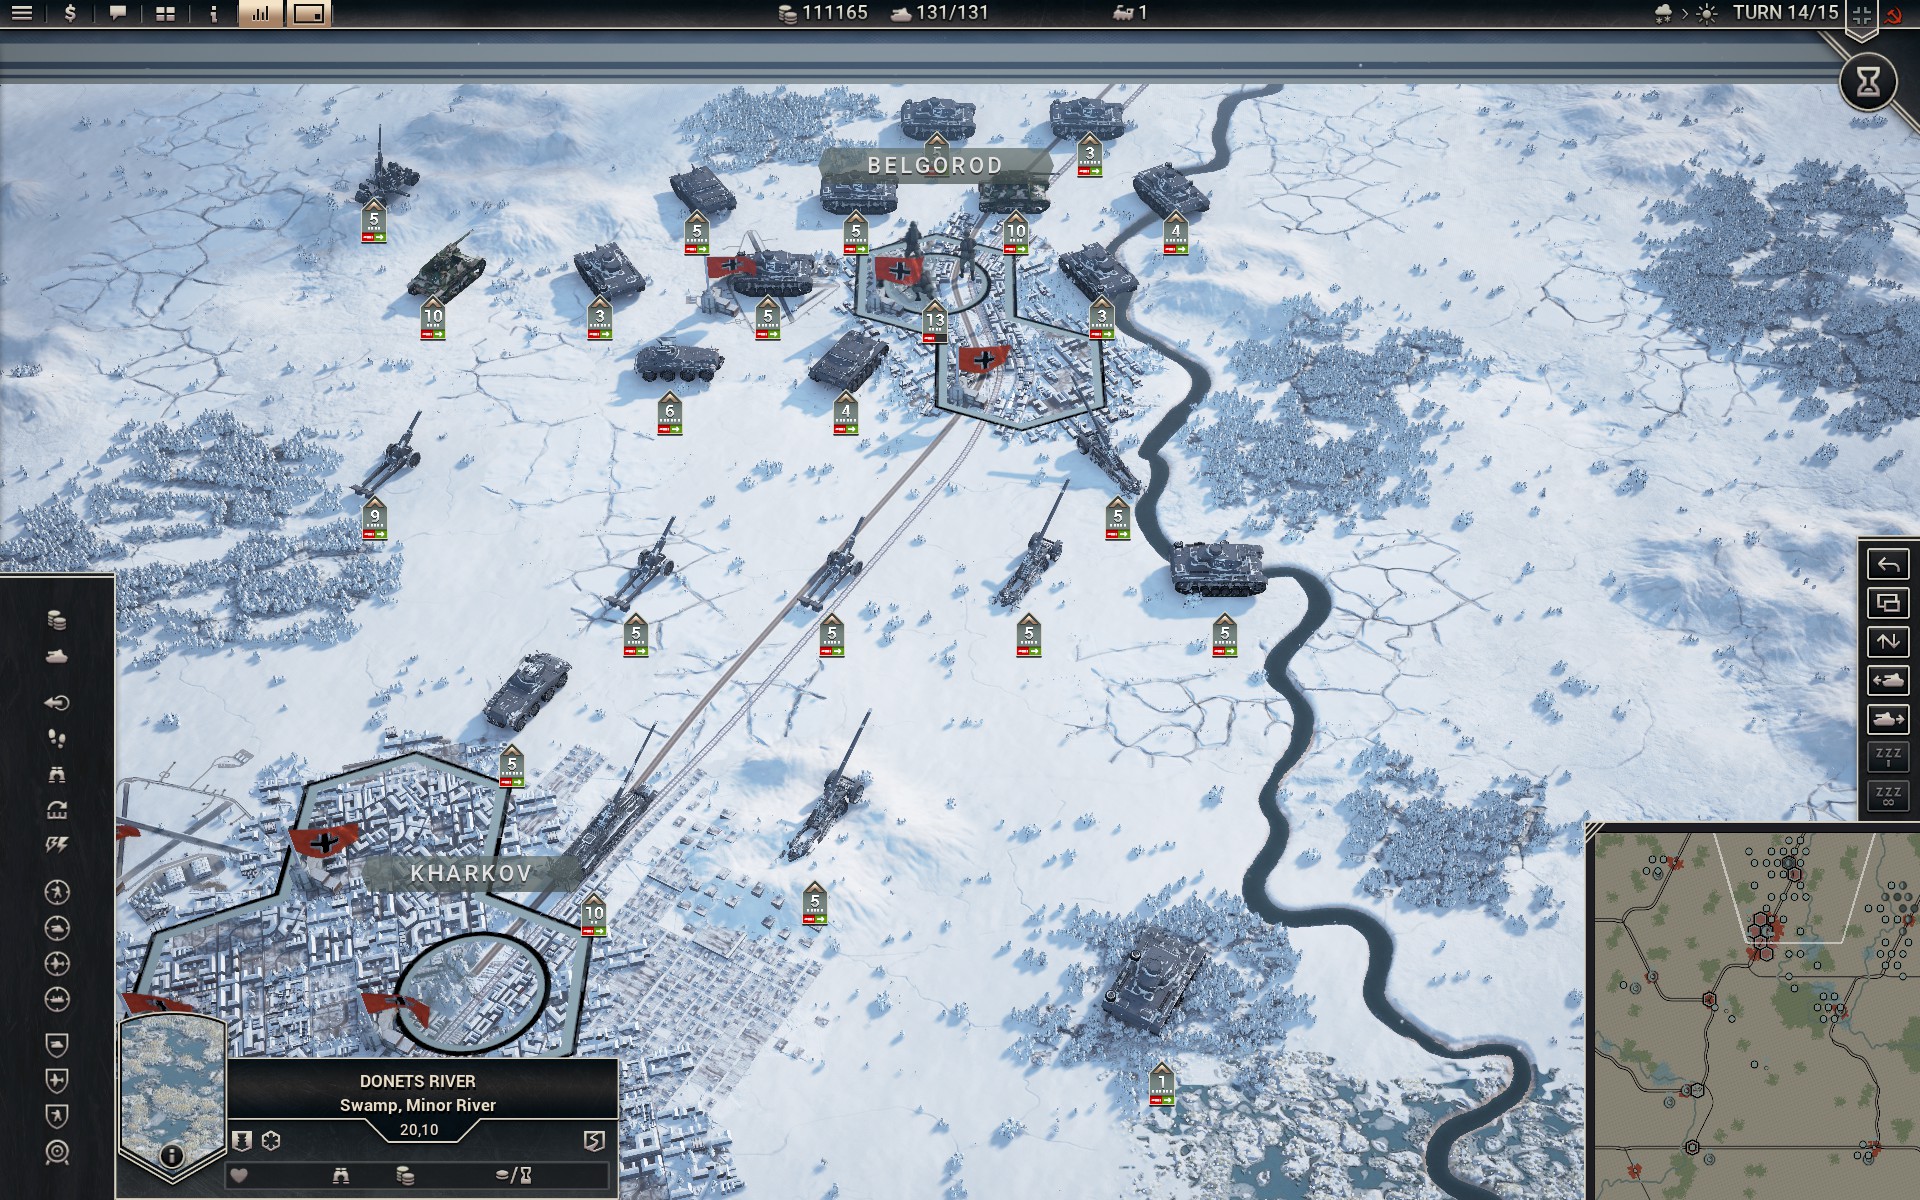
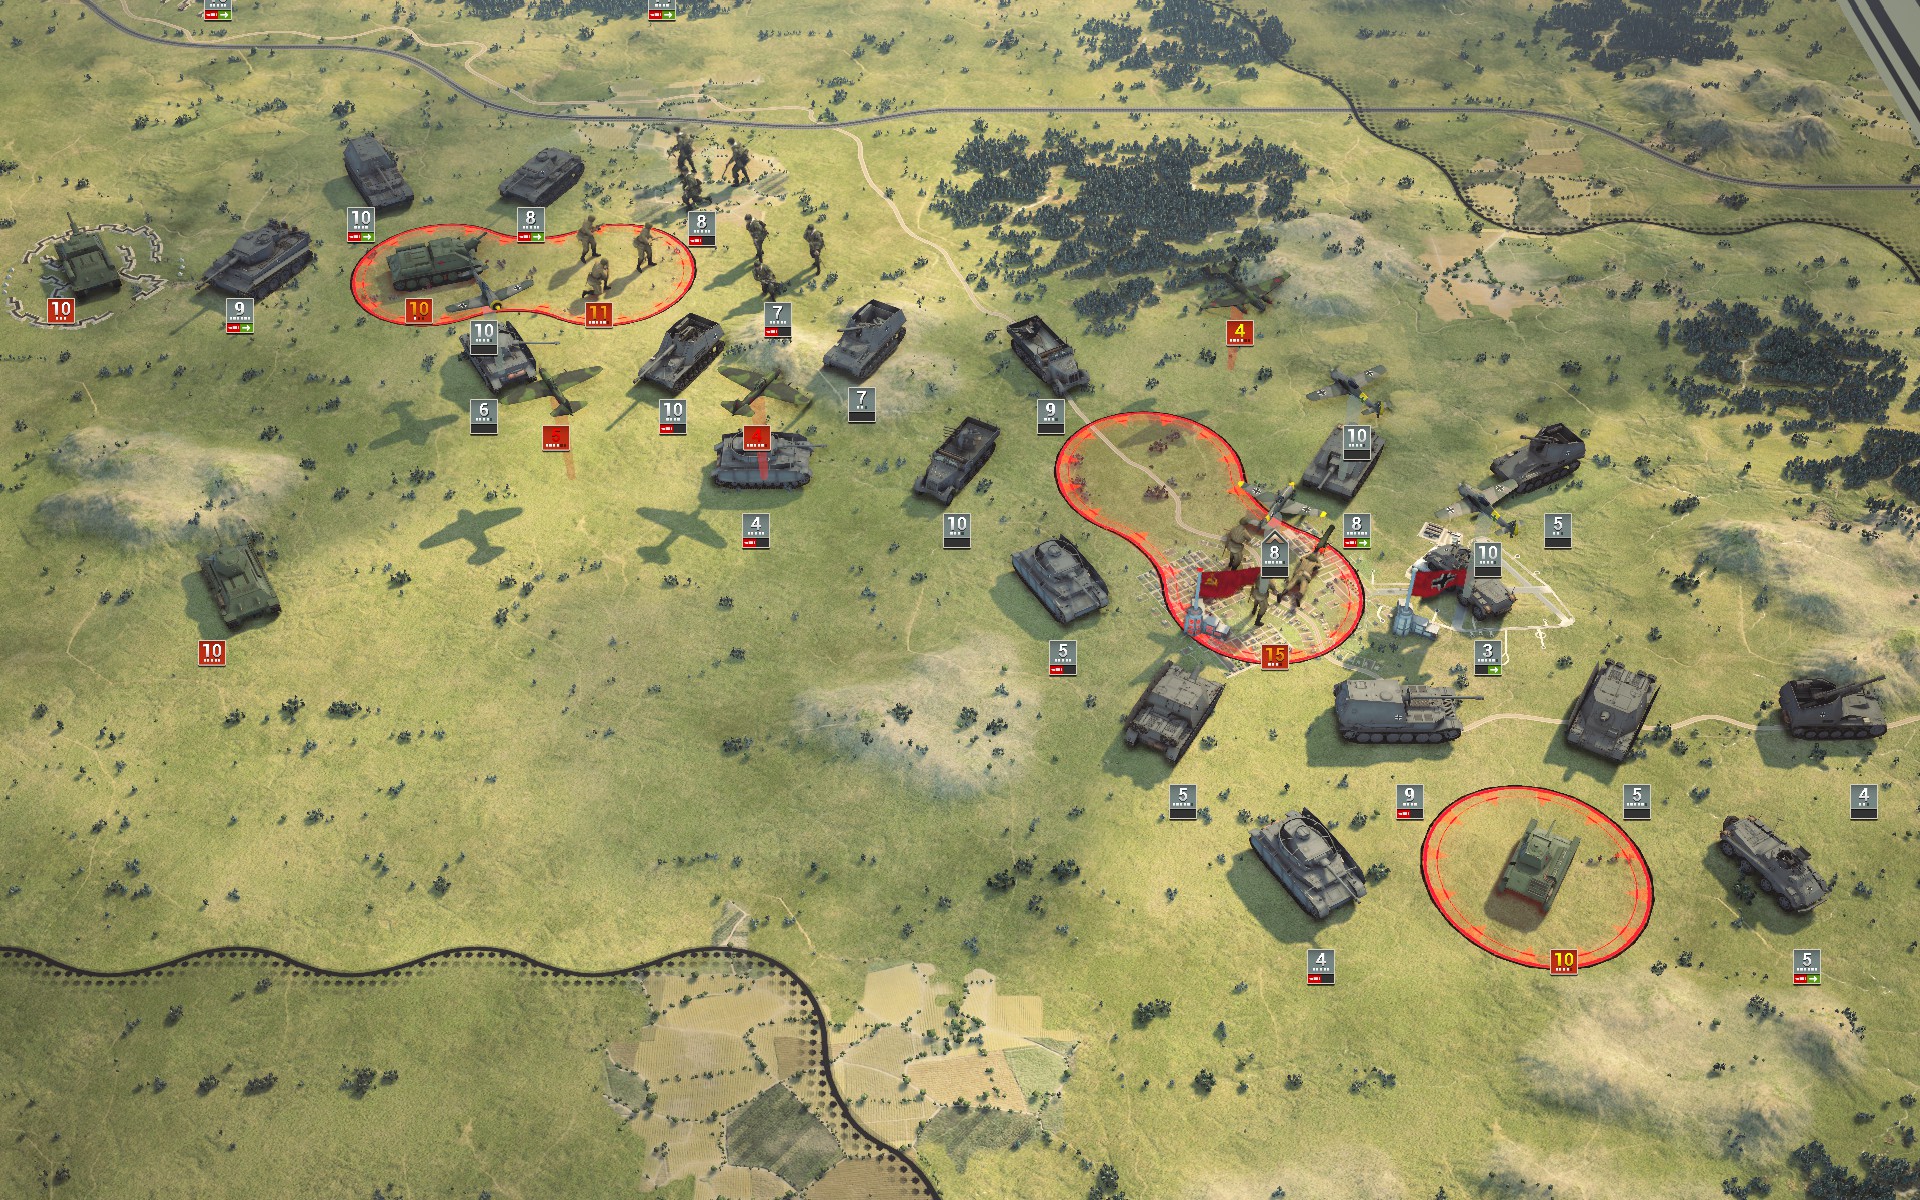
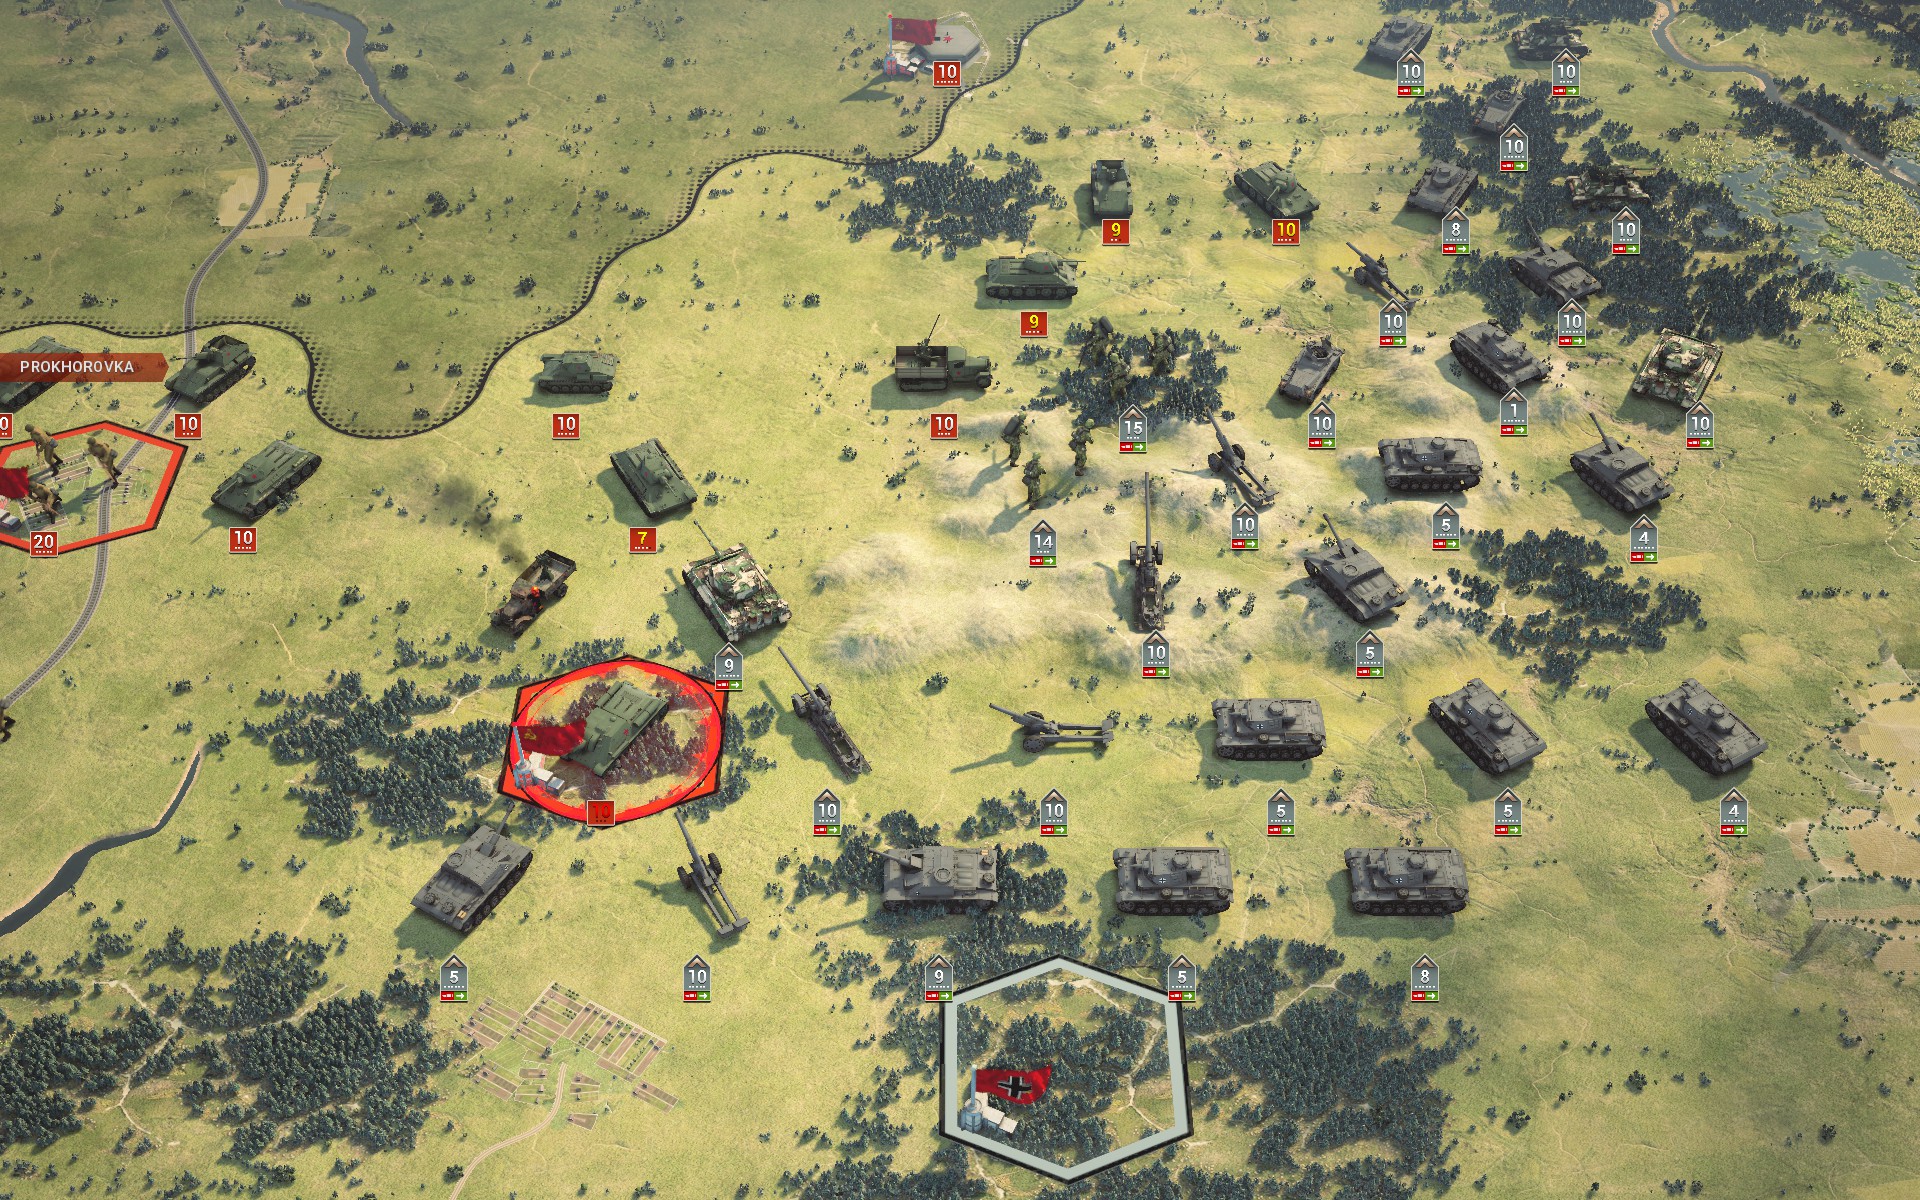
Given the scale of the scenario I've included this view of the battlefield to show the current positions of mine and the Soviet forces, and to give a better idea of the numbers and distances involved.
In the southwest the auxiliary infantry have begun to spread out to cover the entire length of the perimeter.
With the artillery in place my Panzers advance on the Soviet positions by the Oskol.
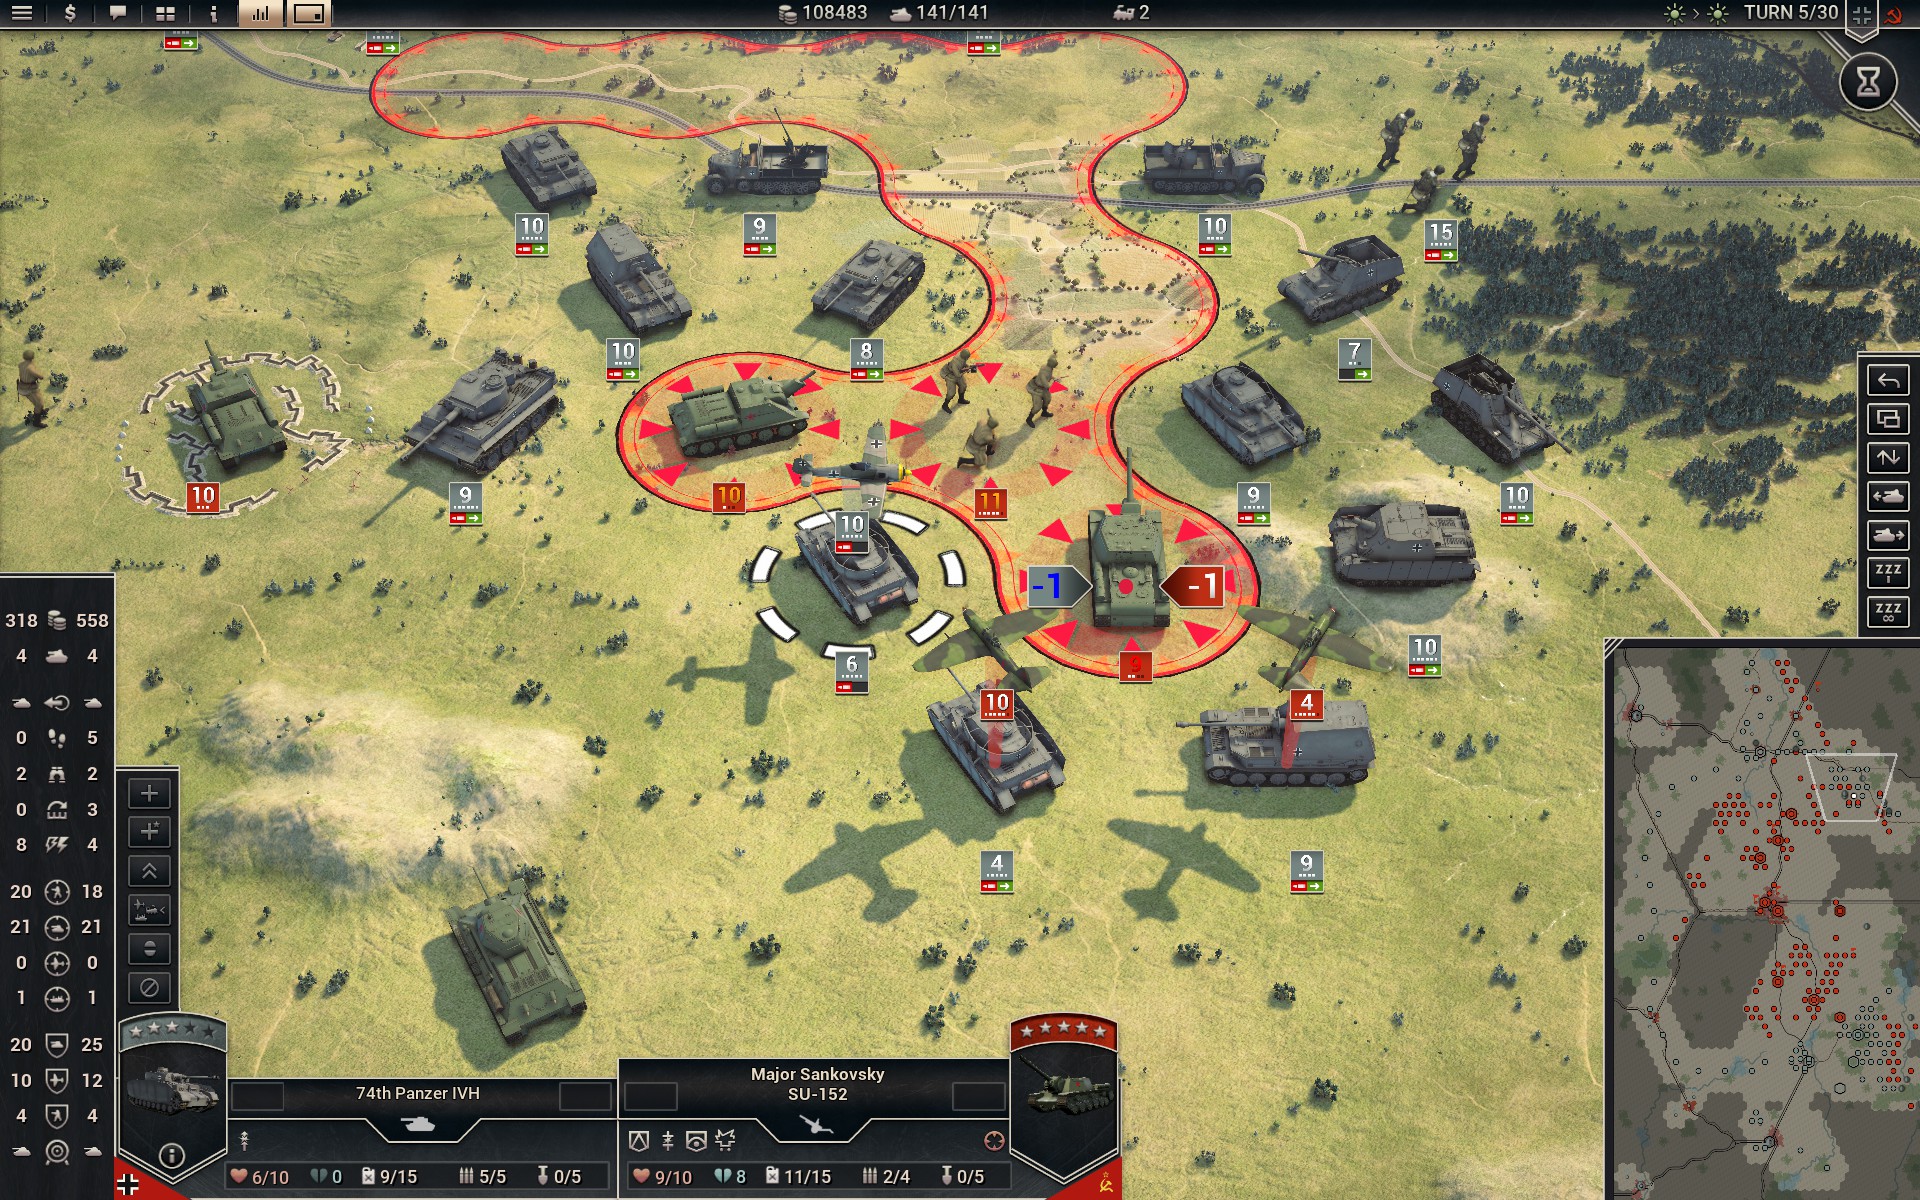
Major Sankovsky and his SU-152 are captured.
The auxiliaries have reached Livny while keeping contact with the Red Army to a minimum. At this rate they'll likely reach the supply depot before my own forces do.

Tigers cross the Oskol to surround the Red Army.

Auxiliary Panzers defeat a Soviet reconnaissance force near Orel as the infantry take up positions in close terrain, with a battalion of Gebirgsjäger anchoring the defences on the hill north of the town.

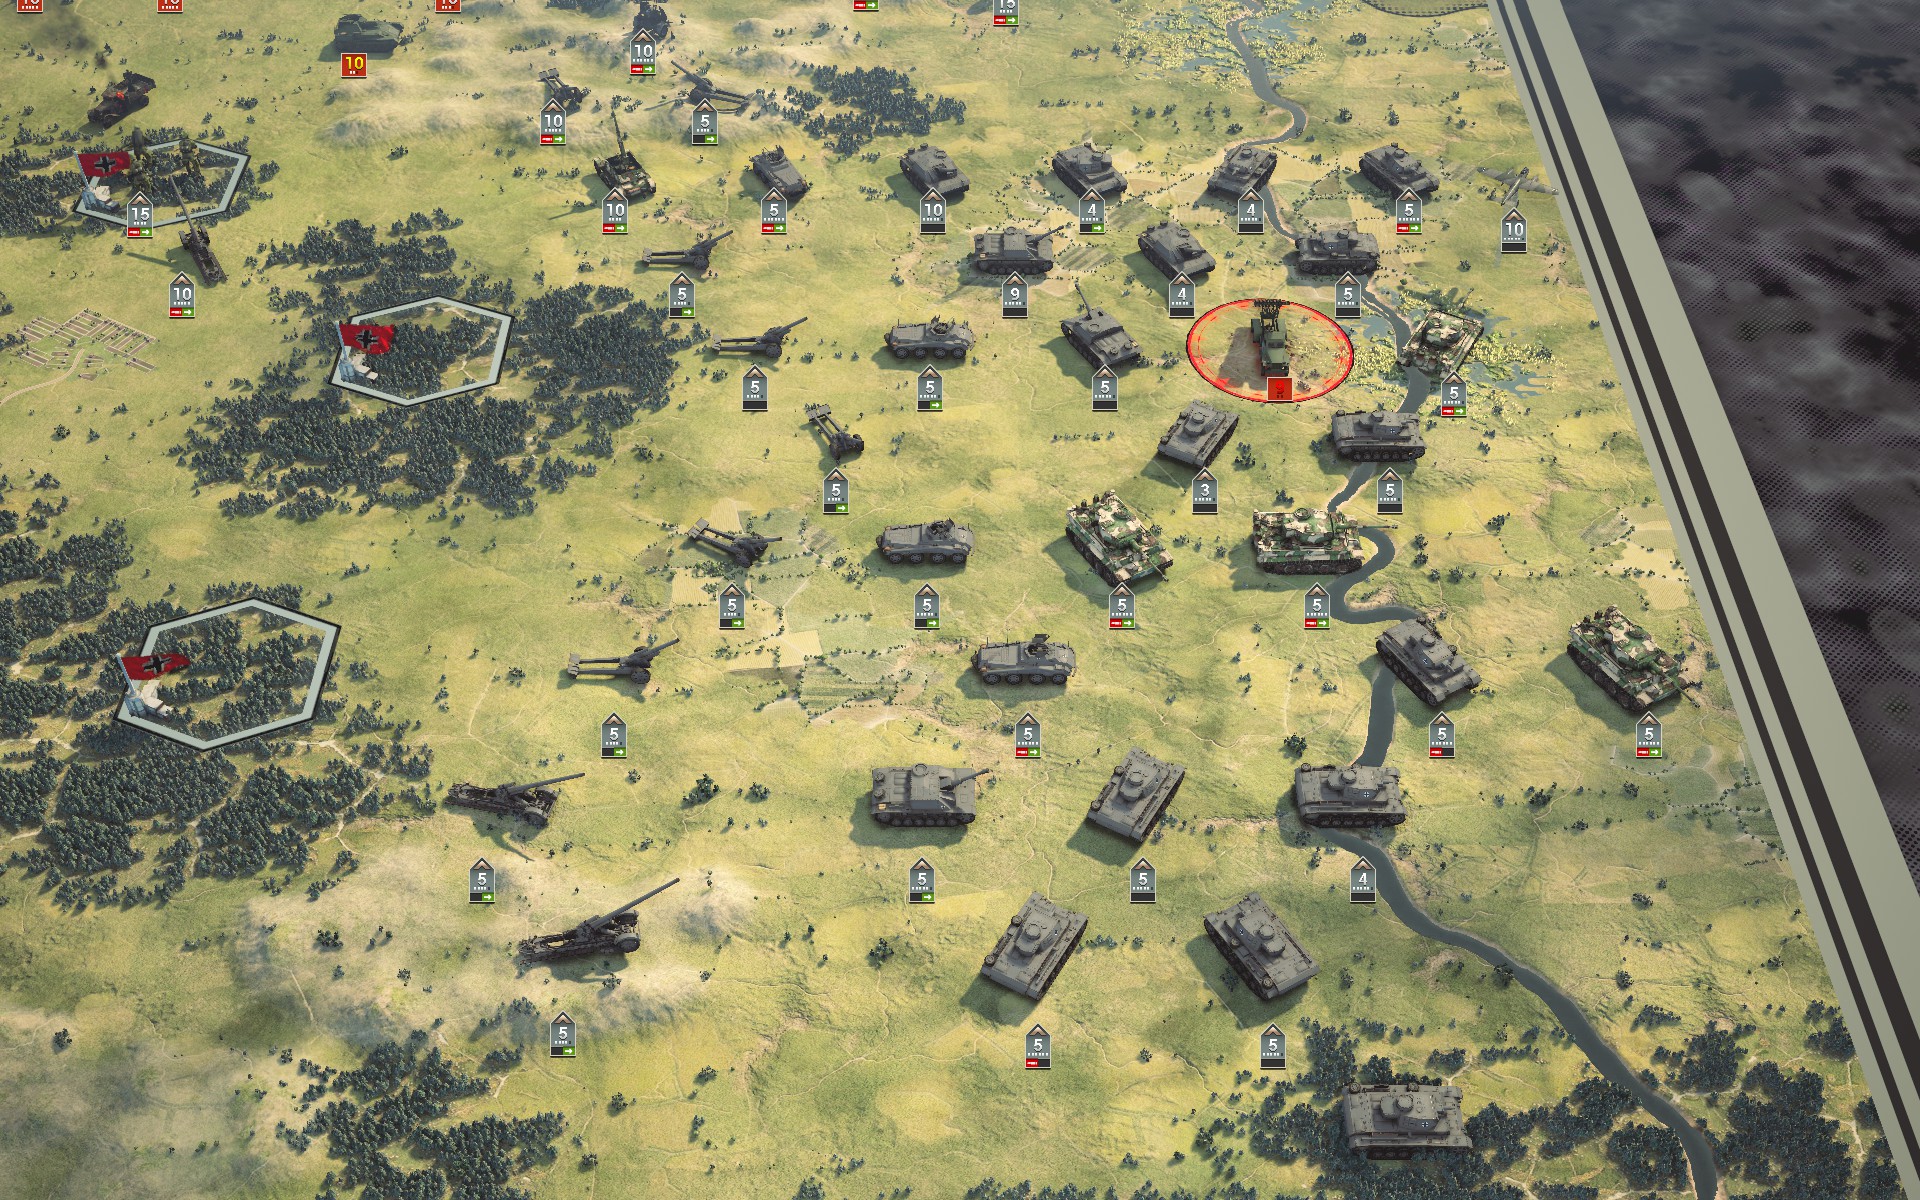
There is a large Soviet armoured reserve in the north too, as well as a number of aircraft that have yet to see action.
The Soviet forces by the Oskol are captured and my forces prepare to move north as per the original plan.
The last Soviet forces near Livny are captured.
More Soviet infantry press in from the south, but they are unable to damage the Panzers.
The Luftwaffe hunts down the last Soviet aircraft within the Kursk salient. The Do 217Es should be able to operate freely now.
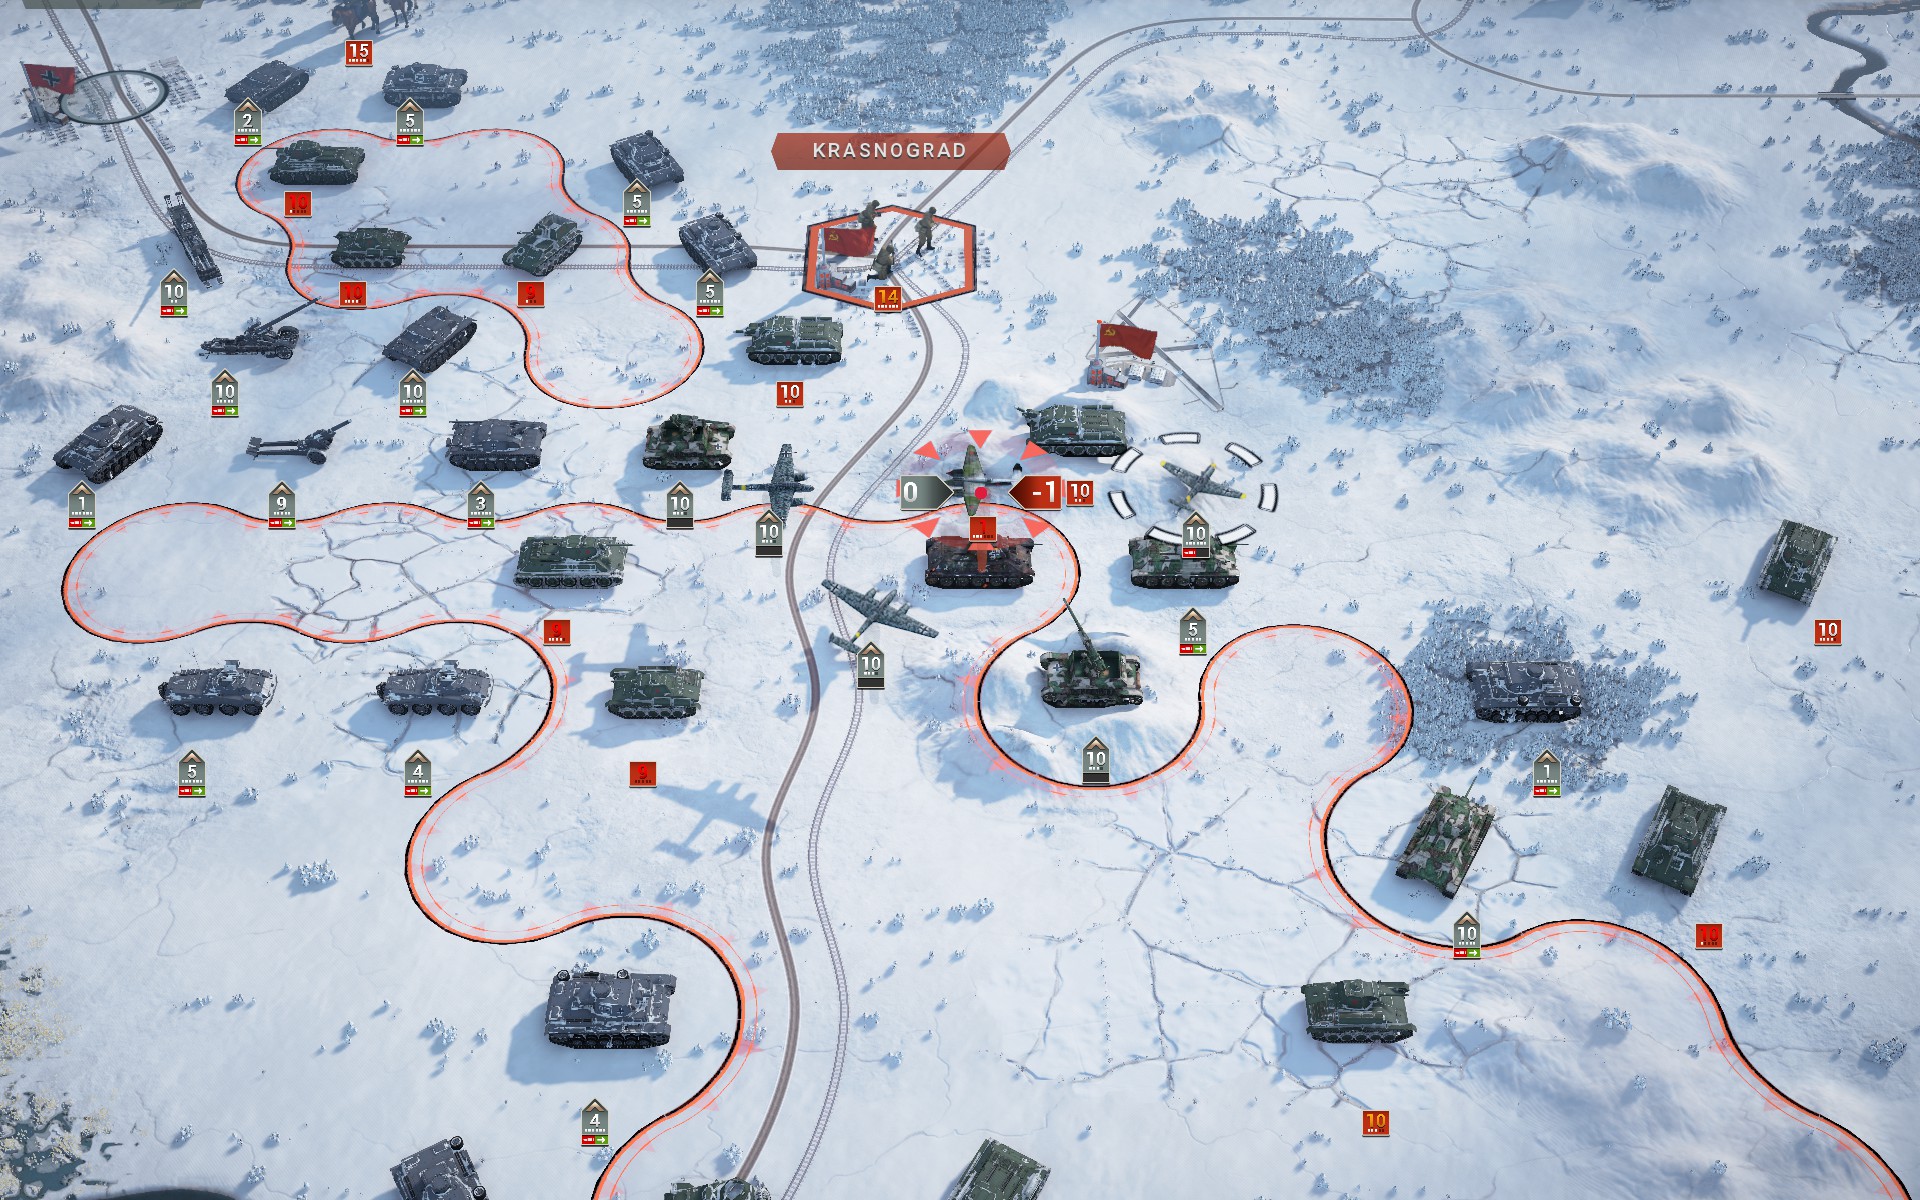
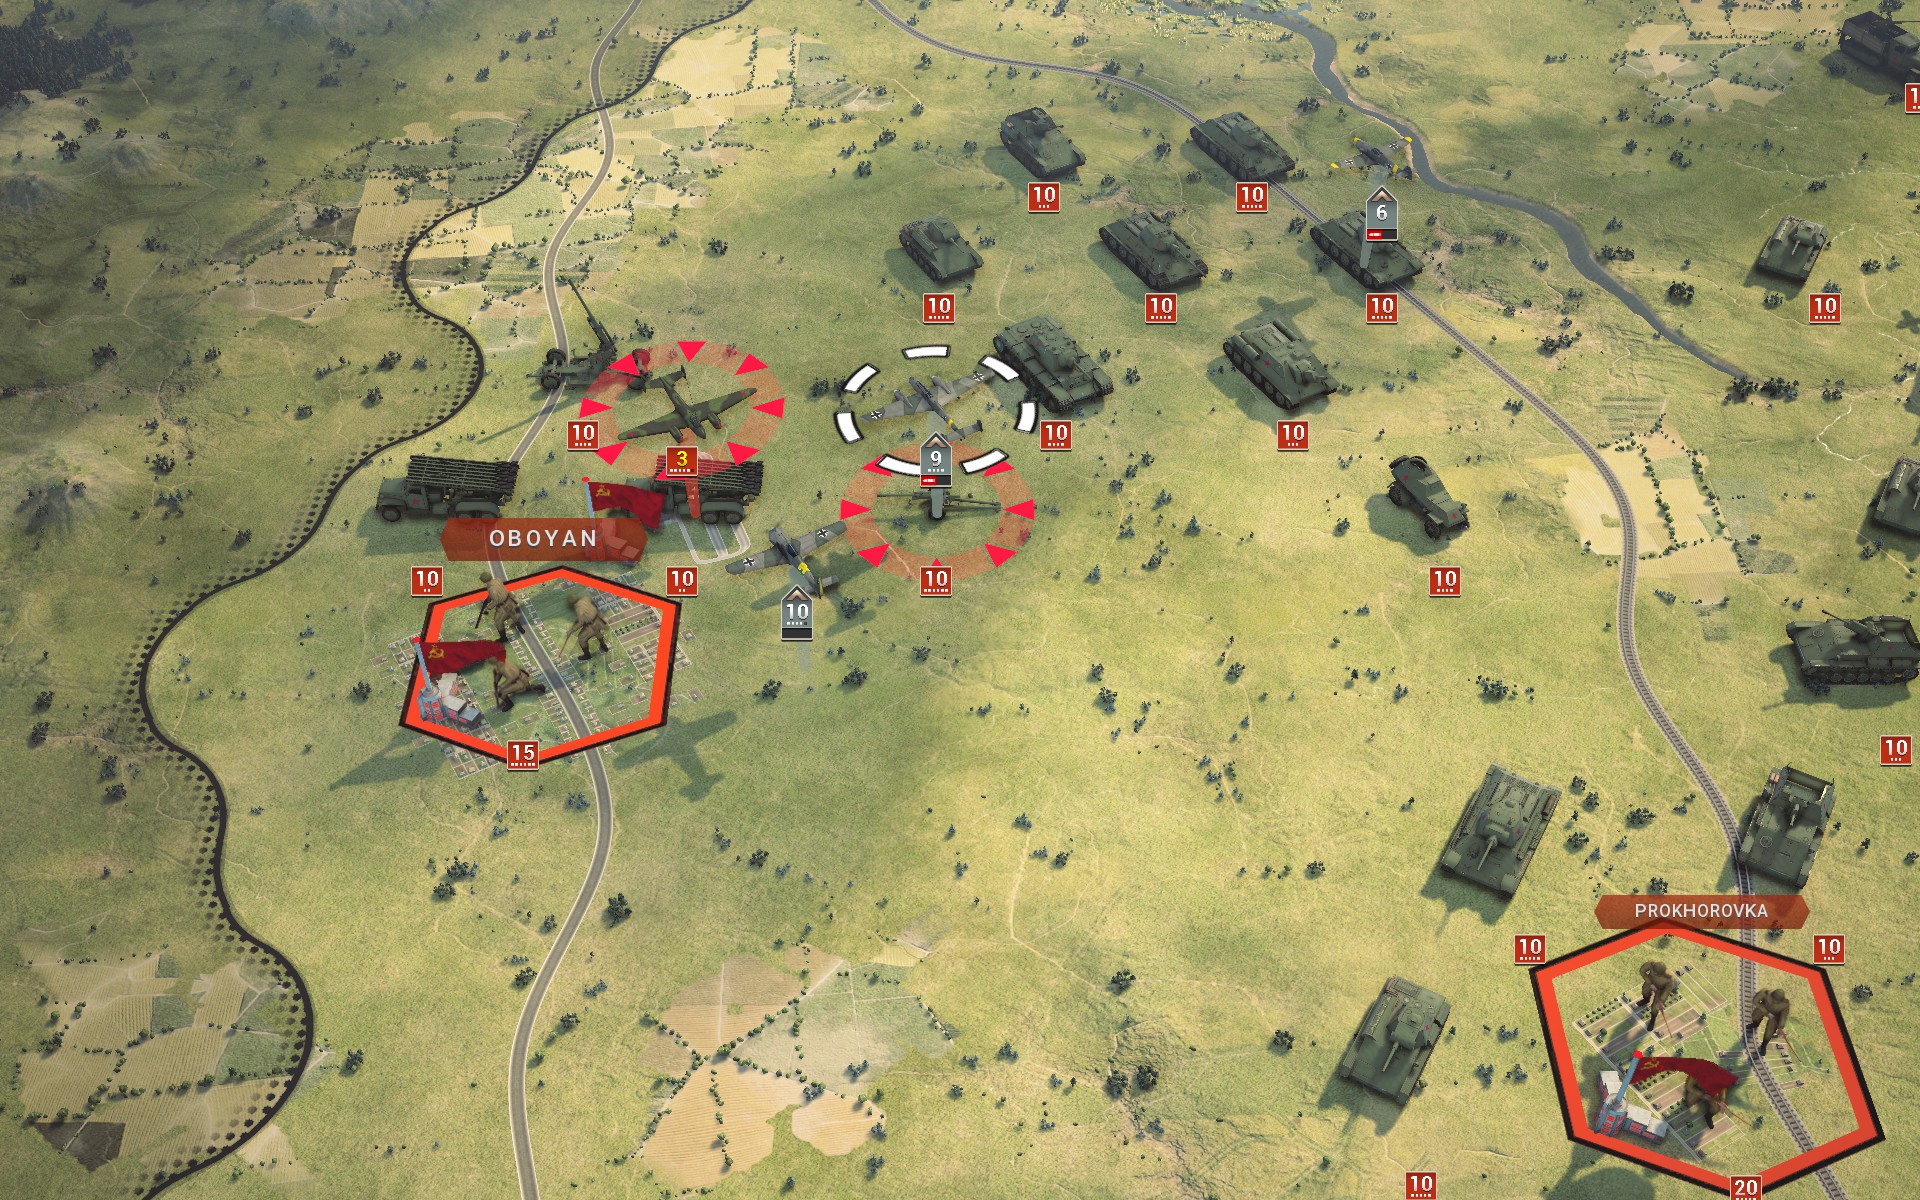
The armoured column at Prokhorovka begin to mobilize in response to my incursion, but their movements are poorly coordinated.
The Luftwaffe seeks to preemptively destroy the Soviet air reserve.
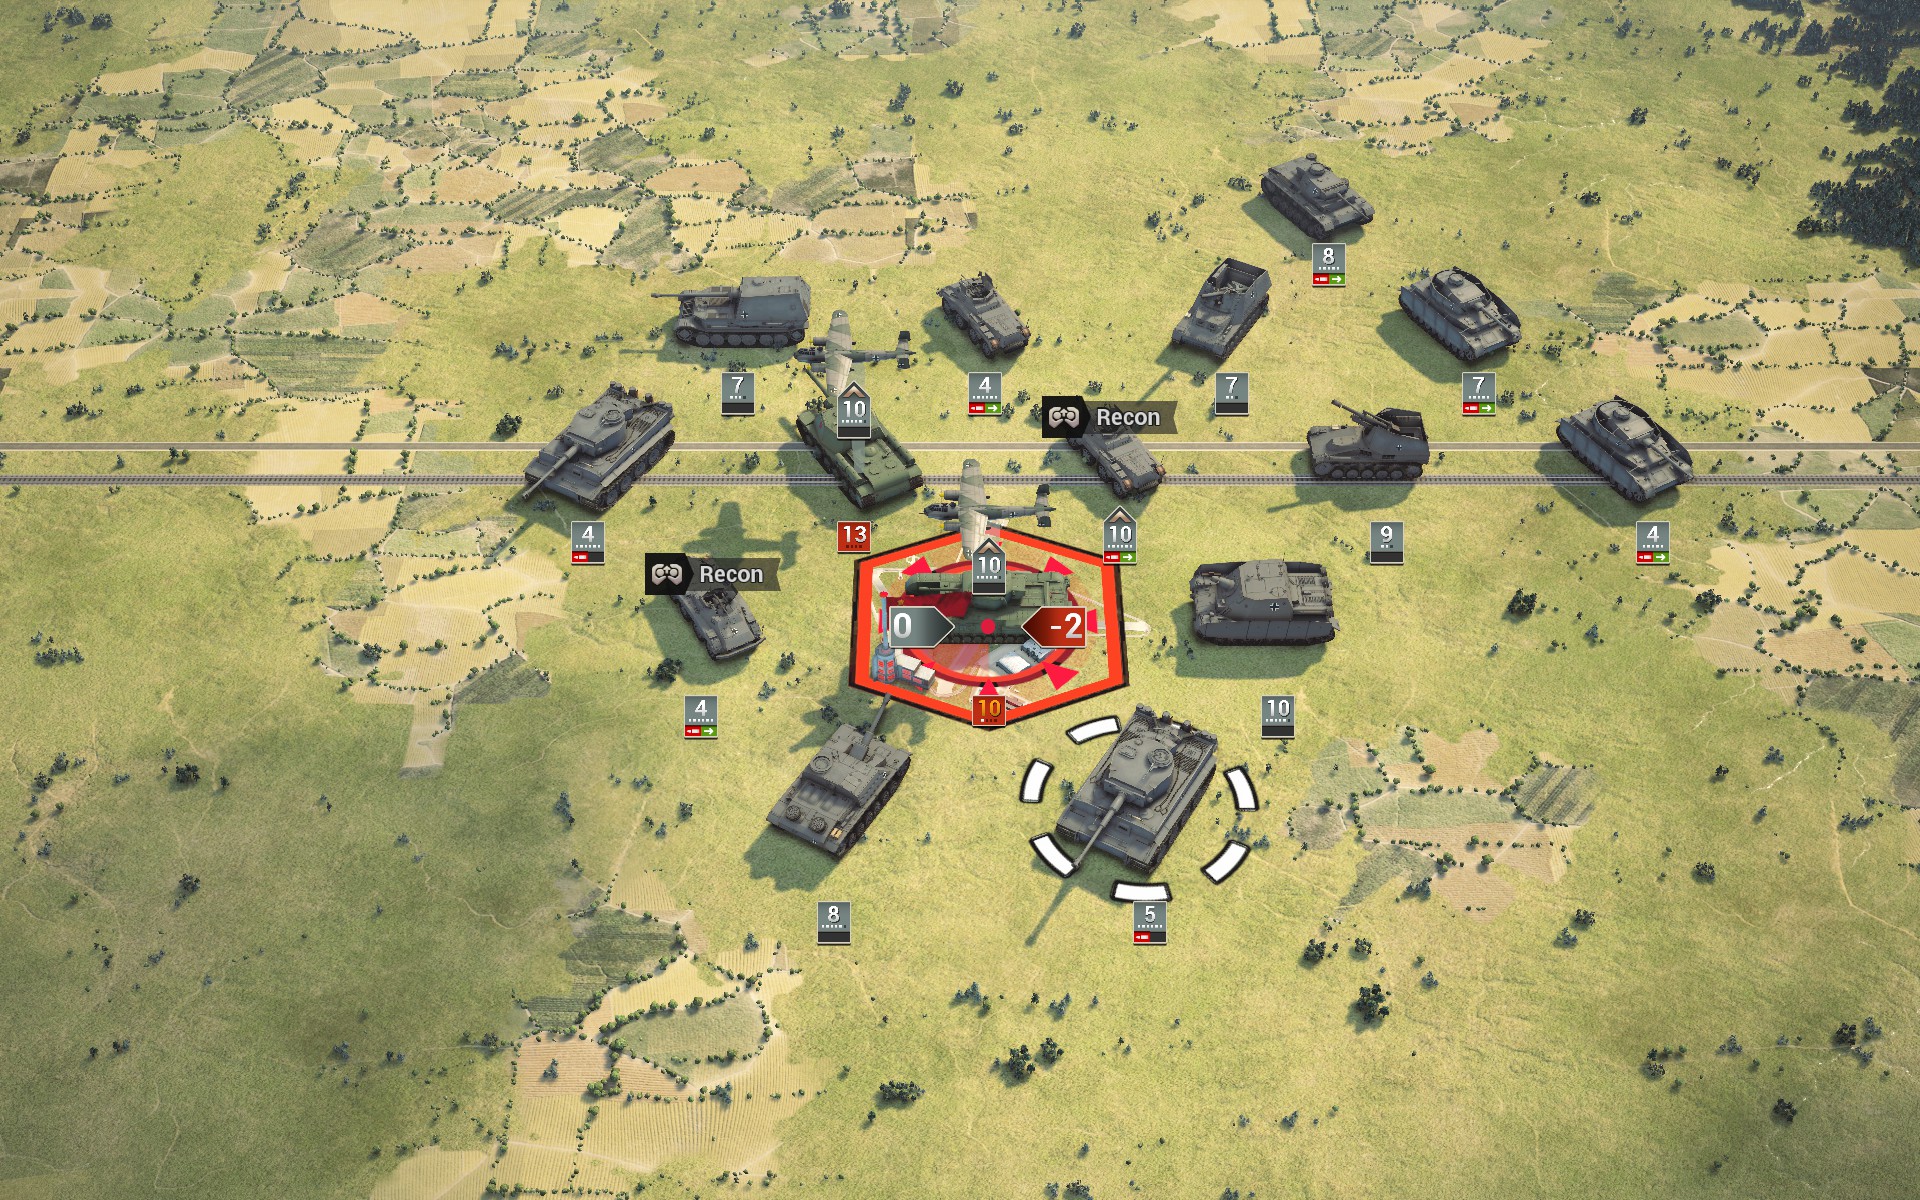
Here's one for those of you who remember the tactical puzzles. A Do 217E and a sacrificial pawn will drain the SU-152 of its ammunition...
... allowing the auxiliaries to safely capture the Churchill Mk.IV...
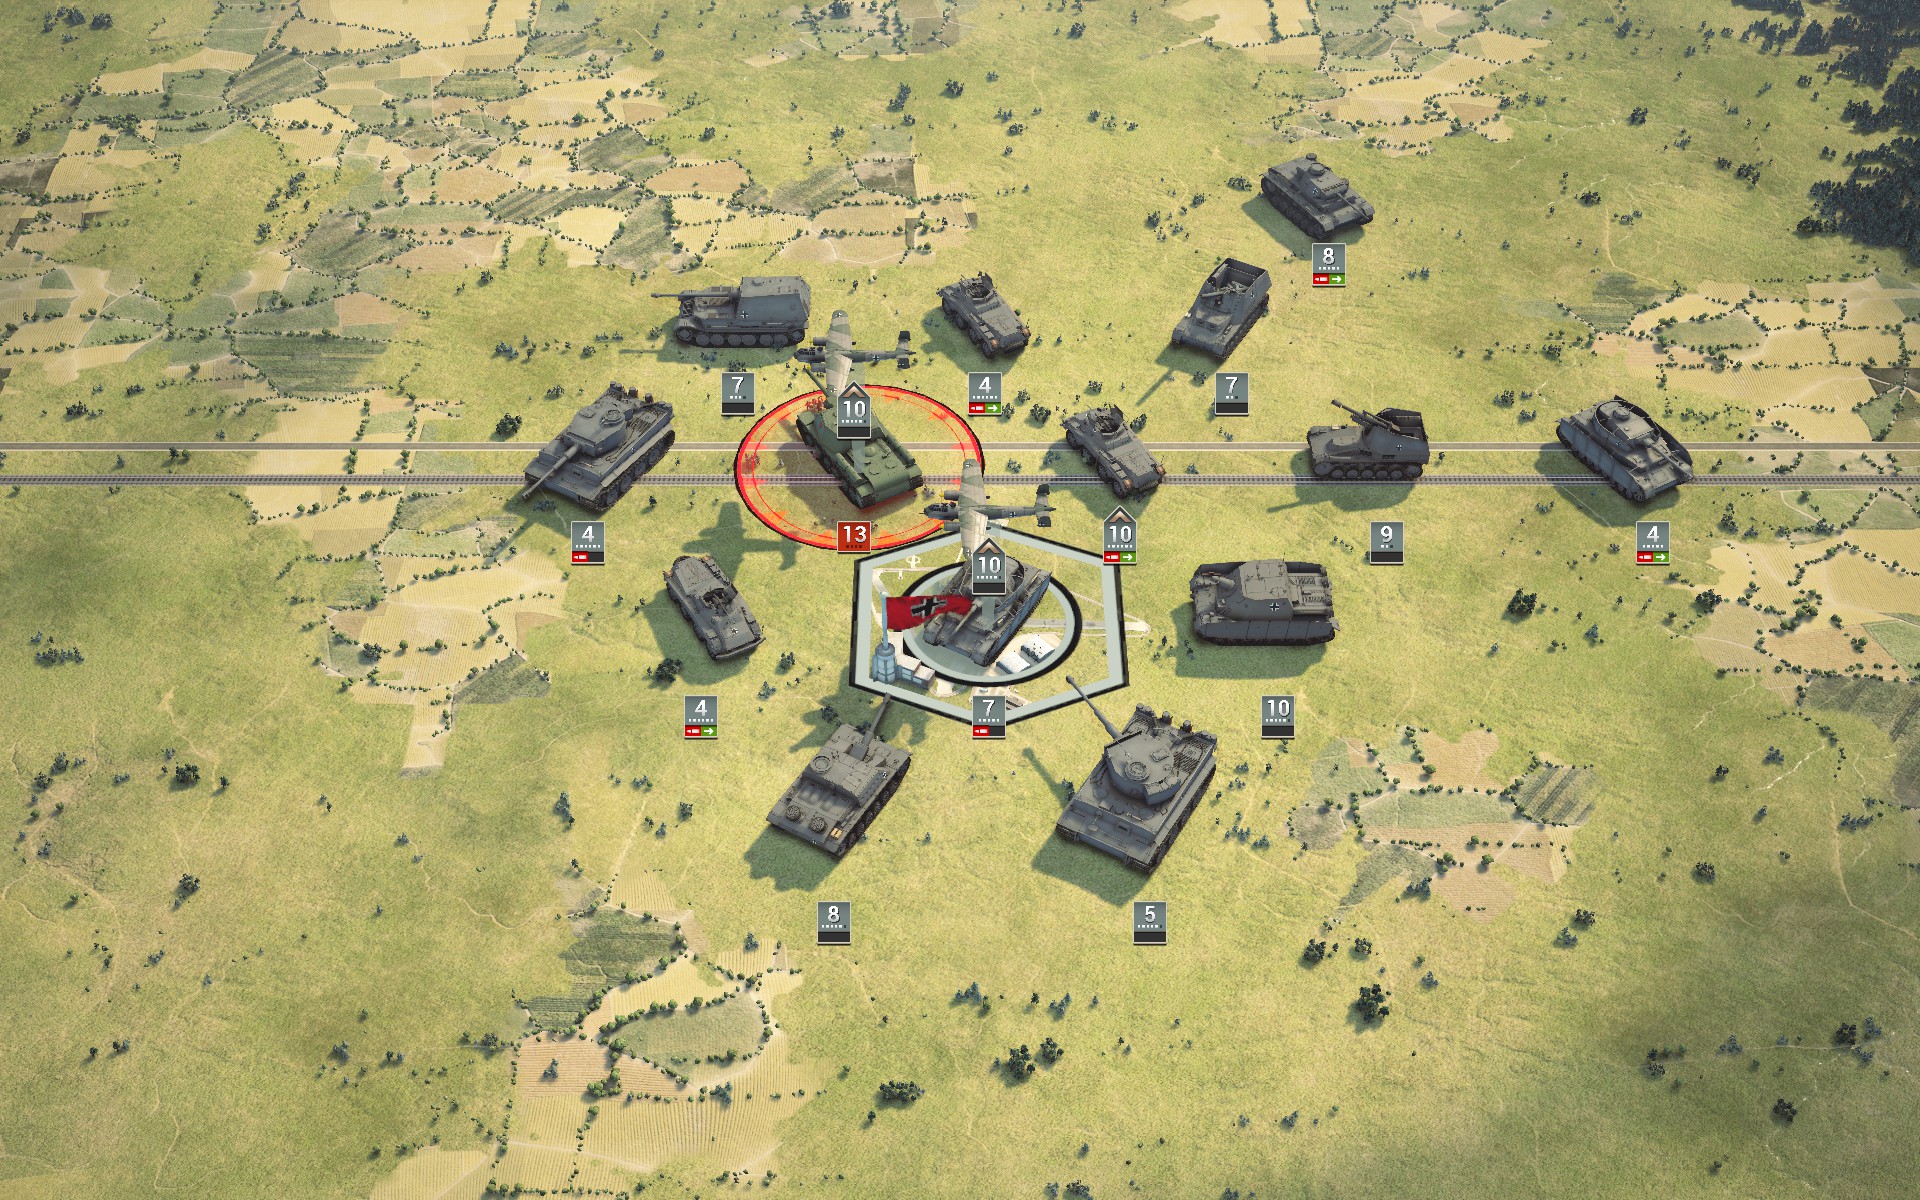
... and secure the supply depot while surrounding the SU-152.
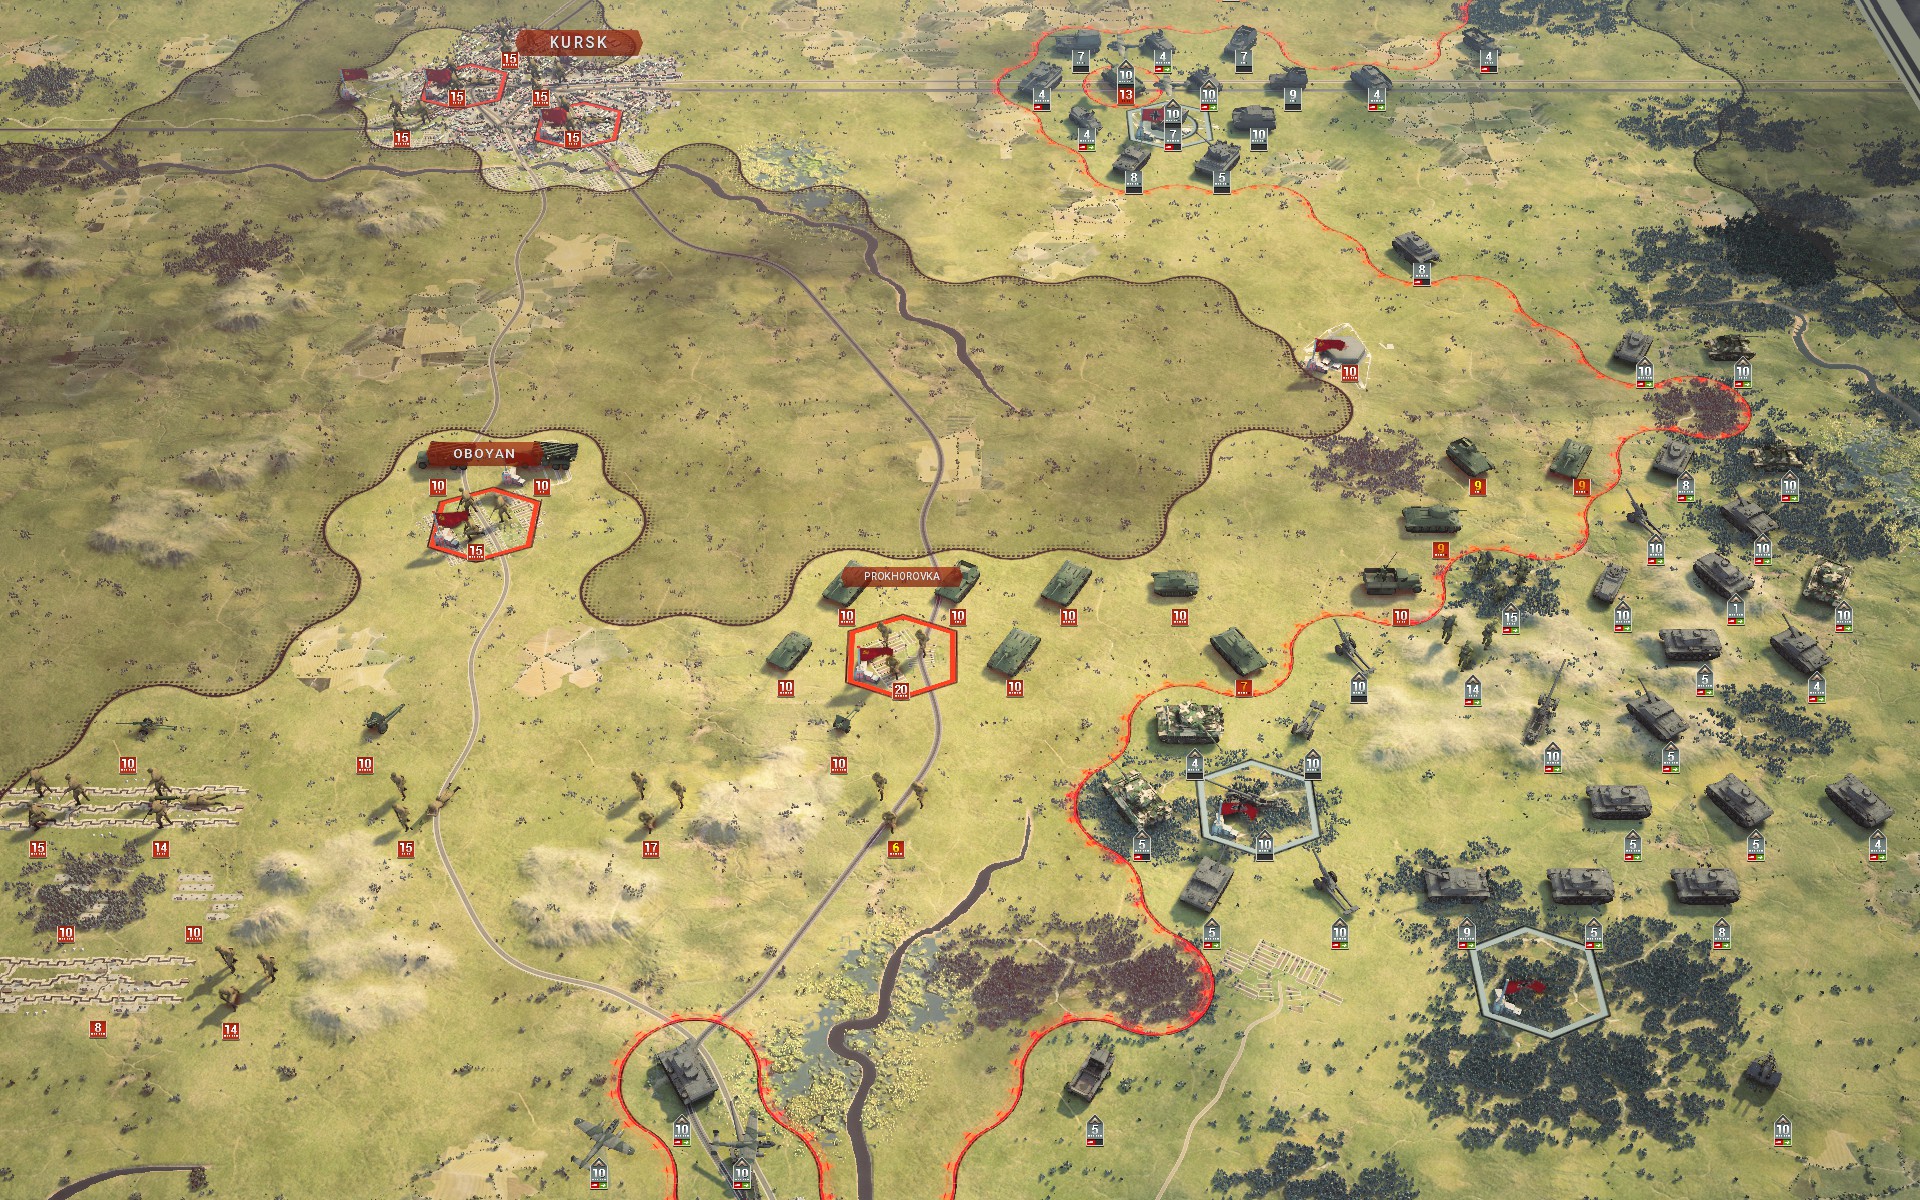
Though the advance of my forces has stalled due to the unexpected presence of Soviet forces by the Oskol, the auxiliaries have secured the supply depot and linked up with them.
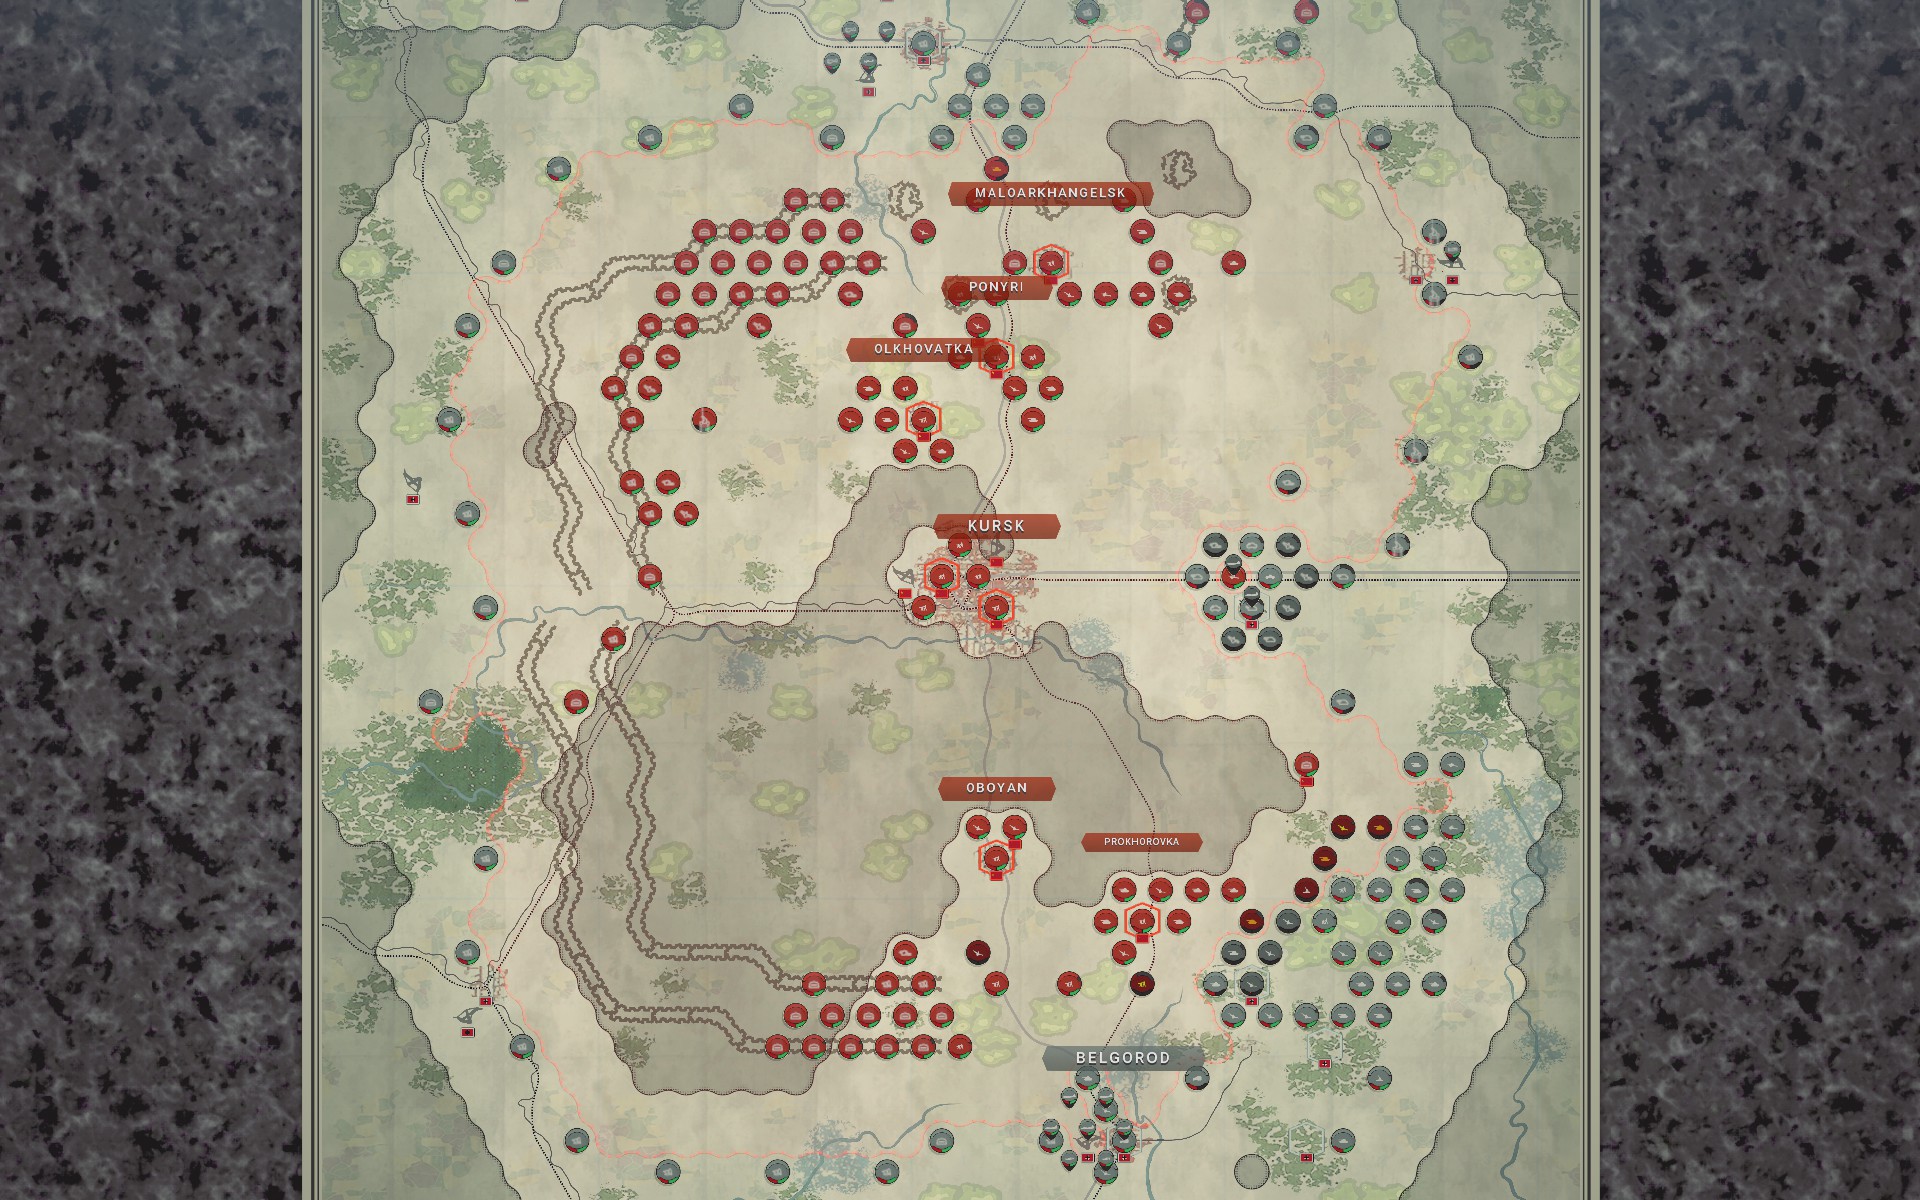
With the grand encirclement established, the Kursk salient has been completely cut off from the east. It should not take long for resistance to collapse.
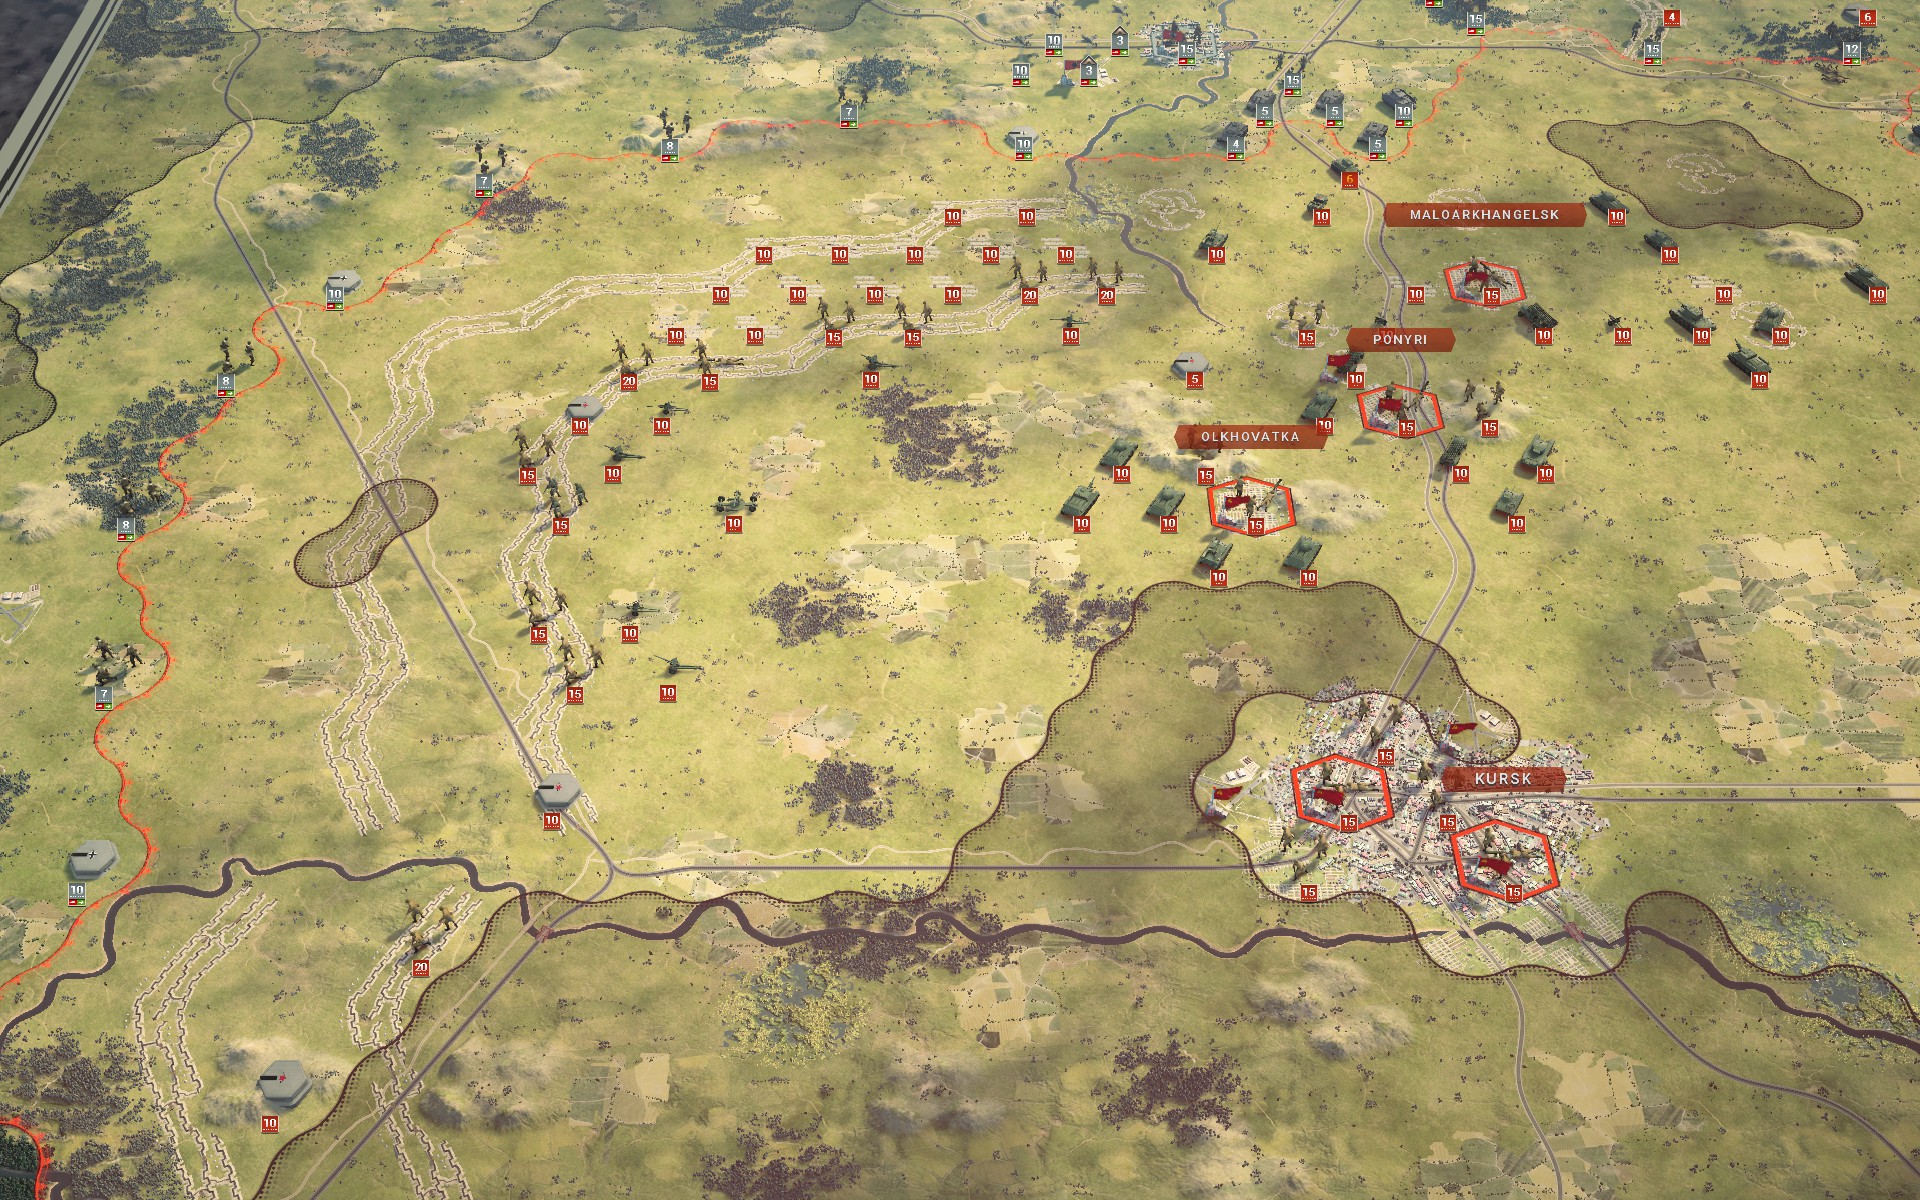
The cordon is maintained by a series of Strongpoints and detached infantry battalions to the west of the Soviet minefields.
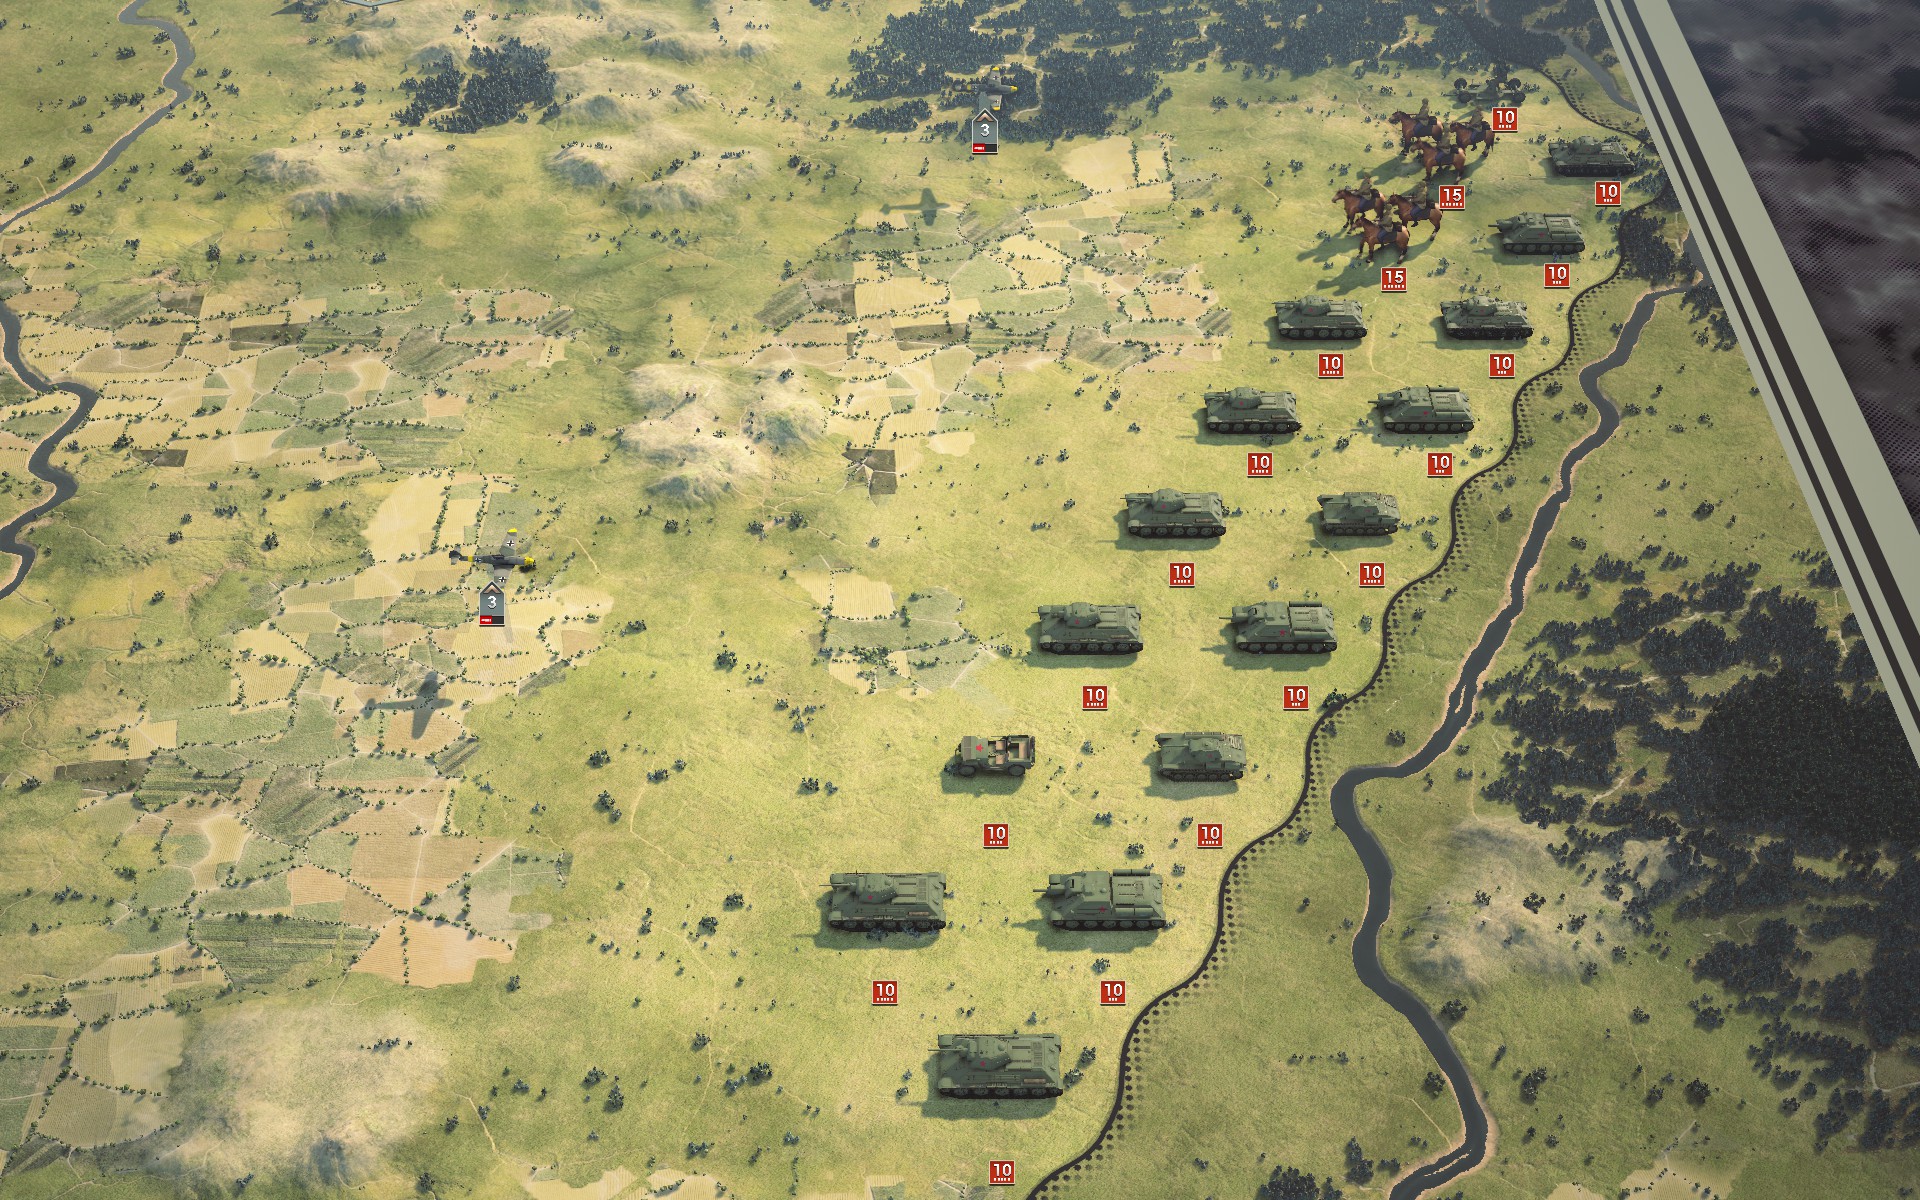
The armoured forces to the southeast have yet to make a move. The AI should probably have a more dynamic set of instructions, because they will only pose a threat if they attack while my forces are occupied in the Kursk salient.
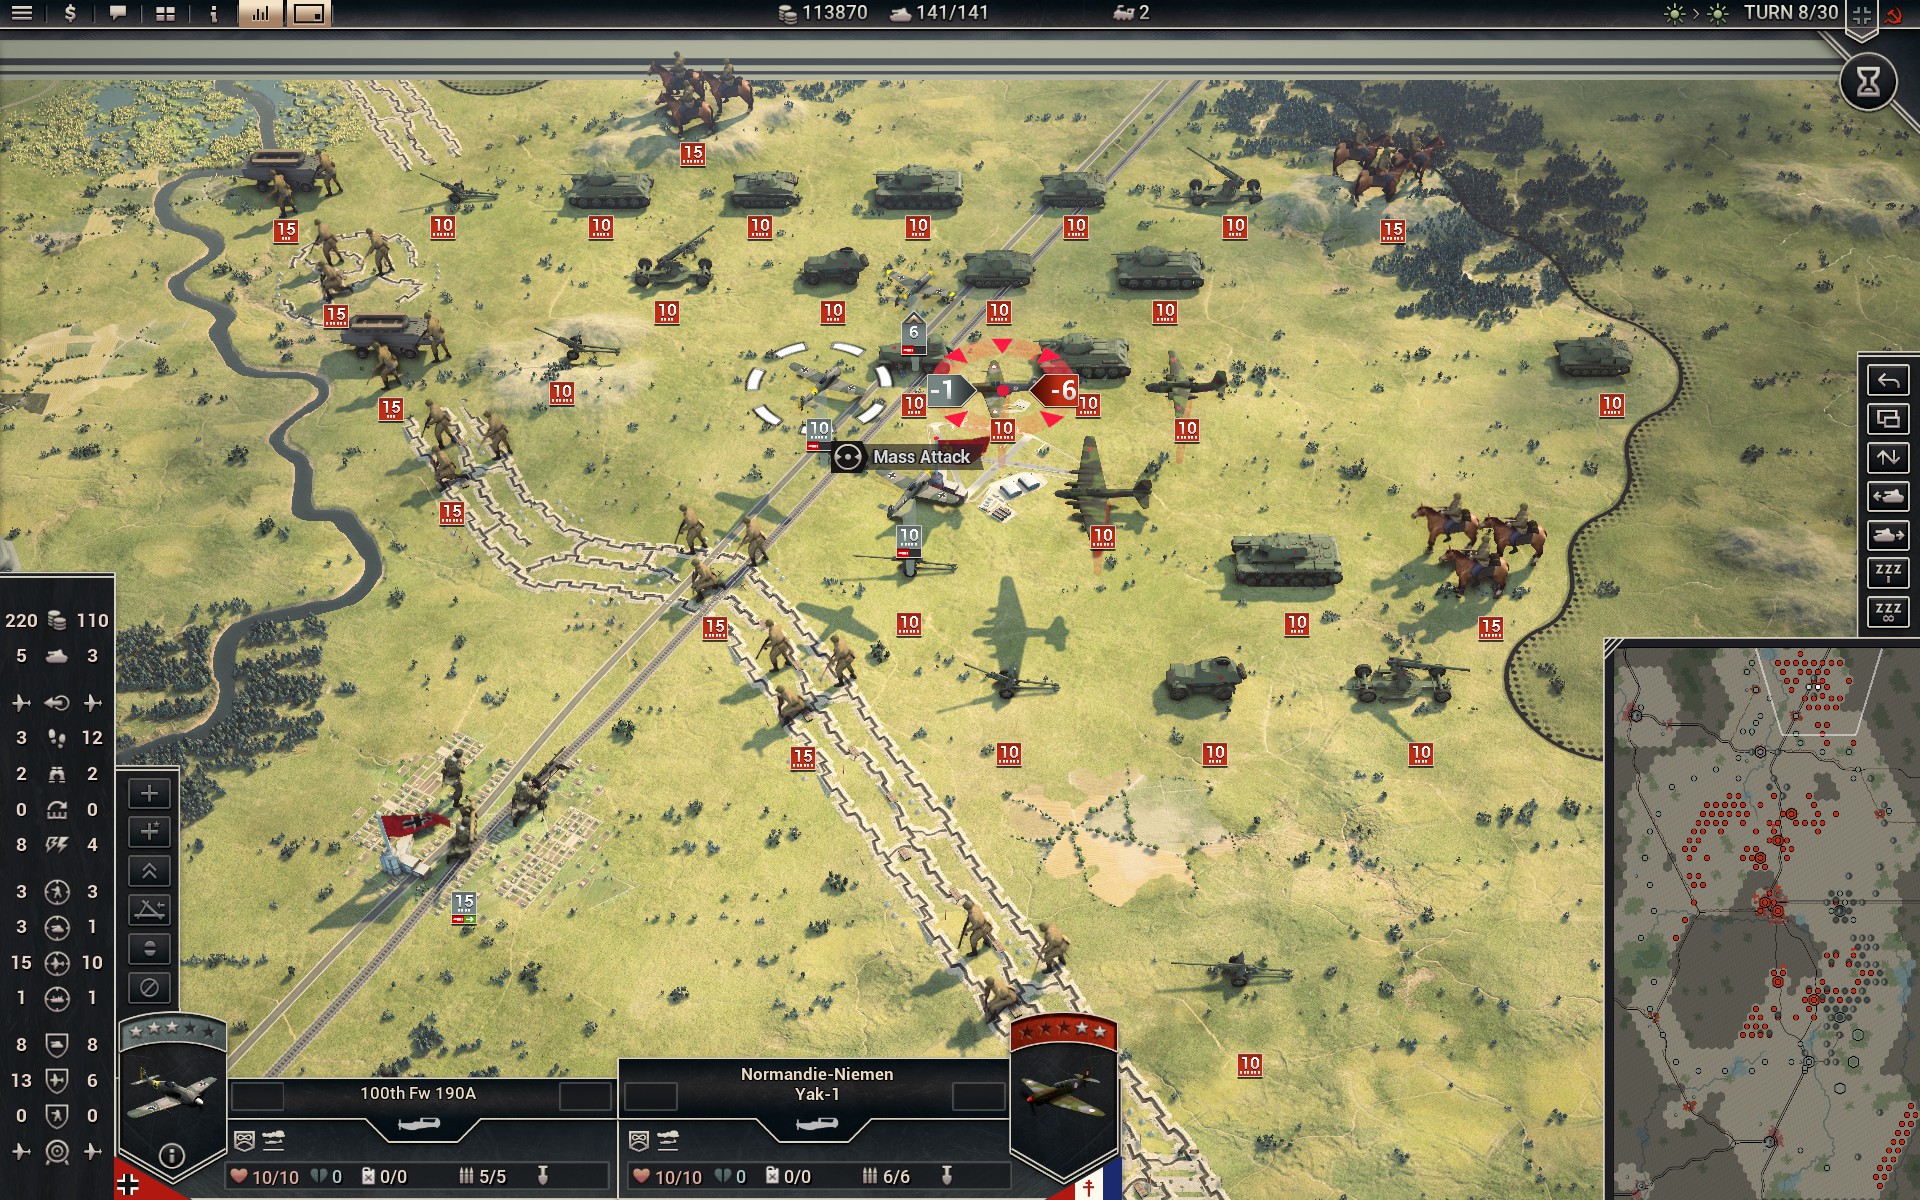
The Luftwaffe targets the Normandie-Niemen, the French volunteer fighter pilots.
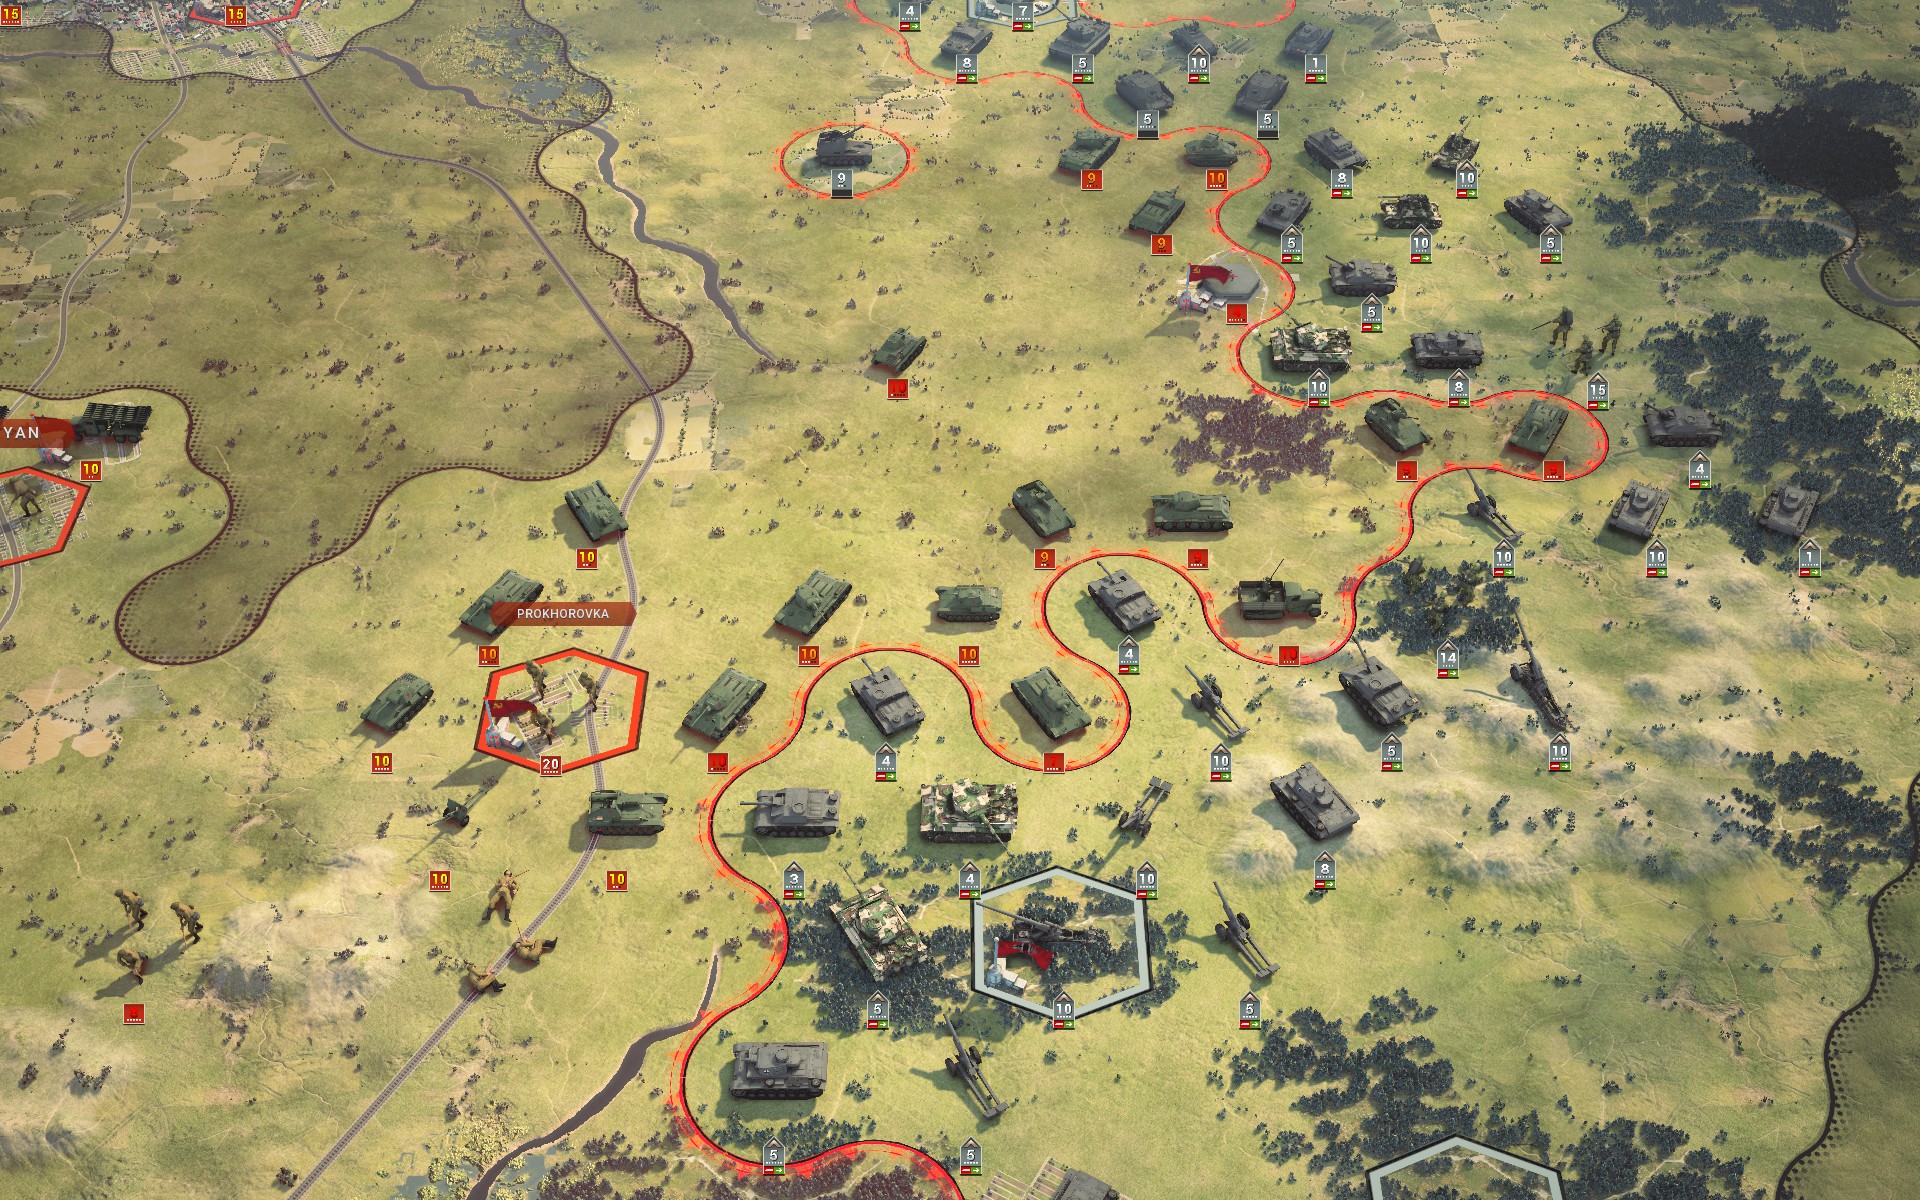
The StuH 42s and artillery provide additional suppression as my forces begin to advance towards Prokhorovka. This probably isn't the armoured clash the Red Army had in mind, but it suits me just fine.
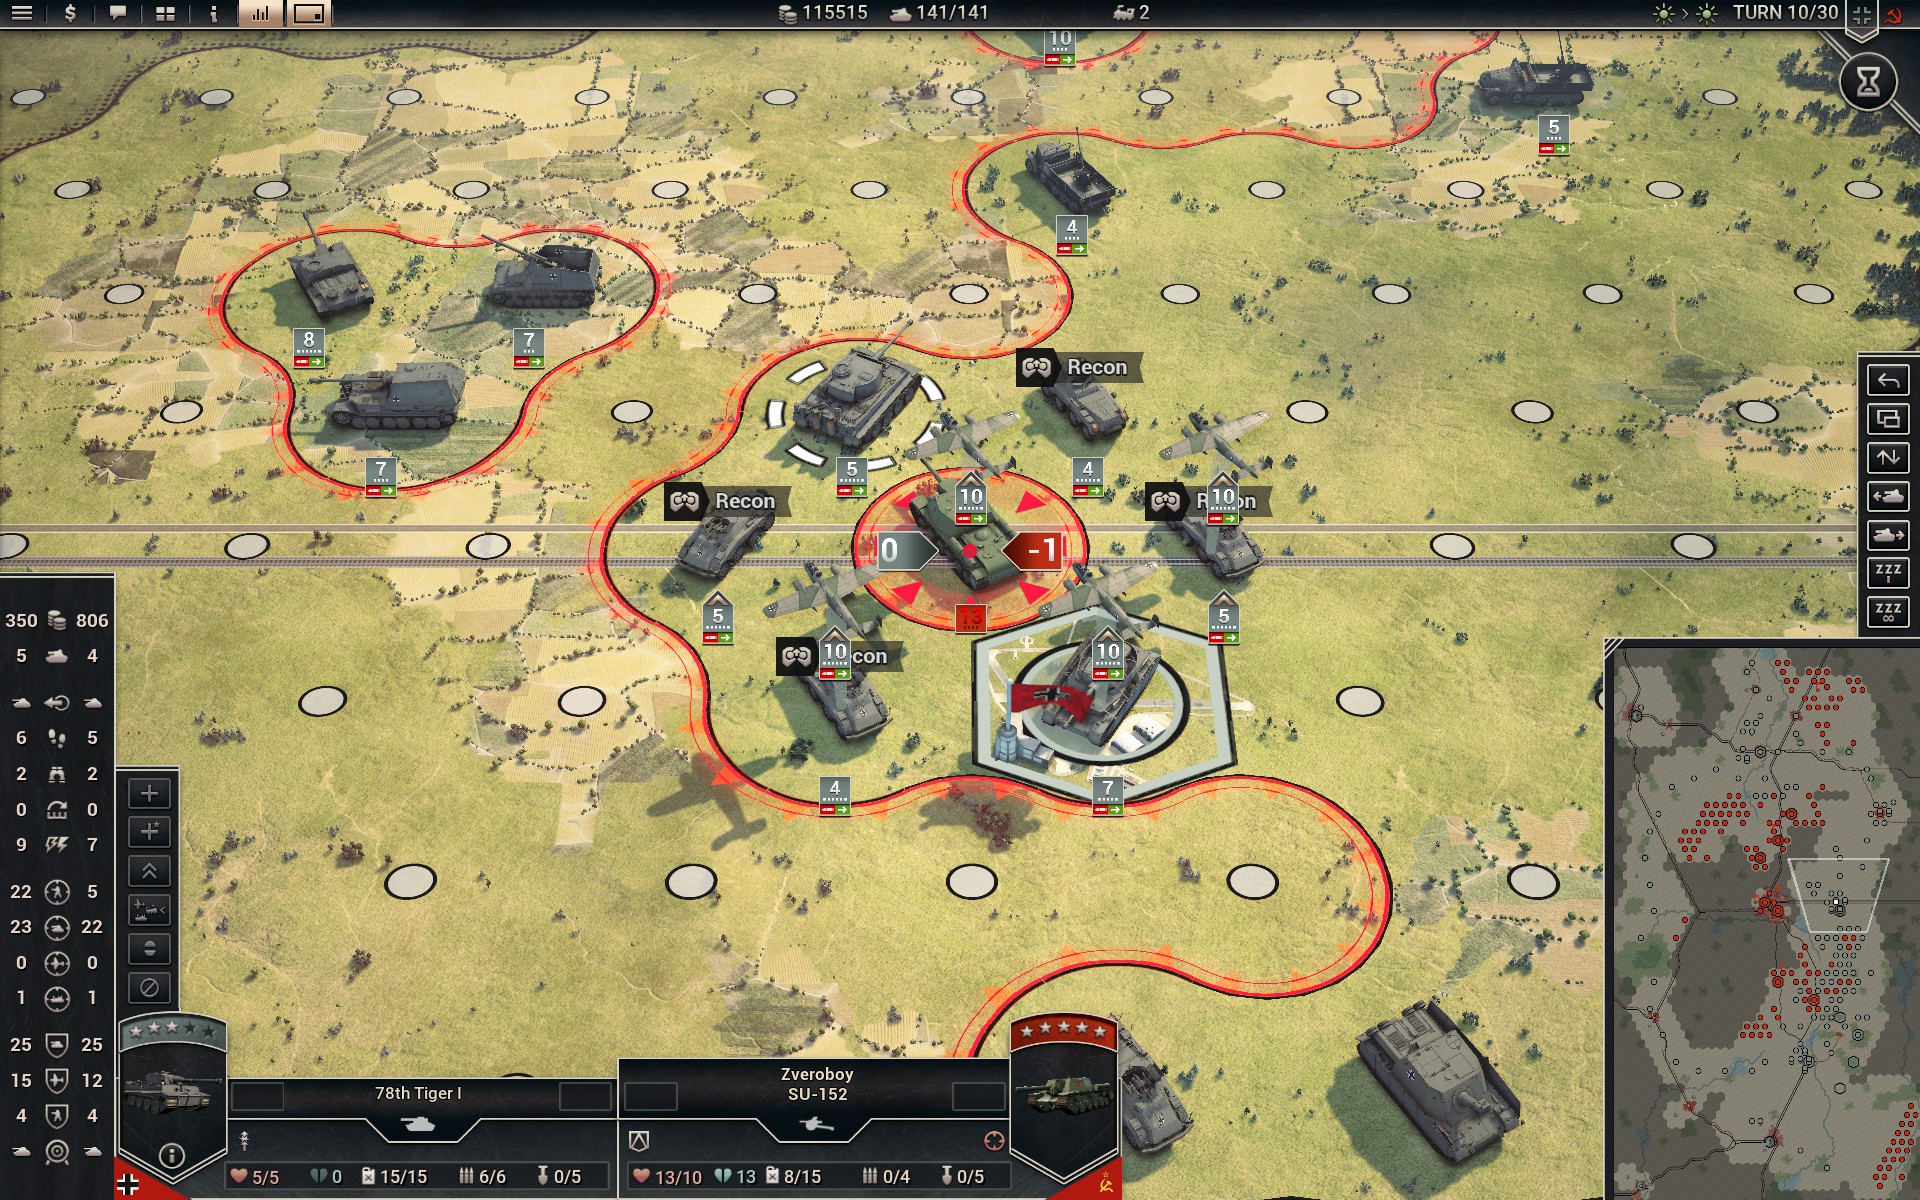
The remaining SU-152 is captured while half of the Do 217Es rebase to the central supply hex.
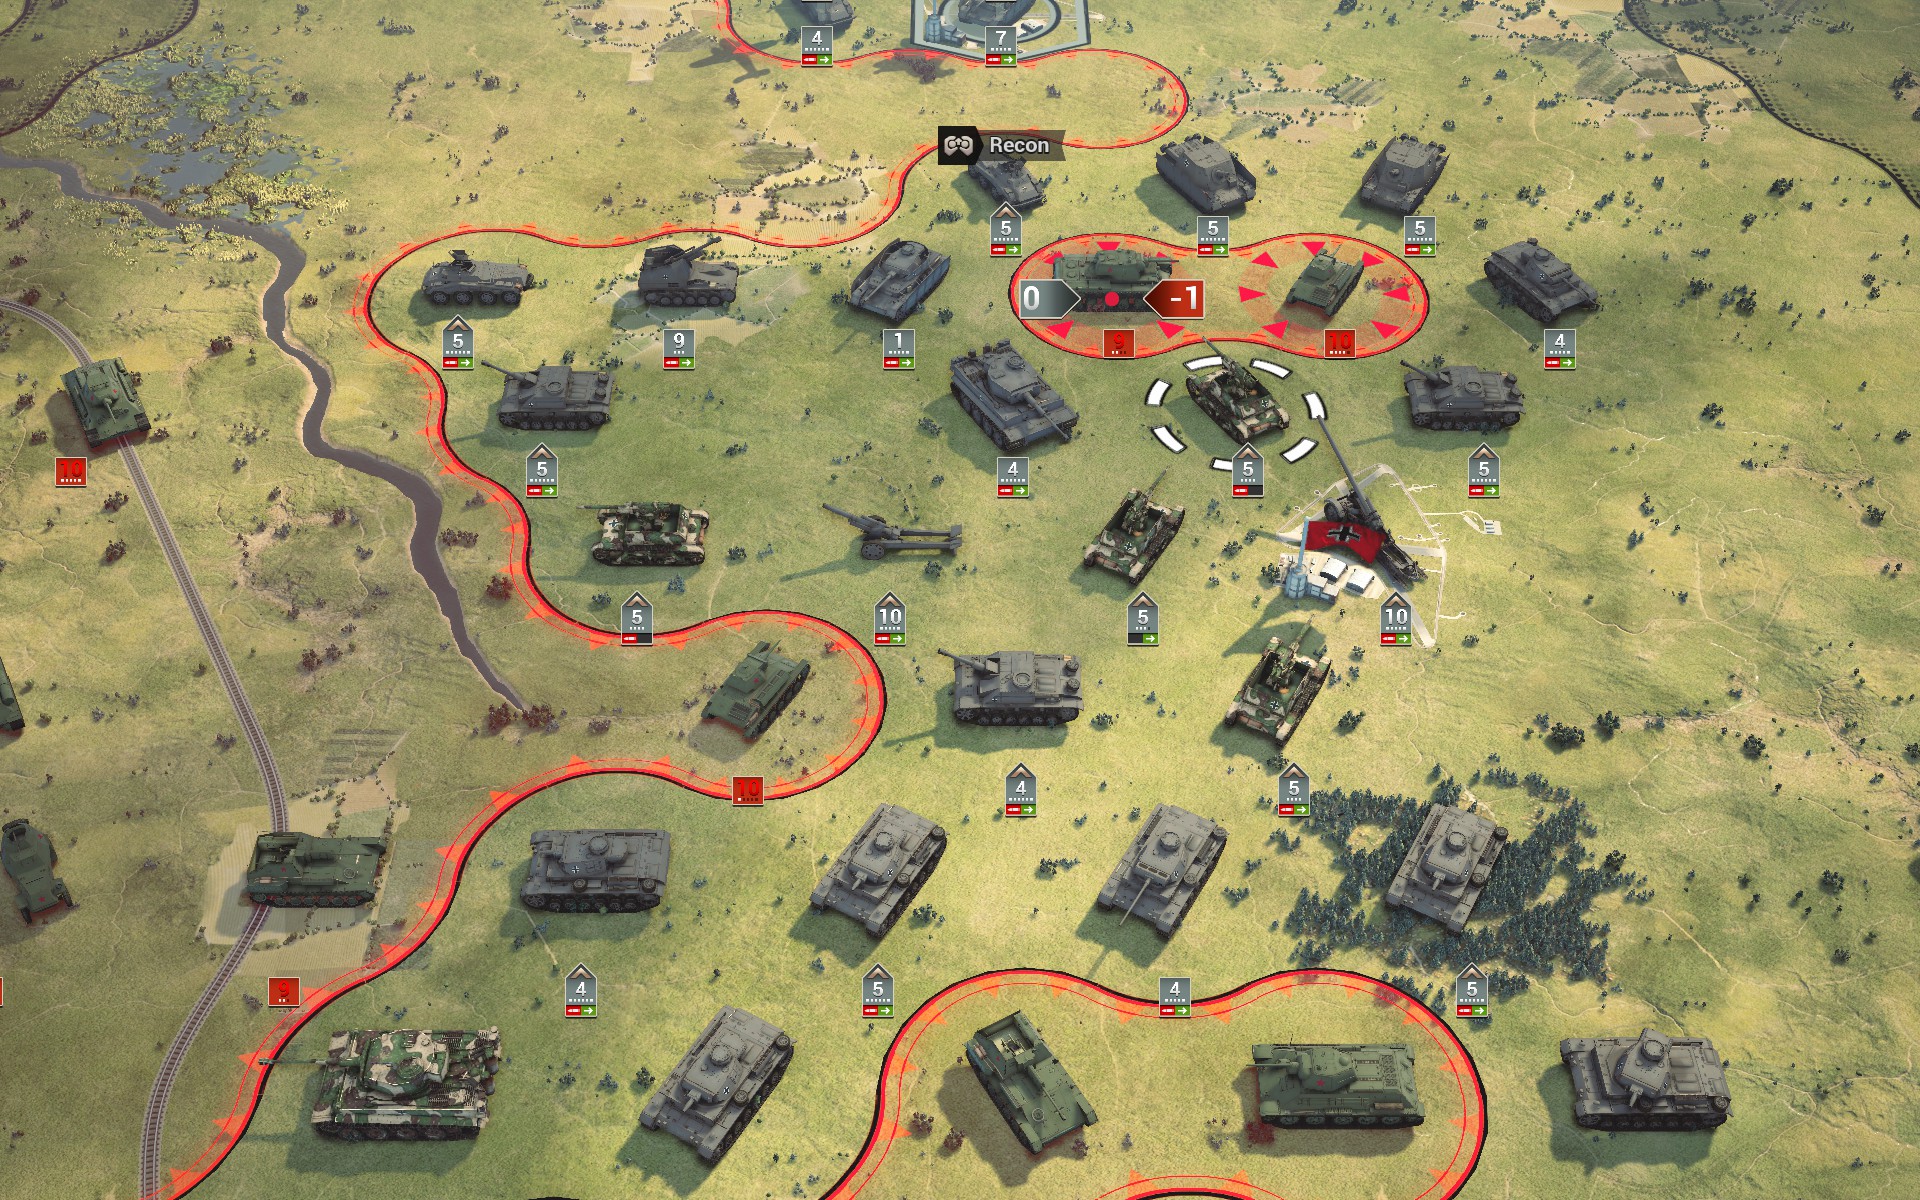
With the Soviet air force defeated, the SU-6s help capture Soviet armour instead.
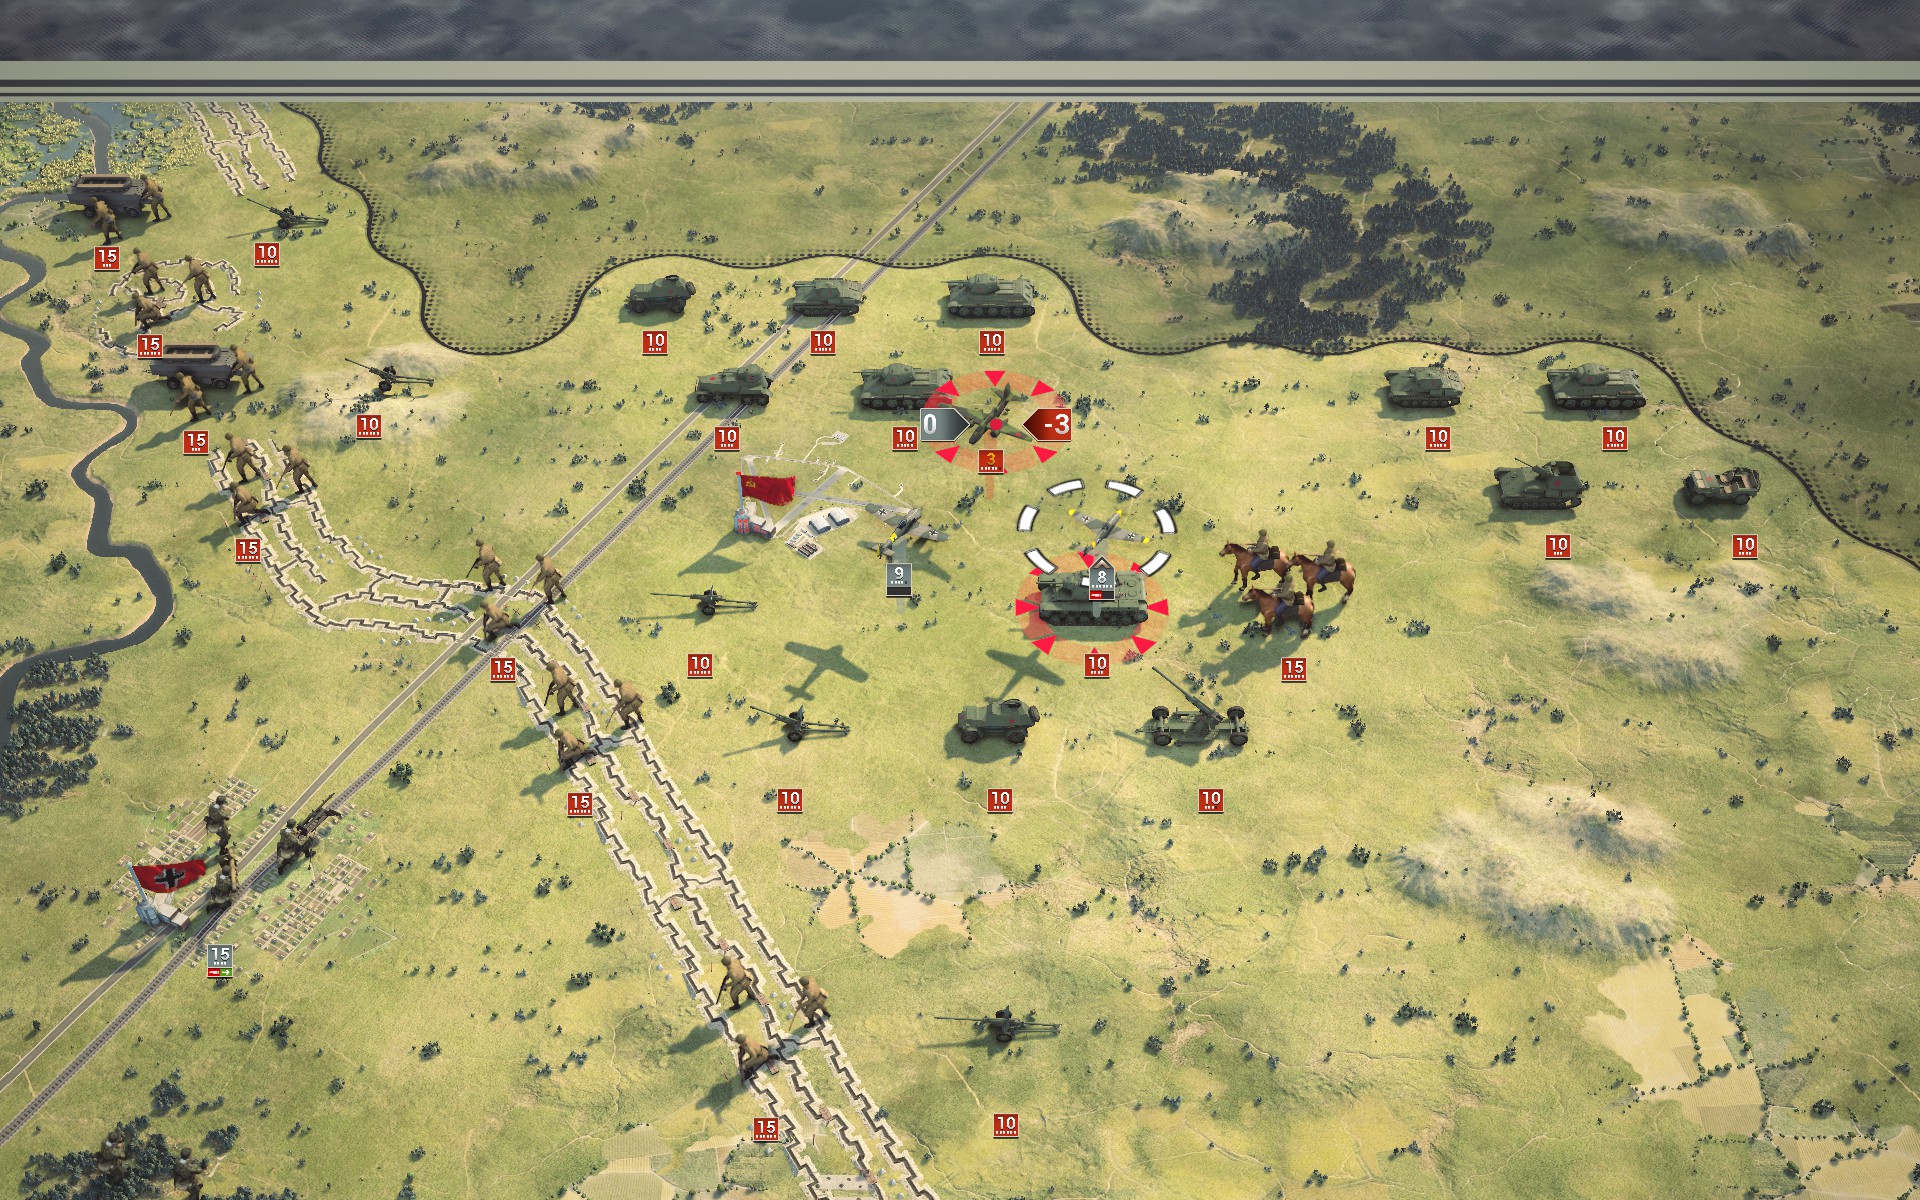
The Luftwaffe finally hunts down the last remaining Soviet aircraft in the northern pocket.
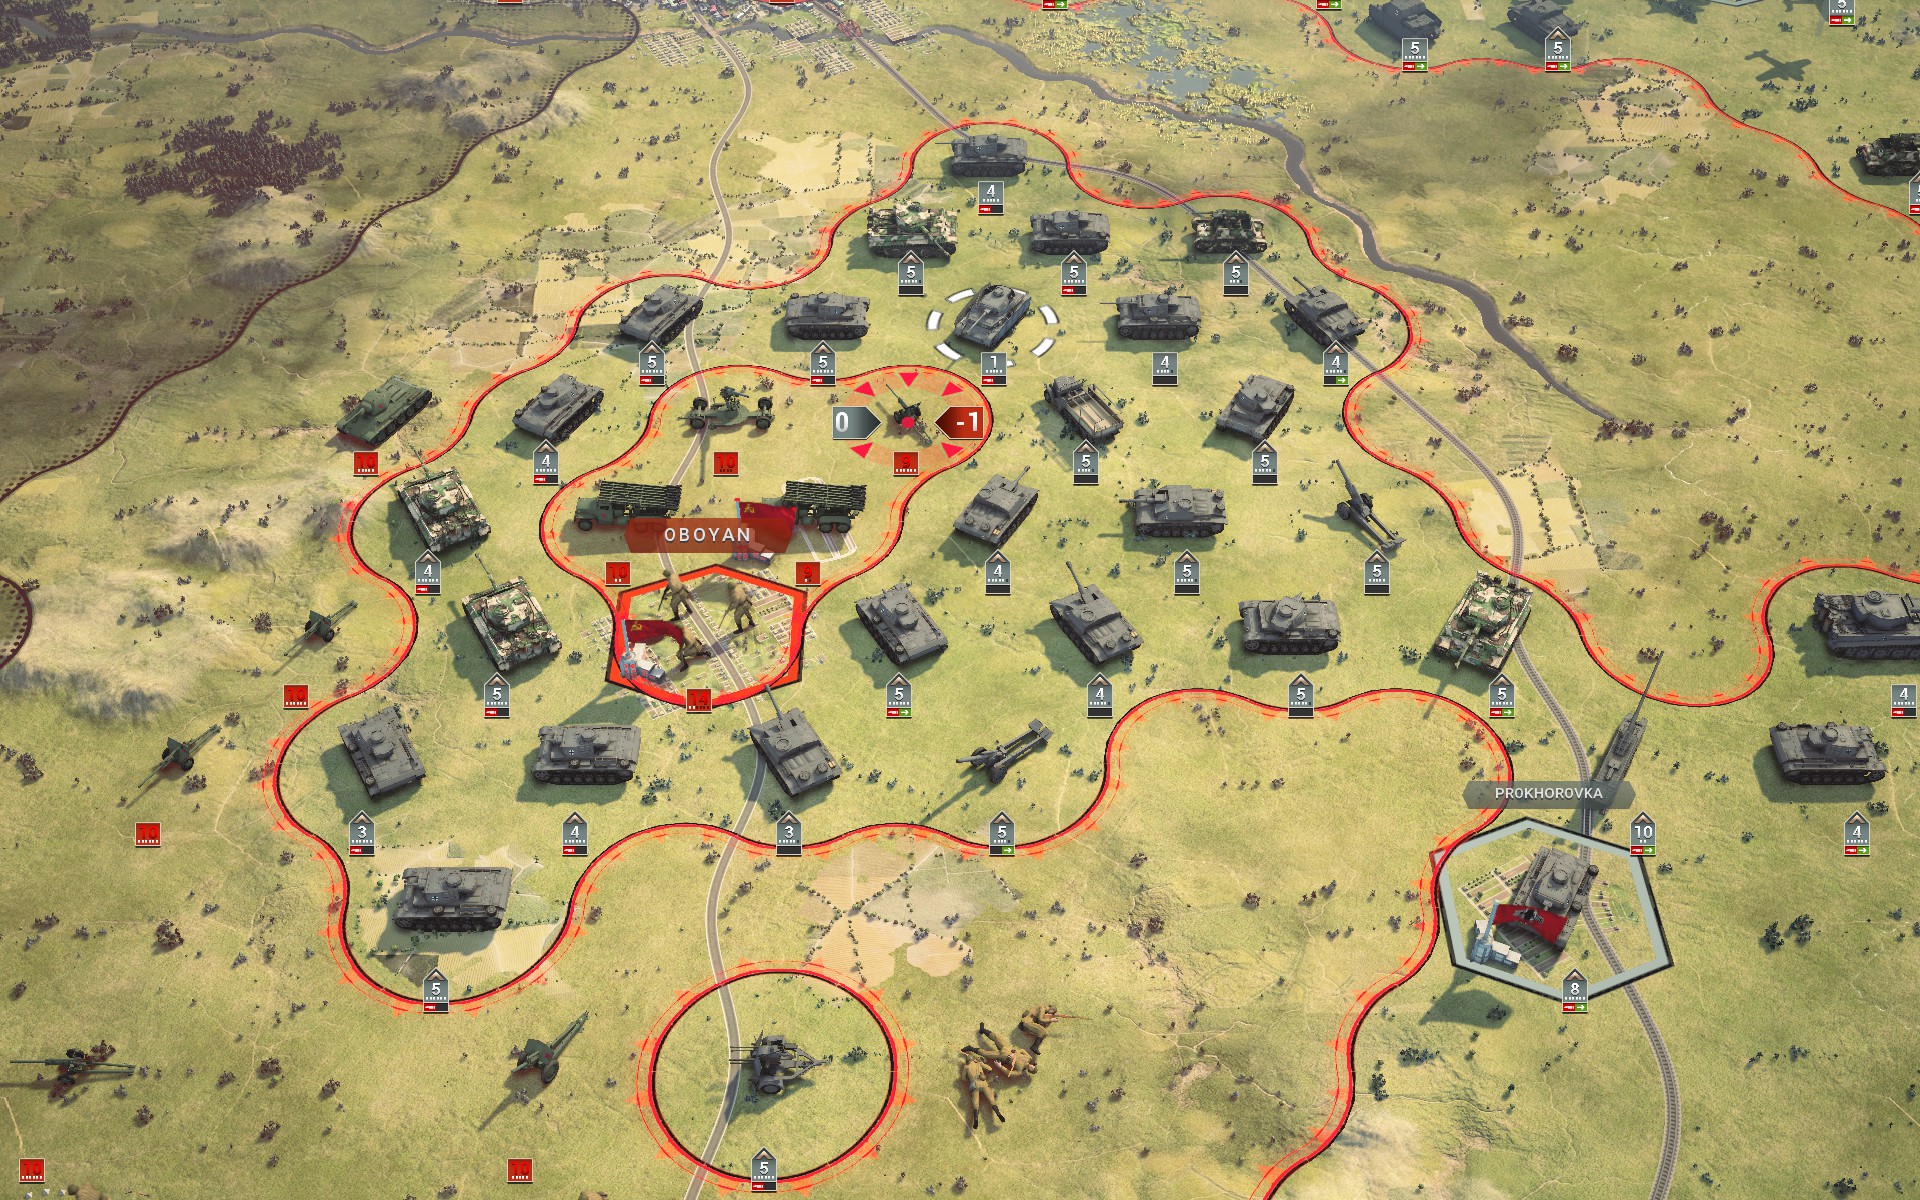
My forces secure Prokhorovka and advance towards Oboyan. If the Red Army intends to make a move, it needs to be now, as time is now on my side.
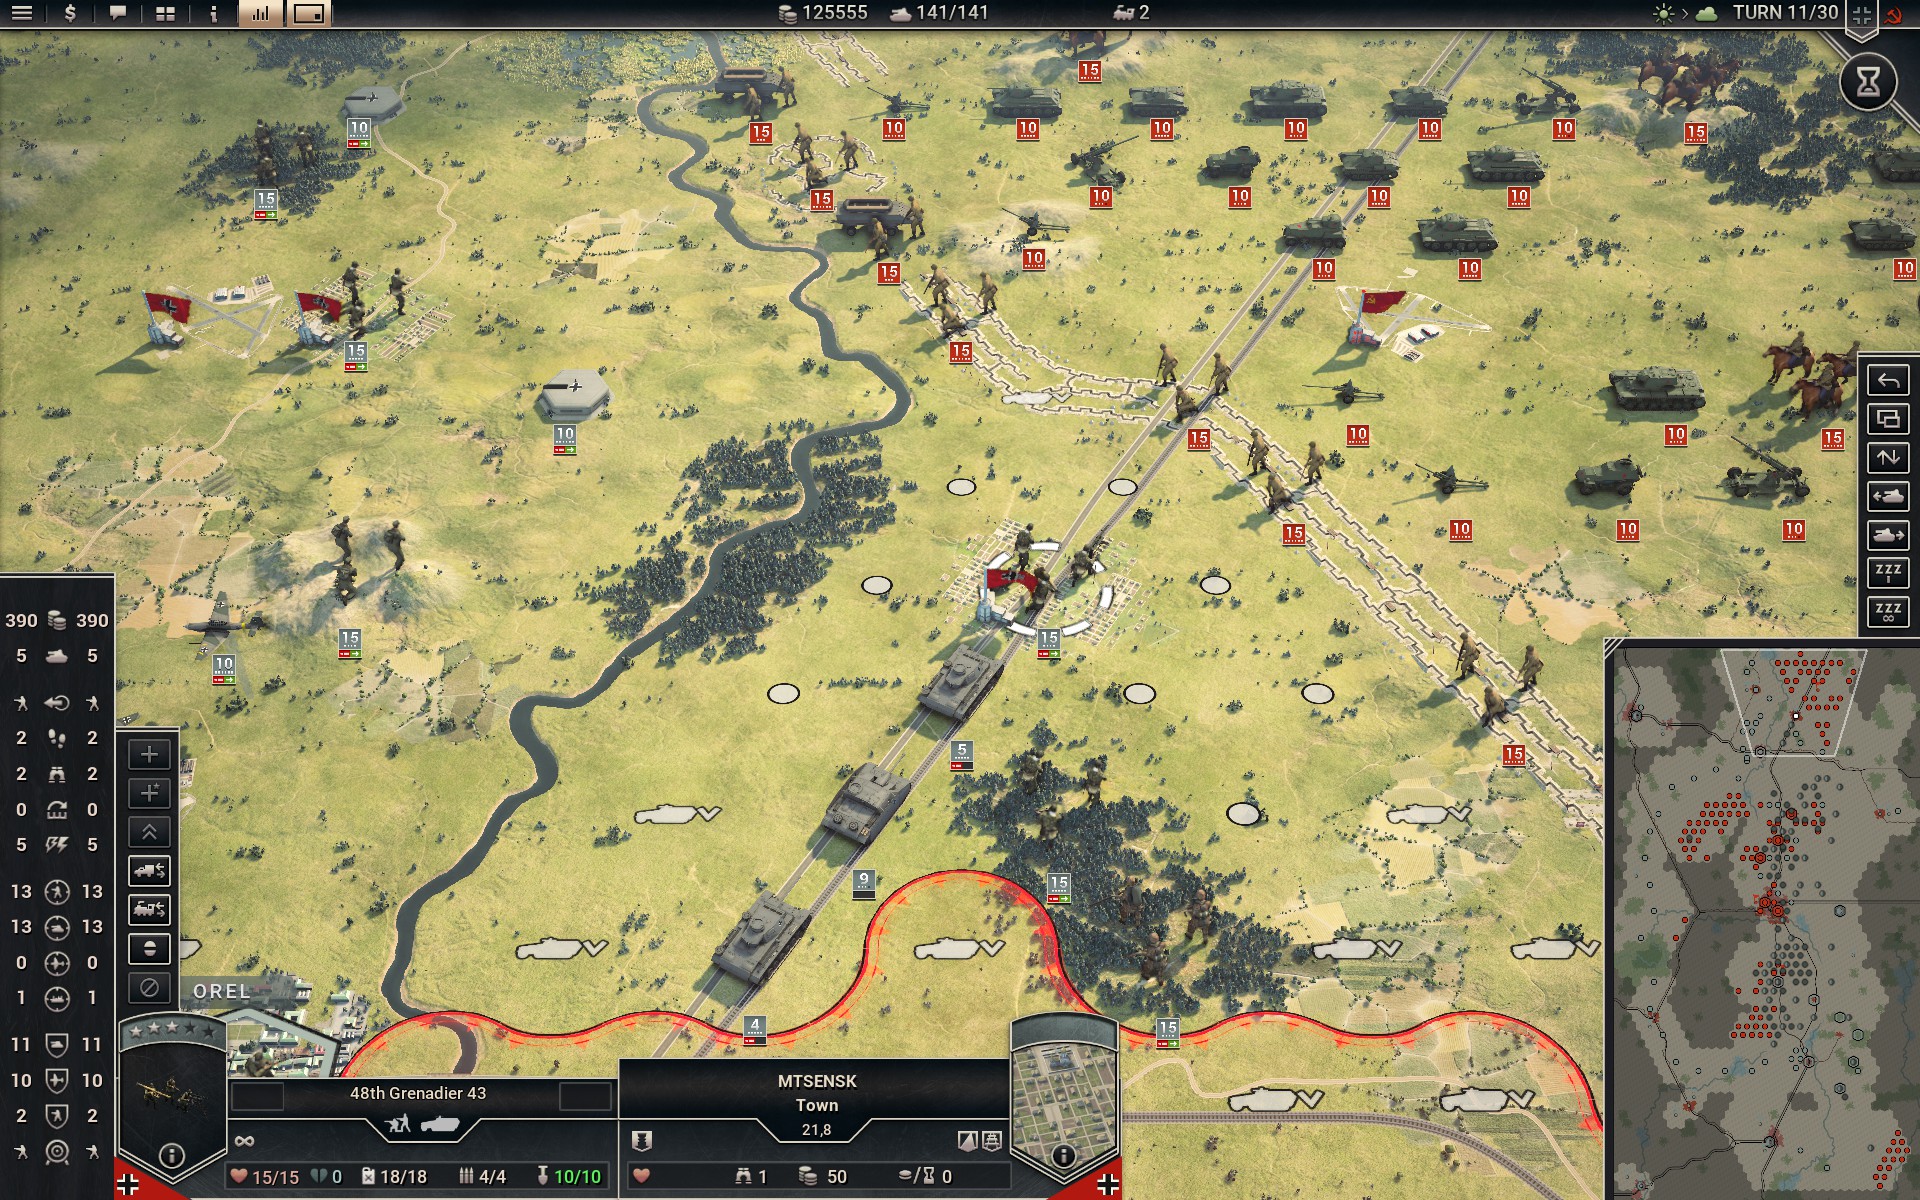
At Orel the auxiliary infantry battalions are now fully entrenched.
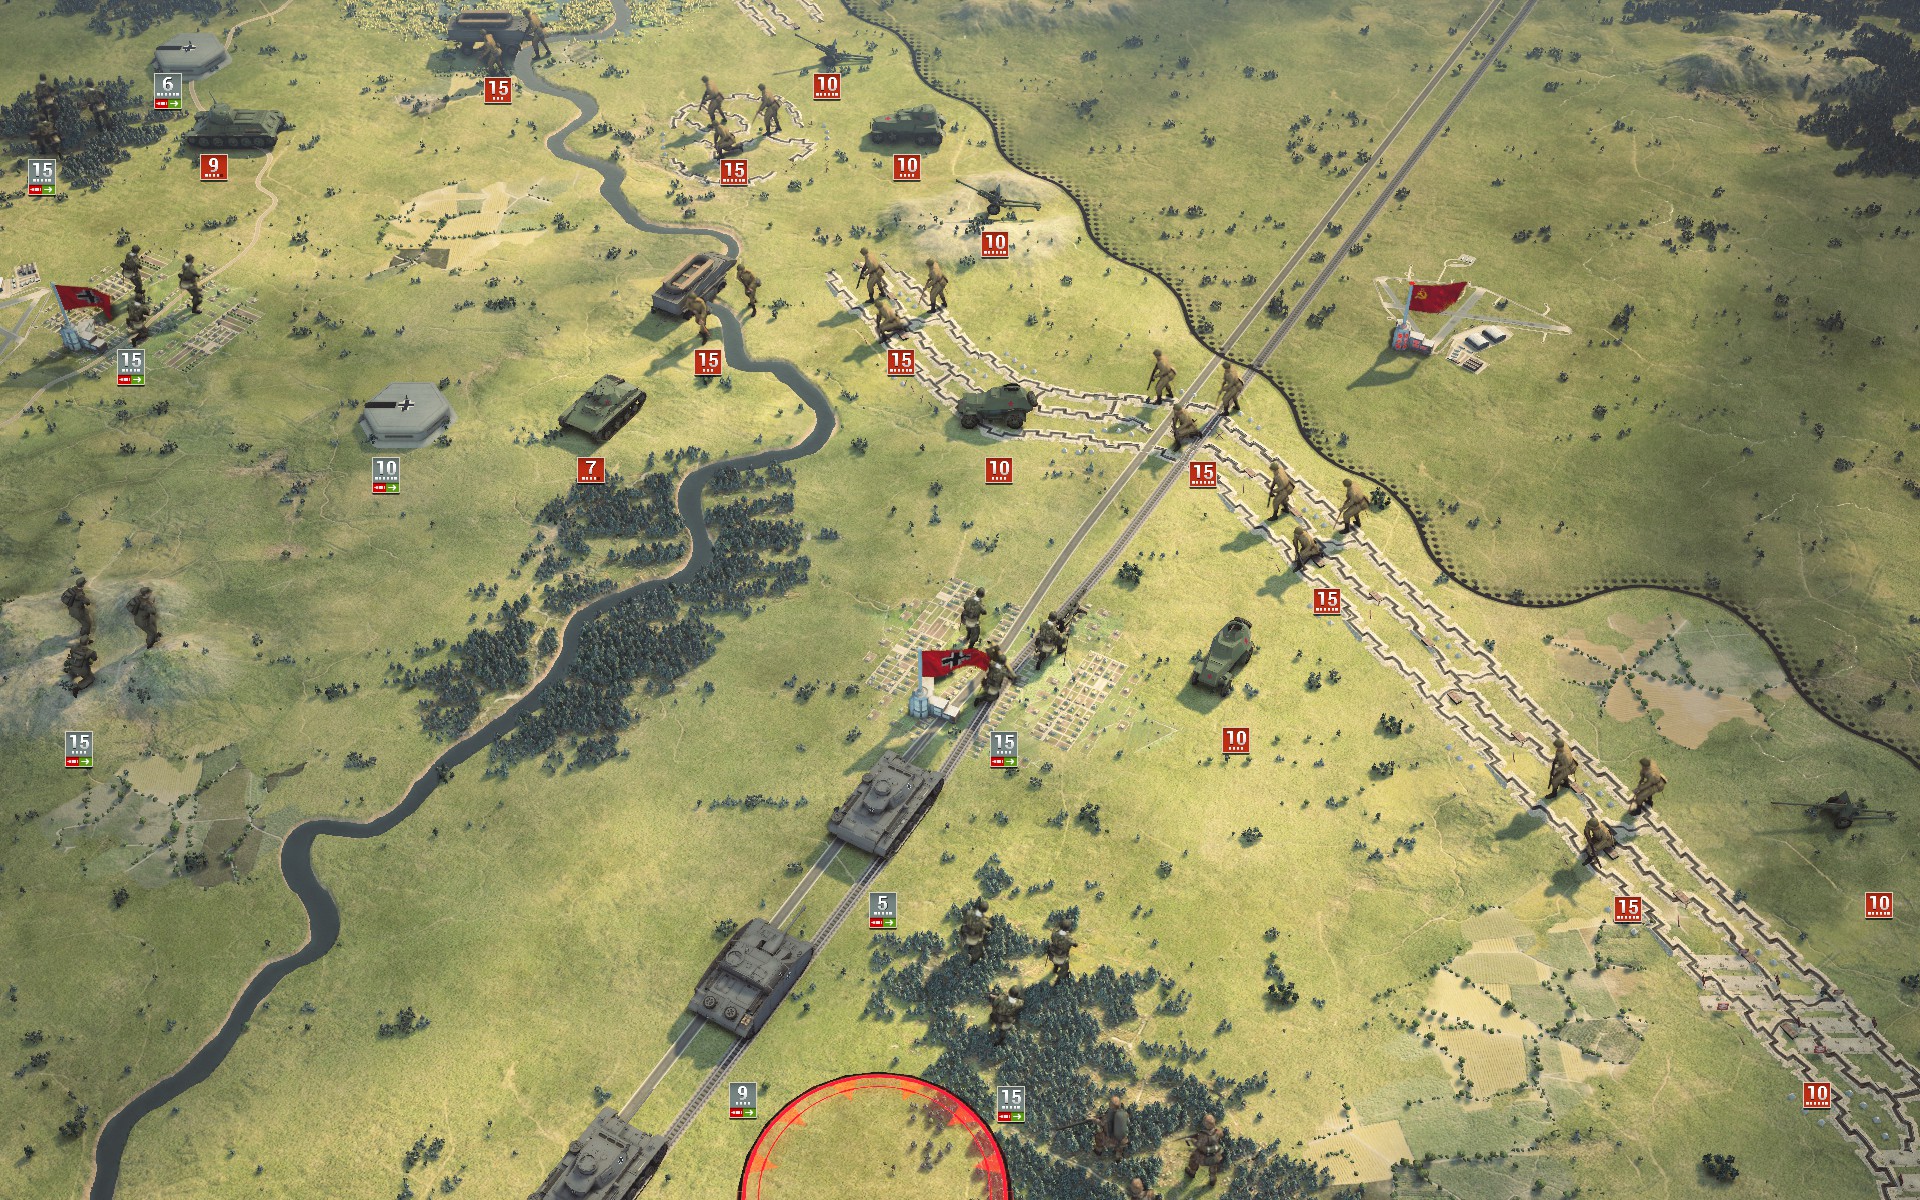
The Red Army finally makes its move, with armour crossing the Oka.
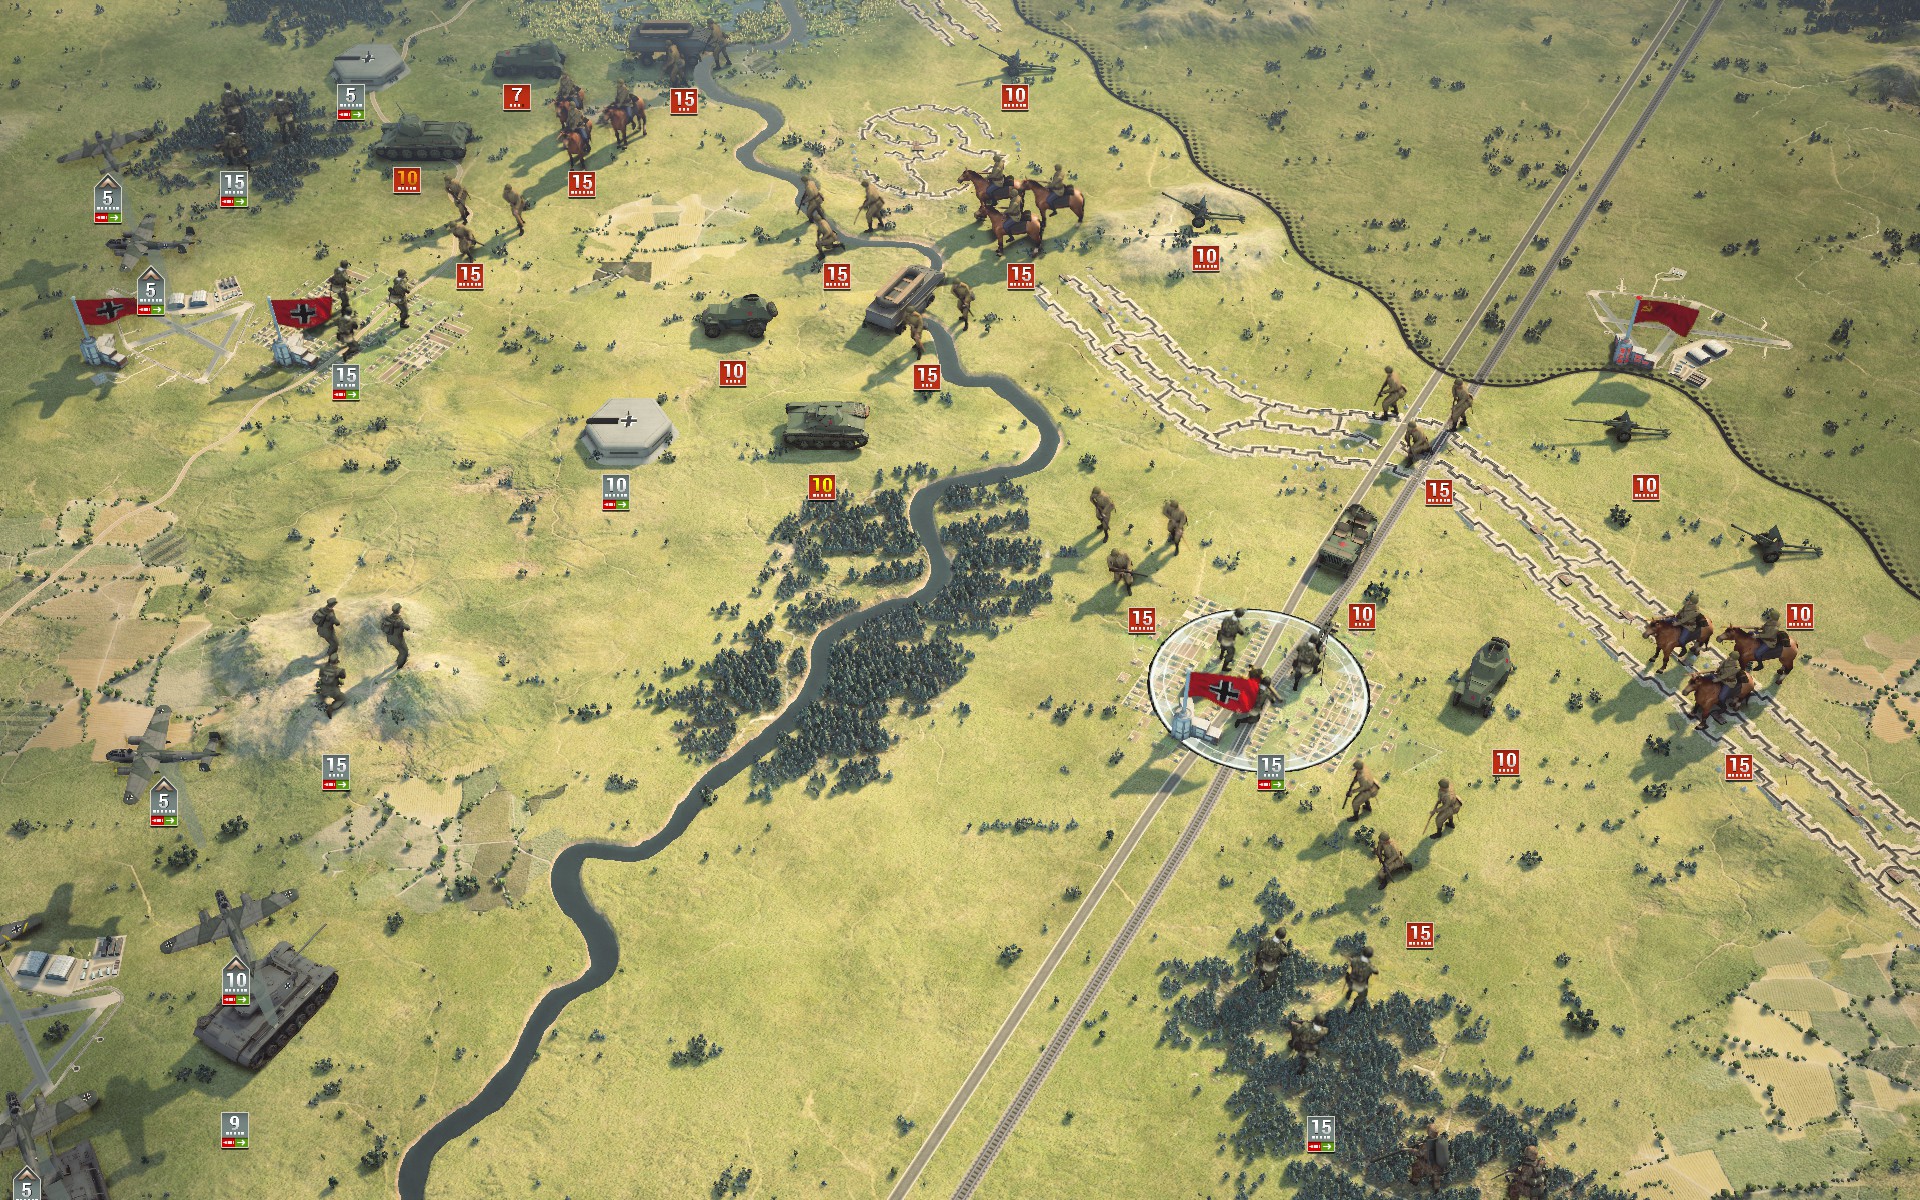
More Soviet forces advance towards Orel, surrounding the Grenadiers are Mtsensk. Theirs will be a sad but necessary sacrifice while I bring up more armour from the south.
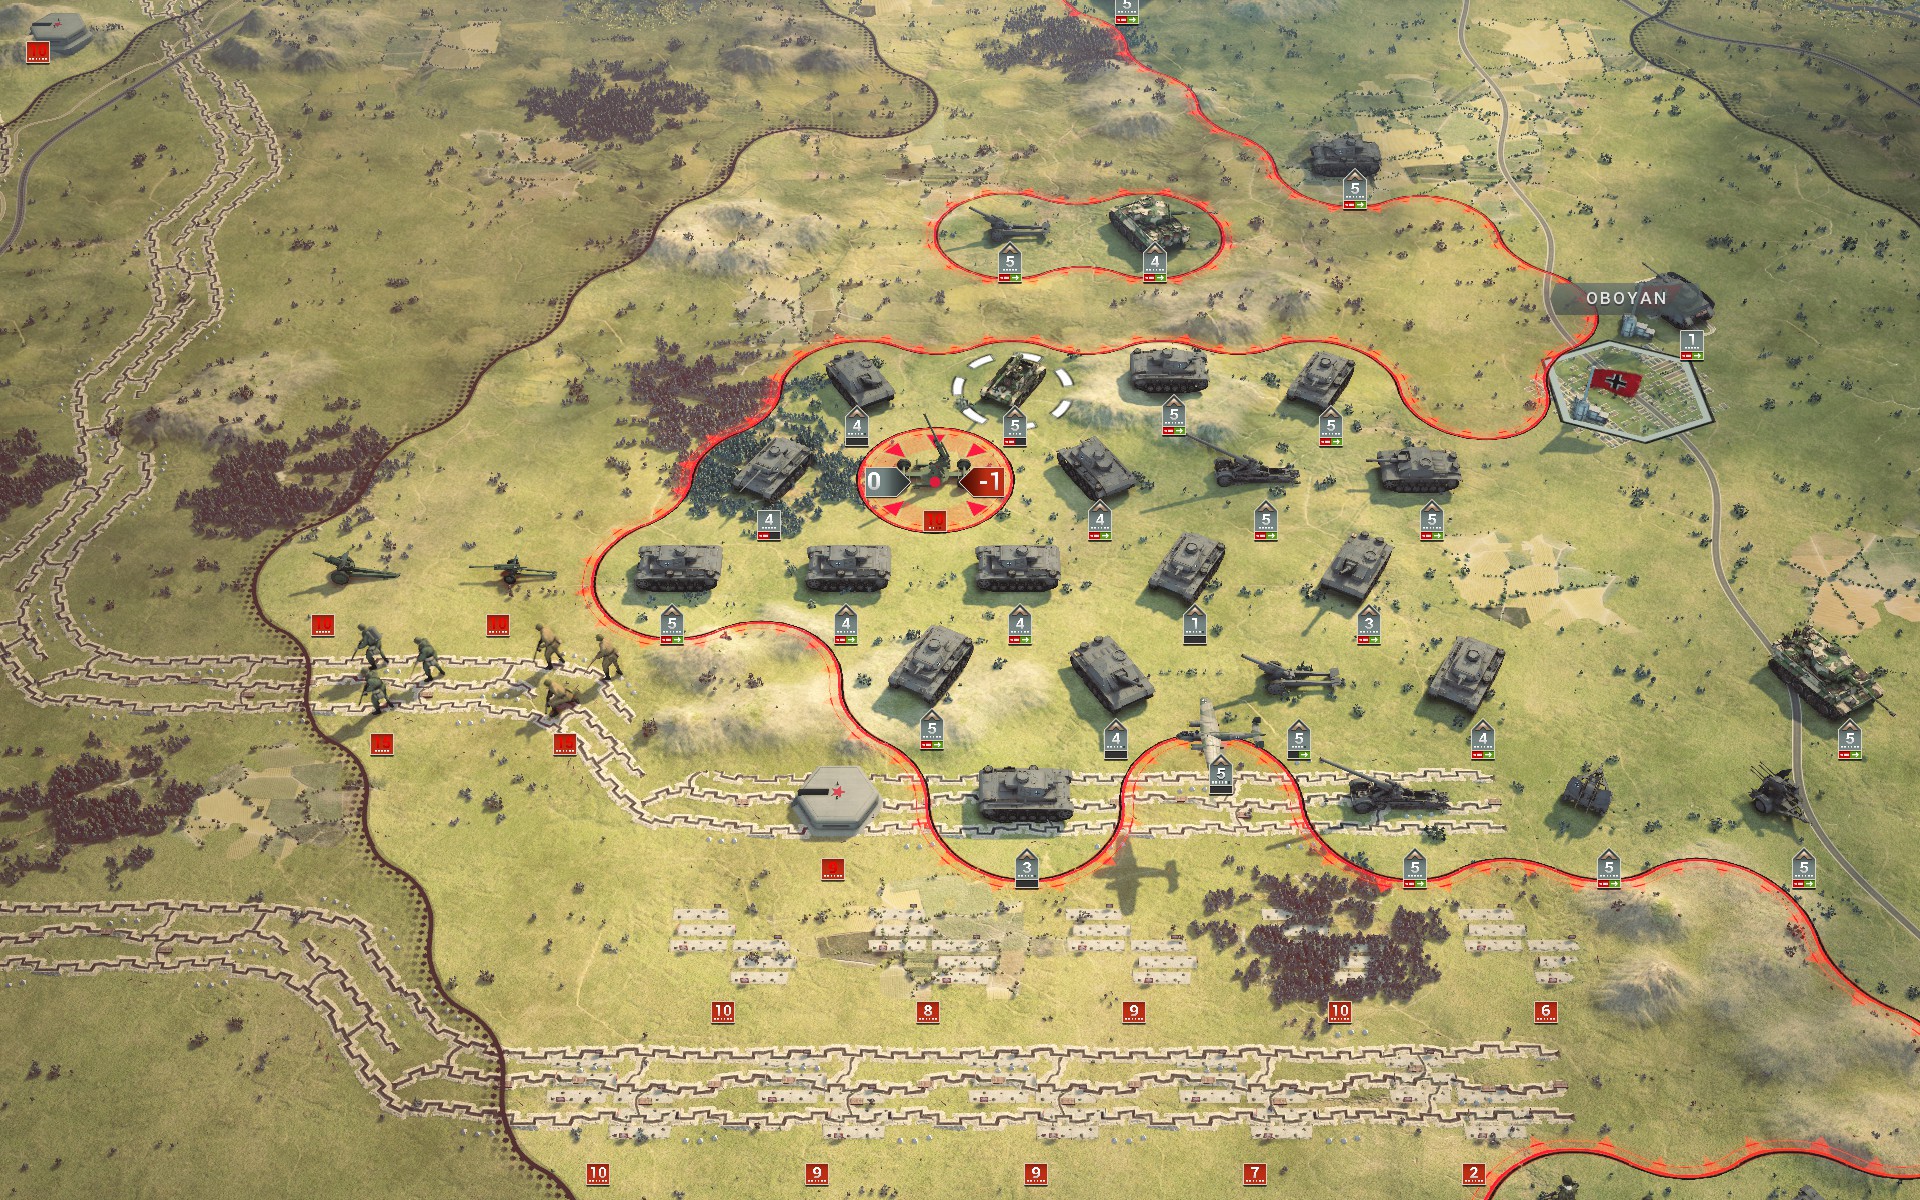
My forces begin to clear the Soviet forces along the southern perimeter of the Kursk salient.
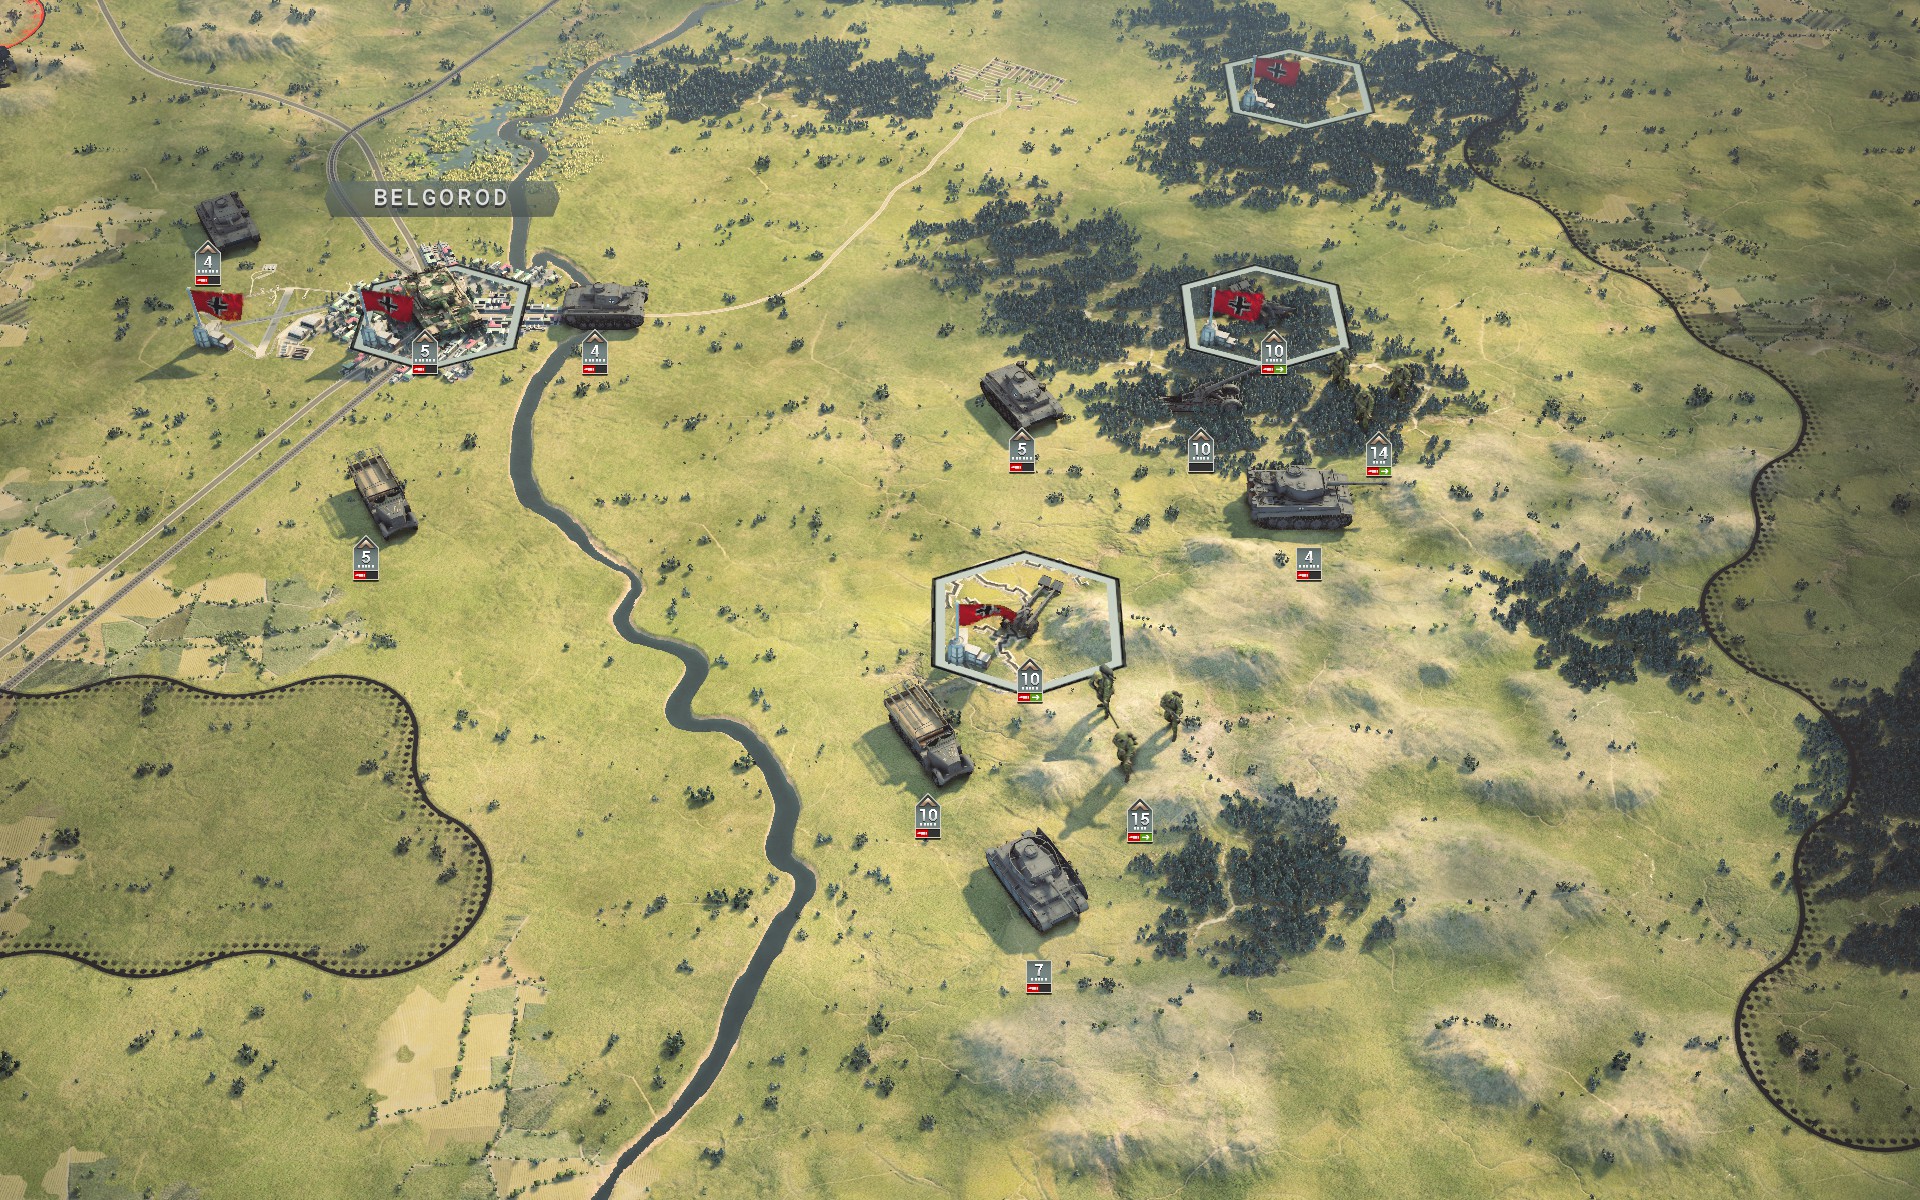
With the bulk of the Soviet armour in the Kursk salient captured, I reroute some of the artillery and Panzers south to support the Bridgeburners and the Crimson Guard.
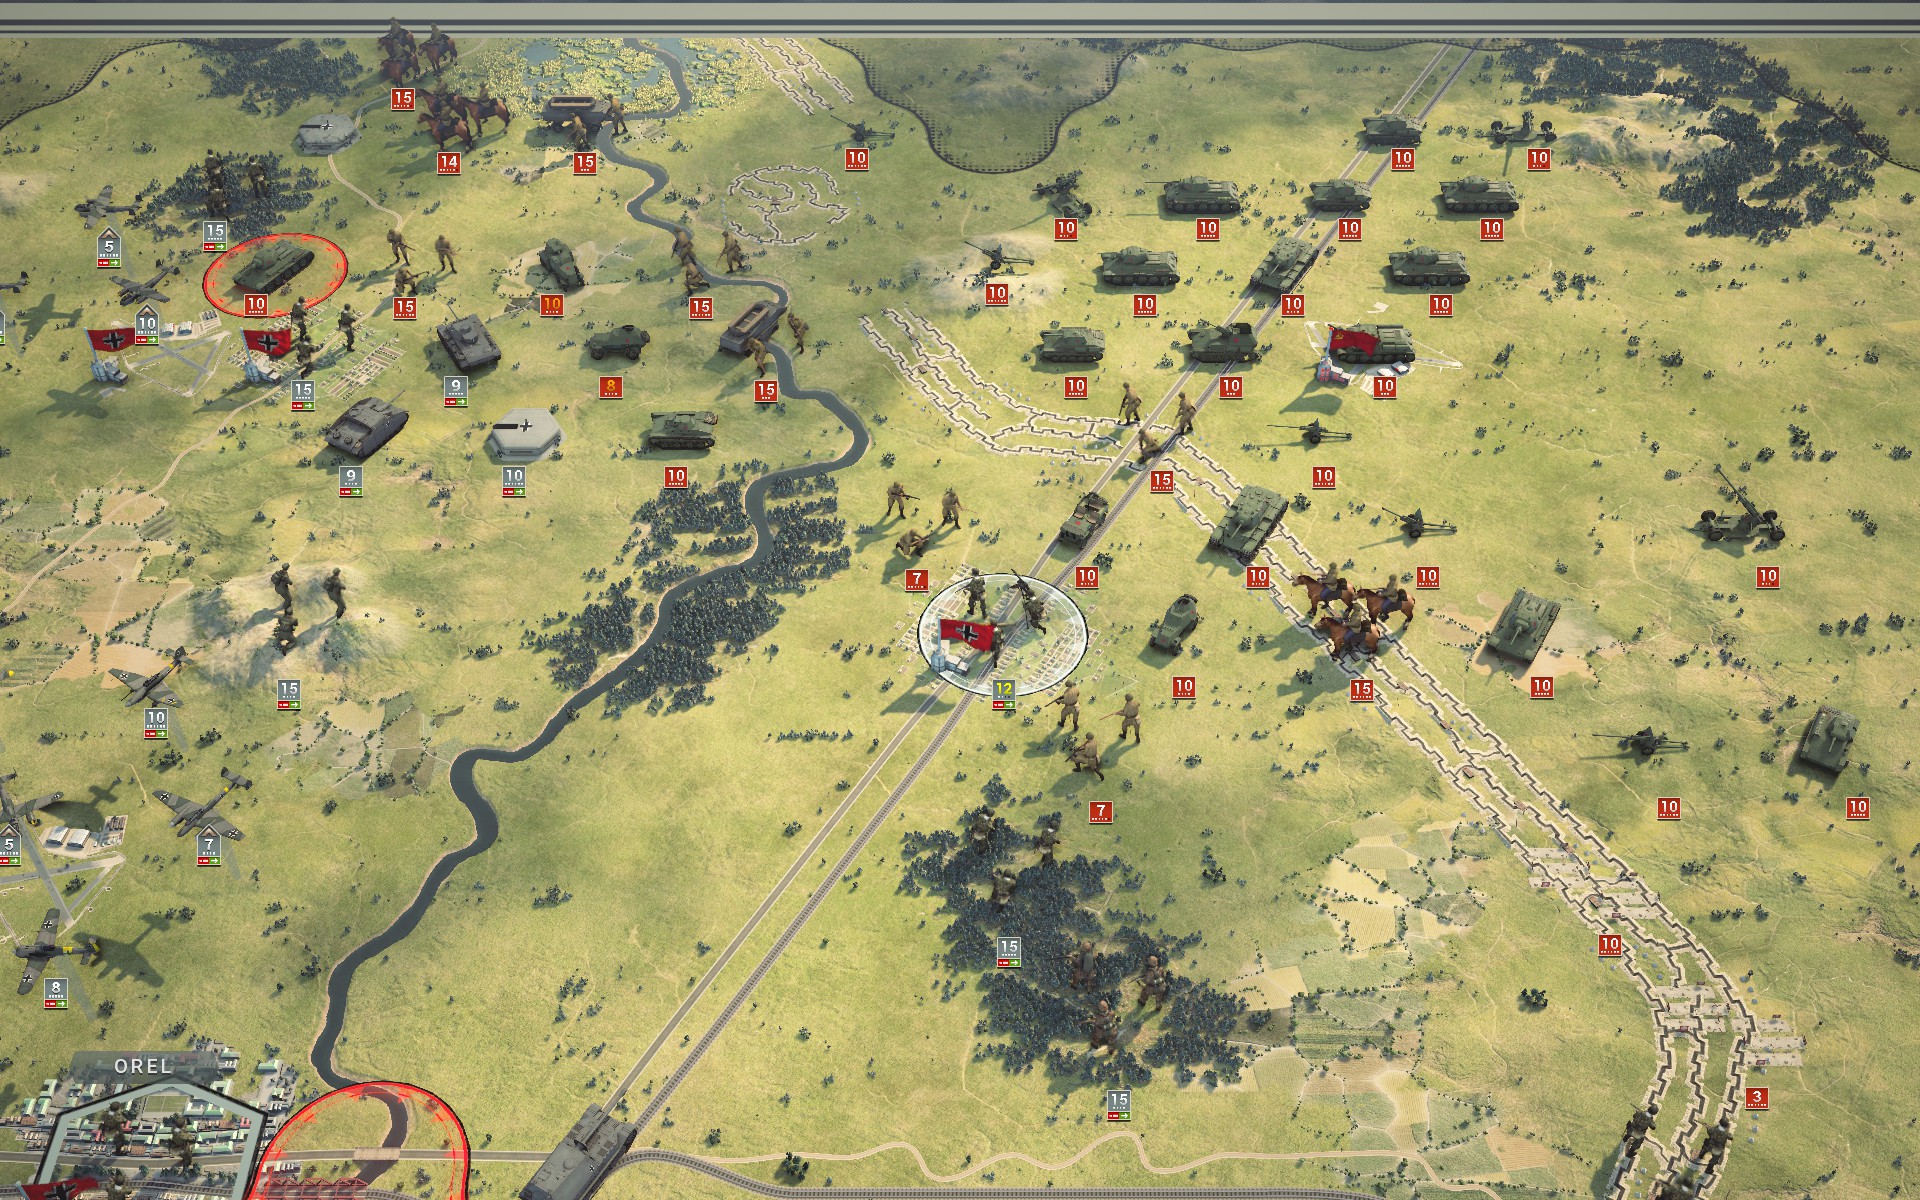
Despite their numbers, the Red Army is struggling to break through the line of auxiliaries.
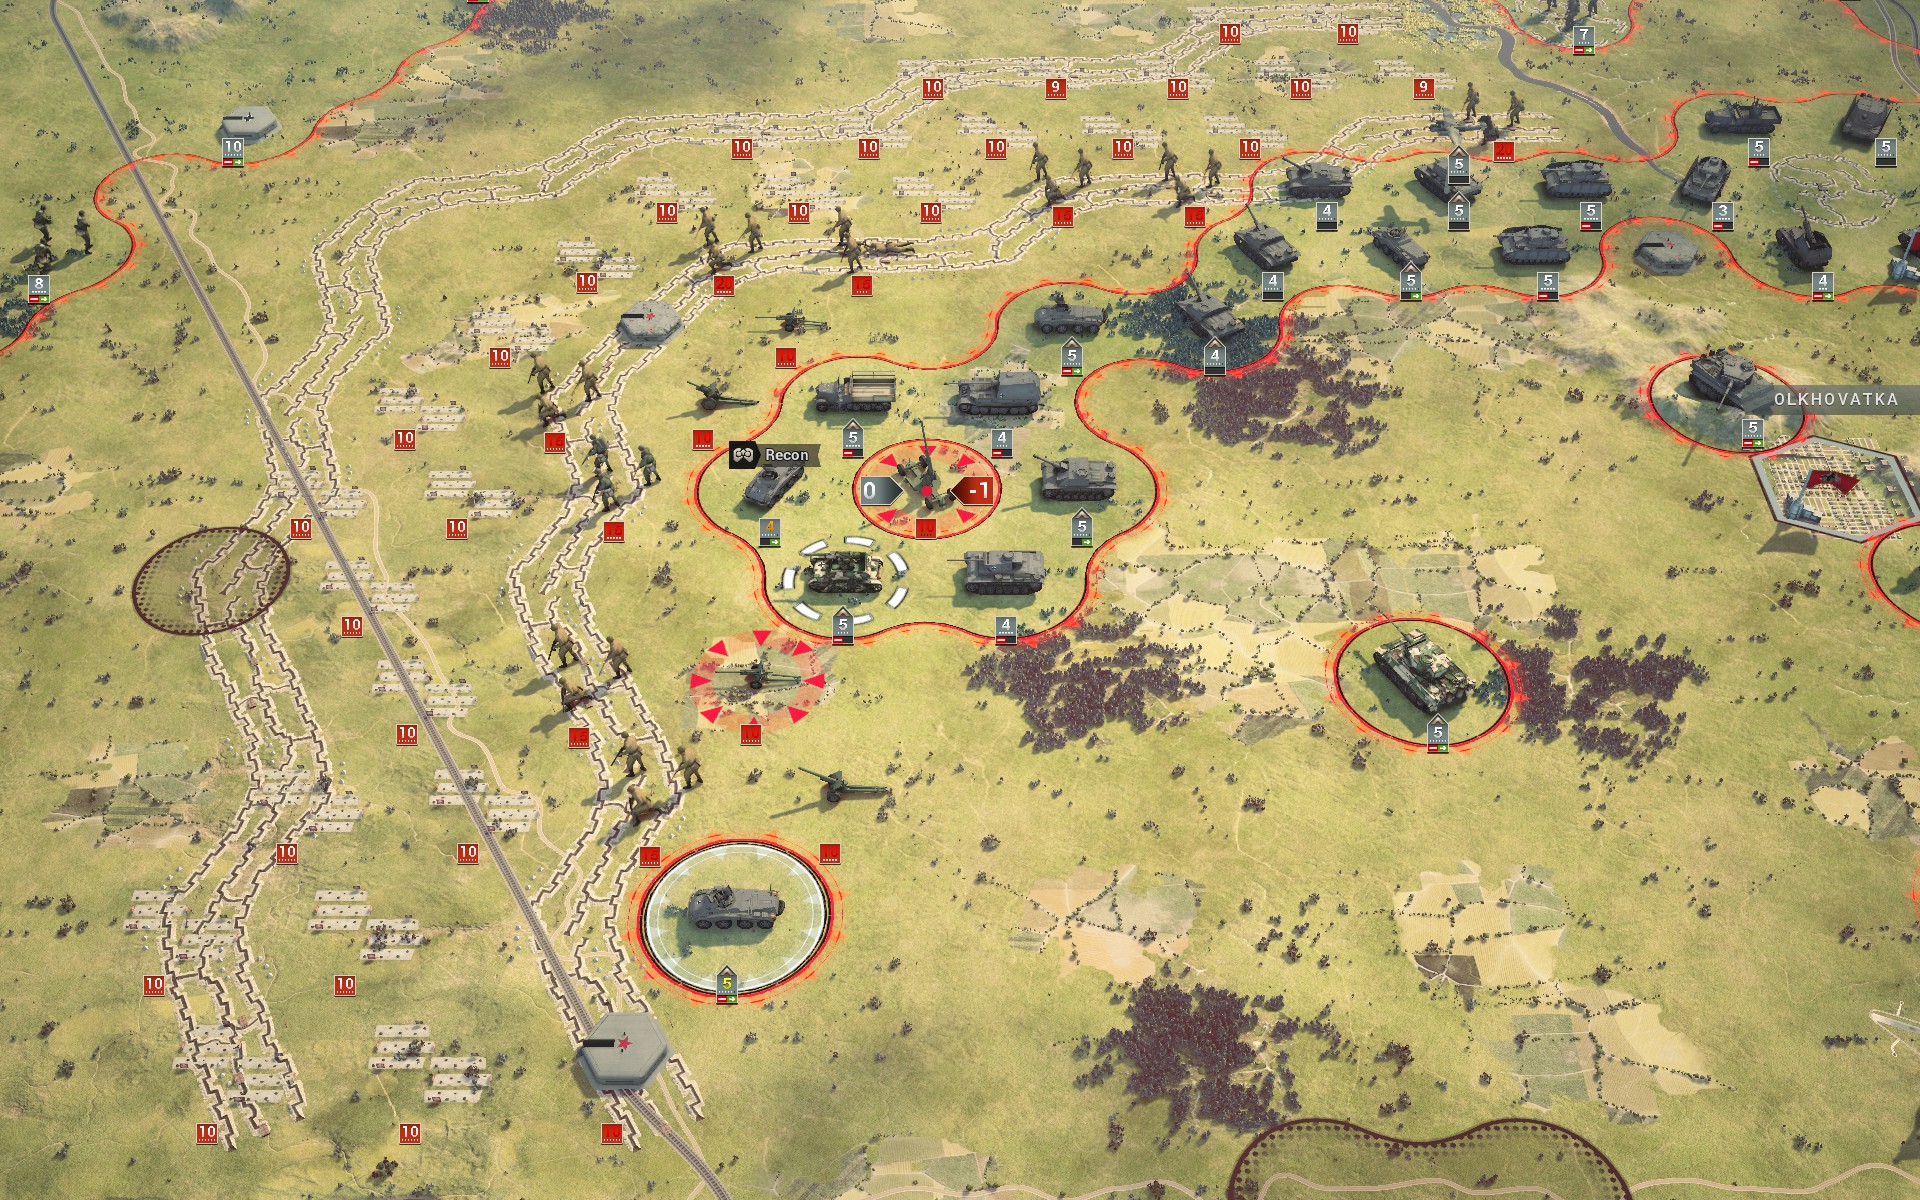
The StuH 42s break down the earthworks of the Soviet units, making it easy to capture them.
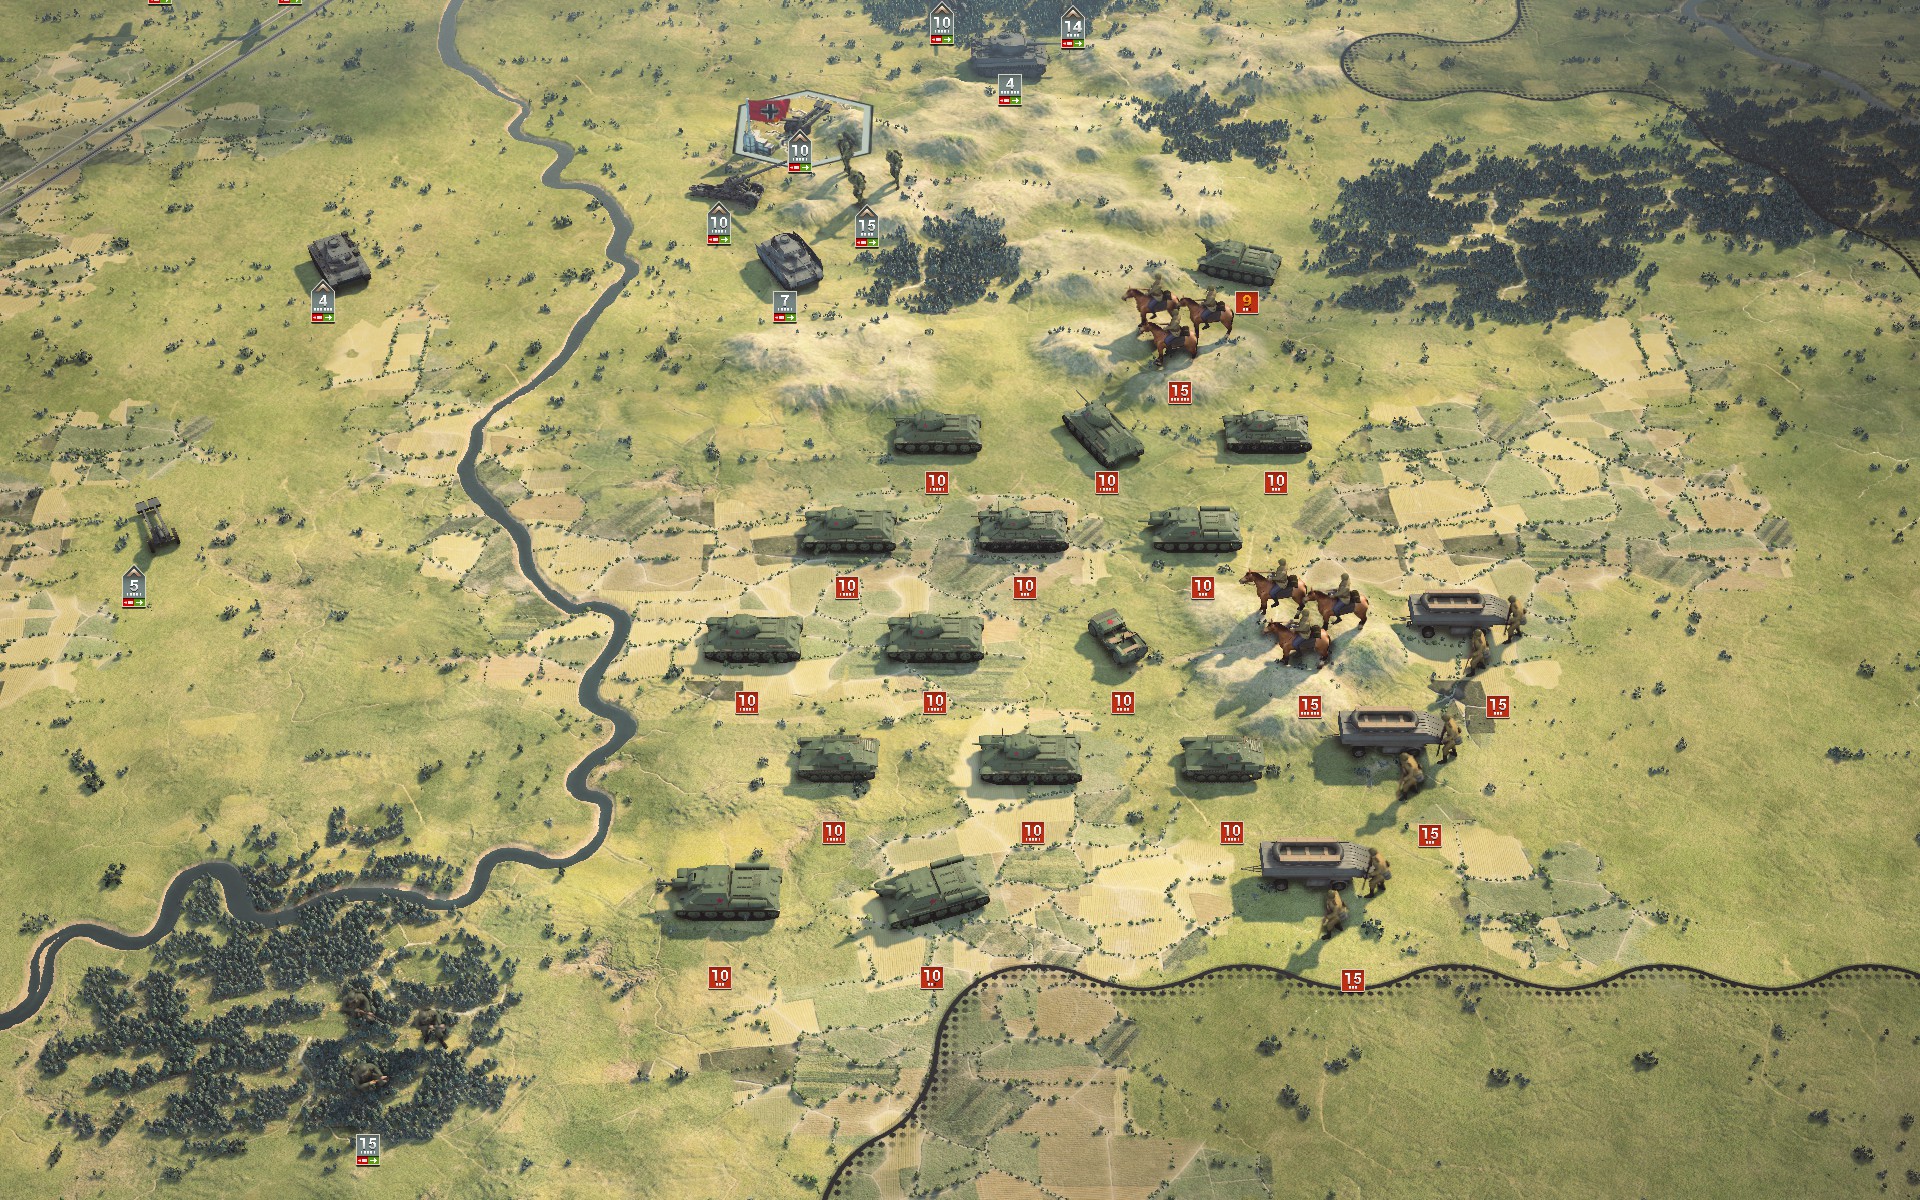
The Red Army commits its last reserves, and worryingly they appear to be heading towards Kharkov. I decide to redeploy more Tigers to the west bank of the Donets.
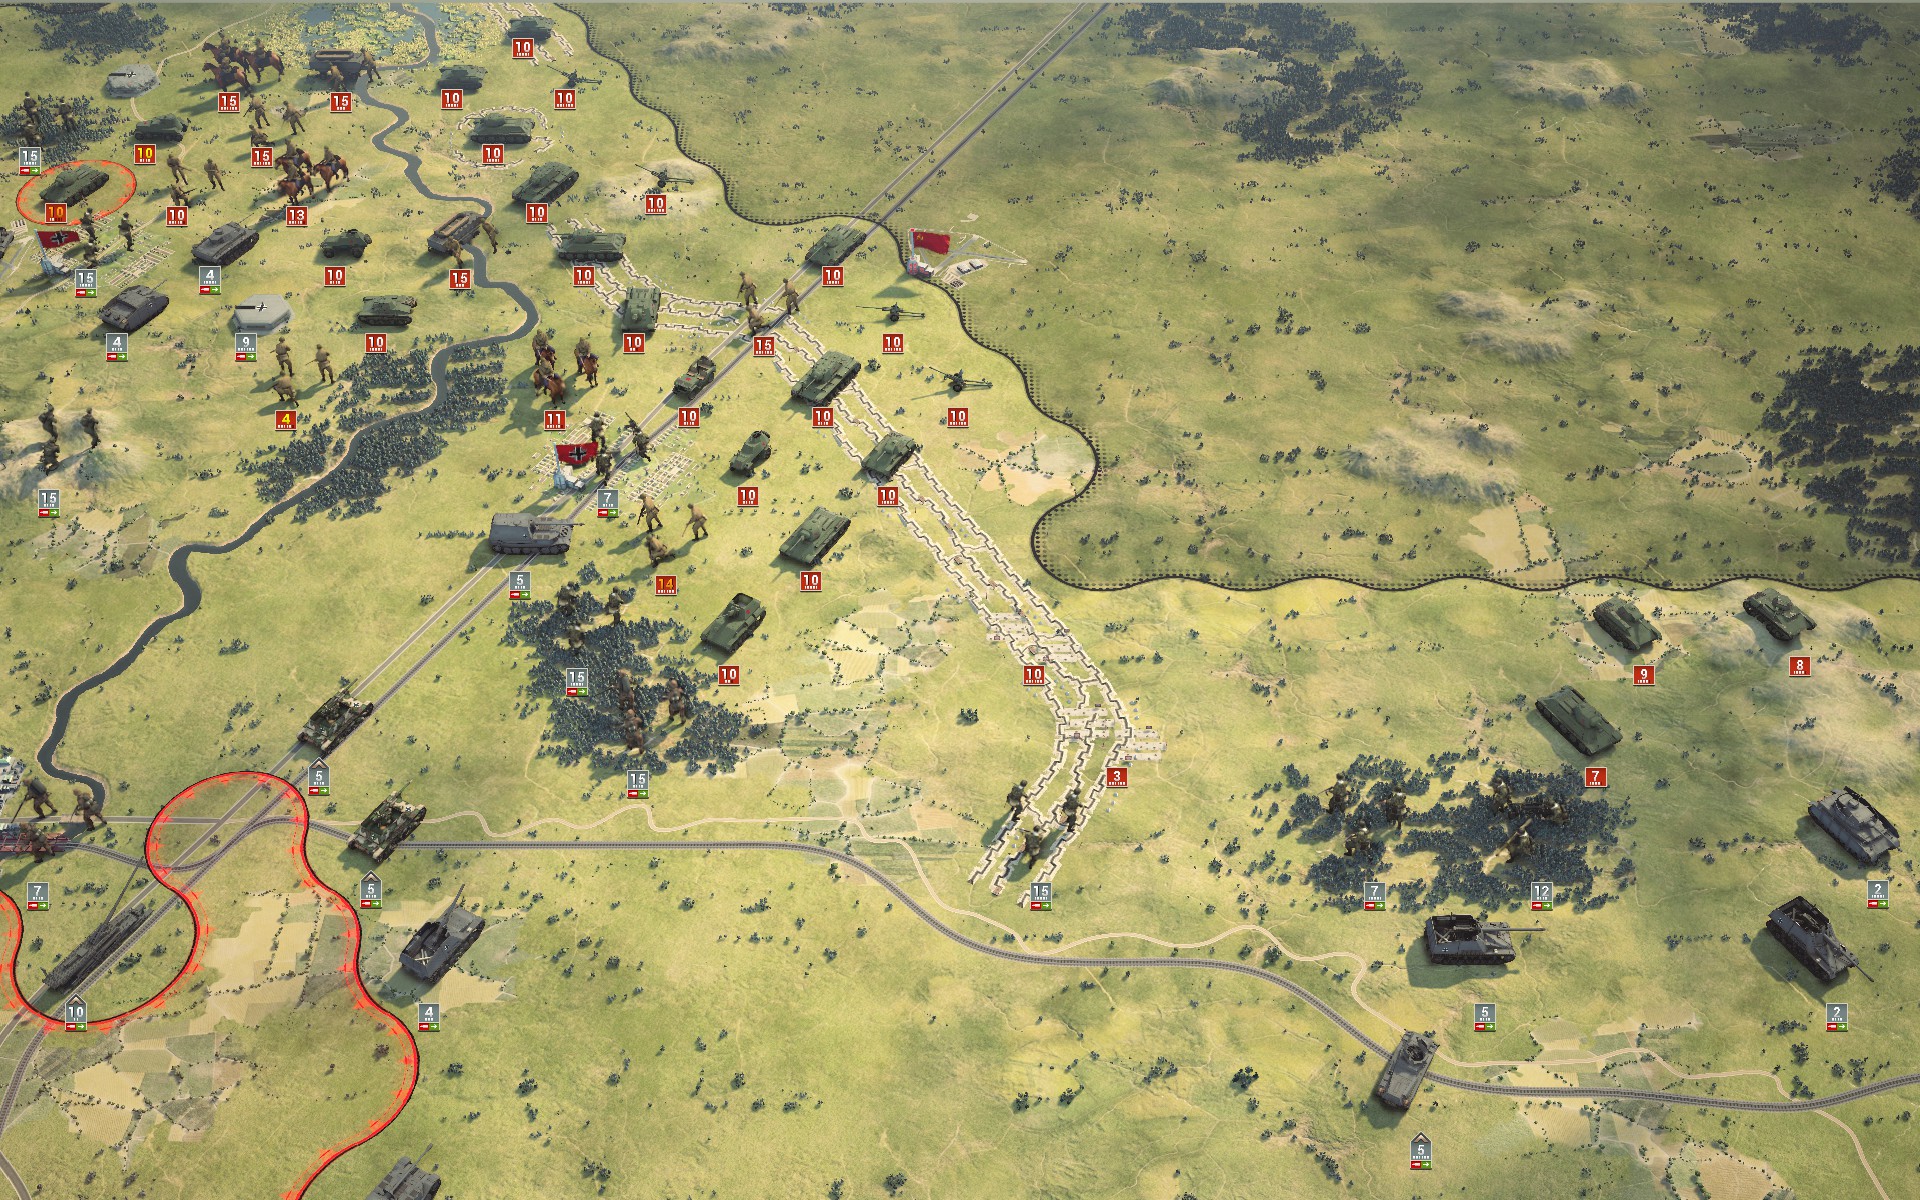
My initial attempt to flank the northern Soviet forces fails as the auxiliaries encounter a larger Soviet force attempting the same manoeuvre, but reinforcements are en route.

As the Soviet forces begin to spread out, it's clear that mine are insufficient to contain them. They will have to adopt a defensive formation until reinforcements arrive.
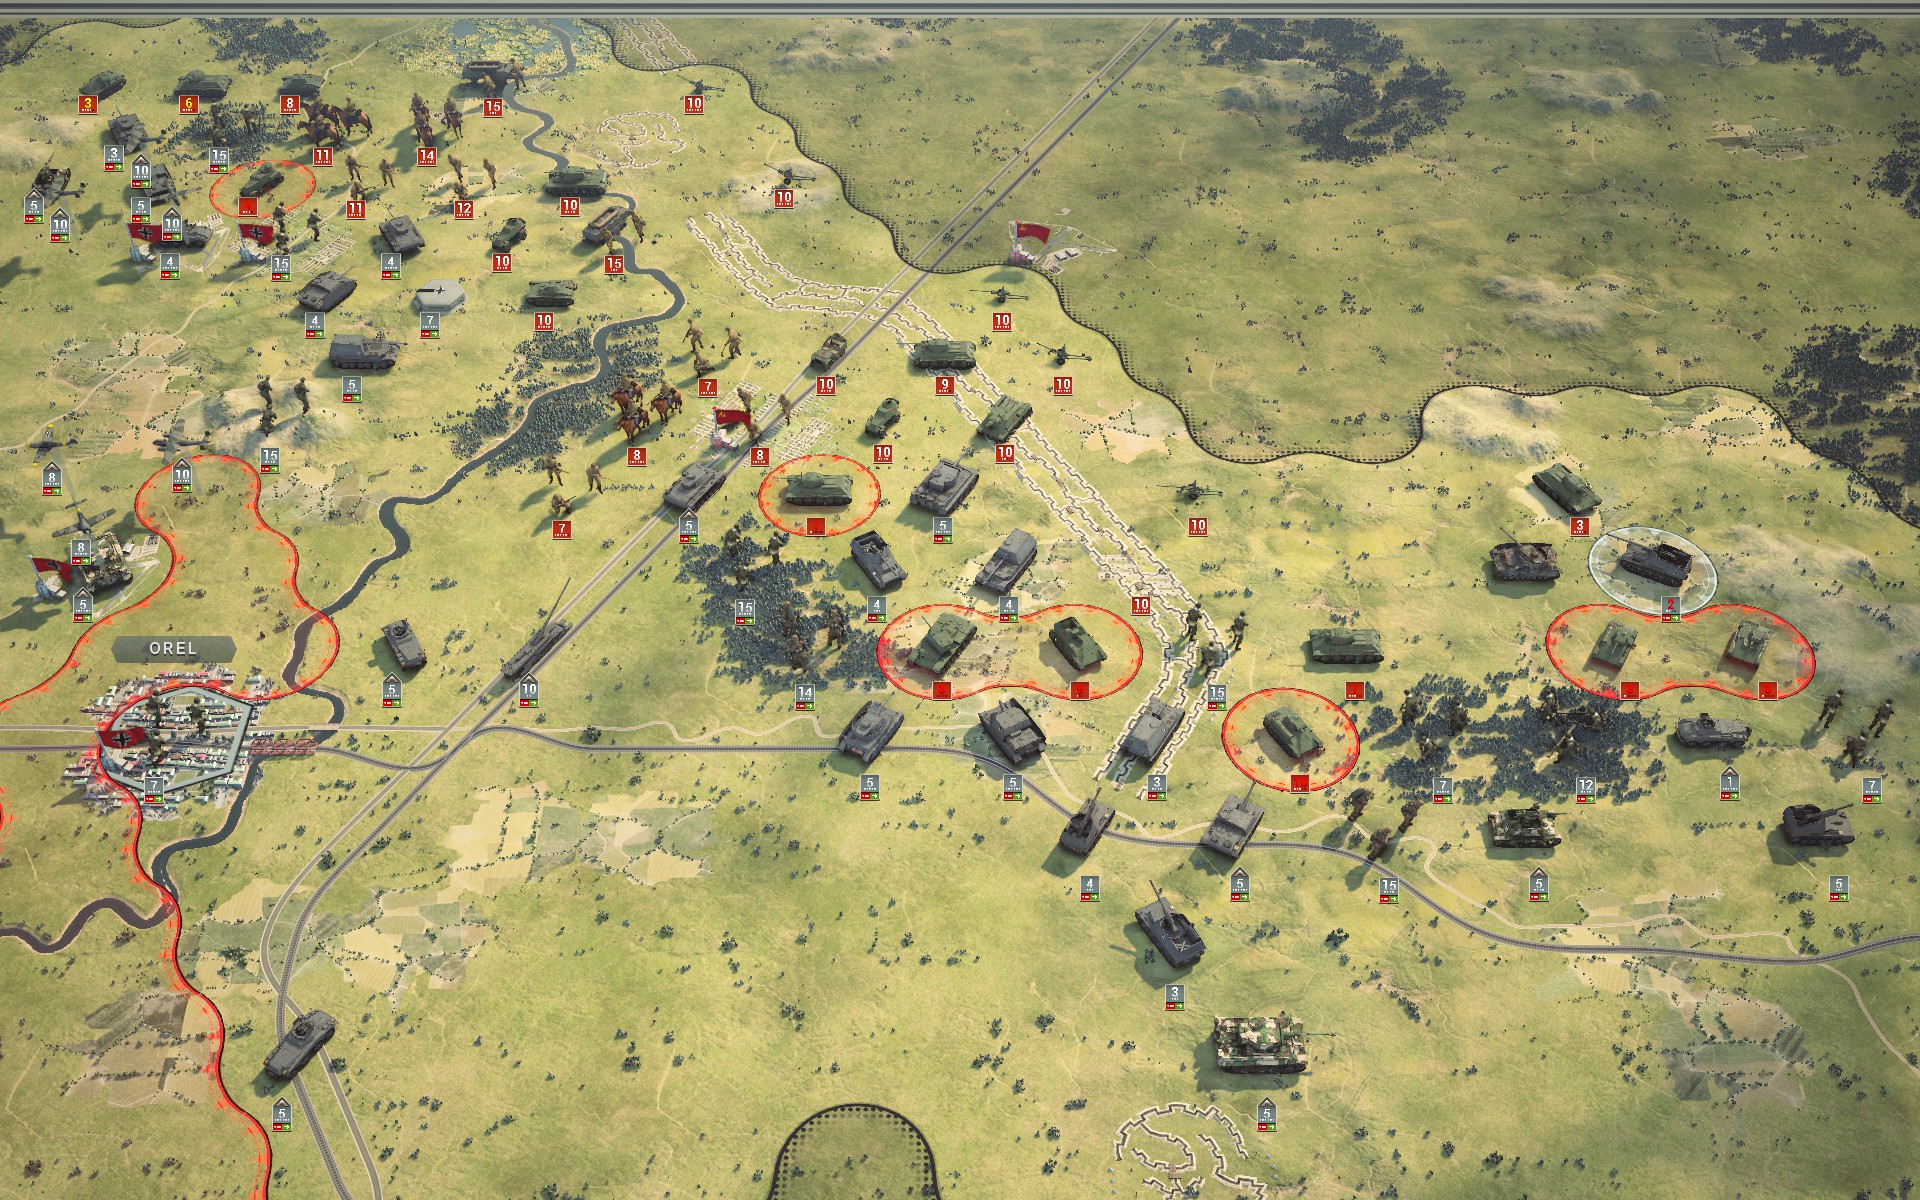
In the north, the auxiliaries suffer heavy losses, but the Soviet advance has been checked.

An OT-34 Flamethrower tank routs and destroys the Wehr Infanterie I had positioned in the woods south of the Donets. I'm not convinced by the decision to park a T-34 in a forest hex next to two battalions of elite Pioniere, however; Sun Tzu reborn the AI is not.
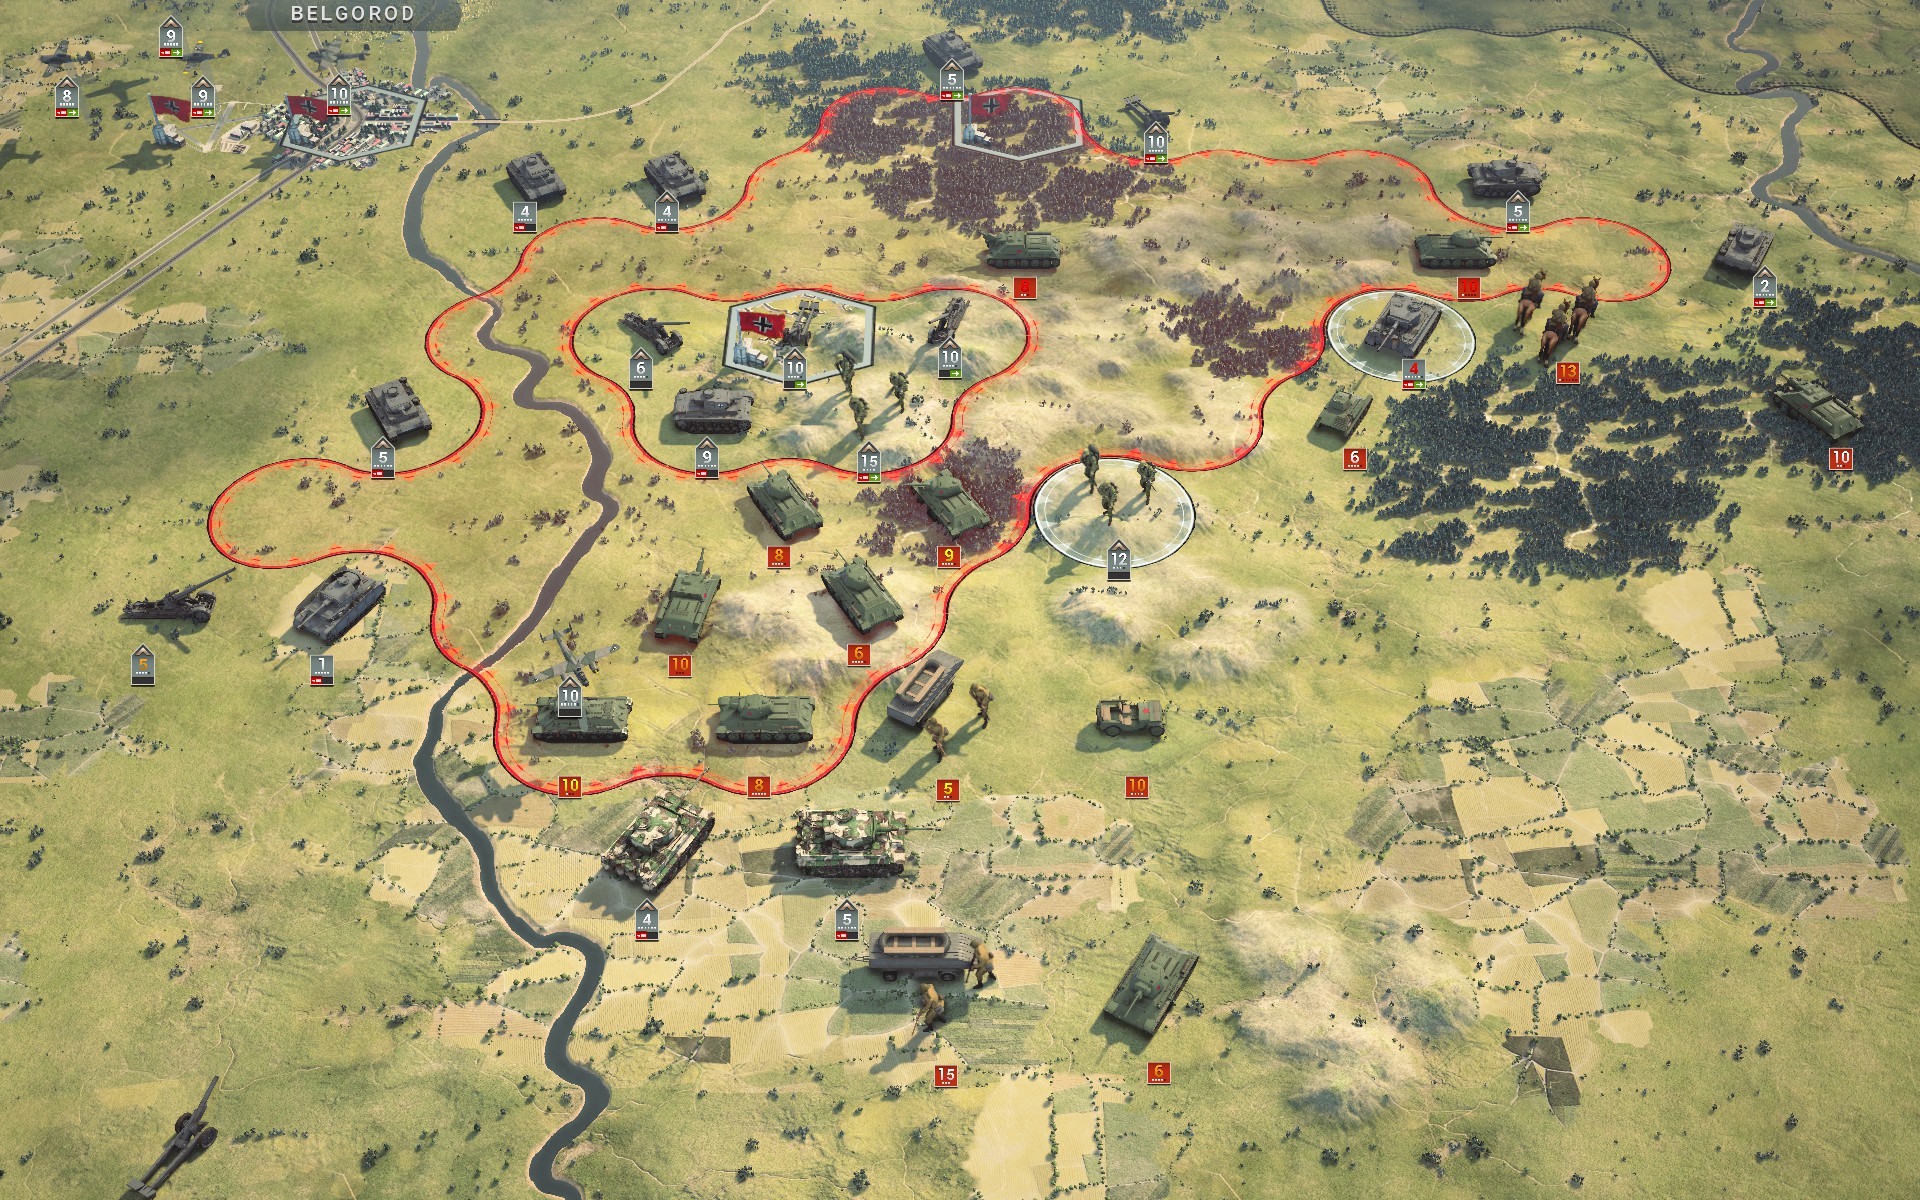
The Tigers cross the Donets to encircle the bulk of the Soviet armour.
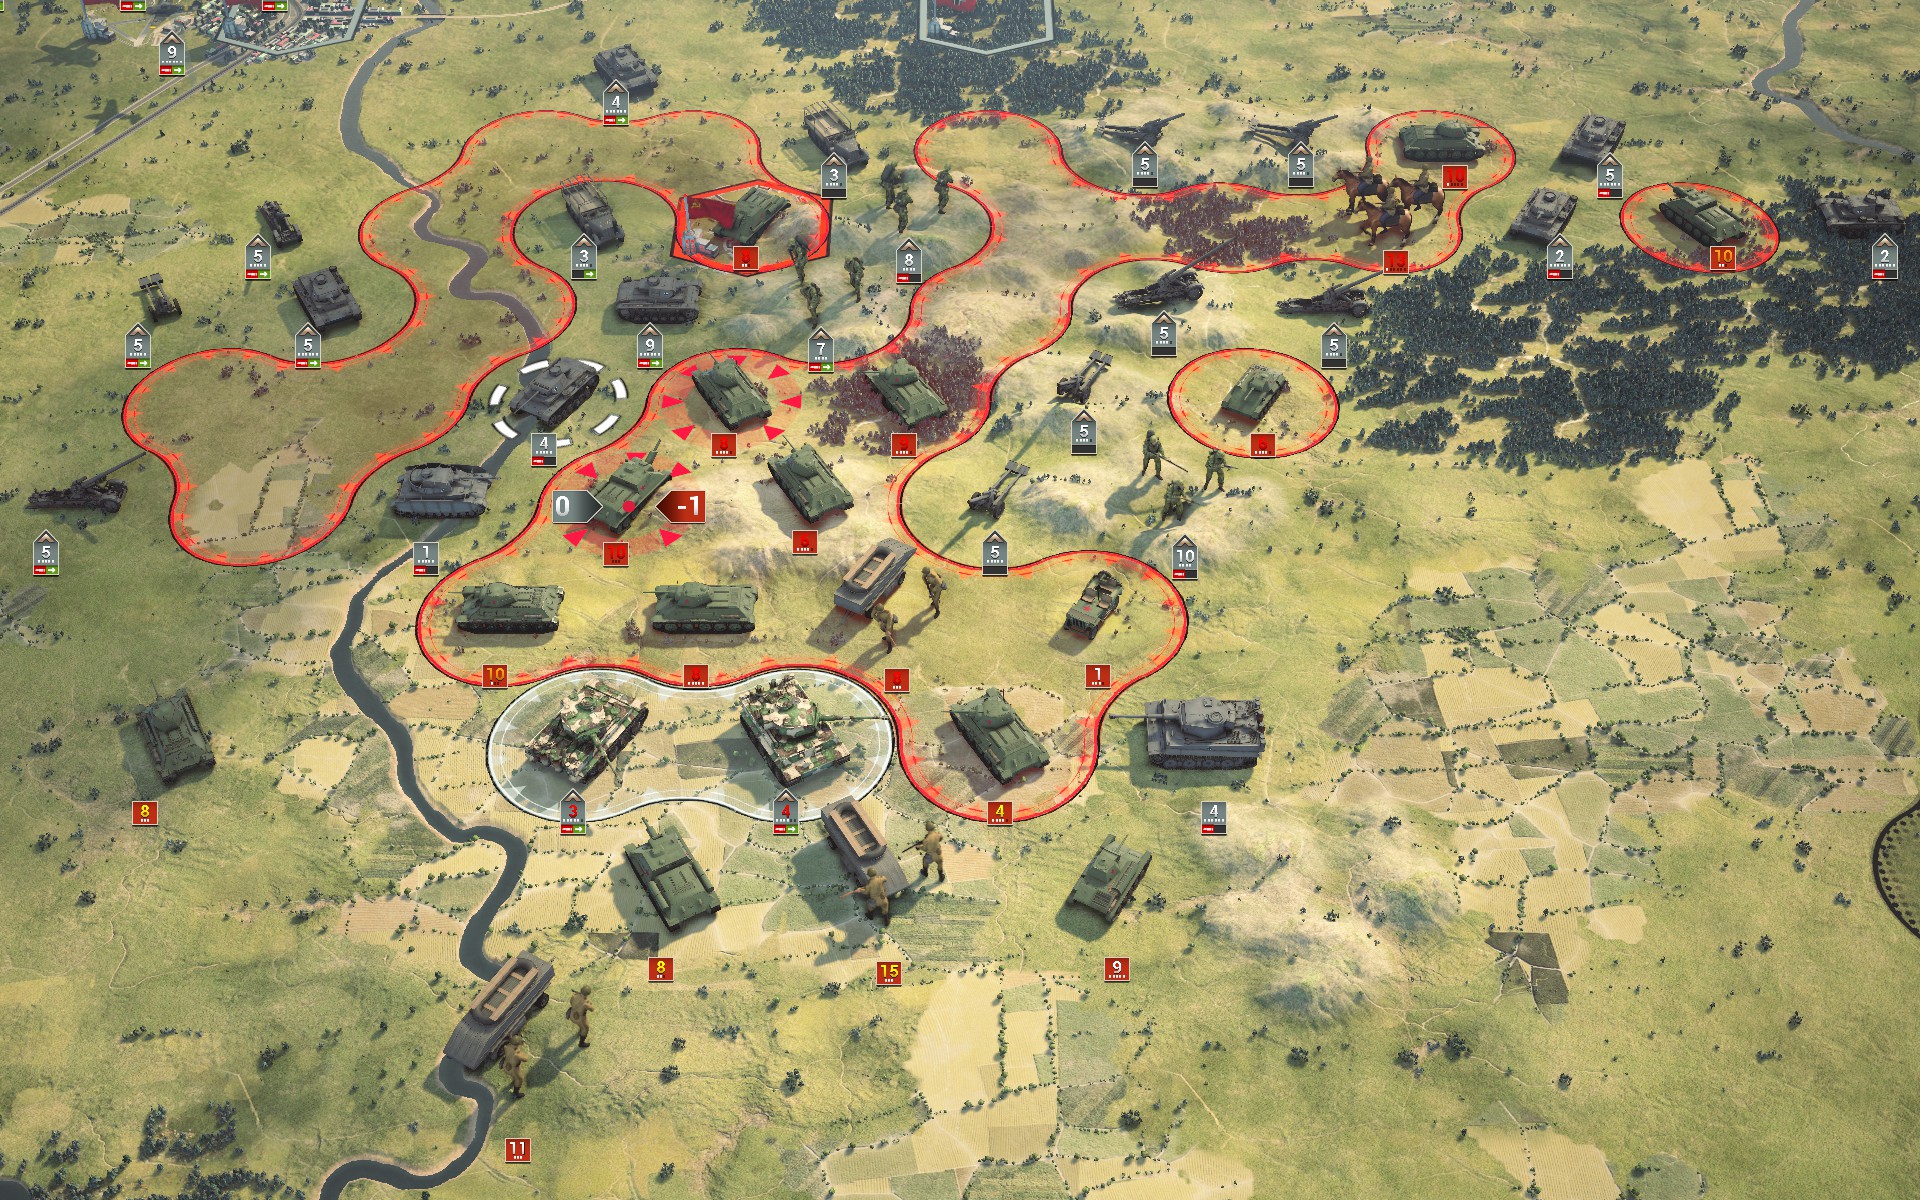
The Tigers come under heavy fire but hold their positions, allowing my forces to begin capturing Soviet armour.
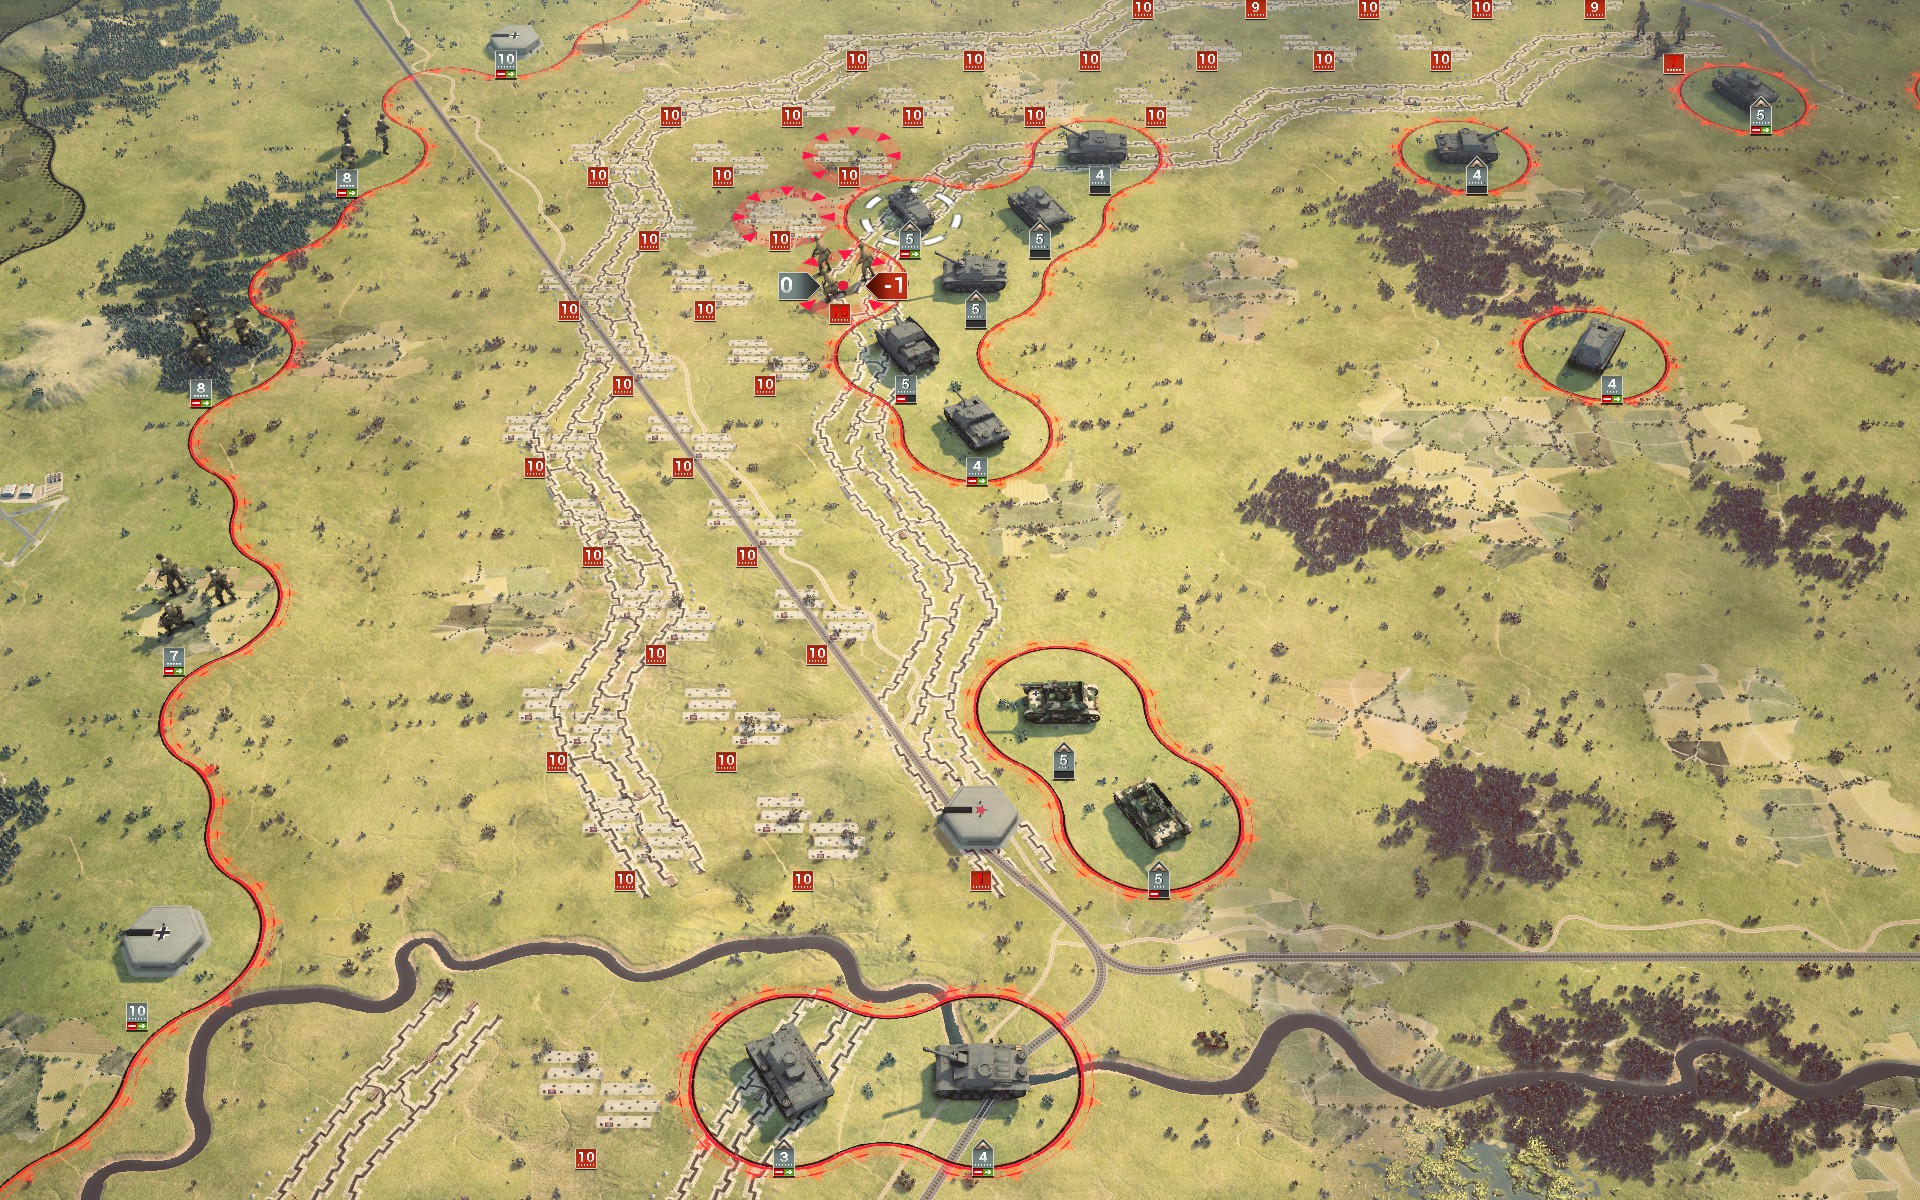
Only a few scattered battalions remain of the once mighty host inside the Kursk salient.
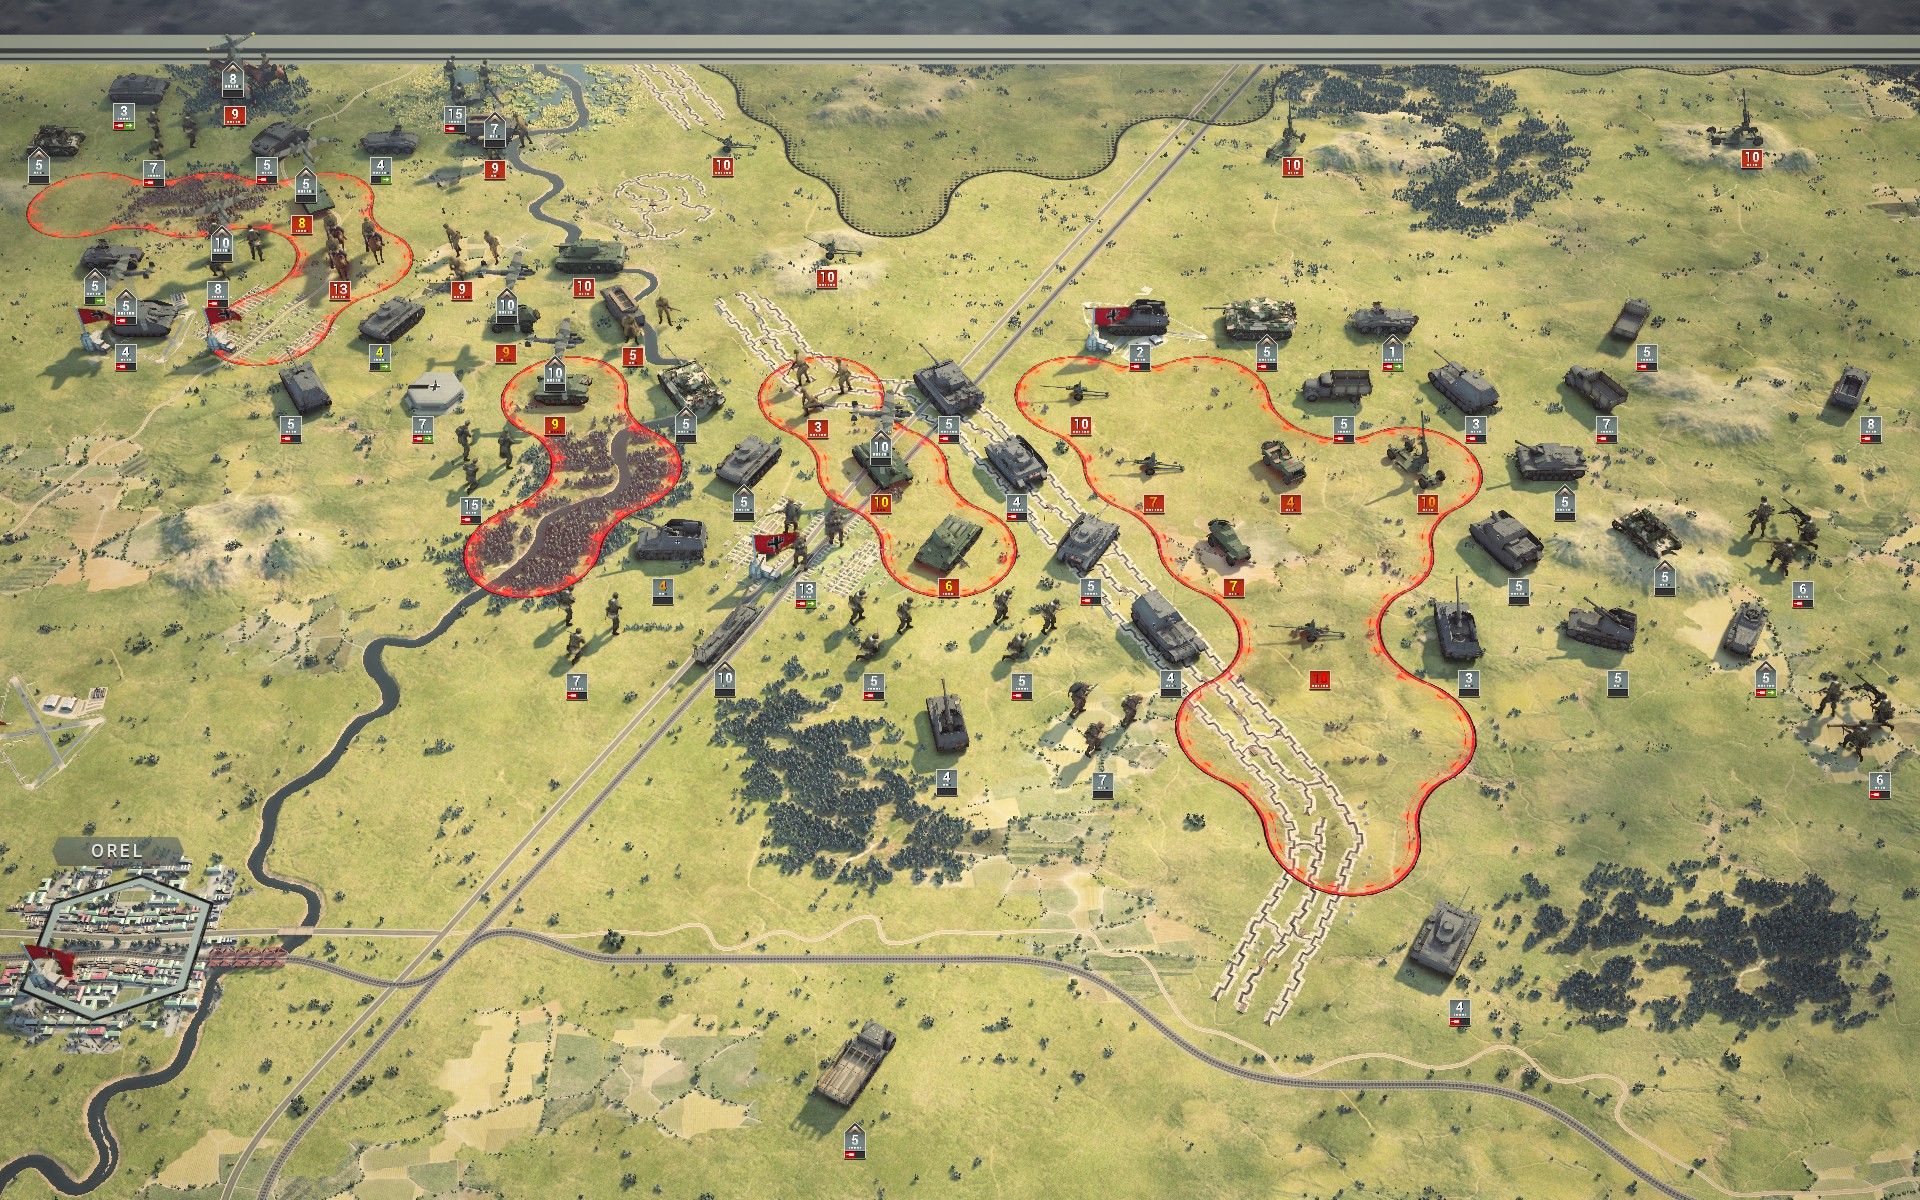
In the north, the Red Army has largely been suppressed.
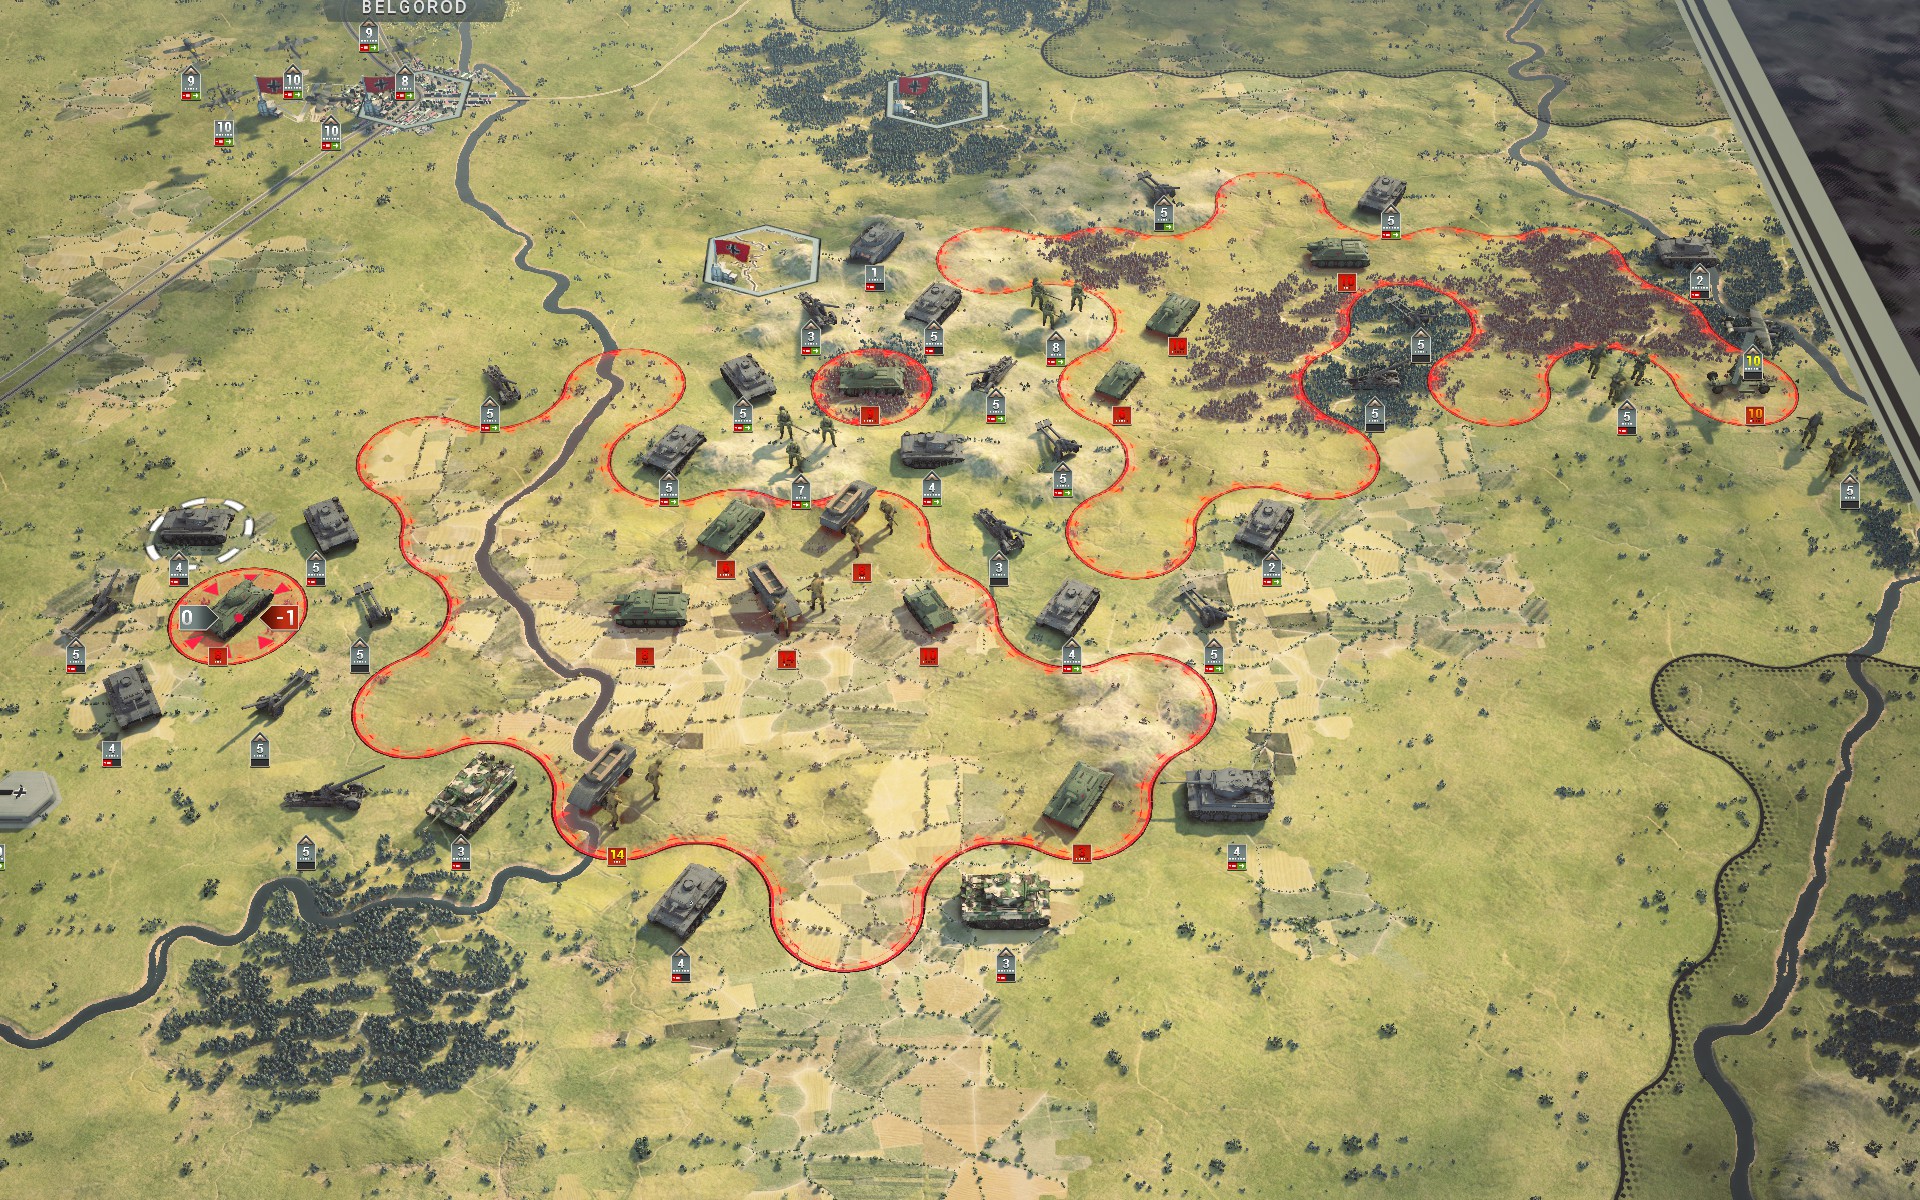
In the south, my forces have likewise stabilized the situation.
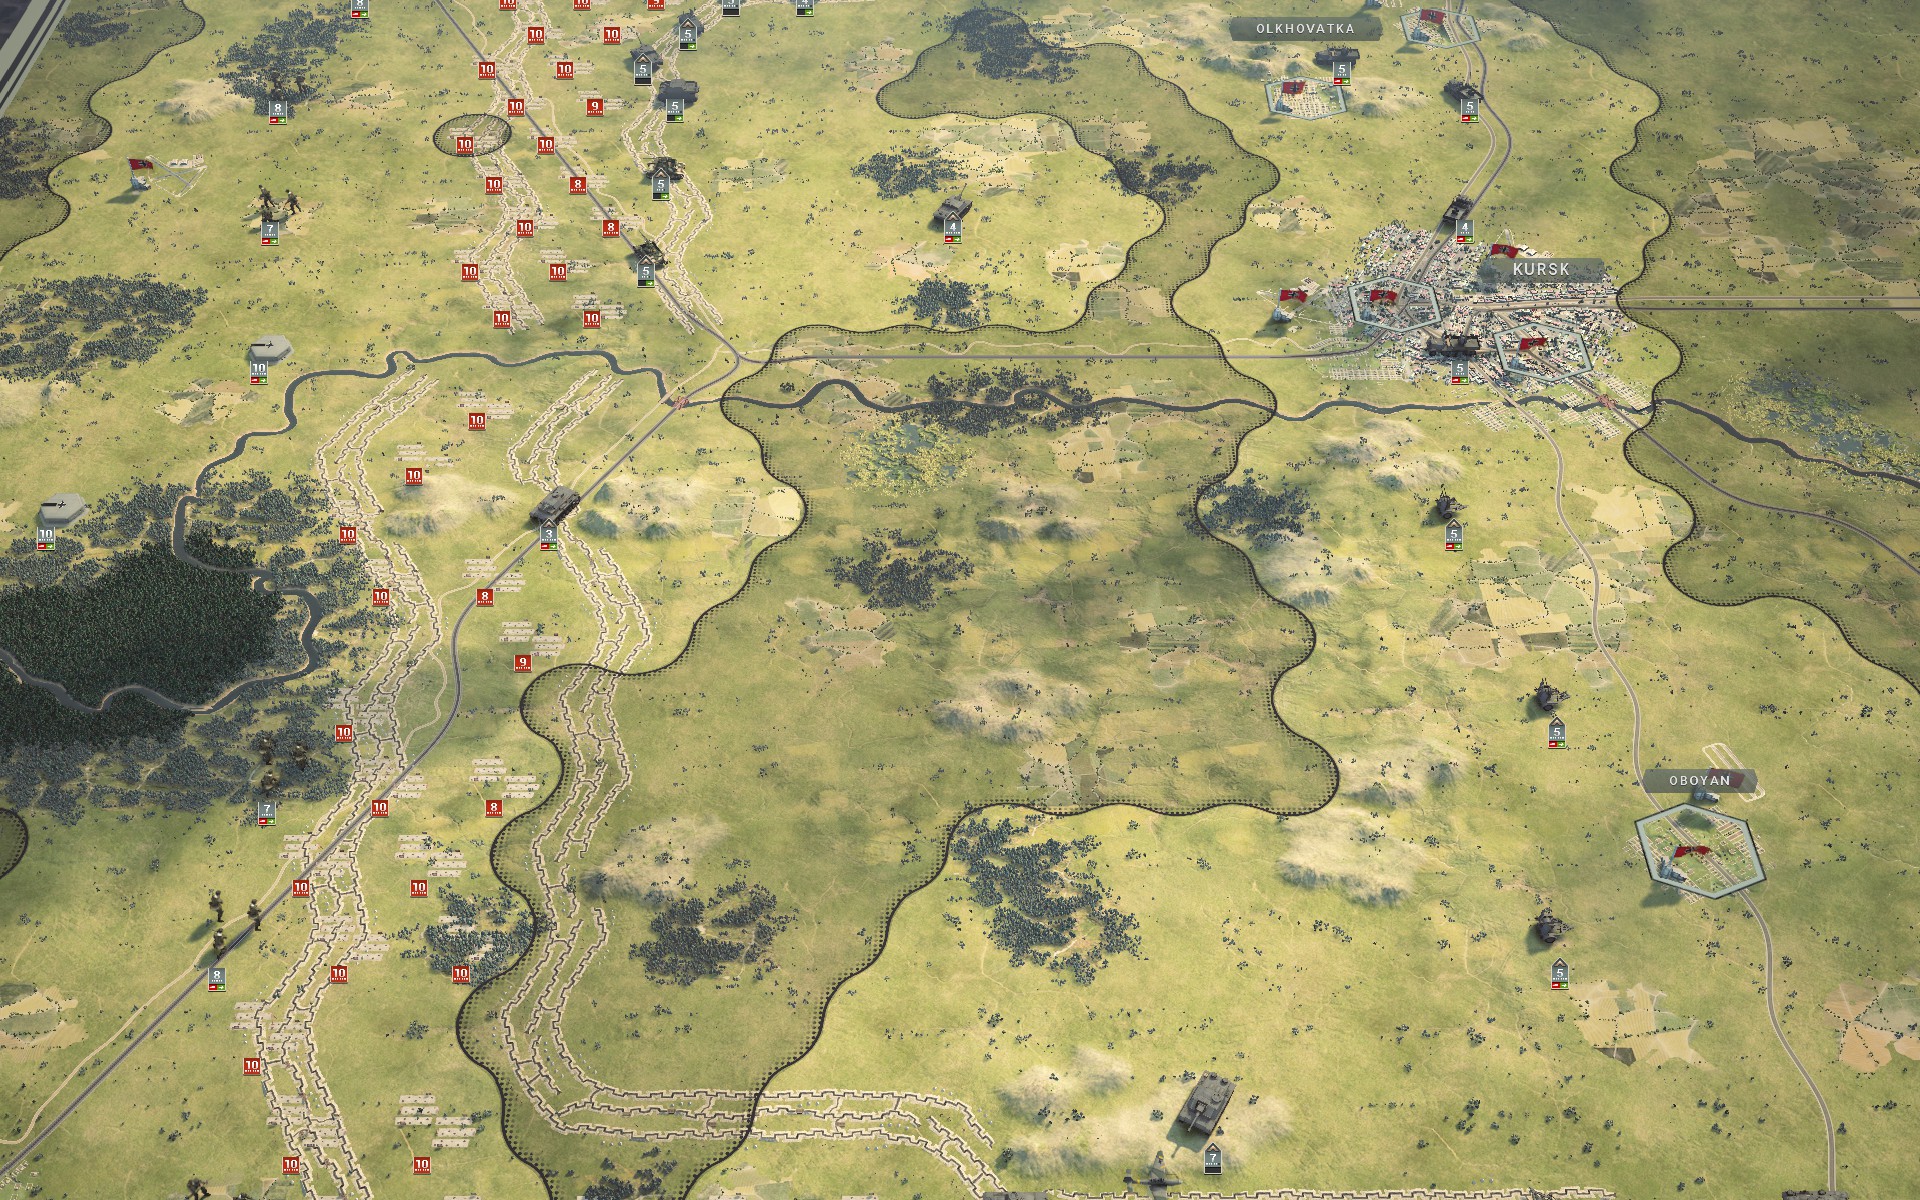
With the last of the Soviet forces captured, the Kursk salient is now secure.
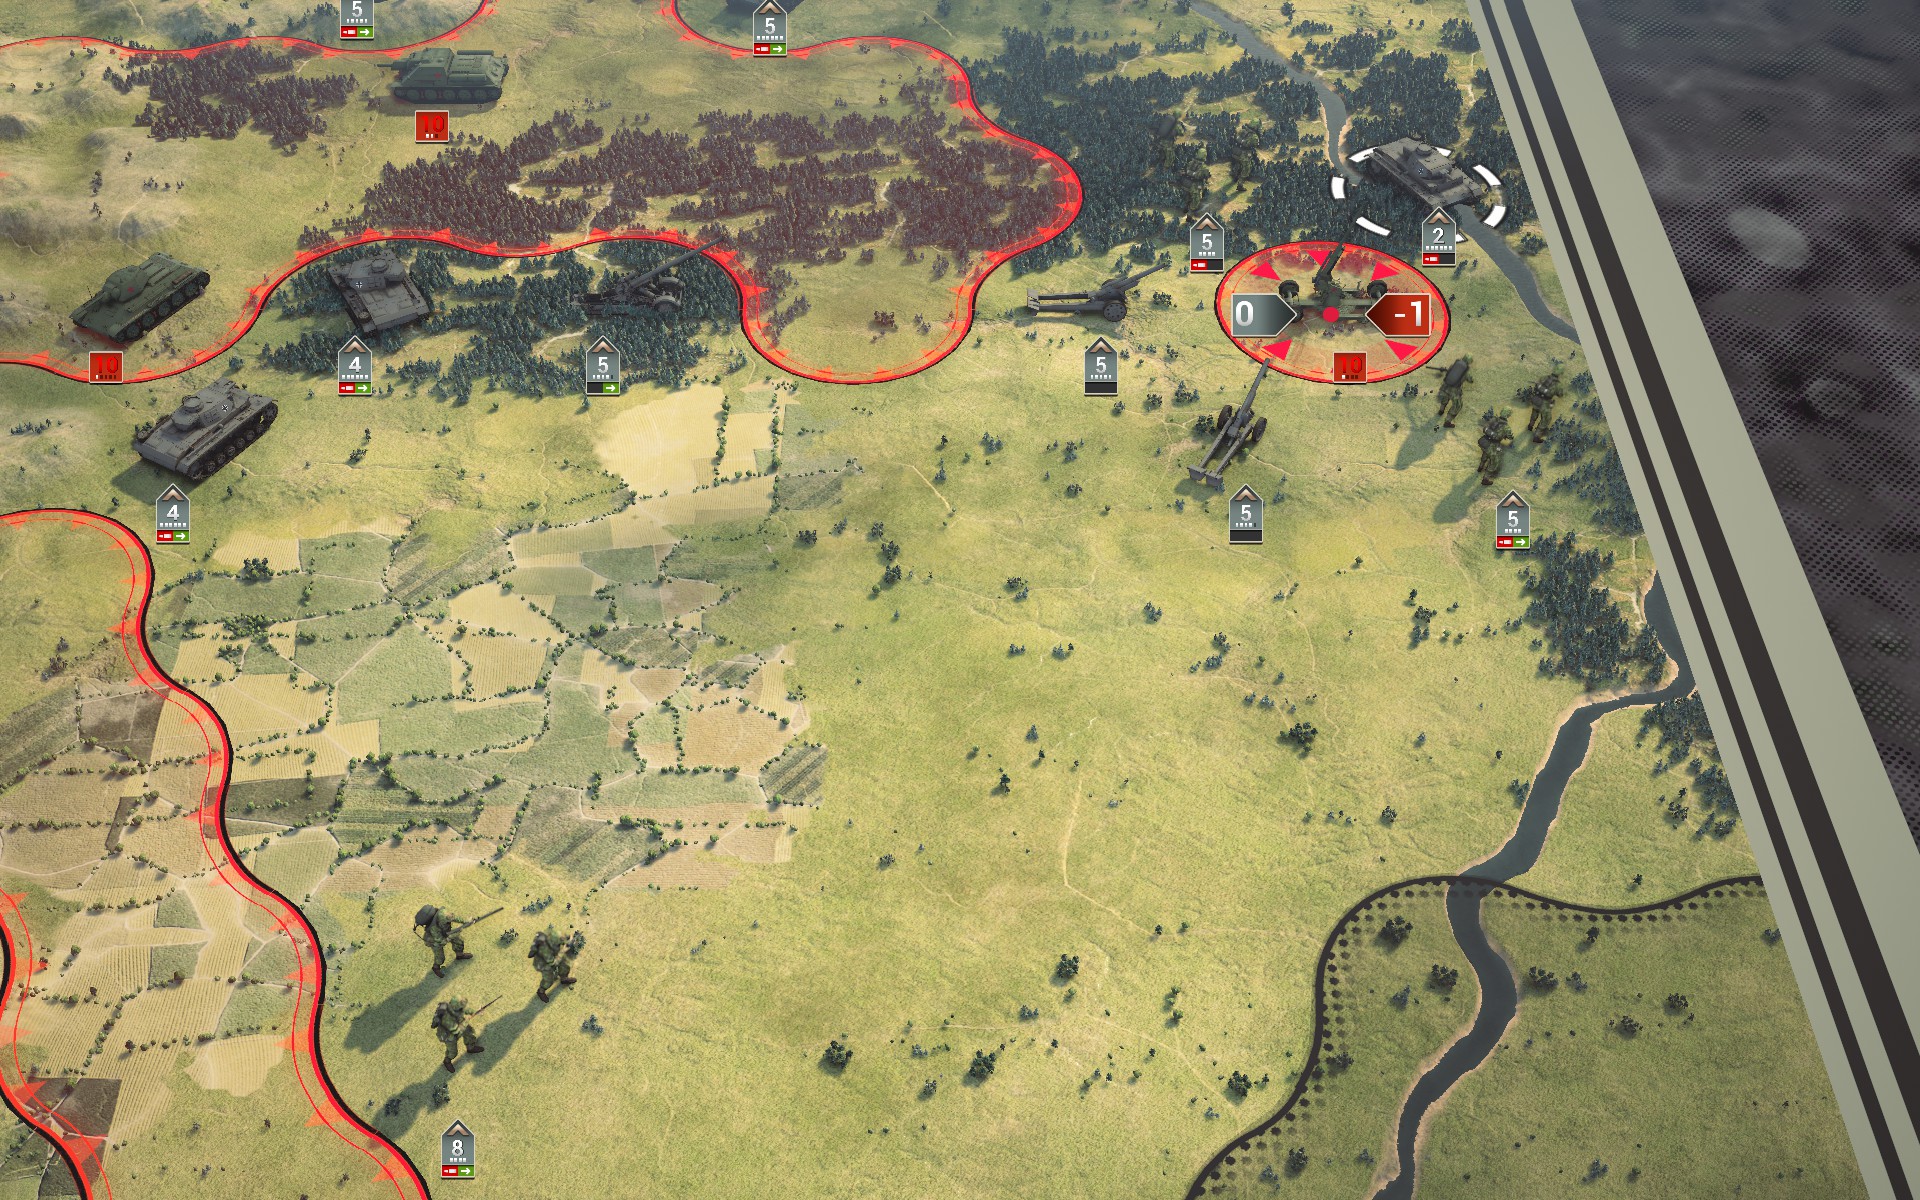
With all remaining mobile Soviet forces suppressed, my forces begin to surround the AA guns to the rear.
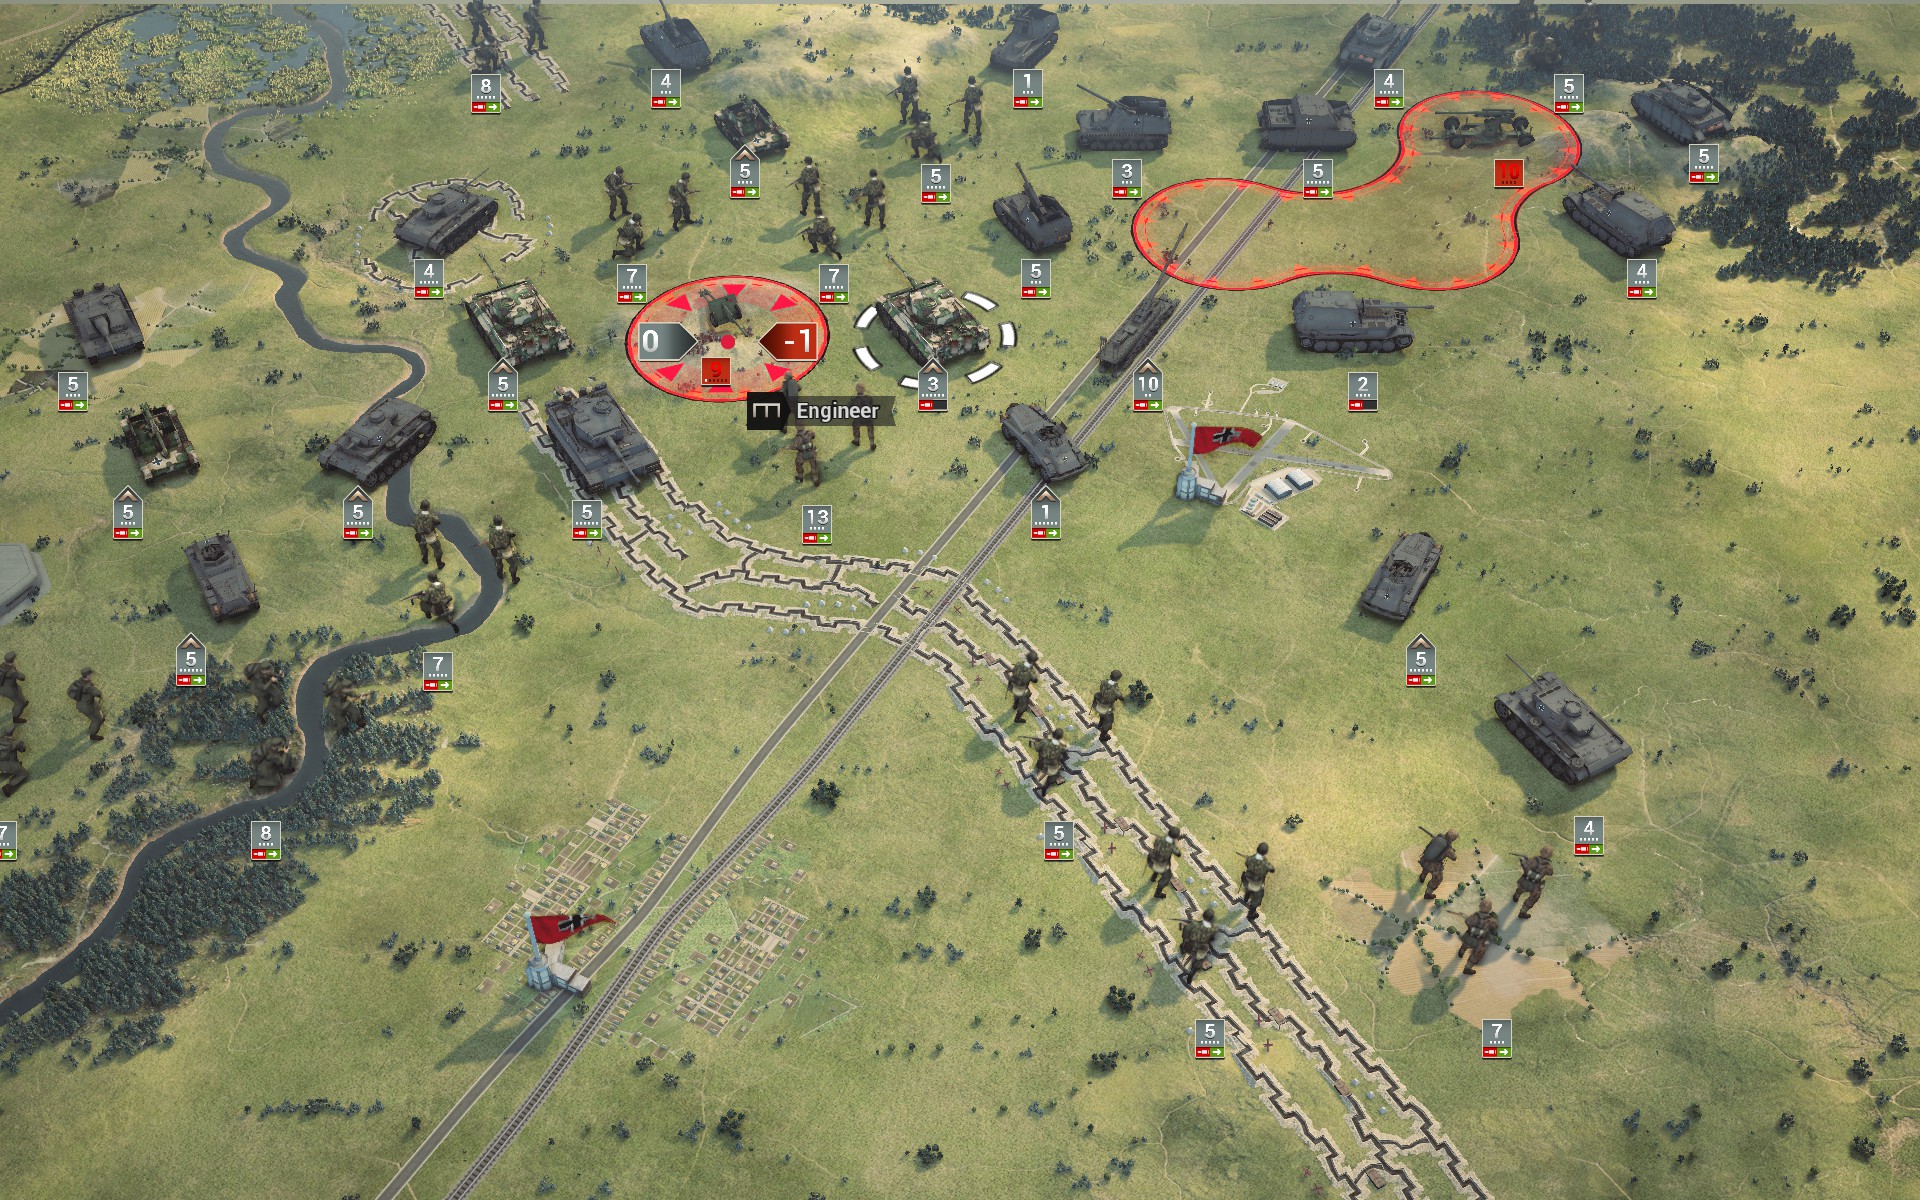
Aided by a battalion of Tigers and Gustav, the auxiliaries have cleared the northern pocket.
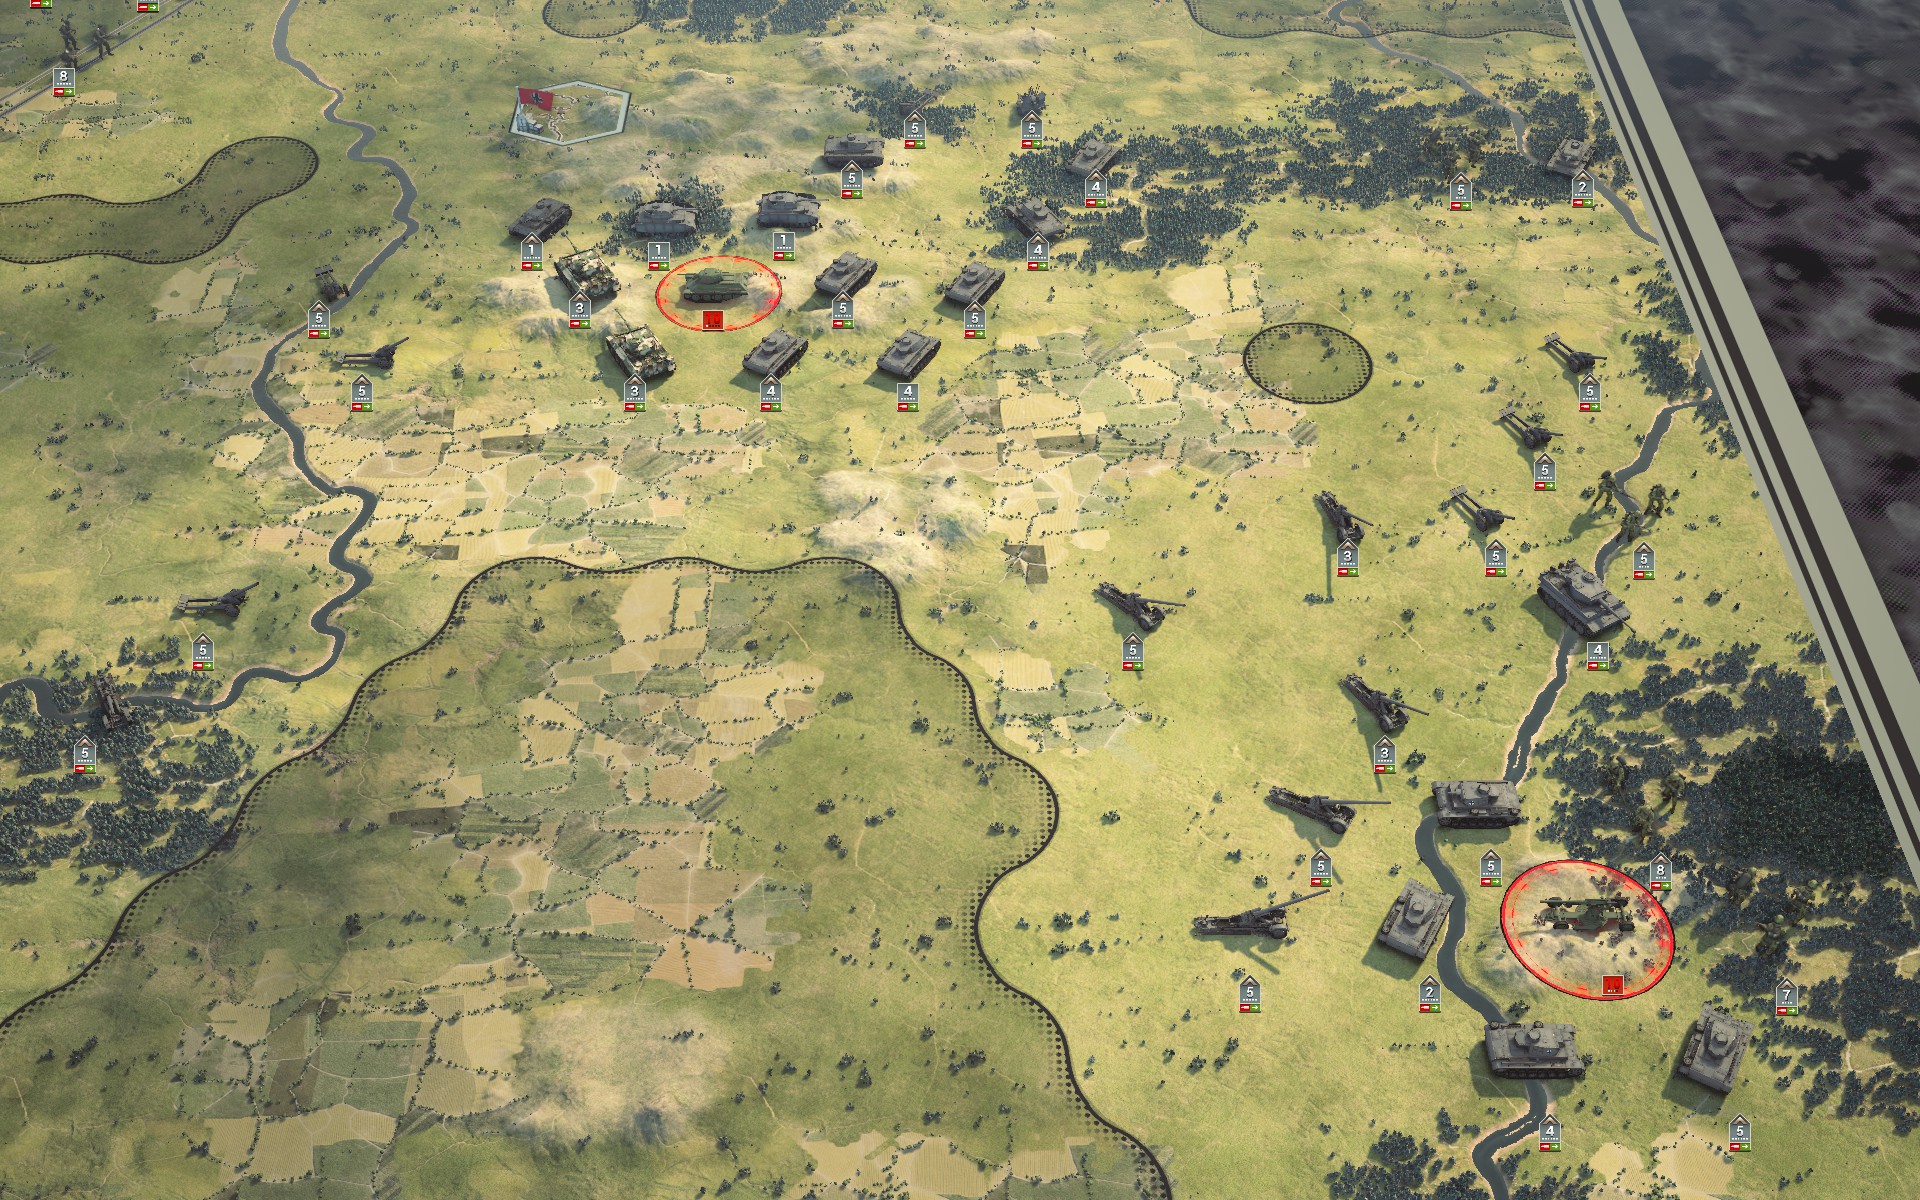
The last of the Soviet forces are captured.
NB: I had to reload a save because the scenario ends the moment you destroy the last mobile Soviet forces, so if you want to capture the AA guns too you'll have to leave at least one unit alive.
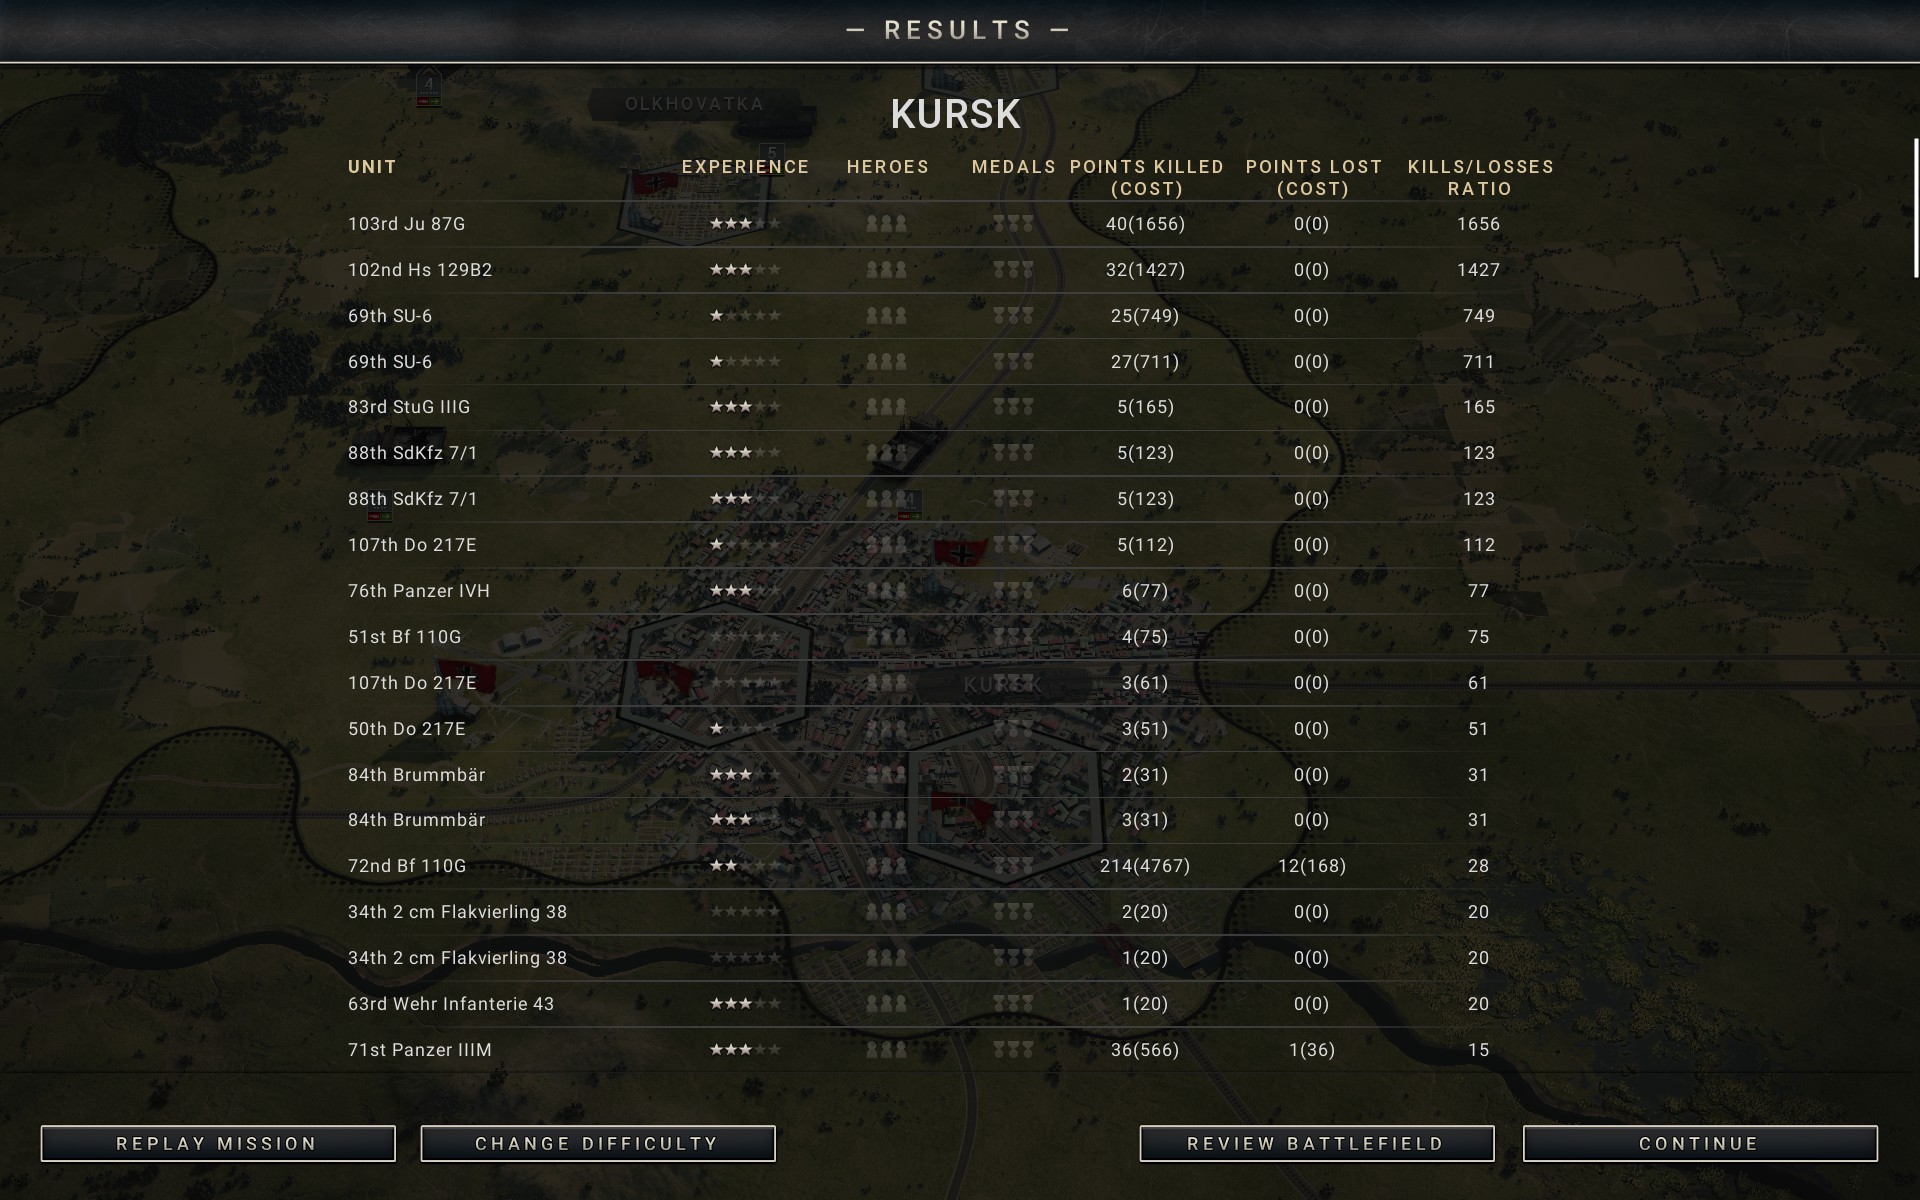
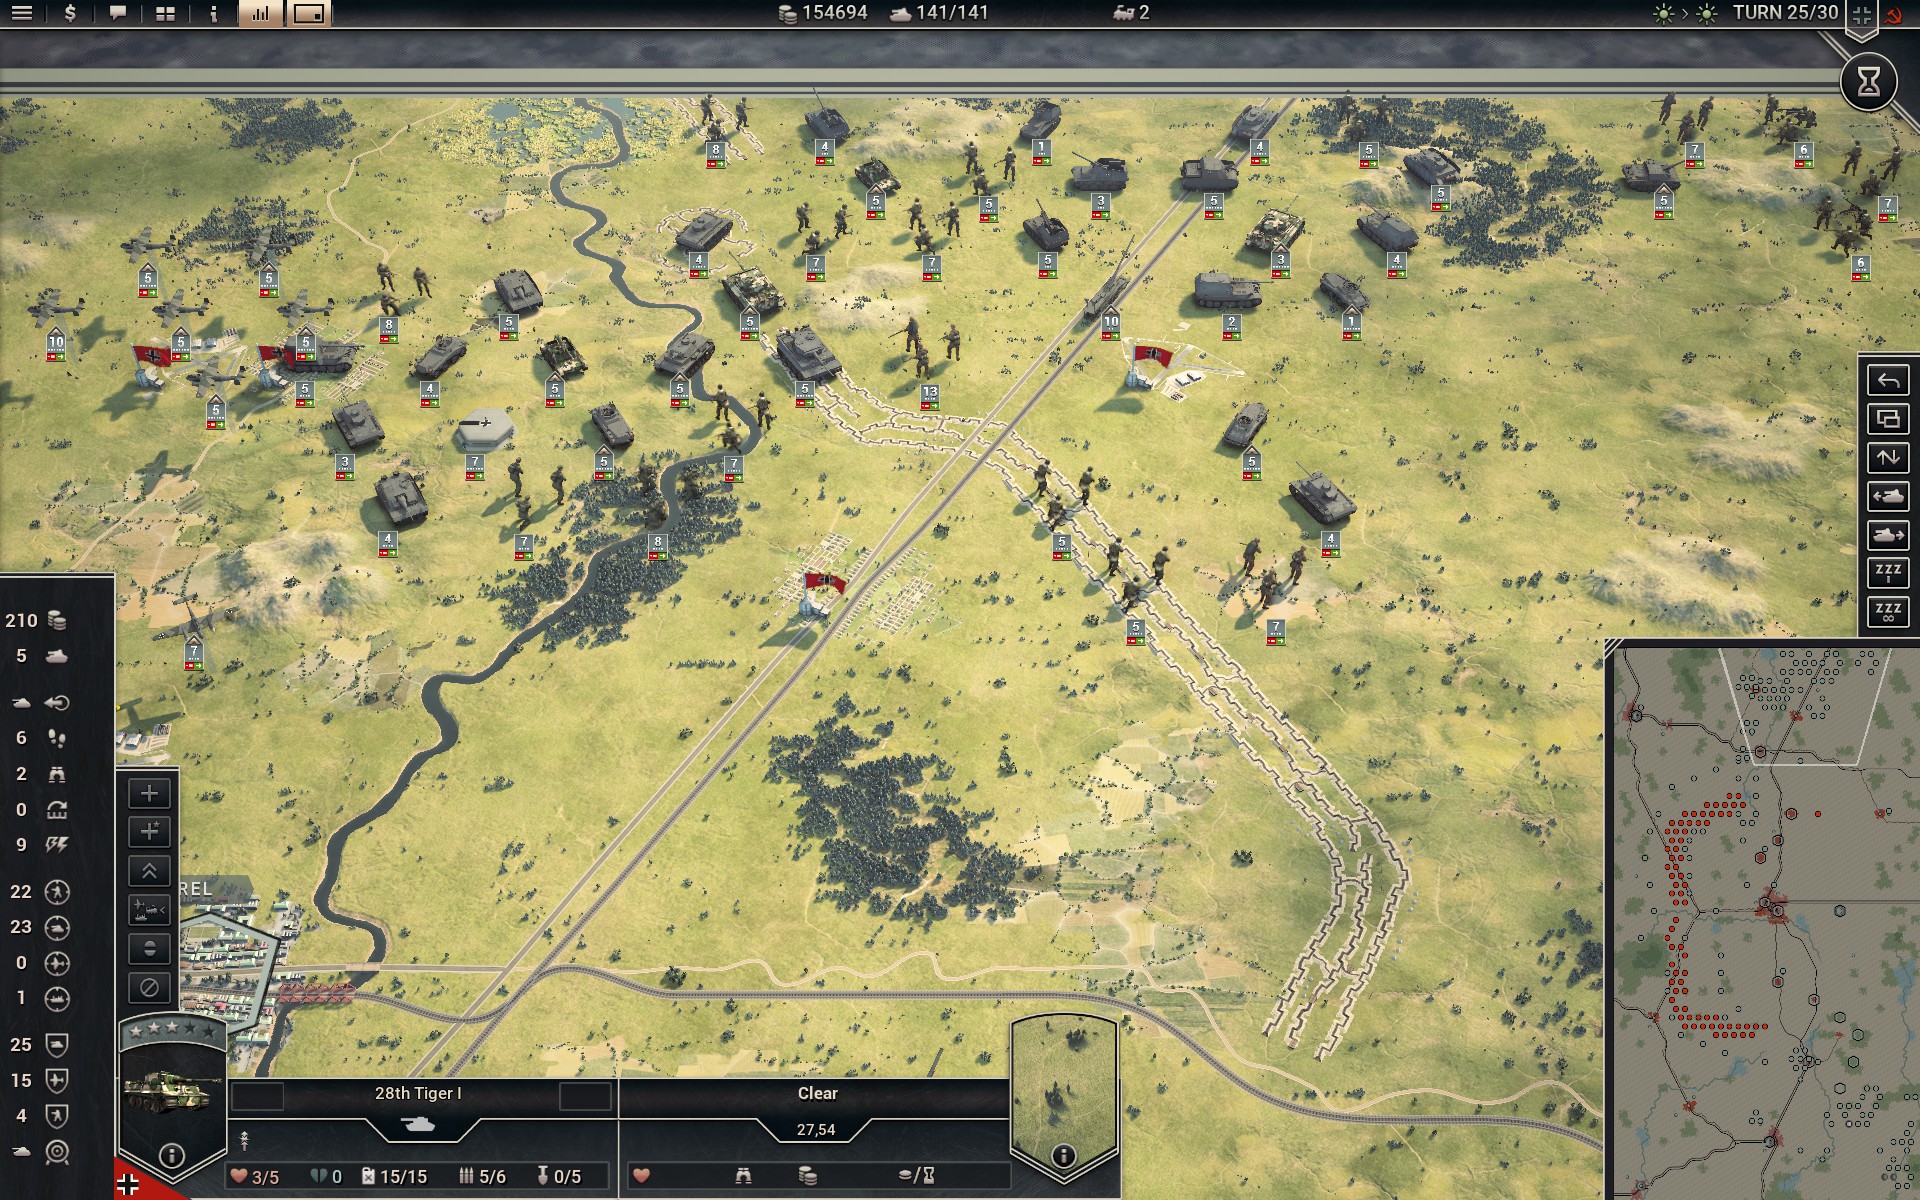
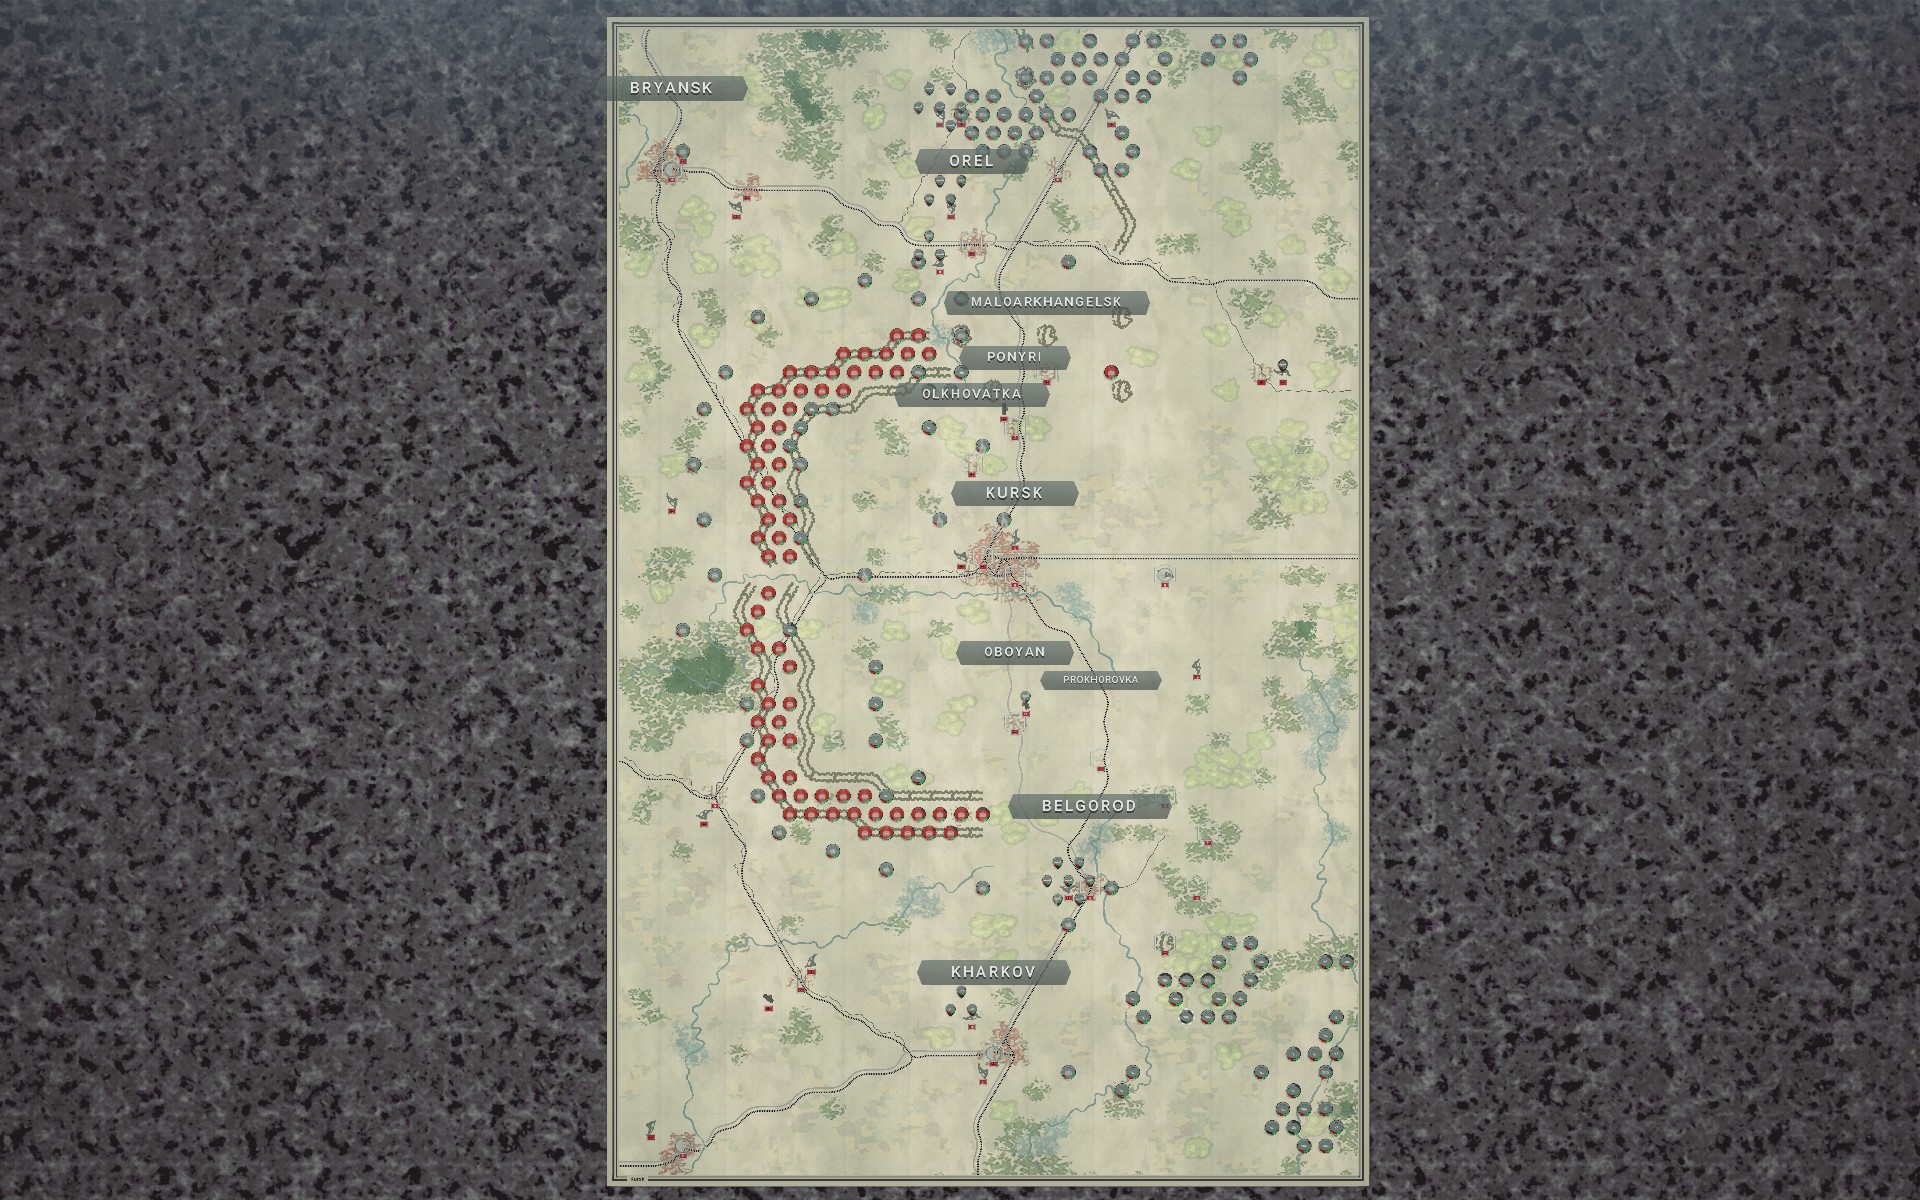
True to its reputation, the Battle of Kursk was epic in scope, and after relying on Soviet hardware for so long it felt good to finally have some quality of my own in the form of Tigers and Fw 190As. However, for all that the Red Army had intimidating numbers they were poorly coordinated, and while I made sure to use my scouts to track enemy movements I never really felt threatened by them. By the time the reserves entered battle I had largely cleared out the Kursk salient and was not in danger of being caught between two opposing forces; the AI really needs more dynamic triggers to present more of a challenge to players.
The auxiliary force is quite strong and could force its way south if you wanted to play this scenario more aggressively, so with some AT support of your own you could reenact the "true" Battle of Kursk as the largest clash of armour in history by challenging the Red Army directly at Prokhorovka. On the whole though I rather enjoyed the scenario. With hundreds of Soviet units I predictably made tens of thousands of prestige from the battle, but at this point prestige is little more than a nice benchmark to have, much like the high score in an arcade game.
Initial Prestige: 107002
Final Prestige: 154694
Core
- Infantry
- Pioniere w/ SdKfz 250/1 [NEW]
- Pioniere w/ SdKfz 250/1
- Tanks
- Tiger I [NEW]
- Tiger I [NEW]
- Panzer IIIN [NEW]
- Panzer IIIN
- Panzer IIIN
- Panzer IIIN
- Panzer IIIN
- Panzer IIIN
- Panzer IIIN
- Panzer IIIN
- Recon
- SdKfz 234/1 8Rad
- SdKfz 234/1 8Rad
- Artillery
- Schwerer Gustav
- 17 cm K 18 w/ SdKfz 7
- 17 cm K 18 w/ SdKfz 7
- 17 cm K 18 w/ SdKfz 7
- 15 cm sFH w/ SdKfz 7
- 15 cm sFH w/ SdKfz 7
- 15 cm sFH w/ SdKfz 7
- 15 cm sFH w/ SdKfz 7
- StuH 42 [NEW]
- StuH 42 [NEW]
- StuH 42 [NEW]
- StuH 42 [NEW]
- Anti-Aircraft
- 2 cm Flakvierling 38 w/ SdKfz 10 [NEW]
- 2 cm Flakvierling 38 w/ SdKfz 10 [NEW]
- SU-6
- SU-6
- Fighters
- Fw 190A [NEW]
- Fw 190A [NEW]
- Fw 190A [NEW]
- Bf 109F
- Bf 109F
- Tactical Bombers
- Bf 109 PR
- Bf 109 PR
- Bf 110G [NEW]
- Strategic Bombers
- Do 217E [NEW]
- Do 217E [NEW]
- Do 217E
- Do 217E
- Do 217E
- Do 217E
- Do 217E
- Do 217E
The Kursk salient is heavily fortified with extensive earthworks and minefields, and it is believed that elements of the Red Army present there number in the hundreds of thousands. The plan as conceived by the OKW is to cut off the salient from the east with a coordinated pincer attack through Maloarkhangelsk in the north and Prokhorovka in the south, which would allow the armoured spearhead of the Wehrmacht to bypass the fortifications. Unfortunately, it is clear that the Soviets are aware of these plans, and it would be foolish to think they have been idle while preparations were made for Operation Citadel. It is likely that the seemingly weak spots in the Kursk salient are in fact a trap, and therefore I have decided to modify the plan; while I intend to achieve the strategic objectives of Operation Citadel, I have no intention of playing into the Red Army's hands.
Infantry support will be limited to the veterans of the Bridgeburners and the Crimson Guard, who will provide an option for close assault should it prove necessary during the initial phase of the operation. Once the objectives east of Belgorod have been secured they will form a rearguard to protect the hills and woodlands while the Panzers move north. Two elite battalions have been outfitted with the Panzer VI Tiger, a powerful heavy tank that finally provides a platform capable of challenging the Soviet armour directly. These Panzers will provide the necessary firepower to penetrate the Soviet lines while the remaining Panzer IIINs provide the numbers and resilience to hold the Red Army in check.
The StuG IIIBs have been replaced with StuH 42s, as these workhorses have begun to show their age; assault guns have proved a valuable asset, but they need to be able to function on the frontlines, and the armour of the StuG IIIB is simply not up to the task at this point. They have been in dire need of an upgrade for some time now, but Retrograde has kept me from replacing them. Two Flakvierlings will provide additional AA defence, as the scale of the battle makes it difficult to gauge what kind of presence the Soviet air force has; now that the bug that affected them has been fixed they are great value at only a single core slot each, and they will hopefully allow the Luftwaffe to focus on offensive operations. The latter has been strengthened by the addition of three squadrons of Fw 190A fighters, which provide a welcome upgrade to the Bf 109F. Under the sweltering sun, the heavy overcast skies of the Russian winter have faded to a distant memory, and two additional Do 217Es and a Bf 110G have been requisitioned to make the most of the clear skies.
Despite the daunting task ahead, I am in good spirits, as these are perfect conditions under which to make good use of my preferred combination of armour, artillery and strategic bombers. As expected of the Battle of Kursk, the scenario is massive in scale, and having finally found the time to play it, I have no doubt it'll prove entertaining.
The western part of the Kursk salient is completely sealed off with earthworks and minefields, but while these would make any attempt to penetrate the Soviet lines difficult, the Red Army is likewise unable to break out. The perimeter is already surrounded by a number of German Strongpoints and auxiliary infantry battalions, so I won't need to split my forces. Despite months of preparations the Red Army has foolishly centralised supplies to a single depot due east of the city of Kursk; while this simplifies their logistics, it also leaves them vulnerable to a flanking maneuver, and it is this supply depot that is the objective of the first phase of my plan.
Intelligence suggests that the Red Army has massed armour near Prokhorovka, and Deep Recon reveals that this is indeed the case. No doubt these forces are meant to ambush my Panzers as they breach the first line of the Soviet defences, but the Red Army has overplayed its hand by weakening the flanks of the Kursk salient. They shall have their armoured battle at Prokhorovka, but on my terms. My forces will cross the Donets to secure the objectives east of Belgorod and then push north through the hills east of Prokhorovka. Ideally the Panzers will be able to advance unchallenged, but if not then the Pioniere and artillery will provide valuable support in repelling the Soviet armour, as the close terrain will hamper their operations. They will then close in on and secure the supply depot and link up with the auxiliary force in the north, cutting off all supplies to the Kursk salient.
The auxiliary force has a trickier position, as they have deployed too close to the Soviet lines to safely disengage due to the low speed of the Elefants. The infantry and a few Panzers will be deployed along the perimeter of the Soviet fortifications to the north to guard against the possibility of a counterattack, while the bulk of the forces will slowly advance east. Their orders are to restrict any contact with Soviet forces to skirmishing in as much as this is possible, as I do not want the Red Army to commit its reserves at this stage of the battle. They will then head south to link up with my corps at the supply depot. The Luftwaffe will conduct aggressive operations targetting Soviet fighters and bombers to clear the way for the Do 217Es during the next phase of the operation.
Once the Kursk salient has been encircled the second phase of the operation will commence. My corps will advance on Prokhorovka and Oboyan to defeat the Soviet armour massing there. If all goes well these forces should offer little resistance, allowing my Panzers to quickly sweep through them. The StuH 42s will provide the fire support necessary to break down the heavy Soviet fortifications to the west and allow me to capture all forces south of Kursk. The auxiliary force will advance northwest towards the rear of the Soviet forces at Maloarkhangelsk and capture these. The heavy support will then be rerouted north to strengthen the defences there while the lighter vehicles push west to clear the salient of any remaining Soviet forces outside of Kursk itself. I suspect the Red Army would react swiftly to the fall of the city, and so I intend to leave it surrounded initially.
Finally, for the third phase of Operation Citadel my forces will return to the objectives east of Belgorod and take up positions west of the Donets to repel any Soviet forces attempting to break into the Kursk salient. With complete air supremacy and the elite Bridgeburners and Crimson Guard to hold the hills, this should not prove difficult. Timing is critical, however -- should my forces be out of position the Red Army could potentially threaten Belgorod and Kharkov, leading to a costly and protracted battle. The auxiliaries will return north to Orel, with a smaller battlegroup heading east to flank the Soviet fortifications. They will repel any attempt to break through my lines and then flank and destroy the remaining Soviet forces. A bold and ambitious plan, Operation Citadel will see all Soviet forces in the Kursk salient and the surrounding areas captured should it prove successful, but war is rarely that simple.
Deep Recon confirms intelligence reports of Soviet armour massing at Prokhorovka, while the objectives east of Belgorod appear to be lightly defended by a few infantry battalions and AT guns. The bulk of my forces will cross the Donets and capture the objectives before heading north over the hills east of Prokhorovka, while Gustav and a token force remain at Belgorod to protect the flank.
The bridge engineers in the north suggest that the Red Army is planning to cross the Oka at some point, so I will leave the infantry and a few Panzers behind to fortify the region around Orel; by using the terrain to their advantage they should be able to buy enough time for the auxiliary force to reposition should it prove necessary. The rest of the battlegroup will make their way east through the gap between the Kursk salient and the northern earthworks, and then turn south towards the town of Livny.
The supply depot due east of Kursk is the main objective of the first phase of Operation Citadel.
Aerial reconnaissance reveals that the seemingly weak spot in the Kursk salient is indeed a trap, with heavy concentrations of Soviet armour massing around Prokhorovka.
The Red Army is massing infantry and light armour to the east. As these forces could prove difficult to deal with should they reach the woodlands around the objectives, I decide to delay the advance north and instead eliminate this threat.
In the north the Soviet forces are more evenly distributed, forming multiple lines of defence. This works to my advantage as the auxiliaries won't need to engage them all.
Strategic bombers are the last units to be numbered, so by looking at them you can get an idea of what kind of numbers you are facing. While a significant part of these will be minefields, this is by far the largest force I have faced to date. Even with a powerful auxiliary force at my disposal, I am heavily outnumbered, and a combination of guile and defeat in detail will be necessary to prevail; it'd be foolish to engage the Red Army directly.
Supported by the IIINs, the StuH 42s cross the Donets to suppress the AT guns while the Tigers drive off the Soviet Guard.
The auxiliaries begin to make their way east, with the Nashorns and Elefants protecting the Panzers.
There are two 15-strength SU-152s near the supply depot. These units are rare and very powerful -- more on that here -- so I definitely want to capture them.
The Soviet air force attempts to stall my advance, but between the AA guns and the Fw 190As damage is minimal.
The Luftwaffe retaliates, shredding the Soviet fighters.
There is yet another large concentration of Soviet armour in the southeast. I suspect they will be ordered to advance once my forces capture Prokhorovka or Kursk, but I will keep an eye on them to ensure I am not caught unawares.
The StuH 42s and IIINs surround the objectives.
The auxiliaries come under heavy fire from SU-122s as they advance east, but damage is fortunately limited.
The Bridgeburners see off two battalions of Soviet infantry.
A recon captures the airfield near Livny, forcing the remaining Soviet aircraft in the north to rebase.
My forces consolidate their positions around the objectives.
The Luftwaffe hunts down the last Soviet bomber in the south.
The Bridgeburners receive reinforcements to bring them back up to full operational capacity.
The Crimson Guard storm the last objective; Soviet Regulars are no match for the elite mechanized Pioniere.
The Tigers strike the centre of the Soviet formation while the IIINs advance along the flanks.
The fortified earthworks to the west are defended by large numbers of Soviet infantry, supported by artillery and AT guns.
Given the scale of the scenario I've included this view of the battlefield to show the current positions of mine and the Soviet forces, and to give a better idea of the numbers and distances involved.
In the southwest the auxiliary infantry have begun to spread out to cover the entire length of the perimeter.
With the artillery in place my Panzers advance on the Soviet positions by the Oskol.
Major Sankovsky and his SU-152 are captured.
The auxiliaries have reached Livny while keeping contact with the Red Army to a minimum. At this rate they'll likely reach the supply depot before my own forces do.
Tigers cross the Oskol to surround the Red Army.
Auxiliary Panzers defeat a Soviet reconnaissance force near Orel as the infantry take up positions in close terrain, with a battalion of Gebirgsjäger anchoring the defences on the hill north of the town.
There is a large Soviet armoured reserve in the north too, as well as a number of aircraft that have yet to see action.
The Soviet forces by the Oskol are captured and my forces prepare to move north as per the original plan.
The last Soviet forces near Livny are captured.
More Soviet infantry press in from the south, but they are unable to damage the Panzers.
The Luftwaffe hunts down the last Soviet aircraft within the Kursk salient. The Do 217Es should be able to operate freely now.
The armoured column at Prokhorovka begin to mobilize in response to my incursion, but their movements are poorly coordinated.
The Luftwaffe seeks to preemptively destroy the Soviet air reserve.
Here's one for those of you who remember the tactical puzzles. A Do 217E and a sacrificial pawn will drain the SU-152 of its ammunition...
... allowing the auxiliaries to safely capture the Churchill Mk.IV...
... and secure the supply depot while surrounding the SU-152.
Though the advance of my forces has stalled due to the unexpected presence of Soviet forces by the Oskol, the auxiliaries have secured the supply depot and linked up with them.
With the grand encirclement established, the Kursk salient has been completely cut off from the east. It should not take long for resistance to collapse.
The cordon is maintained by a series of Strongpoints and detached infantry battalions to the west of the Soviet minefields.
The armoured forces to the southeast have yet to make a move. The AI should probably have a more dynamic set of instructions, because they will only pose a threat if they attack while my forces are occupied in the Kursk salient.
The Luftwaffe targets the Normandie-Niemen, the French volunteer fighter pilots.
The StuH 42s and artillery provide additional suppression as my forces begin to advance towards Prokhorovka. This probably isn't the armoured clash the Red Army had in mind, but it suits me just fine.
The remaining SU-152 is captured while half of the Do 217Es rebase to the central supply hex.
With the Soviet air force defeated, the SU-6s help capture Soviet armour instead.
The Luftwaffe finally hunts down the last remaining Soviet aircraft in the northern pocket.
My forces secure Prokhorovka and advance towards Oboyan. If the Red Army intends to make a move, it needs to be now, as time is now on my side.
At Orel the auxiliary infantry battalions are now fully entrenched.
The Red Army finally makes its move, with armour crossing the Oka.
More Soviet forces advance towards Orel, surrounding the Grenadiers are Mtsensk. Theirs will be a sad but necessary sacrifice while I bring up more armour from the south.
My forces begin to clear the Soviet forces along the southern perimeter of the Kursk salient.
With the bulk of the Soviet armour in the Kursk salient captured, I reroute some of the artillery and Panzers south to support the Bridgeburners and the Crimson Guard.
Despite their numbers, the Red Army is struggling to break through the line of auxiliaries.
The StuH 42s break down the earthworks of the Soviet units, making it easy to capture them.
The Red Army commits its last reserves, and worryingly they appear to be heading towards Kharkov. I decide to redeploy more Tigers to the west bank of the Donets.
My initial attempt to flank the northern Soviet forces fails as the auxiliaries encounter a larger Soviet force attempting the same manoeuvre, but reinforcements are en route.
As the Soviet forces begin to spread out, it's clear that mine are insufficient to contain them. They will have to adopt a defensive formation until reinforcements arrive.
In the north, the auxiliaries suffer heavy losses, but the Soviet advance has been checked.
An OT-34 Flamethrower tank routs and destroys the Wehr Infanterie I had positioned in the woods south of the Donets. I'm not convinced by the decision to park a T-34 in a forest hex next to two battalions of elite Pioniere, however; Sun Tzu reborn the AI is not.
The Tigers cross the Donets to encircle the bulk of the Soviet armour.
The Tigers come under heavy fire but hold their positions, allowing my forces to begin capturing Soviet armour.
Only a few scattered battalions remain of the once mighty host inside the Kursk salient.
In the north, the Red Army has largely been suppressed.
In the south, my forces have likewise stabilized the situation.
With the last of the Soviet forces captured, the Kursk salient is now secure.
With all remaining mobile Soviet forces suppressed, my forces begin to surround the AA guns to the rear.
Aided by a battalion of Tigers and Gustav, the auxiliaries have cleared the northern pocket.
The last of the Soviet forces are captured.
NB: I had to reload a save because the scenario ends the moment you destroy the last mobile Soviet forces, so if you want to capture the AA guns too you'll have to leave at least one unit alive.
True to its reputation, the Battle of Kursk was epic in scope, and after relying on Soviet hardware for so long it felt good to finally have some quality of my own in the form of Tigers and Fw 190As. However, for all that the Red Army had intimidating numbers they were poorly coordinated, and while I made sure to use my scouts to track enemy movements I never really felt threatened by them. By the time the reserves entered battle I had largely cleared out the Kursk salient and was not in danger of being caught between two opposing forces; the AI really needs more dynamic triggers to present more of a challenge to players.
The auxiliary force is quite strong and could force its way south if you wanted to play this scenario more aggressively, so with some AT support of your own you could reenact the "true" Battle of Kursk as the largest clash of armour in history by challenging the Red Army directly at Prokhorovka. On the whole though I rather enjoyed the scenario. With hundreds of Soviet units I predictably made tens of thousands of prestige from the battle, but at this point prestige is little more than a nice benchmark to have, much like the high score in an arcade game.
Last edited by SineMora on Wed Jun 17, 2020 12:18 am, edited 13 times in total.
Mildly pretentious Swede. Goes by Path on most platforms, including Steam.
http://www.slitherine.com/forum/viewtopic.php?f=596&t=98034 -- Generalissimus AAR (no Trophies / Heroes)
http://www.slitherine.com/forum/viewtopic.php?f=596&t=98034 -- Generalissimus AAR (no Trophies / Heroes)
-
SineMora
- Sergeant Major - SdKfz 234/2 8Rad
- Posts: 641
- Joined: Thu Apr 02, 2020 4:20 pm
- Location: Sweden
Re: A Certain Panzer General's Adventures -- Generalissimus (No Liberator / Trophies of War / Heroes)
Scenario XVIII -- Smolensk '43
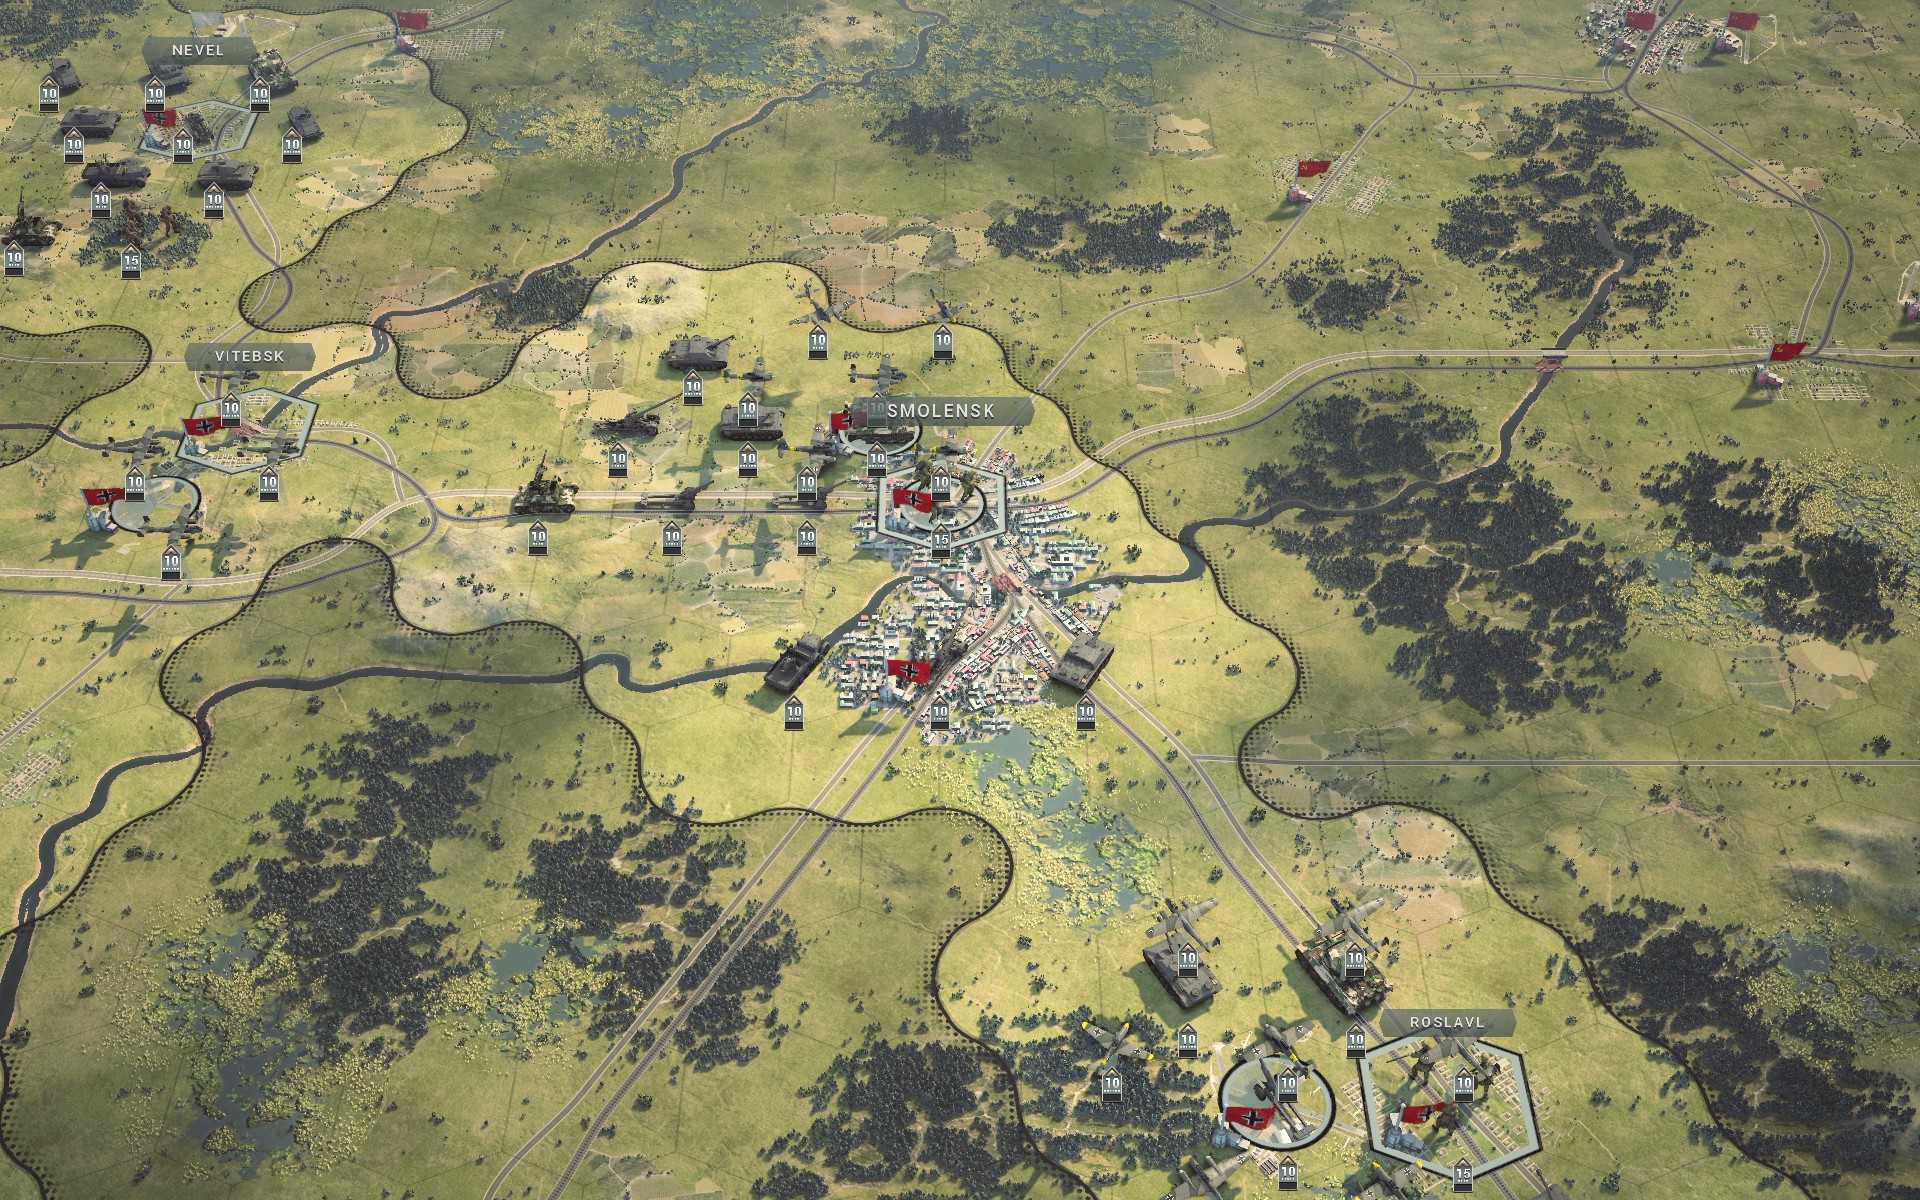
Initial Prestige: 152073
Final Prestige: 159681
Core
My defences will be split into three battlegroups centered around the city of Smolensk and the towns of Roslavl and Nevel respectively. As the Bridgeburners will be deployed at Smolensk and the Crimson Guard at Roslavl, an additional battalion of mechanized Pioniere have been requisitioned to strengthen the defences around Nevel in the north. These elite infantry battalions will form a second line of defence in the event the Panzers should prove unable to repel the initial Soviet onslaught, allowing these to fall back and regroup. With less ground to cover three Panzer IIINs have been rotated to the reserve in favour of an additional Tiger; one of these powerful battalions will be deployed to each battlegroup.
As the Luftwaffe won't be able to provide air support immediately to the northern battlegroup, they have been issued additional AA guns; hopefully an SU-6 and an SdKfz 7/1 should be enough to keep them safe. The rest of the AA guns have been deployed at Smolensk as Roslavl enjoys complete fighter cover. Two Me 410As will help the Luftwaffe gain control of the skies and support the defenders with bombing runs should it prove necessary. To make room for these changes, Gustav has been rotated to the reserve, along with one of the Bf 109 PRs.
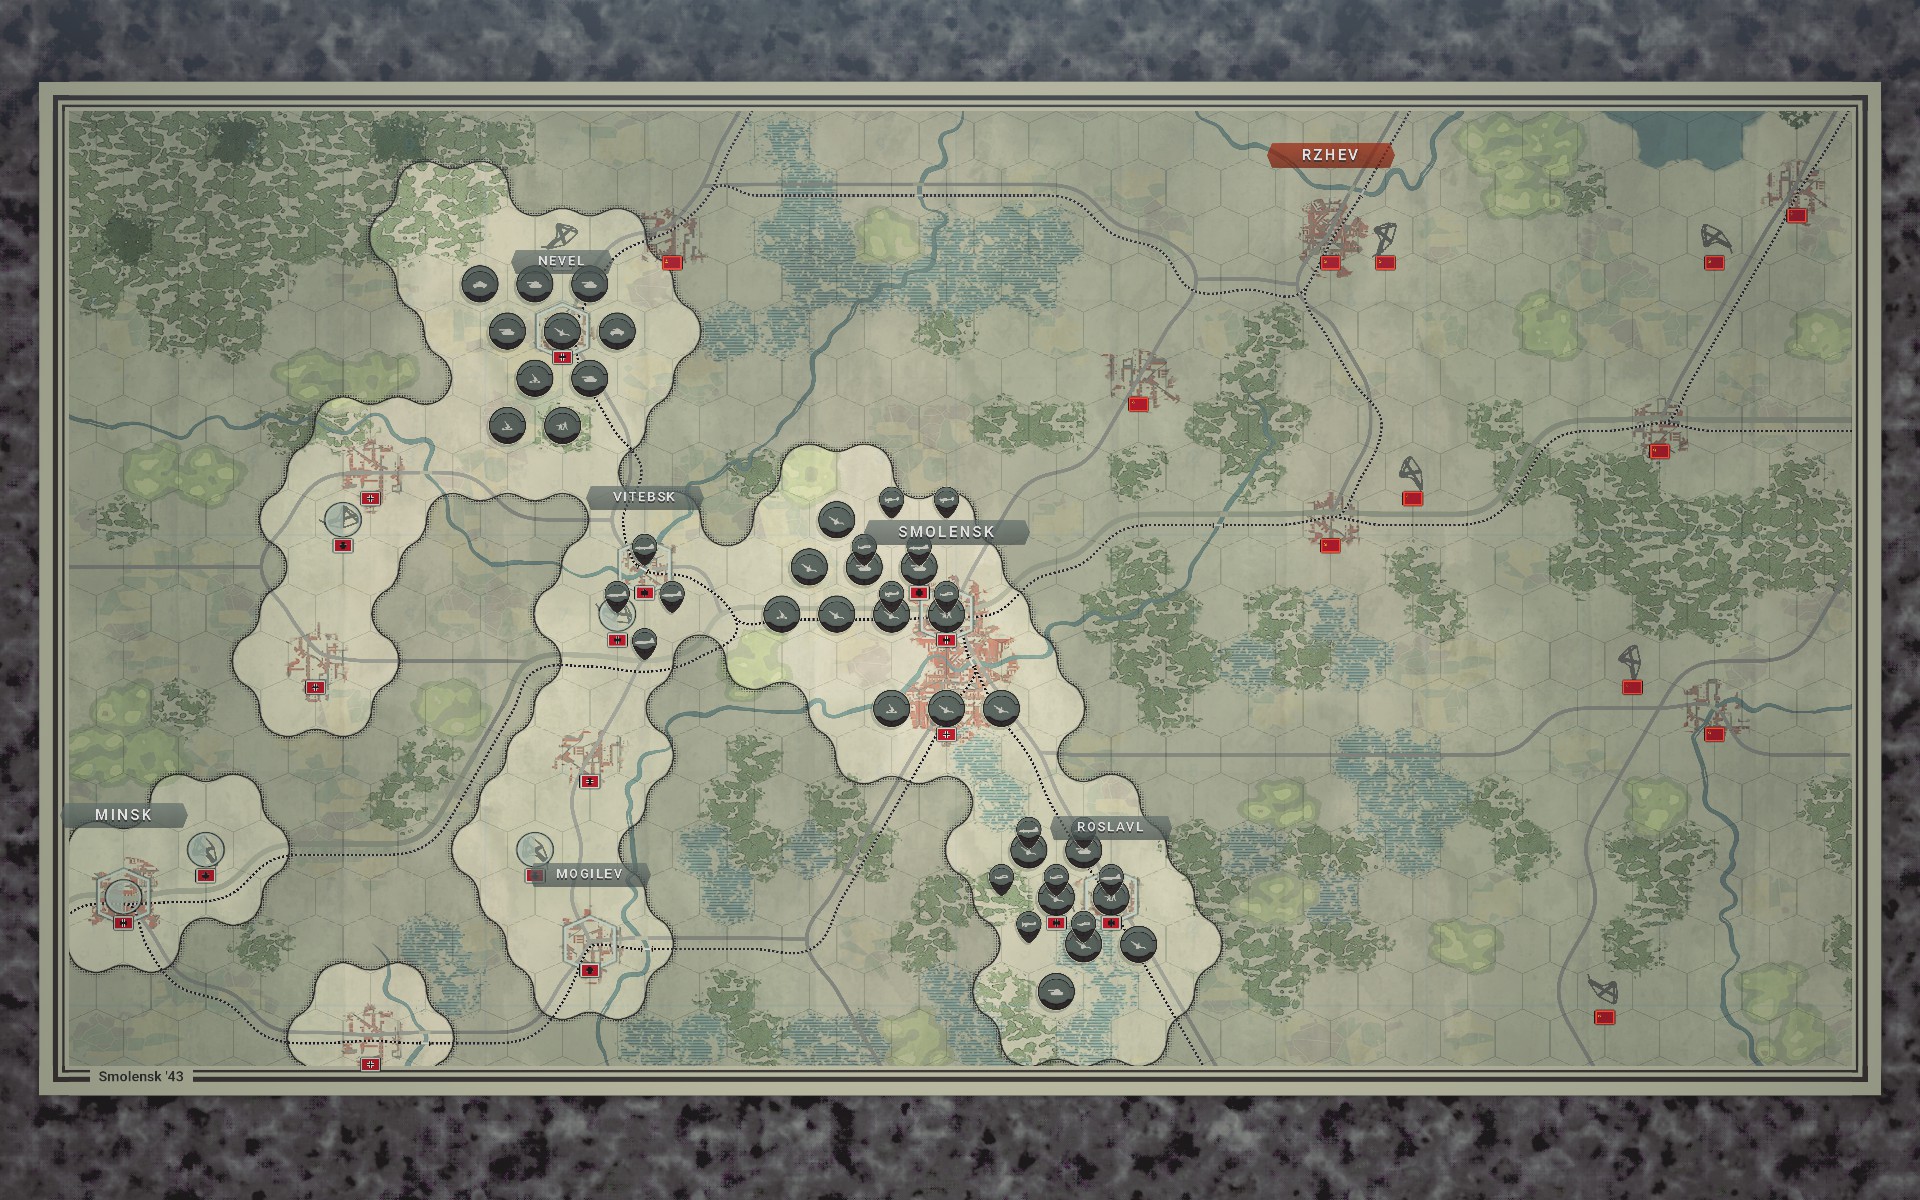
The narrow front and the difficult terrain will make it difficult for armour to operate to the north and south of Smolensk, so I expect the Red Army to focus its efforts on the city itself while infantry and lighter vehicles attempt to flank my positions. Panzers and StuH 42s have been deployed with artillery support to absorb brunt of what I expect to be an early Soviet blitz. Once my forces have repelled the Red Army I intend to advance east, but with only 7 turns at my disposal it will probably prove difficult to capture Rzhev; fortunately the scenario does not require me to actually gain any ground.
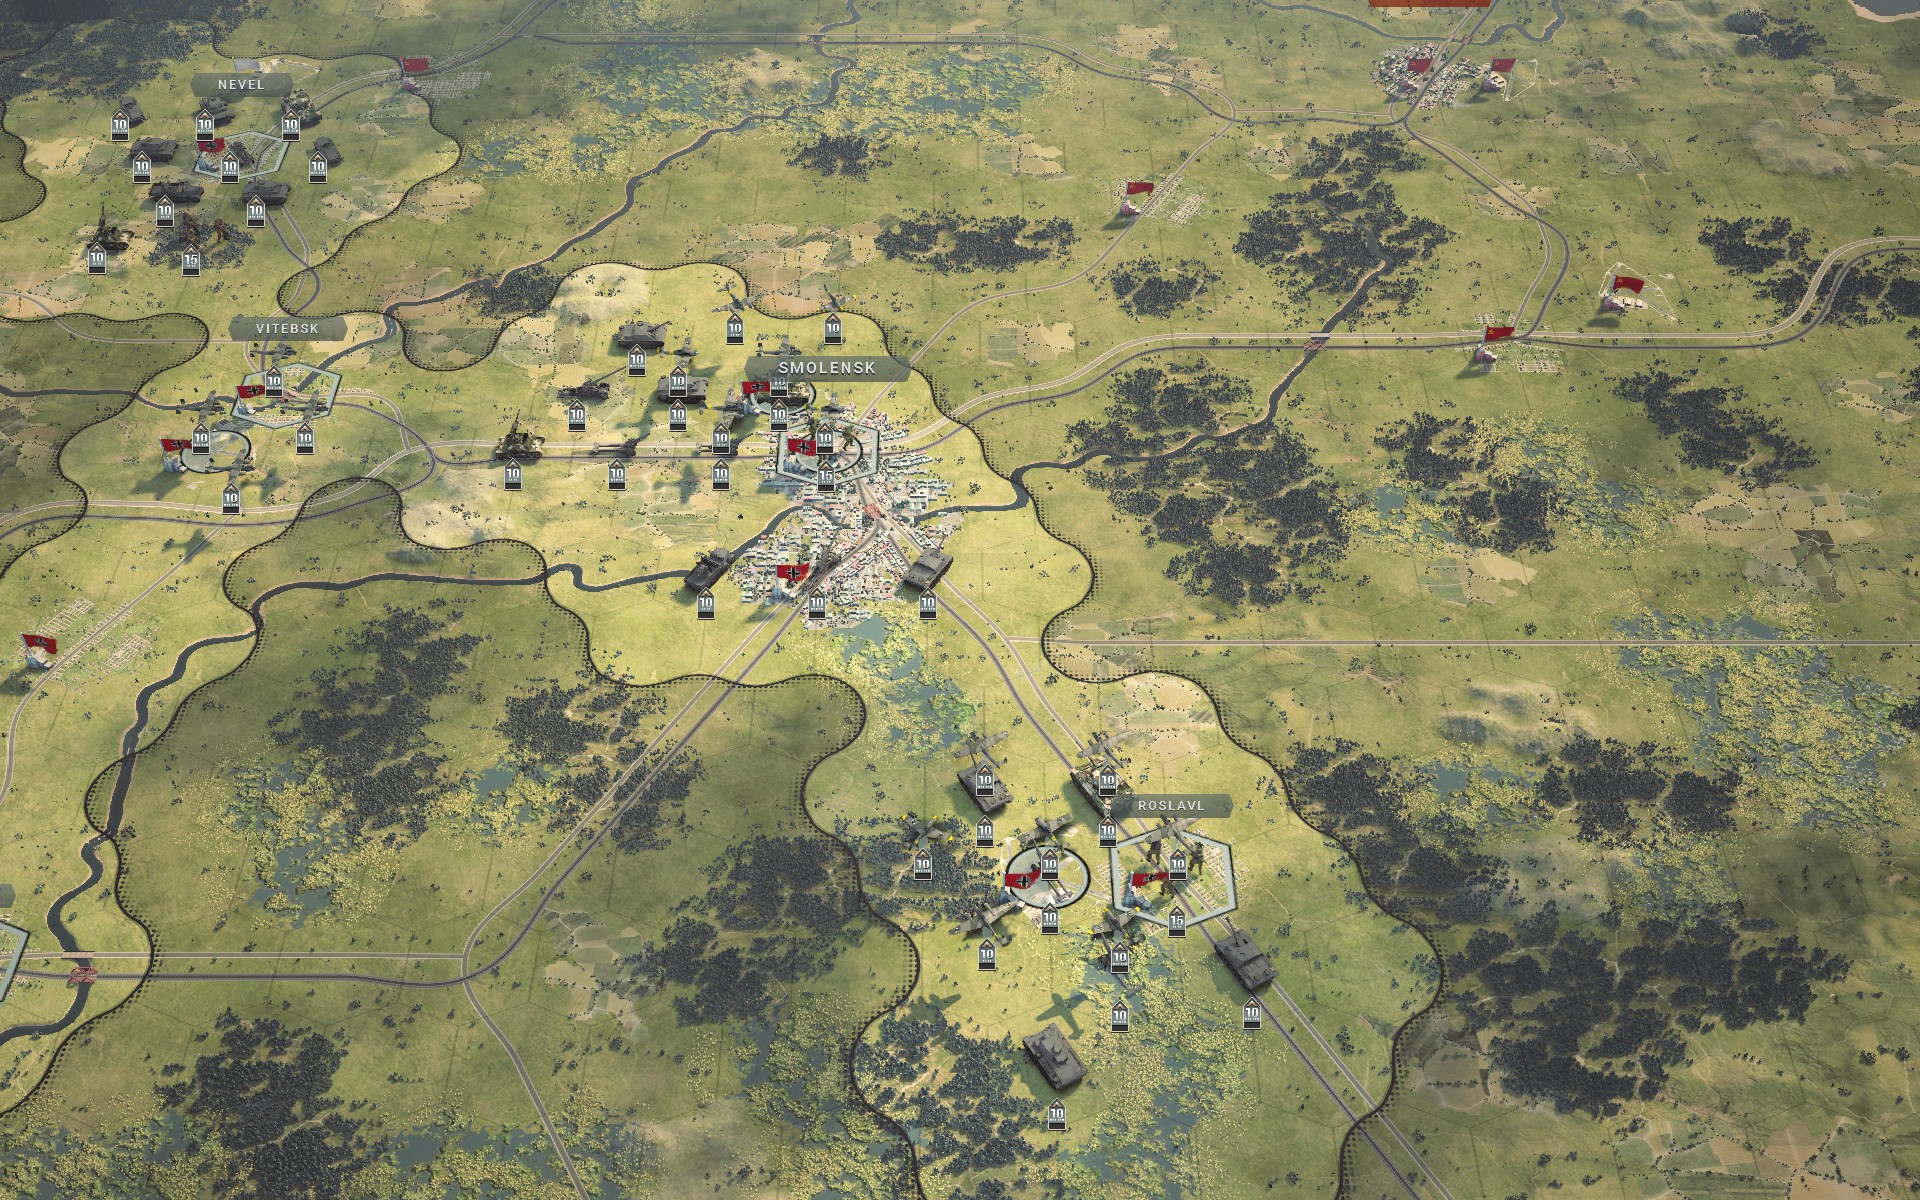
Marshes and woodlands dominate the landscape around Smolensk. This will hamper Soviet operations, but will also make it more difficult for my mostly mechanized forces to advance east. Half of the Do 217Es have been deployed at Vitebsk to the rear to free up enough space at the front for the fighters.
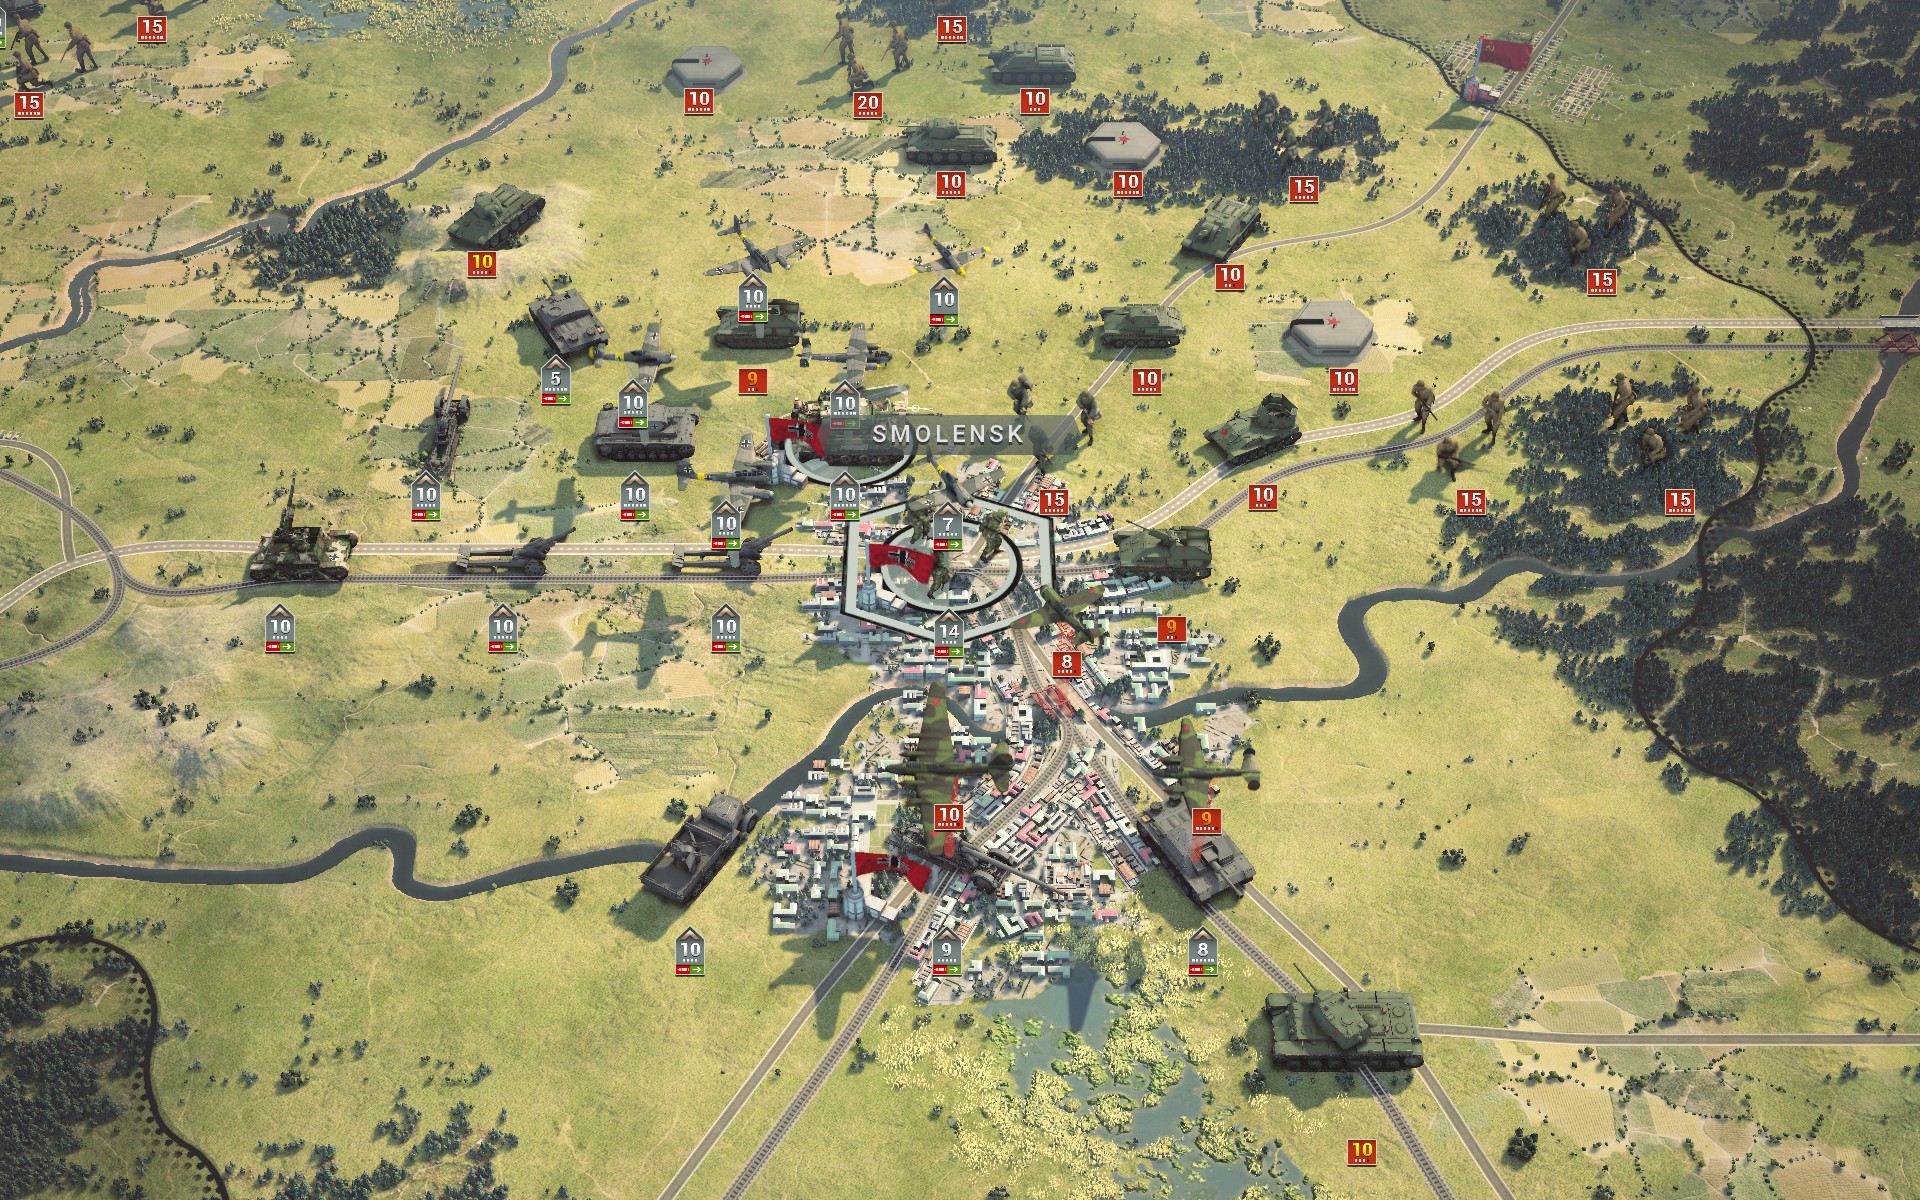
As expected, the Red Army is upon Smolensk before my forces can react, but while one StuH 42 suffers heavy damage, the Soviet Engineers hesitate to attack the Bridgeburners.
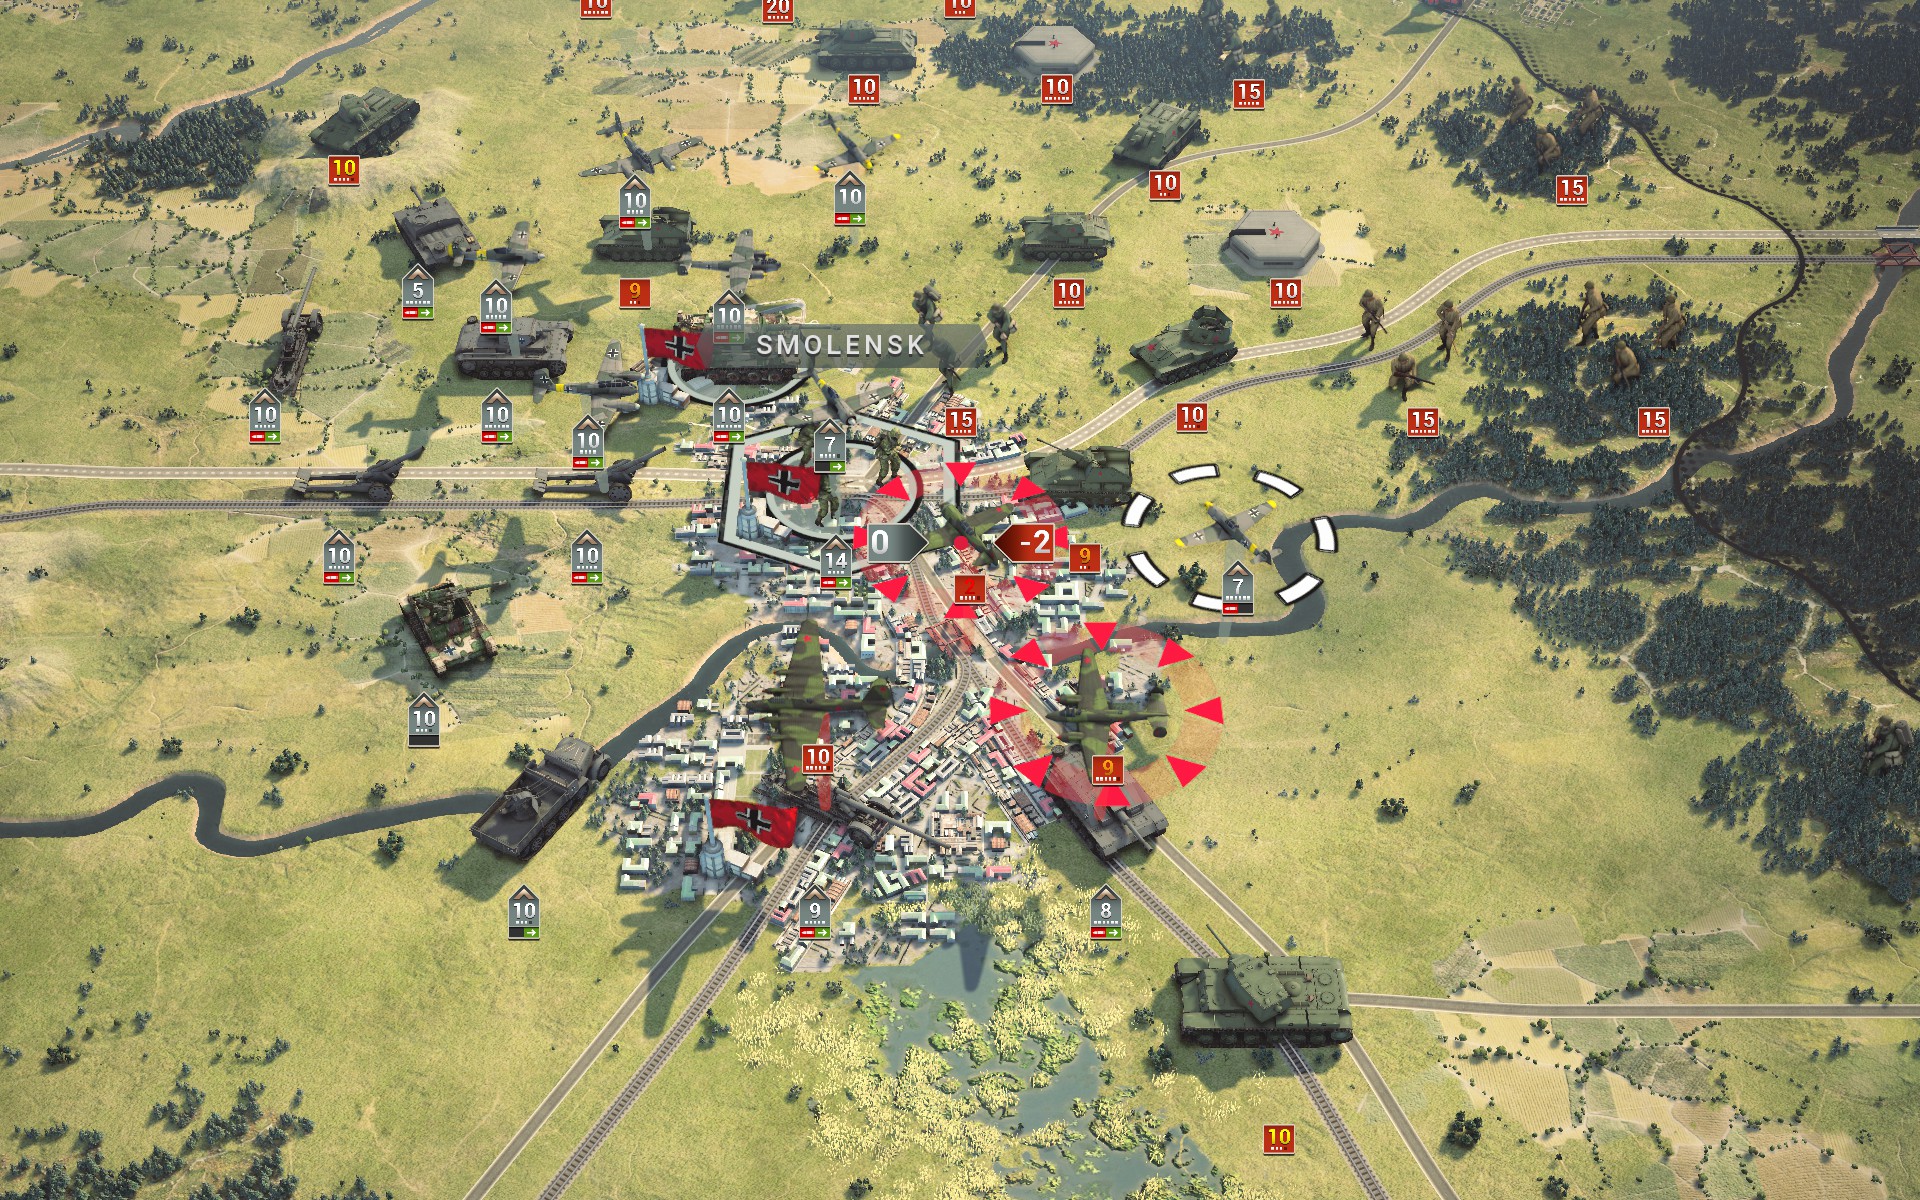
The Luftwaffe retaliates against the Soviet air force.
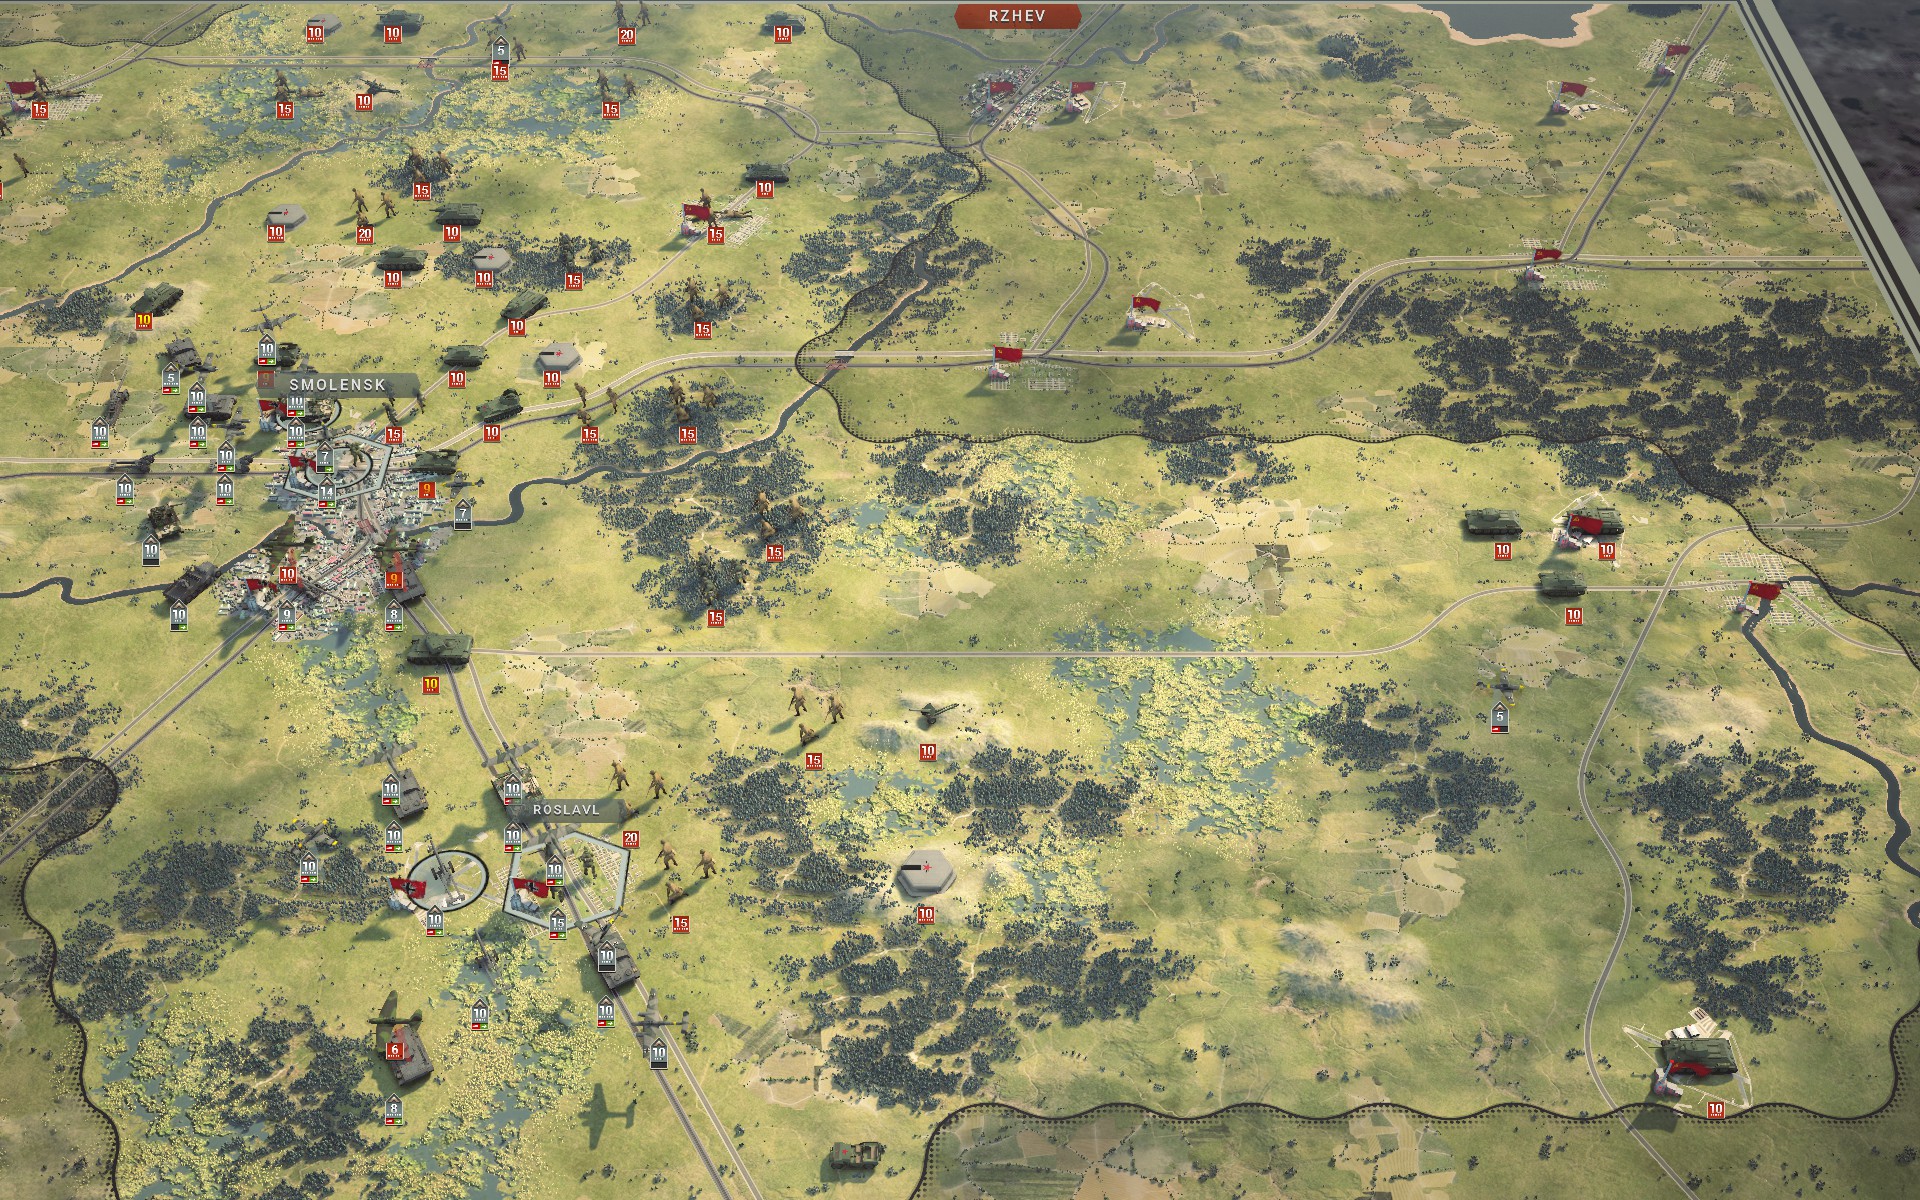
Aerial reconnaissance suggests it should be possible for the battlegroup at Roslavl to encircle the Soviet forces, but the series of Strongpoints and entrenched infantry east of Smolensk pose a problem I had not expected; I am beginning to regret leaving Gustav behind as it will prove difficult to break through the centre.
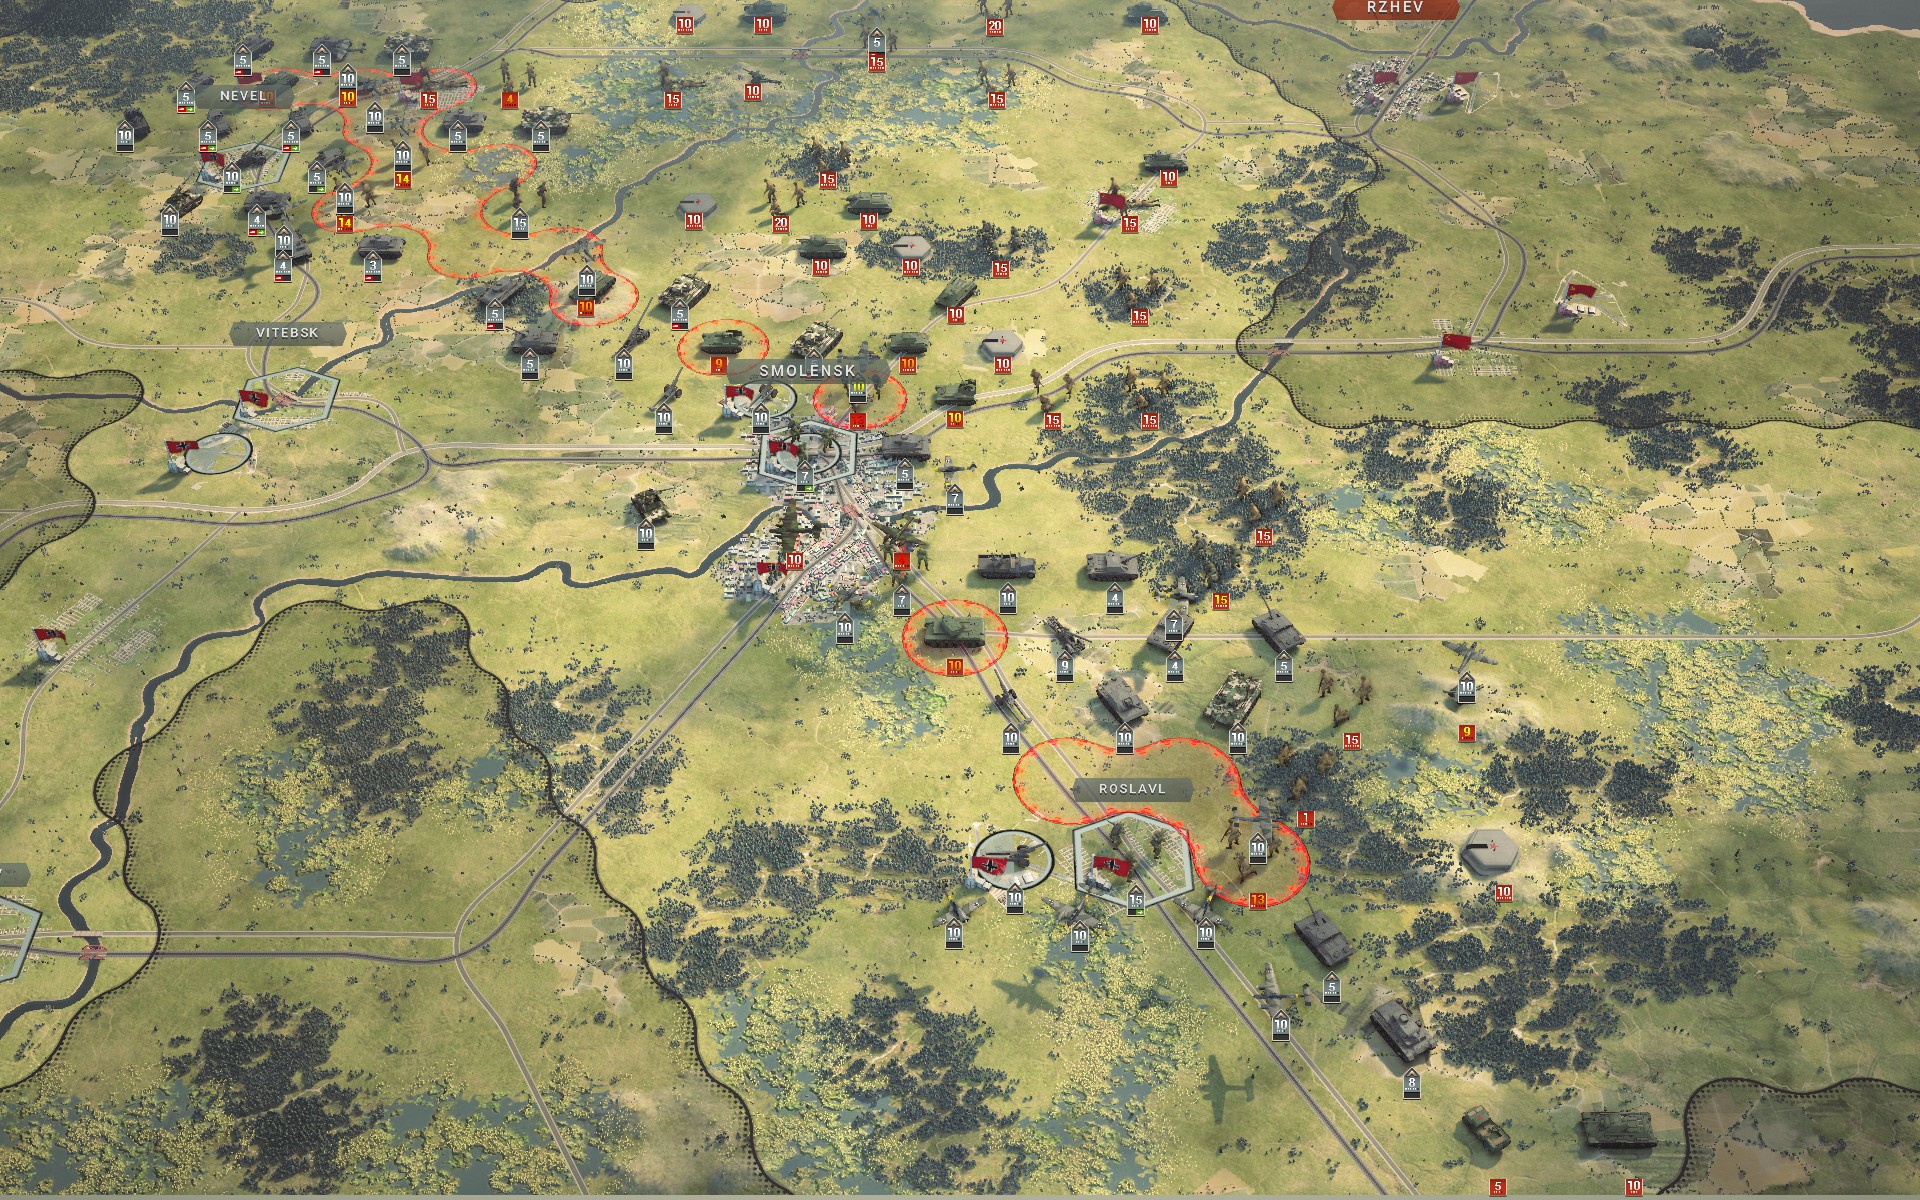
My forces advance on the flanks to cut off the Soviet vanguard.
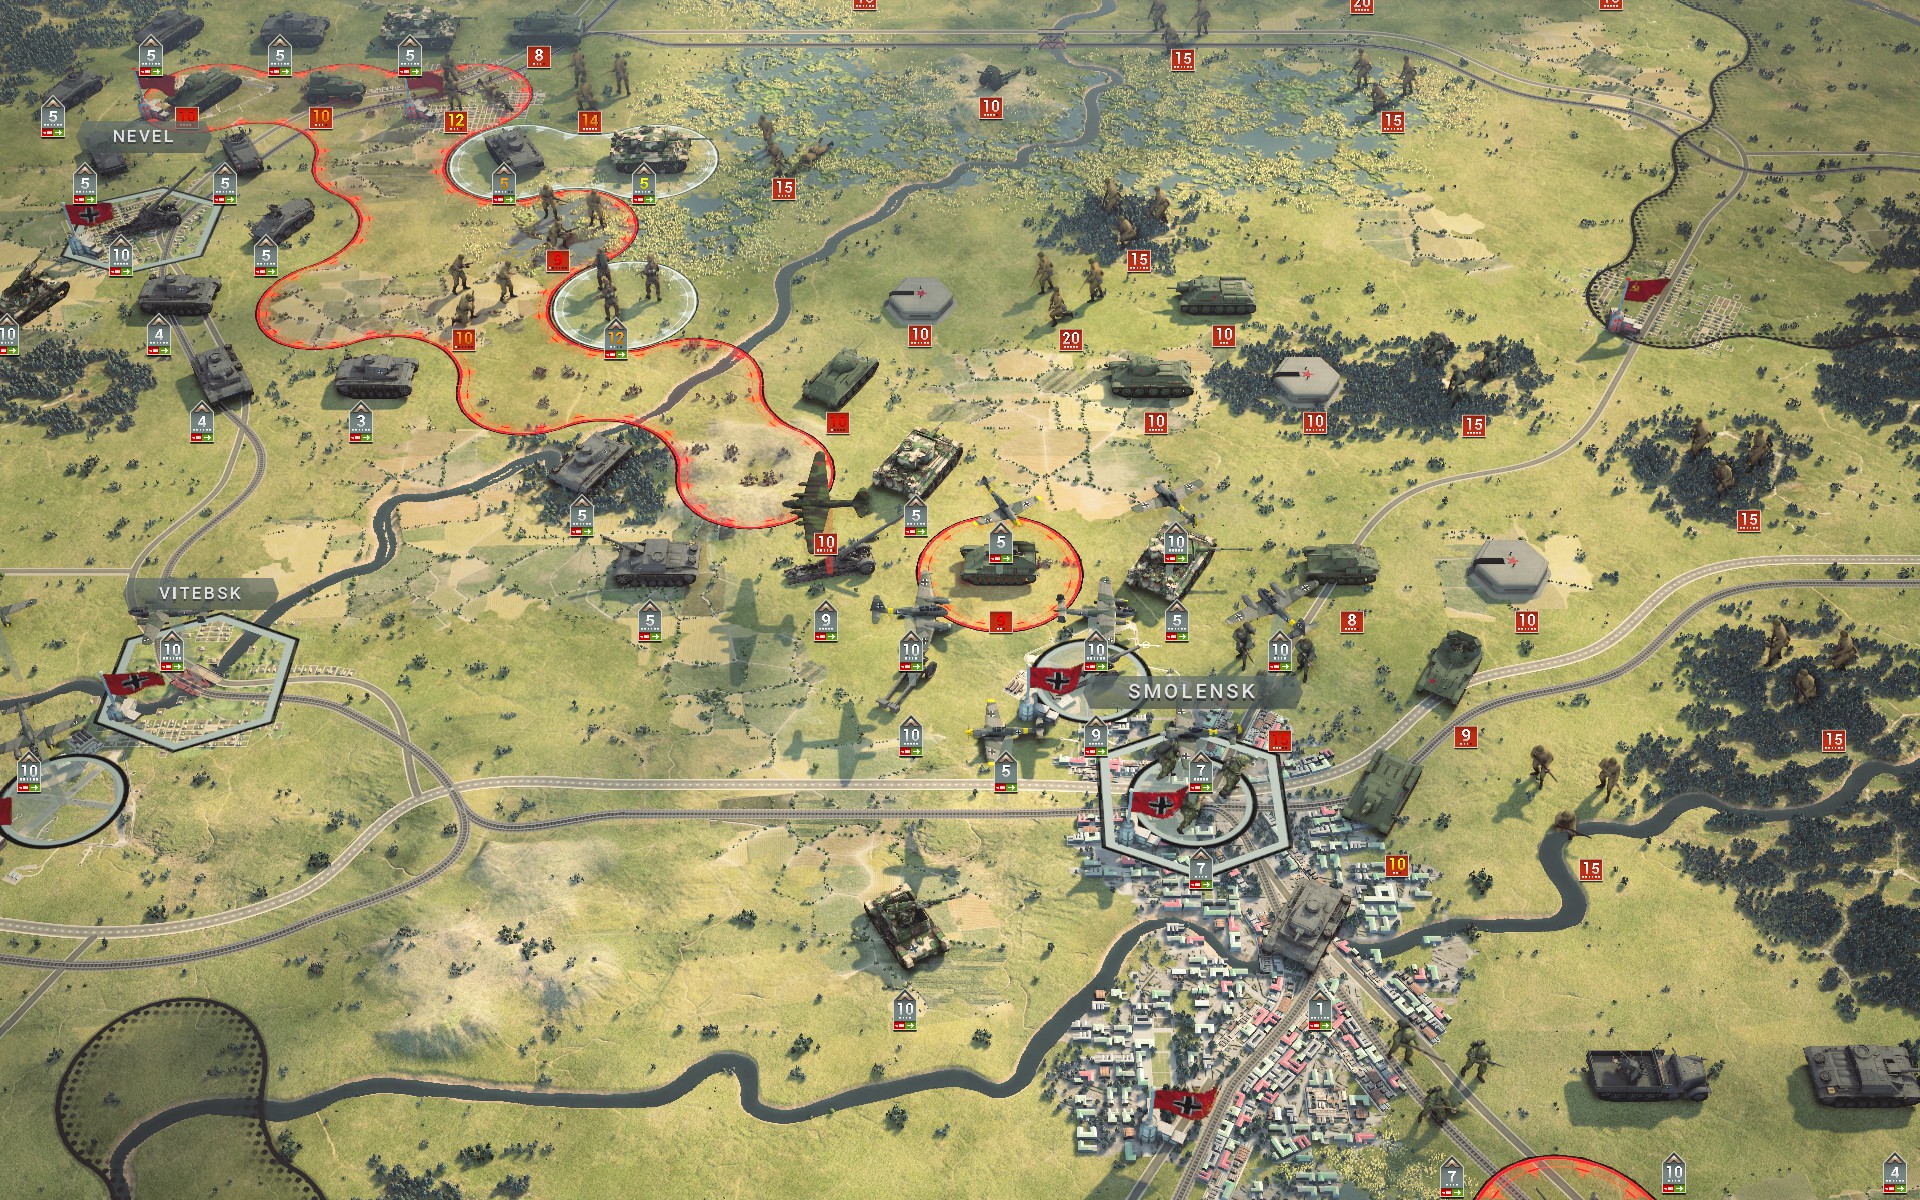
Soviet forces around Smolensk have largely been contained, but a detached IIIN suffers heavy damage due to the lack of fire support.

The Luftwaffe hunts down the last Soviet aircraft.
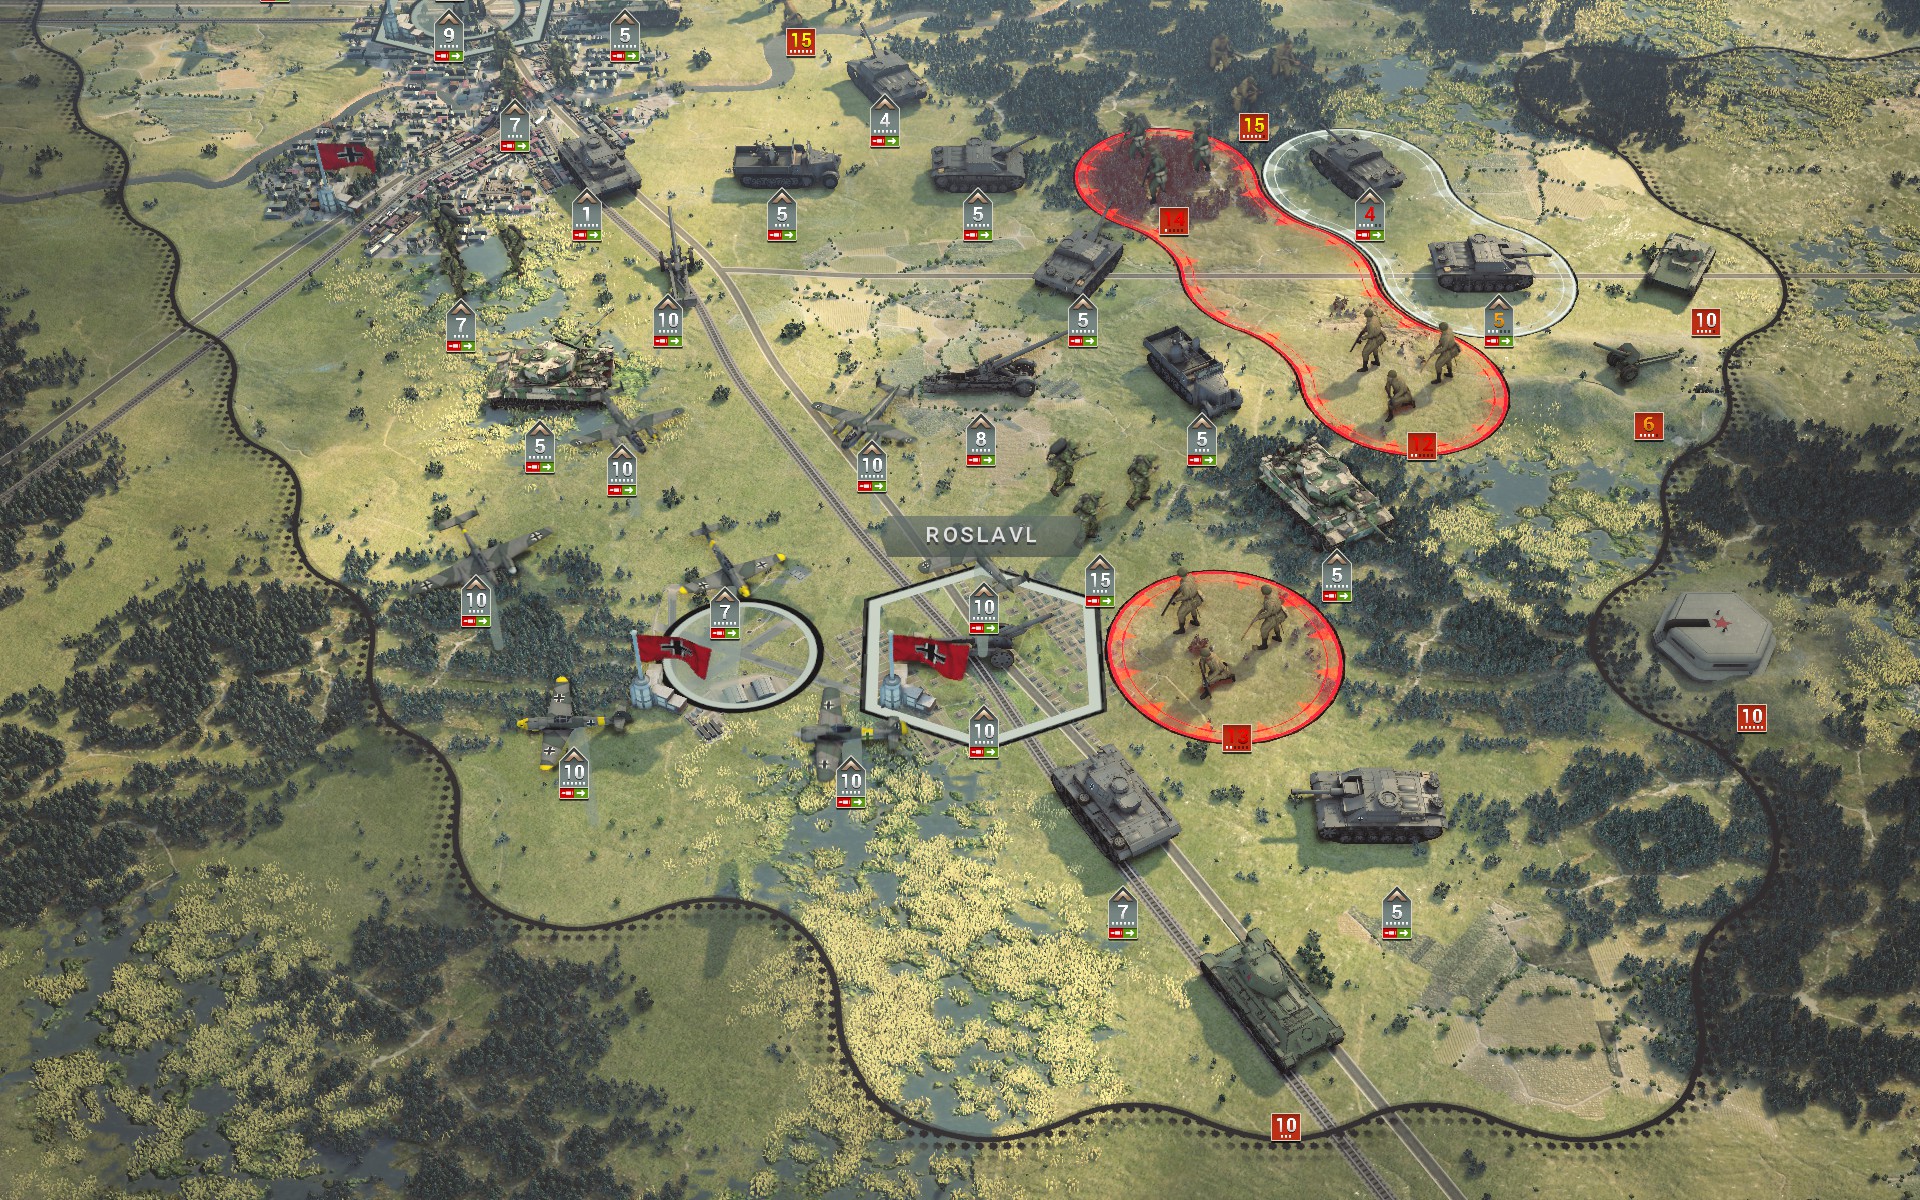
The southern battlegroup advances, making sure to suppress the Soviet Engineers and keeping the OT-34 to the south away from the Crimson Guard; the flamethrower tank poses little threat to the Panzers but could inflict heavy losses on the mechanized Pioniere.
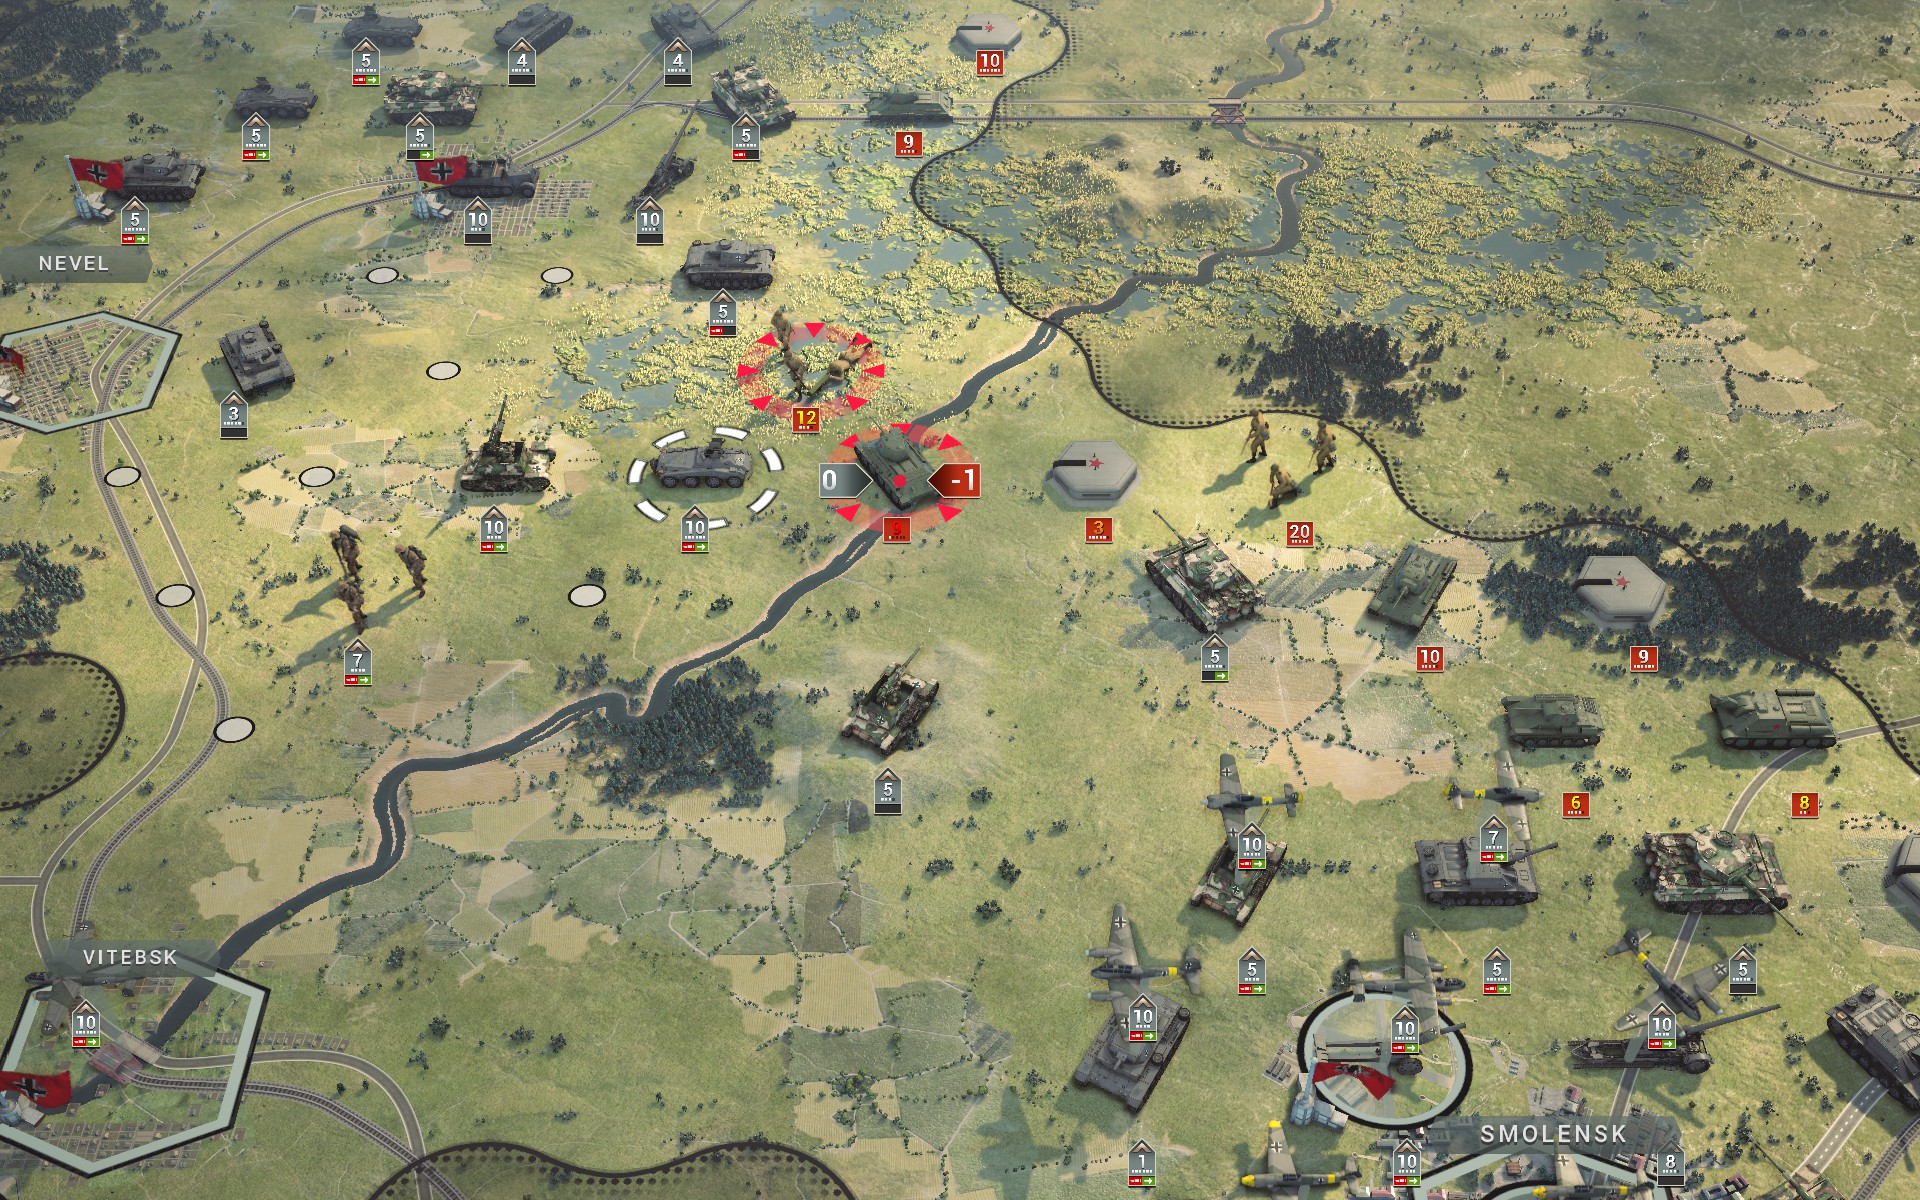
Even an SdKfz 234/1 can capture a T-34 in a vulnerable position; with a hard attack of 11 this wouldn't normally be possible.
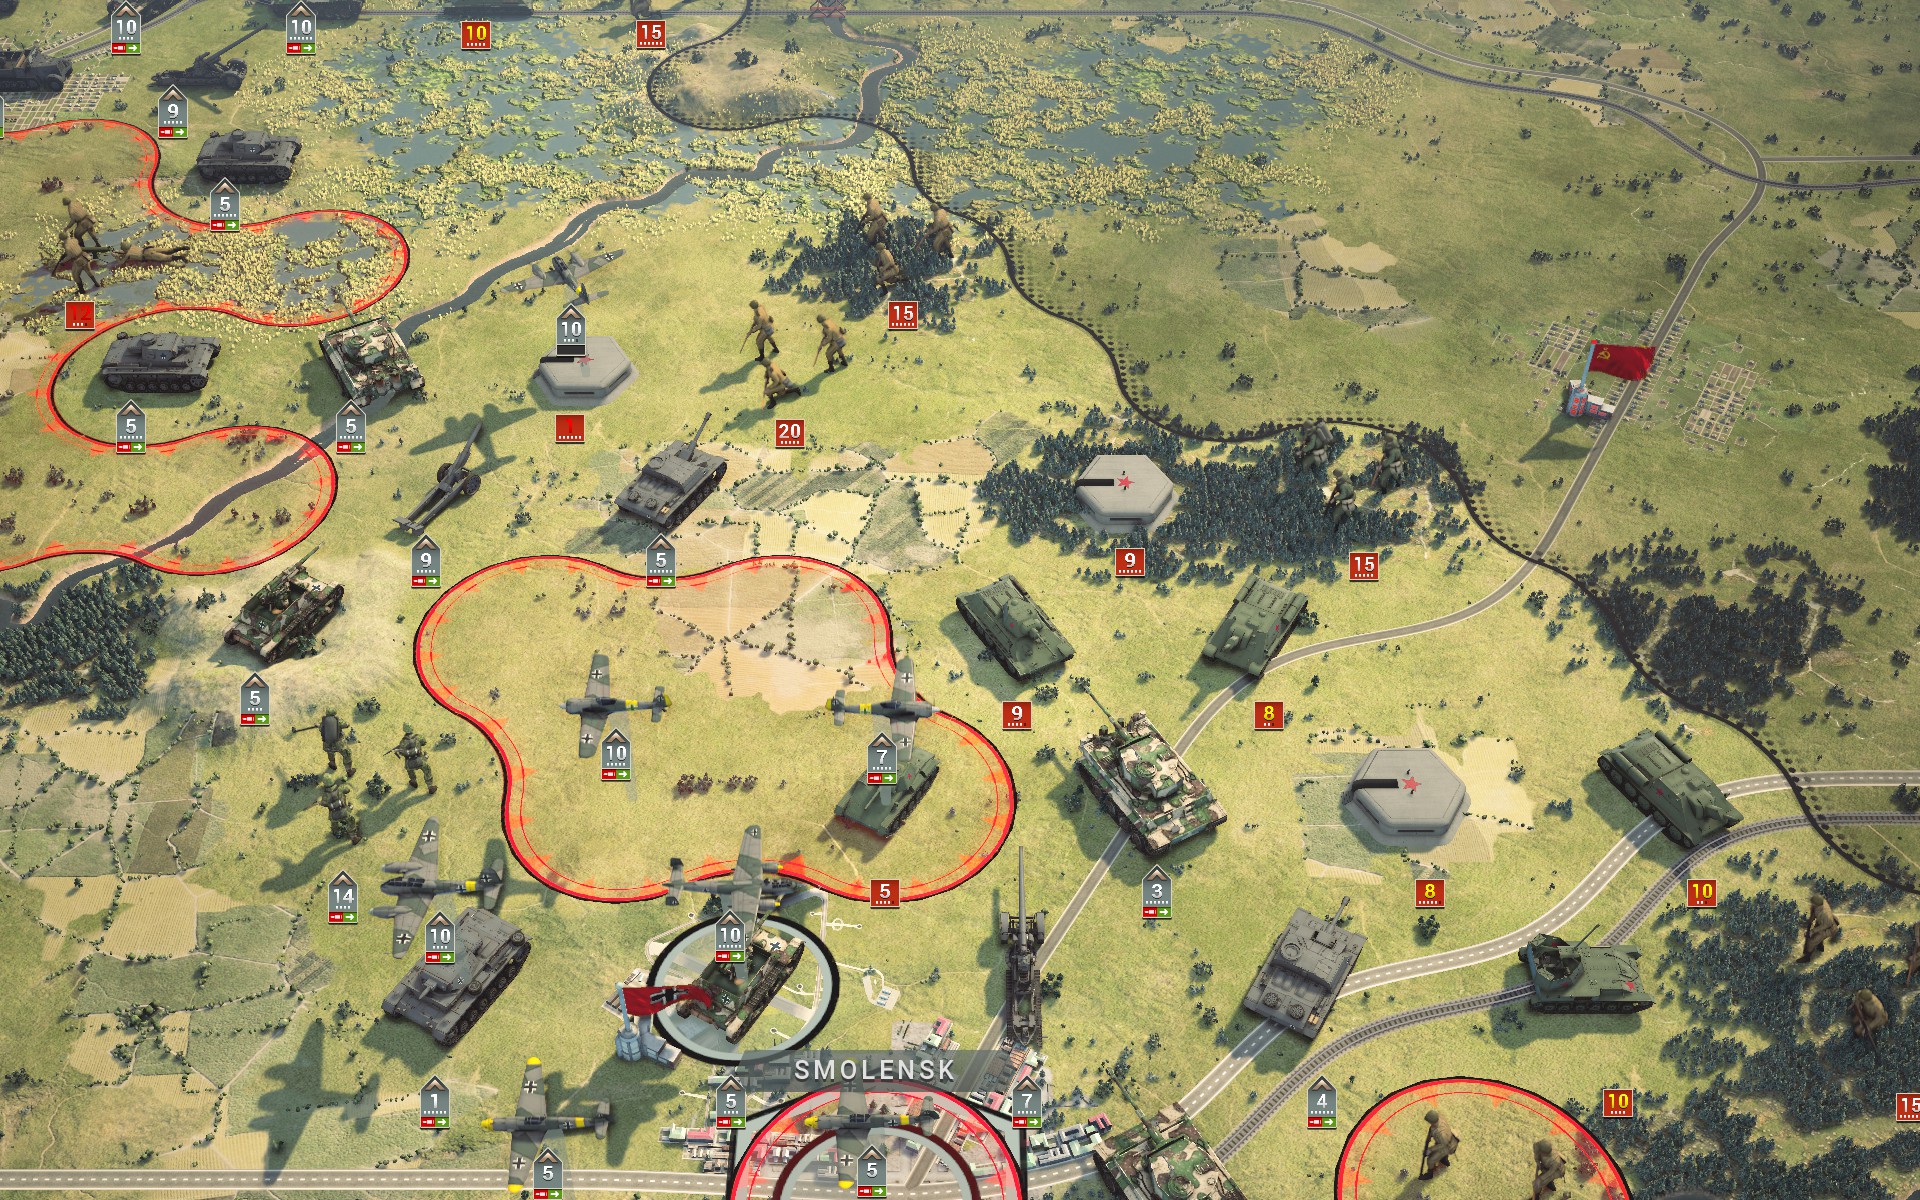
While the southern battlegroup is making good progress, the centre is finding it difficult to advance, as more Soviet units replace the ones captured.
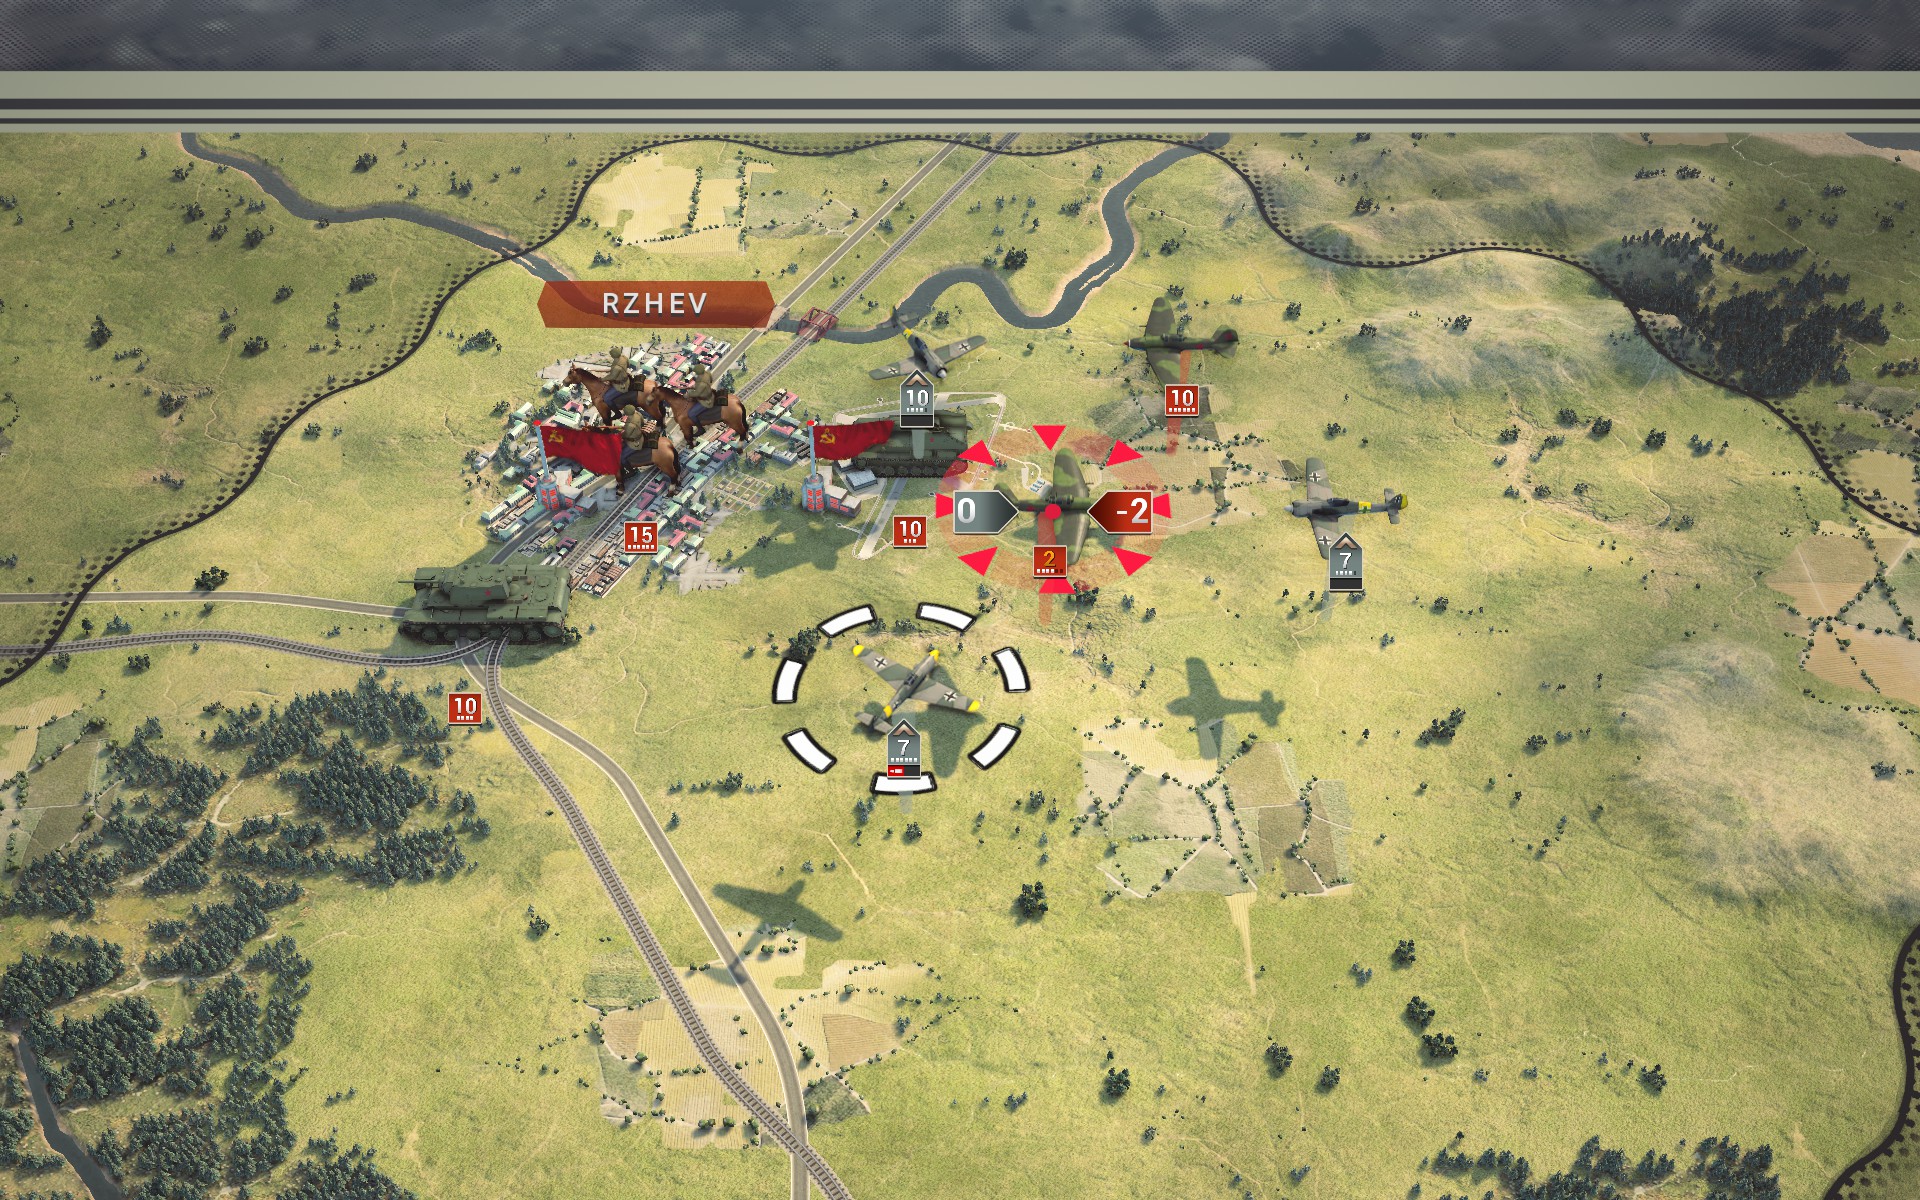
As it turns out, I was mistaken about the Soviet air force; for some reason the Soviet air force has kept aircraft in reserve that have yet to see combat. The Fw 190As scramble to take them down.
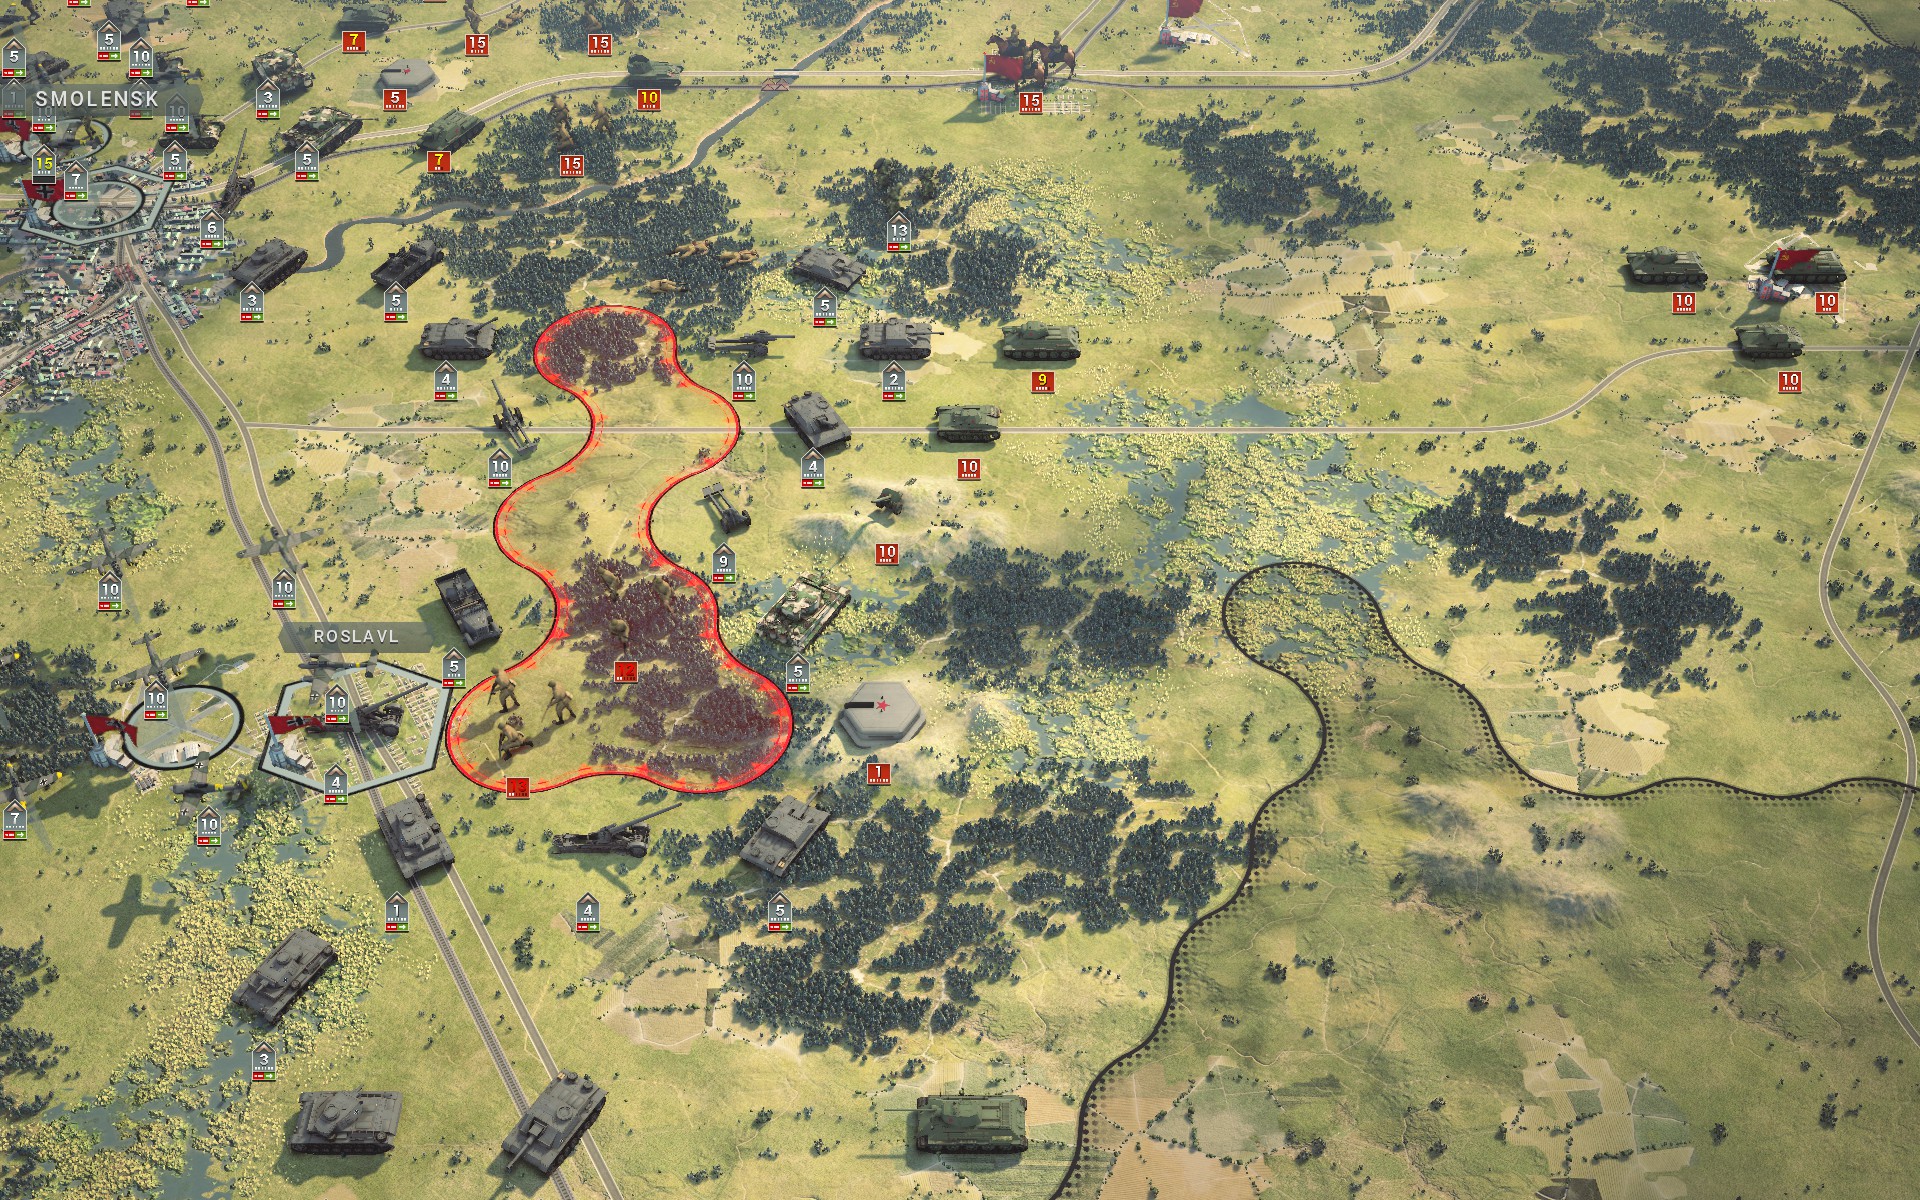
Battlegroup South is forced to halt its advance as additional Soviet T-34s appear.

A Me 410A destroys the southernmost Strongpoint.
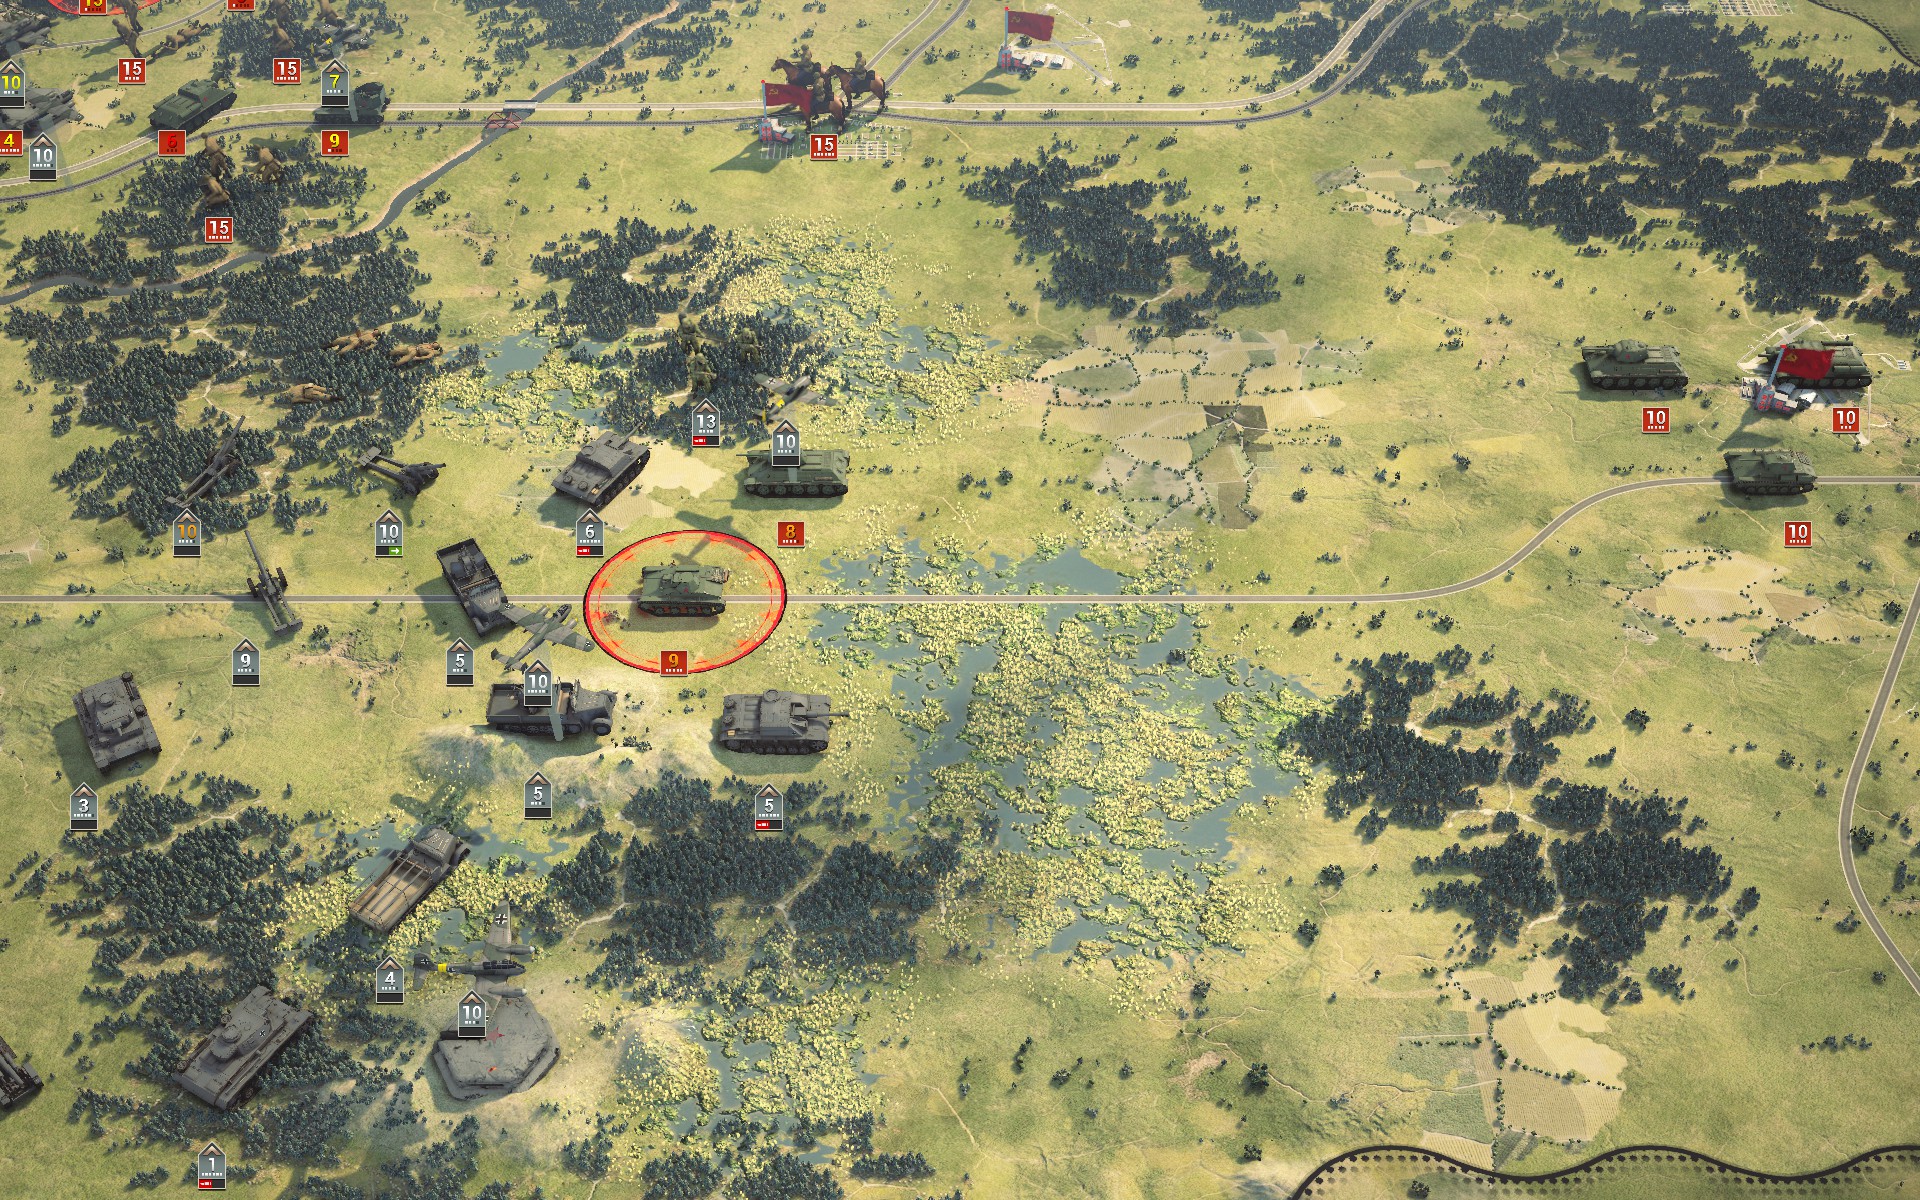
The armoured reserves to the east have yet to move, but I am reluctant to send my forces into the marshes.
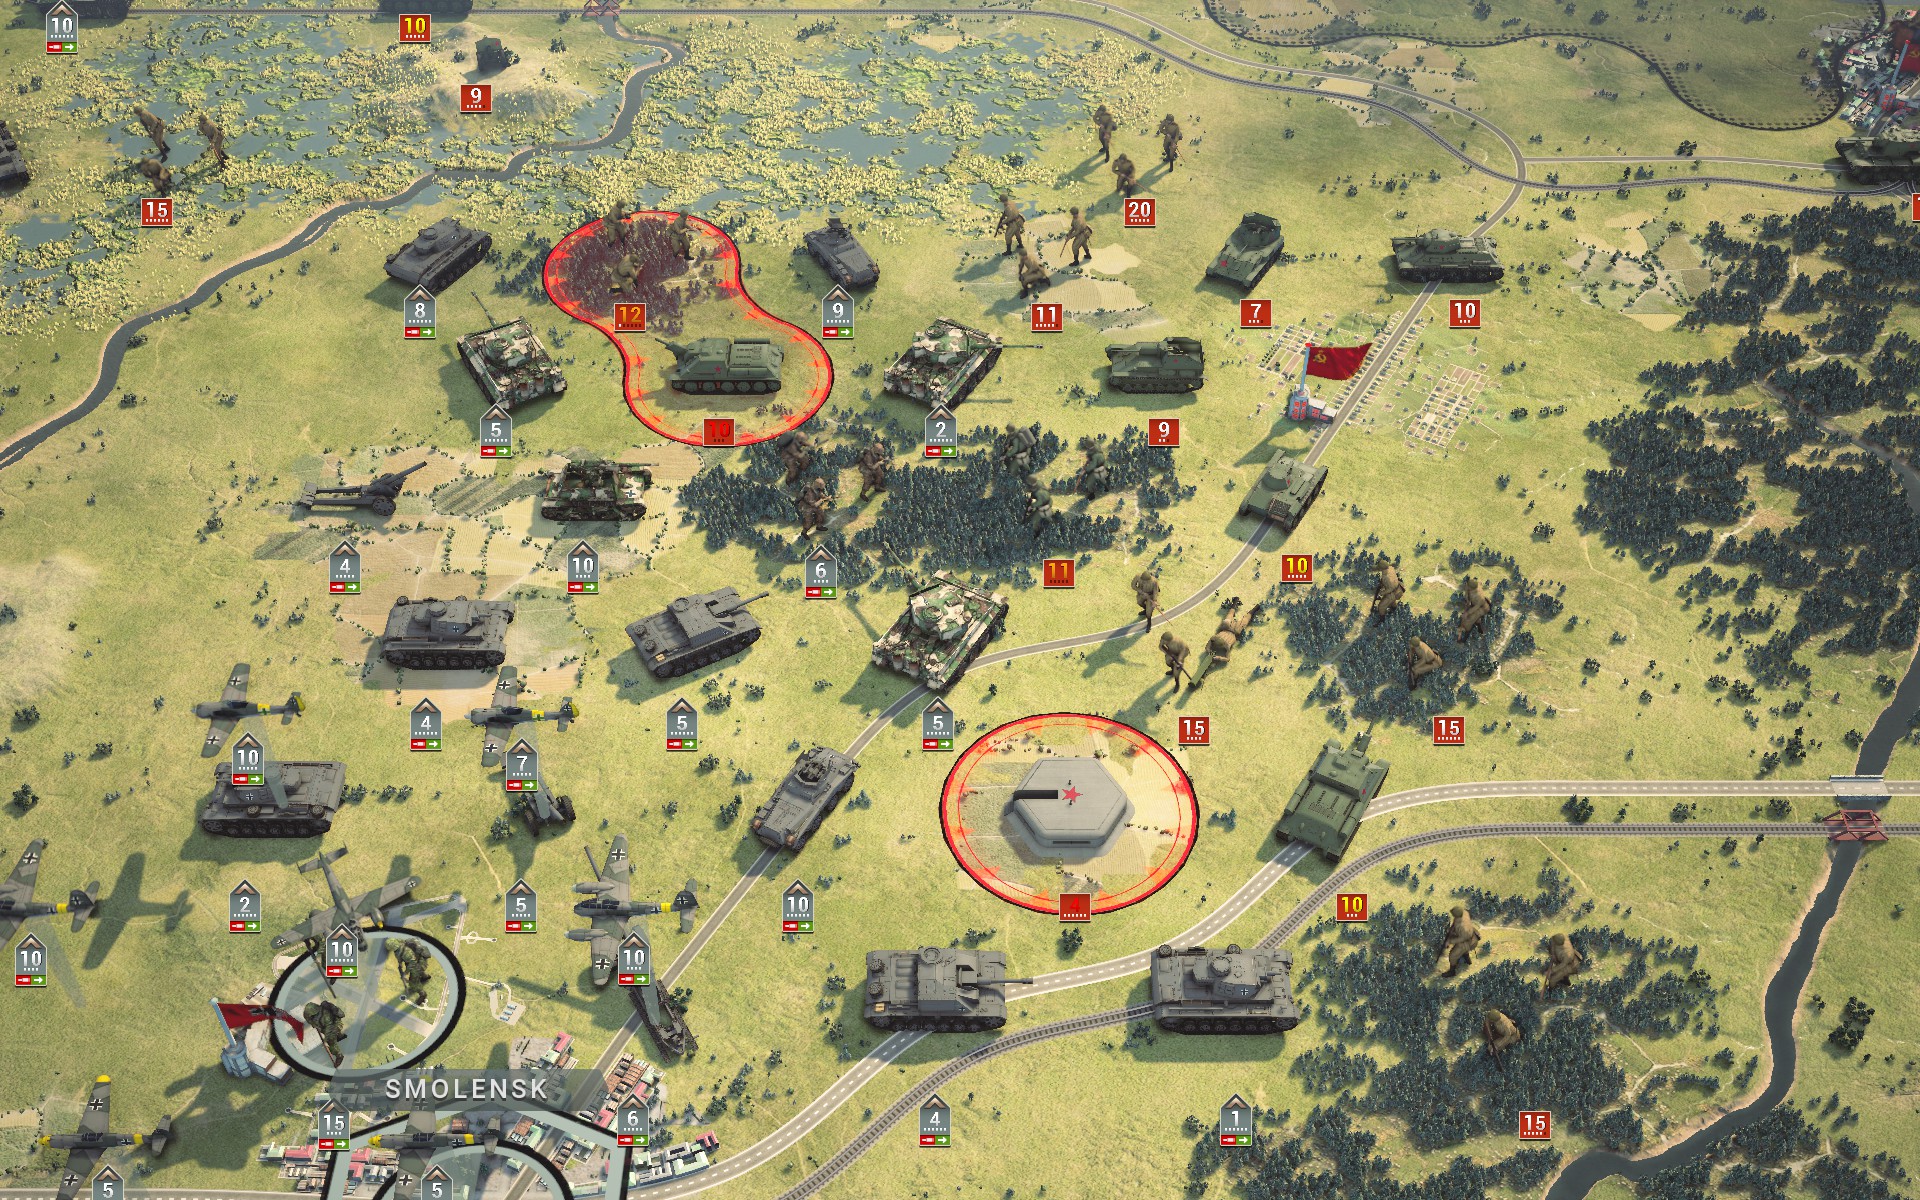
Battlegroup Centre finally breach the line of Strongpoints, but Soviet reinforcements prevent them from exploiting the breakthrough.
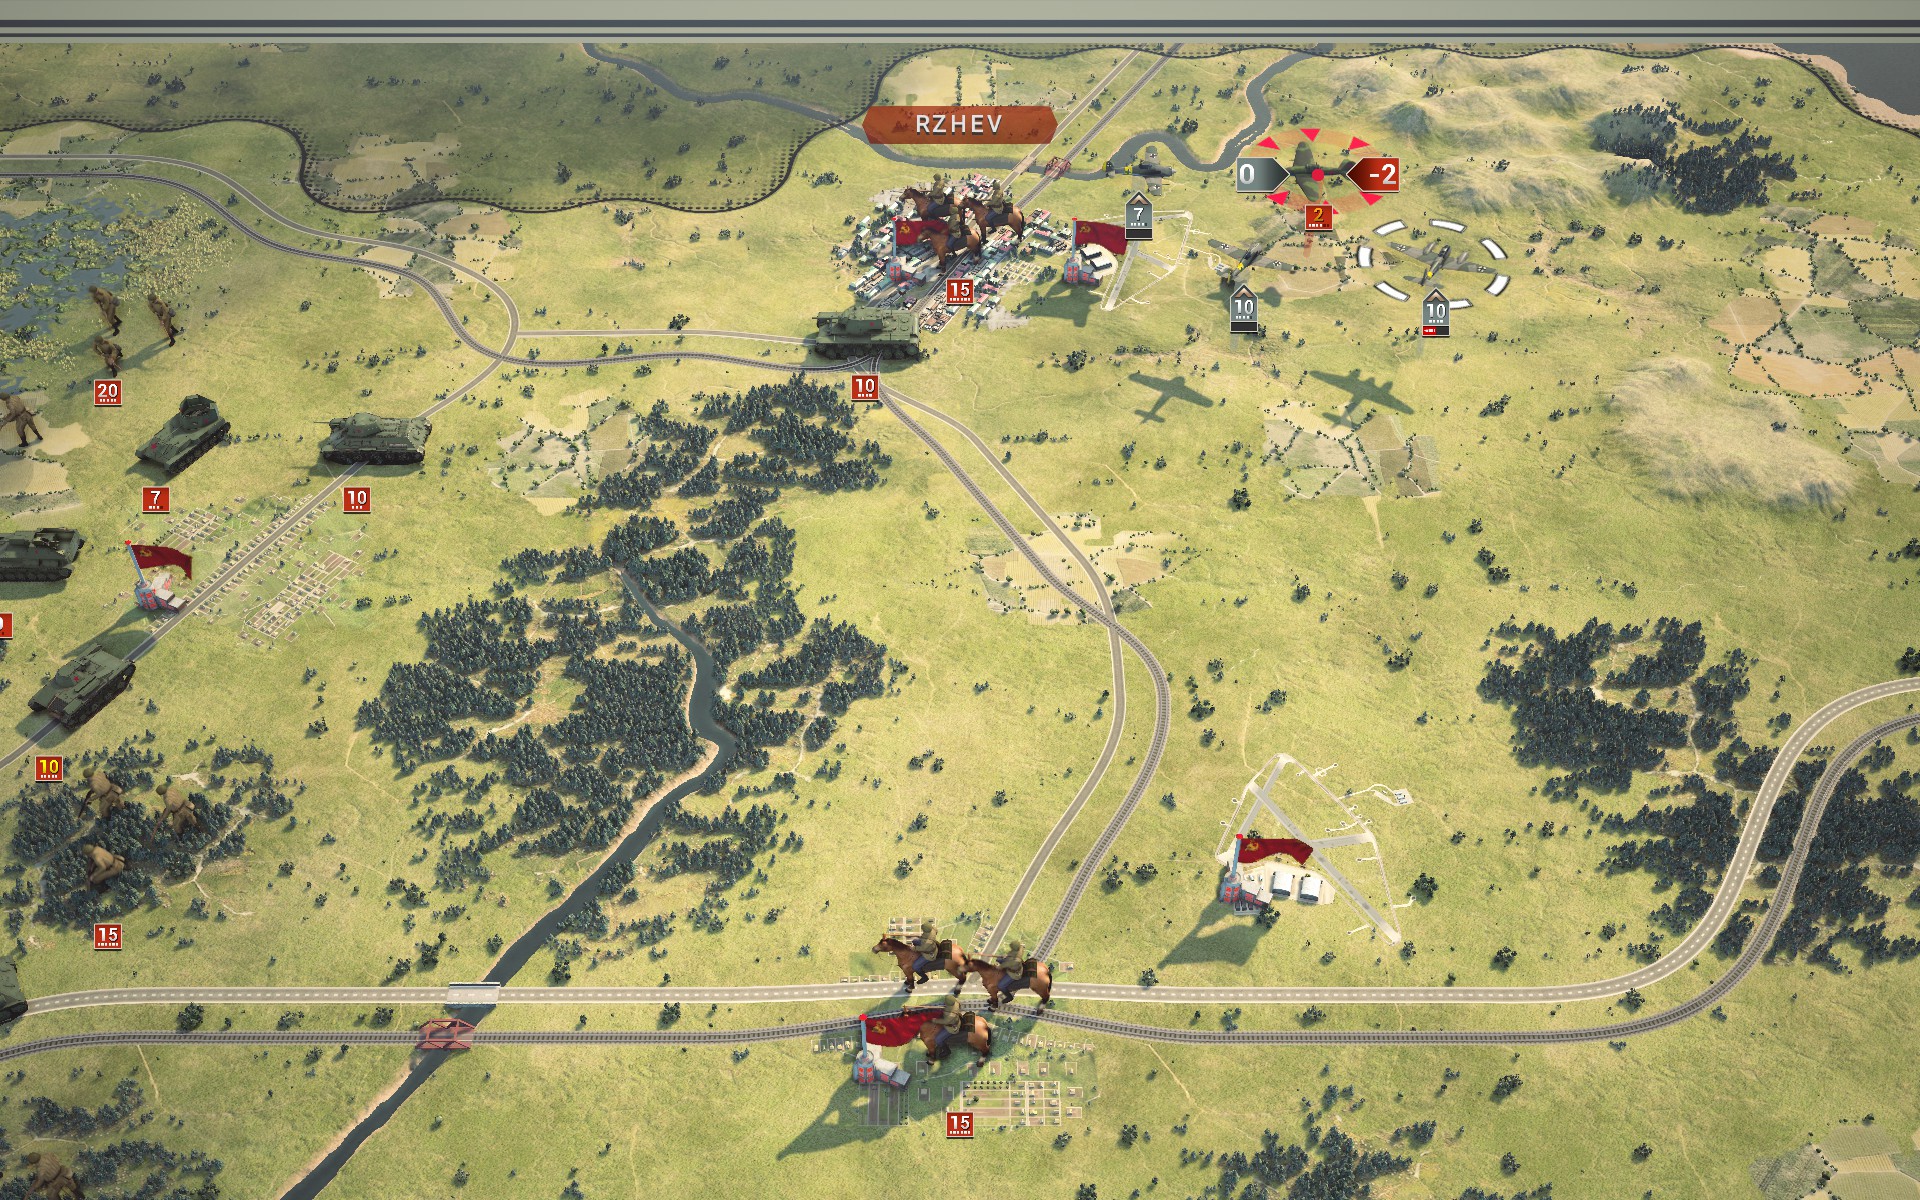
The Luftwaffe hunts down the last Soviet aircraft. Probably.

Battlegroup South successfully surrounds and captures the armoured reserve.
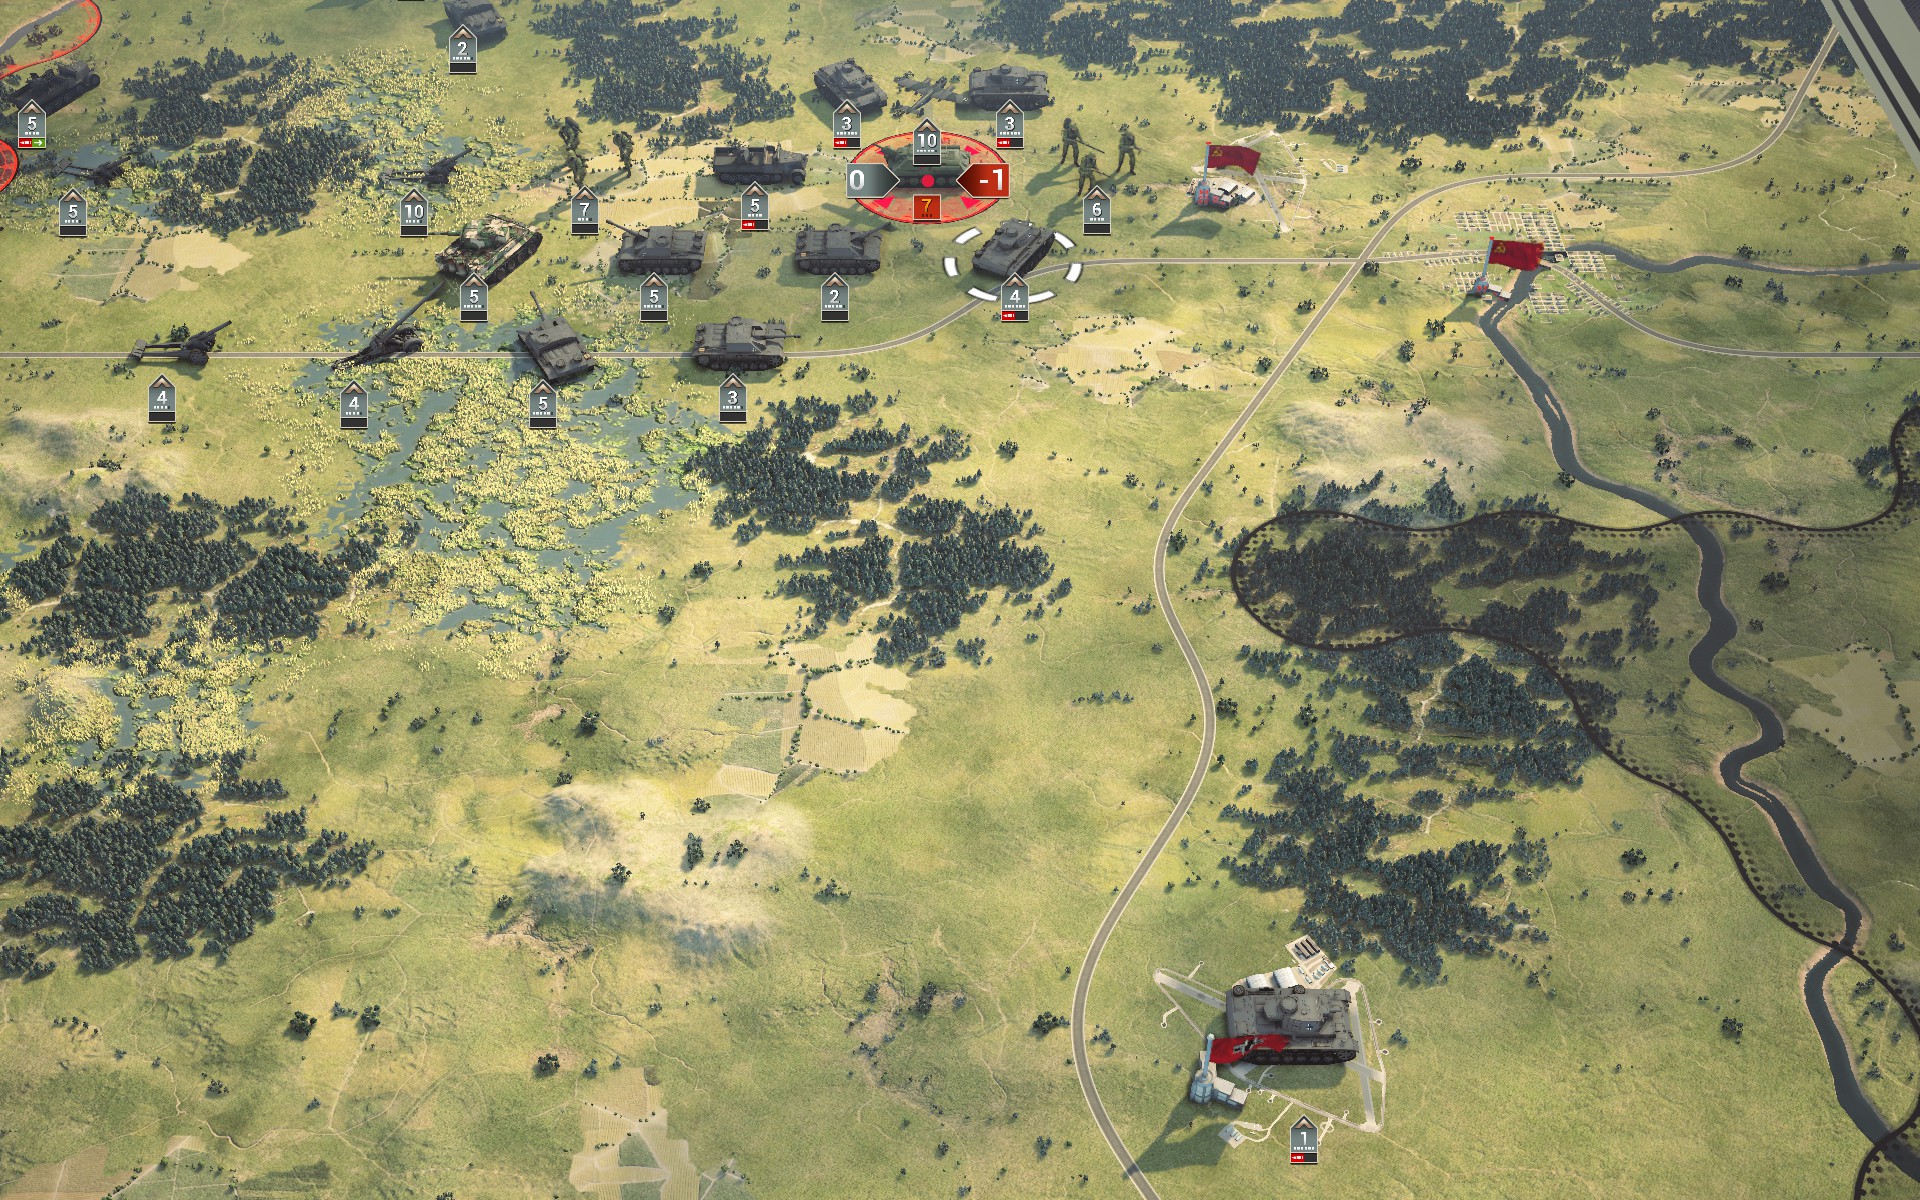
Battlegroup South stops short of the last Soviet positions to capture the remaining SU-122.
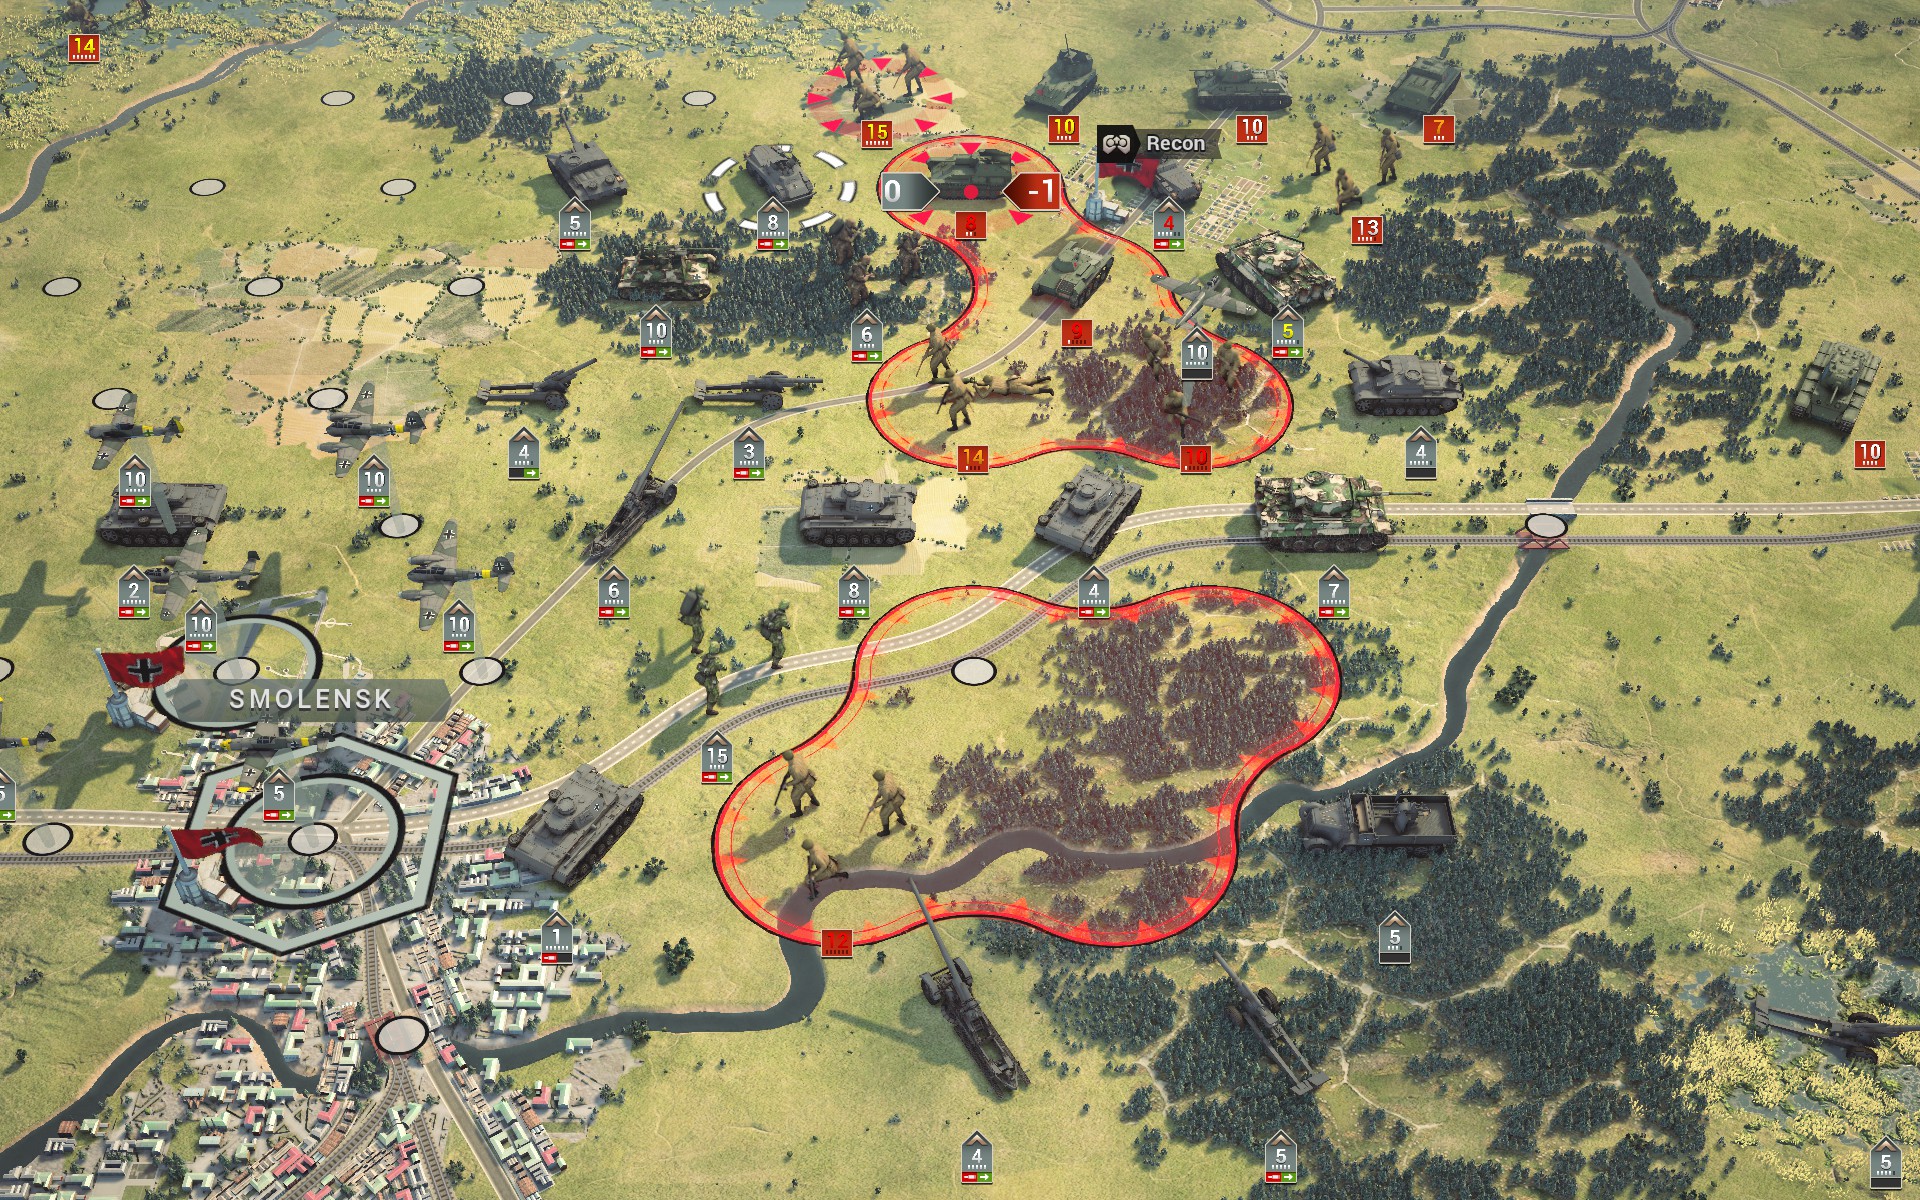
An SdKfz 234/1 sneaks into Bely, but Battlegroup Centre is unable to push through the multiple lines of Soviet forces.

My forces have successfully defended Smolensk, but as you can see I was never close to capturing Rzhev; I would've needed at least 2 more turns to secure all Soviet positions, as the absence of Gustav made it difficult for Battlegroup Centre to deal with the Strongpoints. As for Battlegroup North, I saw little reason to attempt to cross the marshlands.
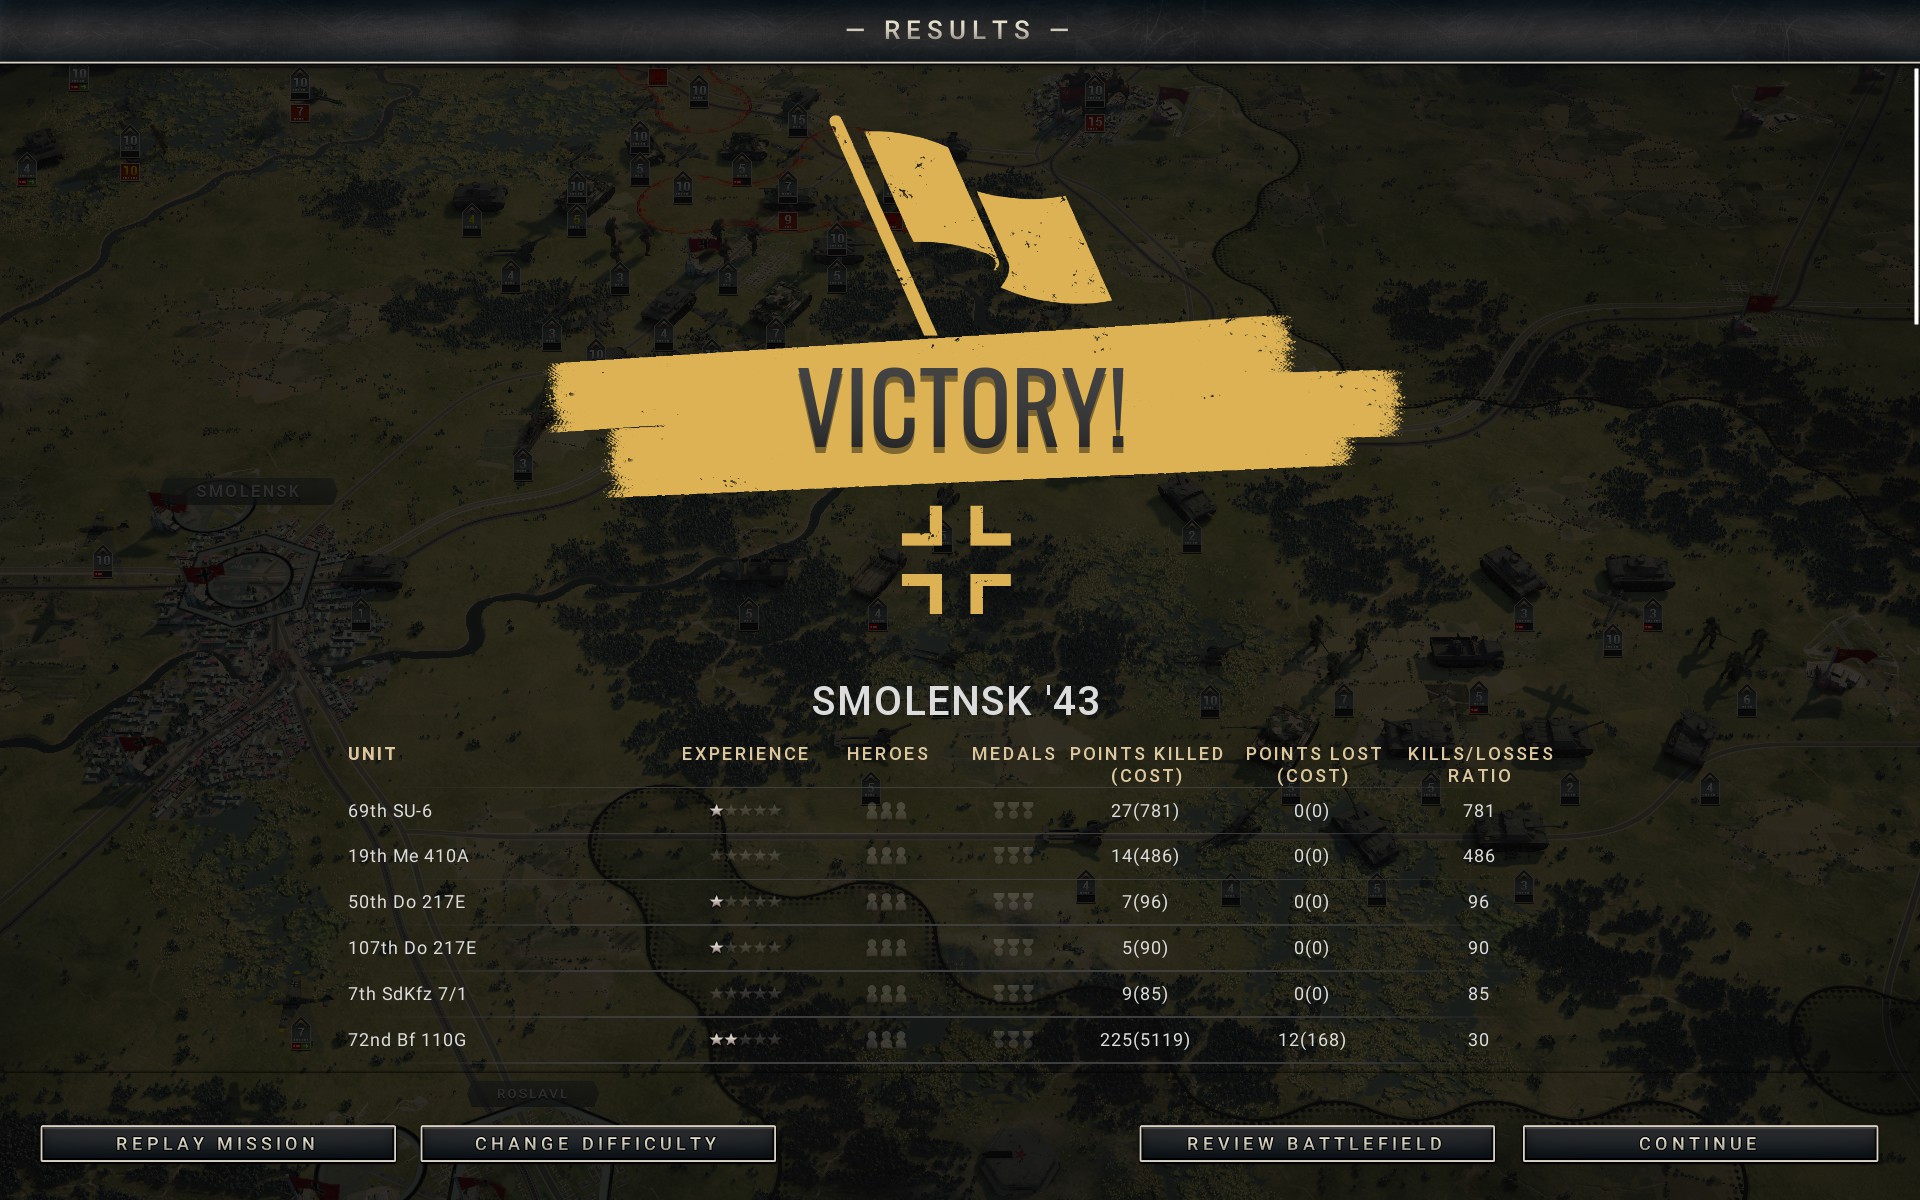
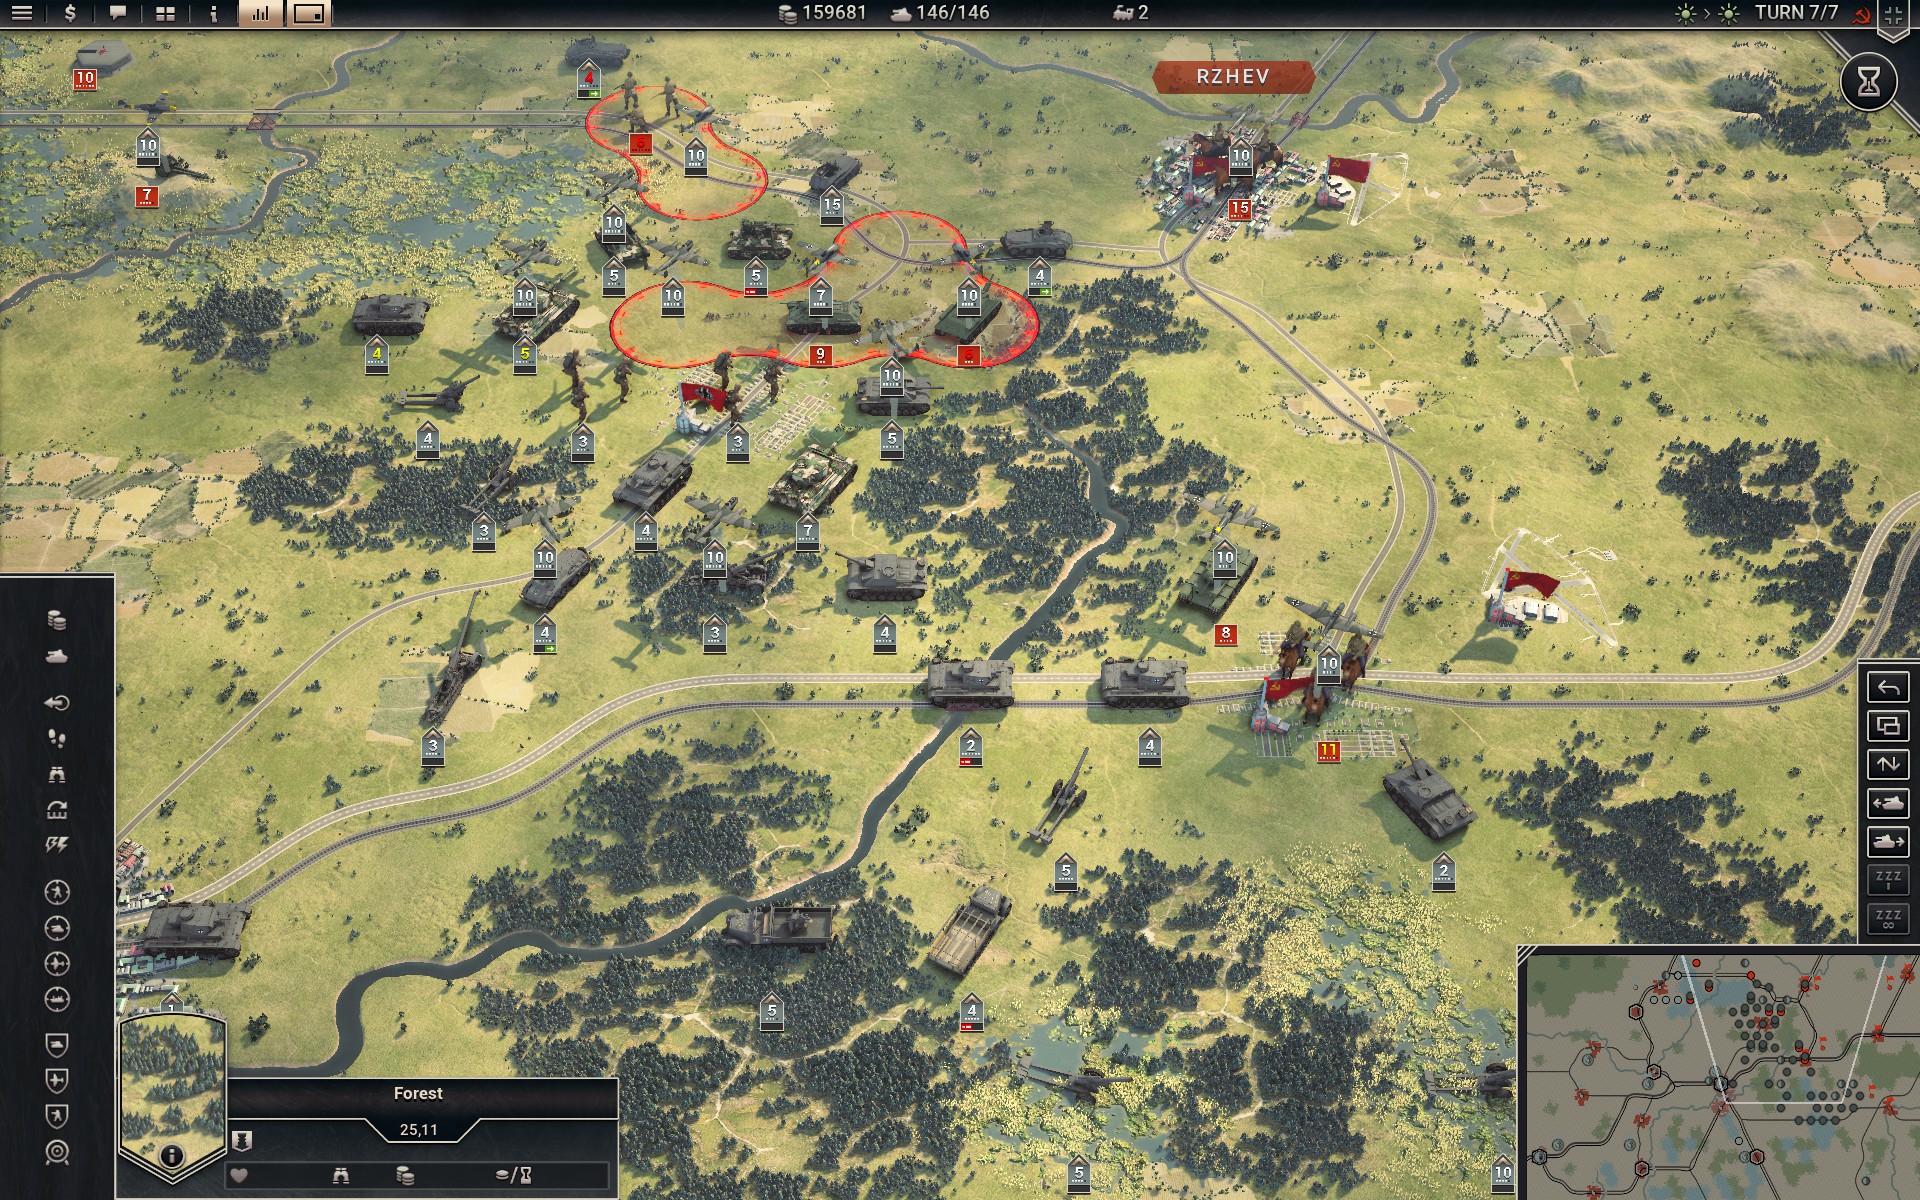
As I suspected, it proved too difficult to capture the Soviet positions with only 7 turns at my disposal, although that was due in part to my failure to account for the line of Strongpoints and entrenched infantry in the centre. The scenario felt well balanced though as with an additional 5 turns you should have enough time to secure all objectives should you wish to attempt to -- Guderian is a choice after all. Perhaps the available core slots should be reduced slightly, as the Red Army currently does not have enough forces to seriously threaten your lines, and simply increasing their numbers would only go so far as the terrain heavily favours the defender. However, I really like the idea behind the scenario, as I've been advocating more variation in the campaign; having a few well-designed smaller scenarios with focused objectives provide a different form of intensity, and one I'd love to see more of.
Initial Prestige: 152073
Final Prestige: 159681
Core
- Infantry
- Pioniere w/ SdKfz 250/1 [NEW]
- Pioniere w/ SdKfz 250/1
- Pioniere w/ SdKfz 250/1
- Tanks
- Tiger I [NEW]
- Tiger I
- Tiger I
- Panzer IIIN
- Panzer IIIN
- Panzer IIIN
- Panzer IIIN
- Panzer IIIN
- Recon
- SdKfz 234/1 8Rad
- SdKfz 234/1 8Rad
- Artillery
- 17 cm K 18 w/ SdKfz 7
- 17 cm K 18 w/ SdKfz 7
- 17 cm K 18 w/ SdKfz 7
- 15 cm sFH w/ SdKfz 7
- 15 cm sFH w/ SdKfz 7
- 15 cm sFH w/ SdKfz 7
- 15 cm sFH w/ SdKfz 7
- StuH 42
- StuH 42
- StuH 42
- StuH 42
- Anti-Aircraft
- SdKfz 7/1 [NEW]
- SdKfz 7/1 [NEW]
- SU-6
- SU-6
- Fighters
- Fw 190A
- Fw 190A
- Fw 190A
- Bf 109F
- Bf 109F
- Tactical Bombers
- Bf 109 PR
- Bf 110G
- Me 410A [NEW]
- Me 410A [NEW]
- Strategic Bombers
- Do 217E
- Do 217E
- Do 217E
- Do 217E
- Do 217E
- Do 217E
- Do 217E
- Do 217E
My defences will be split into three battlegroups centered around the city of Smolensk and the towns of Roslavl and Nevel respectively. As the Bridgeburners will be deployed at Smolensk and the Crimson Guard at Roslavl, an additional battalion of mechanized Pioniere have been requisitioned to strengthen the defences around Nevel in the north. These elite infantry battalions will form a second line of defence in the event the Panzers should prove unable to repel the initial Soviet onslaught, allowing these to fall back and regroup. With less ground to cover three Panzer IIINs have been rotated to the reserve in favour of an additional Tiger; one of these powerful battalions will be deployed to each battlegroup.
As the Luftwaffe won't be able to provide air support immediately to the northern battlegroup, they have been issued additional AA guns; hopefully an SU-6 and an SdKfz 7/1 should be enough to keep them safe. The rest of the AA guns have been deployed at Smolensk as Roslavl enjoys complete fighter cover. Two Me 410As will help the Luftwaffe gain control of the skies and support the defenders with bombing runs should it prove necessary. To make room for these changes, Gustav has been rotated to the reserve, along with one of the Bf 109 PRs.
The narrow front and the difficult terrain will make it difficult for armour to operate to the north and south of Smolensk, so I expect the Red Army to focus its efforts on the city itself while infantry and lighter vehicles attempt to flank my positions. Panzers and StuH 42s have been deployed with artillery support to absorb brunt of what I expect to be an early Soviet blitz. Once my forces have repelled the Red Army I intend to advance east, but with only 7 turns at my disposal it will probably prove difficult to capture Rzhev; fortunately the scenario does not require me to actually gain any ground.
Marshes and woodlands dominate the landscape around Smolensk. This will hamper Soviet operations, but will also make it more difficult for my mostly mechanized forces to advance east. Half of the Do 217Es have been deployed at Vitebsk to the rear to free up enough space at the front for the fighters.
As expected, the Red Army is upon Smolensk before my forces can react, but while one StuH 42 suffers heavy damage, the Soviet Engineers hesitate to attack the Bridgeburners.
The Luftwaffe retaliates against the Soviet air force.
Aerial reconnaissance suggests it should be possible for the battlegroup at Roslavl to encircle the Soviet forces, but the series of Strongpoints and entrenched infantry east of Smolensk pose a problem I had not expected; I am beginning to regret leaving Gustav behind as it will prove difficult to break through the centre.
My forces advance on the flanks to cut off the Soviet vanguard.
Soviet forces around Smolensk have largely been contained, but a detached IIIN suffers heavy damage due to the lack of fire support.
The Luftwaffe hunts down the last Soviet aircraft.
The southern battlegroup advances, making sure to suppress the Soviet Engineers and keeping the OT-34 to the south away from the Crimson Guard; the flamethrower tank poses little threat to the Panzers but could inflict heavy losses on the mechanized Pioniere.
Even an SdKfz 234/1 can capture a T-34 in a vulnerable position; with a hard attack of 11 this wouldn't normally be possible.
While the southern battlegroup is making good progress, the centre is finding it difficult to advance, as more Soviet units replace the ones captured.
As it turns out, I was mistaken about the Soviet air force; for some reason the Soviet air force has kept aircraft in reserve that have yet to see combat. The Fw 190As scramble to take them down.
Battlegroup South is forced to halt its advance as additional Soviet T-34s appear.
A Me 410A destroys the southernmost Strongpoint.
The armoured reserves to the east have yet to move, but I am reluctant to send my forces into the marshes.
Battlegroup Centre finally breach the line of Strongpoints, but Soviet reinforcements prevent them from exploiting the breakthrough.
The Luftwaffe hunts down the last Soviet aircraft. Probably.
Battlegroup South successfully surrounds and captures the armoured reserve.
Battlegroup South stops short of the last Soviet positions to capture the remaining SU-122.
An SdKfz 234/1 sneaks into Bely, but Battlegroup Centre is unable to push through the multiple lines of Soviet forces.
My forces have successfully defended Smolensk, but as you can see I was never close to capturing Rzhev; I would've needed at least 2 more turns to secure all Soviet positions, as the absence of Gustav made it difficult for Battlegroup Centre to deal with the Strongpoints. As for Battlegroup North, I saw little reason to attempt to cross the marshlands.
As I suspected, it proved too difficult to capture the Soviet positions with only 7 turns at my disposal, although that was due in part to my failure to account for the line of Strongpoints and entrenched infantry in the centre. The scenario felt well balanced though as with an additional 5 turns you should have enough time to secure all objectives should you wish to attempt to -- Guderian is a choice after all. Perhaps the available core slots should be reduced slightly, as the Red Army currently does not have enough forces to seriously threaten your lines, and simply increasing their numbers would only go so far as the terrain heavily favours the defender. However, I really like the idea behind the scenario, as I've been advocating more variation in the campaign; having a few well-designed smaller scenarios with focused objectives provide a different form of intensity, and one I'd love to see more of.
Last edited by SineMora on Mon May 11, 2020 4:48 pm, edited 5 times in total.
Mildly pretentious Swede. Goes by Path on most platforms, including Steam.
http://www.slitherine.com/forum/viewtopic.php?f=596&t=98034 -- Generalissimus AAR (no Trophies / Heroes)
http://www.slitherine.com/forum/viewtopic.php?f=596&t=98034 -- Generalissimus AAR (no Trophies / Heroes)
-
SineMora
- Sergeant Major - SdKfz 234/2 8Rad
- Posts: 641
- Joined: Thu Apr 02, 2020 4:20 pm
- Location: Sweden
Re: A Certain Panzer General's Adventures -- Generalissimus (No Liberator / Trophies of War / Heroes)
I'll try to get the reports finished today -- honest -- but for now I'll throw in this little tidbit.
I'm sure you all love the Hummel. It's basically a self-propelled version of the 15 cm gun, the backbone of the German artillery. Imagine if there were a Hummel with strong armour, some actual protection against tactical bombers and the ability to switch to AT mode if necessary. Imagine that this Super Hummel would use 4 core slots instead of 5. Well, you don't have to imagine it -- ladies and gentlemen, I present to you, the Super Hummel:
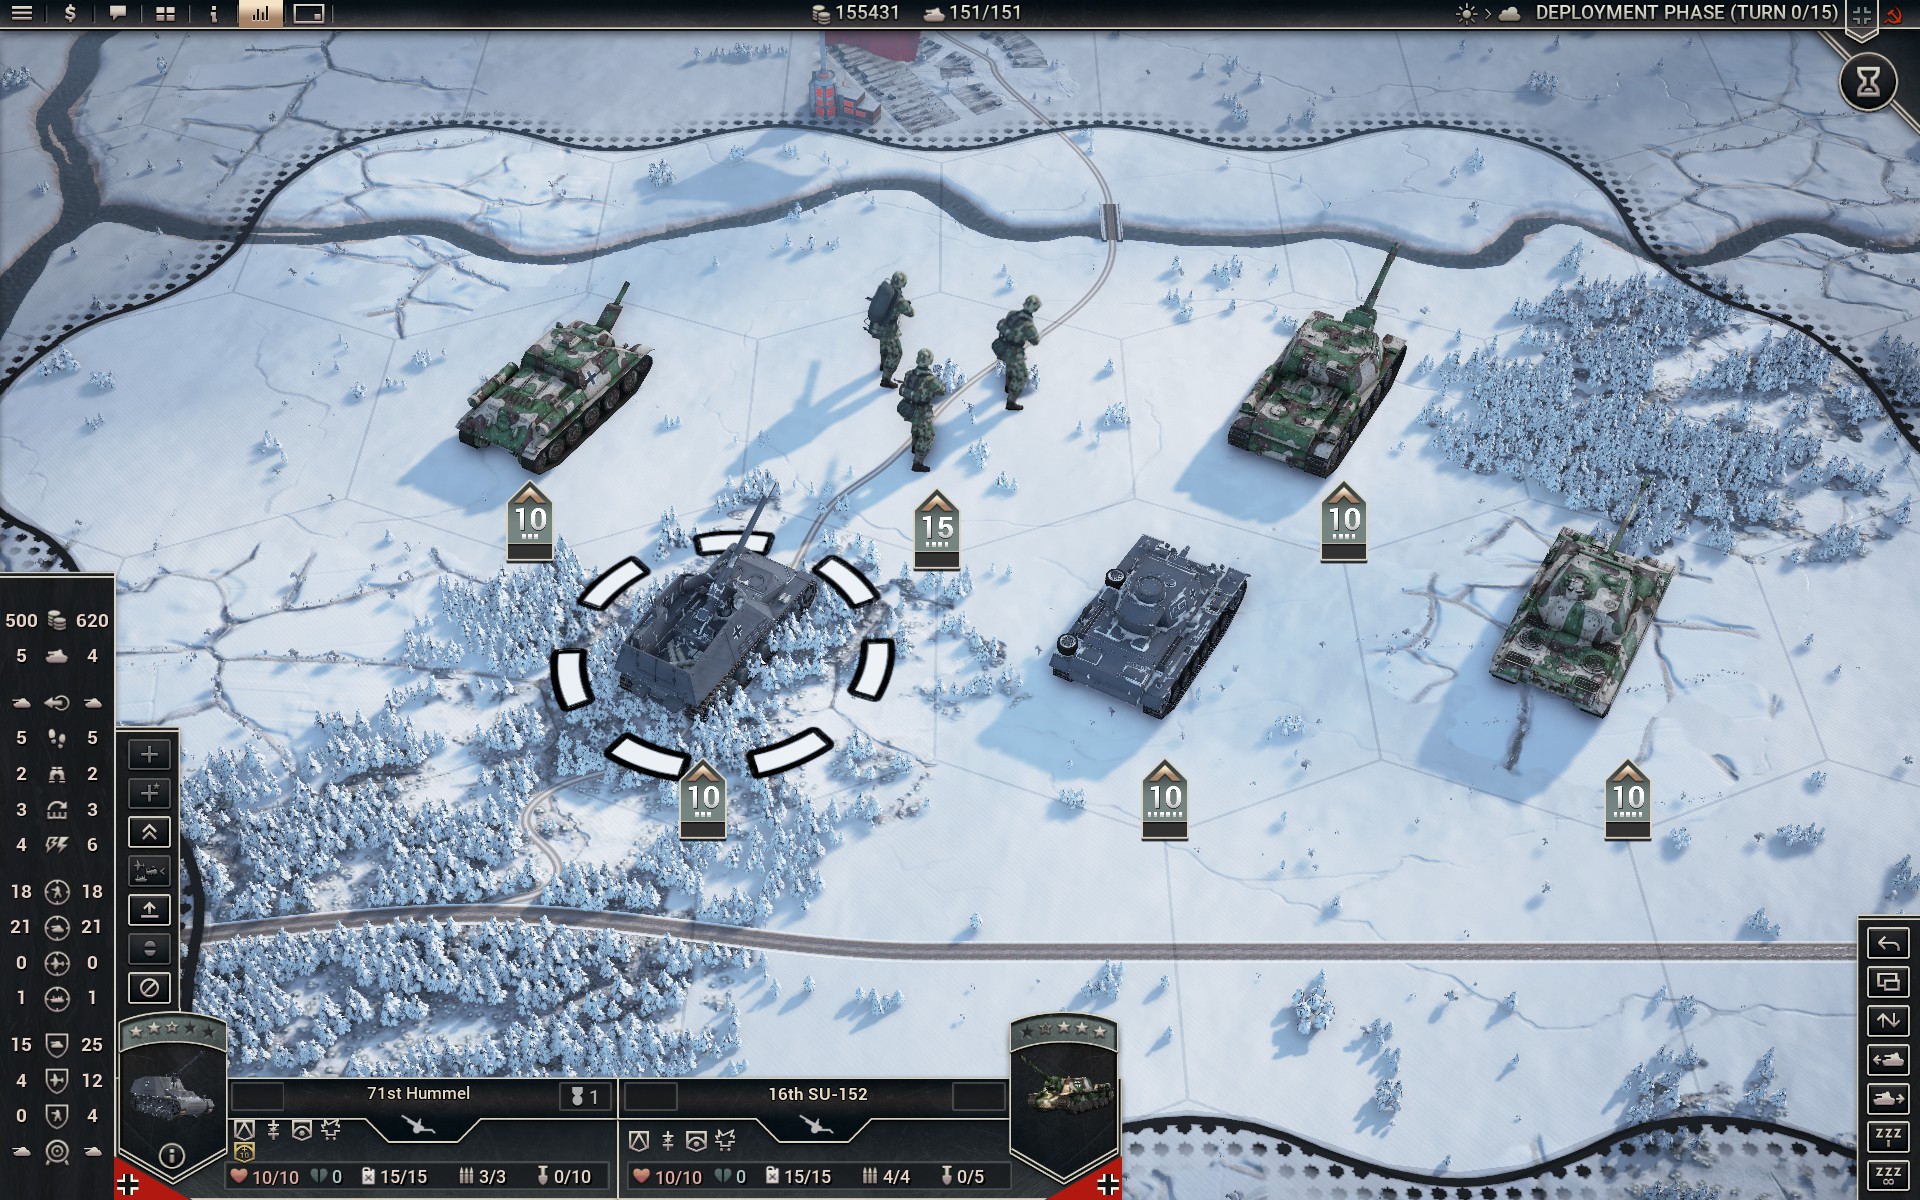
The SU-152 is just an incredible piece of hardware, and unfortunately just as rare. There are two overstrengthened ones at the Battle of Kursk, however, so be sure to pick yours up.
I'm sure you all love the Hummel. It's basically a self-propelled version of the 15 cm gun, the backbone of the German artillery. Imagine if there were a Hummel with strong armour, some actual protection against tactical bombers and the ability to switch to AT mode if necessary. Imagine that this Super Hummel would use 4 core slots instead of 5. Well, you don't have to imagine it -- ladies and gentlemen, I present to you, the Super Hummel:
The SU-152 is just an incredible piece of hardware, and unfortunately just as rare. There are two overstrengthened ones at the Battle of Kursk, however, so be sure to pick yours up.
Mildly pretentious Swede. Goes by Path on most platforms, including Steam.
http://www.slitherine.com/forum/viewtopic.php?f=596&t=98034 -- Generalissimus AAR (no Trophies / Heroes)
http://www.slitherine.com/forum/viewtopic.php?f=596&t=98034 -- Generalissimus AAR (no Trophies / Heroes)
-
SineMora
- Sergeant Major - SdKfz 234/2 8Rad
- Posts: 641
- Joined: Thu Apr 02, 2020 4:20 pm
- Location: Sweden
Re: A Certain Panzer General's Adventures -- Generalissimus (No Liberator / Trophies of War / Heroes)
Kursk and Smolensk '43 are finally complete. It has been a long journey, but the end is in sight. Next my corps will be called upon to brave the Russian winter to break through Soviet lines to evacuate the German troops trapped at Korsun.
Mildly pretentious Swede. Goes by Path on most platforms, including Steam.
http://www.slitherine.com/forum/viewtopic.php?f=596&t=98034 -- Generalissimus AAR (no Trophies / Heroes)
http://www.slitherine.com/forum/viewtopic.php?f=596&t=98034 -- Generalissimus AAR (no Trophies / Heroes)
-
SineMora
- Sergeant Major - SdKfz 234/2 8Rad
- Posts: 641
- Joined: Thu Apr 02, 2020 4:20 pm
- Location: Sweden
Re: A Certain Panzer General's Adventures -- Generalissimus (No Liberator / Trophies of War / Heroes)
Scenario XIX -- Korsun
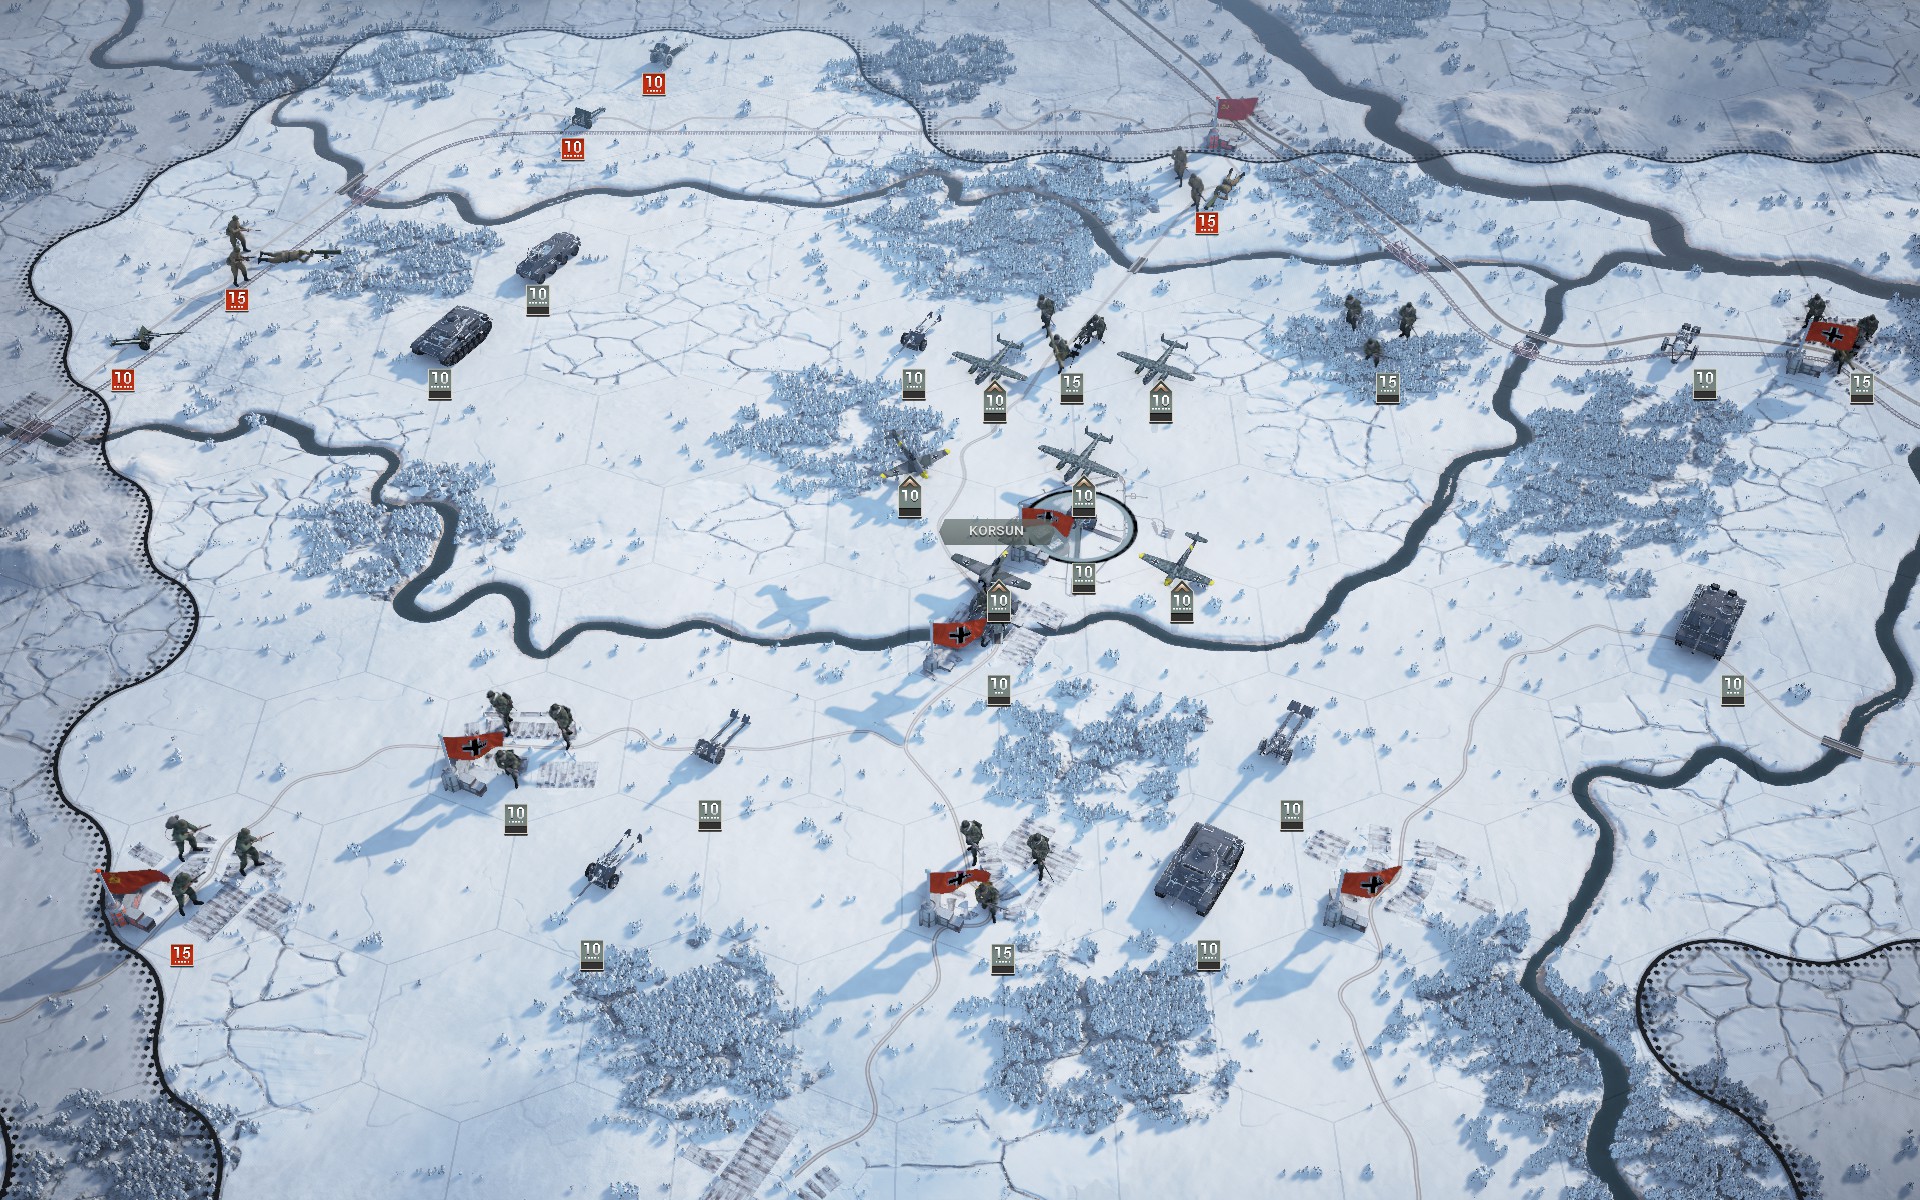
Initial Prestige: 155411
Final Prestige: 177156
Core
The core is similar to the one I deployed at Smolensk, with three battalions of mechanized Pioniere providing an expensive but reliable option should I be forced to storm any fortified positions; it's possible that the Korsun salient won't be able to hold out for long, and if so the Pioniere will give me the option of breaking through the Soviet lines quickly rather than by suppressing them. Ideally they won't see much action, but a shift in the weather could quickly worsen the situation at Korsun. With the Red Army fielding more and heavier SPATs, an additional battalion of Tigers has been requisitioned to improve the resilience of my frontline, while the cost-effective IIINs will continue to make up the bulk of the Panzers.
The Gustav will remain in reserve once more, and as the heavy snow will severely hamper the towed artillery only two powerful 17 cm batteries will remain to provide me with a long-range option. Four battalions have been outfitted with captured Soviet SU-122s and powerful SU-152s, which are less vulnerable than their German counterparts -- for comparison purposes, in artillery mode the SU-122 and SU-152 offer similar performance to the Wespe and Hummel respectively. As there are not enough SU-152s, one battalion has instead been issued Hummels. Due to Retrograde I haven't had access to the Wespe or Hummel before now, but they already feel dated given the strength of the Soviet artillery. The StuH 42s have been upgraded to more powerful Brummbärs, which offer better performance for the same amount of core slots, while a Wurfrahmen 40 will provide close-range fire support for the Pioniere. An Me 410A and both SdKfz 7/1 have been moved to the reserve to accomodate these changes, as I expect the Luftwaffe will have little difficulty securing the skies; I'm more worried about the weather than the strength of the Soviet air force.
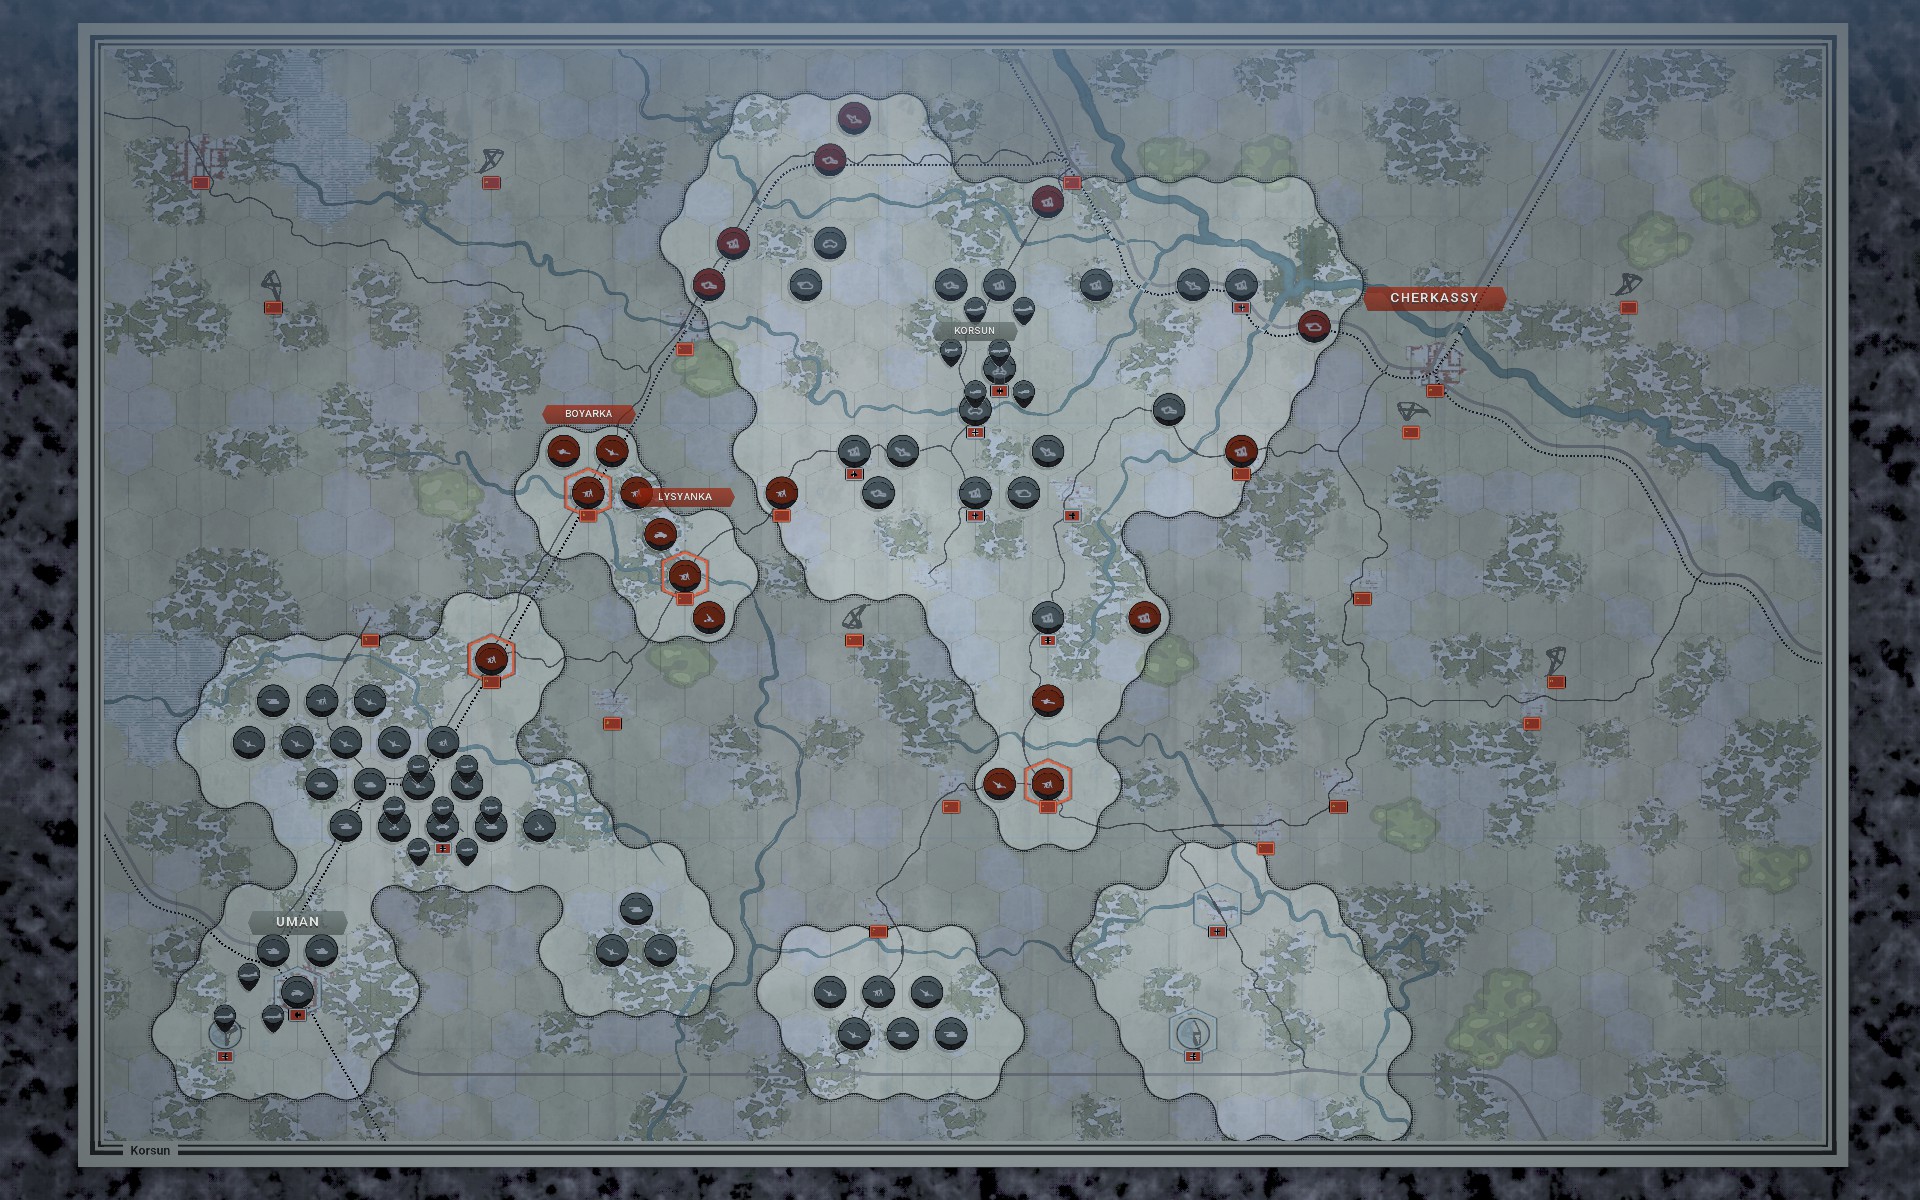
While it's possible to deploy at every position in the south controlled by the Wehrmacht, I have opted to focus my forces in the west. While this means that I will likely lose the easternmost objectives to advancing Soviet forces, I should have a clear advantage in numbers locally, allowing me to advance quickly and secure Boyarka and Lysyanka while capturing any Soviet forces in the region. There seems to be little advantage to spreading my forces, especially as I lack intelligence on Soviet positions other than the strong concentration of troops near the two aforementioned villages. This will also free up Luftwaffe assets to provide cover for the Korsun pocket. I intend to withdraw the auxiliaries towards the airfield and fortify the perimeter using the rivers and woodlands to my advantage, as they are too exposed in their current positions and cannot support each other.
Once the west is firmly under my control my forces will advance towards the village of Bohuslav on the Ros river. Capturing this strategic crossing should allow me to flank the Soviet position west of Korsun and allow the auxiliaries to break out and link up with my forces. I will then reform the lines and take stock of the situation; if time will allow it, my forces will slowly advance east while encircling and suppressing Soviet forces, with the ultimate goal of securing not only the objectives that the Red Army will no doubt have captured by now, but the town of Cherkassy, pushing the Red Army back across the Dniepr. It is likely too late now to fortify the river as originally intended, but this should buy valuable time while the Red Army is forced to bring up reserves. Should I be pressed for time my forces will instead abandon Korsun entirely in favour of a focused push southeast towards the objectives; nothing is set in stone until I have a clear idea of the size of the Soviet forces.
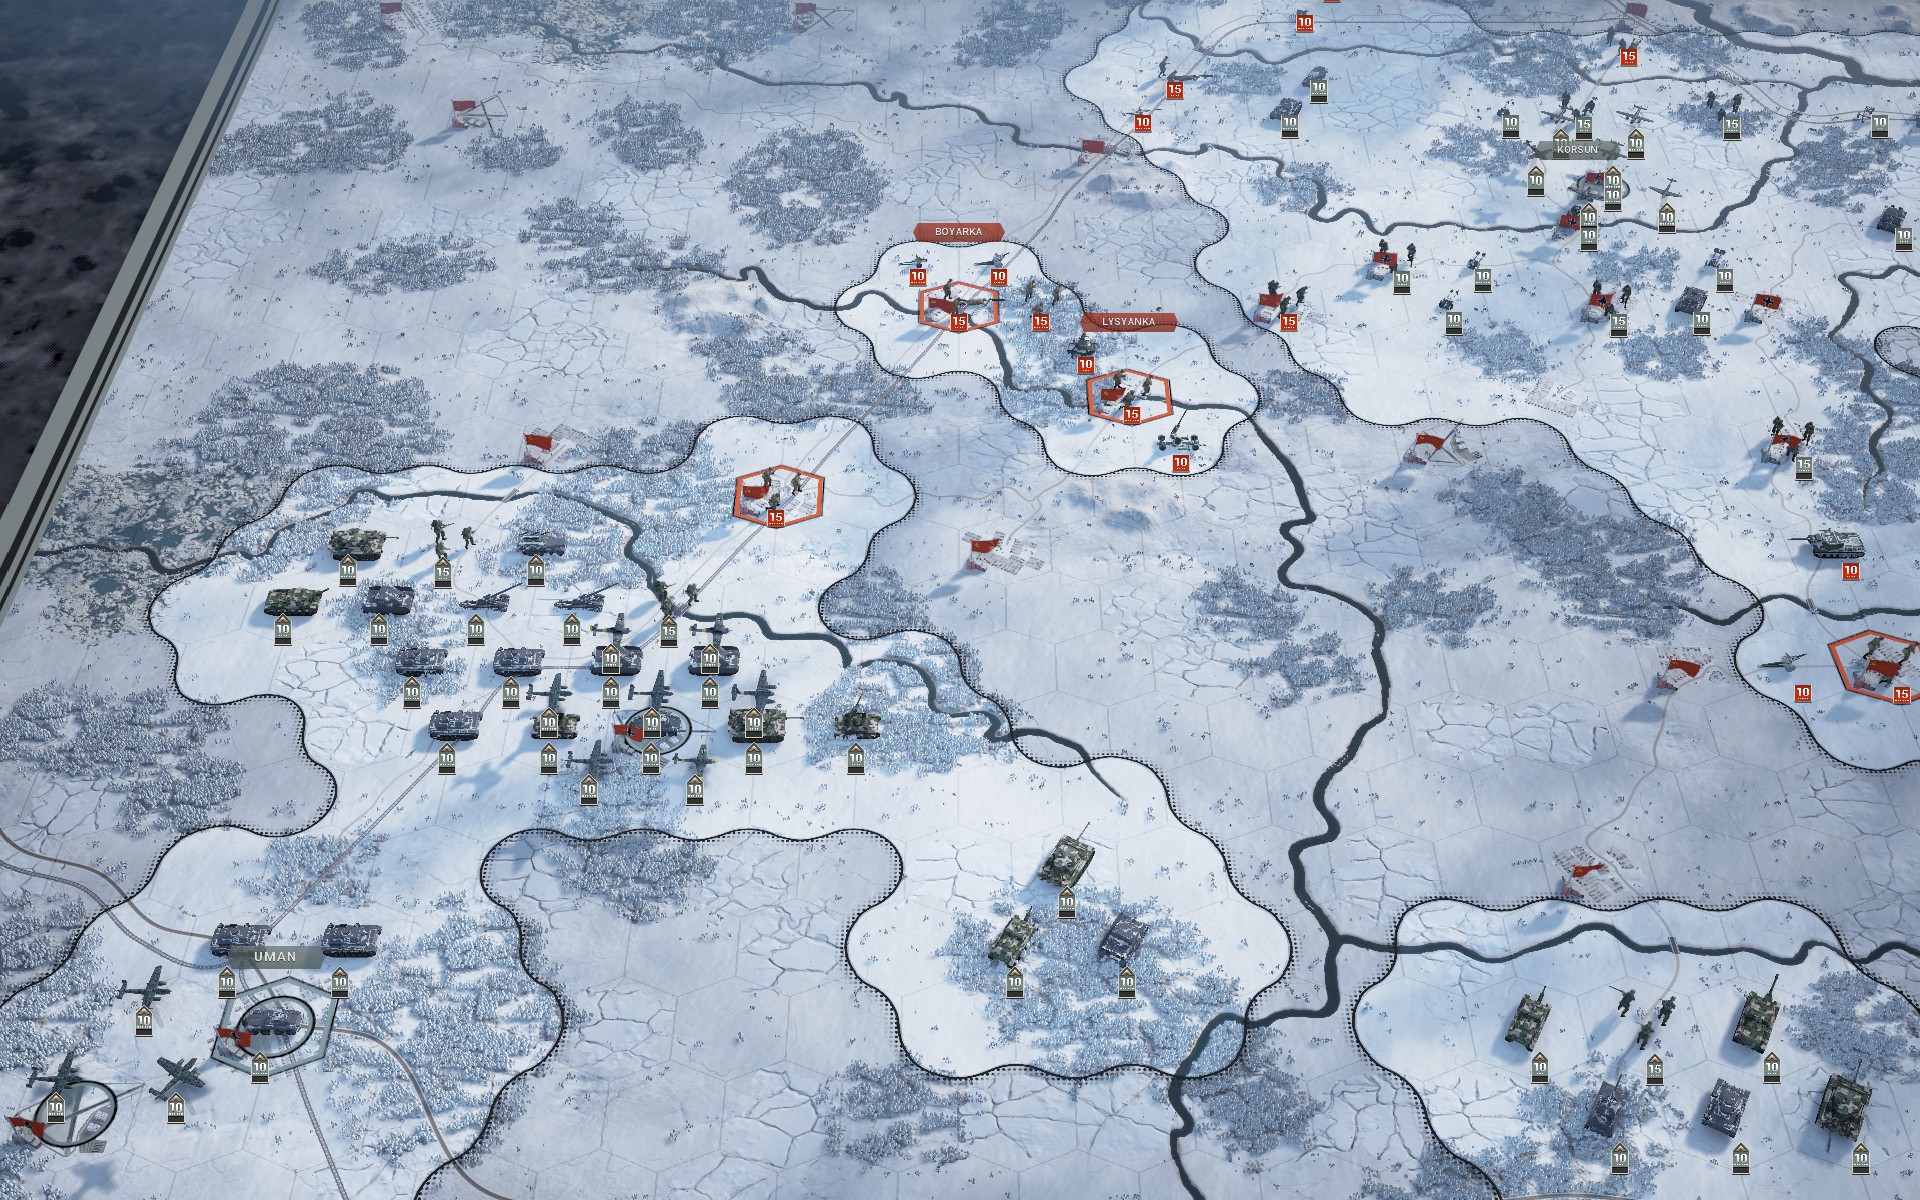
Deep Recon reveals that Boyarka and Lysyanka are heavily fortified, but I am uneasy about the conspicuous absence of Soviet armour; caution is advised while I wait for the Luftwaffe to provide aerial reconnaissance.

The Korsun pocket is surrounded on all sides, but the airfield offers a crucial lifeline in the form of a supply hex. The auxiliaries will fall back and establish a new line of defence around it, allowing them to support each other as they are currently too spread out.
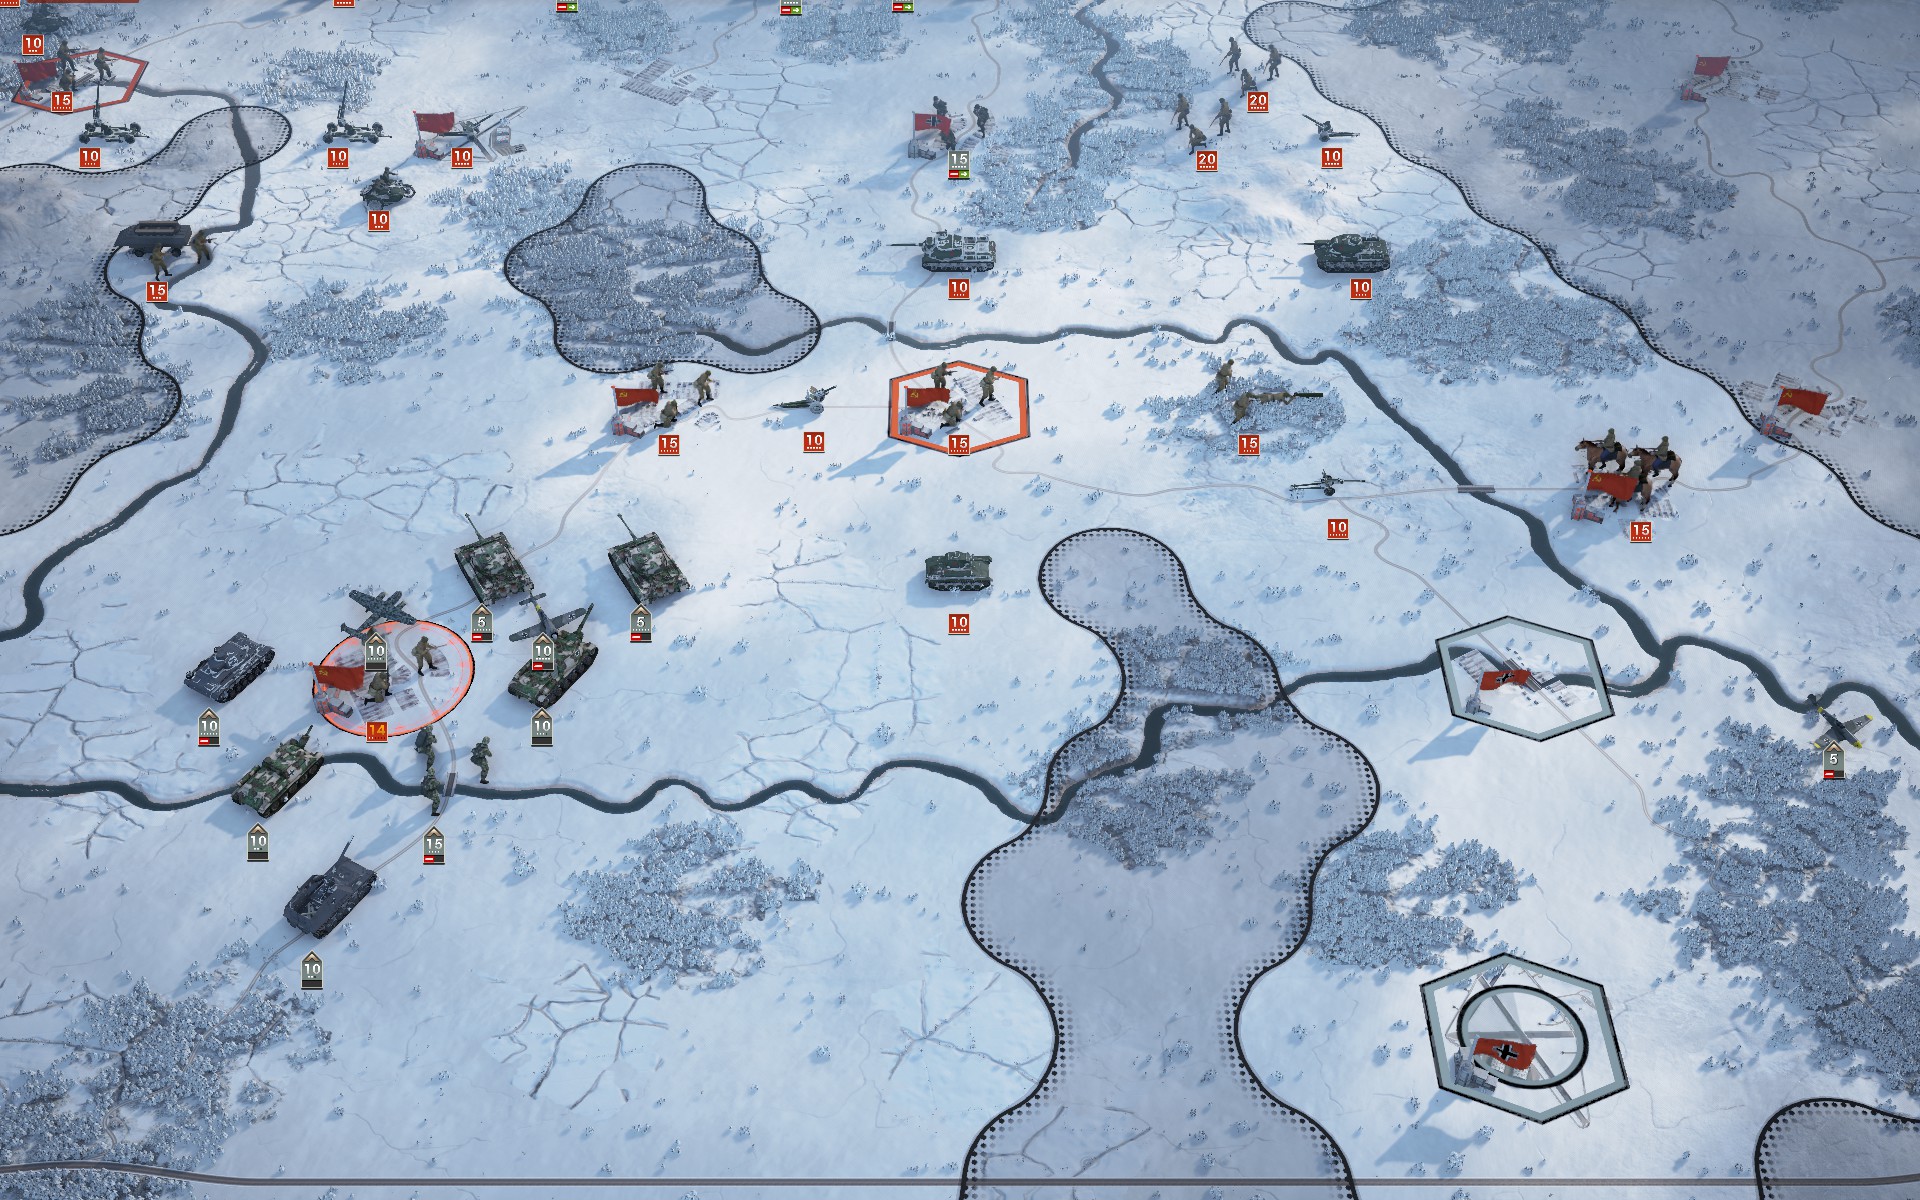
Panzers cross the Bolshaya Vys river to surround the Soviet Guard in the town of Yampol. Their task will be to protect the flank of the main force as it advances north.
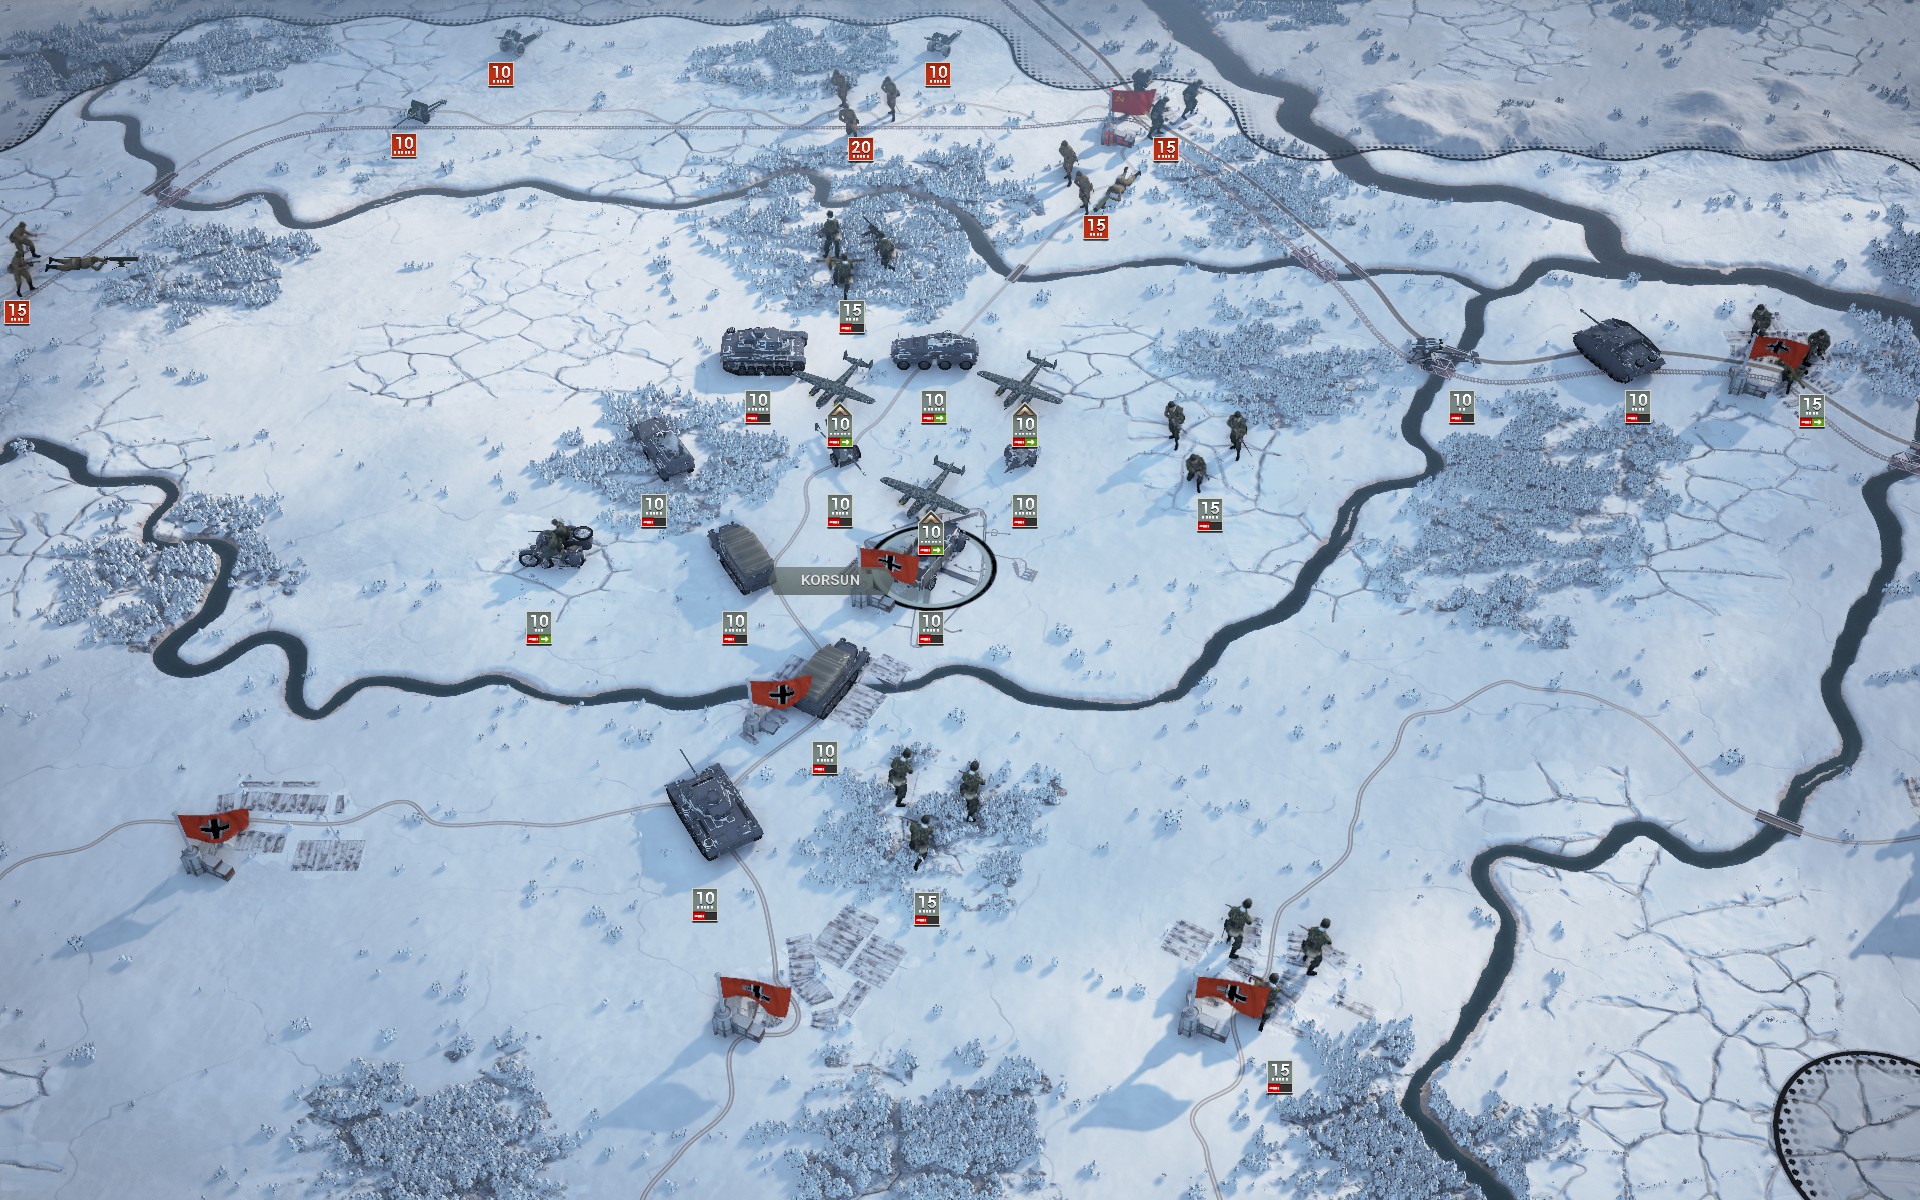
The auxiliaries begin to fall back towards the airfield.
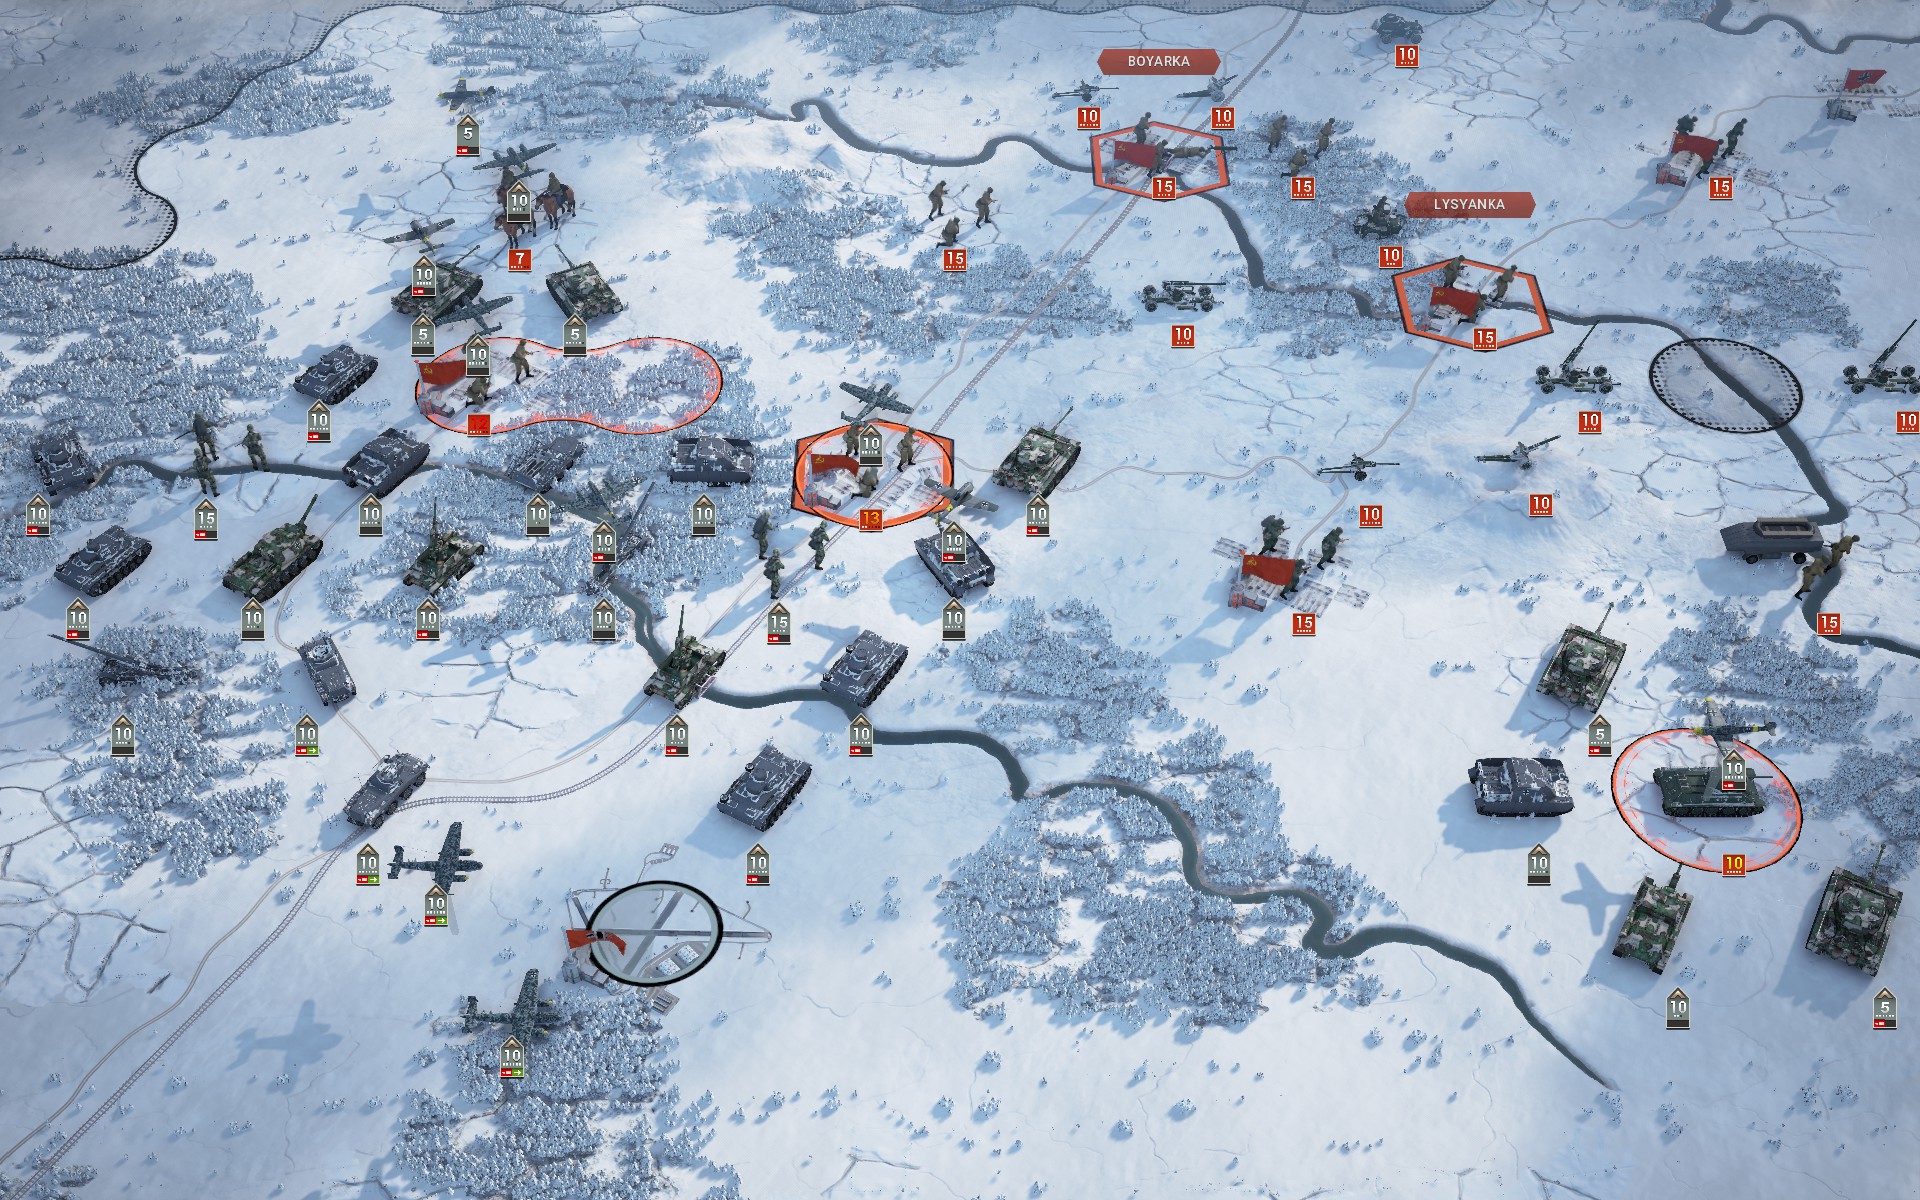
The Tigers lead the way as the main battlegroup advances towards Boyarka and Lysyanka.
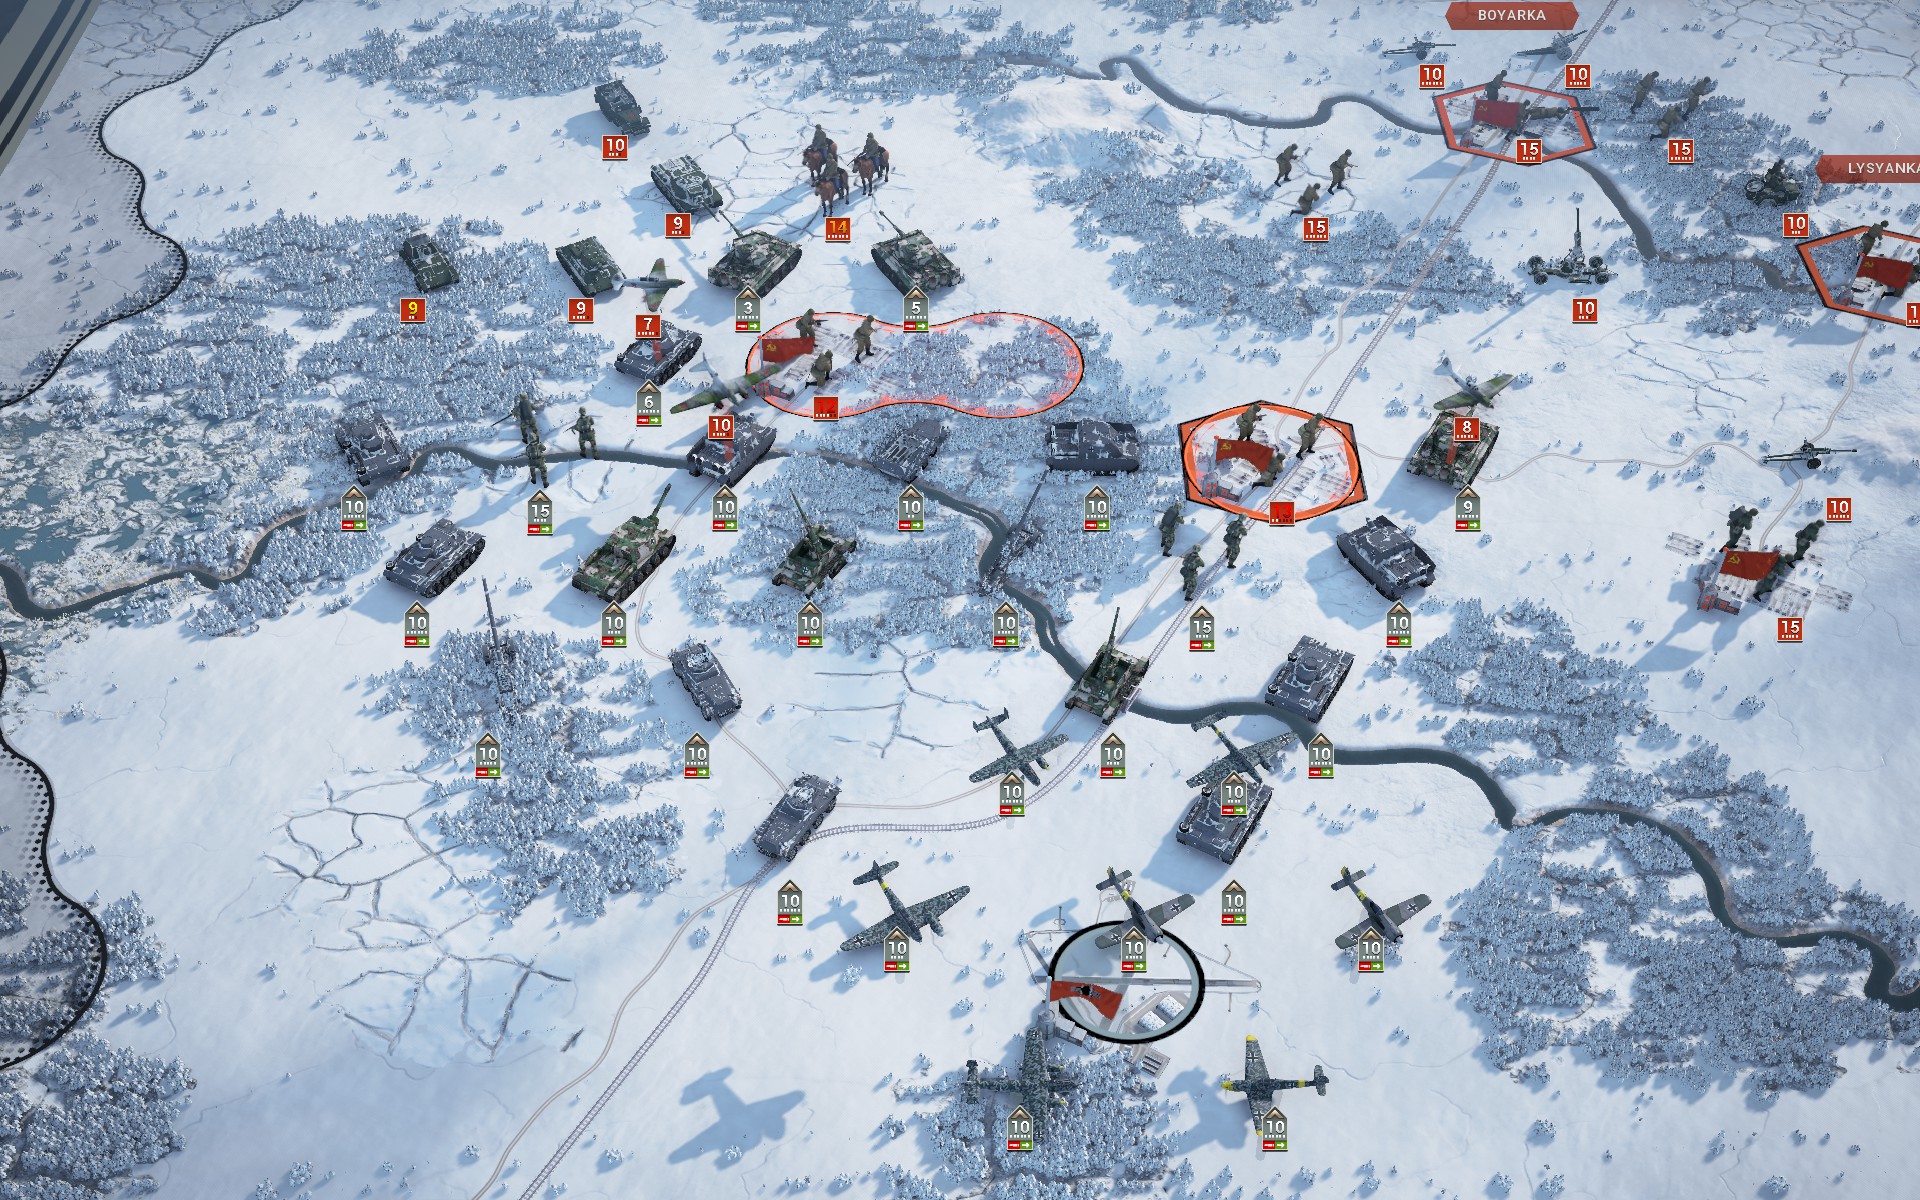
My vanguard suffers heavy damage due to the lack of fire support as Soviet armour counterattacks. The veterans hold their ground, however.
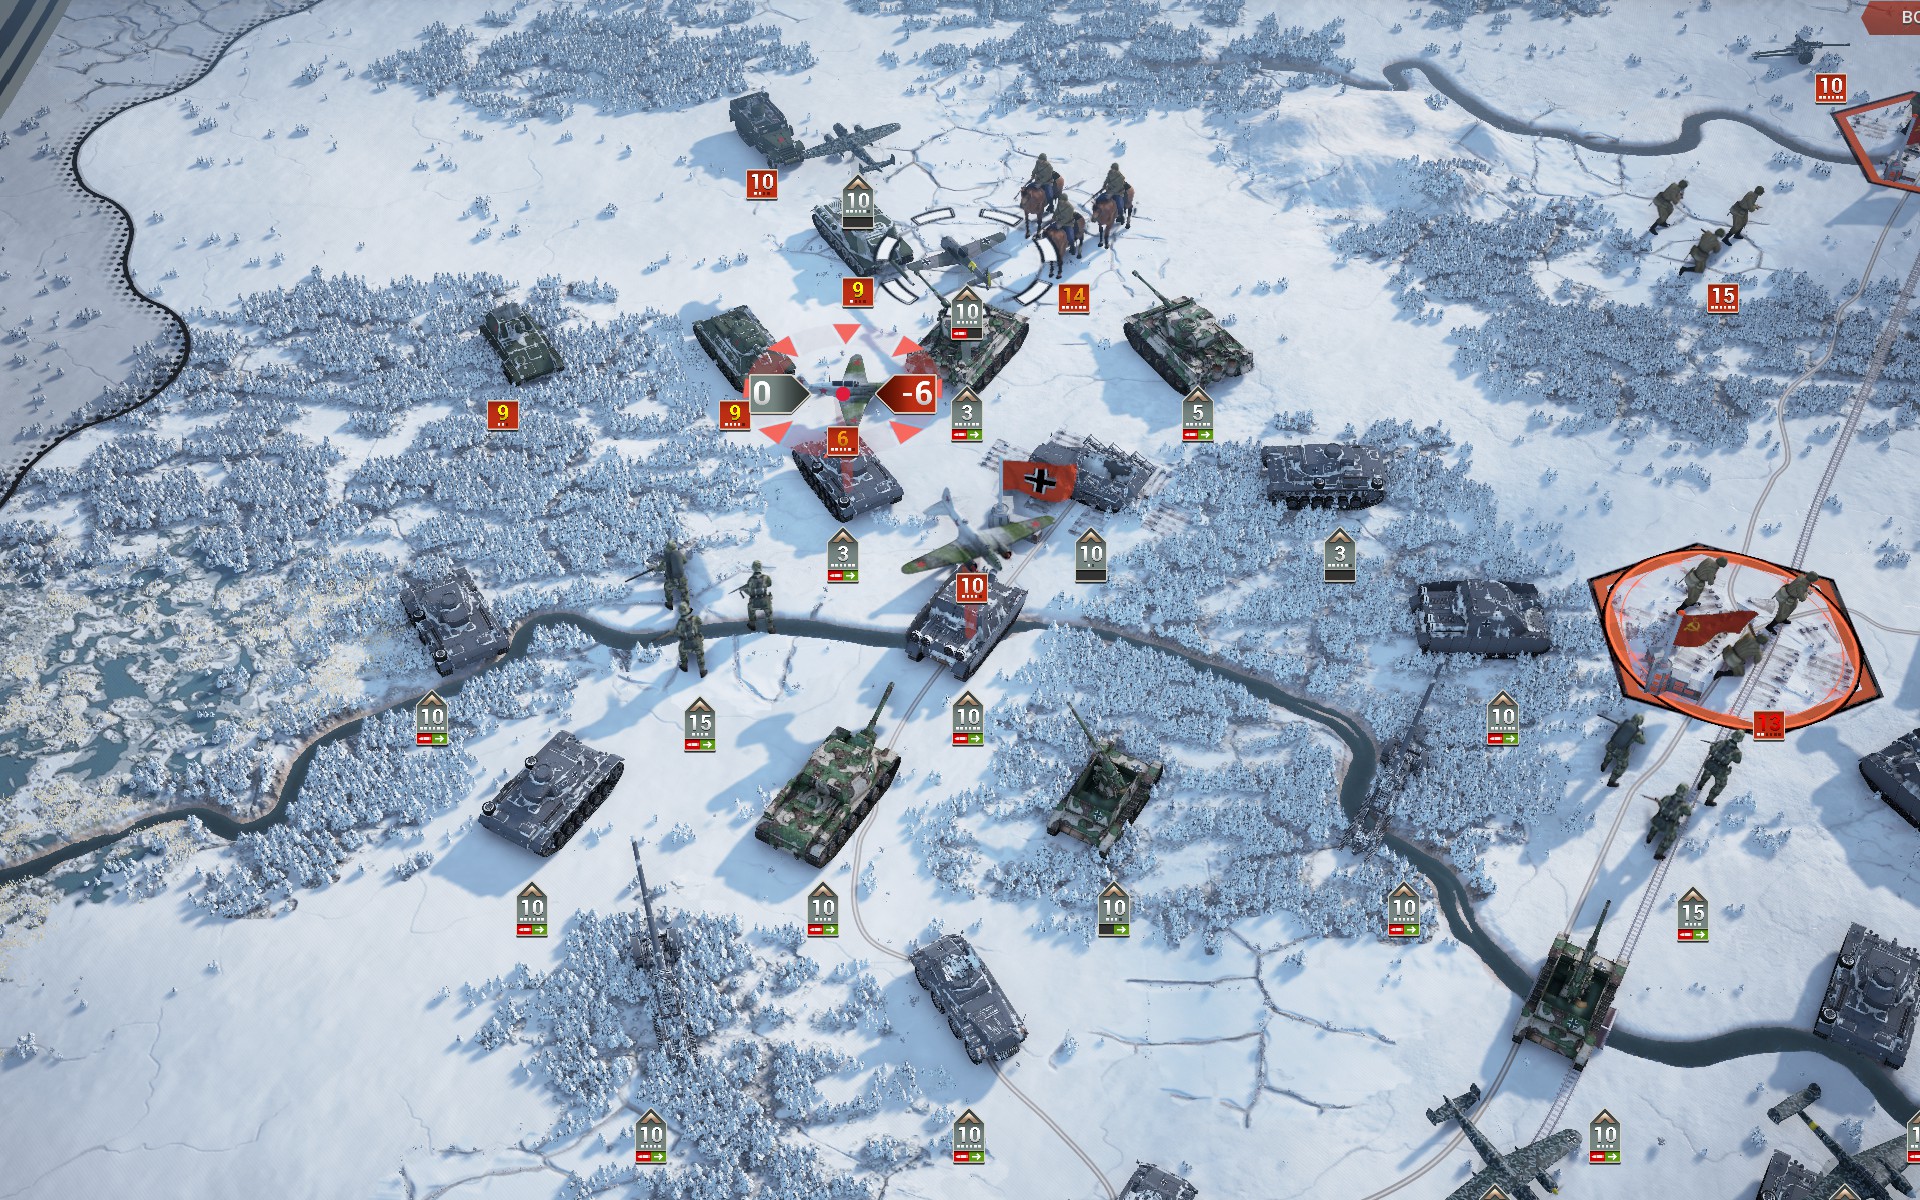
The Luftwaffe shoots down the Soviet fighters.
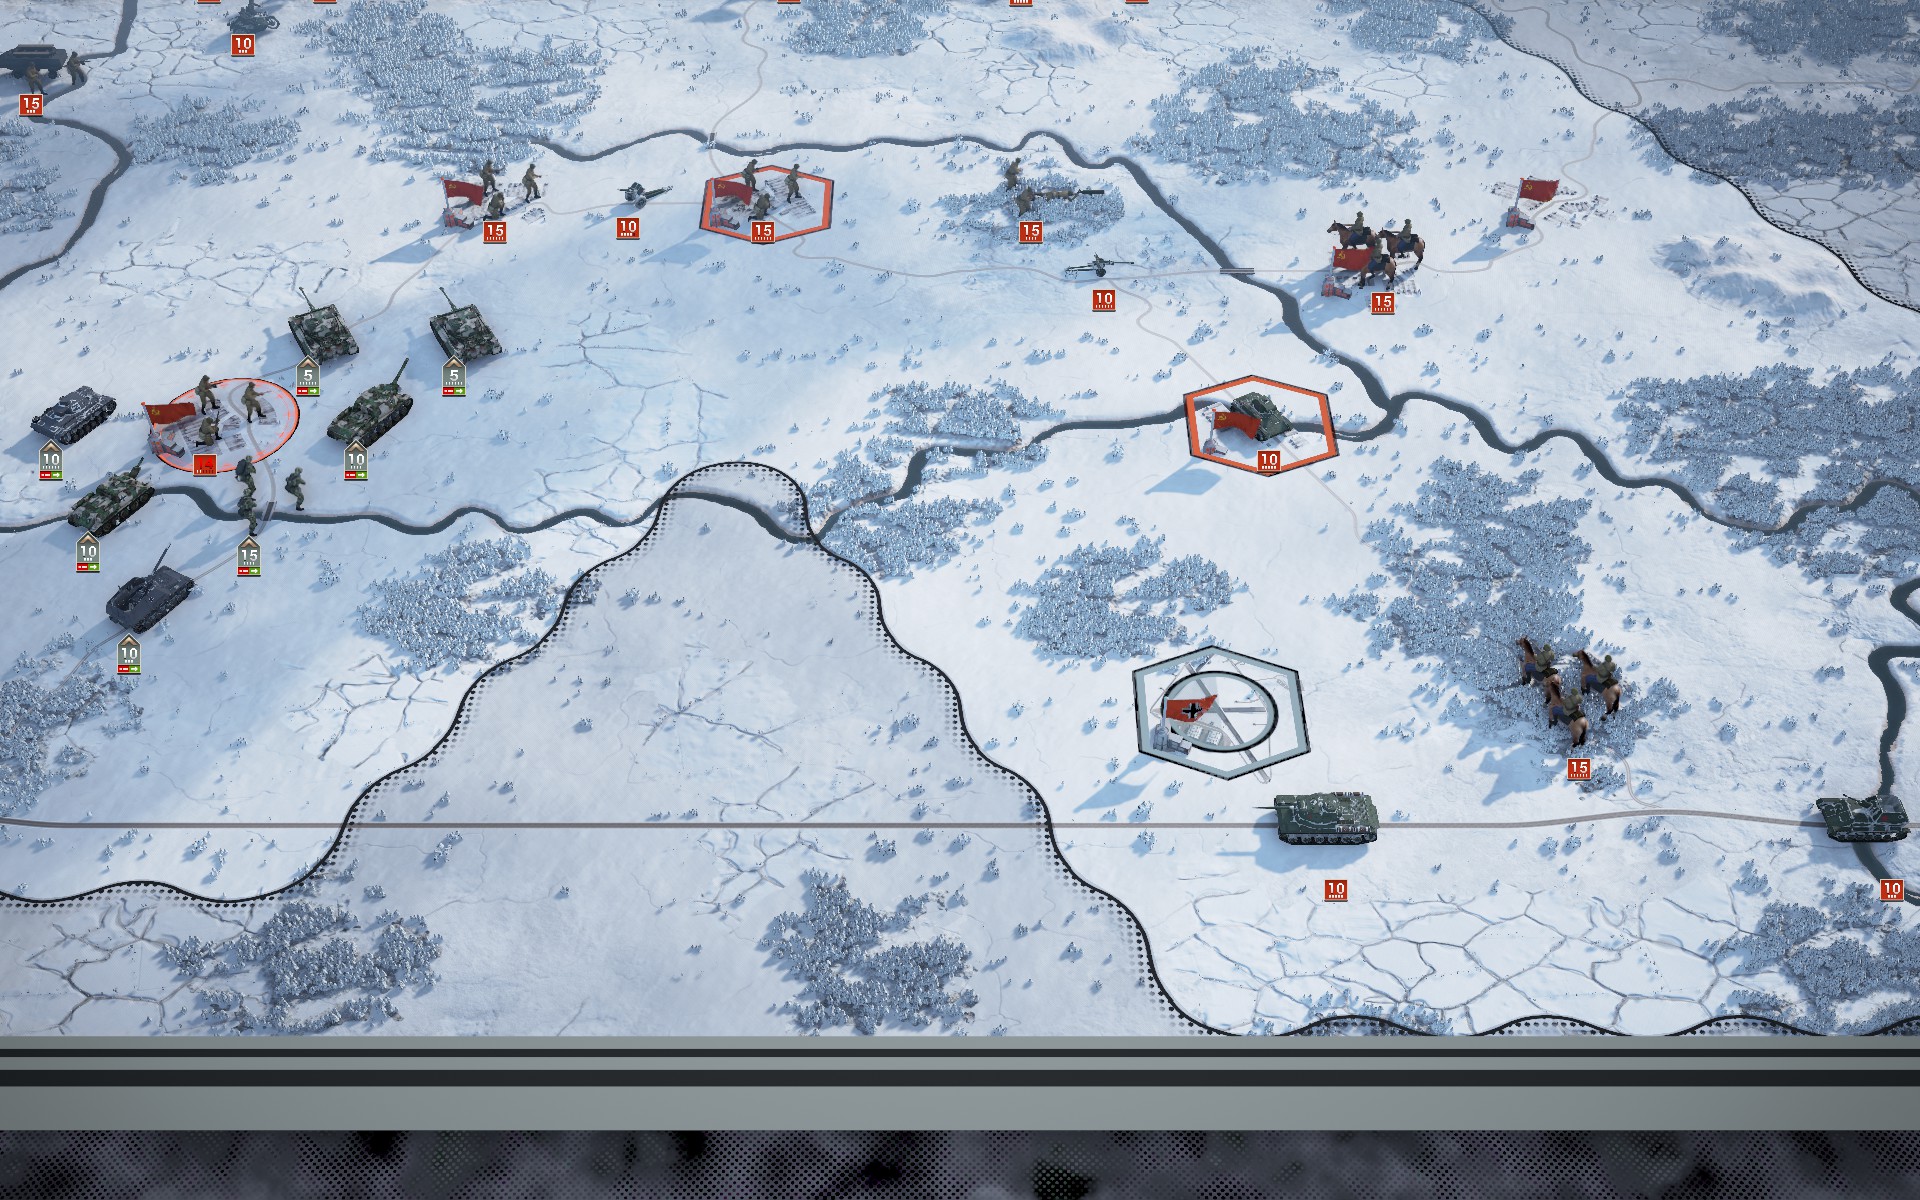
As I suspected it would, the Red Army takes control of the undefended objectives to the east. Due to the presence of a powerful IS-1 heavy tank I revise my plans for the eastern battlegroup; while slow, the IS-1 is even more resilient than the Tiger and would make a fine addition to my forces. As I strive to suppress and capture enemy forces I value resilience more than firepower, and with a Ground Defense of 27 the IS-1 can shrug off attacks that would cripple lesser tanks.
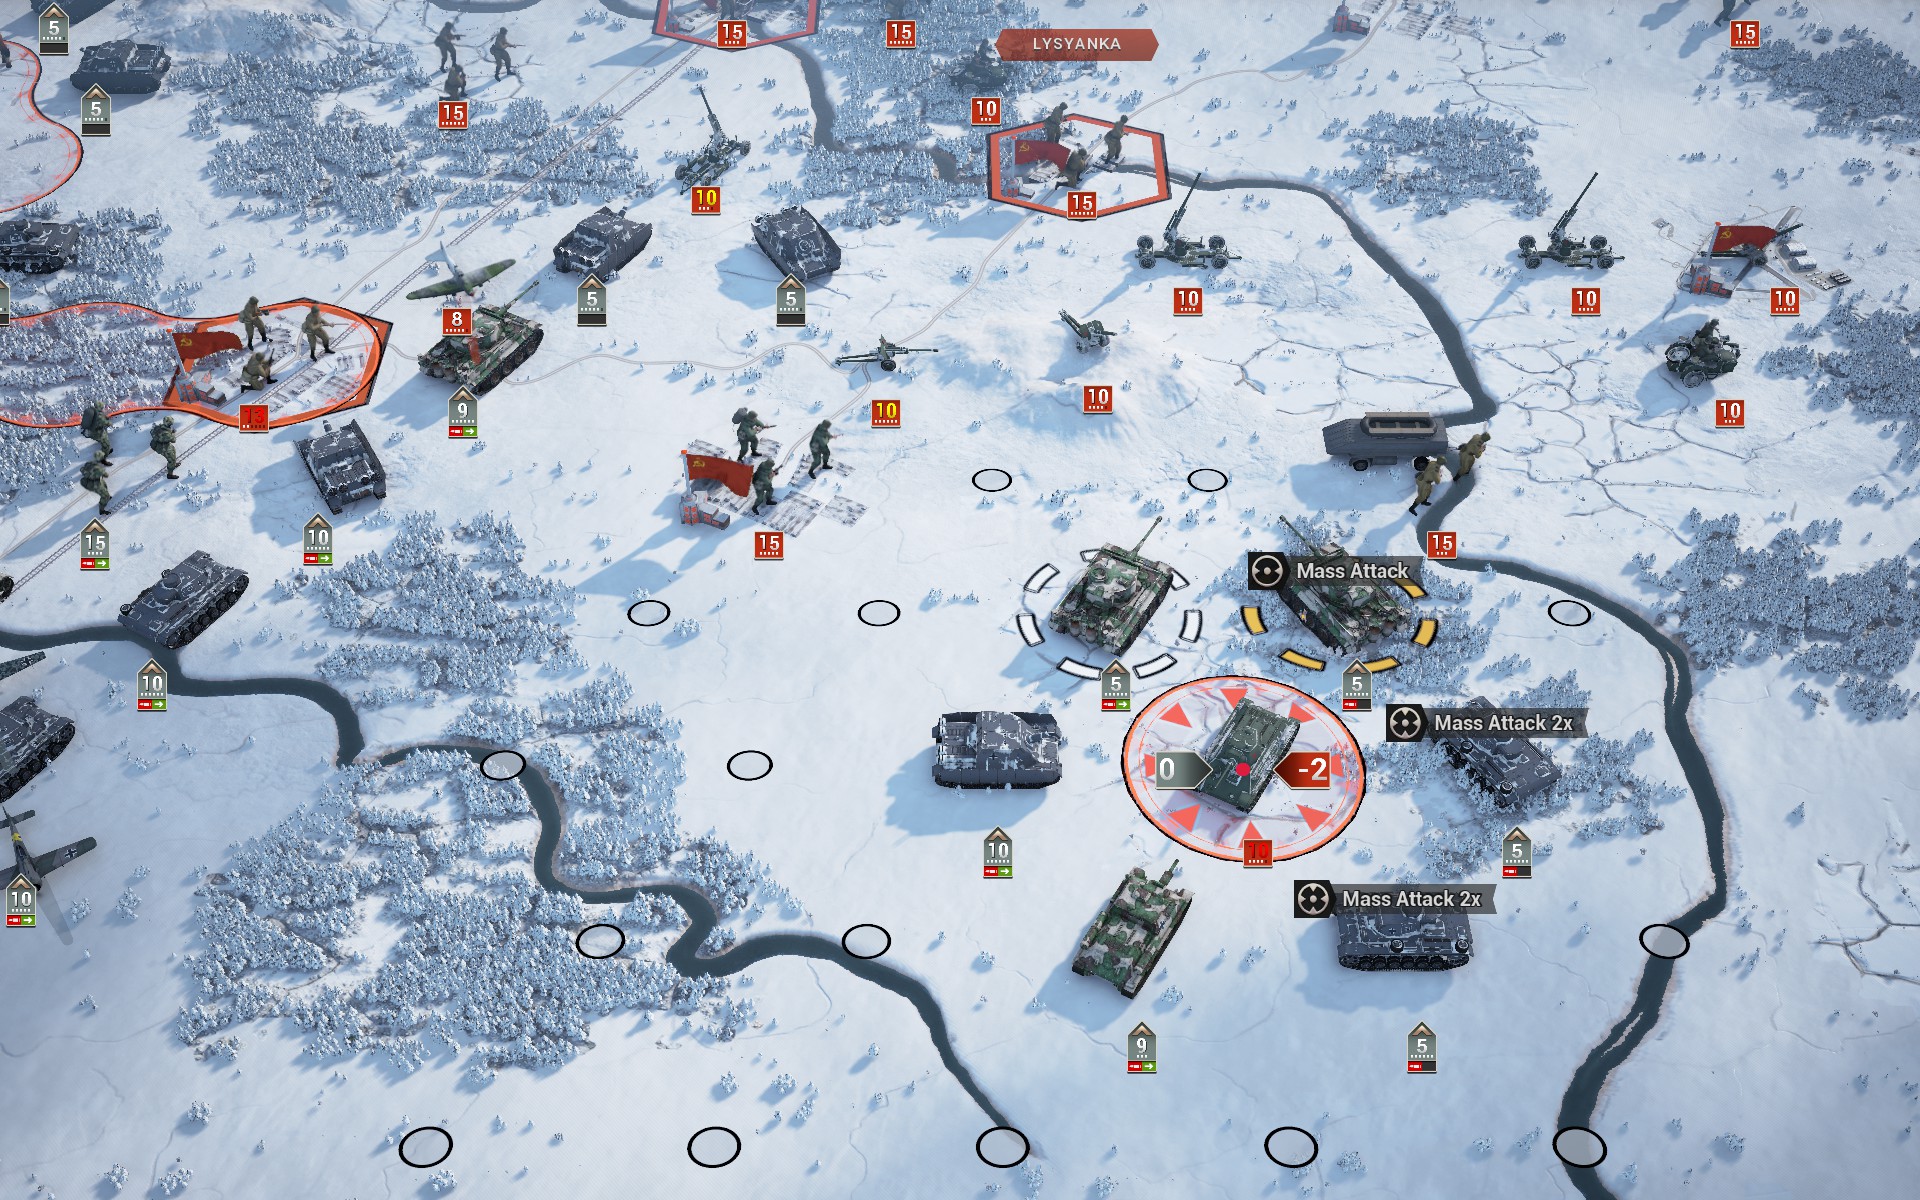
The IIINs struggle with the armour of the T-34/43, forcing me to rely on the Tigers to capture it.
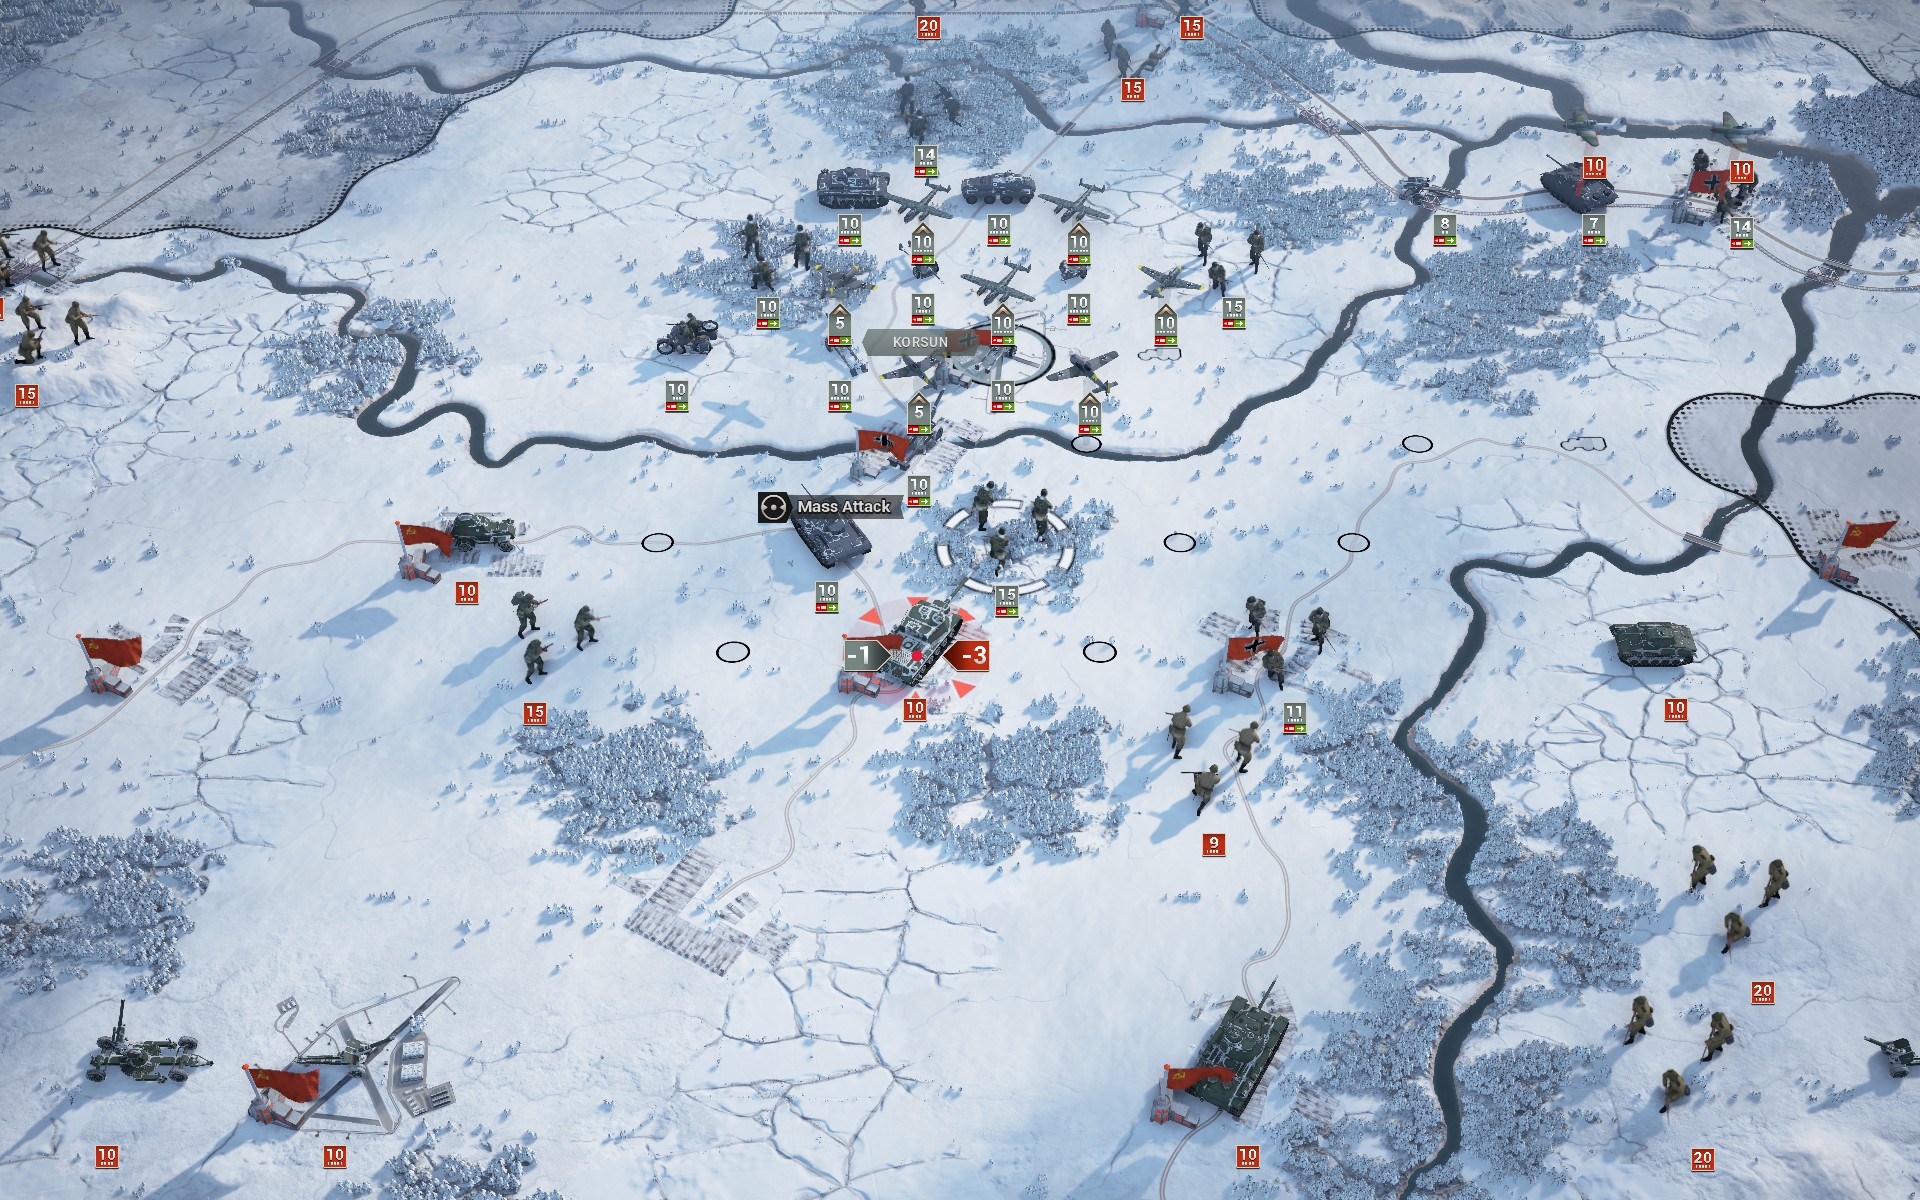
A powerful ISU-122 has foolishly entered a village, allowing the infantry to damage it. This should force the AI to repair it while the auxiliaries withdraw across the river.
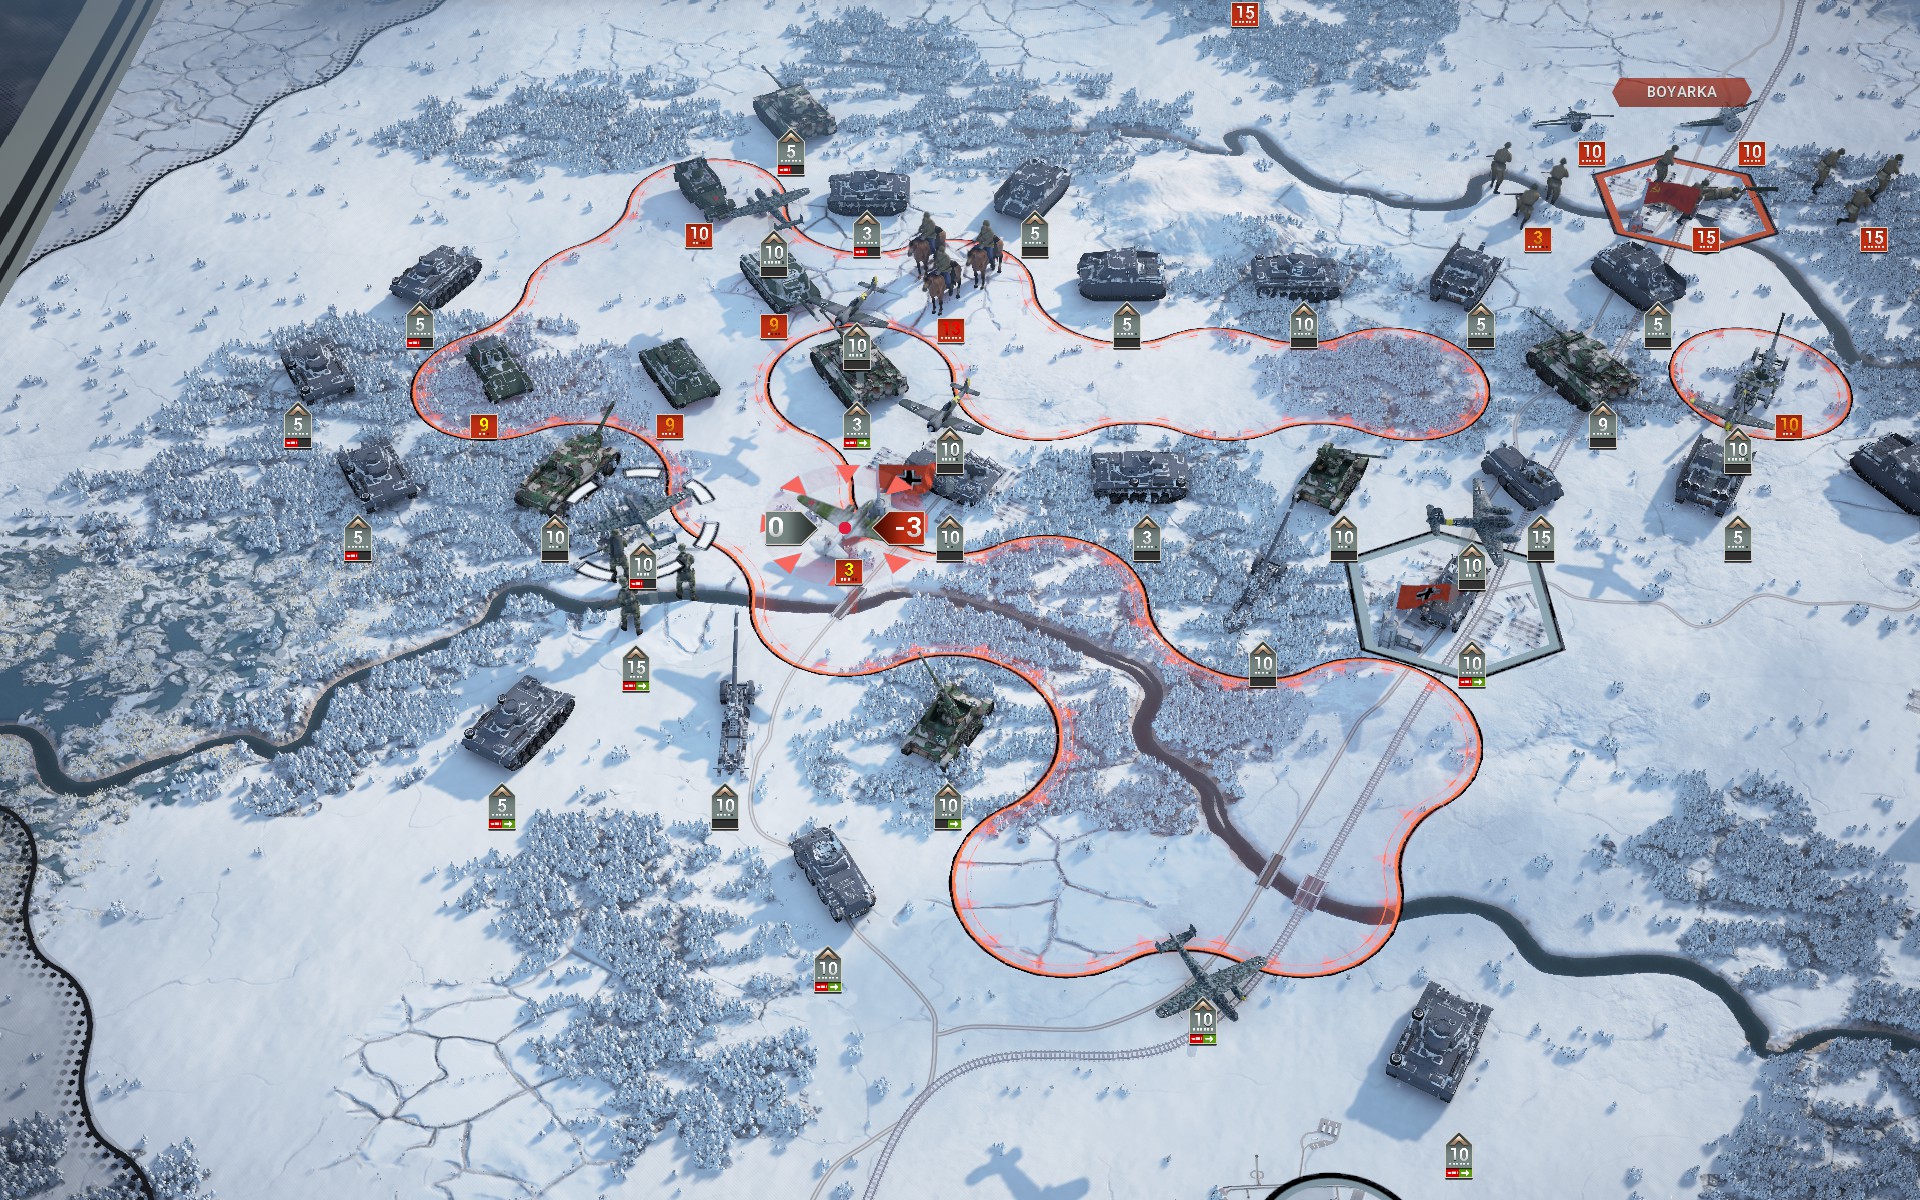
In the west, the Soviet armour is suppressed and encircled.
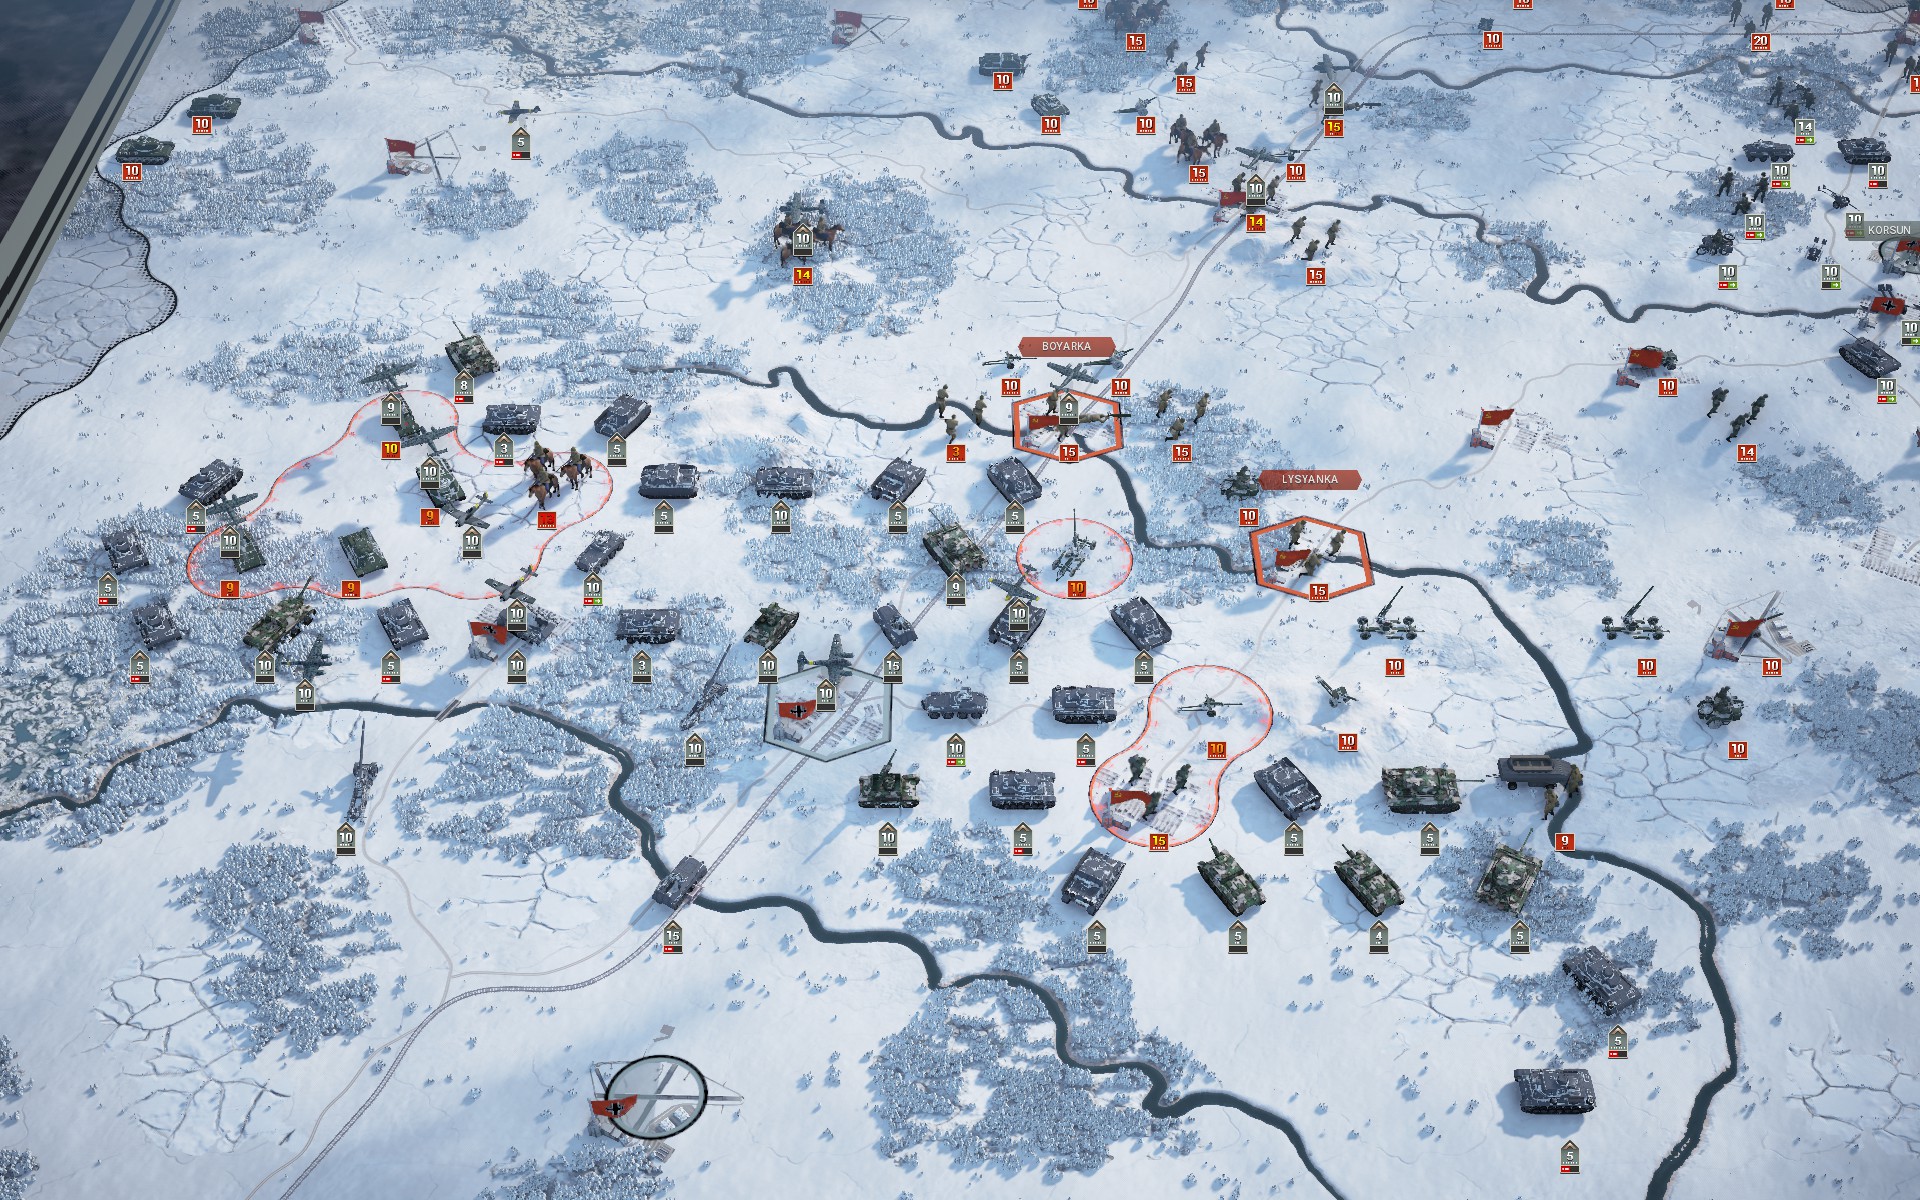
As the main battlegroup consolidates its position in preparation for the assault on Boyarka and Lysyanka, another IS-1 is spotted to the north. Due to the snow the 17 cm artillery is difficult to redeploy, so I decide to send a force north to flank Boyarka and capture the IS-1.
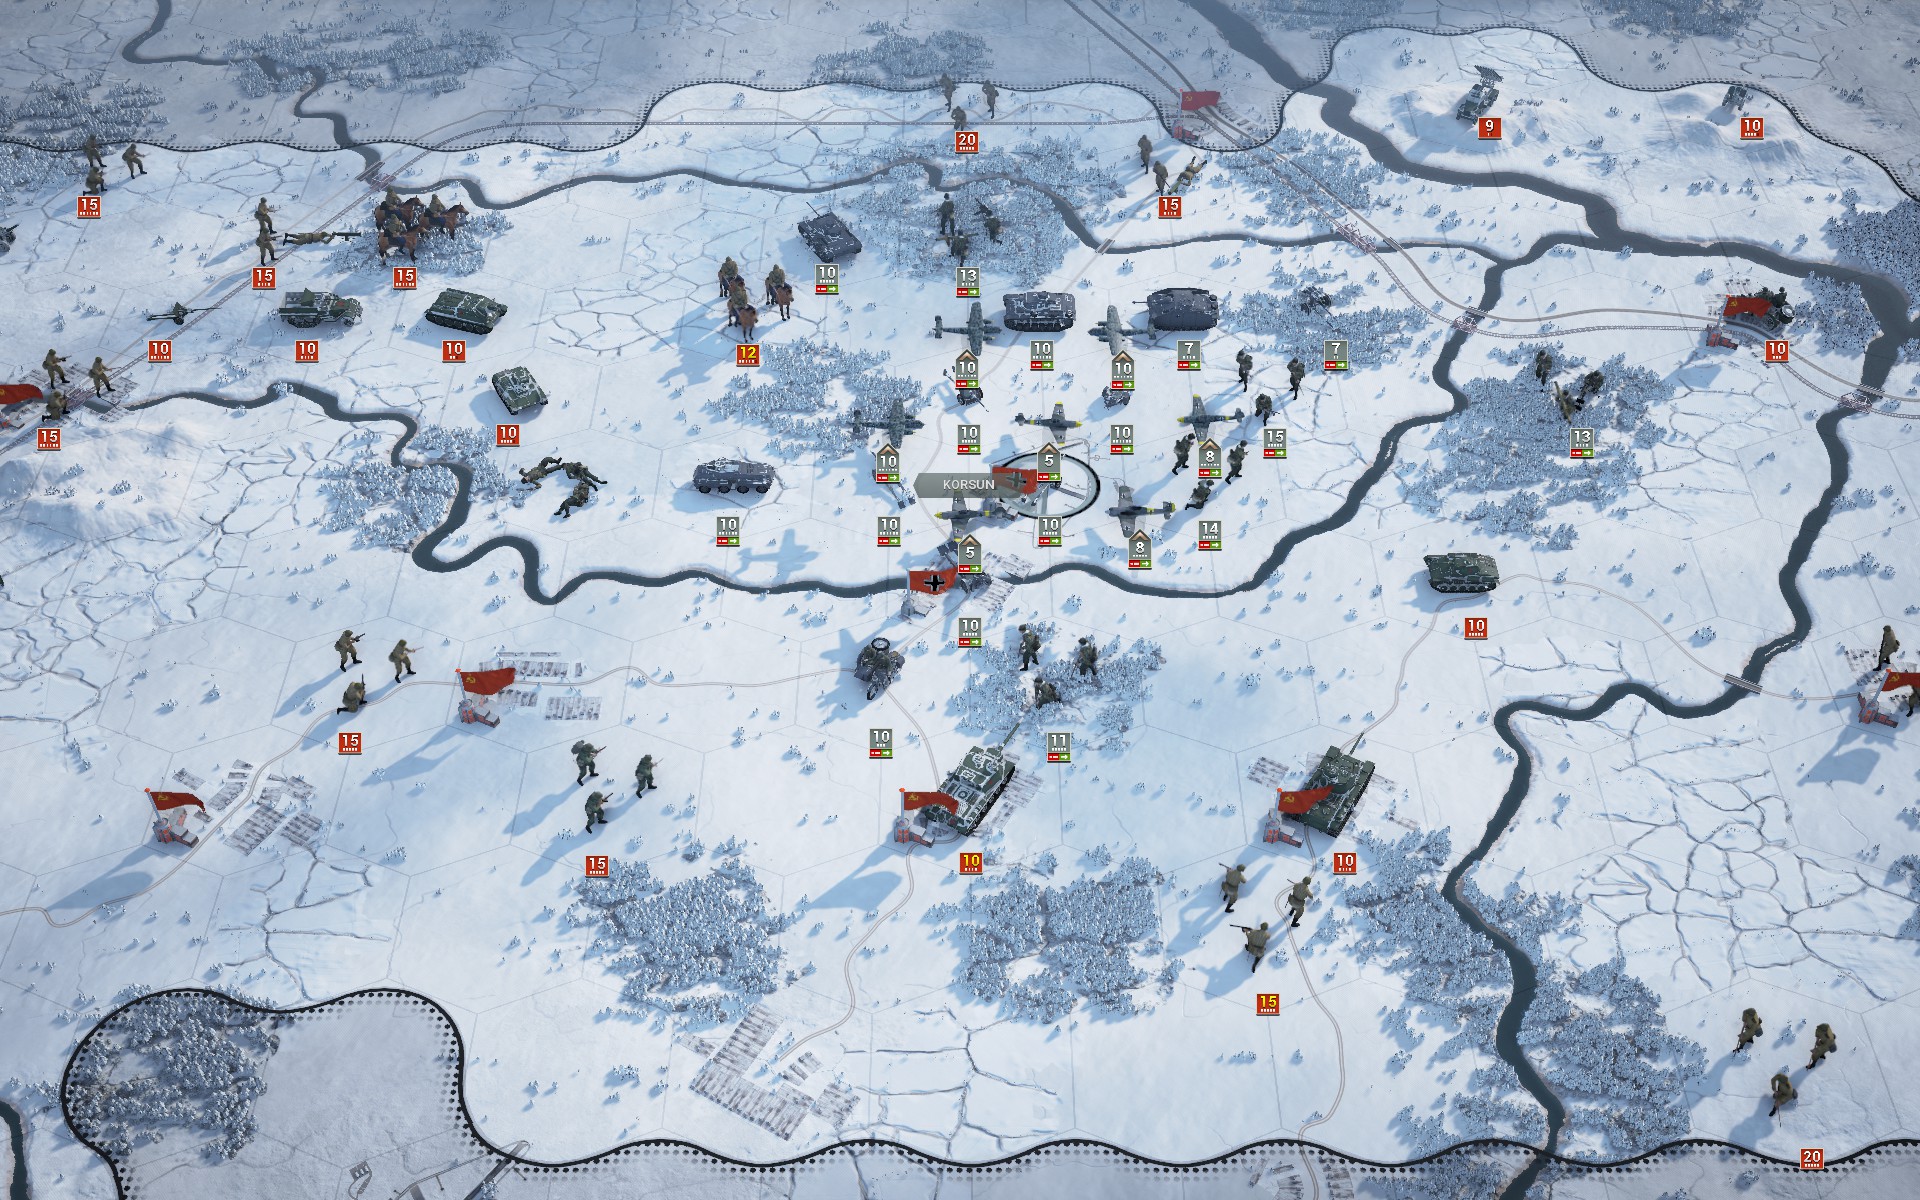
The Korsun pocket comes under heavy attack from the west. The Katyusha battery on the other side of the Dniepr is proving a menace.
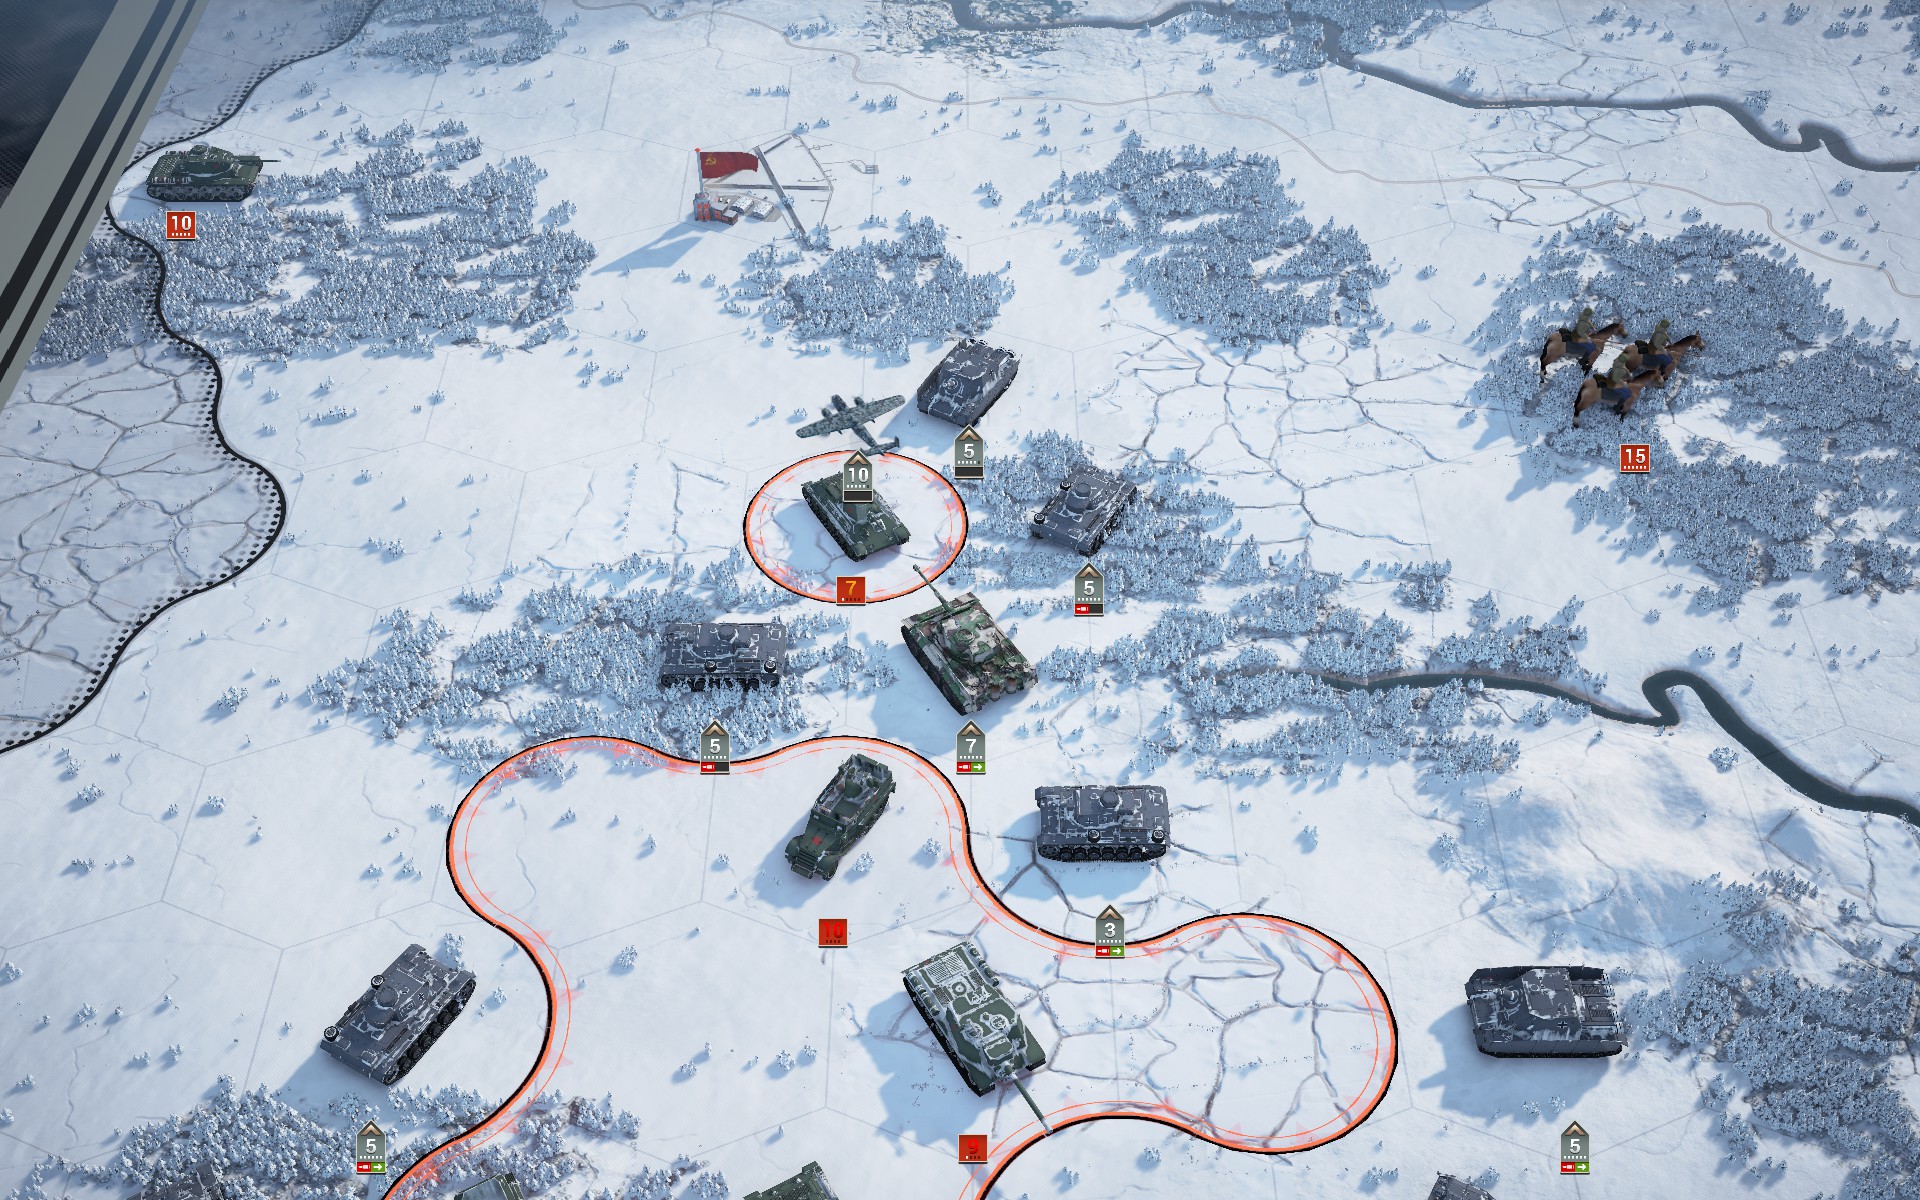
The T-34/43 recklessly leaves the slower IS-1 behind. This makes things easier for me.
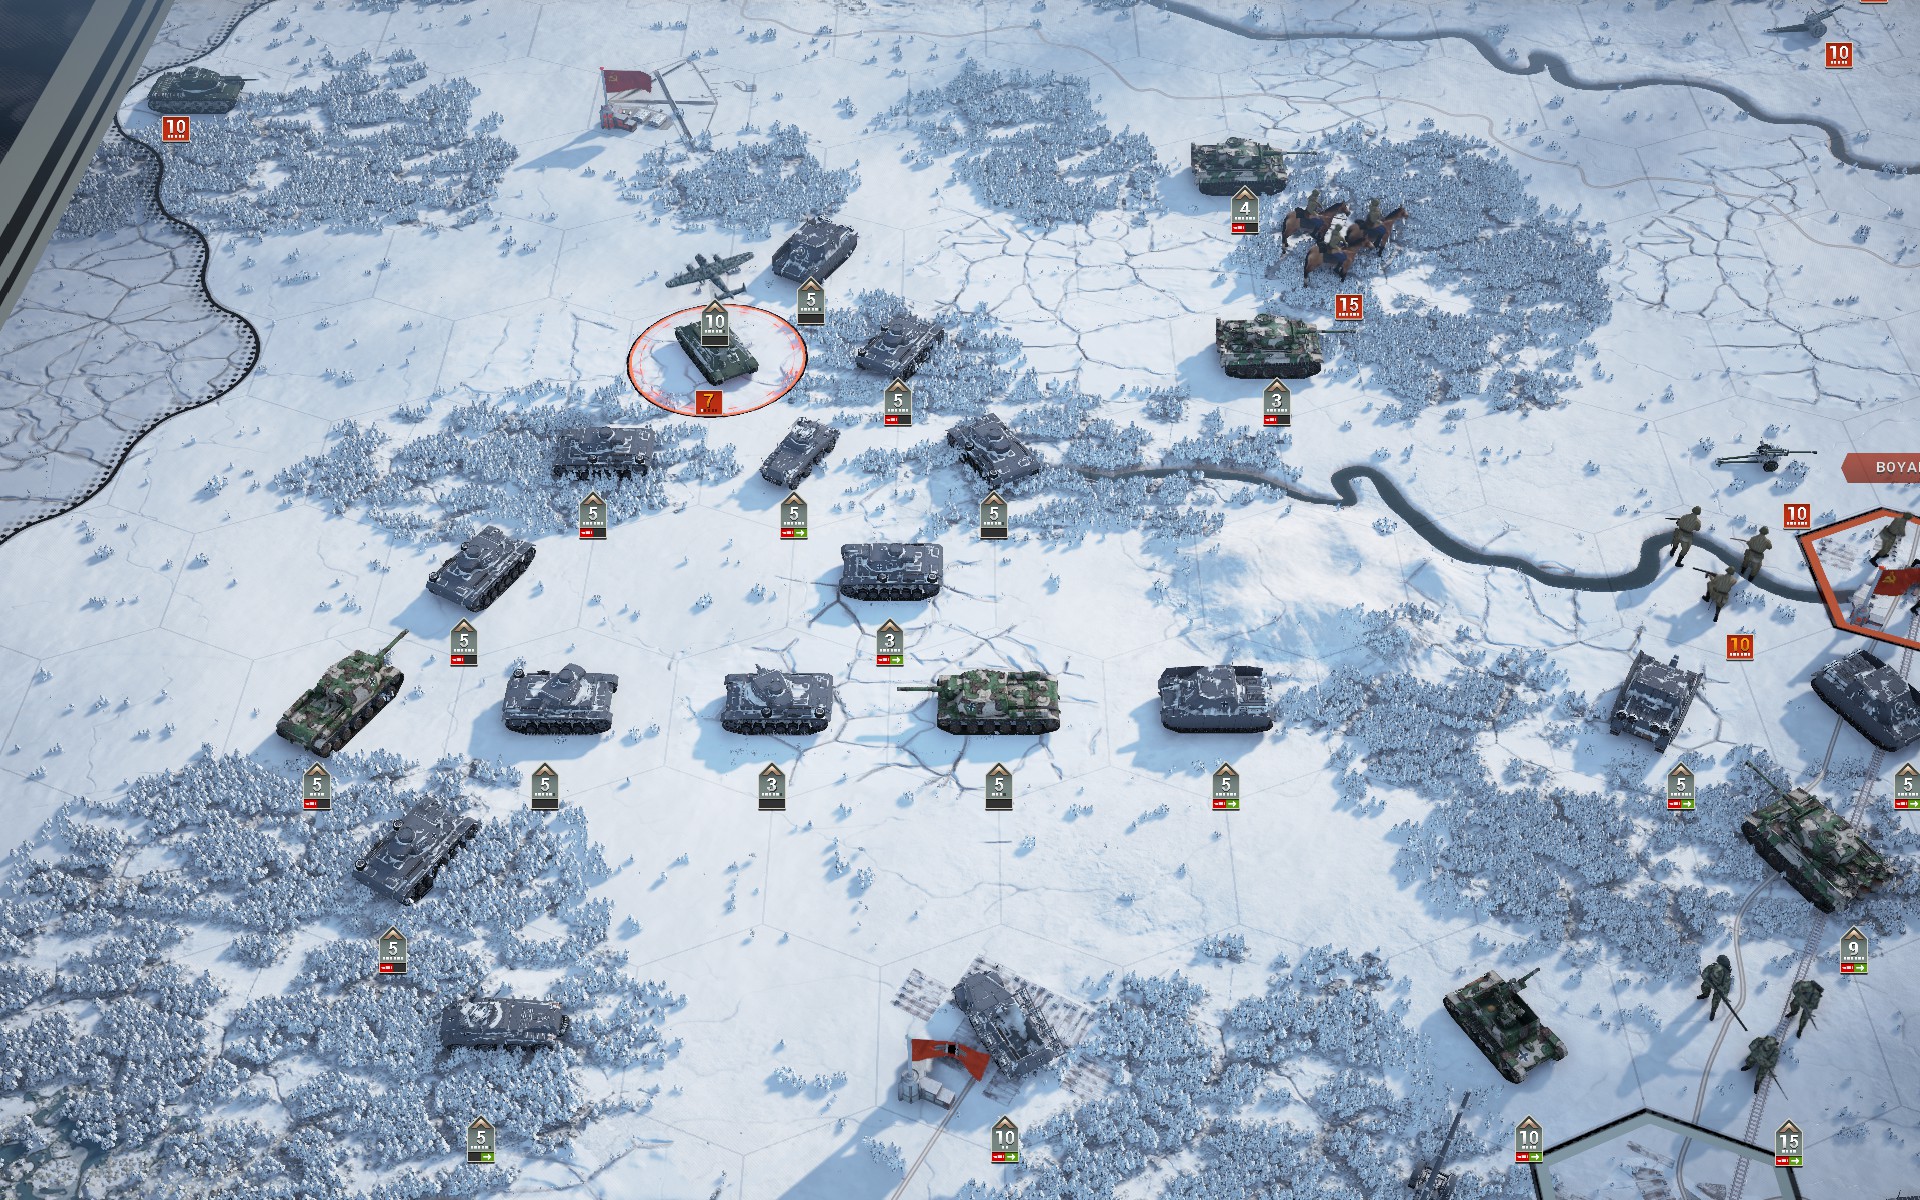
The Tigers take up positions to prevent the Soviet Cavalry from threatening the exposed IIINs in the woods as they prepare to capture the T-34/43.

The Luftwaffe hunts down the last Soviet aircraft.
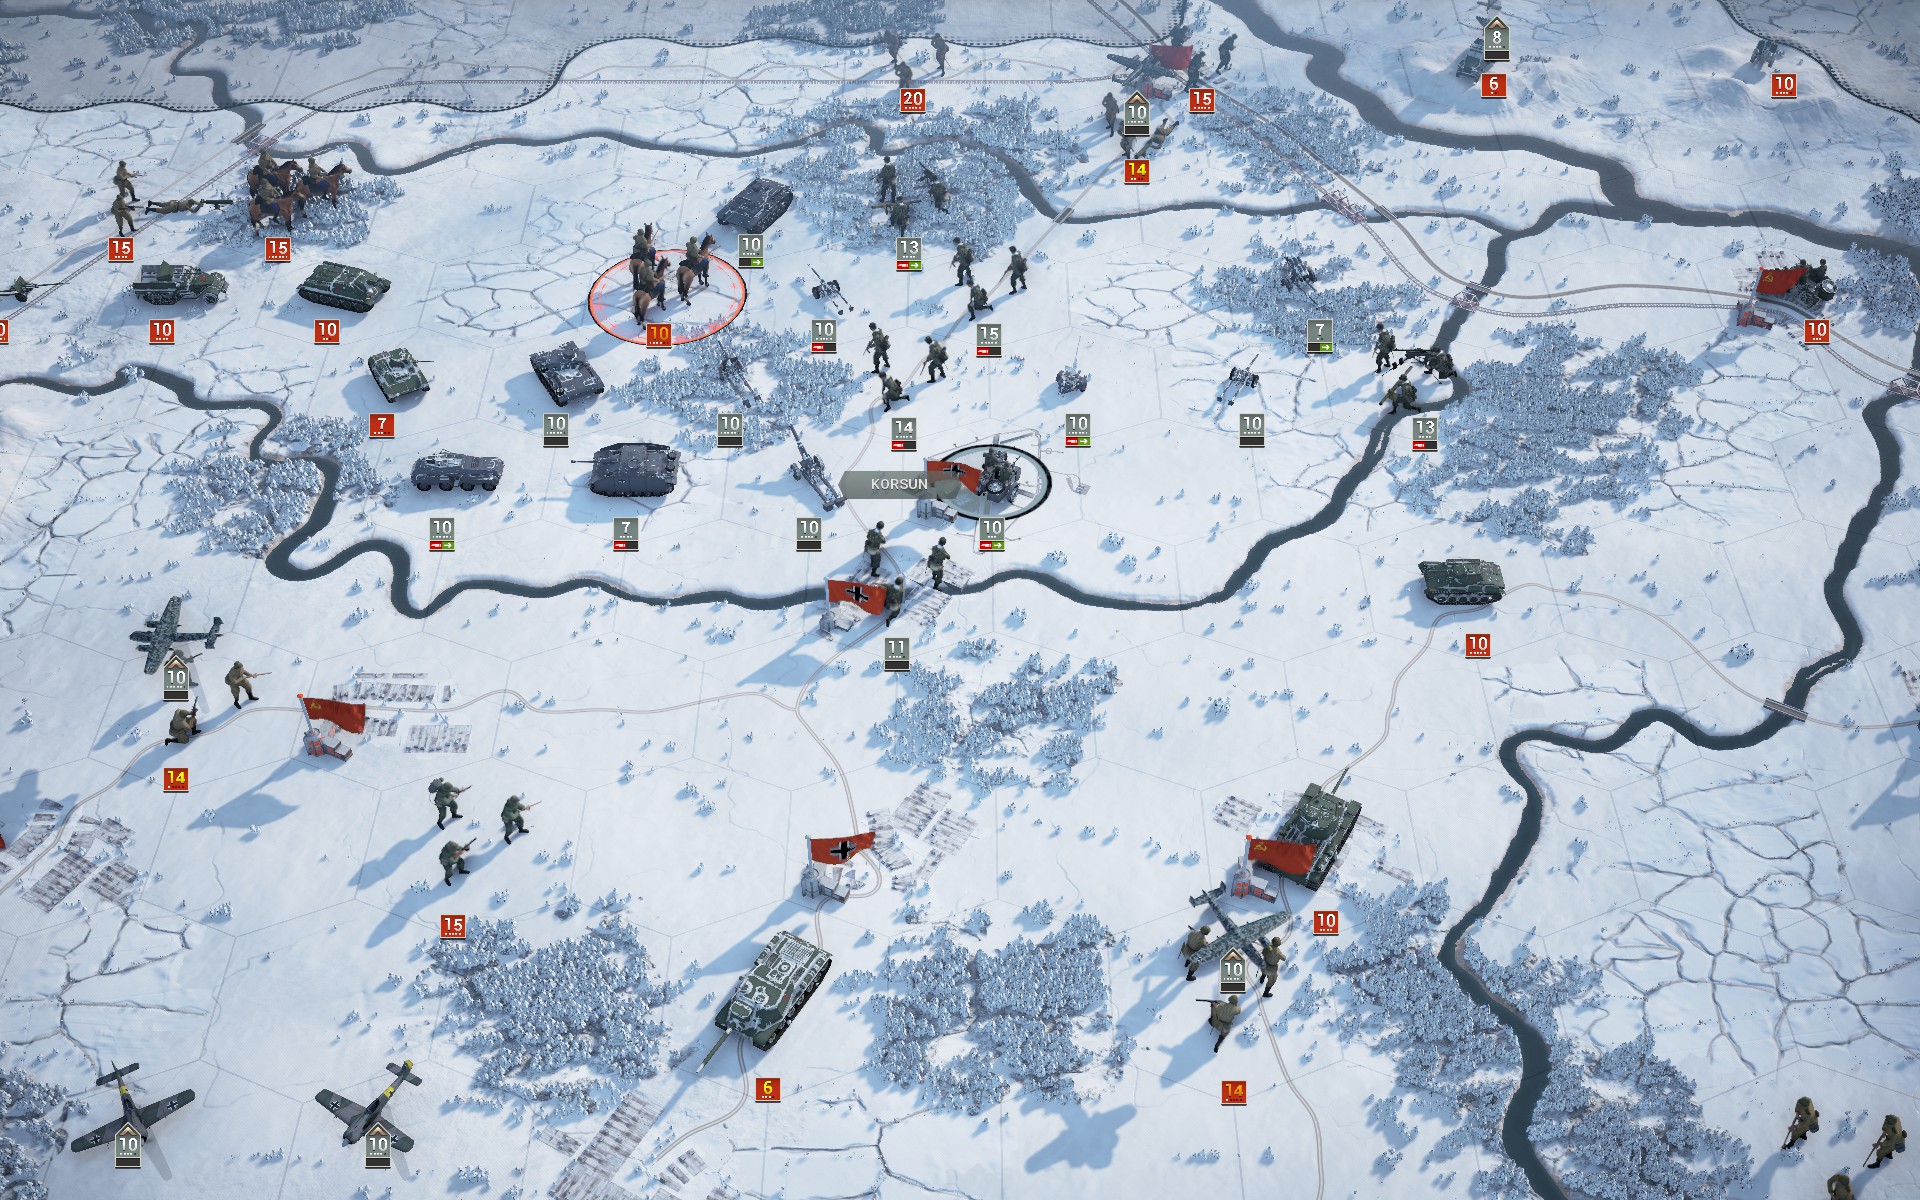
At Korsun, the Red Army once again attempts to breach the pocket from the west.
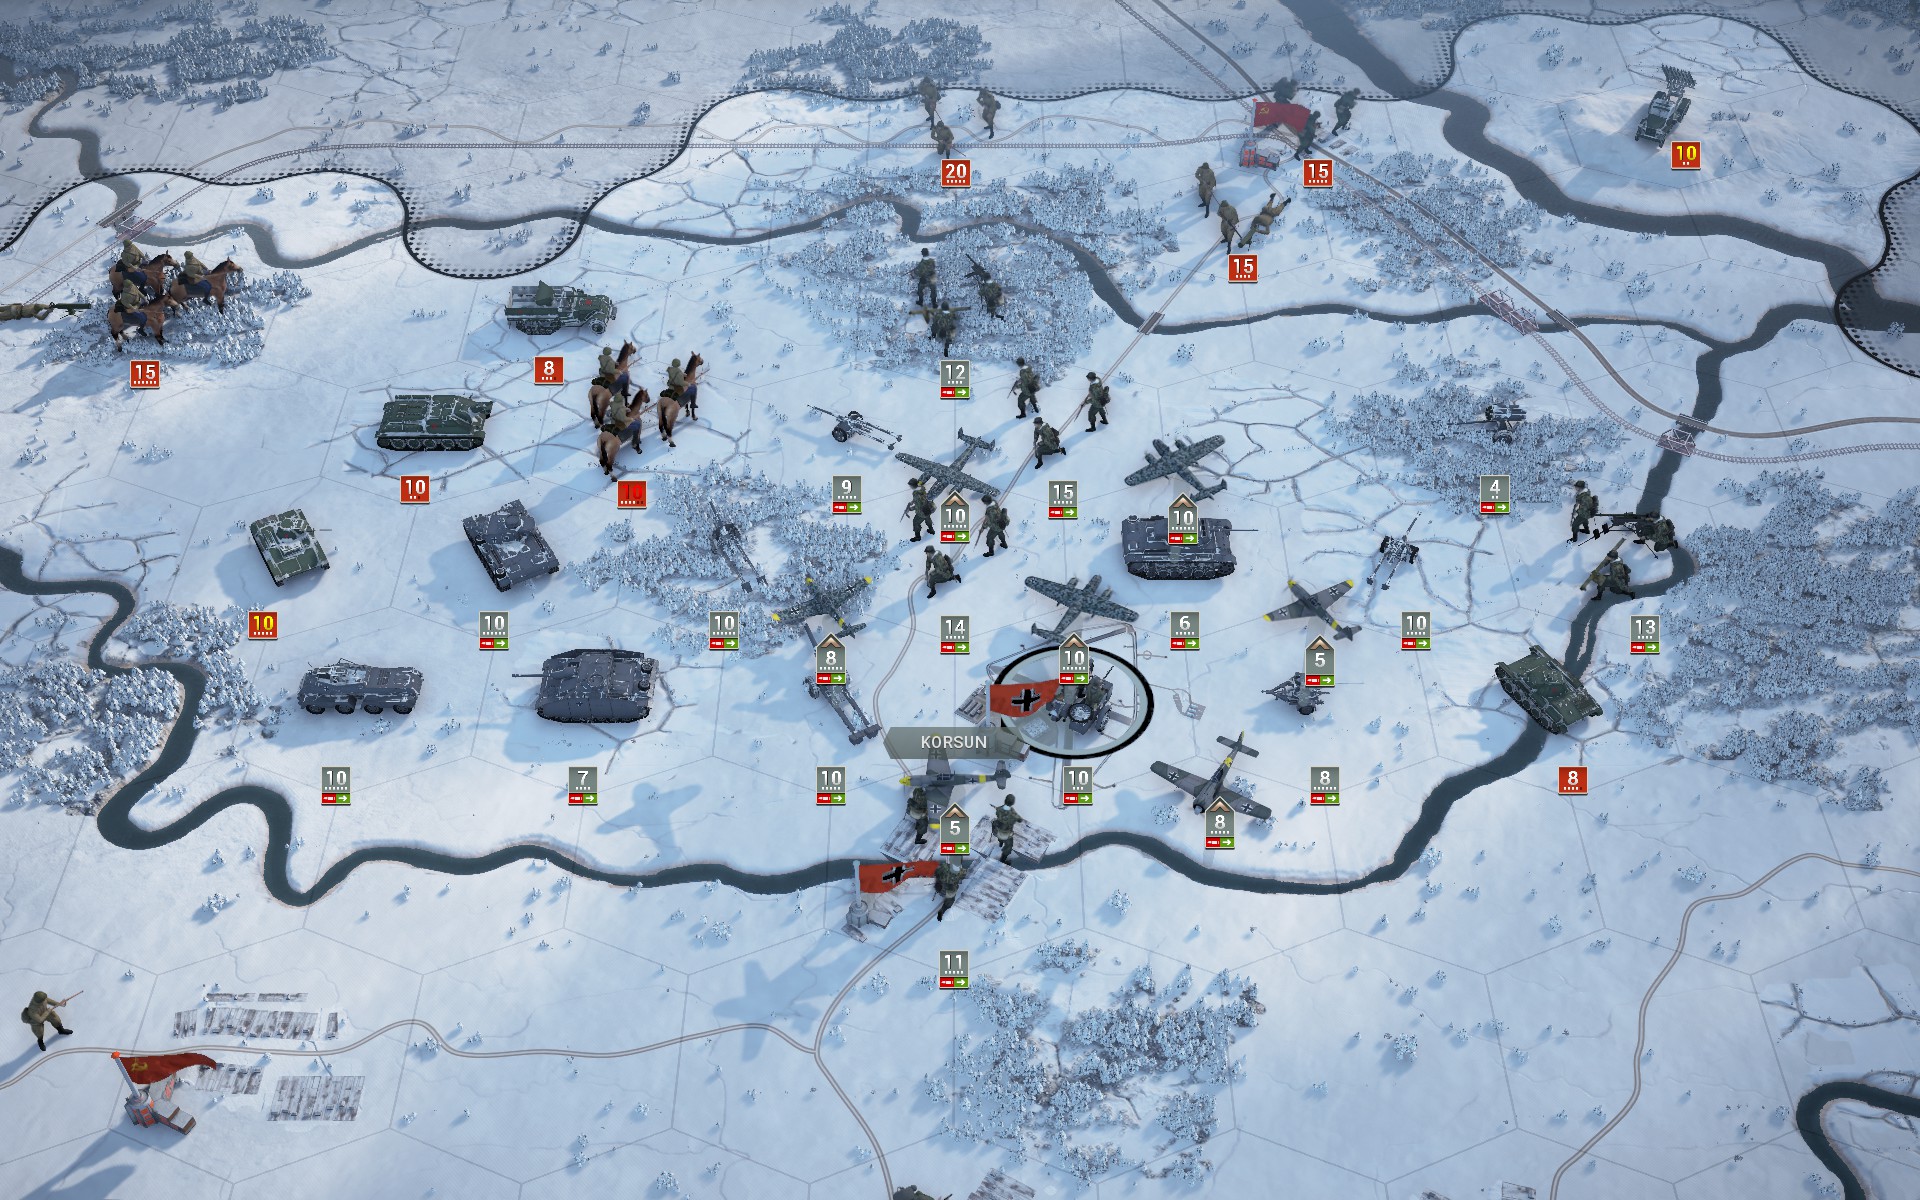
With neither side being able to defeat the other's AT support, the battle of Korsun is quickly turning into a tug of war.

My forces capture the first IS-1.
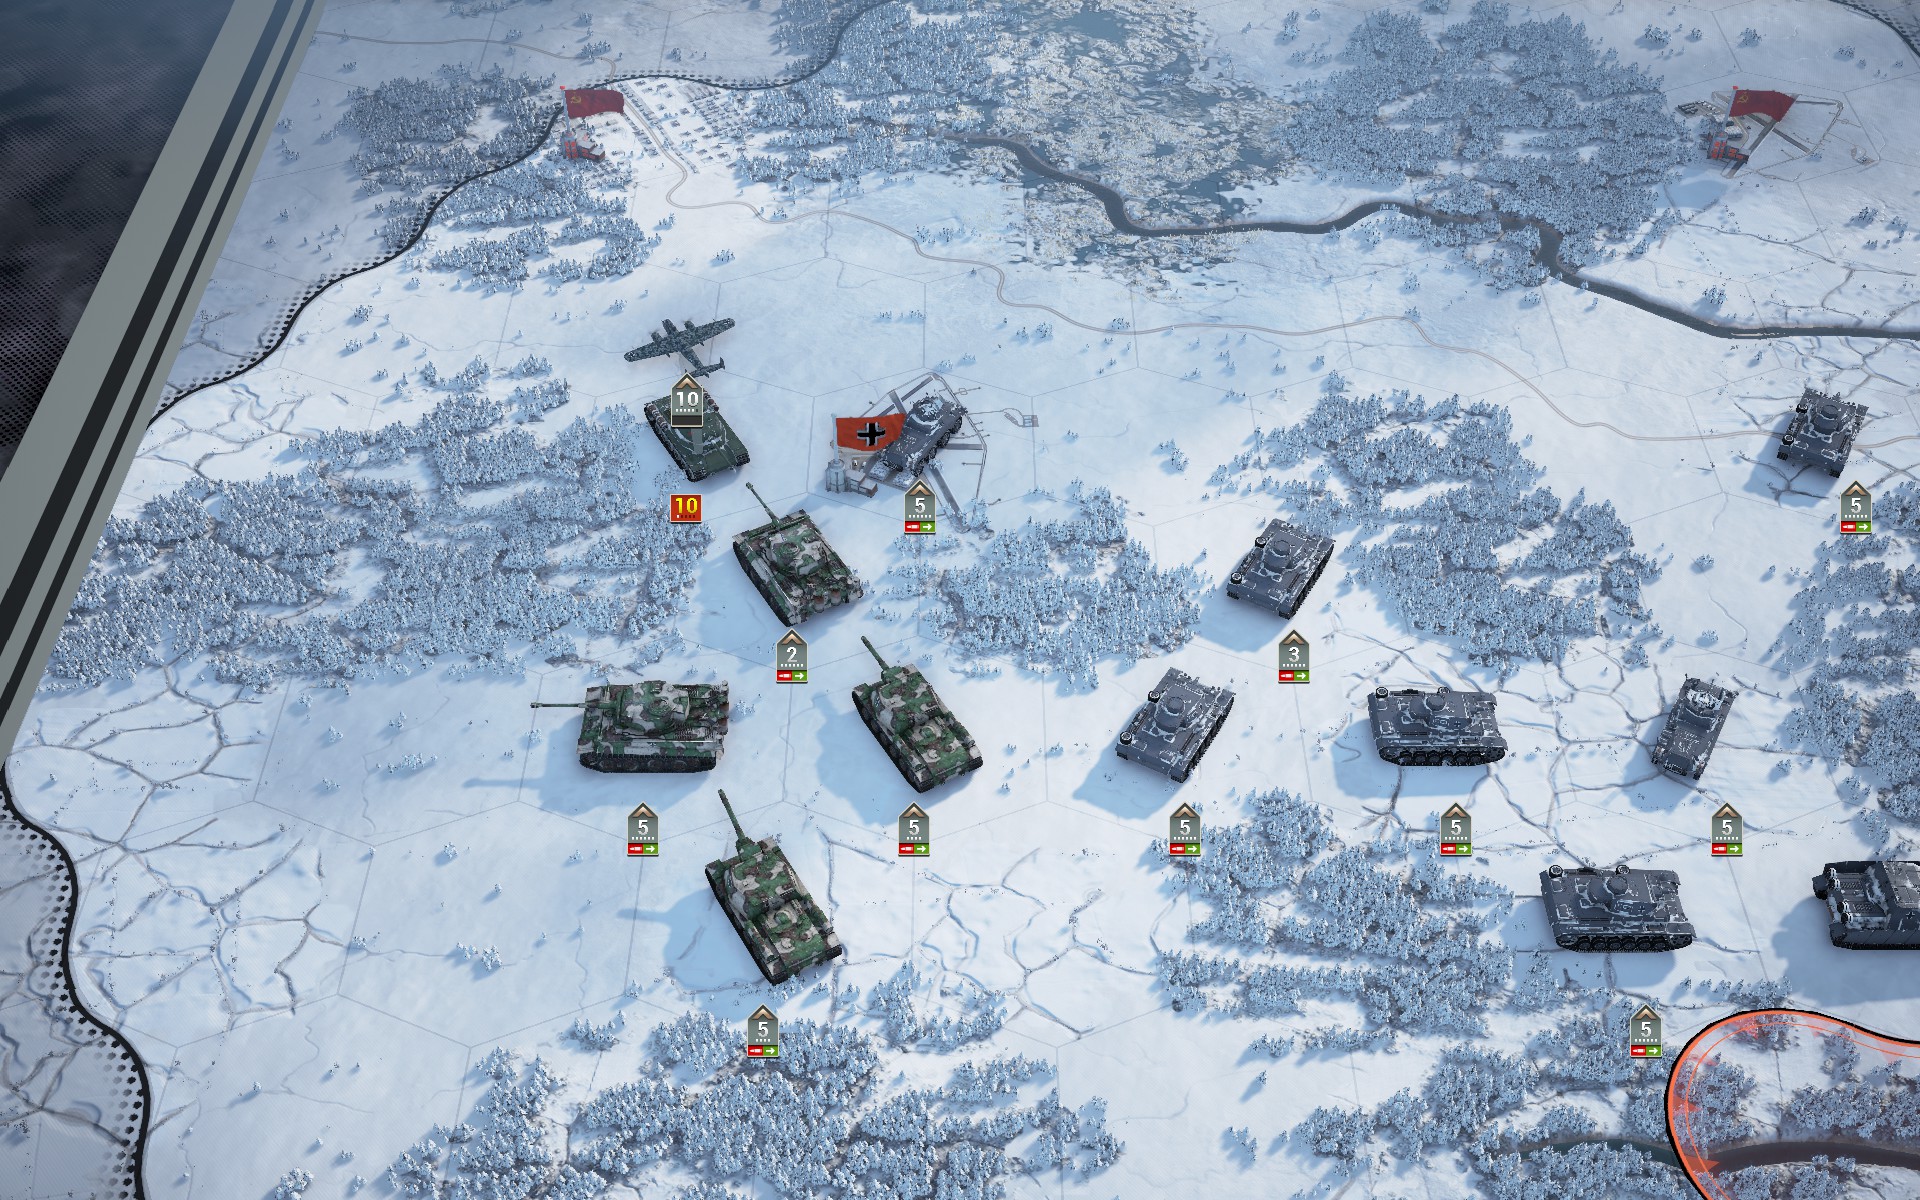
Due to the high accuracy of AI units on Generalissimus, even a few extra points of Ground Defense go a long way to mitigate damage, and an IS-1 would likely have suffered fewer losses than the detached Tiger. I've been increasingly guilty of failing to provide adequate fire support for my frontline, however, and I suspect it's partly because prestige has become irrelevant; I've become complacent.
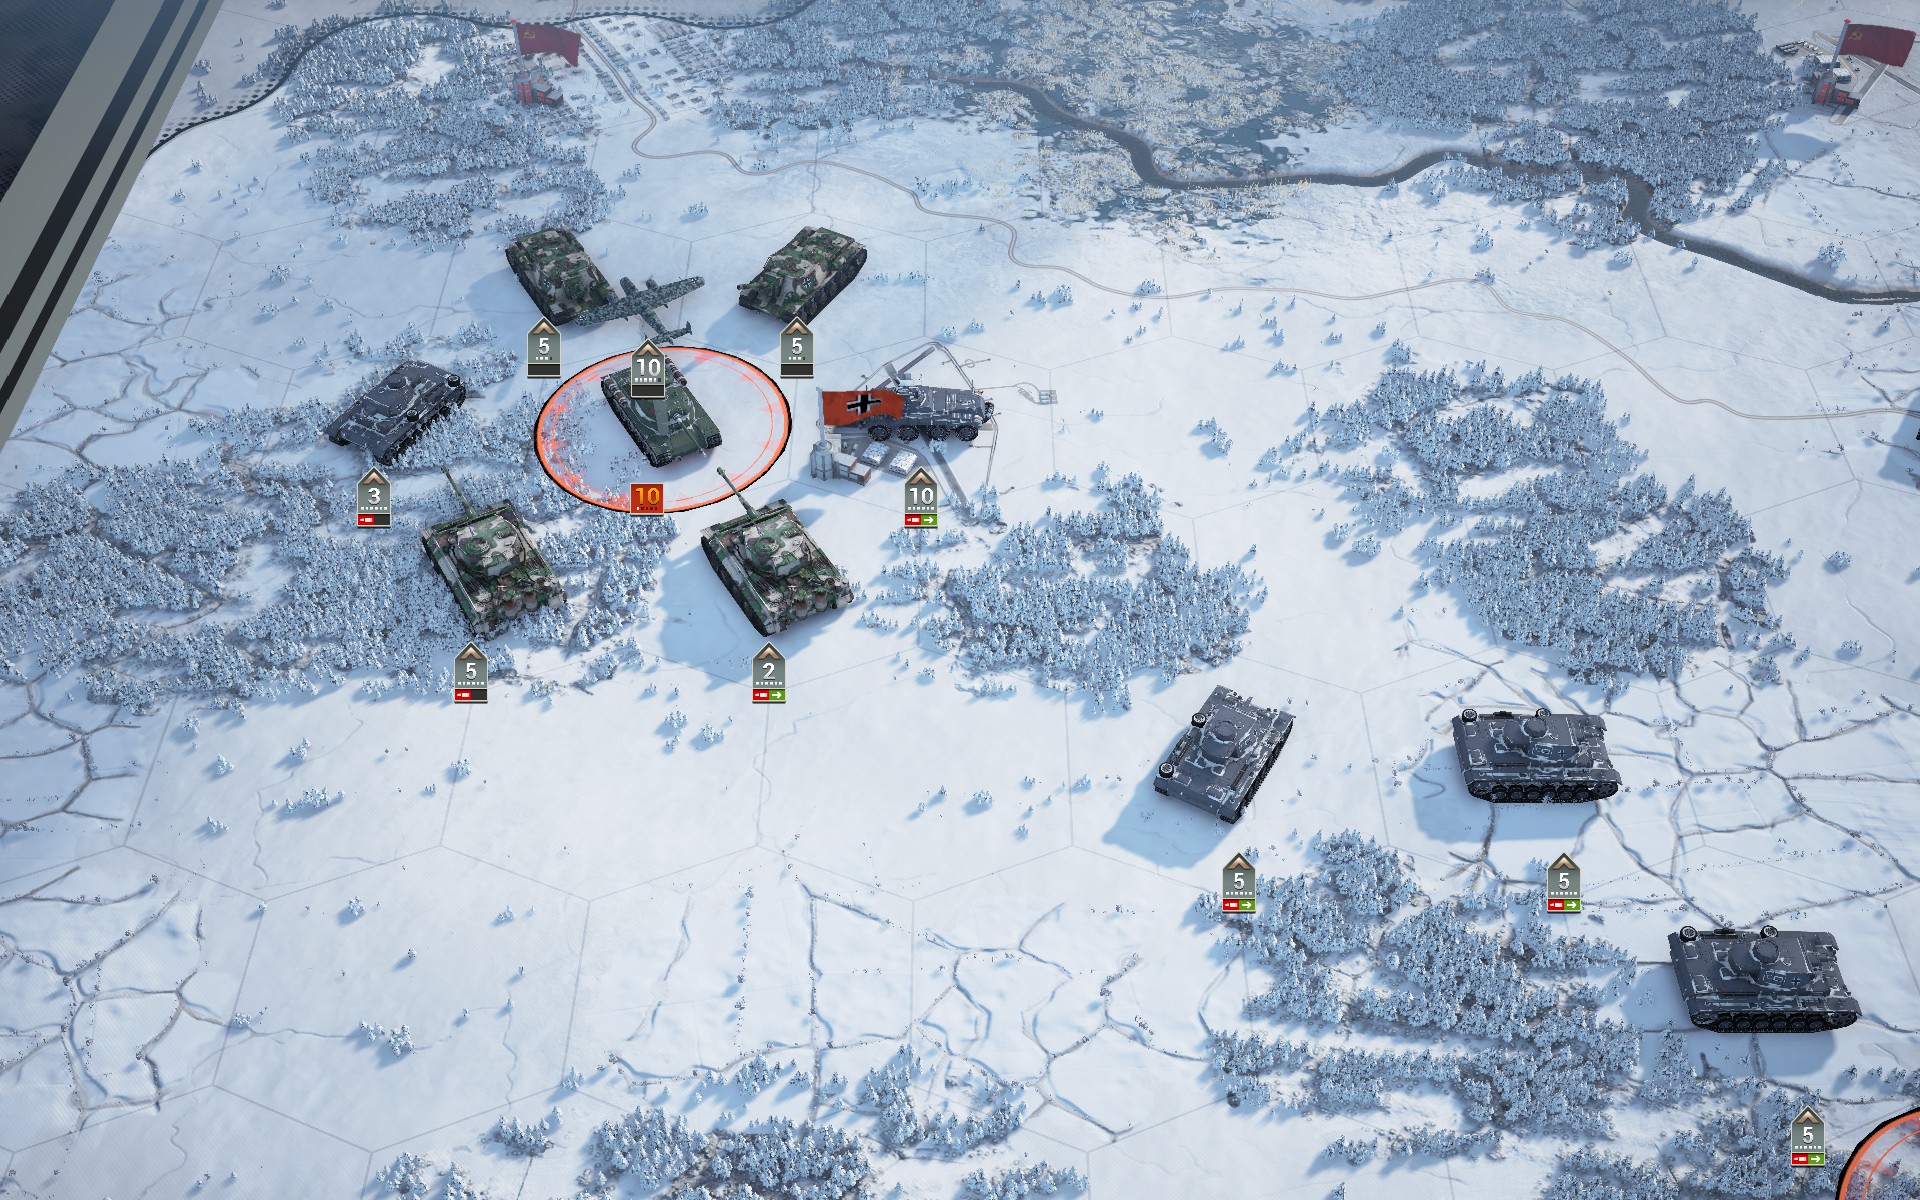
The IS-1 is quickly surrounded and suppressed.

A detached SU-122 in AT mode is more than capable of capturing a T-34/43.
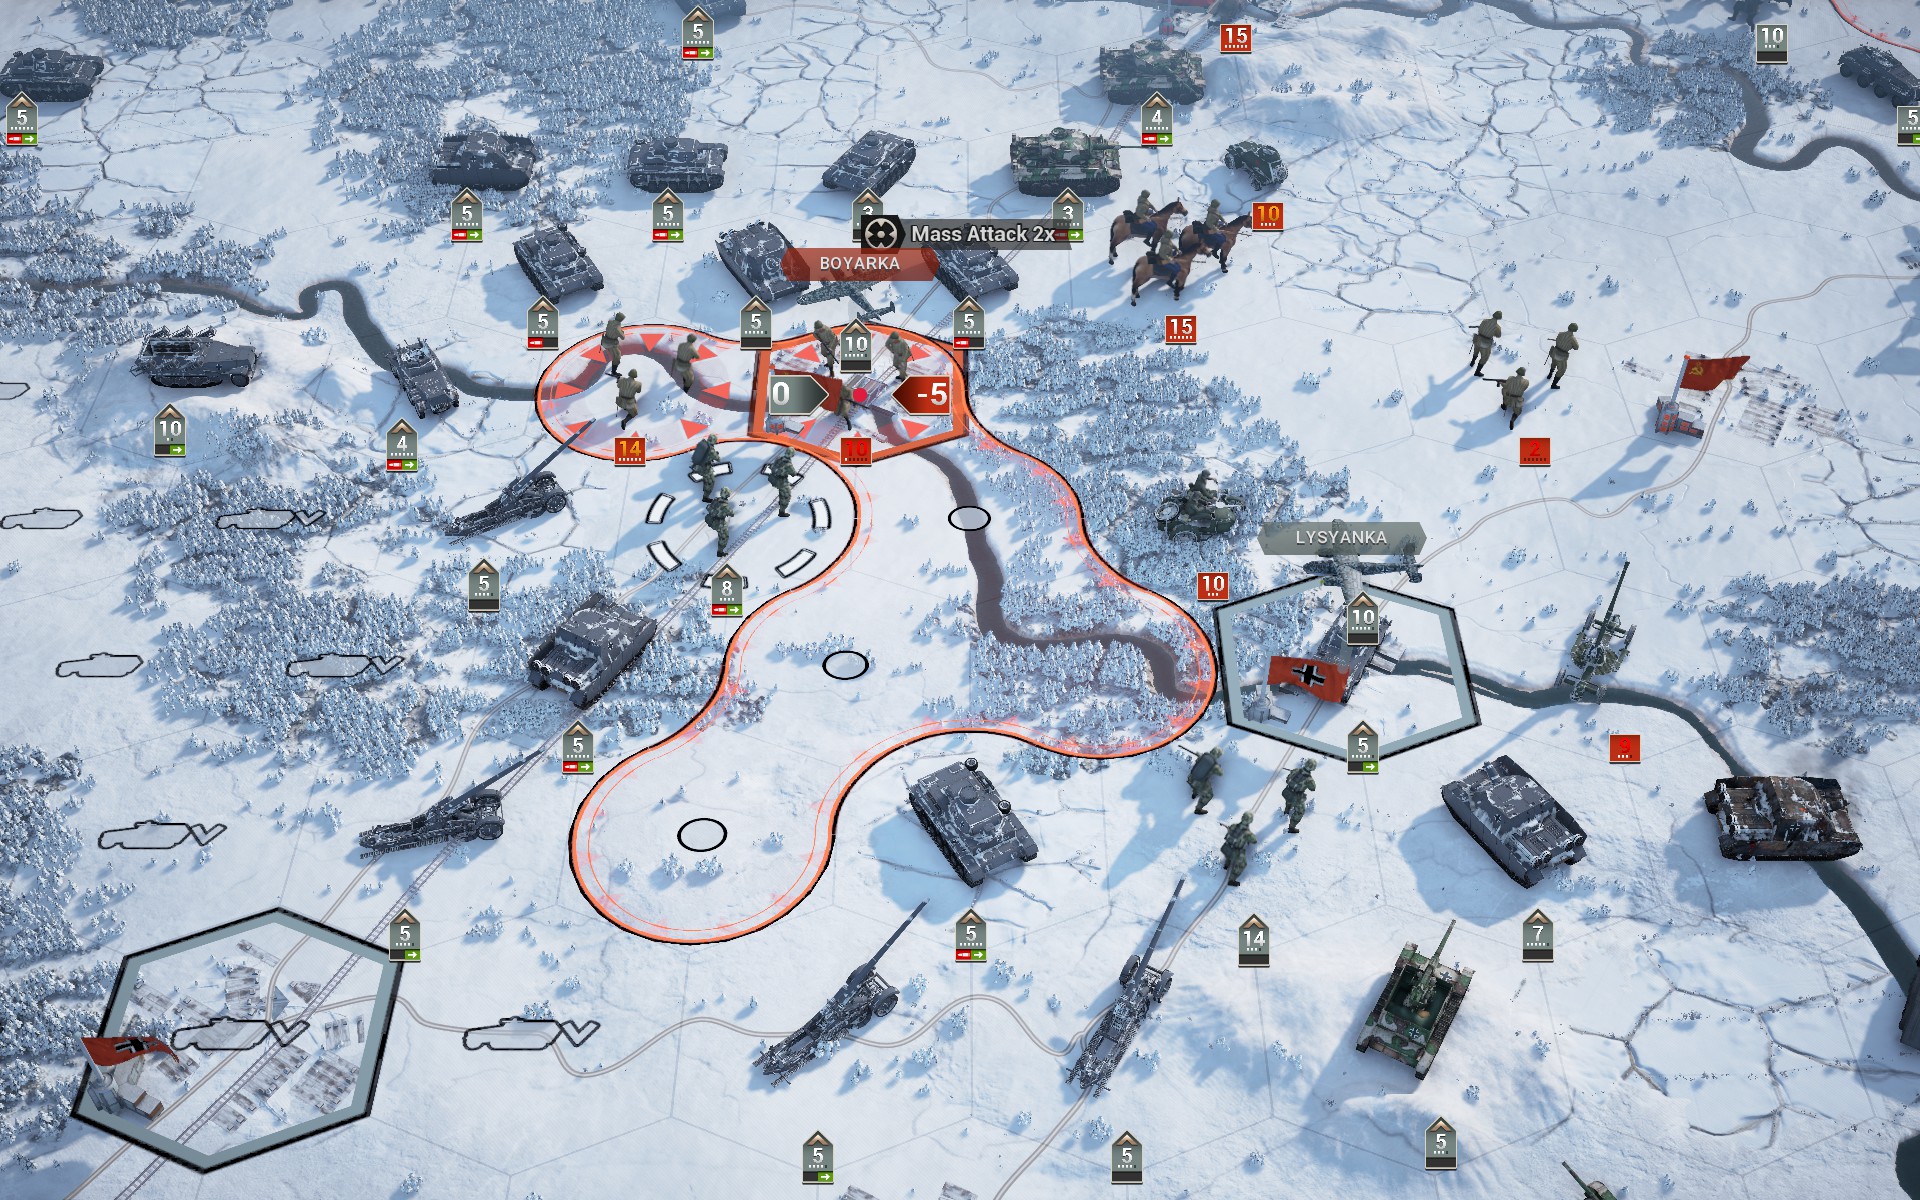
The Bridgeburners and Crimson Guard storm Boyarka and Lysyanka.
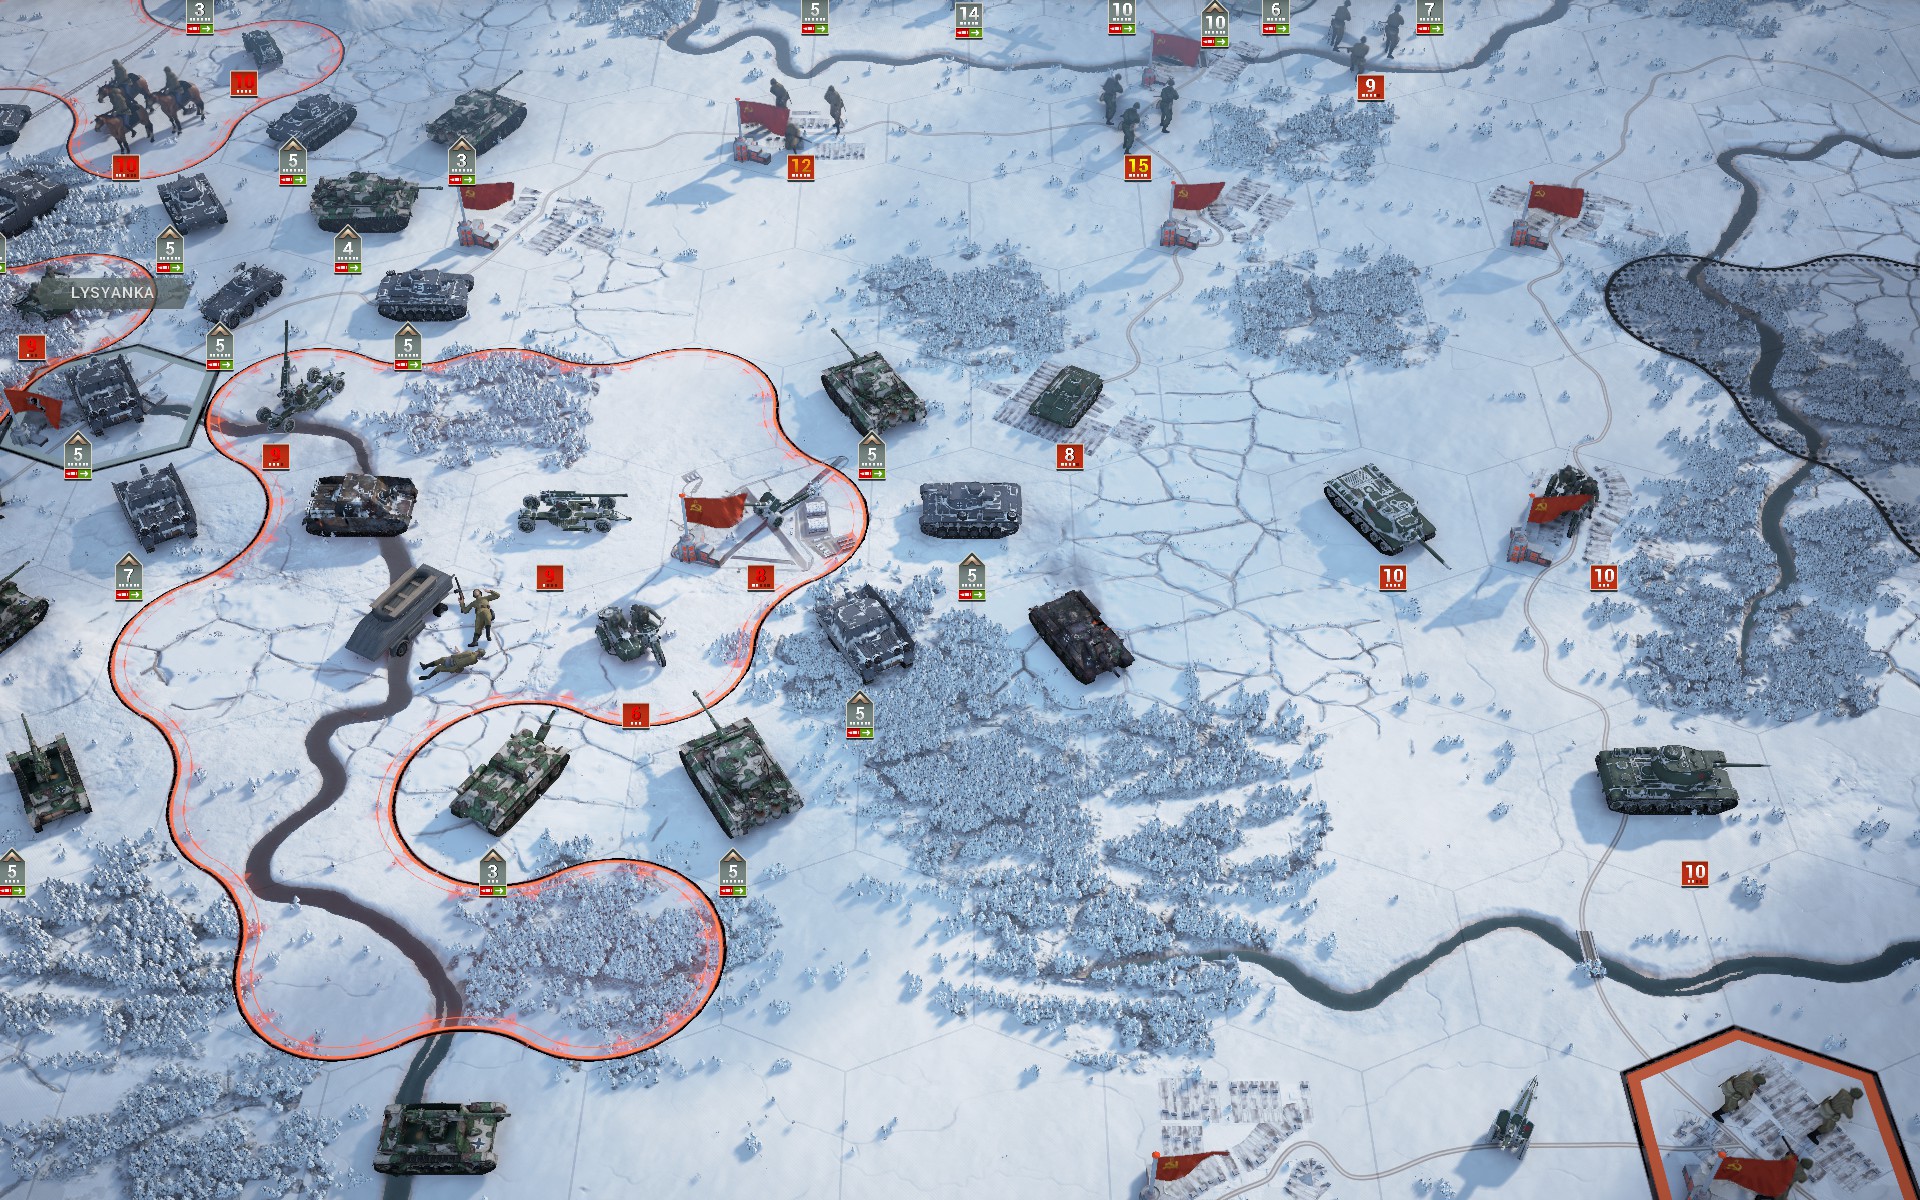
Soviet forces destroy two detached units -- a Brummbär and an SU-122 -- in another debacle for me. I will have to be more prudent in Bagration, as these losses were completely unnecessary.
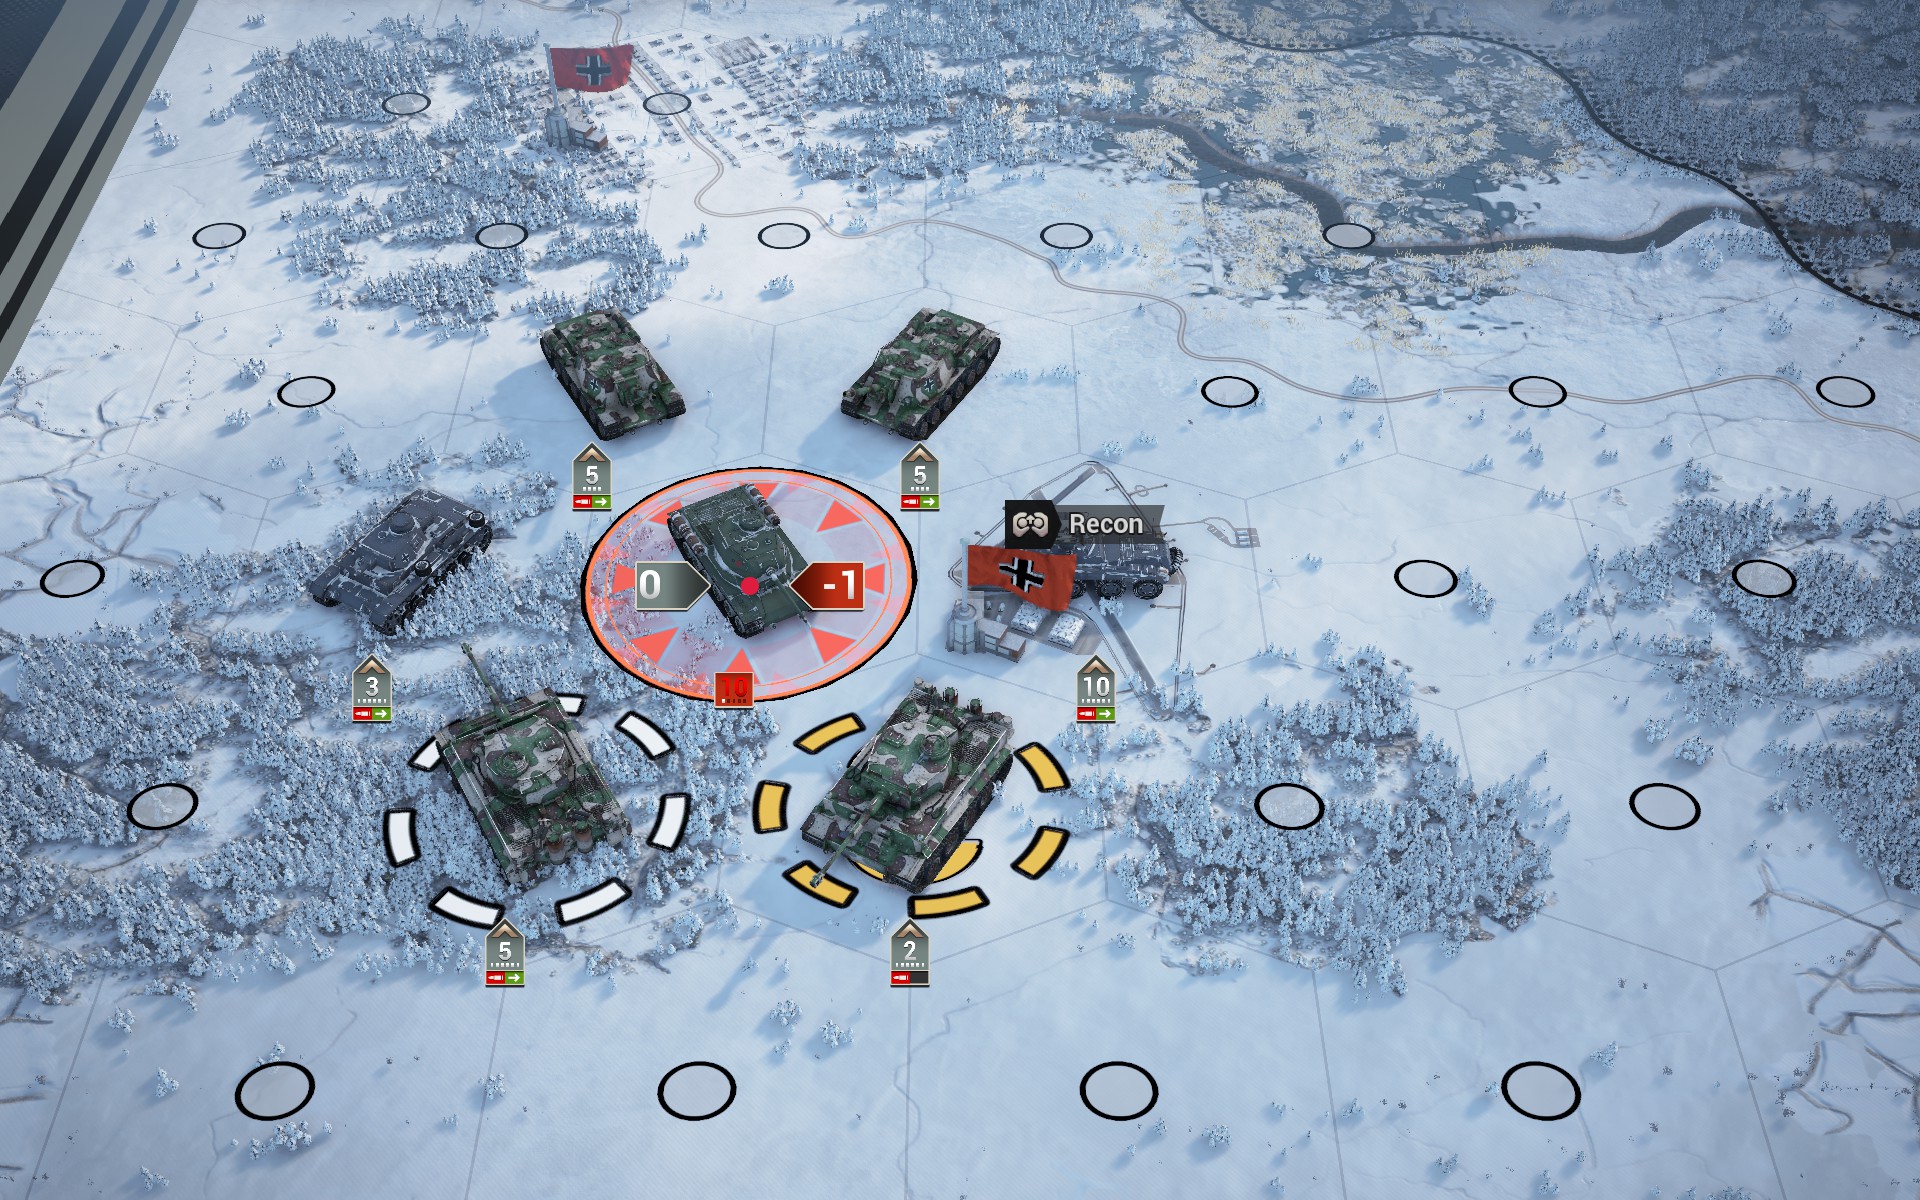
My forces capture the second IS-1.
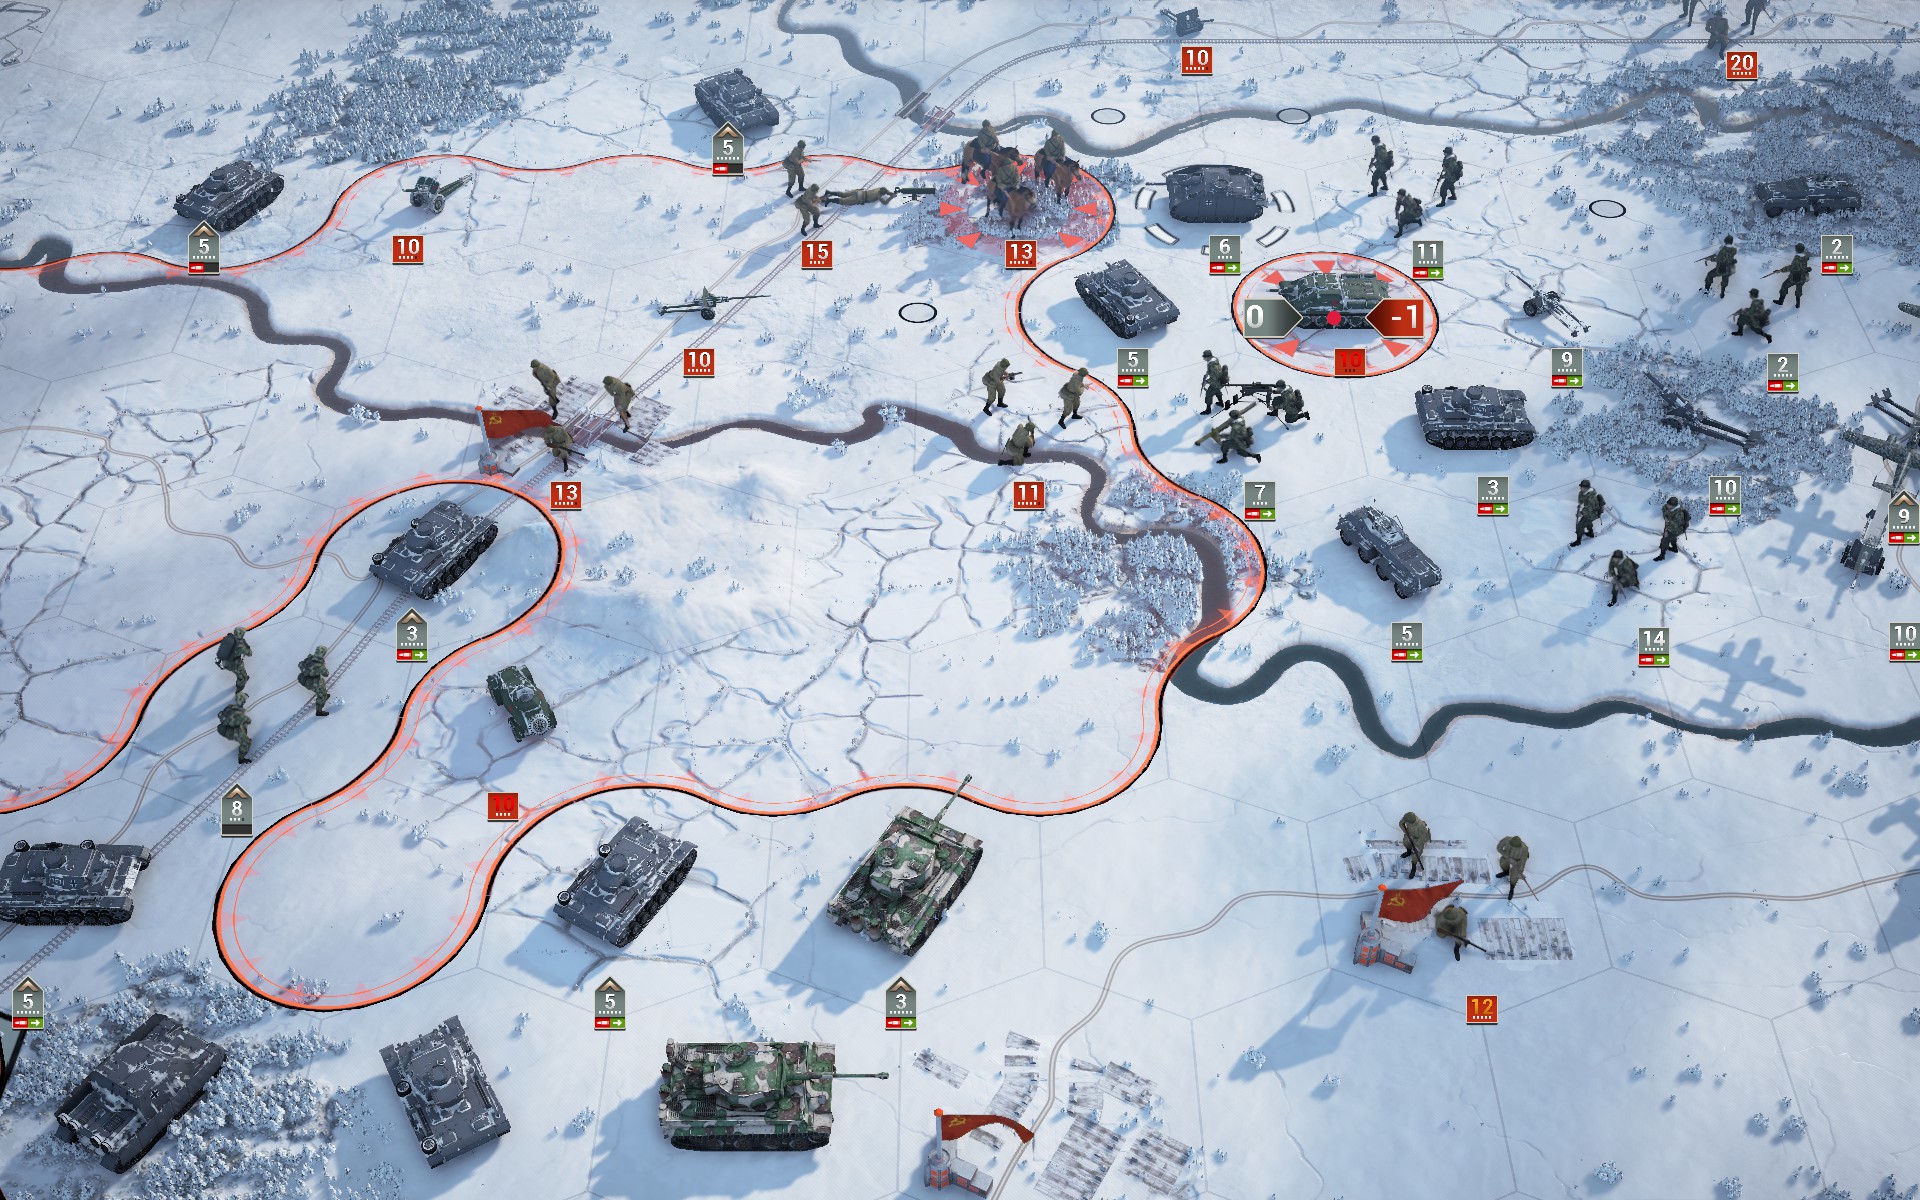
The Soviet forces involved in a tug of war at Korsun suddenly find themselves surrounded.
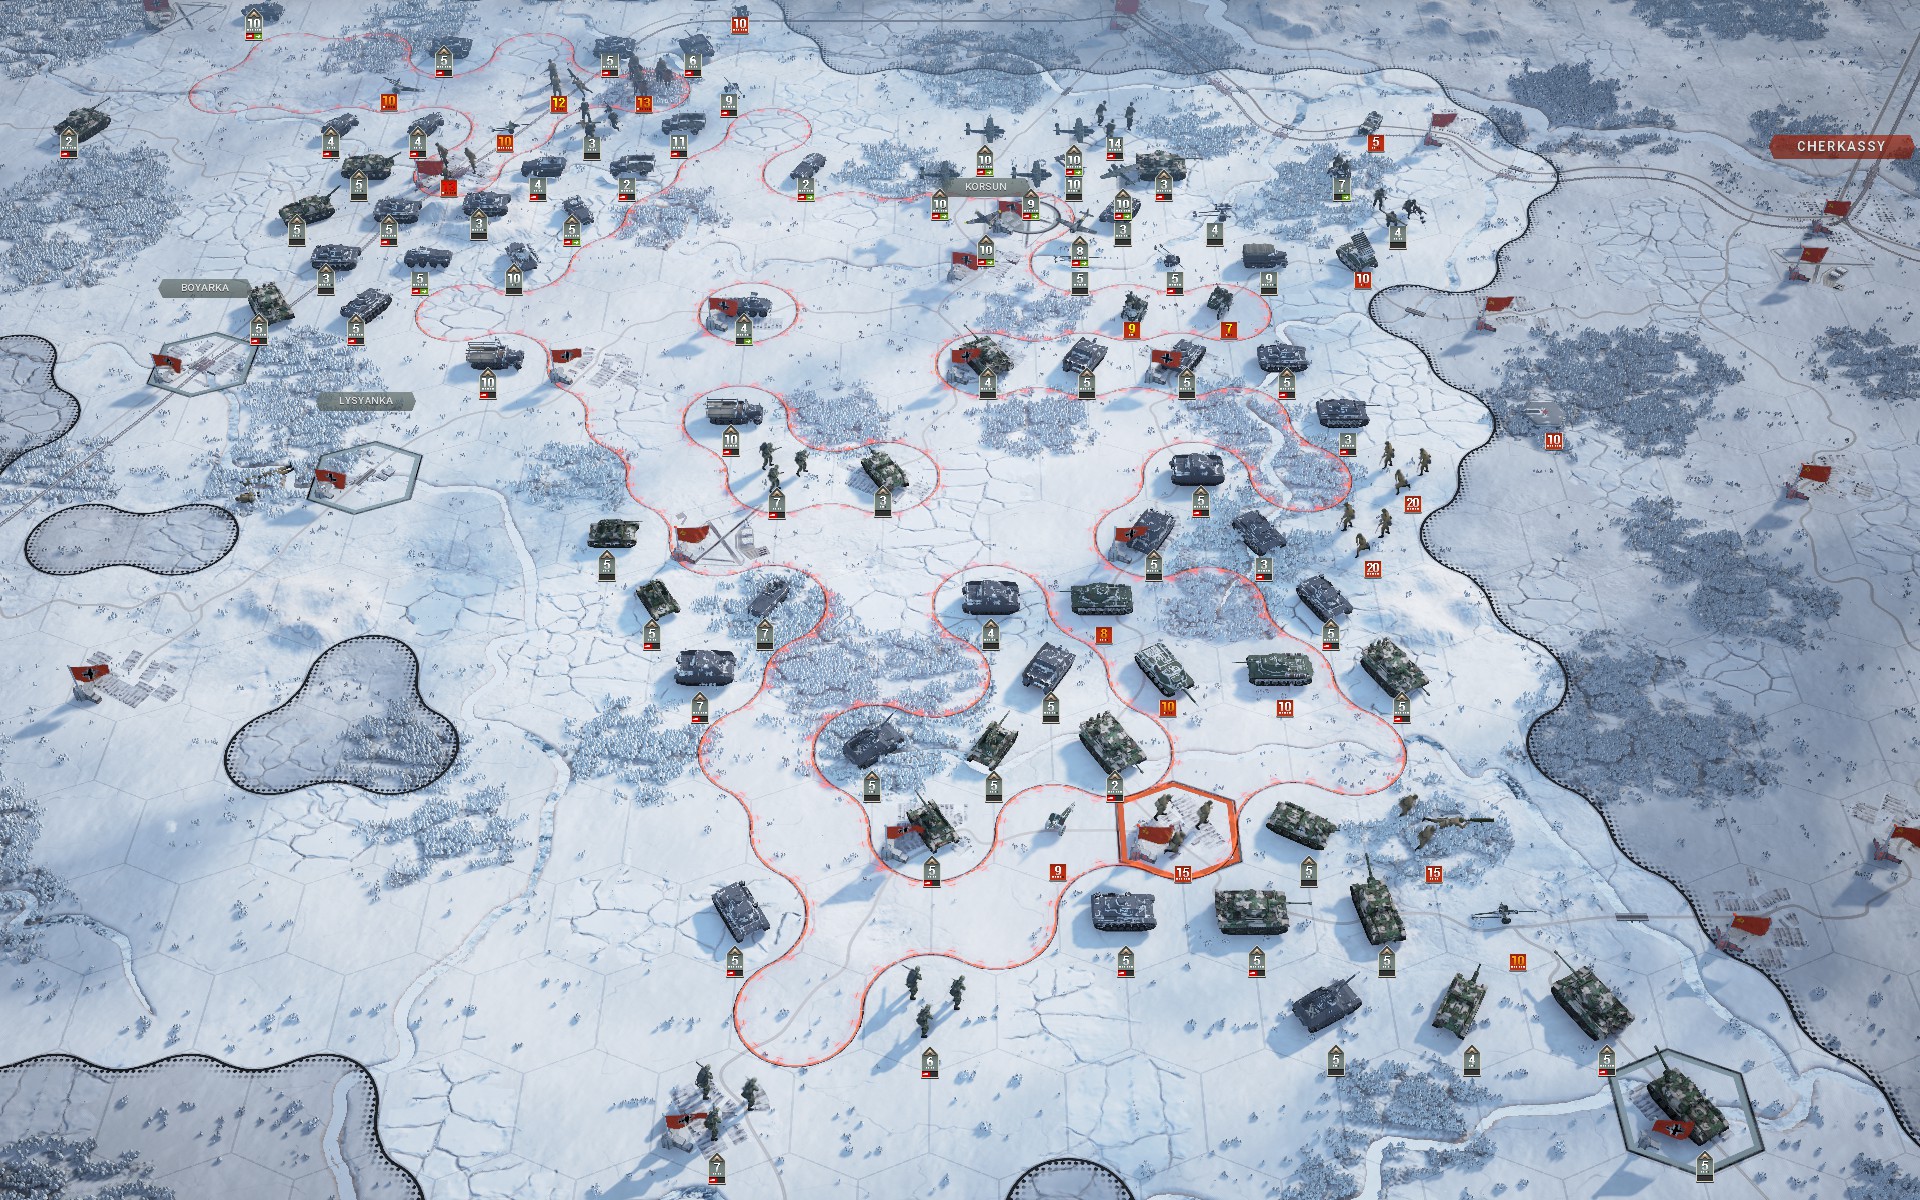
With the Korsun pocket secured my forces push east towards Cherkassy. As I only need to keep 3 auxiliary units alive, I am callously using them to draw out any remaining Soviet forces.
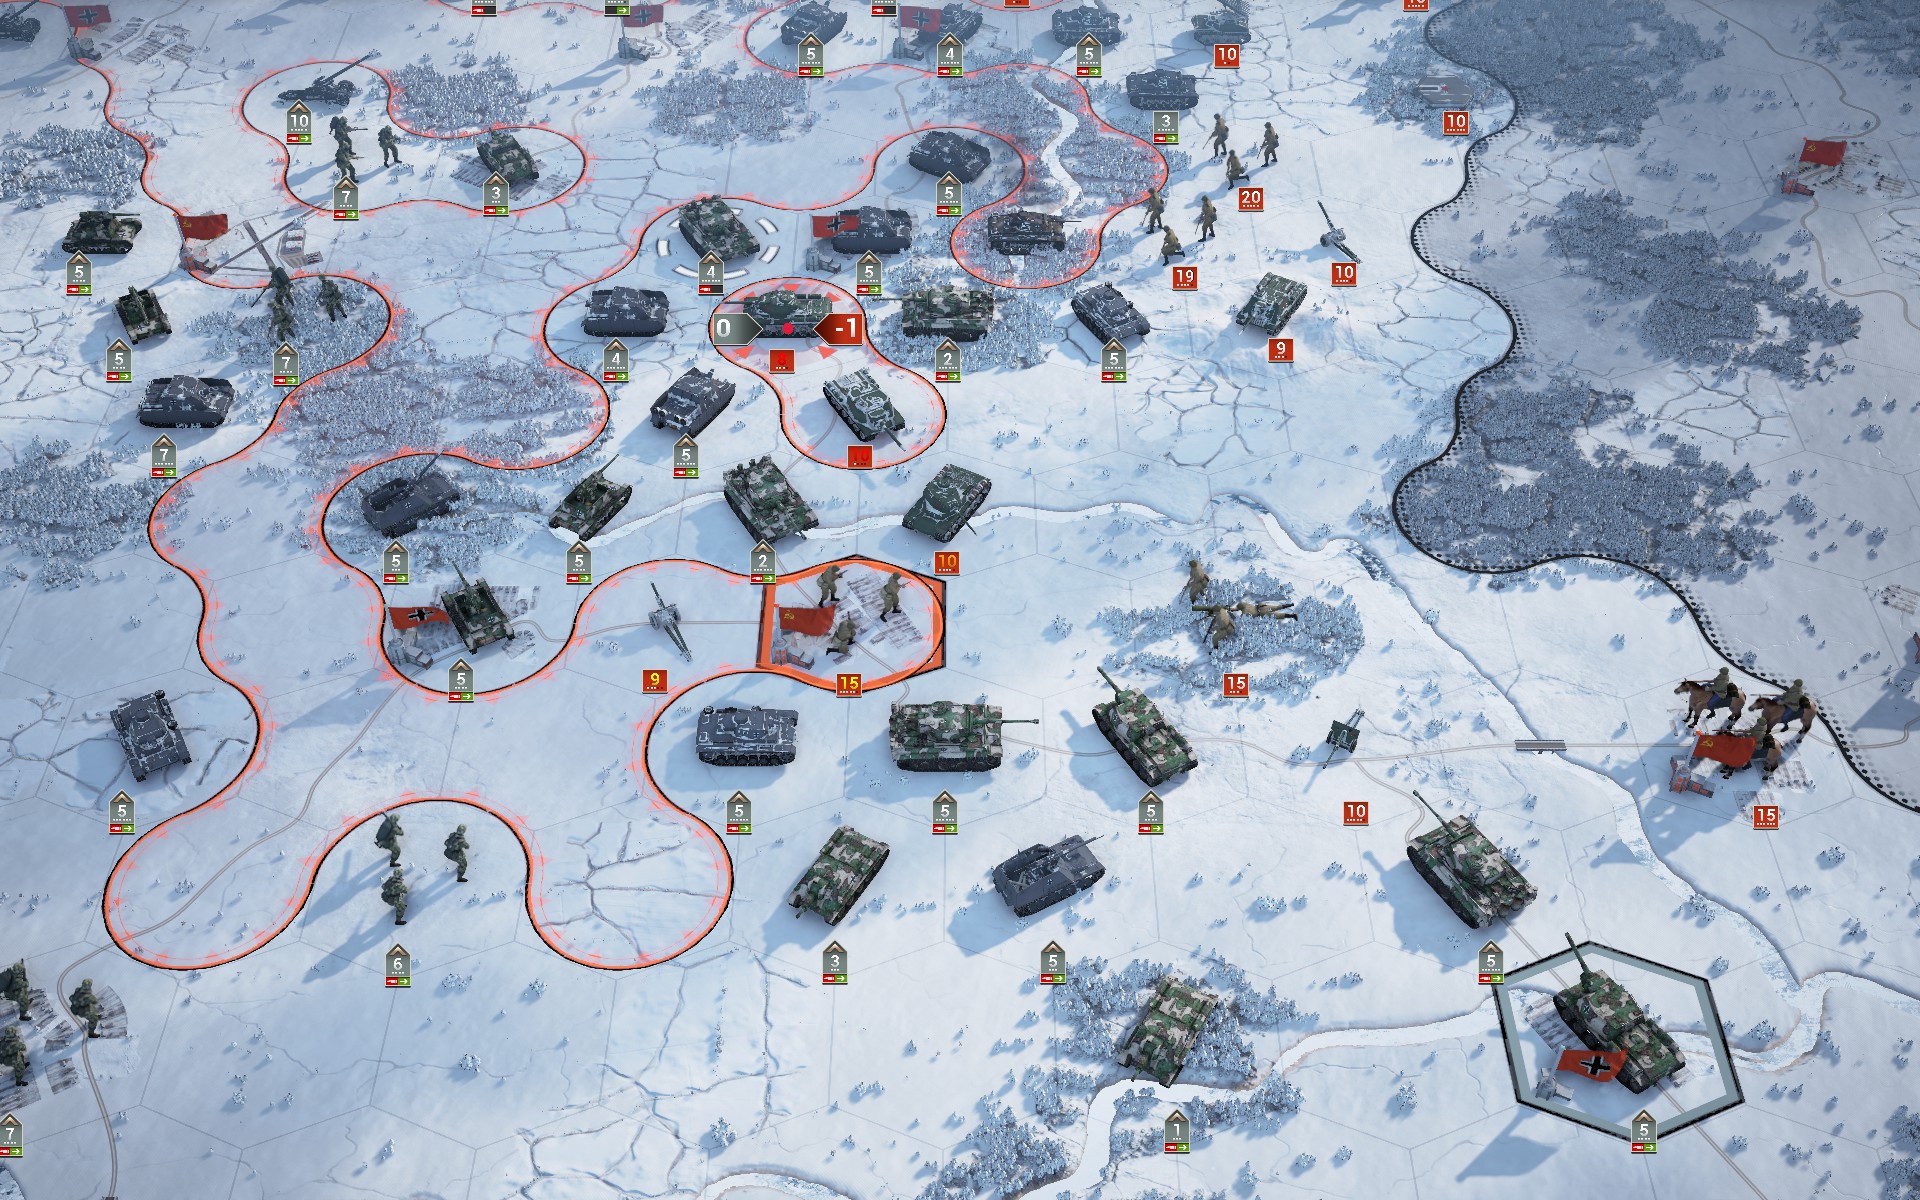
The KV-85 is a powerful tank, but as the Tiger is an iconic unit and less vulnerable to tactical bombers I don't plan on using it. The IS-1 is very welcome, however.
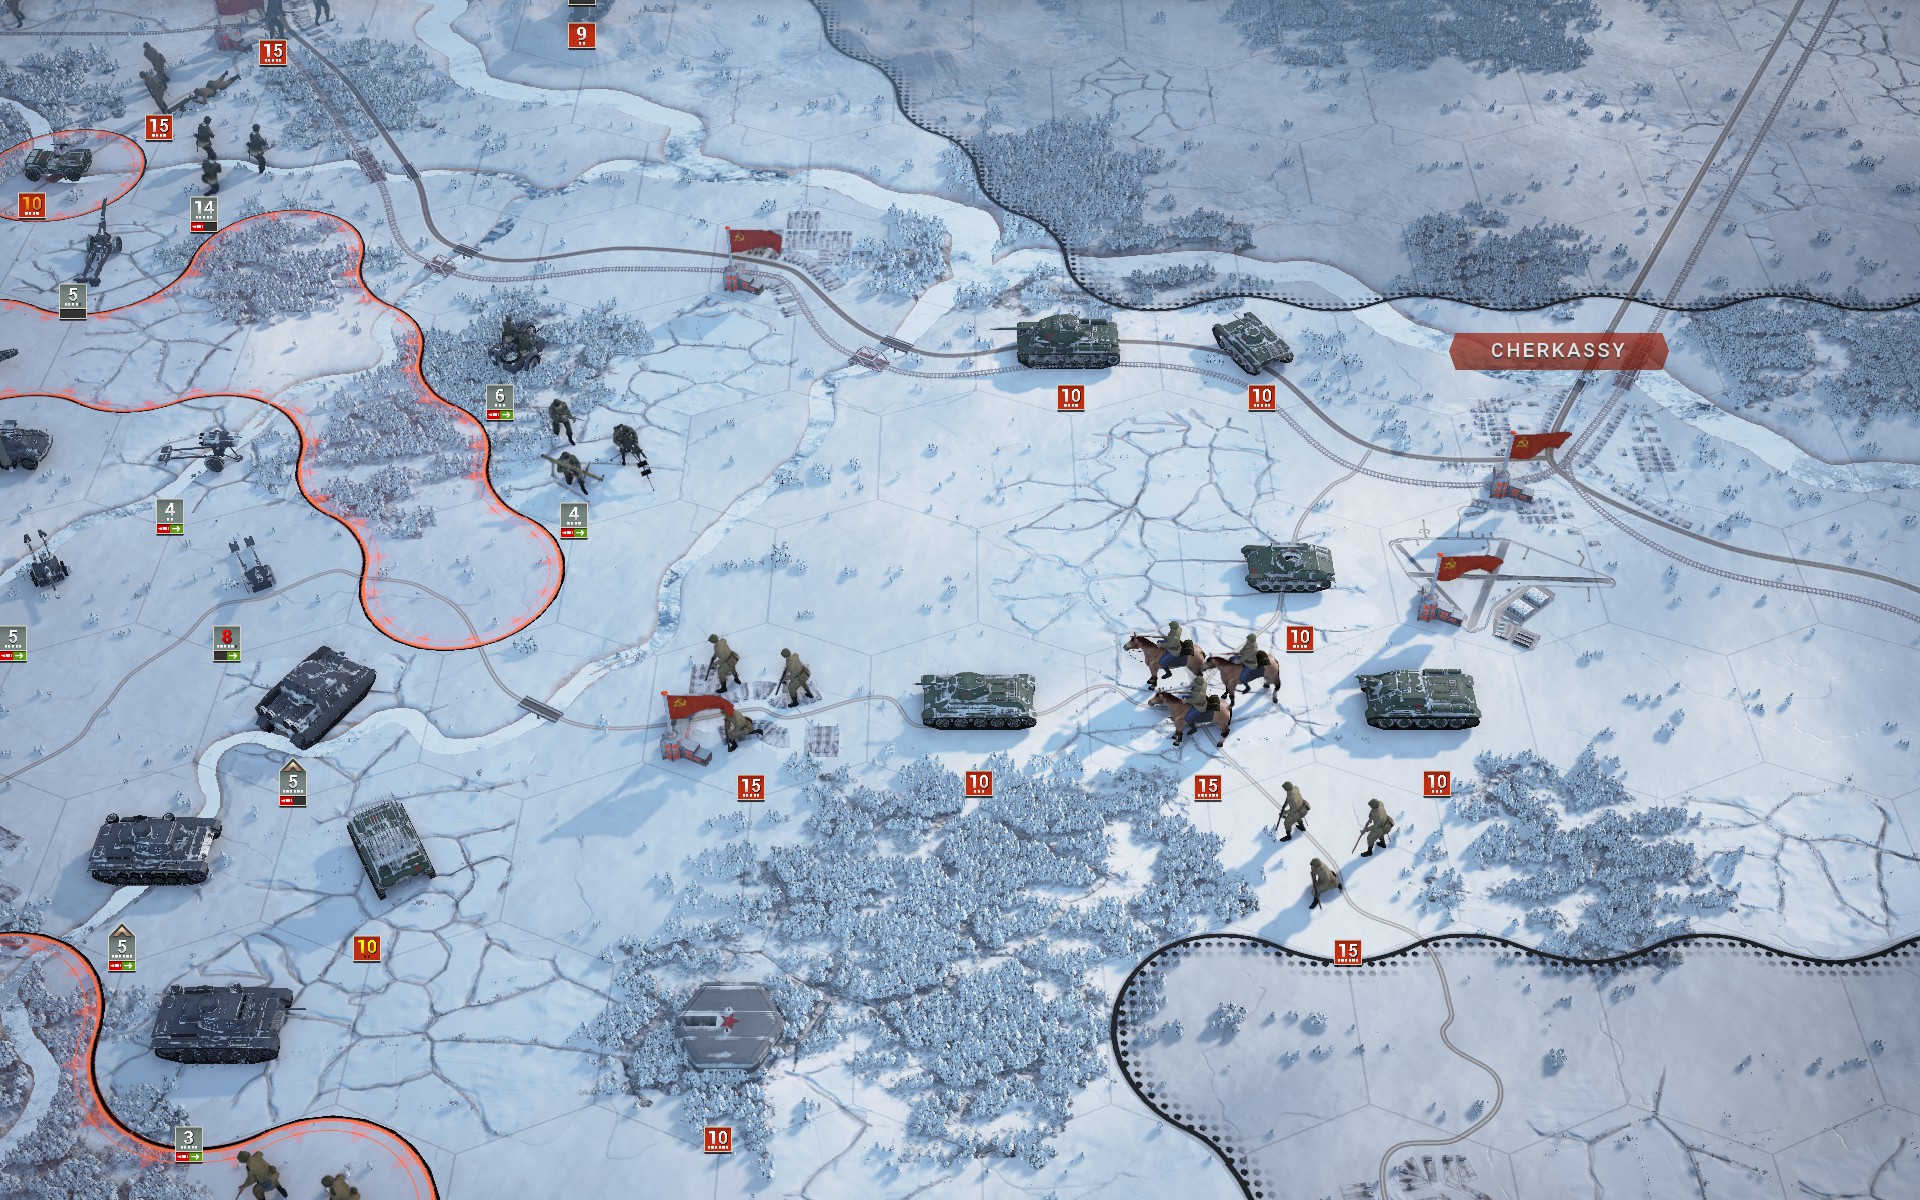
The Red Army mobilises its last reserves as my forces close in on Cherkassy.
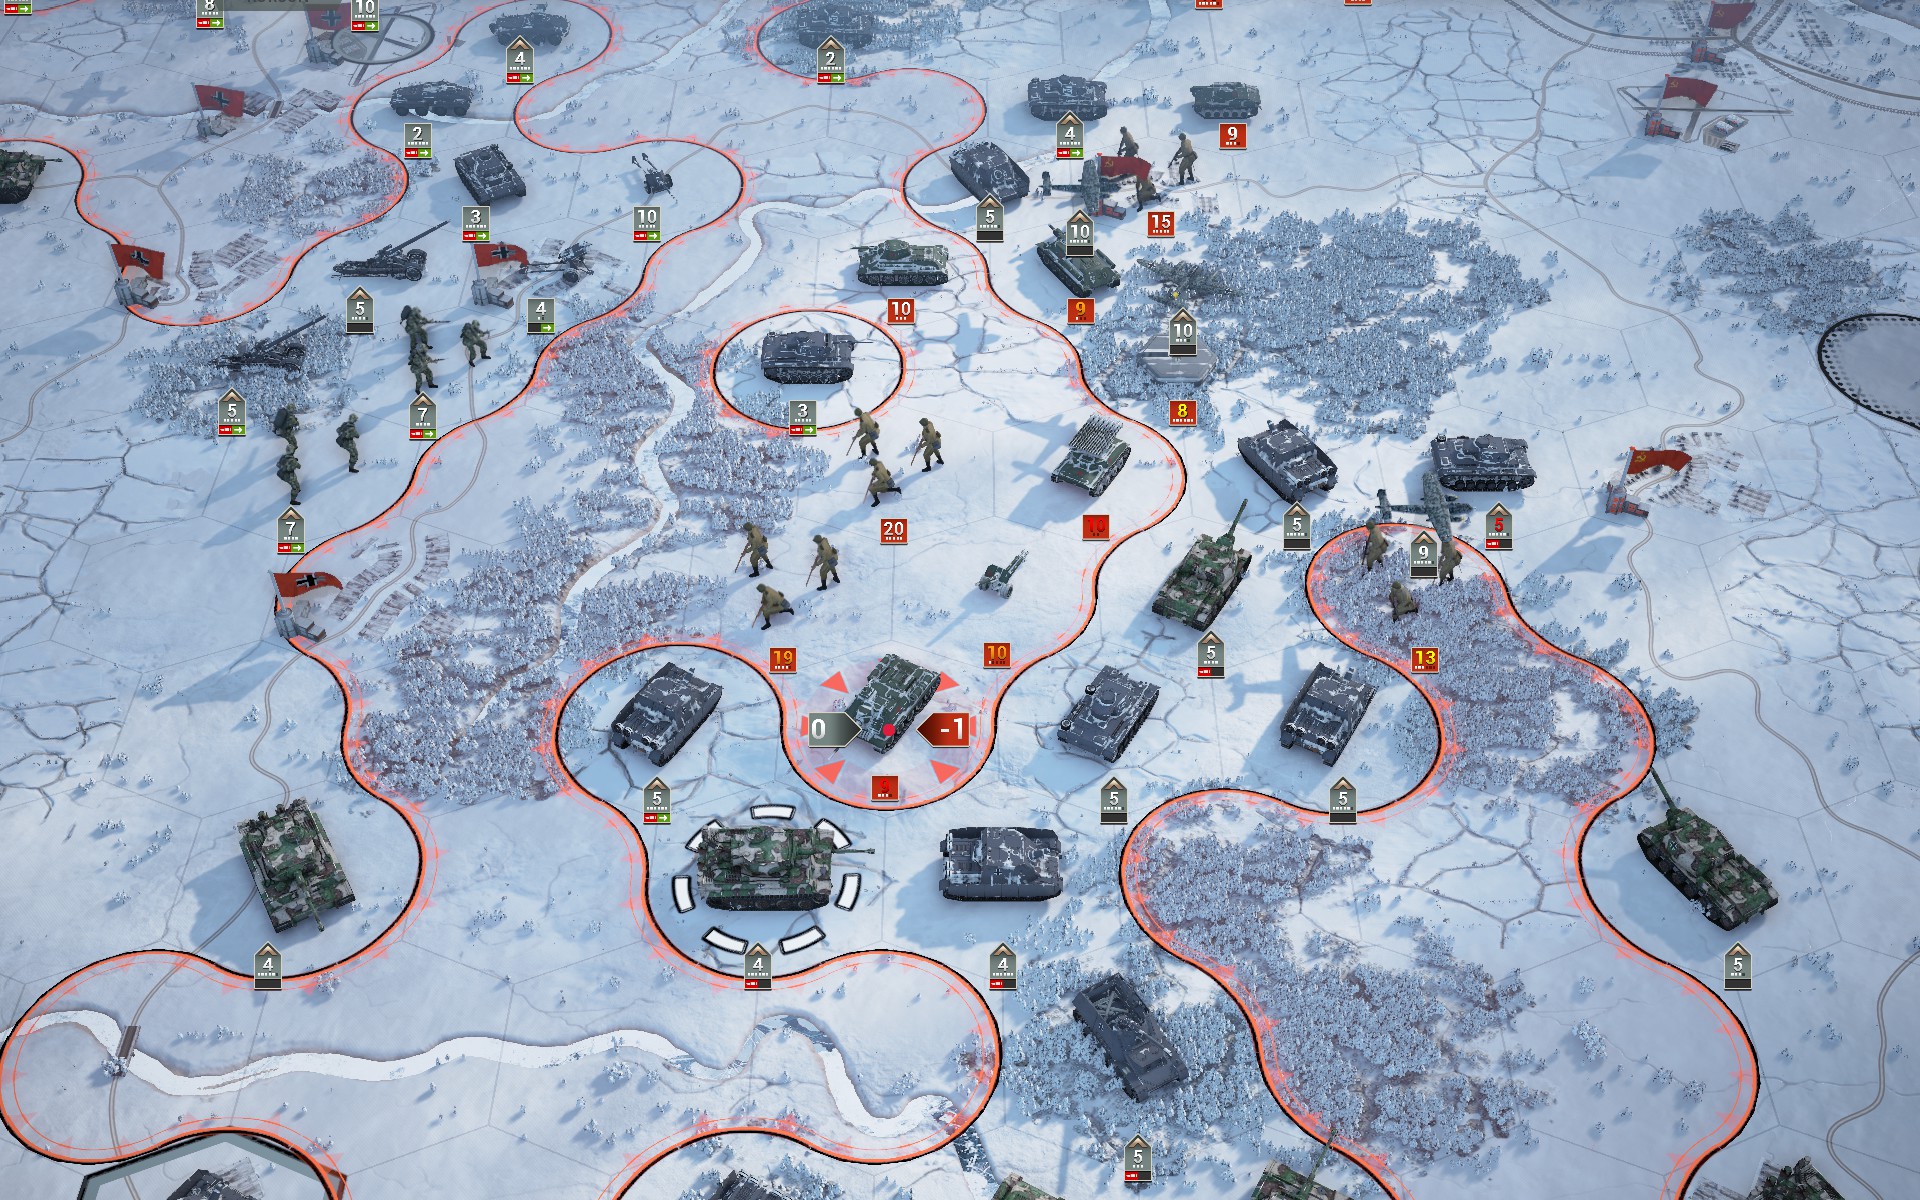
My forces capture the last objective and move to encircle the Soviet reserve.
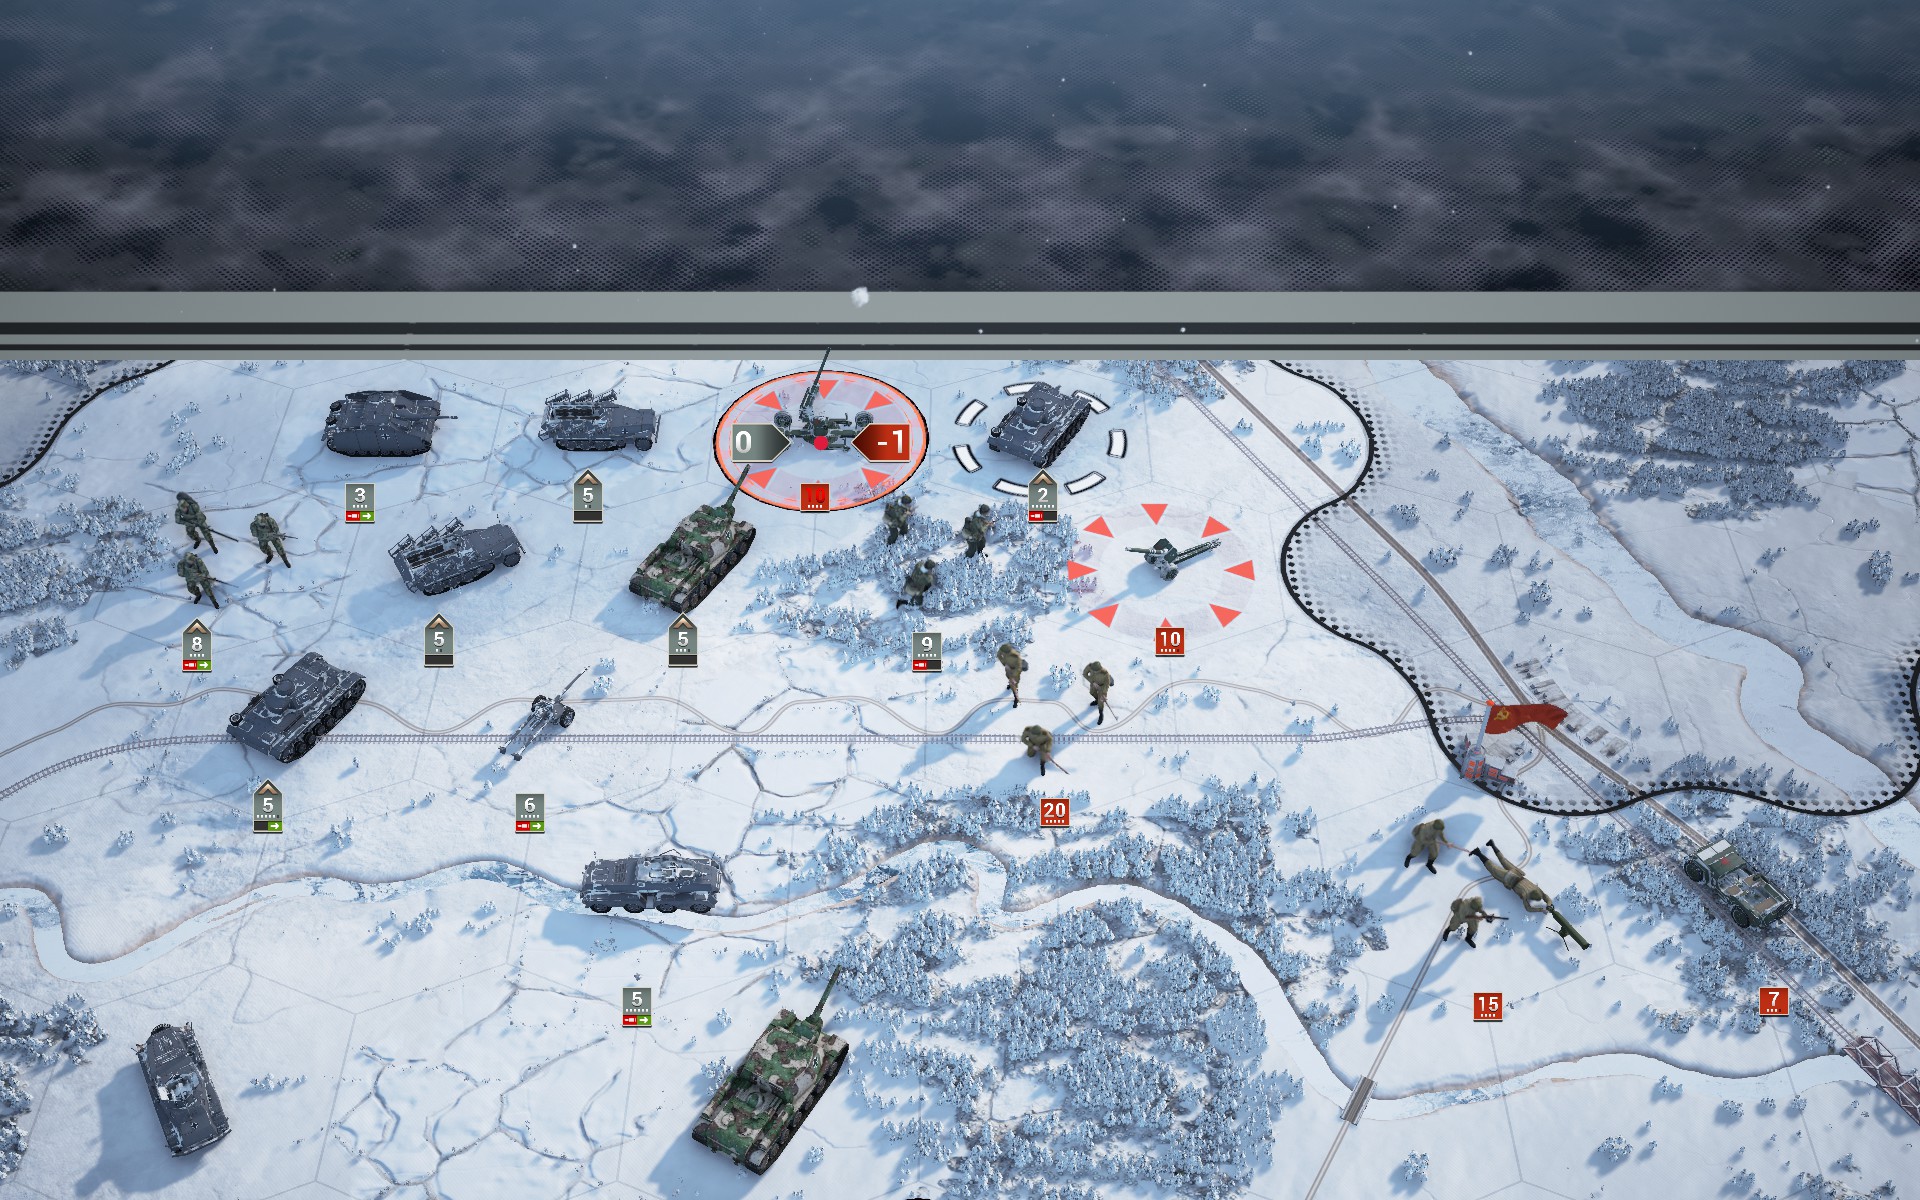
With no armour to support them, Soviet forces north of Korsun offer little resistance.
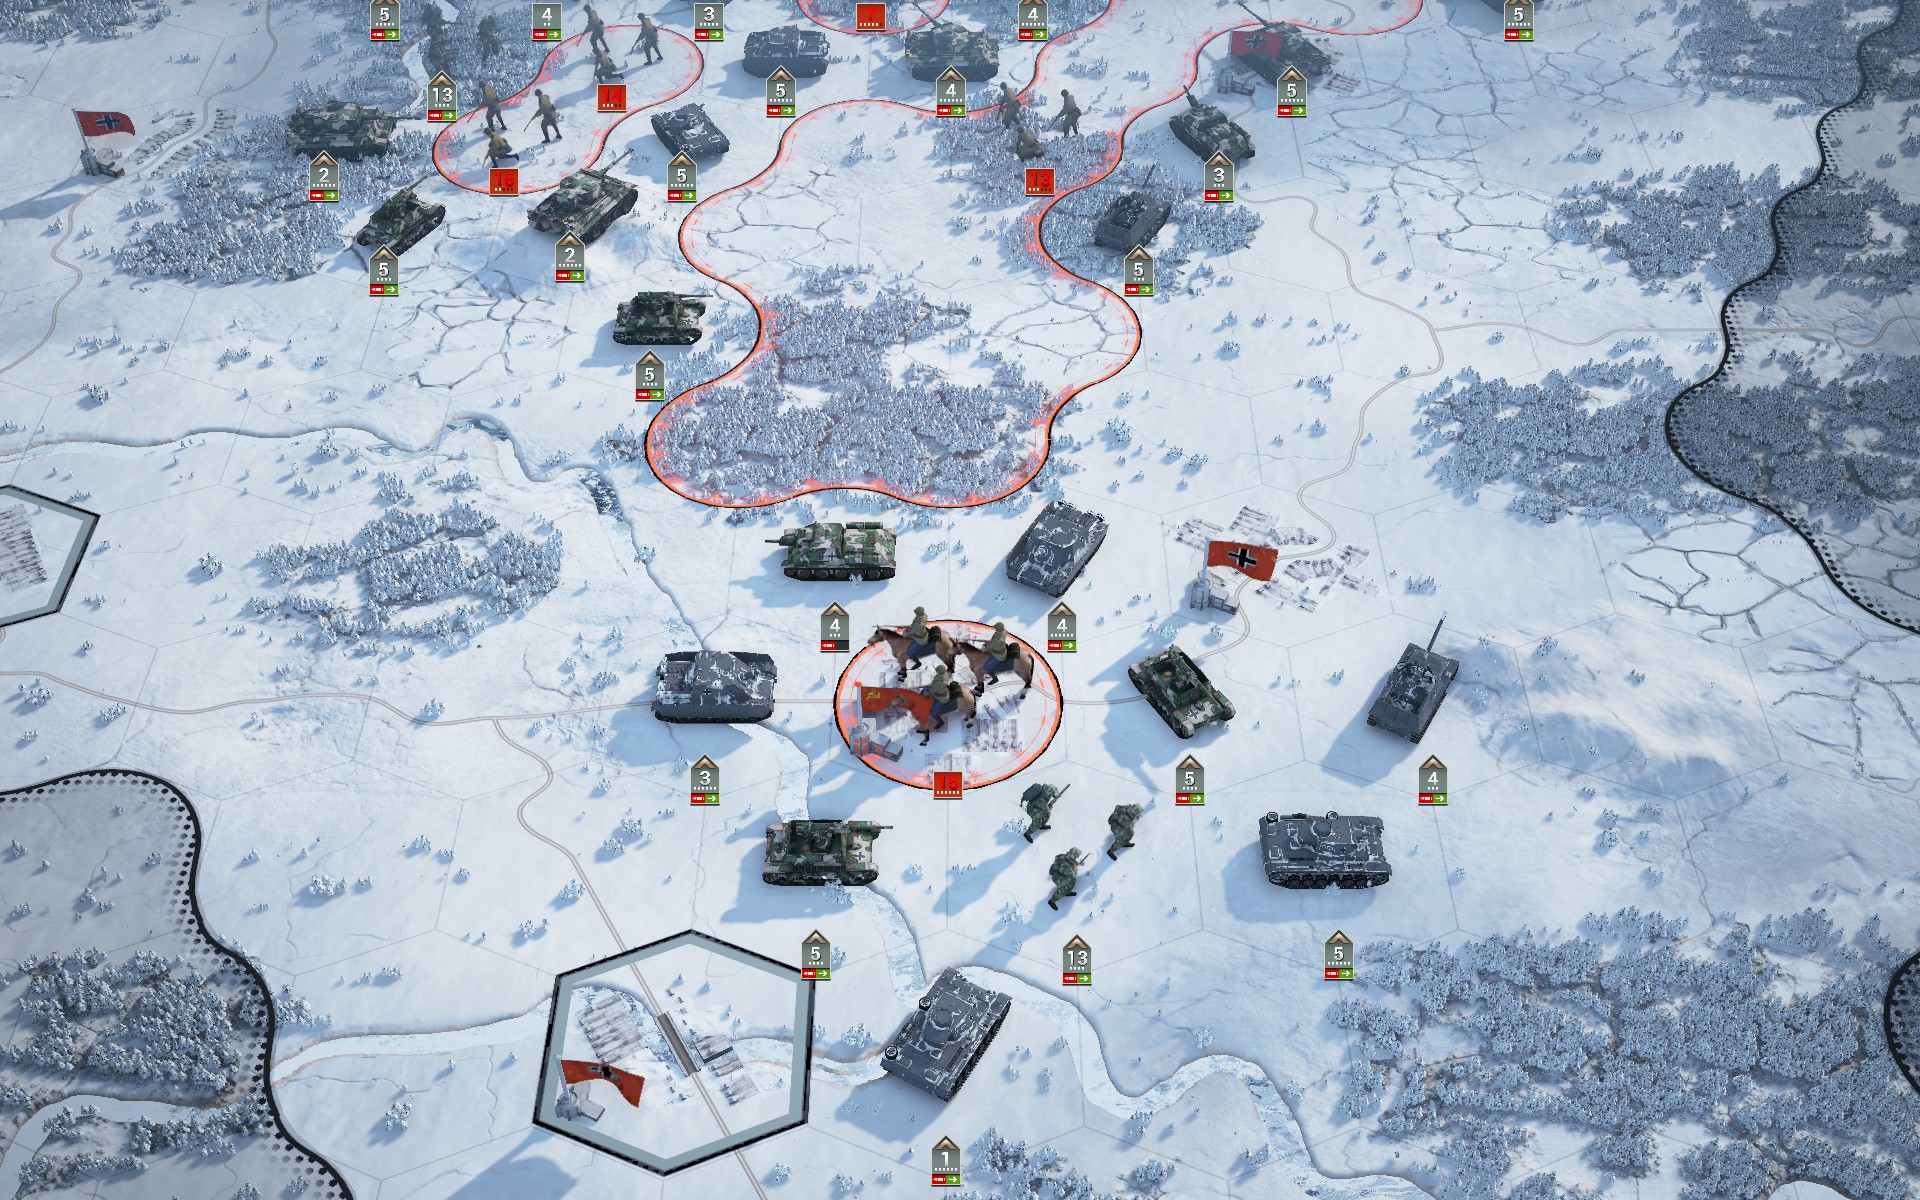
The Soviet Cavalry at Kapitanovka is surrounded and captured.
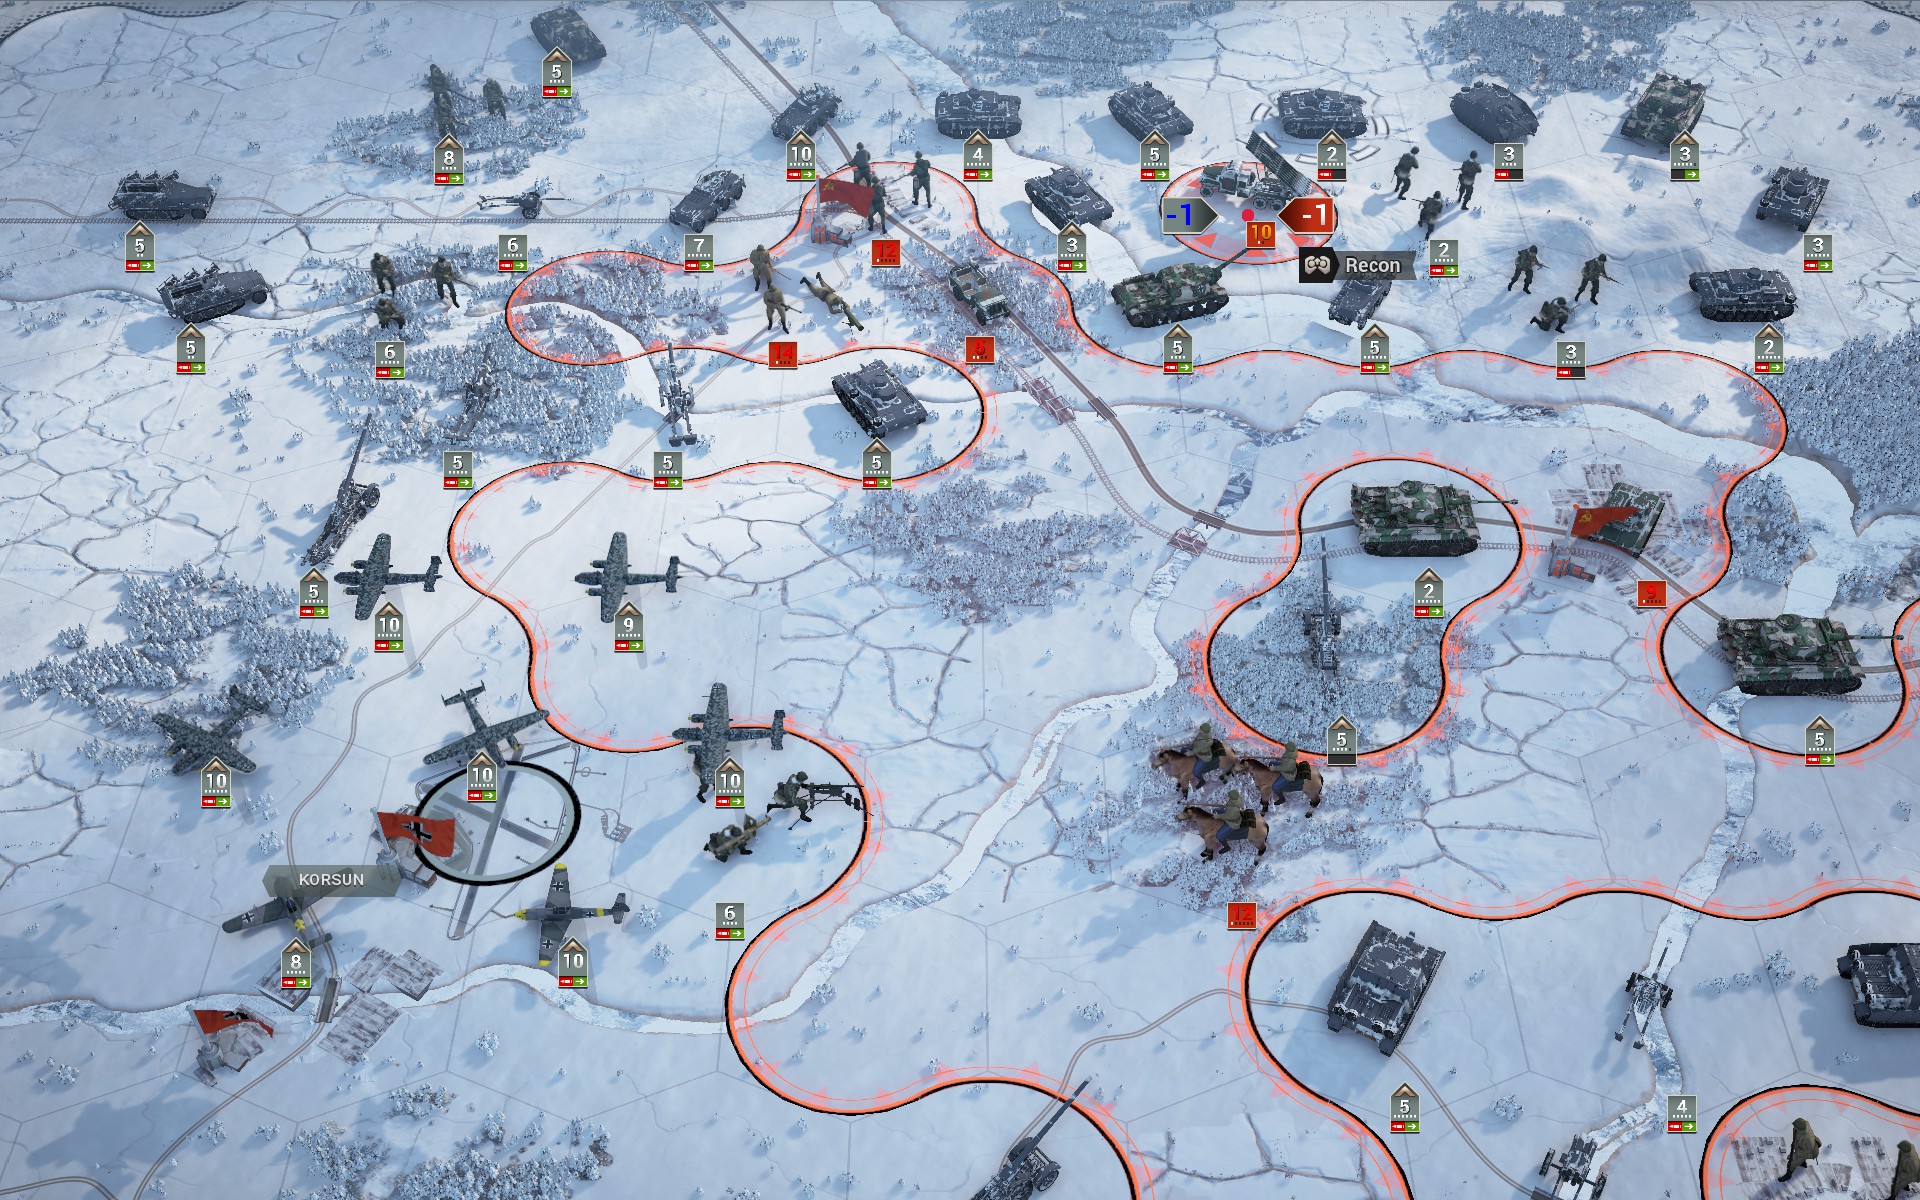
In a reversal of fortunes, the Katyusha battery north of the Dniepr that hounded the auxiliaries is captured.
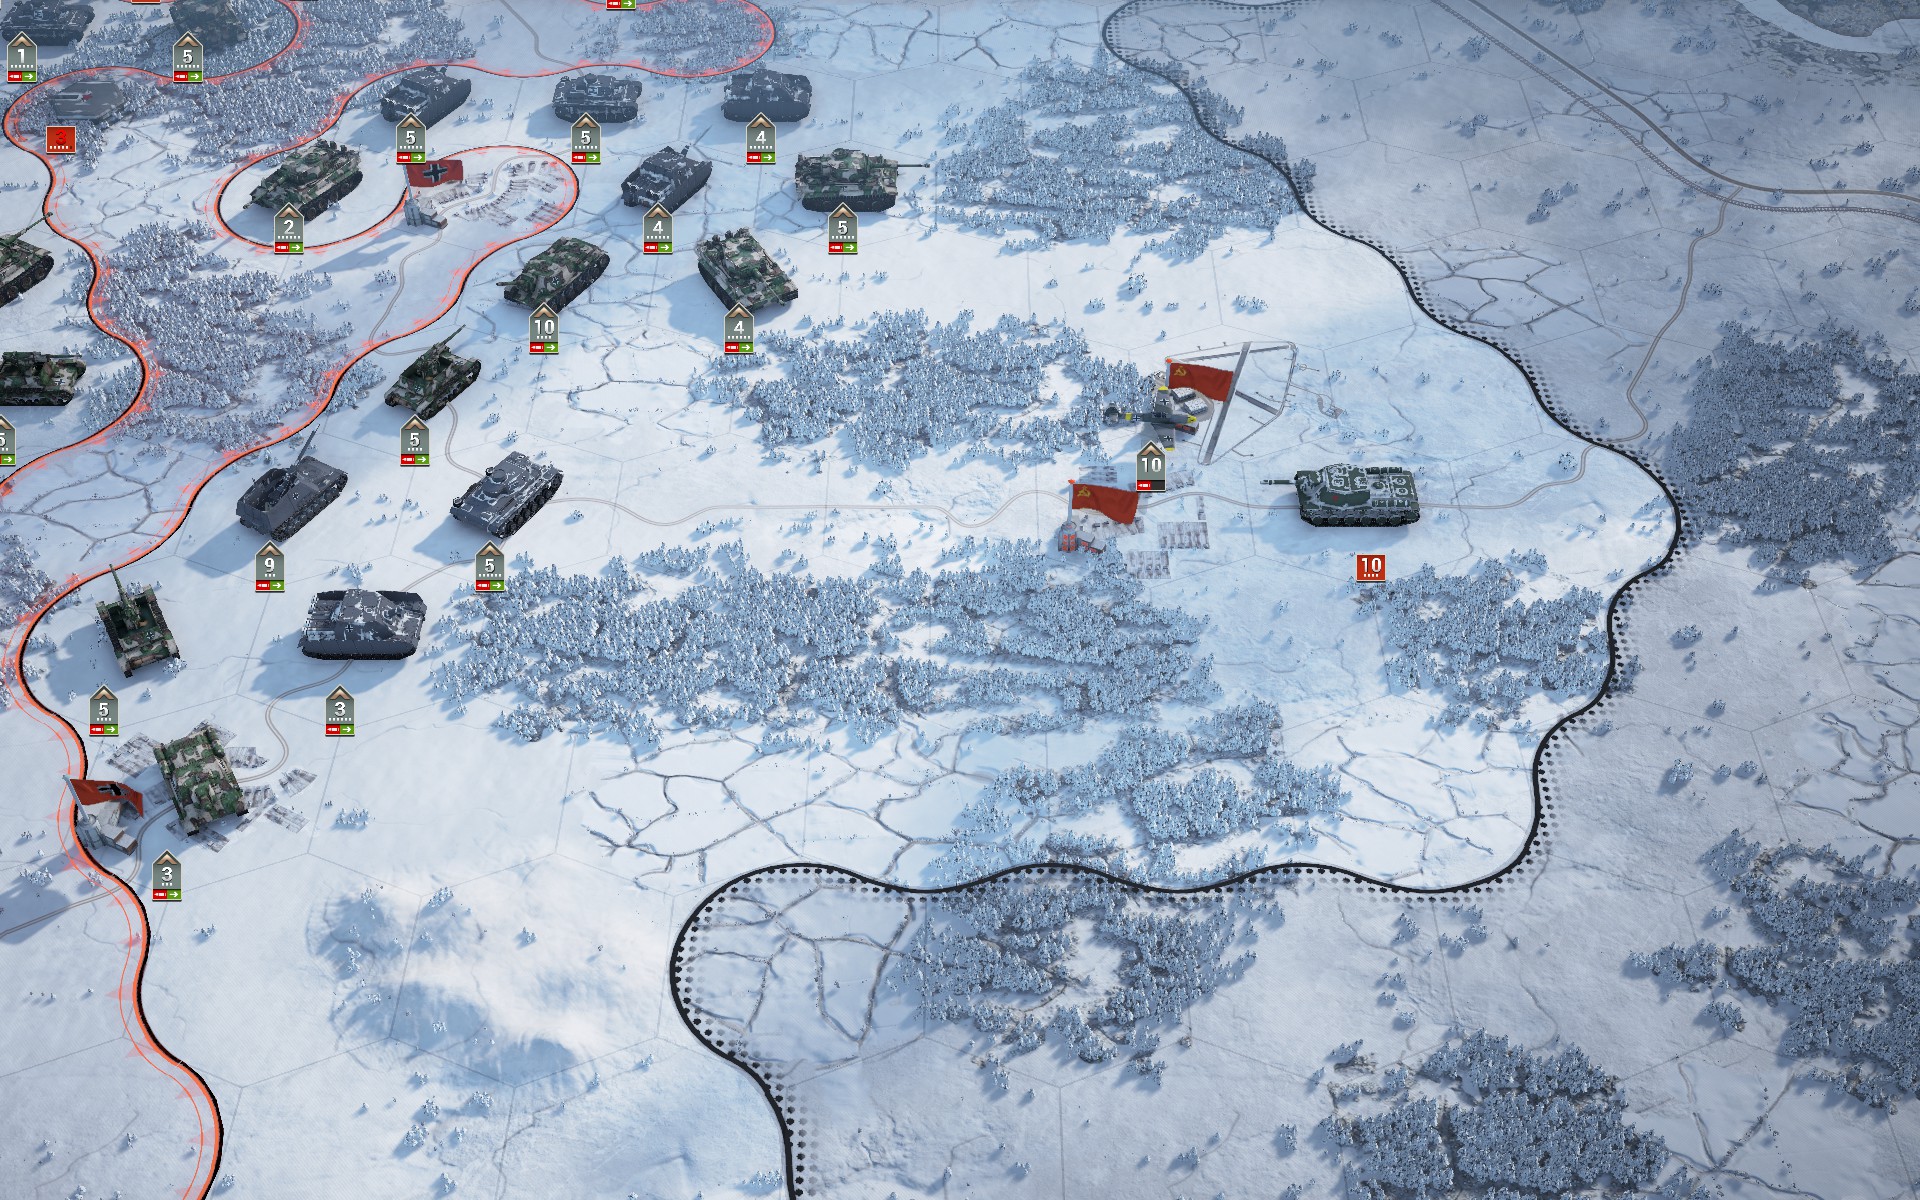
Cloudy skies hamper reconnaissance, but it's clear that there is still Soviet armour present in the east.
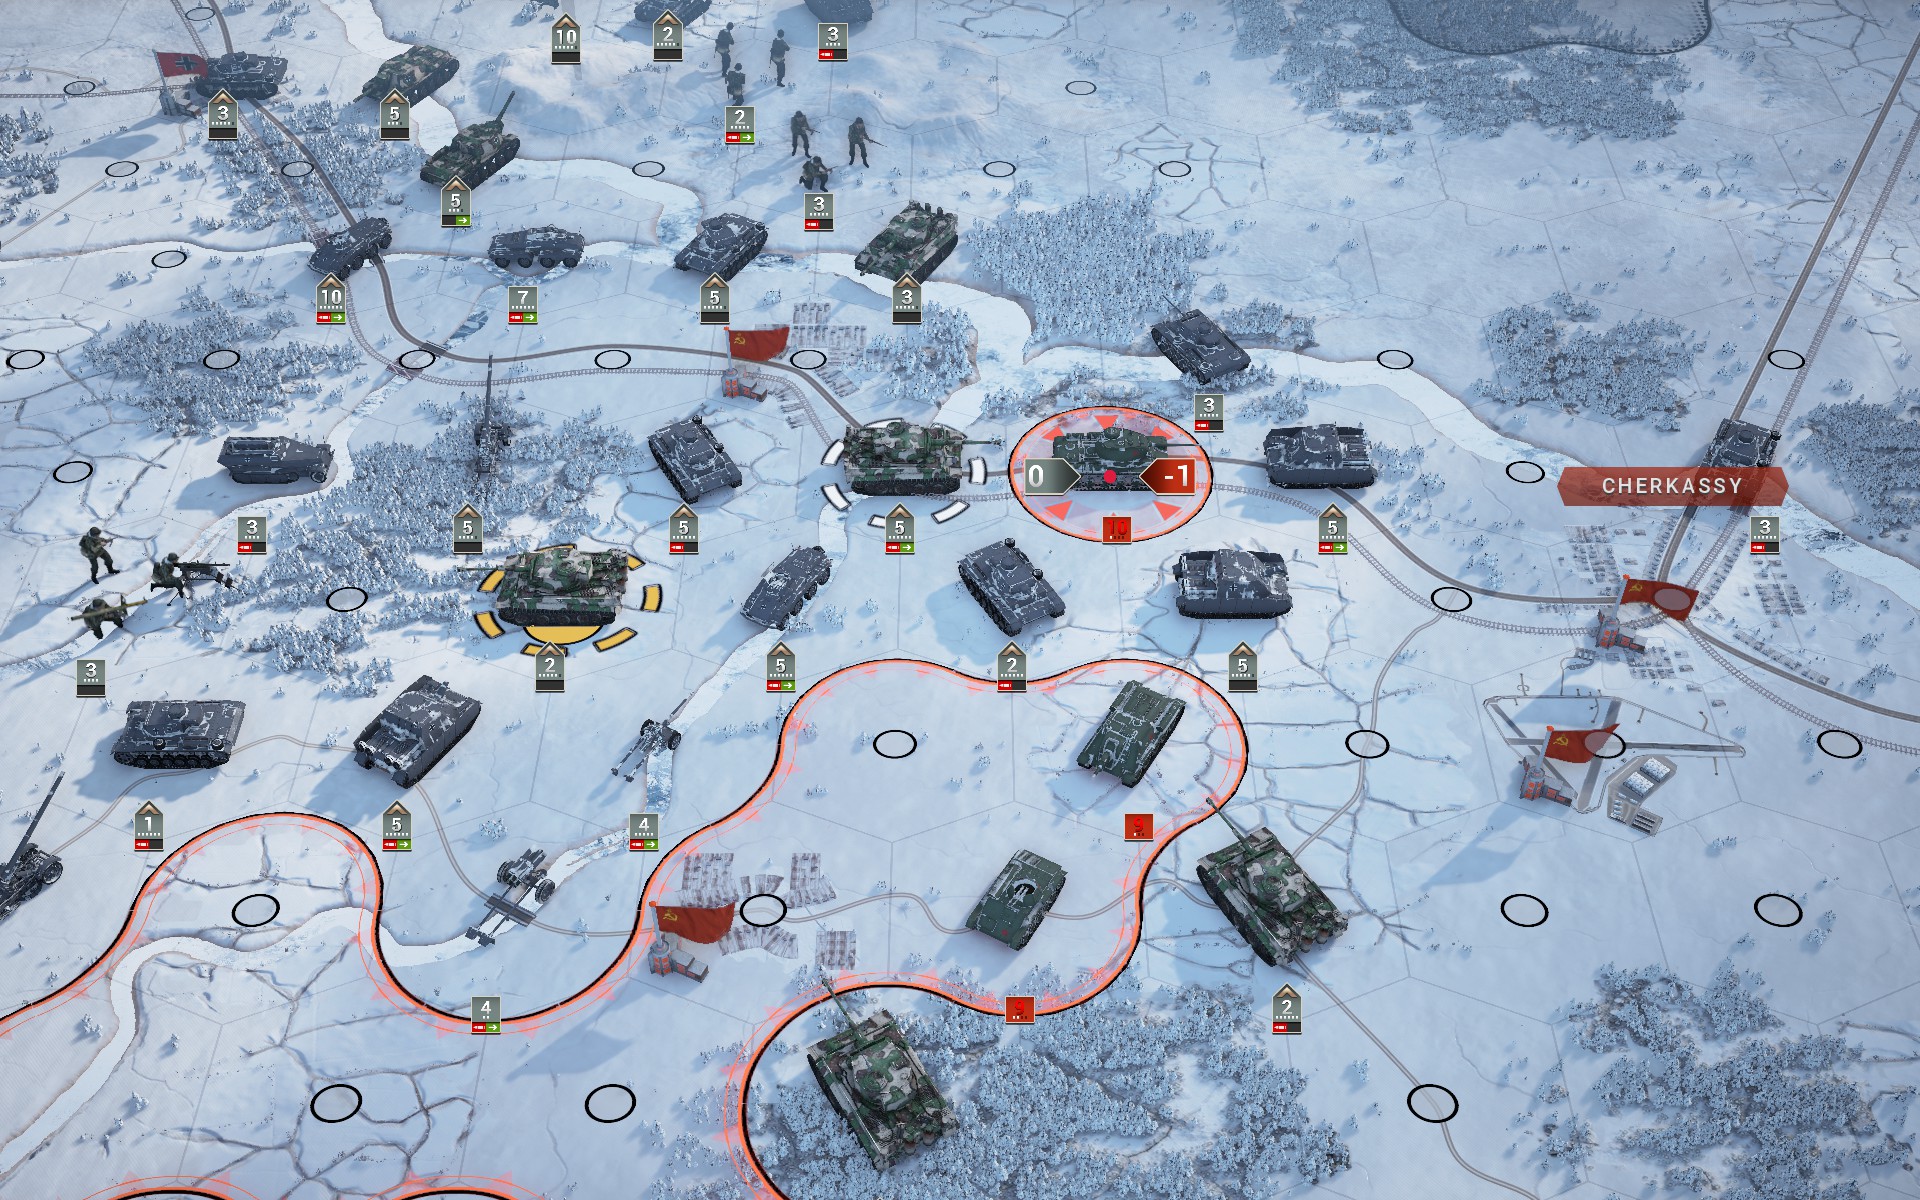
The last Soviet forces in the north are captured as my forces secure Cherkassy.
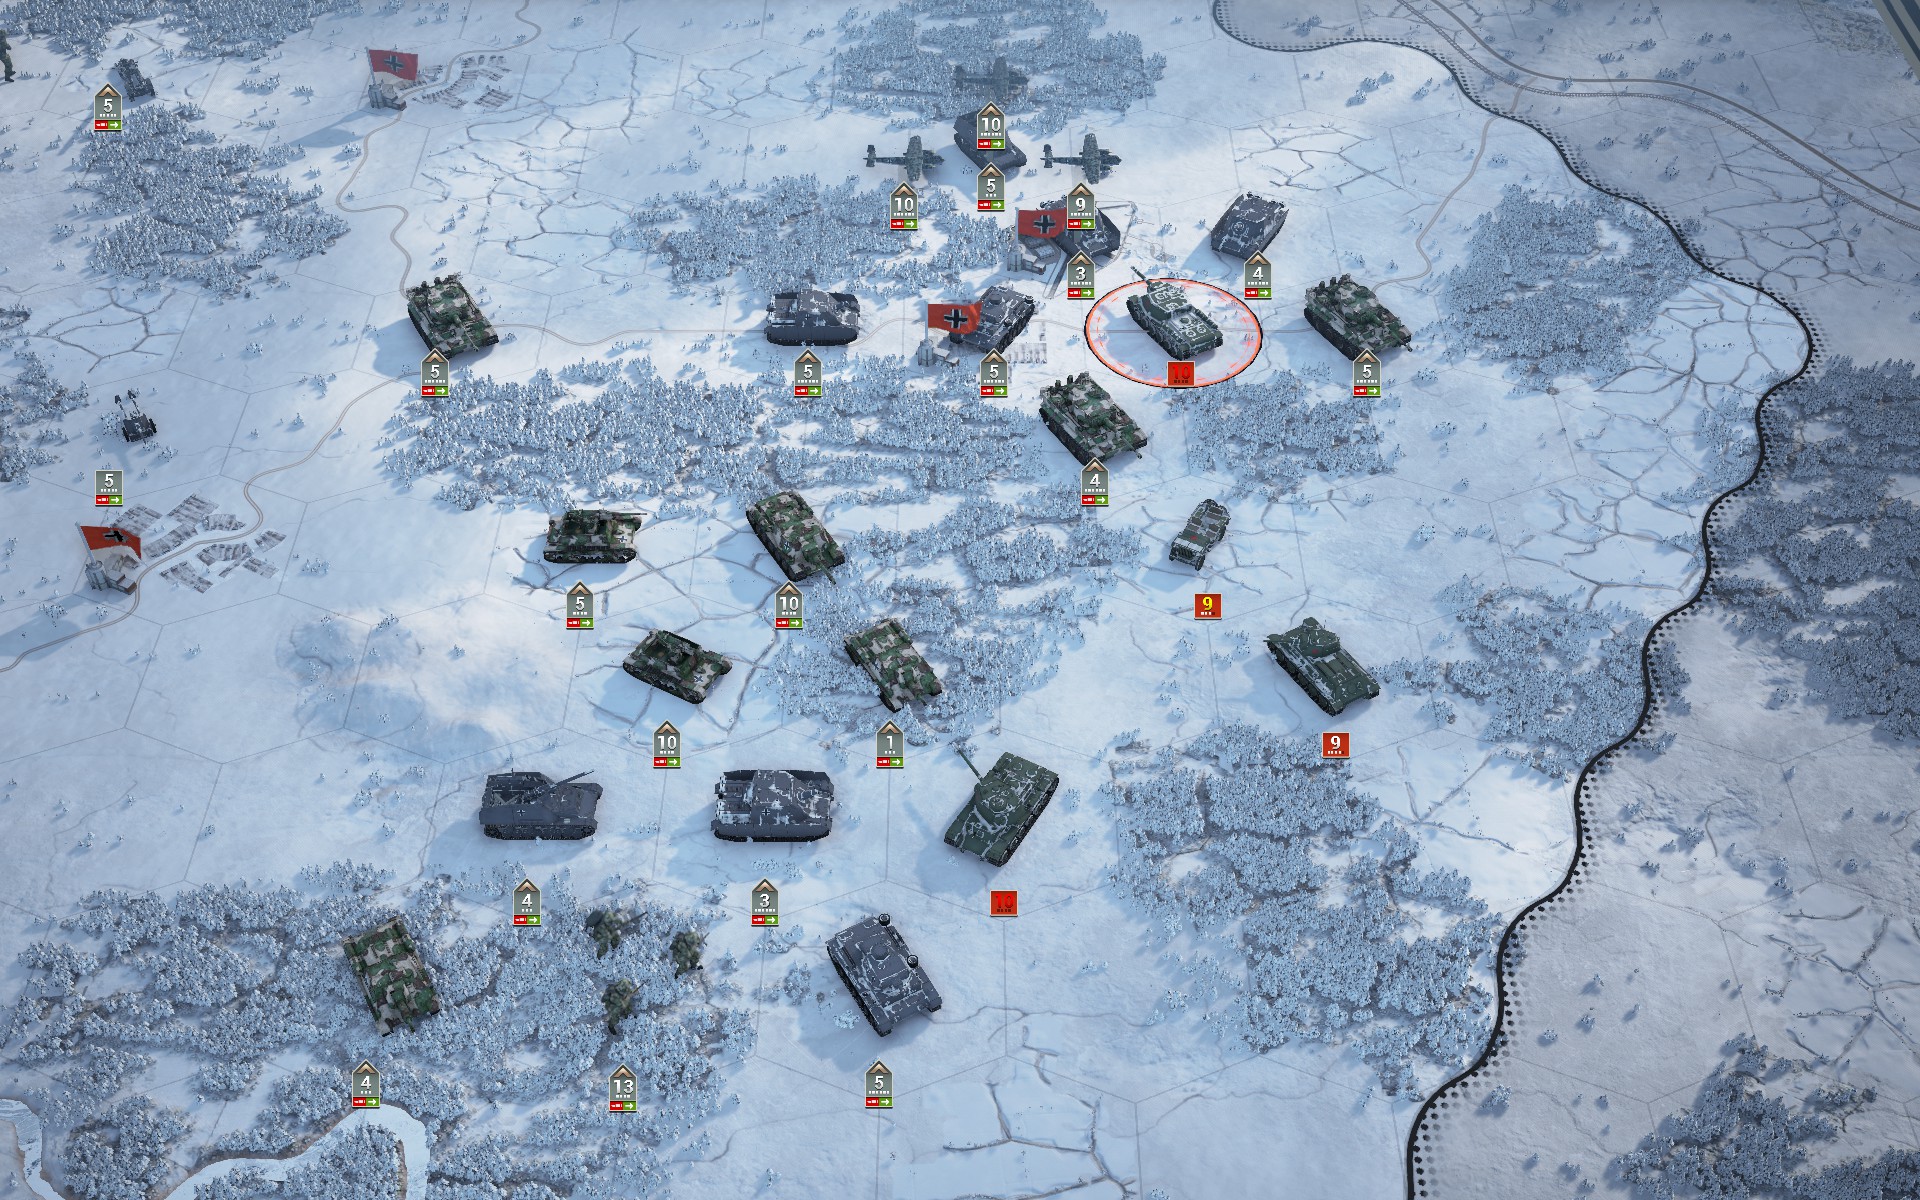
A hitherto undetected Soviet reserve inflicts heavy damage on my forces, illustrating the value of reconnaissance. I'm still glad I pushed east, however, as the reserve includes a rare SU-152.
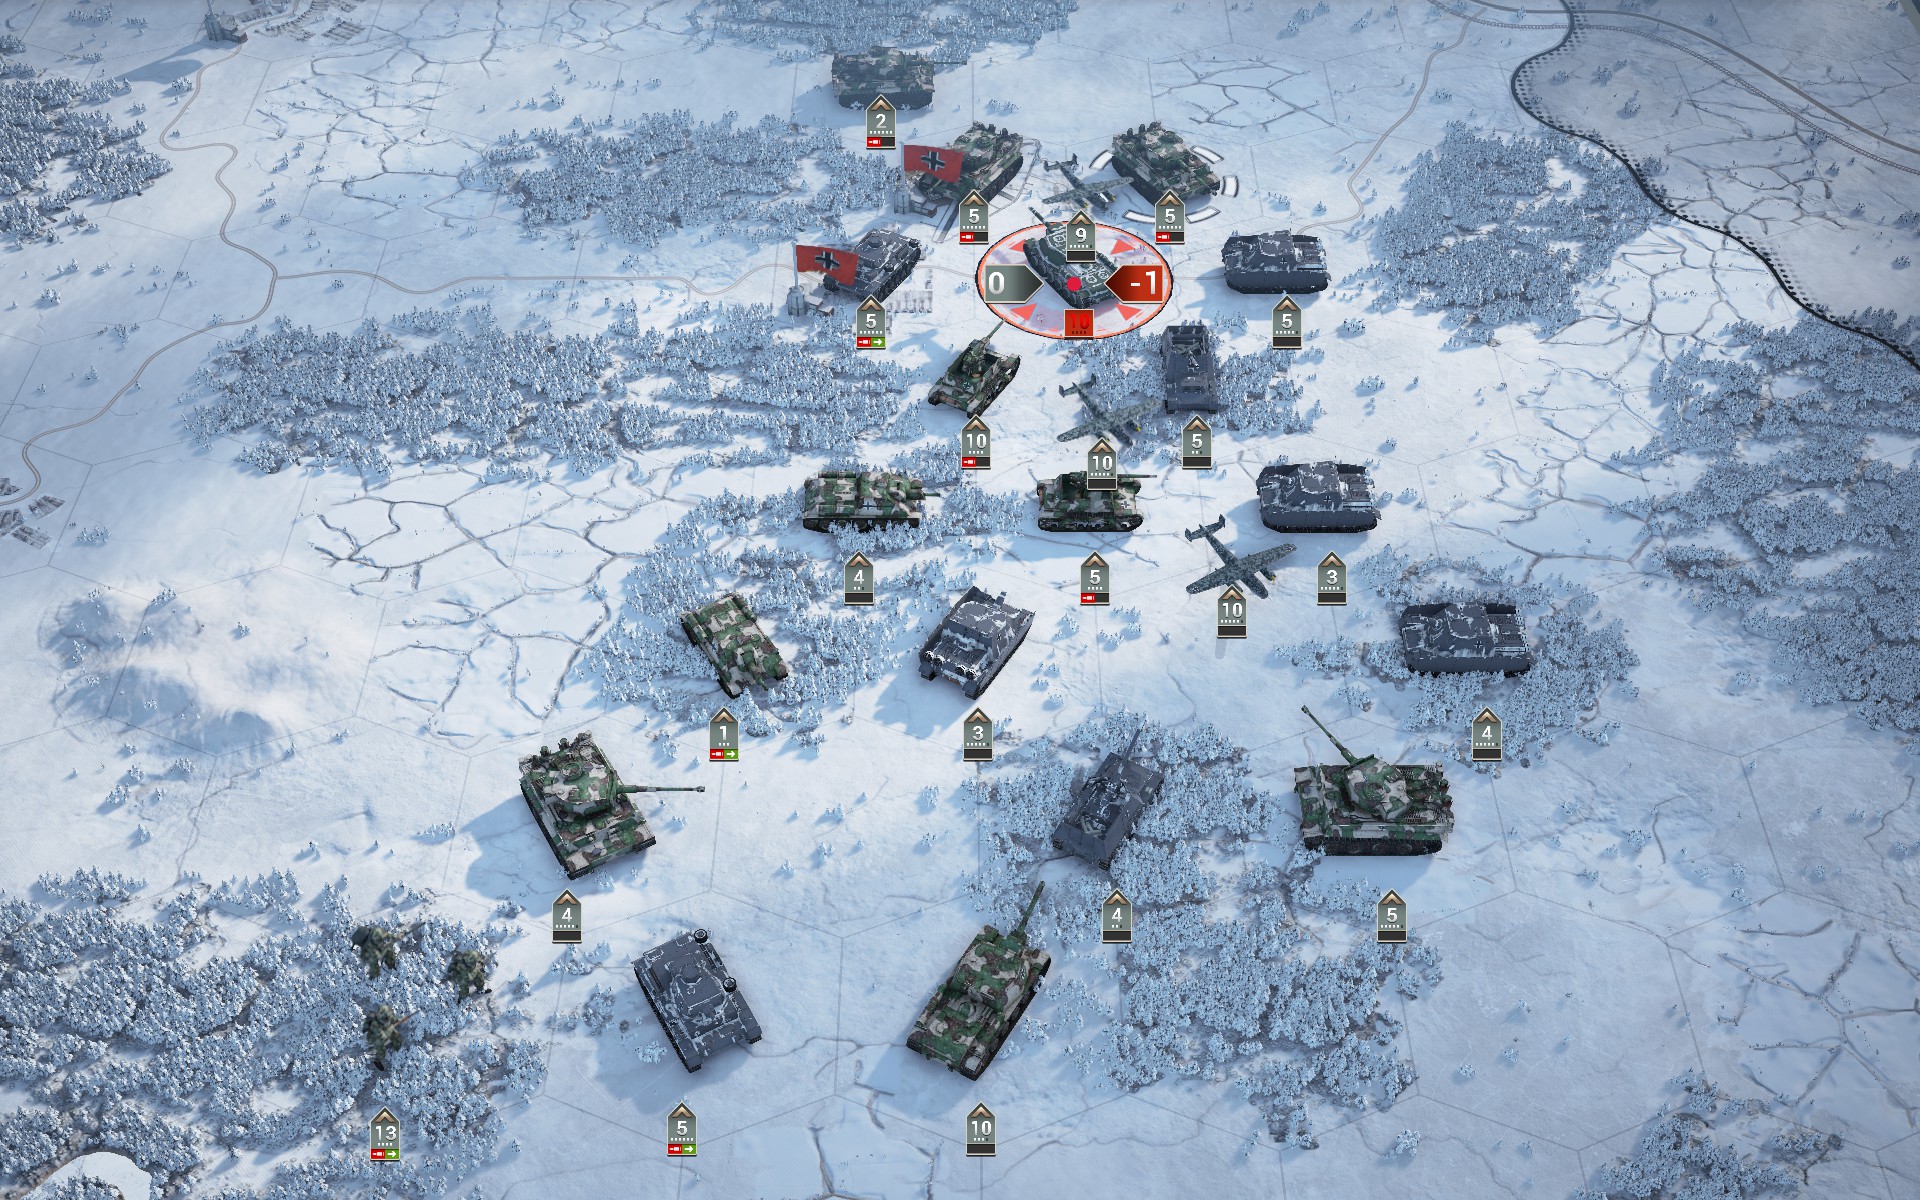
My forces capture the SU-152, bringing an end to the Soviet presence in the region.
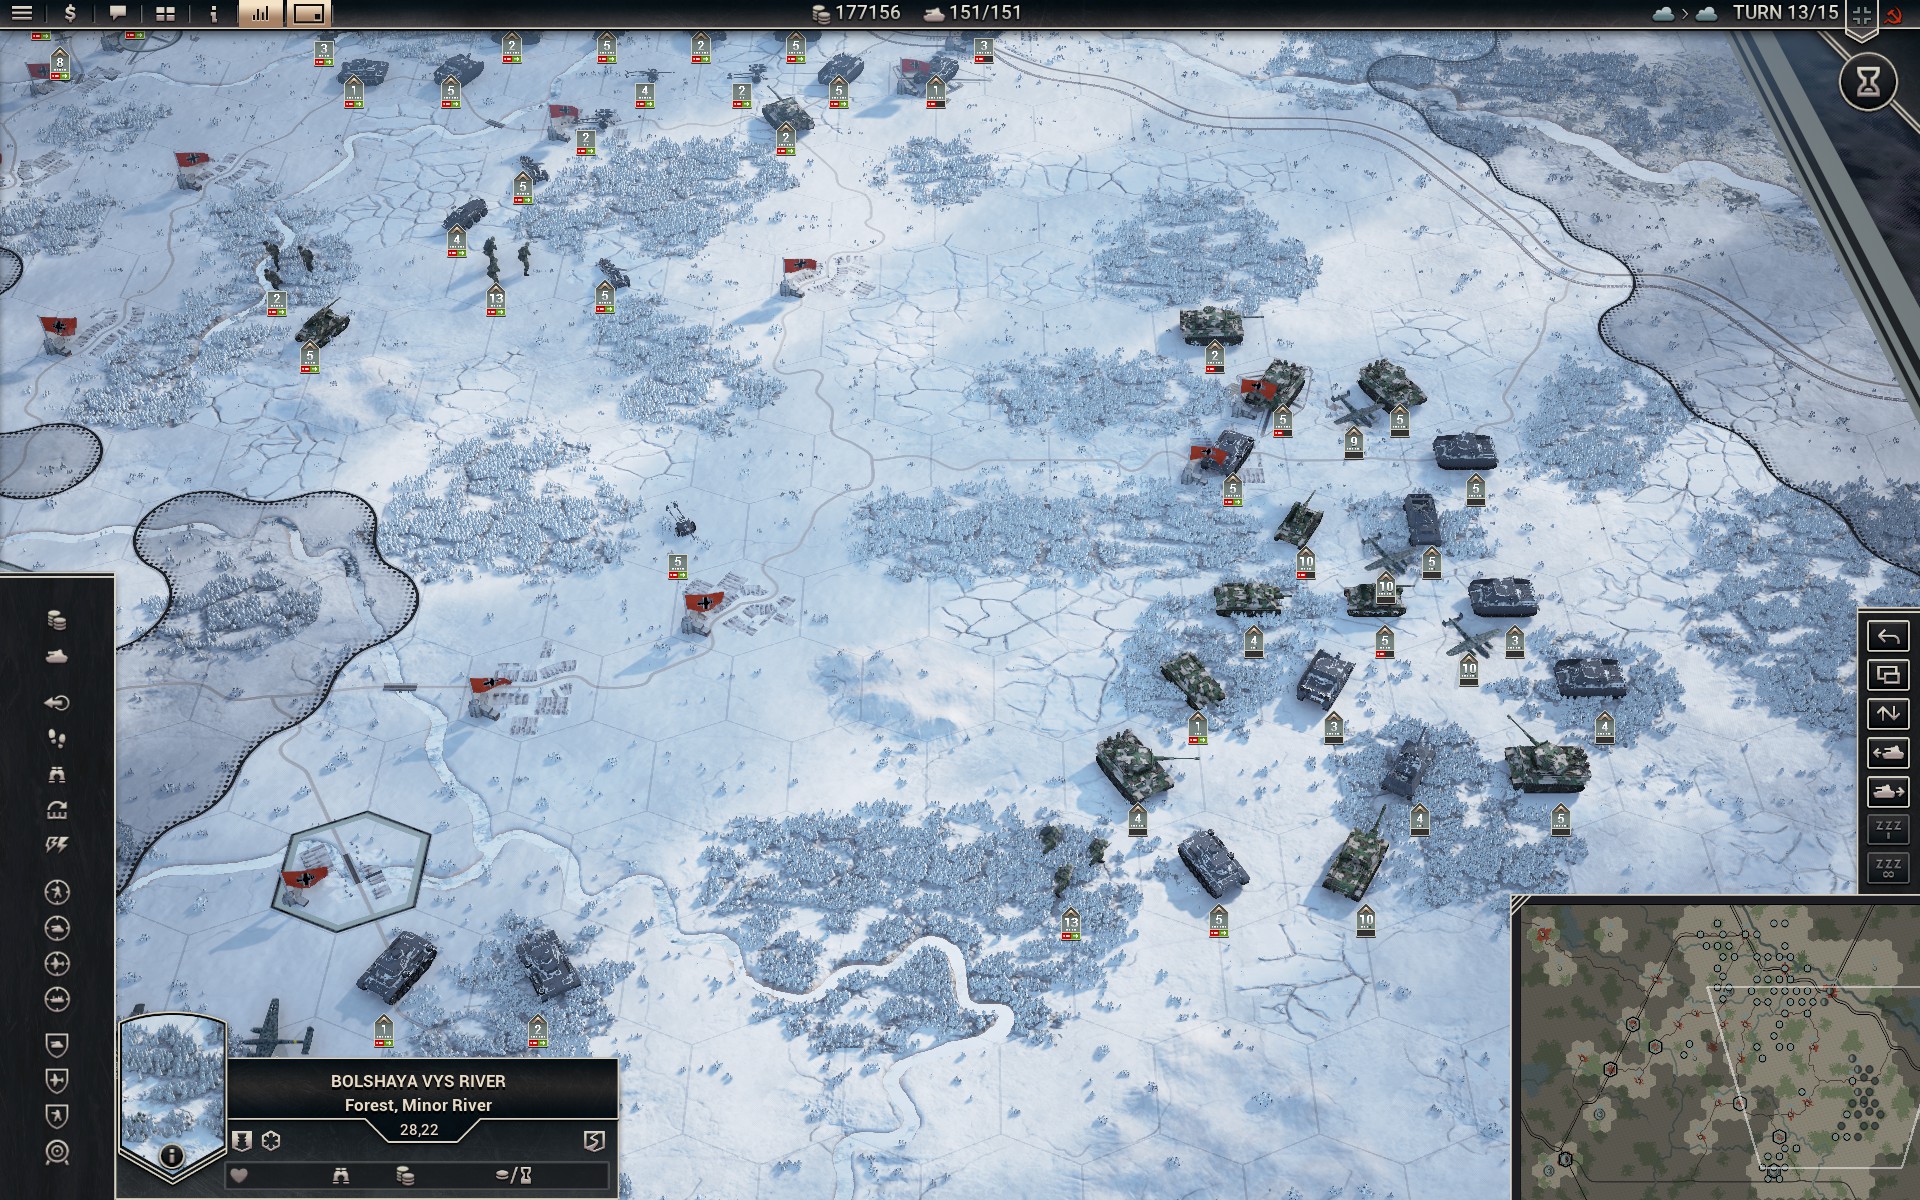
Even though there are no Soviet forces remaining, the scenario doesn't end. It doesn't really matter, although it feels a little strange to just pass turns.
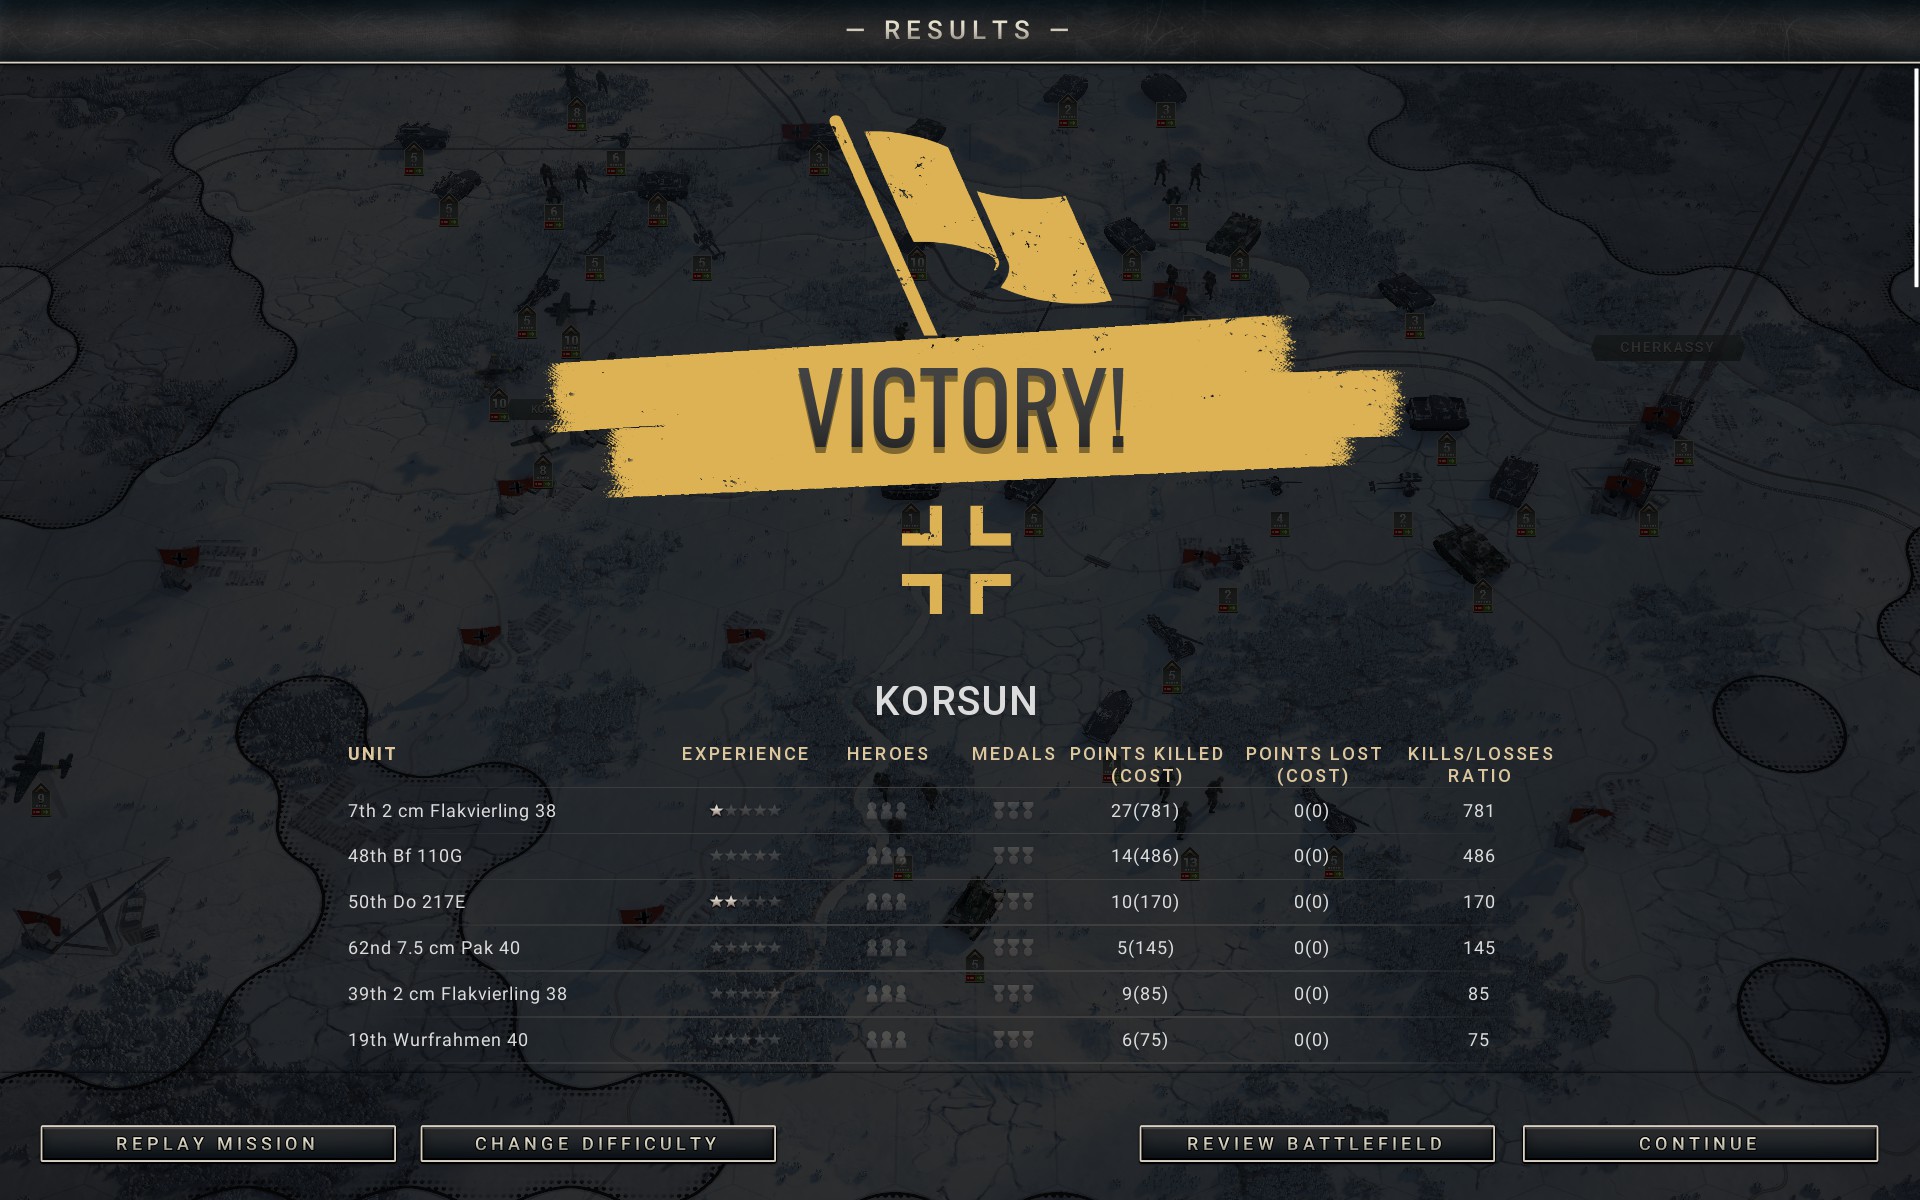
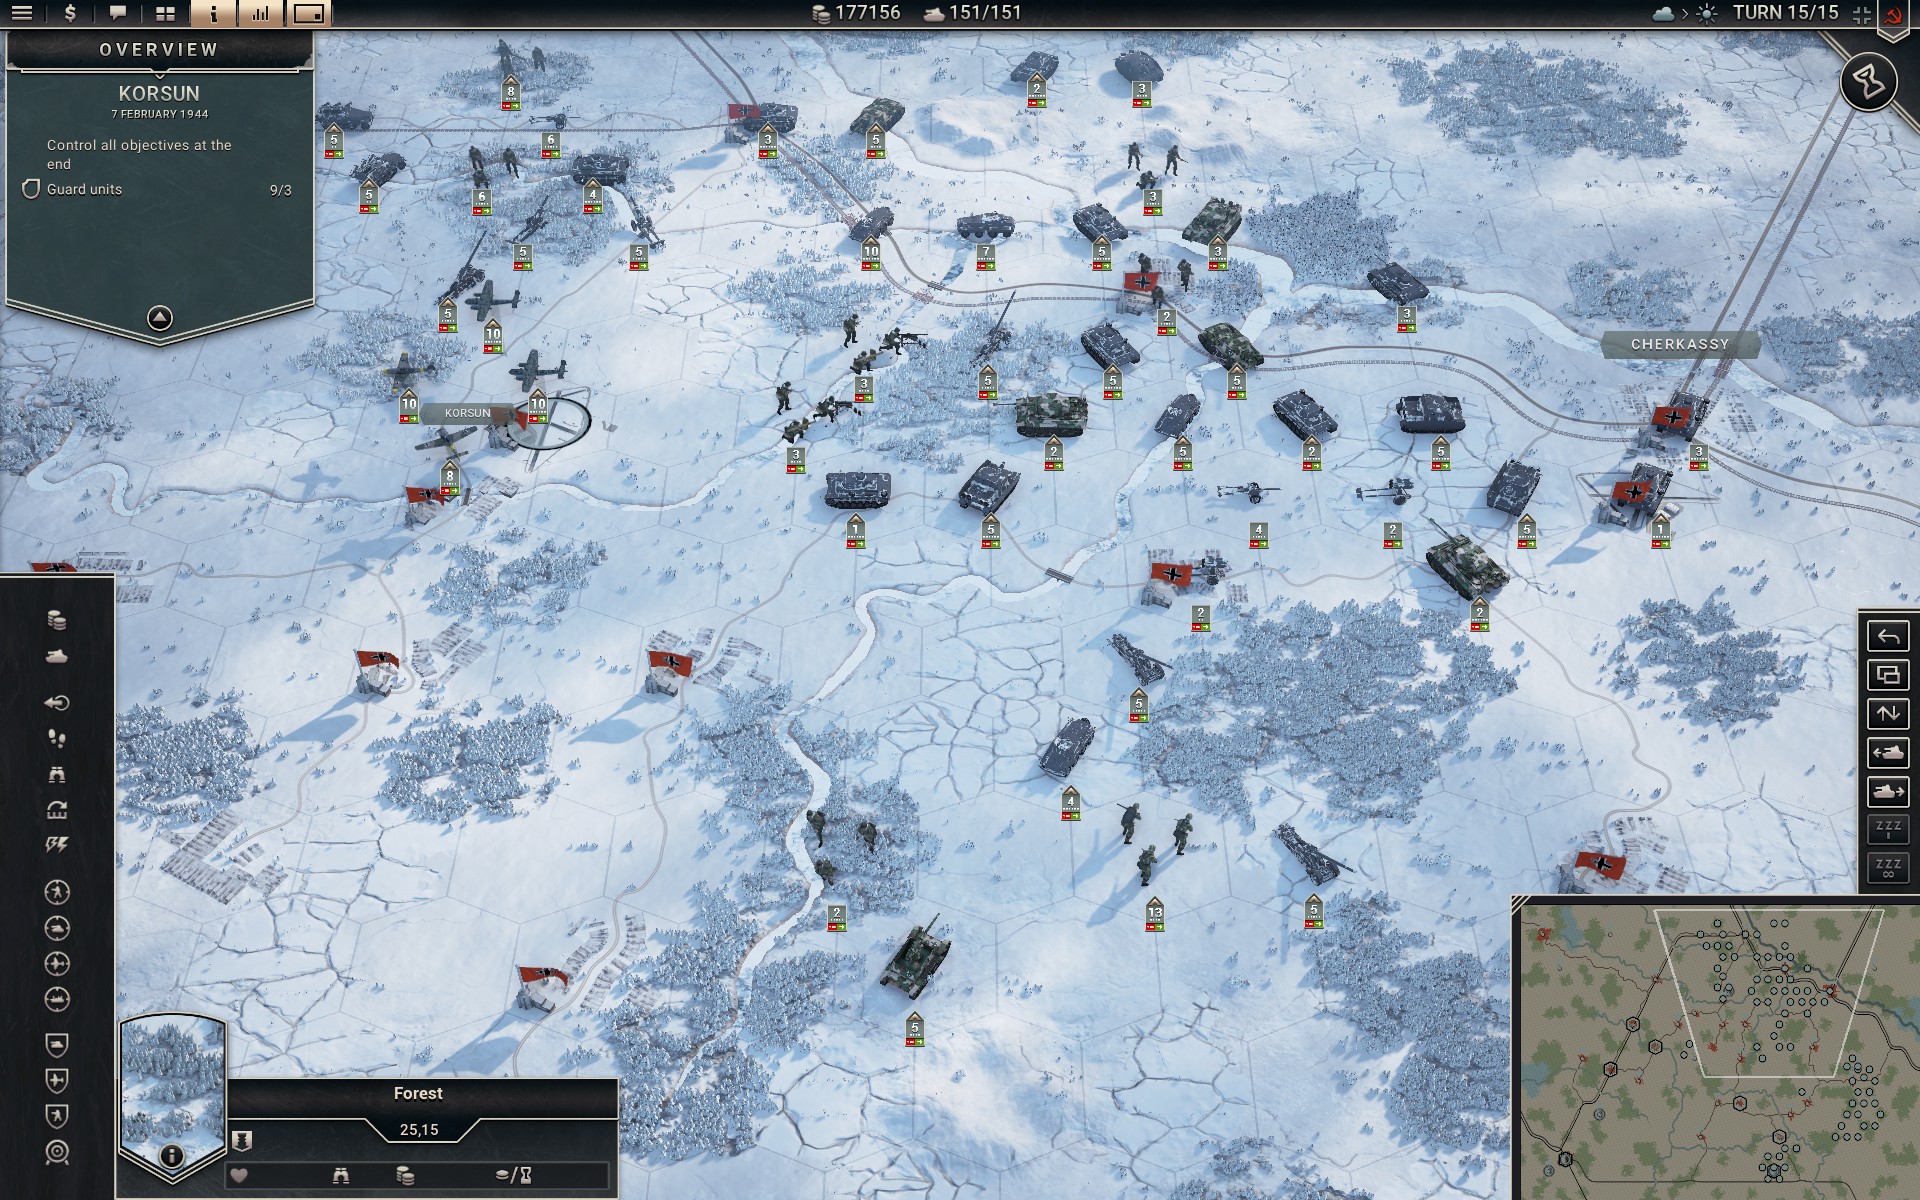
In the end, 9 auxiliaries survived the battle, which is a little surprising considering how callously I used them. The rivers froze halfway through the scenario, but fortunately I had already linked up with the auxiliaries by then; it'd have been harder to defend Korsun otherwise. On the whole I was fairly lucky with the weather, however, so I enjoyed strong air support. Concentrating my forces was definitely a good idea, but bringing all three battalions of mechanized Pioniere was not; they were meant to serve as an insurance but were I to play the scenario again I'd settle for a single battalion. I was extremely sloppy at times and as a result I was saddled with a repair bill in the thousands as my core is no longer particularly cheap, and while prestige isn't really a concern at this point I don't want to develop bad habits.
Initial Prestige: 155411
Final Prestige: 177156
Core
- Infantry
- Pioniere w/ SdKfz 250/1
- Pioniere w/ SdKfz 250/1
- Pioniere w/ SdKfz 250/1
- Tanks
- Tiger I [NEW]
- Tiger I
- Tiger I
- Tiger I
- Panzer IIIN [NEW]
- Panzer IIIN
- Panzer IIIN
- Panzer IIIN
- Panzer IIIN
- Panzer IIIN
- Recon
- SdKfz 234/1 8Rad
- SdKfz 234/1 8Rad
- Artillery
- 17 cm K 18 w/ SdKfz 7
- 17 cm K 18 w/ SdKfz 7
- SU-152 [NEW]
- SU-152 [NEW]
- SU-122 [NEW]
- SU-122 [NEW]
- Hummel [NEW]
- Wurfrahmen 40 [NEW]
- Brummbär [NEW]
- Brummbär [NEW]
- Brummbär [NEW]
- Brummbär [NEW]
- Anti-Aircraft
- SU-6
- SU-6
- Fighters
- Fw 190A
- Fw 190A
- Fw 190A
- Bf 109F
- Bf 109F
- Tactical Bombers
- Bf 109 PR
- Bf 110G
- Me 410A
- Strategic Bombers
- Do 217E
- Do 217E
- Do 217E
- Do 217E
- Do 217E
- Do 217E
- Do 217E
- Do 217E
The core is similar to the one I deployed at Smolensk, with three battalions of mechanized Pioniere providing an expensive but reliable option should I be forced to storm any fortified positions; it's possible that the Korsun salient won't be able to hold out for long, and if so the Pioniere will give me the option of breaking through the Soviet lines quickly rather than by suppressing them. Ideally they won't see much action, but a shift in the weather could quickly worsen the situation at Korsun. With the Red Army fielding more and heavier SPATs, an additional battalion of Tigers has been requisitioned to improve the resilience of my frontline, while the cost-effective IIINs will continue to make up the bulk of the Panzers.
The Gustav will remain in reserve once more, and as the heavy snow will severely hamper the towed artillery only two powerful 17 cm batteries will remain to provide me with a long-range option. Four battalions have been outfitted with captured Soviet SU-122s and powerful SU-152s, which are less vulnerable than their German counterparts -- for comparison purposes, in artillery mode the SU-122 and SU-152 offer similar performance to the Wespe and Hummel respectively. As there are not enough SU-152s, one battalion has instead been issued Hummels. Due to Retrograde I haven't had access to the Wespe or Hummel before now, but they already feel dated given the strength of the Soviet artillery. The StuH 42s have been upgraded to more powerful Brummbärs, which offer better performance for the same amount of core slots, while a Wurfrahmen 40 will provide close-range fire support for the Pioniere. An Me 410A and both SdKfz 7/1 have been moved to the reserve to accomodate these changes, as I expect the Luftwaffe will have little difficulty securing the skies; I'm more worried about the weather than the strength of the Soviet air force.
While it's possible to deploy at every position in the south controlled by the Wehrmacht, I have opted to focus my forces in the west. While this means that I will likely lose the easternmost objectives to advancing Soviet forces, I should have a clear advantage in numbers locally, allowing me to advance quickly and secure Boyarka and Lysyanka while capturing any Soviet forces in the region. There seems to be little advantage to spreading my forces, especially as I lack intelligence on Soviet positions other than the strong concentration of troops near the two aforementioned villages. This will also free up Luftwaffe assets to provide cover for the Korsun pocket. I intend to withdraw the auxiliaries towards the airfield and fortify the perimeter using the rivers and woodlands to my advantage, as they are too exposed in their current positions and cannot support each other.
Once the west is firmly under my control my forces will advance towards the village of Bohuslav on the Ros river. Capturing this strategic crossing should allow me to flank the Soviet position west of Korsun and allow the auxiliaries to break out and link up with my forces. I will then reform the lines and take stock of the situation; if time will allow it, my forces will slowly advance east while encircling and suppressing Soviet forces, with the ultimate goal of securing not only the objectives that the Red Army will no doubt have captured by now, but the town of Cherkassy, pushing the Red Army back across the Dniepr. It is likely too late now to fortify the river as originally intended, but this should buy valuable time while the Red Army is forced to bring up reserves. Should I be pressed for time my forces will instead abandon Korsun entirely in favour of a focused push southeast towards the objectives; nothing is set in stone until I have a clear idea of the size of the Soviet forces.
Deep Recon reveals that Boyarka and Lysyanka are heavily fortified, but I am uneasy about the conspicuous absence of Soviet armour; caution is advised while I wait for the Luftwaffe to provide aerial reconnaissance.
The Korsun pocket is surrounded on all sides, but the airfield offers a crucial lifeline in the form of a supply hex. The auxiliaries will fall back and establish a new line of defence around it, allowing them to support each other as they are currently too spread out.
Panzers cross the Bolshaya Vys river to surround the Soviet Guard in the town of Yampol. Their task will be to protect the flank of the main force as it advances north.
The auxiliaries begin to fall back towards the airfield.
The Tigers lead the way as the main battlegroup advances towards Boyarka and Lysyanka.
My vanguard suffers heavy damage due to the lack of fire support as Soviet armour counterattacks. The veterans hold their ground, however.
The Luftwaffe shoots down the Soviet fighters.
As I suspected it would, the Red Army takes control of the undefended objectives to the east. Due to the presence of a powerful IS-1 heavy tank I revise my plans for the eastern battlegroup; while slow, the IS-1 is even more resilient than the Tiger and would make a fine addition to my forces. As I strive to suppress and capture enemy forces I value resilience more than firepower, and with a Ground Defense of 27 the IS-1 can shrug off attacks that would cripple lesser tanks.
The IIINs struggle with the armour of the T-34/43, forcing me to rely on the Tigers to capture it.
A powerful ISU-122 has foolishly entered a village, allowing the infantry to damage it. This should force the AI to repair it while the auxiliaries withdraw across the river.
In the west, the Soviet armour is suppressed and encircled.
As the main battlegroup consolidates its position in preparation for the assault on Boyarka and Lysyanka, another IS-1 is spotted to the north. Due to the snow the 17 cm artillery is difficult to redeploy, so I decide to send a force north to flank Boyarka and capture the IS-1.
The Korsun pocket comes under heavy attack from the west. The Katyusha battery on the other side of the Dniepr is proving a menace.
The T-34/43 recklessly leaves the slower IS-1 behind. This makes things easier for me.
The Tigers take up positions to prevent the Soviet Cavalry from threatening the exposed IIINs in the woods as they prepare to capture the T-34/43.
The Luftwaffe hunts down the last Soviet aircraft.
At Korsun, the Red Army once again attempts to breach the pocket from the west.
With neither side being able to defeat the other's AT support, the battle of Korsun is quickly turning into a tug of war.
My forces capture the first IS-1.
Due to the high accuracy of AI units on Generalissimus, even a few extra points of Ground Defense go a long way to mitigate damage, and an IS-1 would likely have suffered fewer losses than the detached Tiger. I've been increasingly guilty of failing to provide adequate fire support for my frontline, however, and I suspect it's partly because prestige has become irrelevant; I've become complacent.
The IS-1 is quickly surrounded and suppressed.
A detached SU-122 in AT mode is more than capable of capturing a T-34/43.
The Bridgeburners and Crimson Guard storm Boyarka and Lysyanka.
Soviet forces destroy two detached units -- a Brummbär and an SU-122 -- in another debacle for me. I will have to be more prudent in Bagration, as these losses were completely unnecessary.
My forces capture the second IS-1.
The Soviet forces involved in a tug of war at Korsun suddenly find themselves surrounded.
With the Korsun pocket secured my forces push east towards Cherkassy. As I only need to keep 3 auxiliary units alive, I am callously using them to draw out any remaining Soviet forces.
The KV-85 is a powerful tank, but as the Tiger is an iconic unit and less vulnerable to tactical bombers I don't plan on using it. The IS-1 is very welcome, however.
The Red Army mobilises its last reserves as my forces close in on Cherkassy.
My forces capture the last objective and move to encircle the Soviet reserve.
With no armour to support them, Soviet forces north of Korsun offer little resistance.
The Soviet Cavalry at Kapitanovka is surrounded and captured.
In a reversal of fortunes, the Katyusha battery north of the Dniepr that hounded the auxiliaries is captured.
Cloudy skies hamper reconnaissance, but it's clear that there is still Soviet armour present in the east.
The last Soviet forces in the north are captured as my forces secure Cherkassy.
A hitherto undetected Soviet reserve inflicts heavy damage on my forces, illustrating the value of reconnaissance. I'm still glad I pushed east, however, as the reserve includes a rare SU-152.
My forces capture the SU-152, bringing an end to the Soviet presence in the region.
Even though there are no Soviet forces remaining, the scenario doesn't end. It doesn't really matter, although it feels a little strange to just pass turns.
In the end, 9 auxiliaries survived the battle, which is a little surprising considering how callously I used them. The rivers froze halfway through the scenario, but fortunately I had already linked up with the auxiliaries by then; it'd have been harder to defend Korsun otherwise. On the whole I was fairly lucky with the weather, however, so I enjoyed strong air support. Concentrating my forces was definitely a good idea, but bringing all three battalions of mechanized Pioniere was not; they were meant to serve as an insurance but were I to play the scenario again I'd settle for a single battalion. I was extremely sloppy at times and as a result I was saddled with a repair bill in the thousands as my core is no longer particularly cheap, and while prestige isn't really a concern at this point I don't want to develop bad habits.
Last edited by SineMora on Fri May 15, 2020 2:54 am, edited 2 times in total.
Mildly pretentious Swede. Goes by Path on most platforms, including Steam.
http://www.slitherine.com/forum/viewtopic.php?f=596&t=98034 -- Generalissimus AAR (no Trophies / Heroes)
http://www.slitherine.com/forum/viewtopic.php?f=596&t=98034 -- Generalissimus AAR (no Trophies / Heroes)
-
SineMora
- Sergeant Major - SdKfz 234/2 8Rad
- Posts: 641
- Joined: Thu Apr 02, 2020 4:20 pm
- Location: Sweden
Re: A Certain Panzer General's Adventures -- Generalissimus (No Liberator / Trophies of War / Heroes)
Korsun is now complete. Coming up next is Bagration, which could be the largest Soviet offensive in the game. Stay tuned as my corps tries to hold off the armoured legions of the Red Army.
Mildly pretentious Swede. Goes by Path on most platforms, including Steam.
http://www.slitherine.com/forum/viewtopic.php?f=596&t=98034 -- Generalissimus AAR (no Trophies / Heroes)
http://www.slitherine.com/forum/viewtopic.php?f=596&t=98034 -- Generalissimus AAR (no Trophies / Heroes)
-
SineMora
- Sergeant Major - SdKfz 234/2 8Rad
- Posts: 641
- Joined: Thu Apr 02, 2020 4:20 pm
- Location: Sweden
Re: A Certain Panzer General's Adventures -- Generalissimus (No Liberator / Trophies of War / Heroes)
Scenario XX -- Bagration
Part I -- The Battle of Minsk
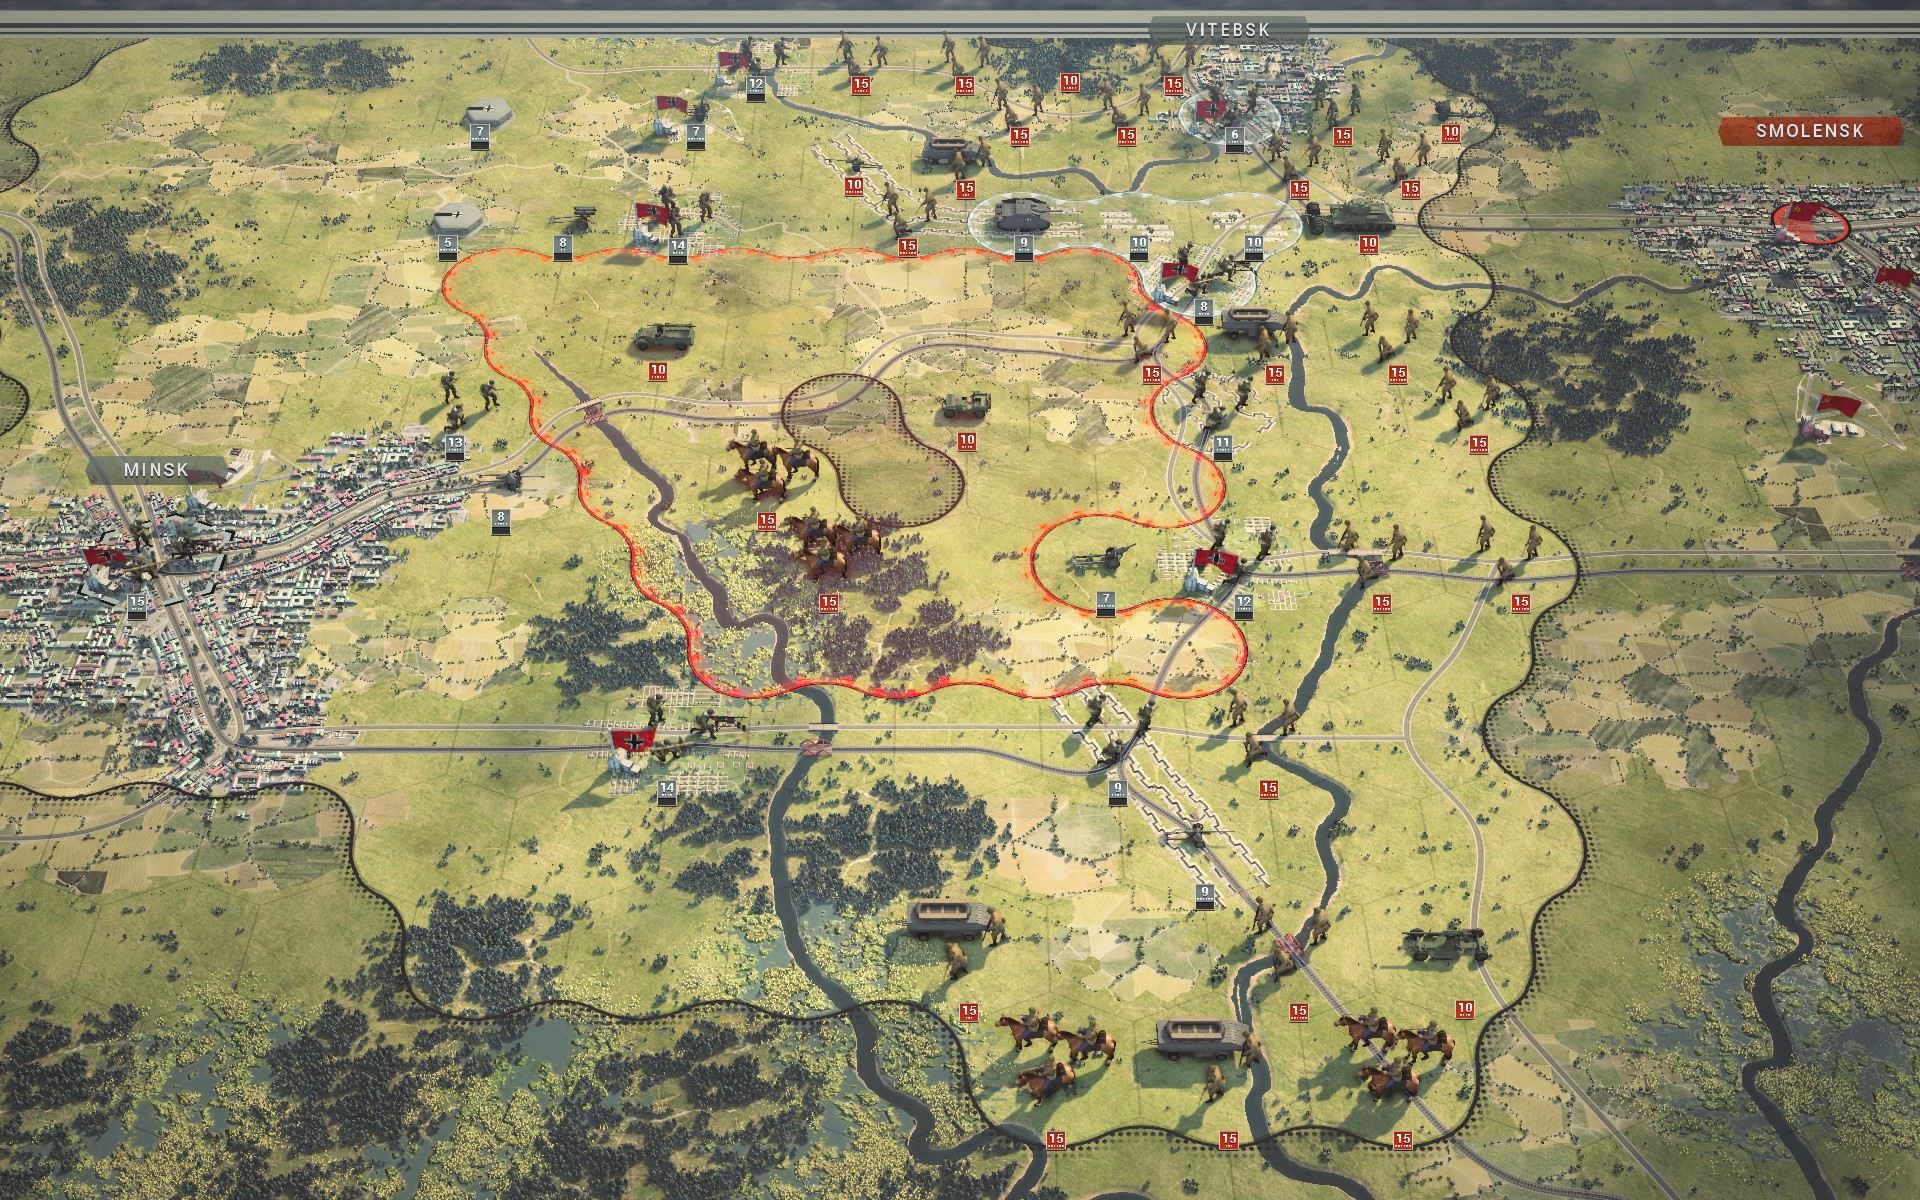
Initial Prestige: 171389
Final Prestige: 195024
Core
Operation Bagration is the largest Soviet offensive in the game, so naturally it features a large number of units, most of which will advance on my positions at some point. Due to the number of screenshots and the extensive changes to the roster that occurred roughly halfway through the scenario I've decided to split it into two parts. Part I will cover the first part of the scenario and focus primarily on the Battle of Minsk and the optional objectives that need to be under your control at the beginning of turn 10 in order to receive the reward of 12 extra core slots, while Part II will cover the climax of Operation Bagration as the Red Army expands the front and commits its reserves in an all-out offensive. The units marked with red text are all temporary additions to the core that I intend to disband during the battle; between these and the 12 additional core slots from fulfilling the bonus objectives, I expect to be able to rotate in an additional 34 core slots worth of untis. Part II will have the revised roster that I finished the scenario with. Note that prestige values are provided for the scenario as a whole.
As one can expect scenario bonus objectives to be designed in such a way as to allow a reasonably skilled player to achieve them, it's likely that the Red Army will only commit limited forces early on and gradually increase the pressure over the course of the battle. I intend to make use of this by deploying substantial air assets to engage and destroy the Soviet air force at an early stage, after which I will disband them and rotate in experienced units from the reserve. This should allow me to bolster the defences on the ground where it's needed while denying the Red Army air support as the full might of Soviet juggernaut is unleashed. The large number of airfields with nearby supply hexes near Warsaw and Bialystok will allow me to complete the transition quickly, as a unit must begin the turn on top of a supply hex to be disbanded (unless it has Phased Movement).
The veteran mechanized Pioniere of the Bridgeburners and Crimson Guard will protect the southern flank of the Minsk battlegroup; while I'll have access to plenty of auxiliary infantry, I want quality in critical positions and nothing beats mechanized Pioniere in close terrain. They'll also be able to clear out the city should the Red Army entrench itself there before my troops arrive. Two Panzer battalions have been outfitted with captured IS-1s, as these tanks are even more resilient than Tigers, and a battalion of Panther Ds has been requisitioned to provide more tactical options for the Minsk battlegroup alongside the heavier -- and slower -- IS-1s and Tiger.
The cost-effective IIINs will provide the necessary numbers to allow the more powerful Panzers to exploit Perimeter Control, but as my corps now allows me to deploy so many expensive Panzers Bagration may prove to be their swan song, as their defense doesn't hold up against the newer T-34 models, and I should be able to get by fielding mainly elites in the last few scenarios. For now, however, they still have a role to fill, although two battalions were outfitted with Soviet OT-34s instead, providing nearly the same resilience but offering more options for dealing with entrenched enemies; these will be deployed to assist the auxiliaries in the south. With so many Soviet units deployed I've made some changes to the camouflage; all Soviet units now have a pattern of their own while the ambush pattern is reserved for the elite German Panzers, specifically the Tiger and Panther battalions.
A part of me would prefer to rely on Panzer IVs to form a more palatable core, but unfortunately game mechanics mean that you are almost always better off using either cheaper or stronger options; the IVH is twice the price of the IIIN but offers only a minimal upgrade in resilience and isn't strong enough to easily defeat modern Soviet armour, while a single point extra gets you a Panther or Tiger, both of which are significantly more powerful. Admittedly this is with Panzer General, but sadly it's hard to see the Panzer IV being a good choice.
Only a single SdKfz 234/1 8Rad will be deployed initially, as the Luftwaffe should be able to handle reconnaissance. As my core has become more experienced the additional accuracy provided can often be detrimental as I don't want to inflict unnecessary casualties when I'm capturing units, so Recons will be scaled back whenever I expect weather conditions to allow the Luftwaffe to operate at or near peak capacity. Gustav has been rotated in from the reserve once more, as the firepower and mobility of the heavy railway gun will allow it to support both fronts, and one of the heavy batteries have been outfitted with 21 cm guns to allow effective suppression of the most powerful Soviet armour.
With the SU-152 captured at Korsun I can now field three battalions of these fantastic units, but as I'll be on the defensive during this scenario the Hummels have been downgraded to 15 cm batteries to conserve core slots. Two Brummbärs will provide resilient fire support for the auxiliaries, while the Nebelwerfer will cover the most valuable troops to prevent them being overrun by Soviet Engineers. Three 8.8s and three Flakvierlings should provide ample defense for my forces, allowing the Luftwaffe to focus on destroying the Soviet air force. Once the latter has been neutralised the Flakvierlings will be disbanded and the 8.8s switched to AT mode to provide additional support against the Soviet armour should it prove necessary. Detached 8.8s are also useful for capturing heavy armour, freeing up my own to focus on more important tasks.
The Luftwaffe has provided me with significant assets for this operation, and while the pilots are inexperienced there is no questioning the quality of the aircraft. In gameplay terms this means I'll be fielding five Fw 190As, two Bf 109Fs and four Me 410A fighter-bombers, providing me with an unprecedented fighter force. These will be used to preemptively destroy the Soviet air force, after which the newly requisitioned units will be rotated to the rear and disbanded as previously explained. I'm confident that this will be enough to achieve air supremacy, thus ensuring that the Red Army will not have any air support during the main offensive. An additional Bf 109 PR will provide vital aerial reconnaissance while the bulk of the Do 217Es have been put in reserve; once the skies are clear I intend to rotate in more of them.
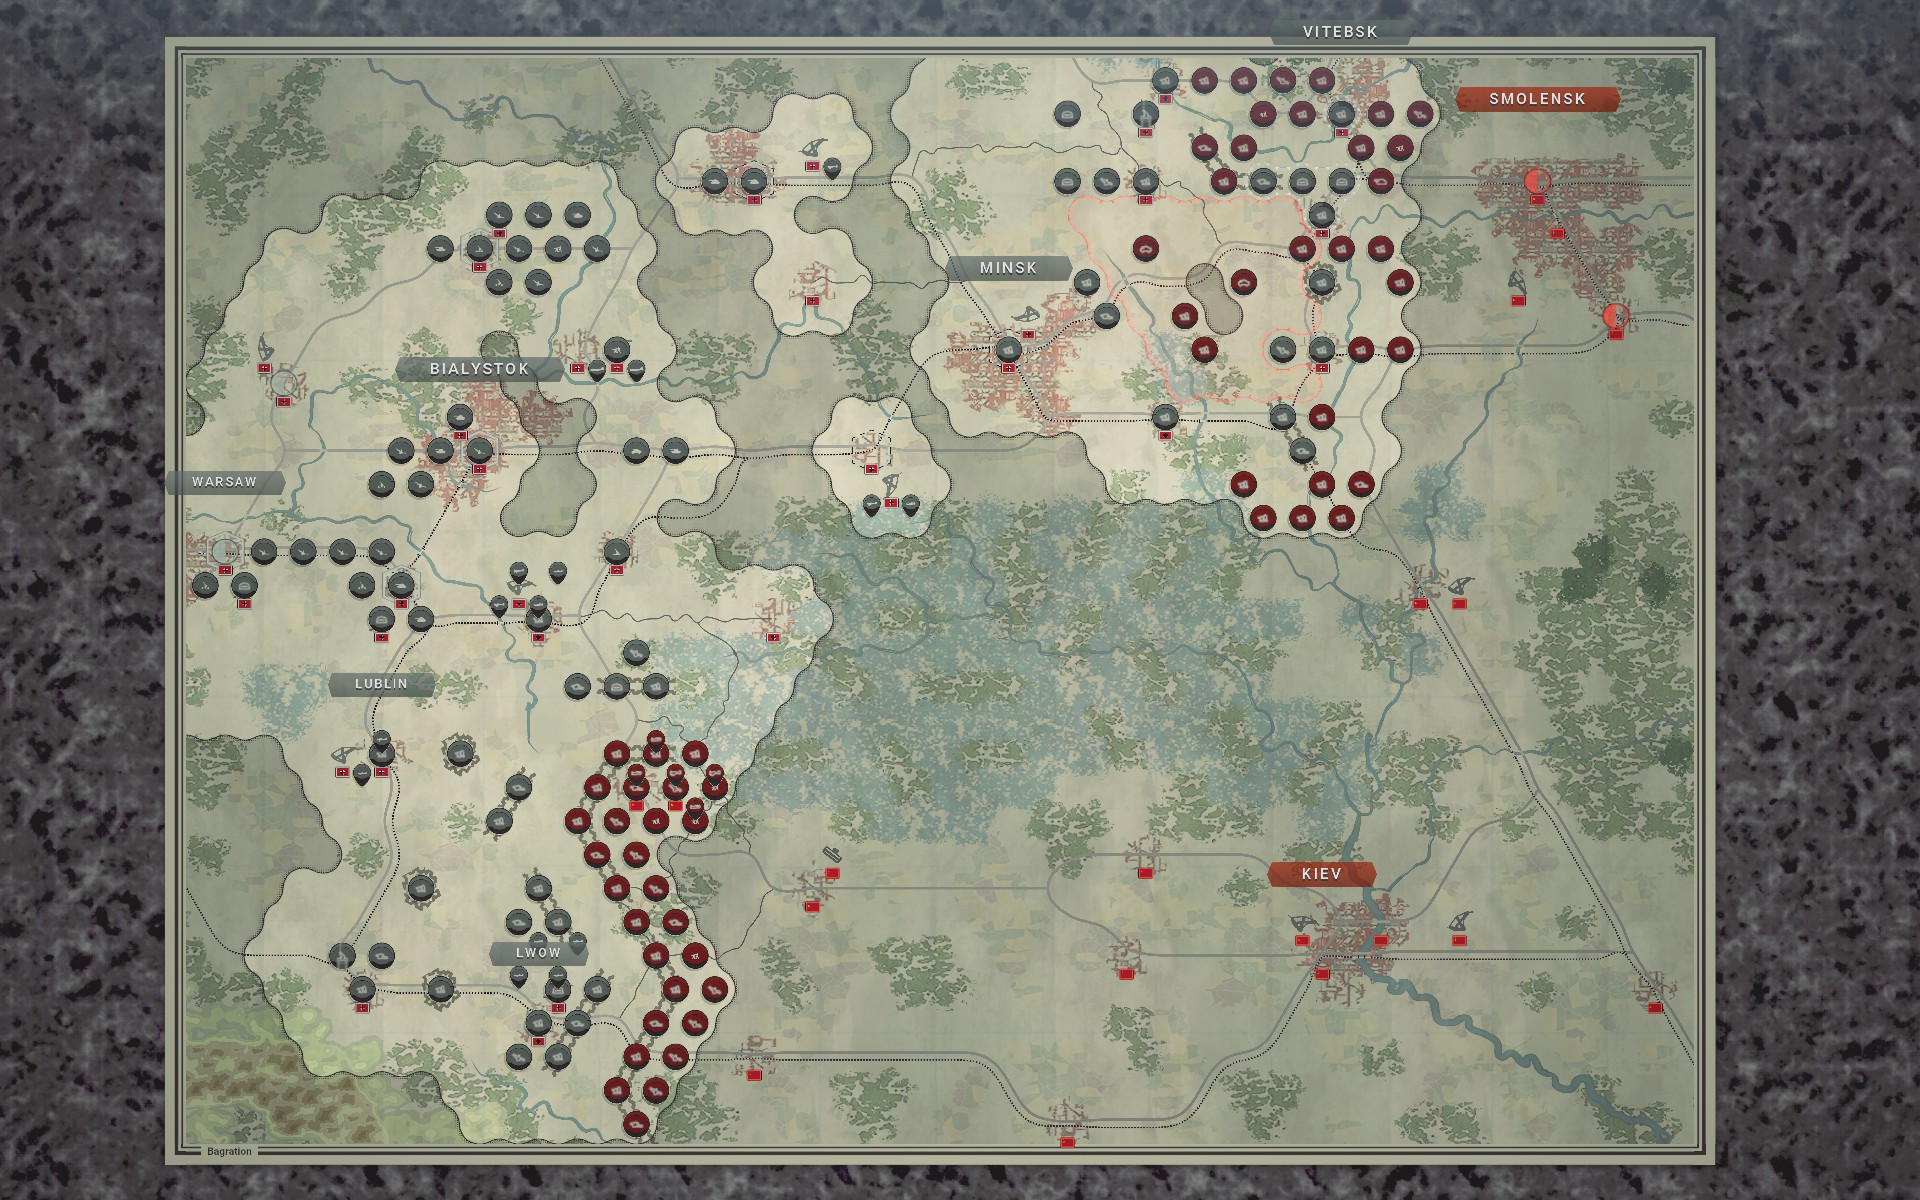
Considering the number of enemies and the terrain it's unlikely that there'll be much room for finesse or sweeping maneuvers, which is why I've opted for a relatively large number of powerful Panzers that will be deployed in the north to recapture and hold Minsk. The auxiliaries near the city are already outflanked and quite possibly doomed, though I will make an attempt to save the more valuable ones. My plan is to establish a defensive line along the Berezina river east of Minsk, anchoring it with heavy armour in the north and mechanized Pioniere in the south. Once the optional objective has been achieved the battlegroup will fall back in good order, with the slower elements using the railway to redeploy towards Bialystok. With the Niemen on one side and the marshlands on the other it should prove difficult for the Red Army to leverage its superior numbers.
The Luftwaffe will focus on destroying the Soviet air force, after which additional bombers will be rotated in to provide air support for the ground forces as they begin to withdraw from Minsk. Meanwhile the auxiliaries around Lwow will redeploy further back, as they would quickly be overrun by the Red Army and I won't have any heavy armour to support them with until I can free up additional core slots. There are some quality troops among them but unfortunately none of them have transports, which will make redeploying a hassle. On the bright side, the Soviet infantry isn't motorised either. I will establish a new defensive line near Lublin and reinforce it with the Brummbärs and OT-34s. A few battalions will be deployed in the mountains to the south; hopefully they'll be able to trap the Red Army with a pincer movement, but even if that proves impossible the terrain should make them hard to dislodge.
I intend to stop the Red Army east of Bilalystok and south of Lublin, but there is enough space to allow the battlegroups to fall back should the Soviet assault prove too fierce, allowing me to stretch their lines further. This shouldn't be necessary as the Luftwaffe should've achieved complete air supremacy by then and with no air support I don't see the Red Army breaking through regardless of their numbers as long as I am able to rotate in more ground forces. Still, the solid red wall in the south is intimidating and my somewhat cavalier attitude at Korsun is a source of concern -- I will have to do better here.
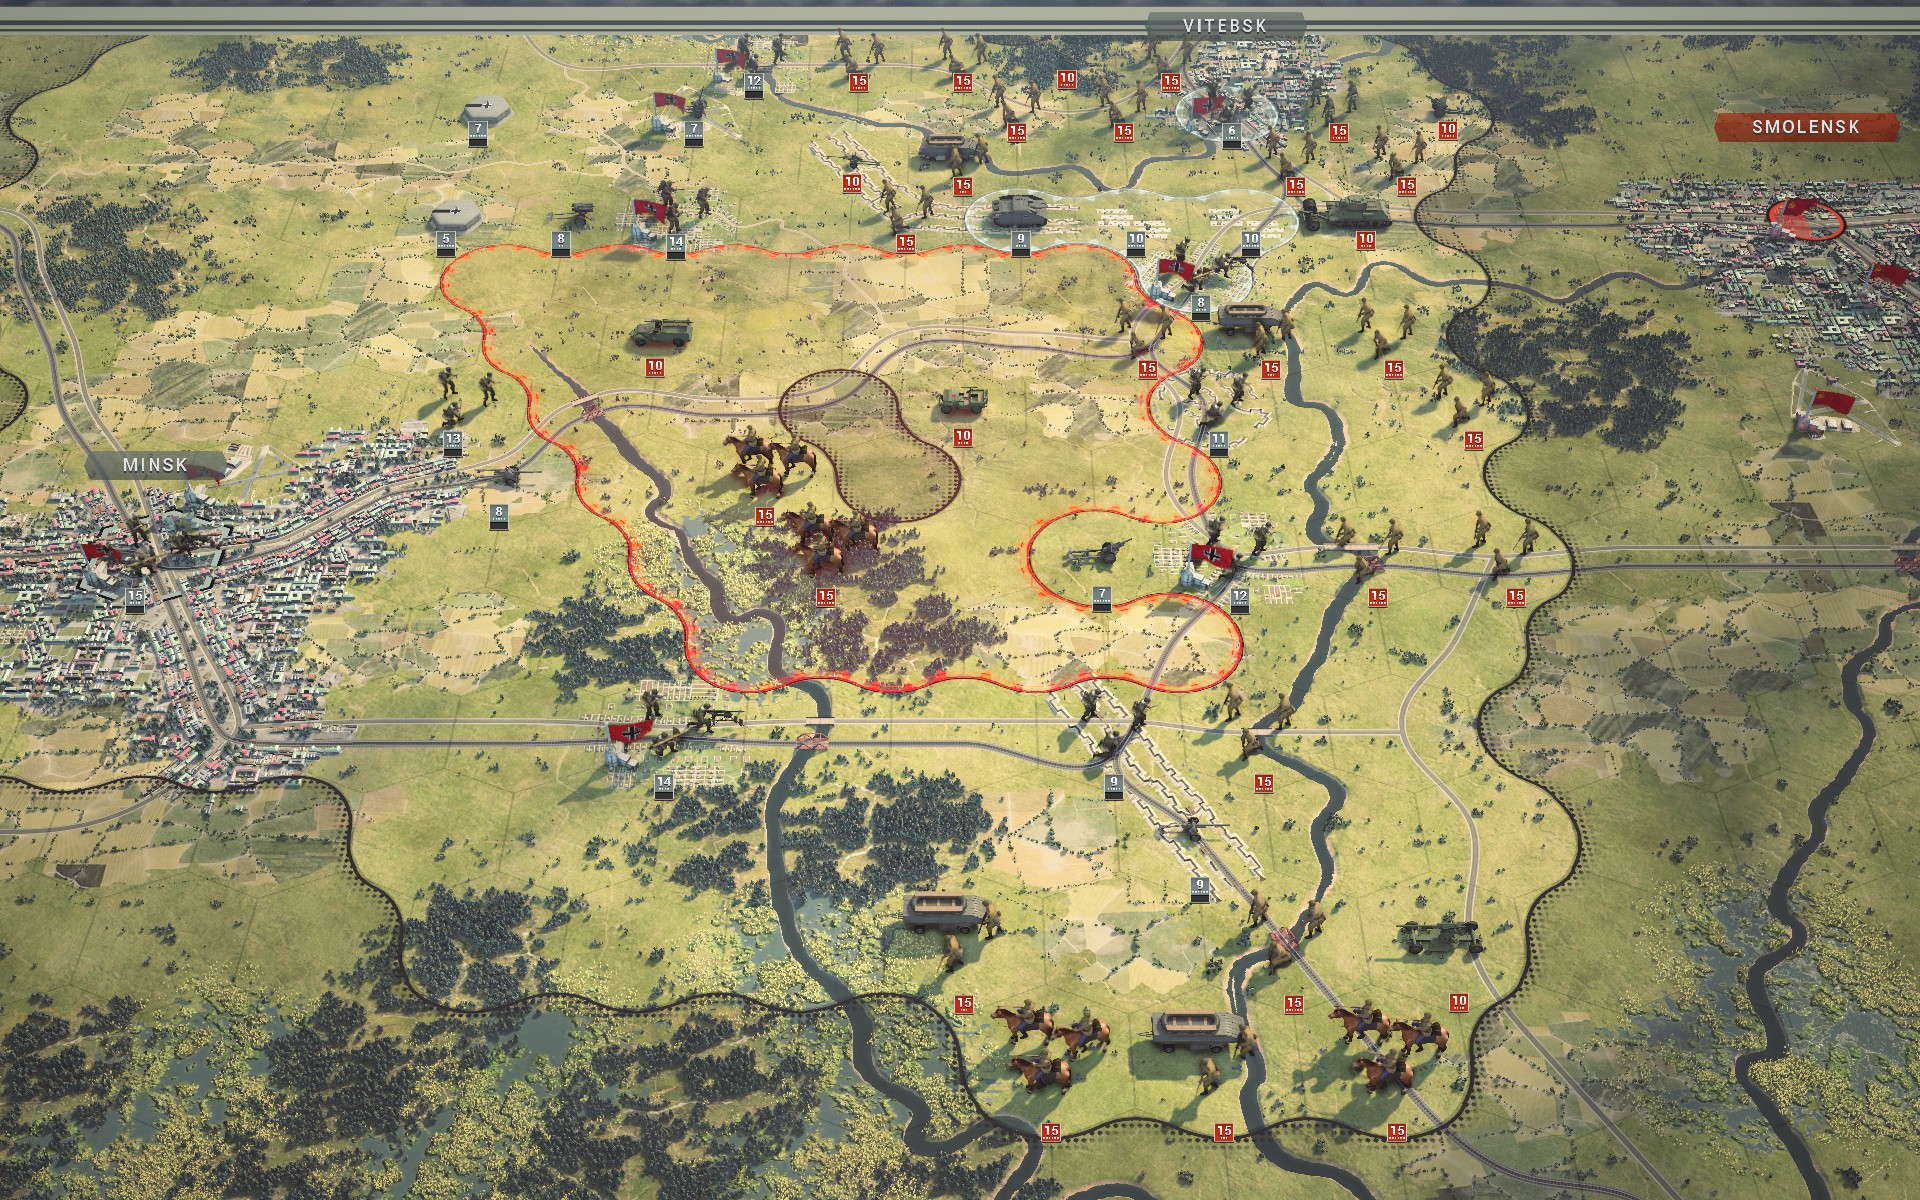
The vanguard of the Red Army has already breached the defensive line east of Minsk, and many of these auxiliaries will likely be destroyed before I can even attempt to withdraw them.
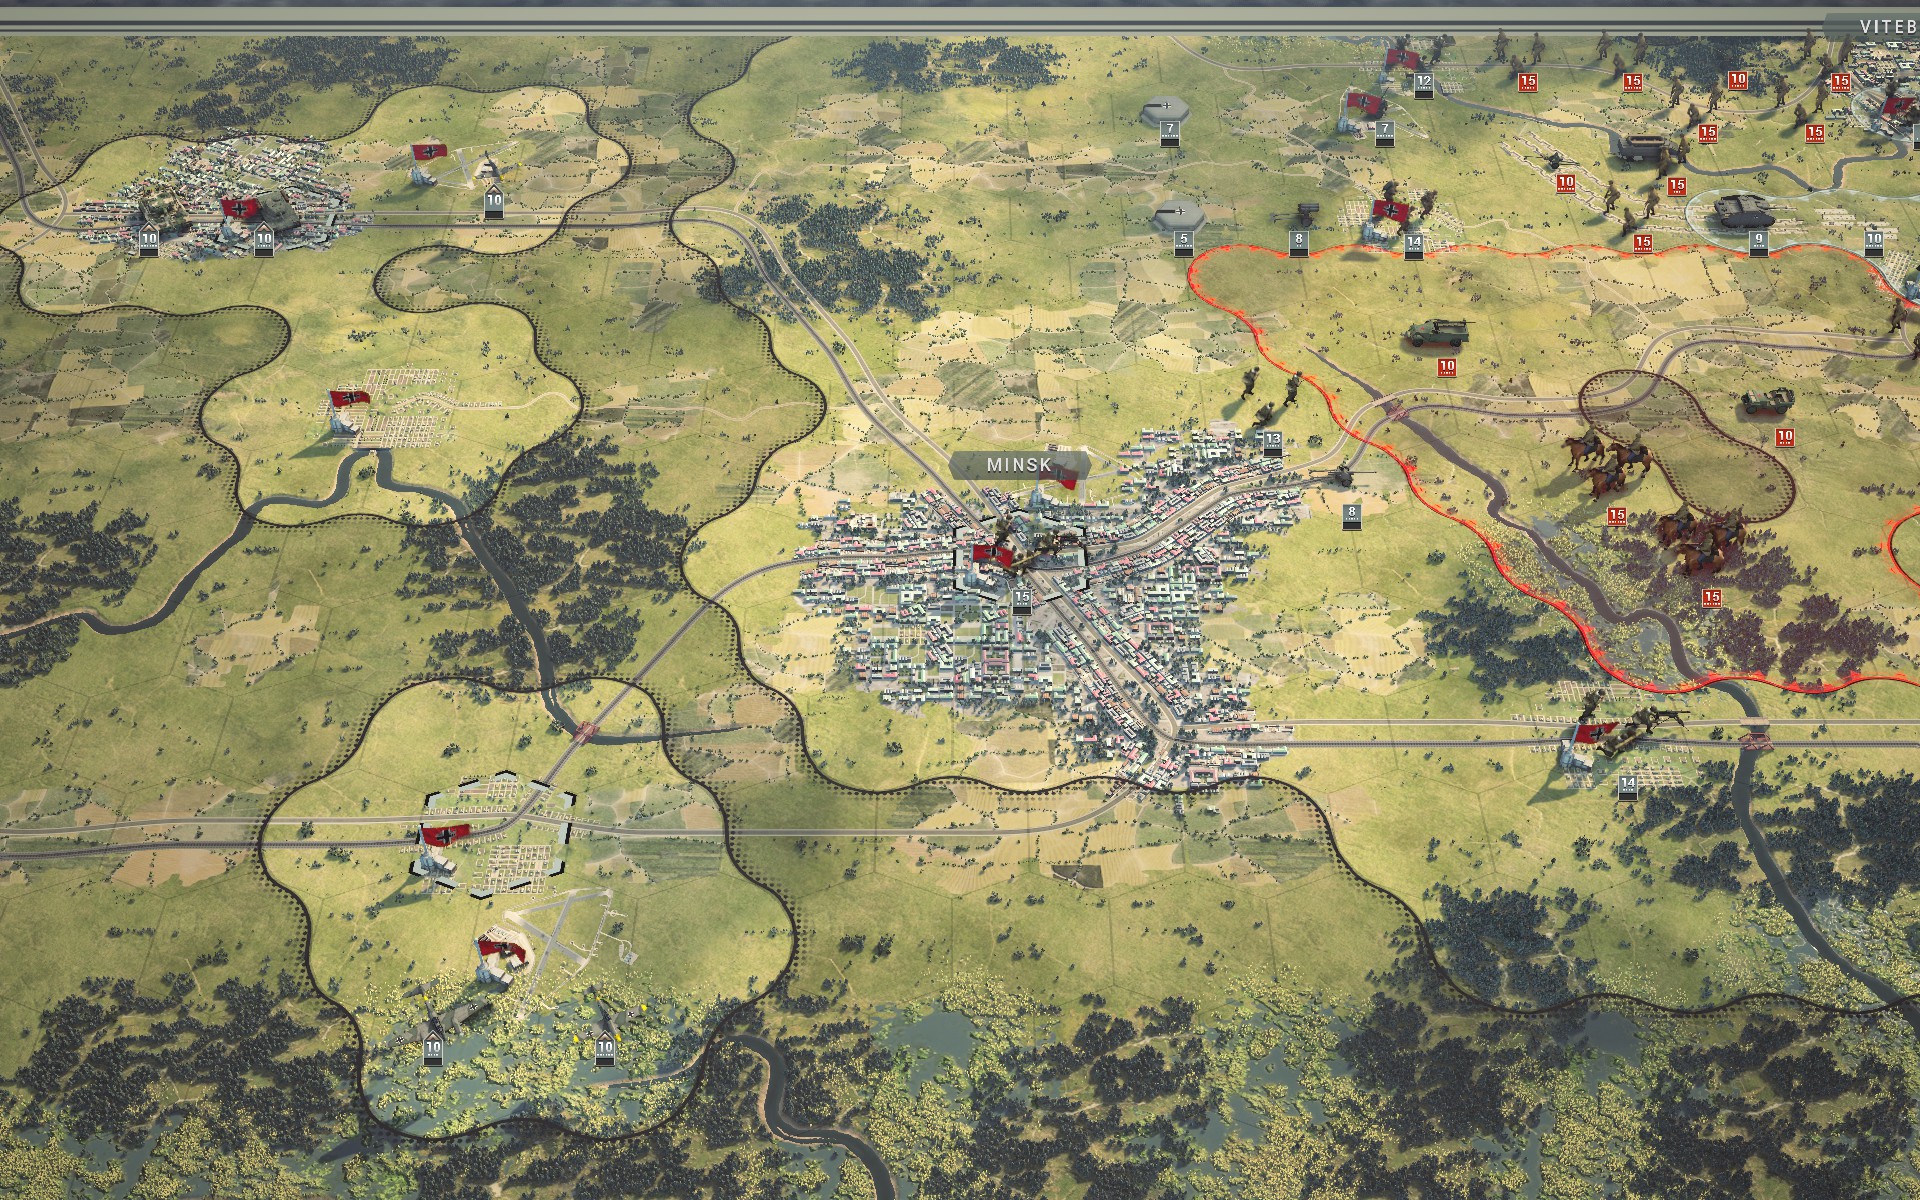
Minsk, Vilnius and Baranovichi are the three optional objectives that need to be held on turn 10, but losing control of one or more of them temporarily is fine; indeed, Soviet Cavalry will most likely capture Minsk as I intend to evacuate the Grenadiers, leaving the city undefended while my forces get into position.
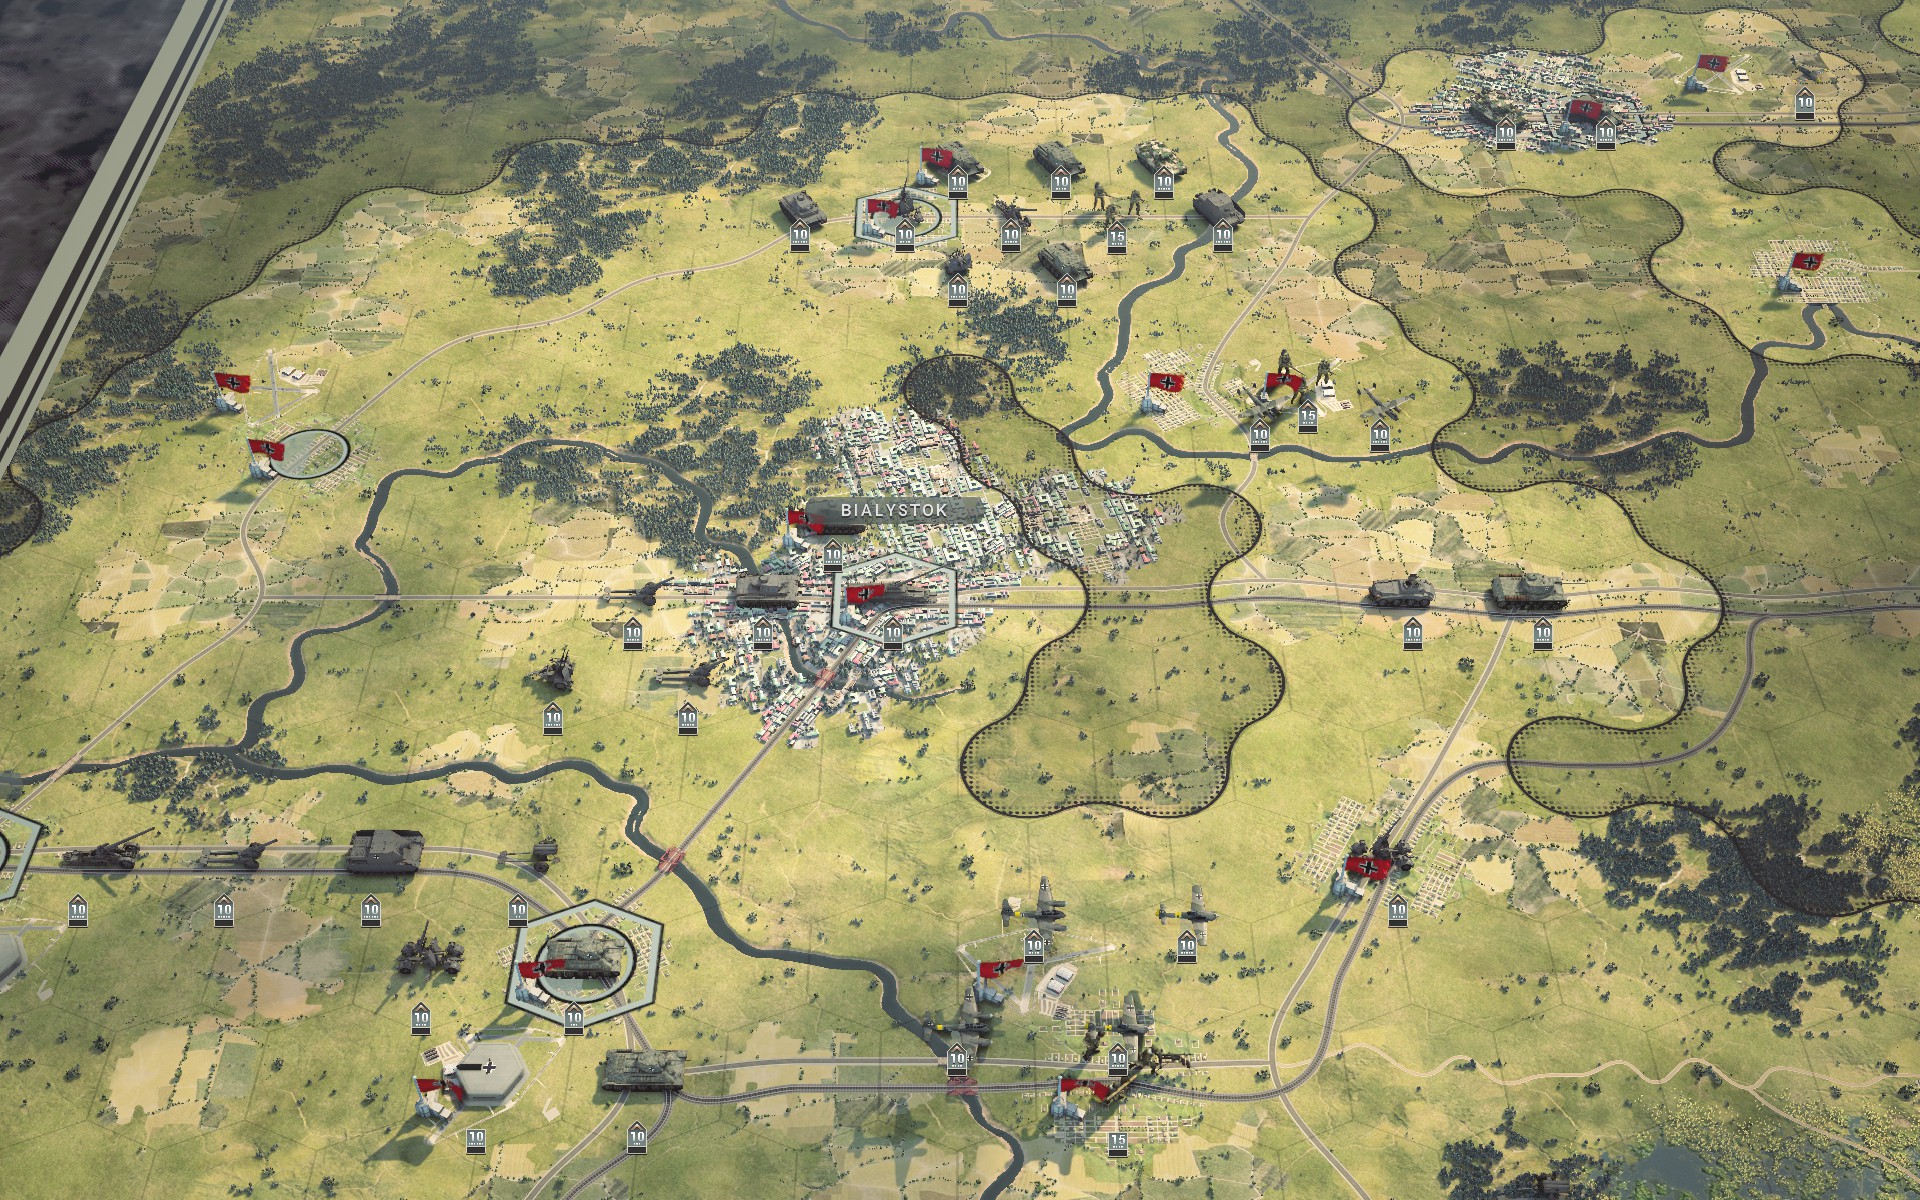
The bulk of my forces have been deployed as close to Minsk as possible, with only a small number of support battalions deployed further south to assist the auxiliaries. I've taken advantage of the few forward deployment hexes to deploy the Tiger and IS-1 battalions further east, but as the briefing specifically warns against this a Recon has been deployed with them to ensure that the railway is unobstructed before I attempt to bring up the artillery.
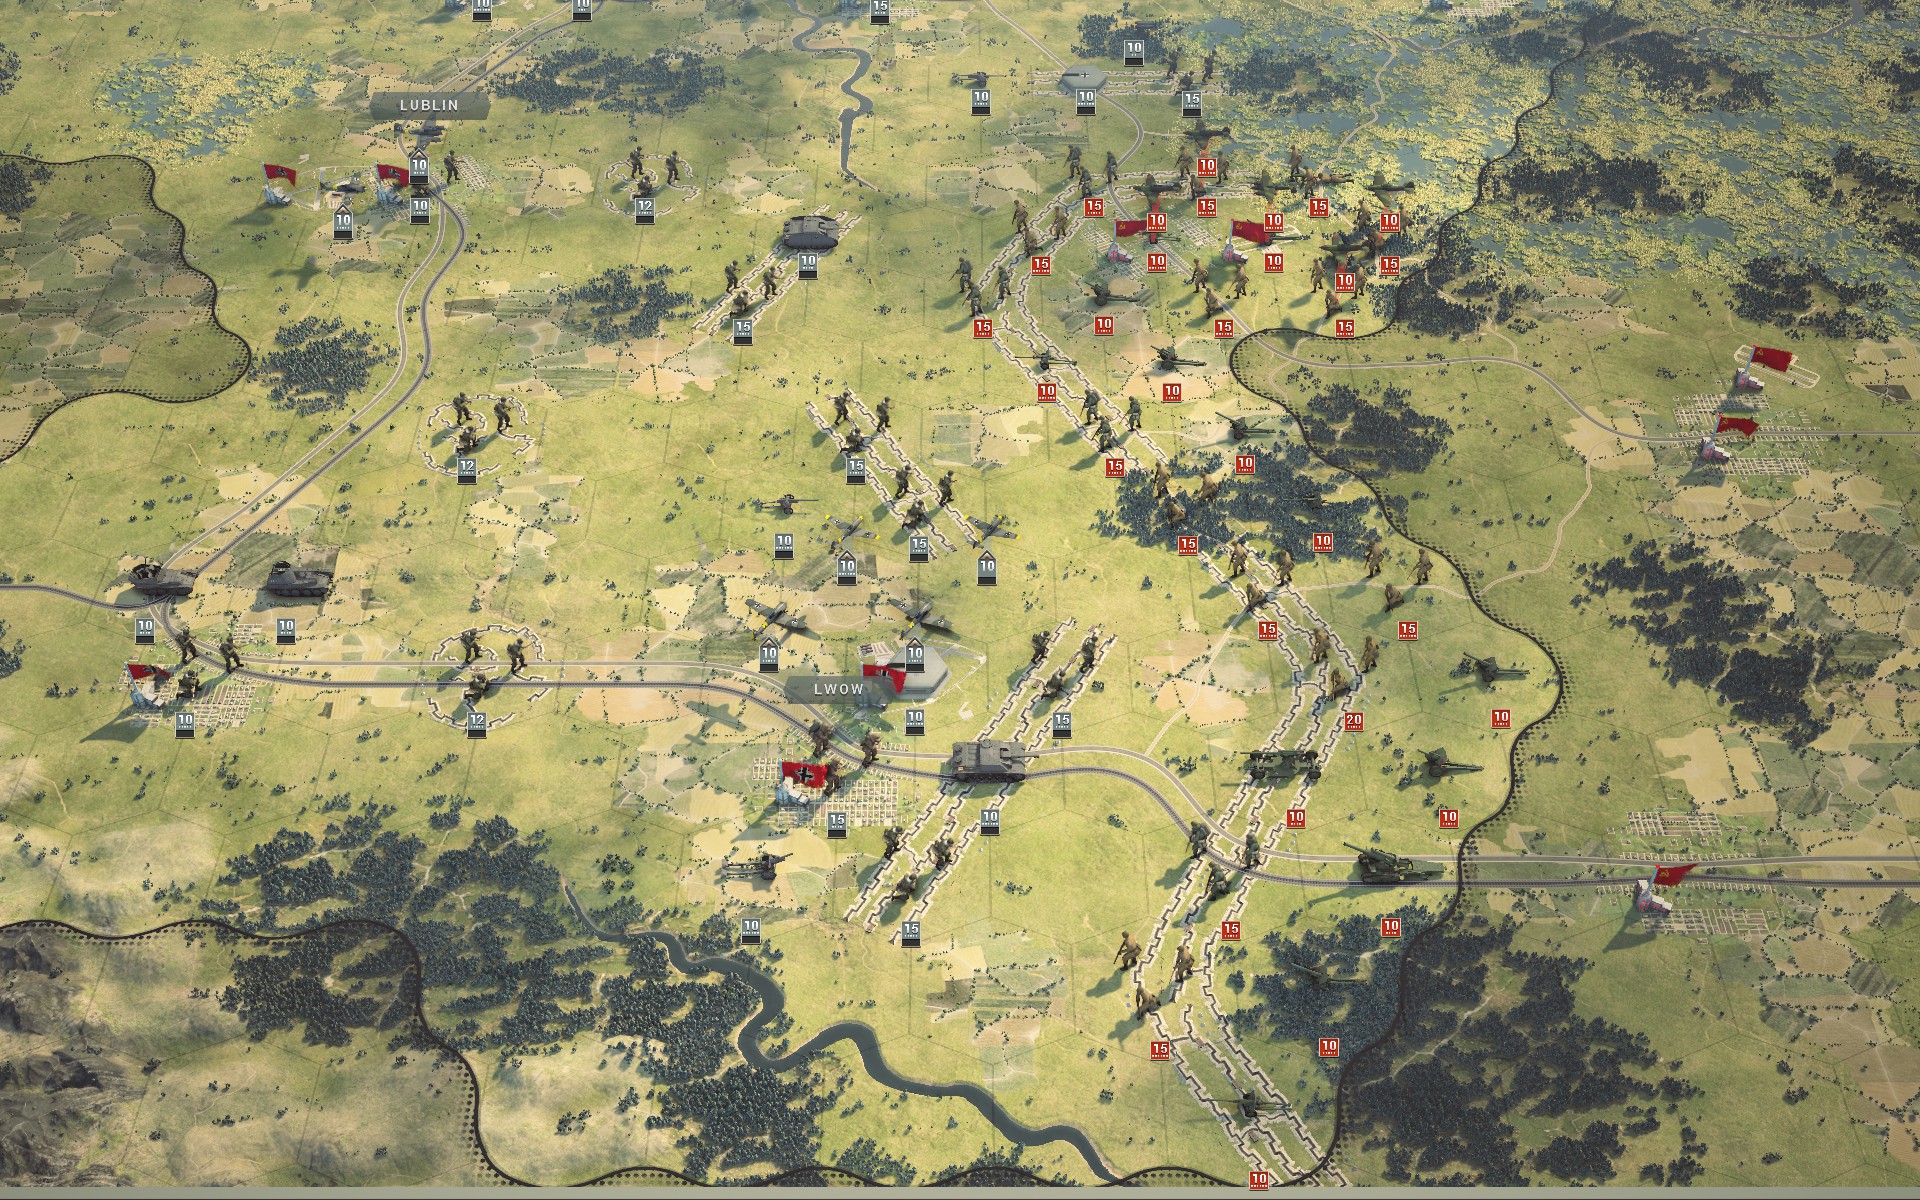
The auxiliaries will be withdrawn towards Lublin and the hills as Lwow is just too exposed. They will need some armoured support as the Red Army has at least eight artillery batteries and four Engineer battalions, and that's just among the forces along the perimeter. I'm not expecting much movement from these troops early on though, so there should be time to redeploy them. With so many airfields at my disposal I have deployed the Luftwaffe along the entire front, leaving enough free space at every airfield to split units should that be advantageous.
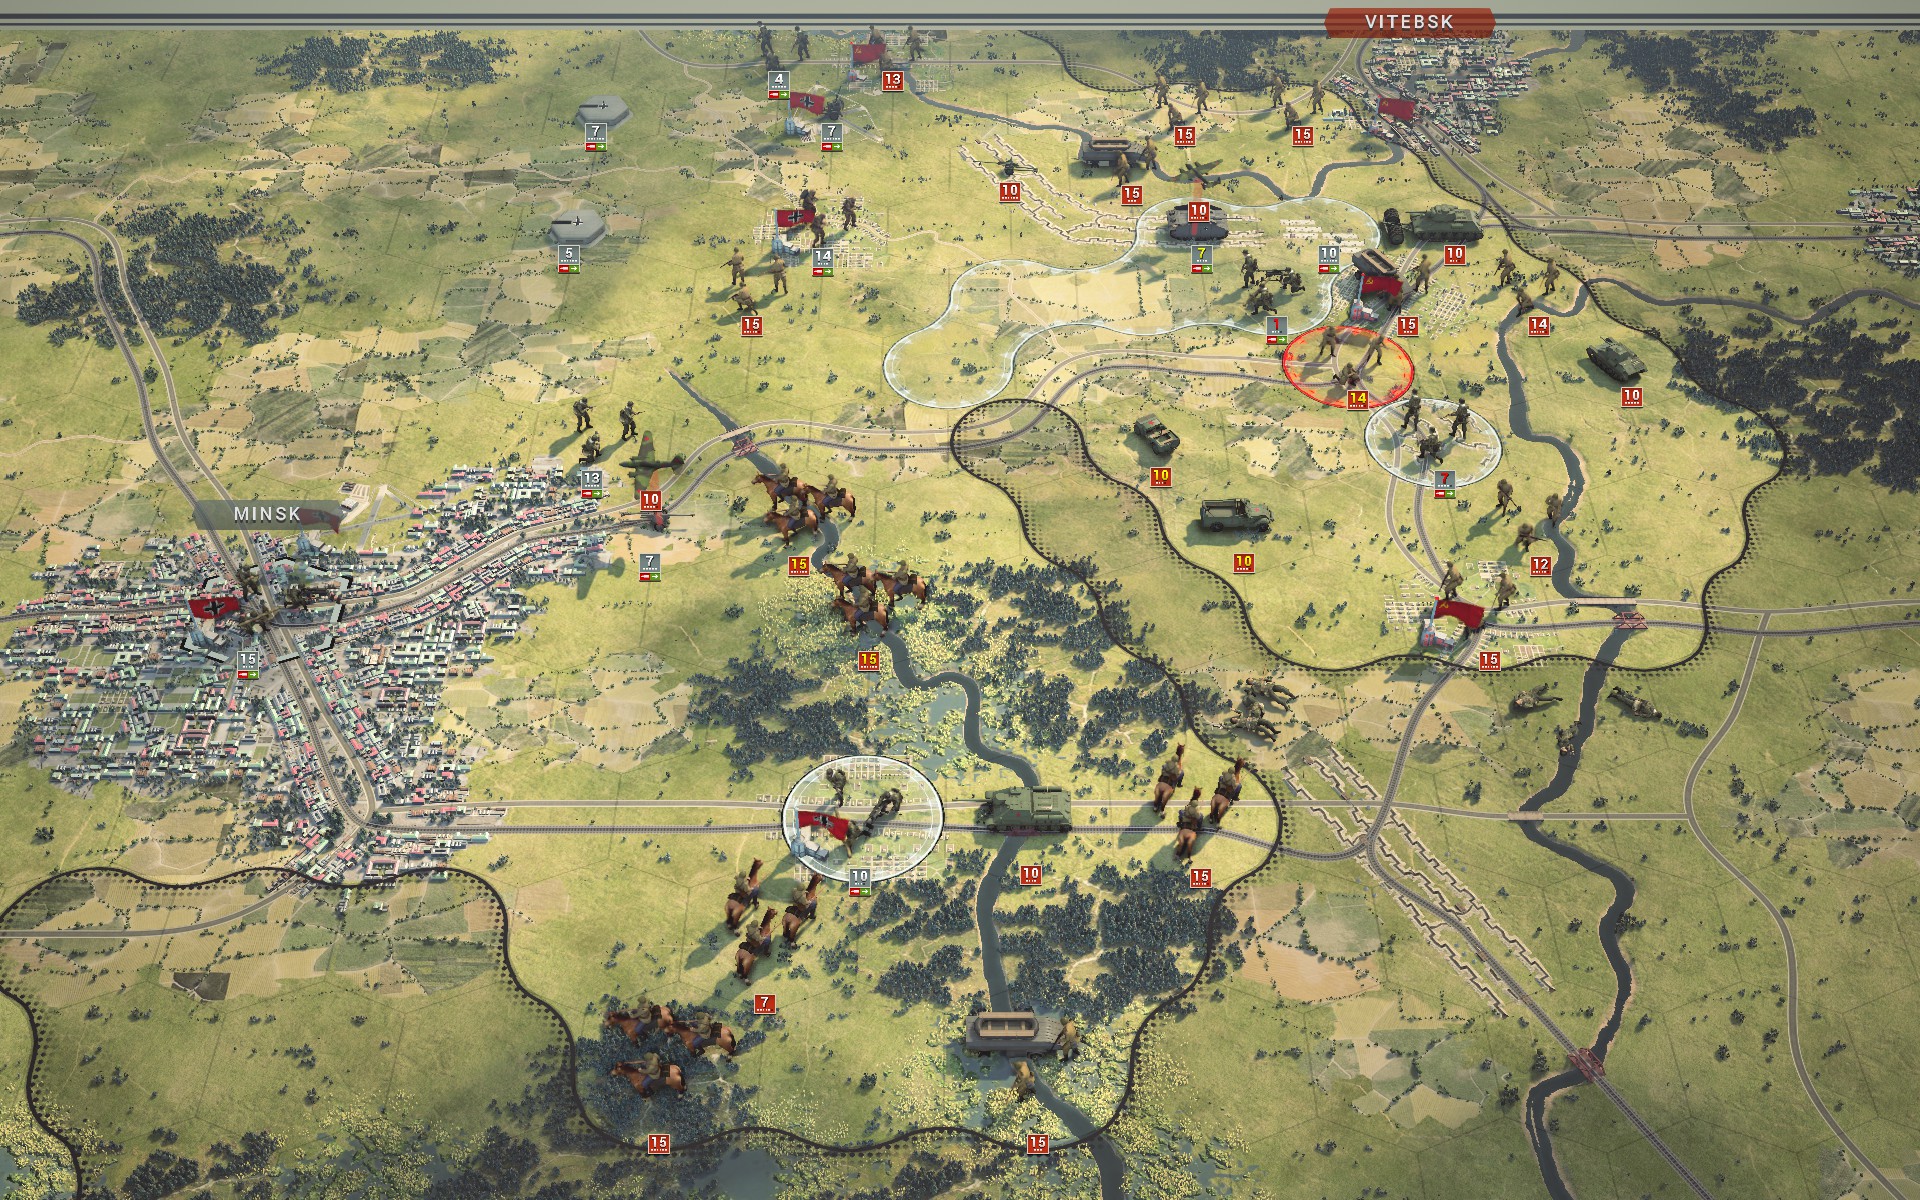
As expected, the Soviet vanguard easily routs the auxiliaries east of Minsk. Fortunately, I should be able to save a few battalions at least.
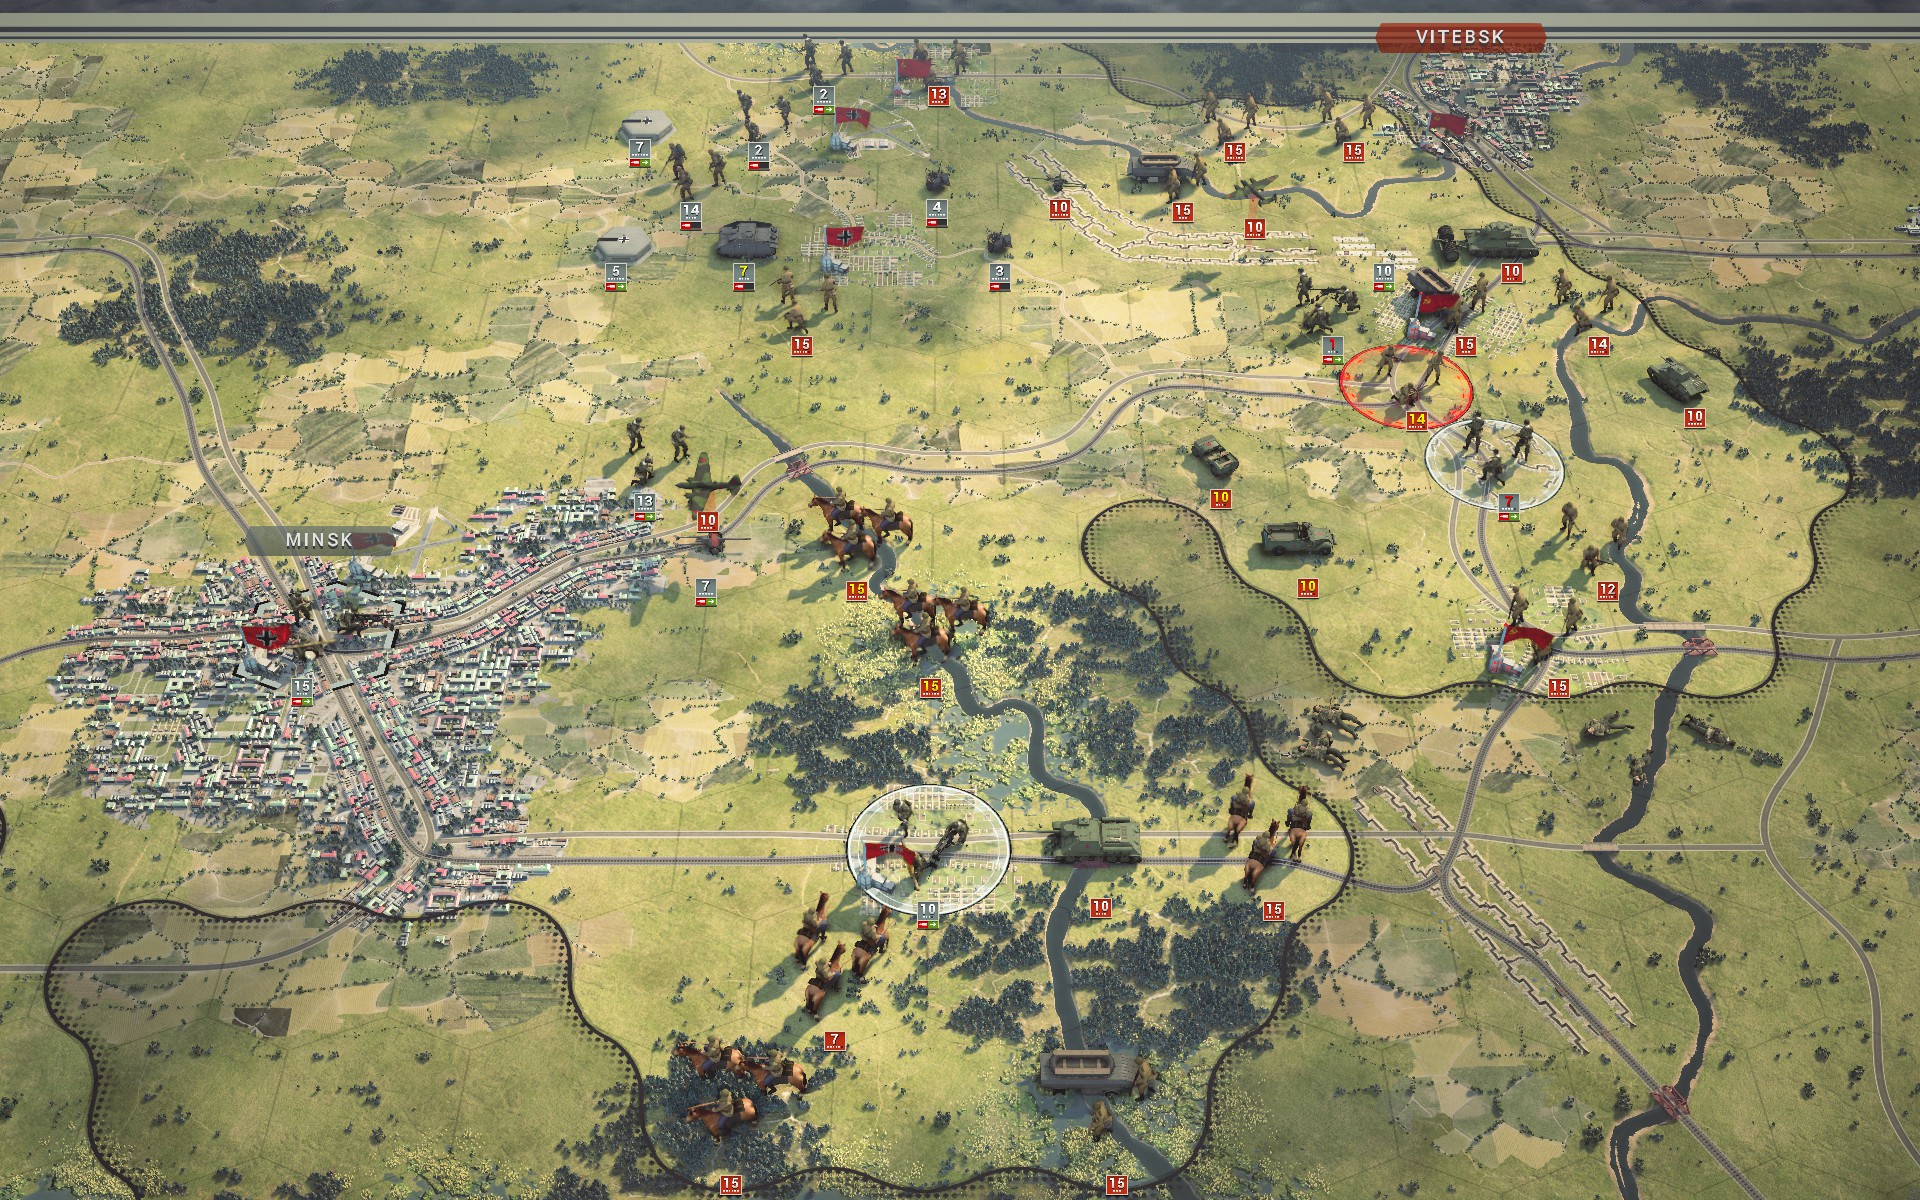
By splitting and sacrificing the Wehr and FlaK, I am able to withdraw the StuG IIIG and the Pioniere.
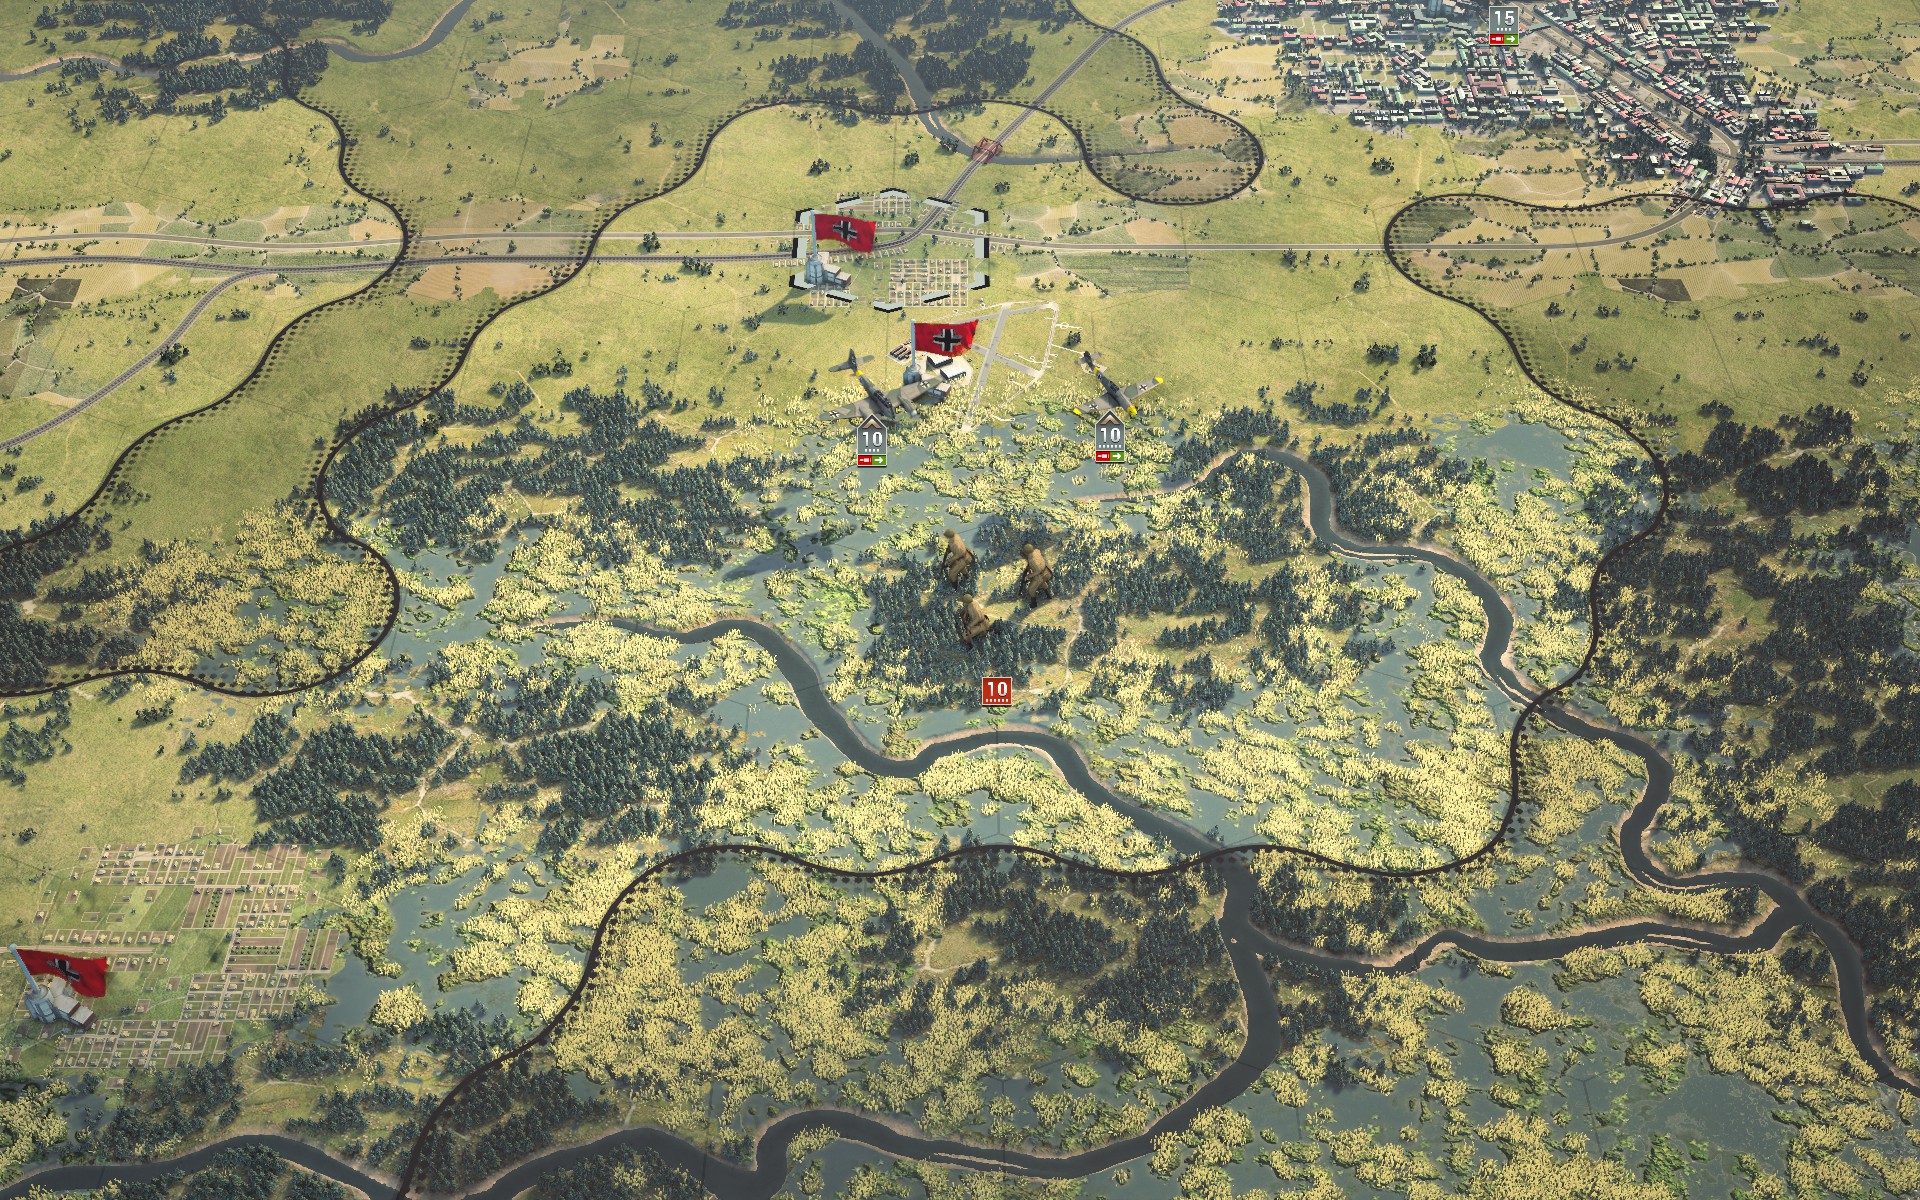
Partisans are spotted just south of the airfield at Baranovichi, so the Abwehr was correct in advising caution. As they have camouflage I will have to sweep the area carefully as I advance towards Minsk, lest I risk having them cut off supplies at a later stage, or even deny me a bonus objective.
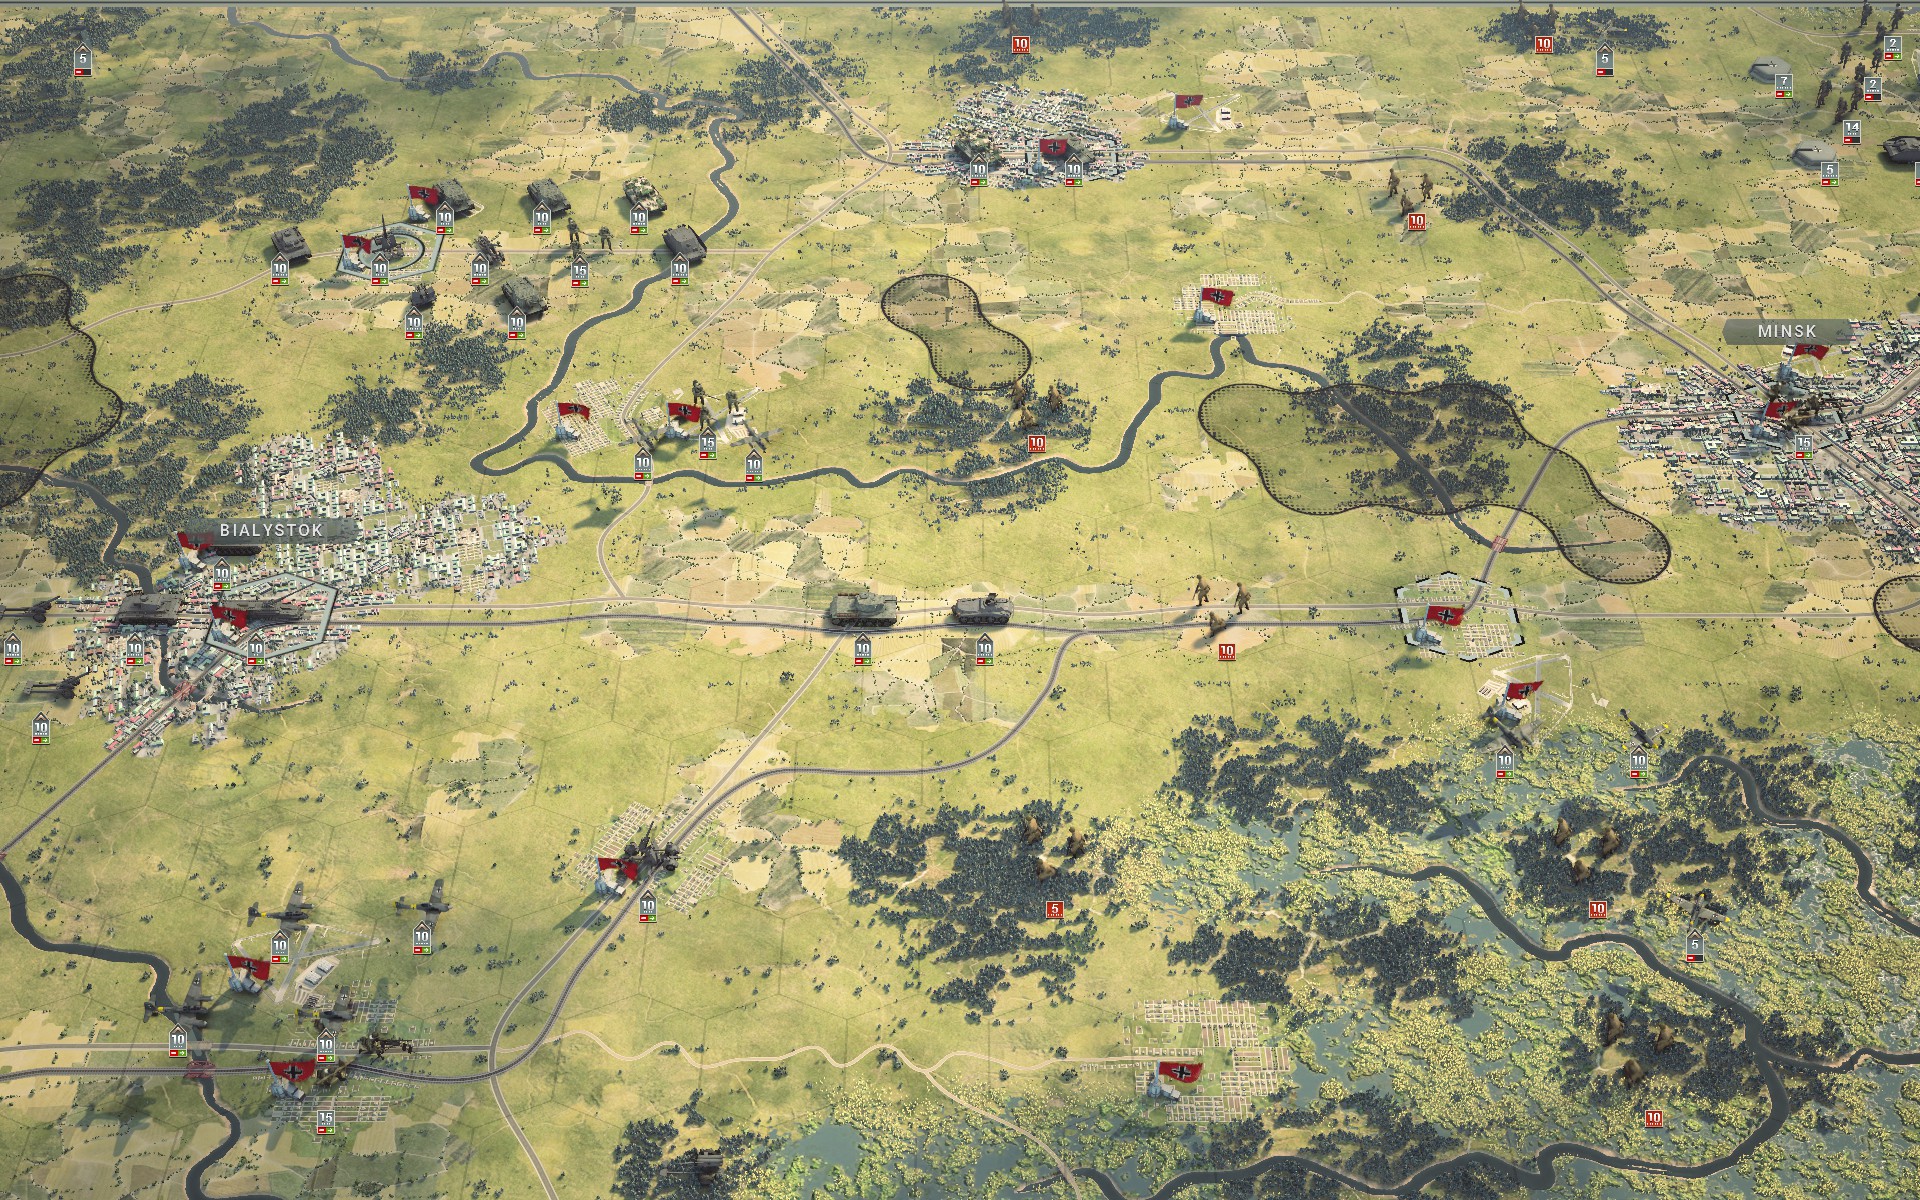
This is worse than I thought -- there are Partisans everywhere. I decide to send a few Panzers ahead of the battlegroup to protect the auxiliaries, but the rest of my forces will engage and destroy the Partisans as they advance.
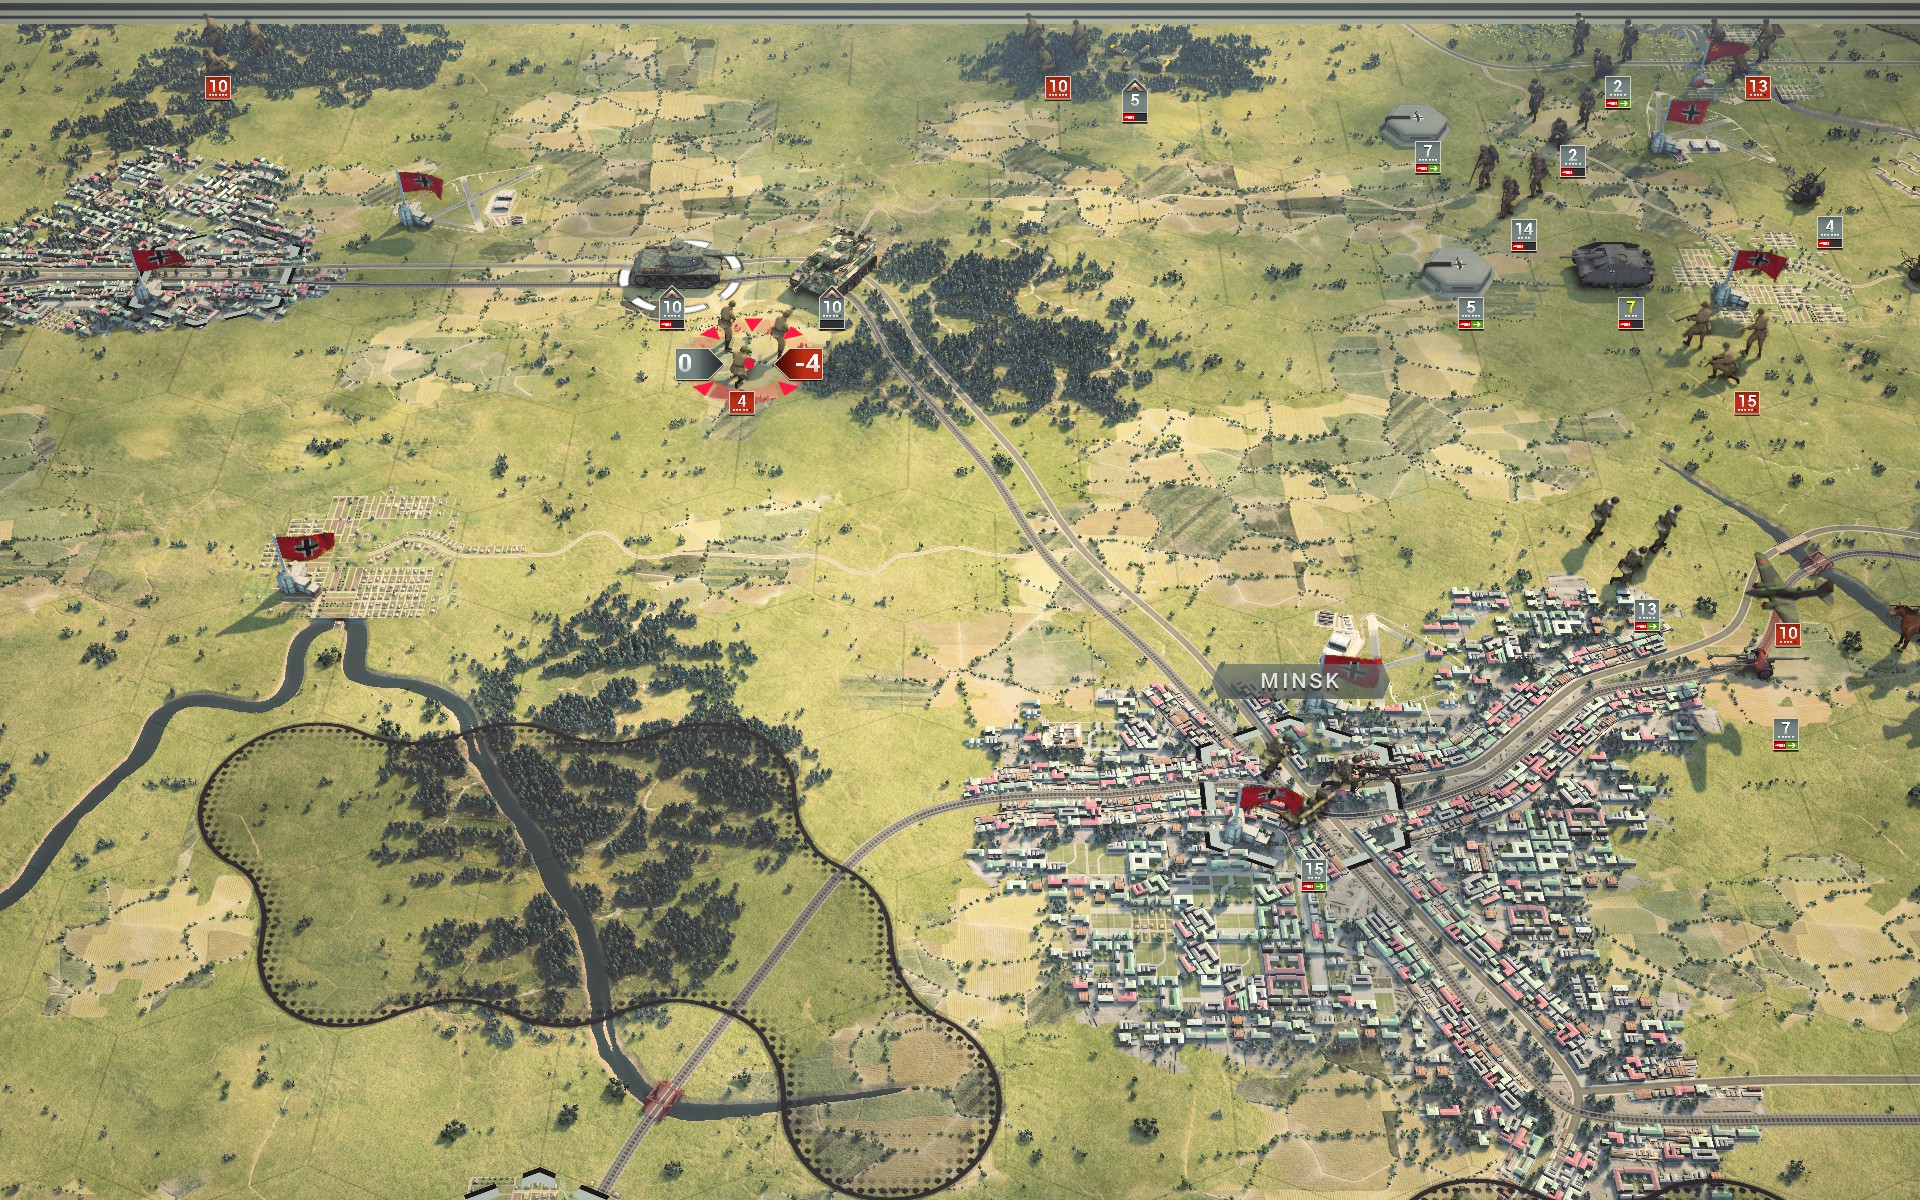
Two heavy Panzer battalions head towards the bunkers north of Minsk. The Pioniere auxiliaries could prove valuable but with no transport they are dreadfully slow.
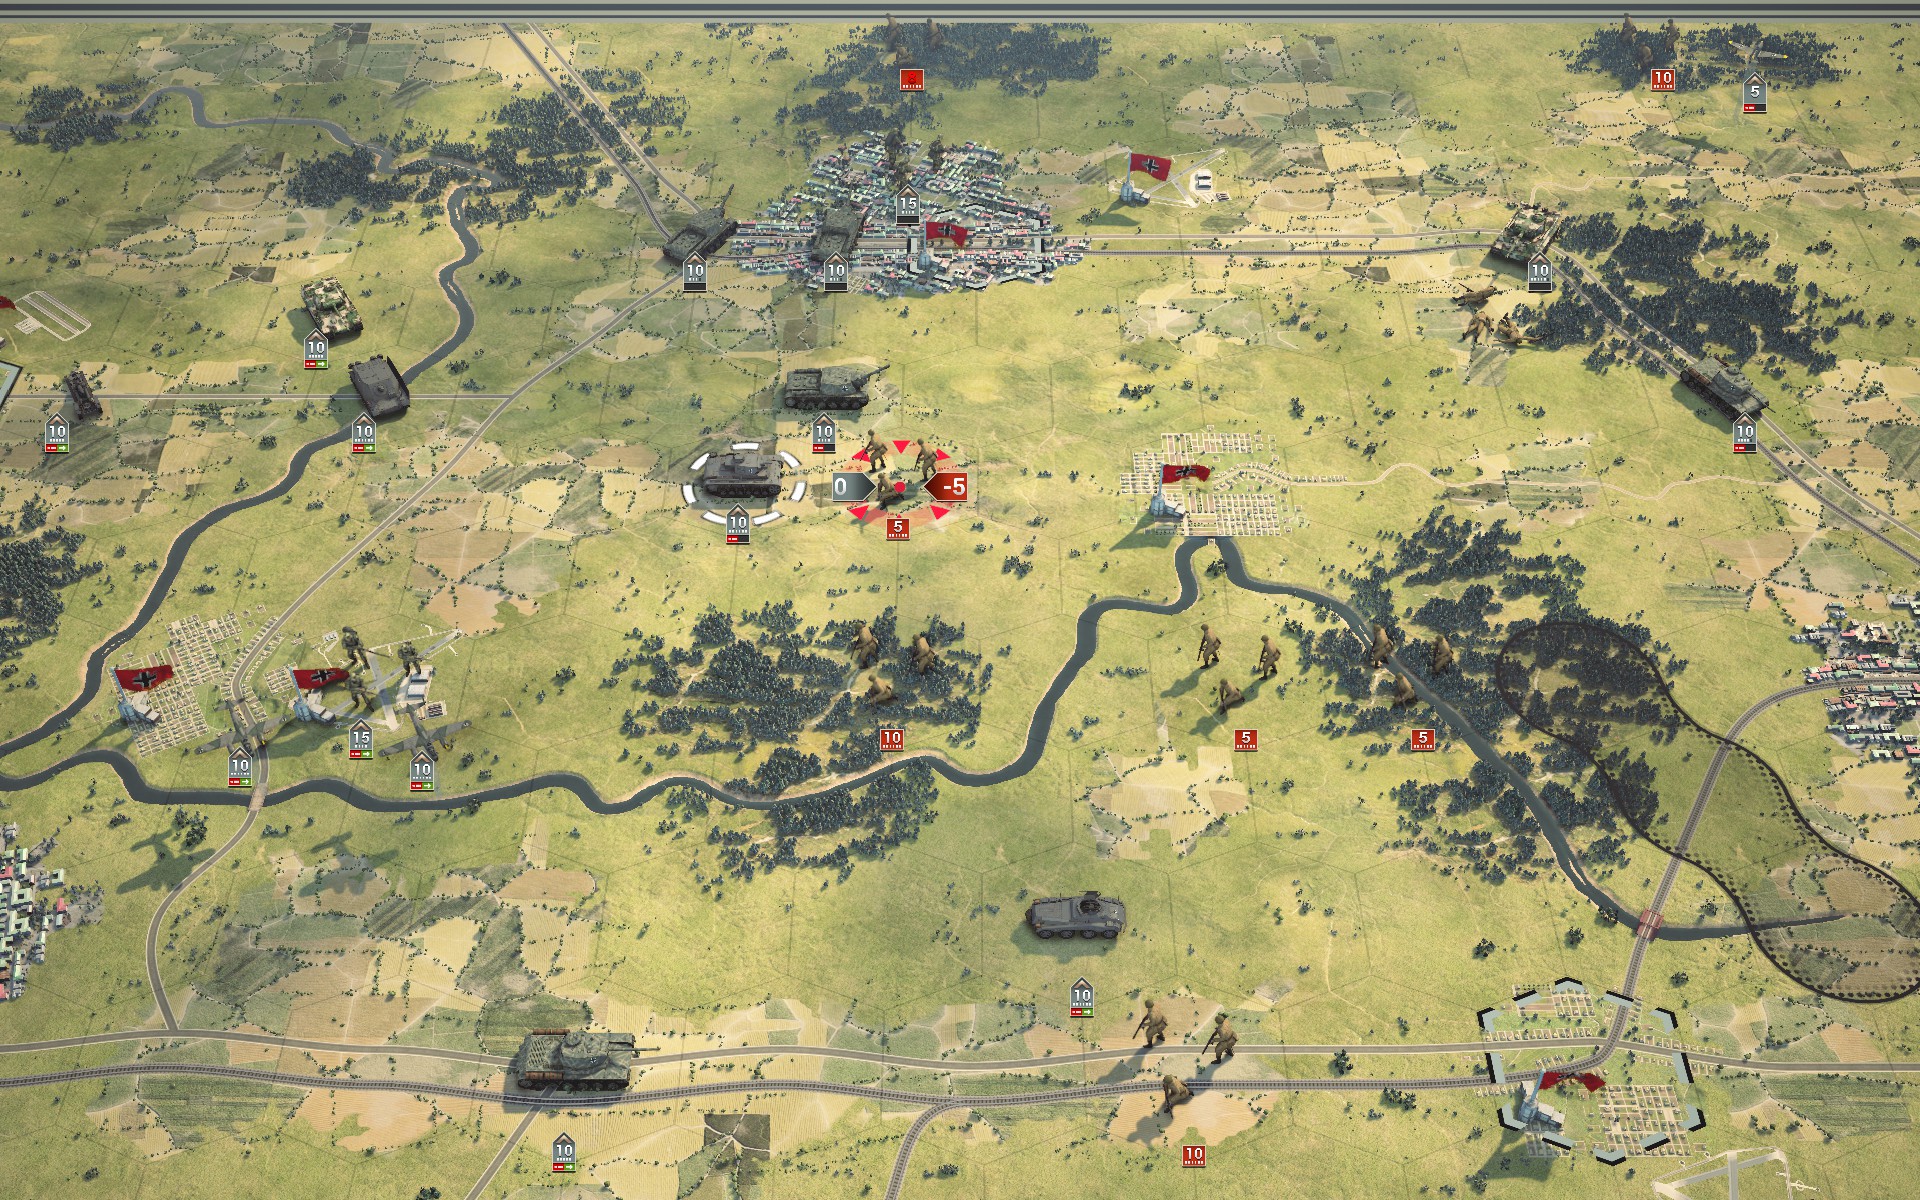
Partisans are little better than Conscripts so a IIIN can easily handle them in the open.
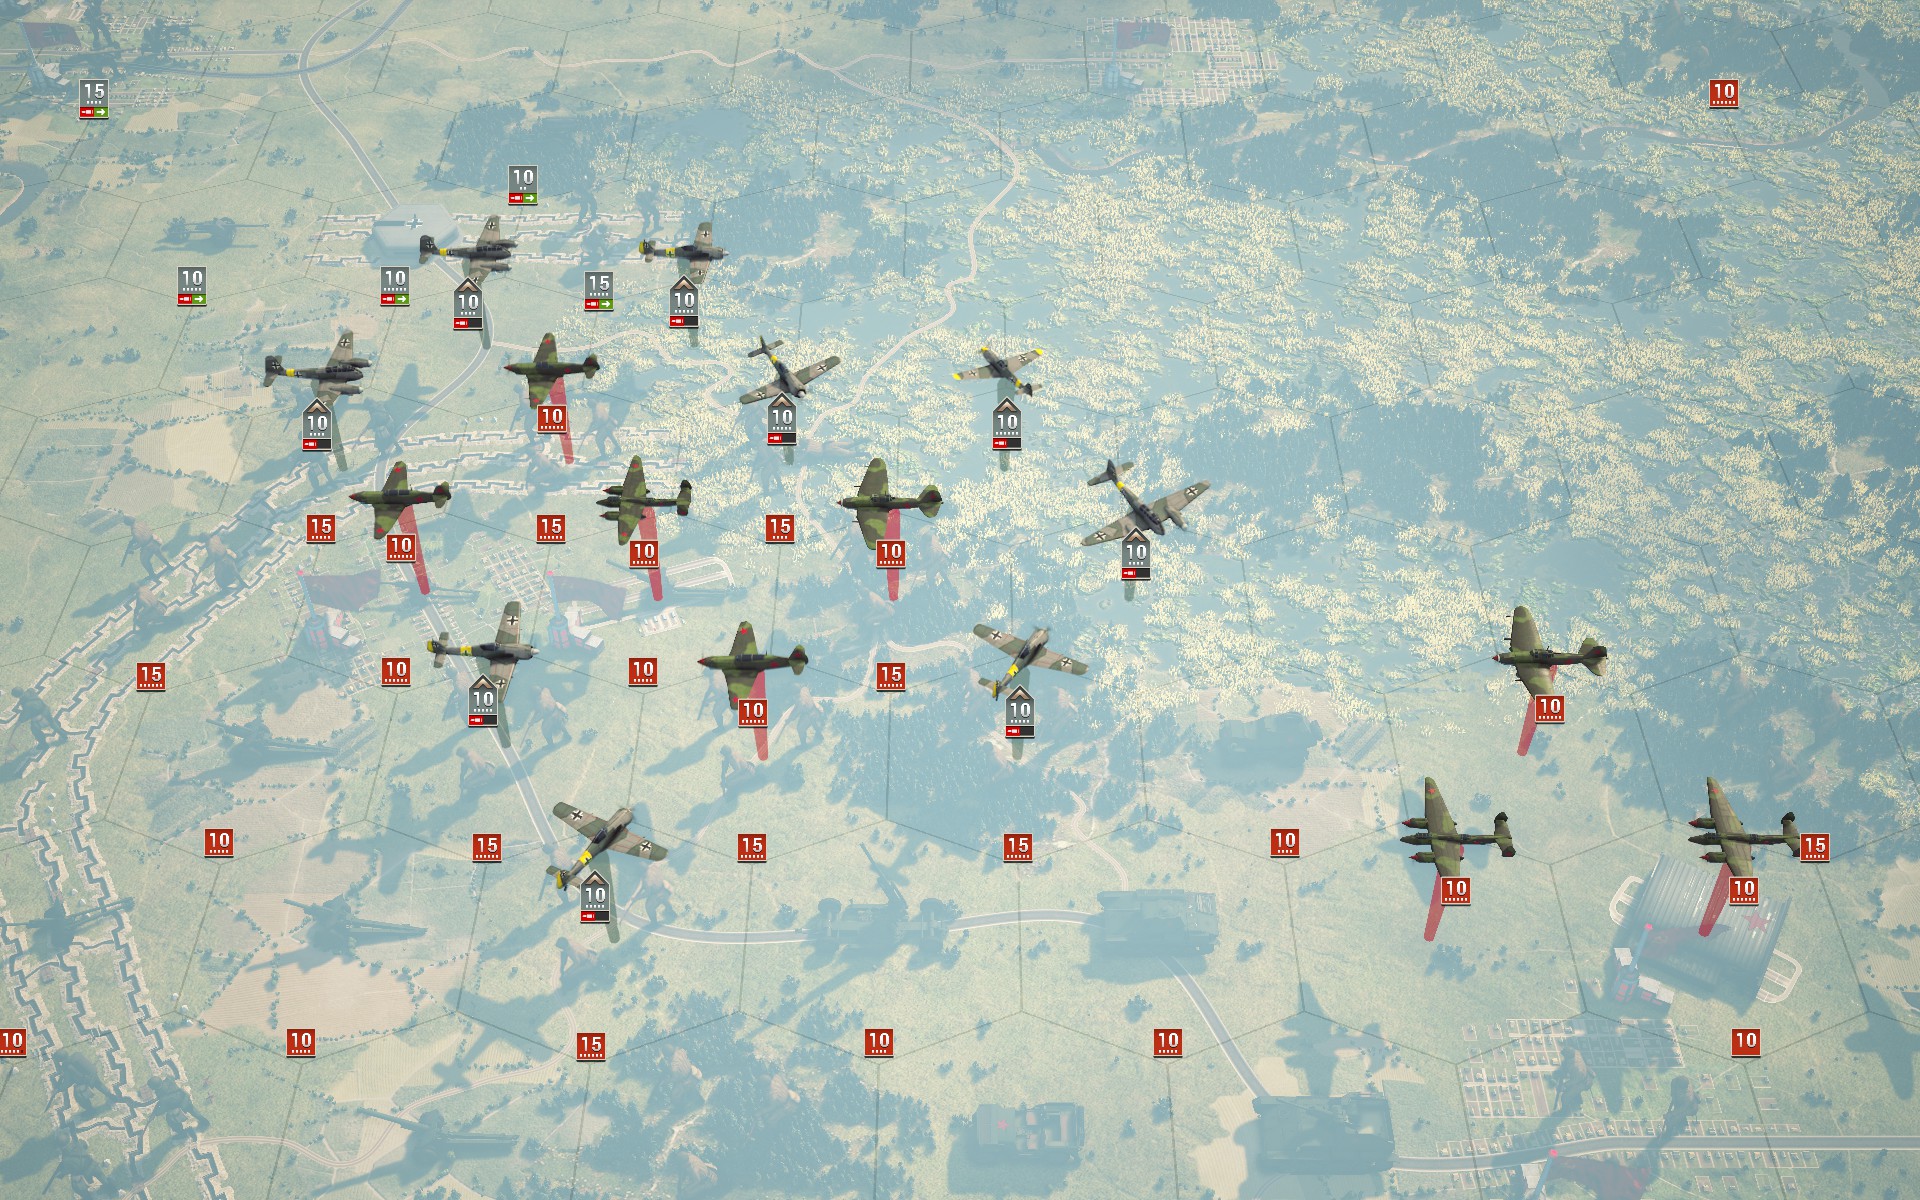
The Soviet forces in the south were completely passive during the first turn -- even the artillery didn't fire on my auxiliaries -- so it seems I will have a few turns to prepare for them. The Luftwaffe engages the Soviet air force at Kowel...
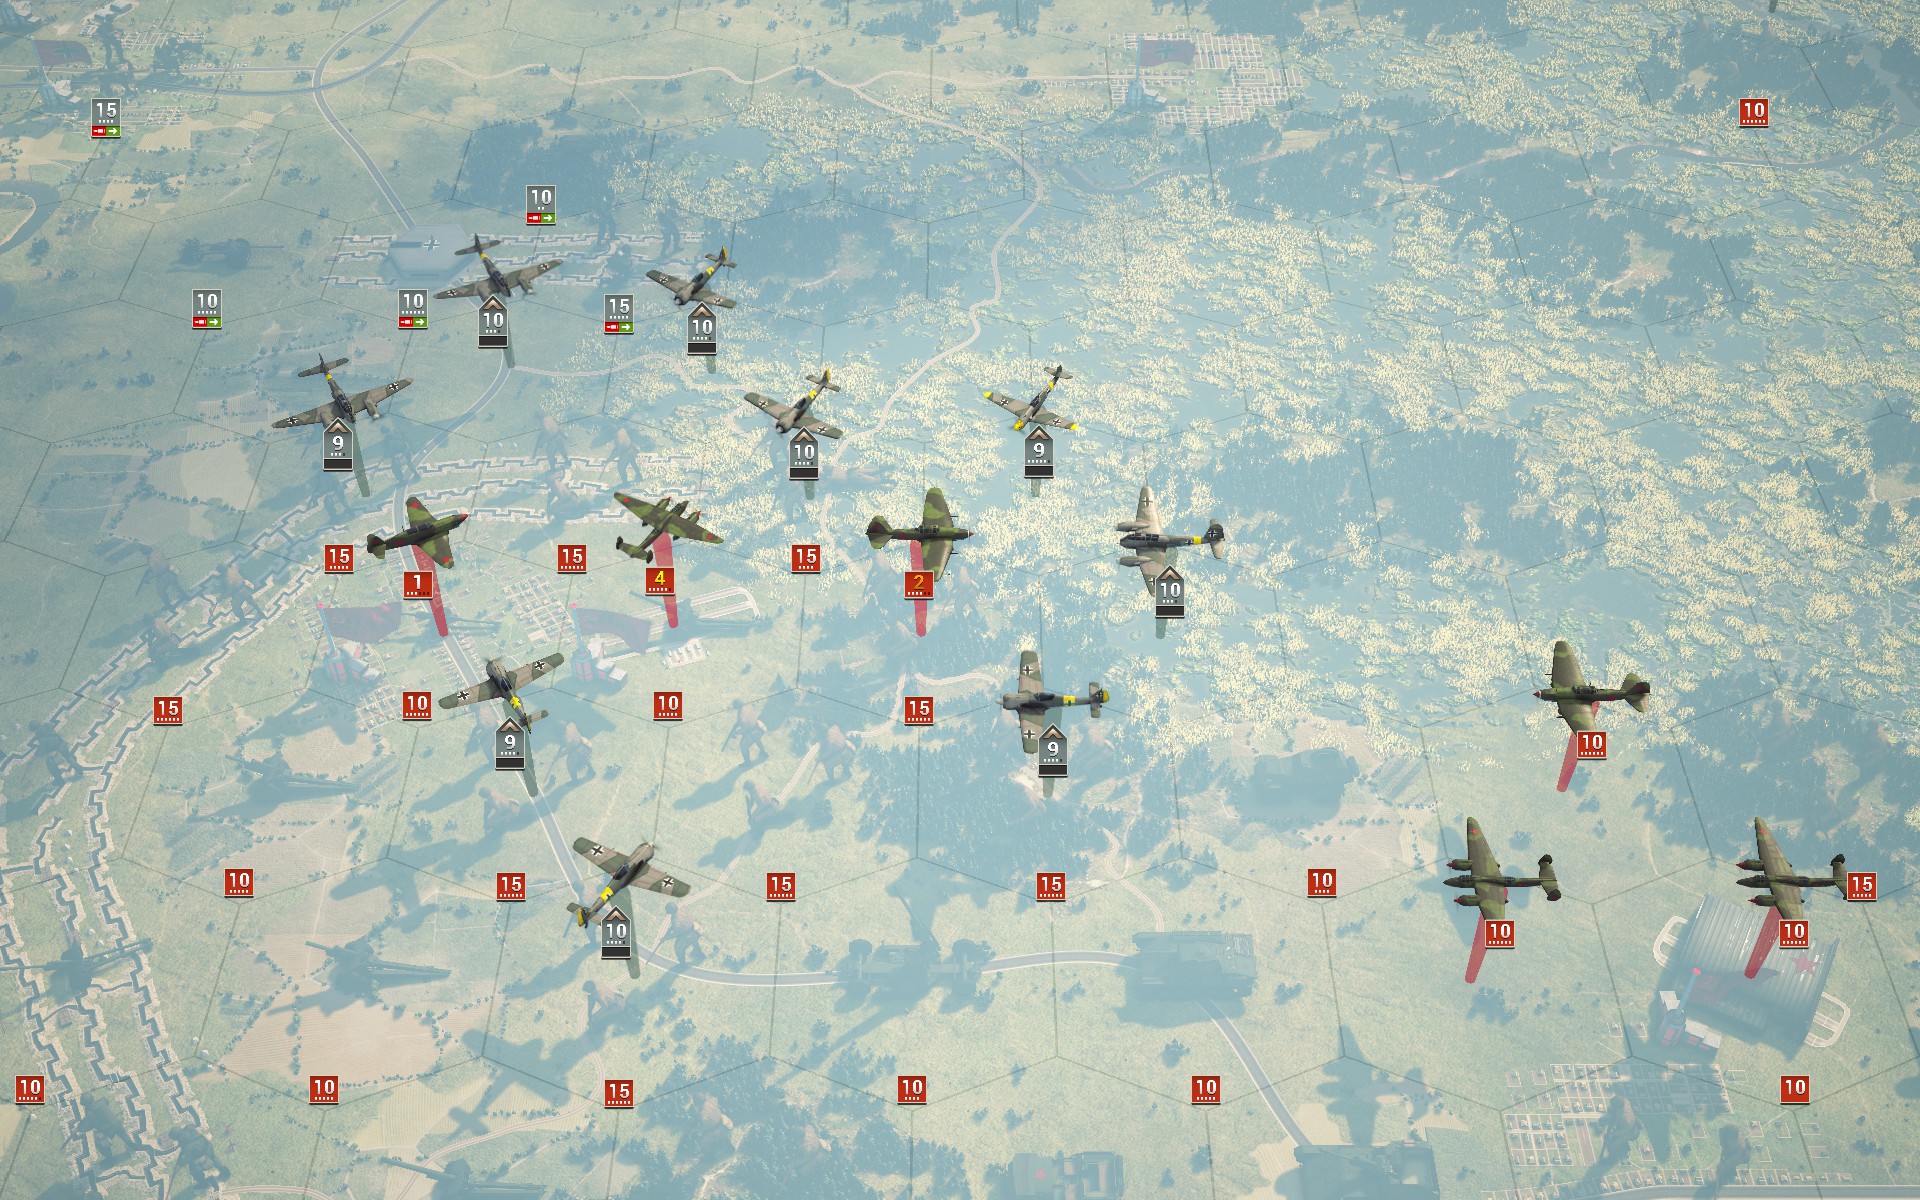
... causing significant damage. A turn or two should suffice to wipe out all enemy aircraft in the region, after which the Luftwaffe will rebase to Minsk, provided I have secured the city by then.
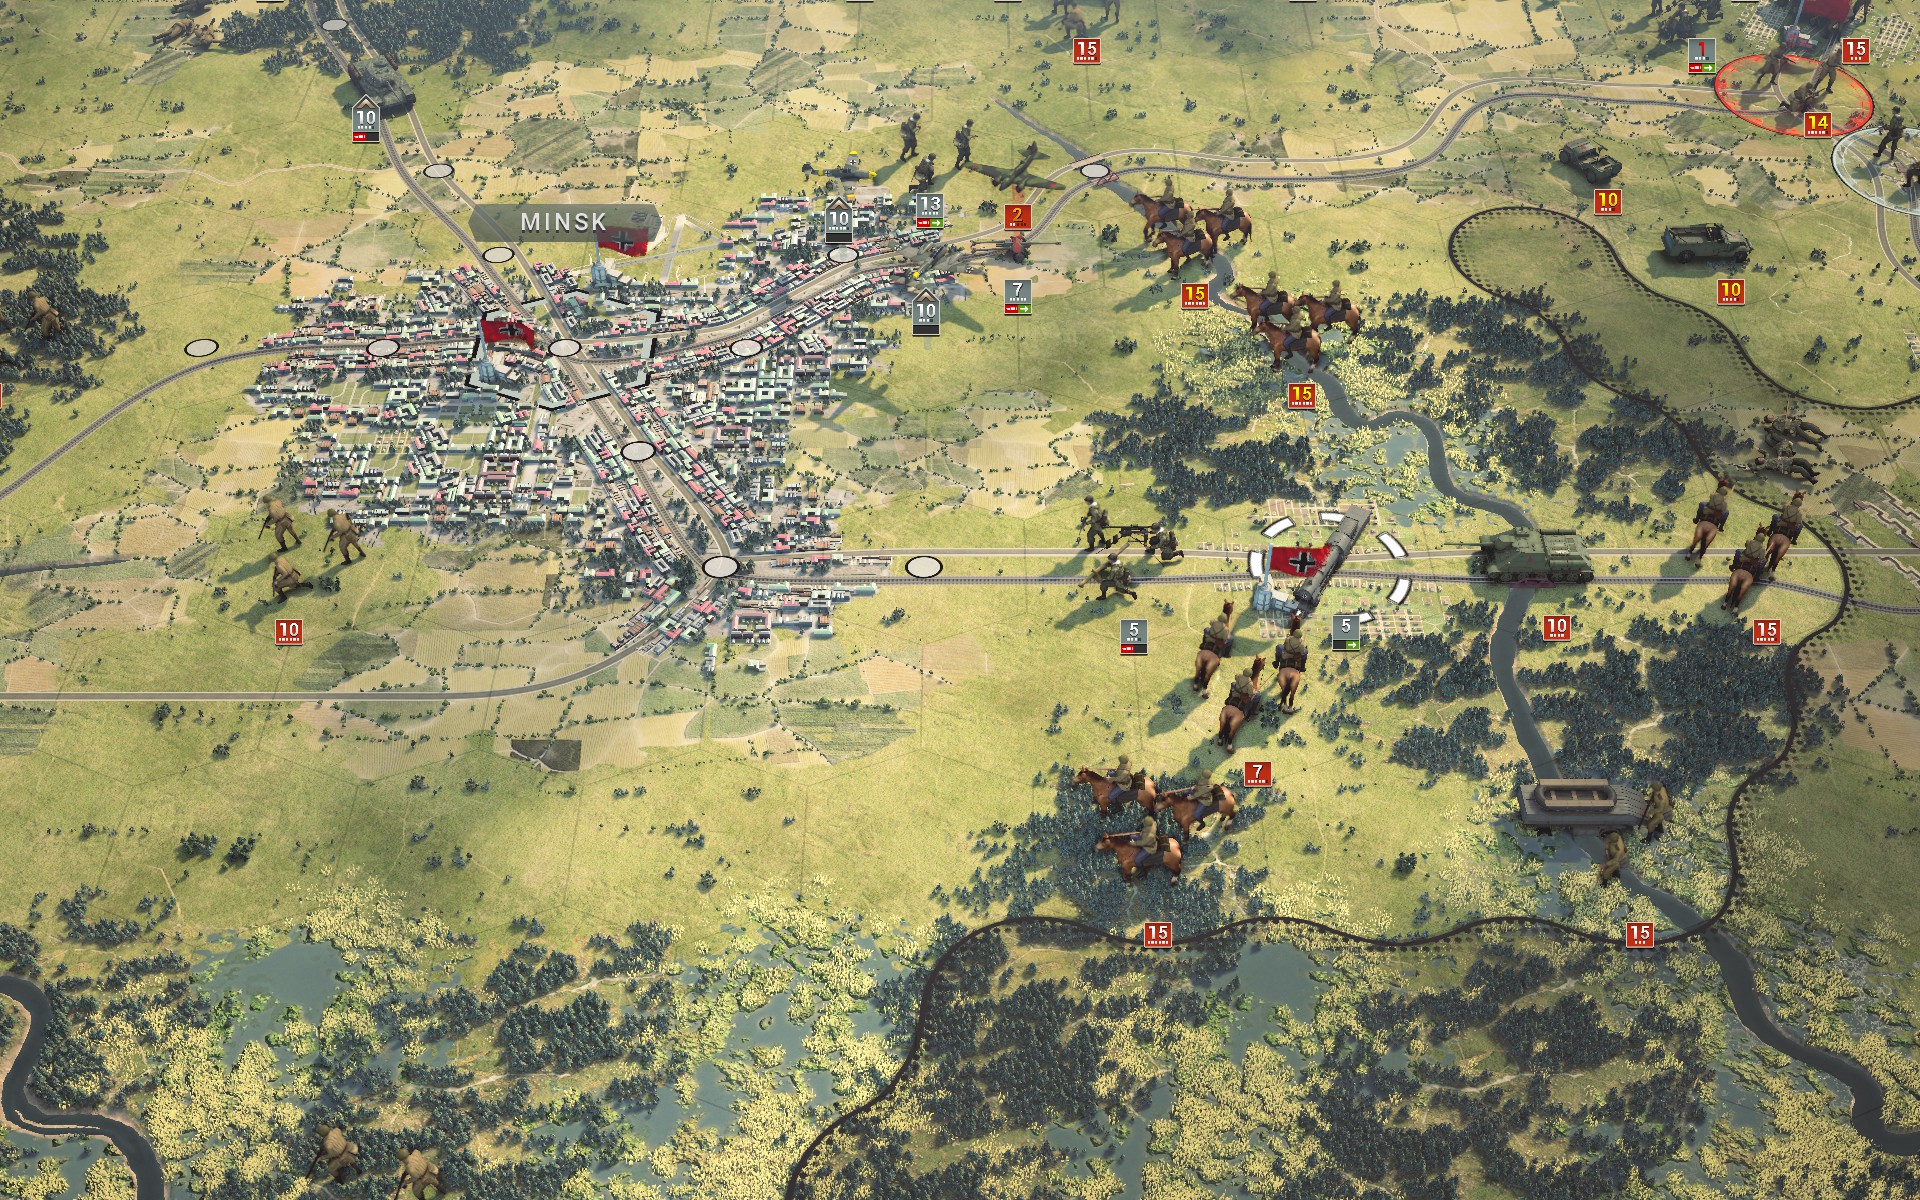
The Luftwaffe cripples an Il-4 at Minsk, while half the Grenadier at Bobruysk form a rearguard to allow the rest of the battalion to withdraw using the train.
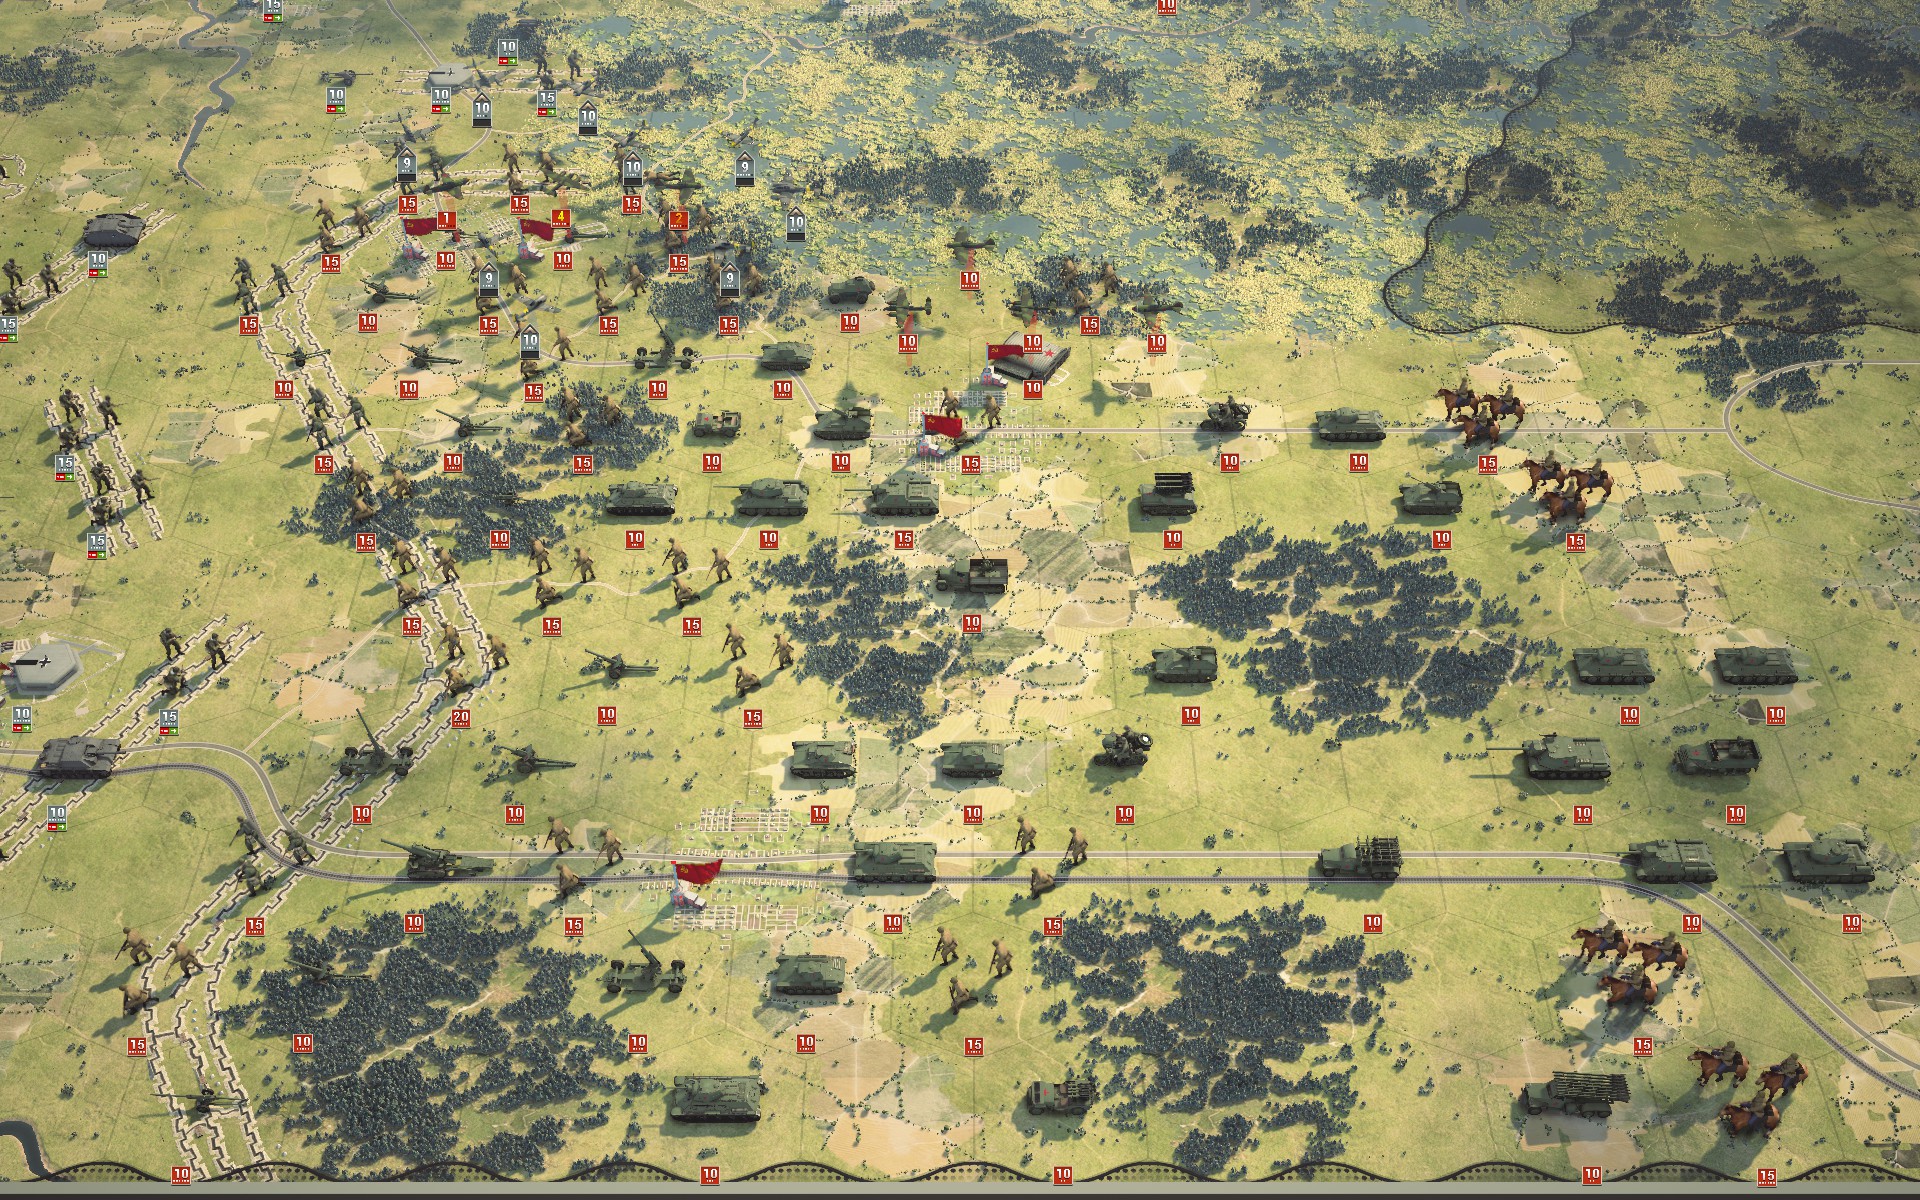
All right, maybe I should be a little worried after all.
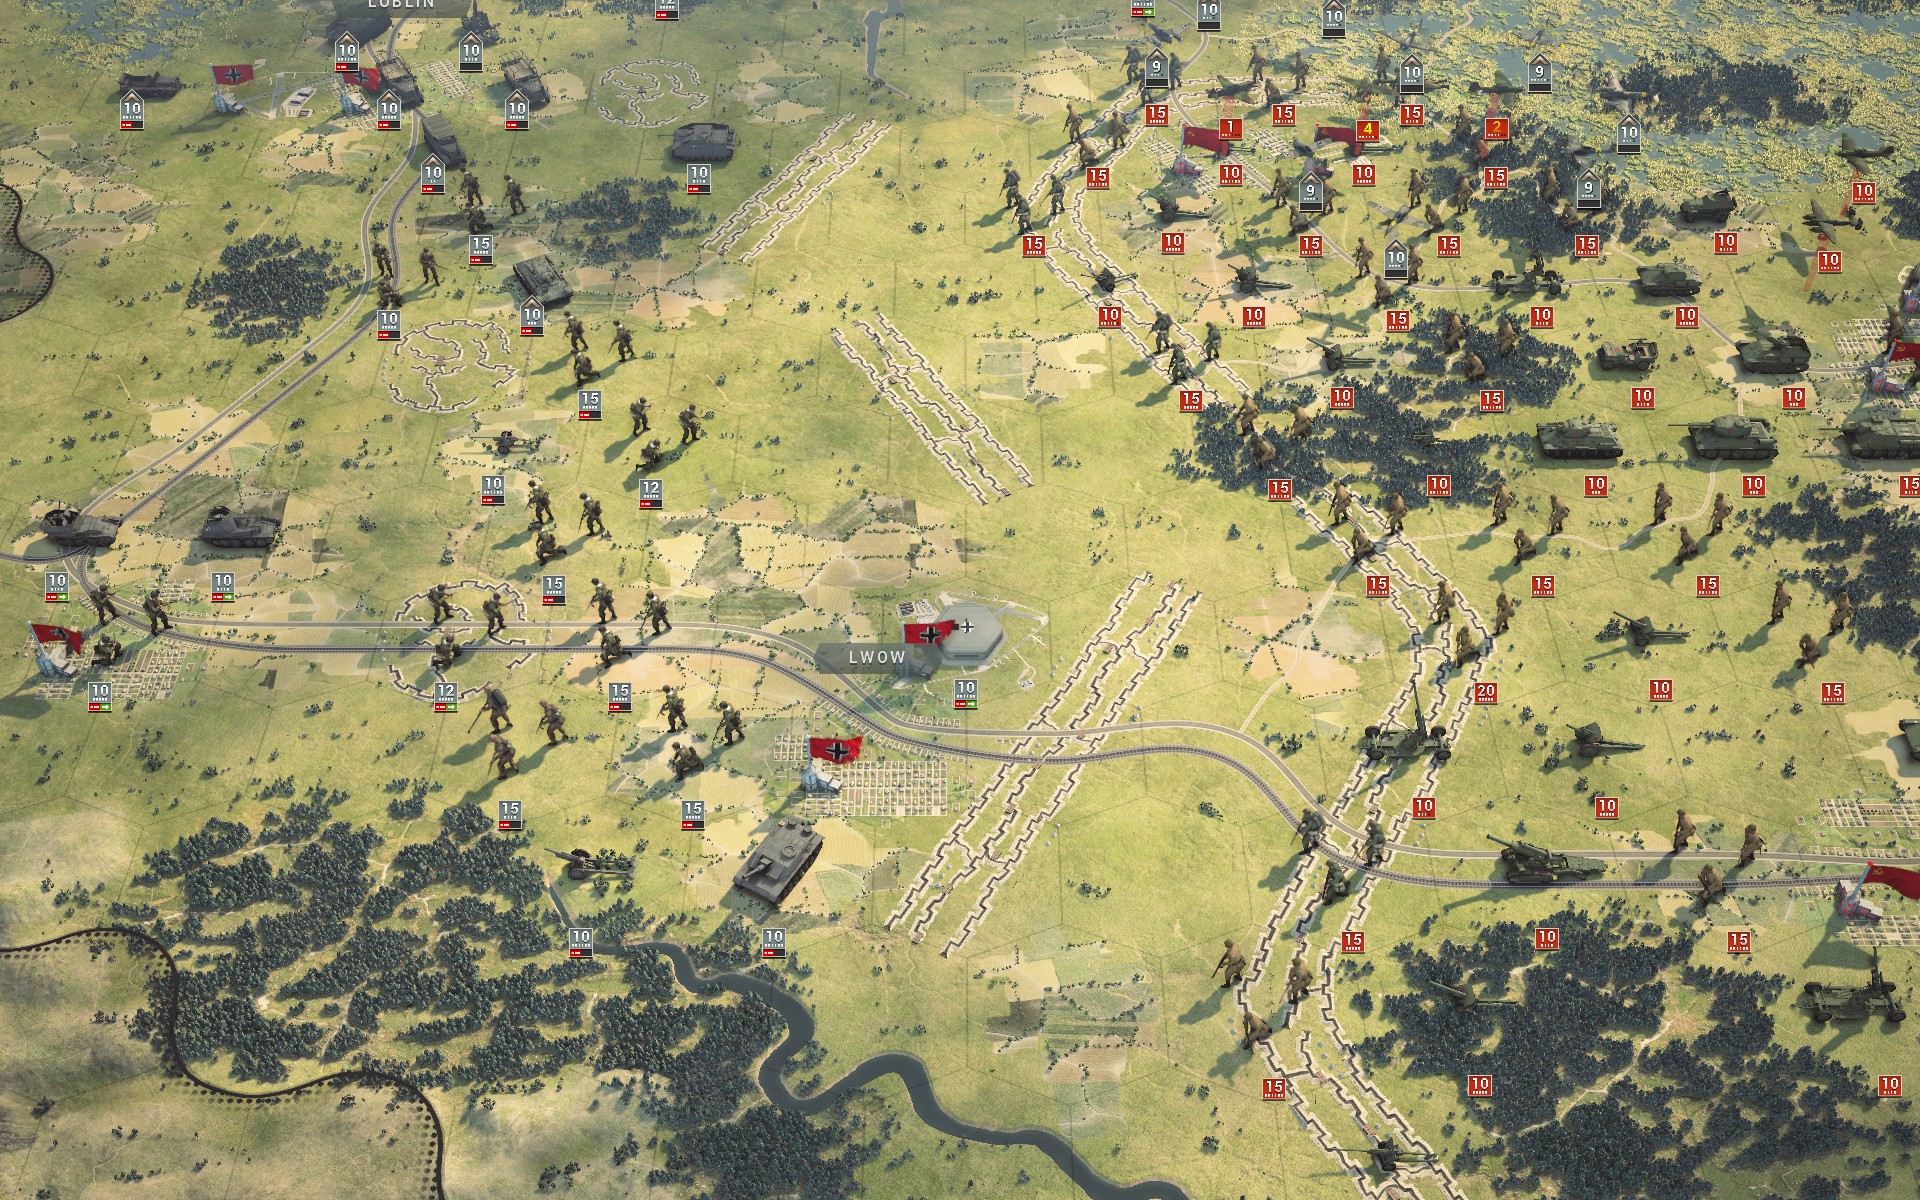
The auxiliaries begin to withdraw from Lwow.
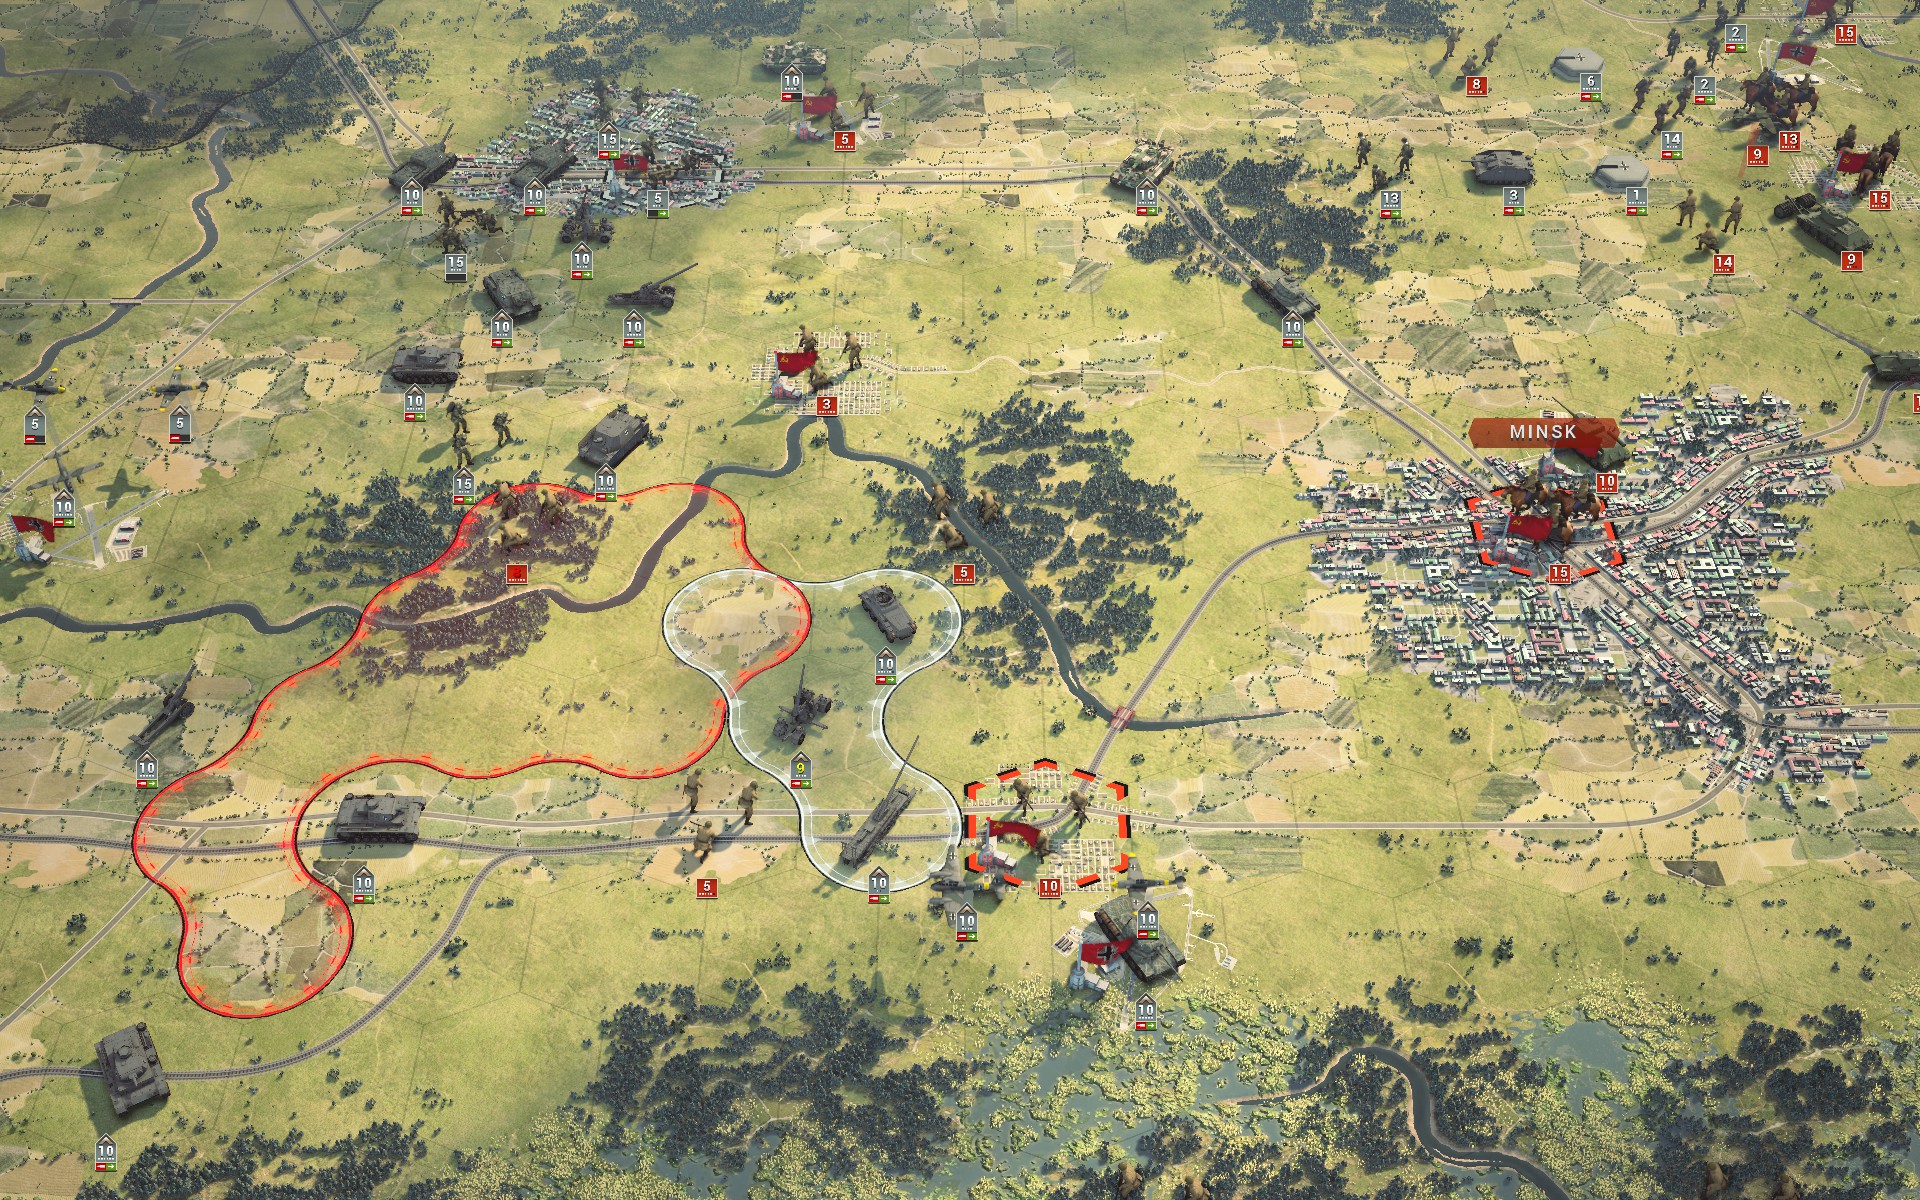
Minsk falls to the Red Army and the Partisans capture a number of locations, but with no armour or fire support the latter stand no chance of holding them.
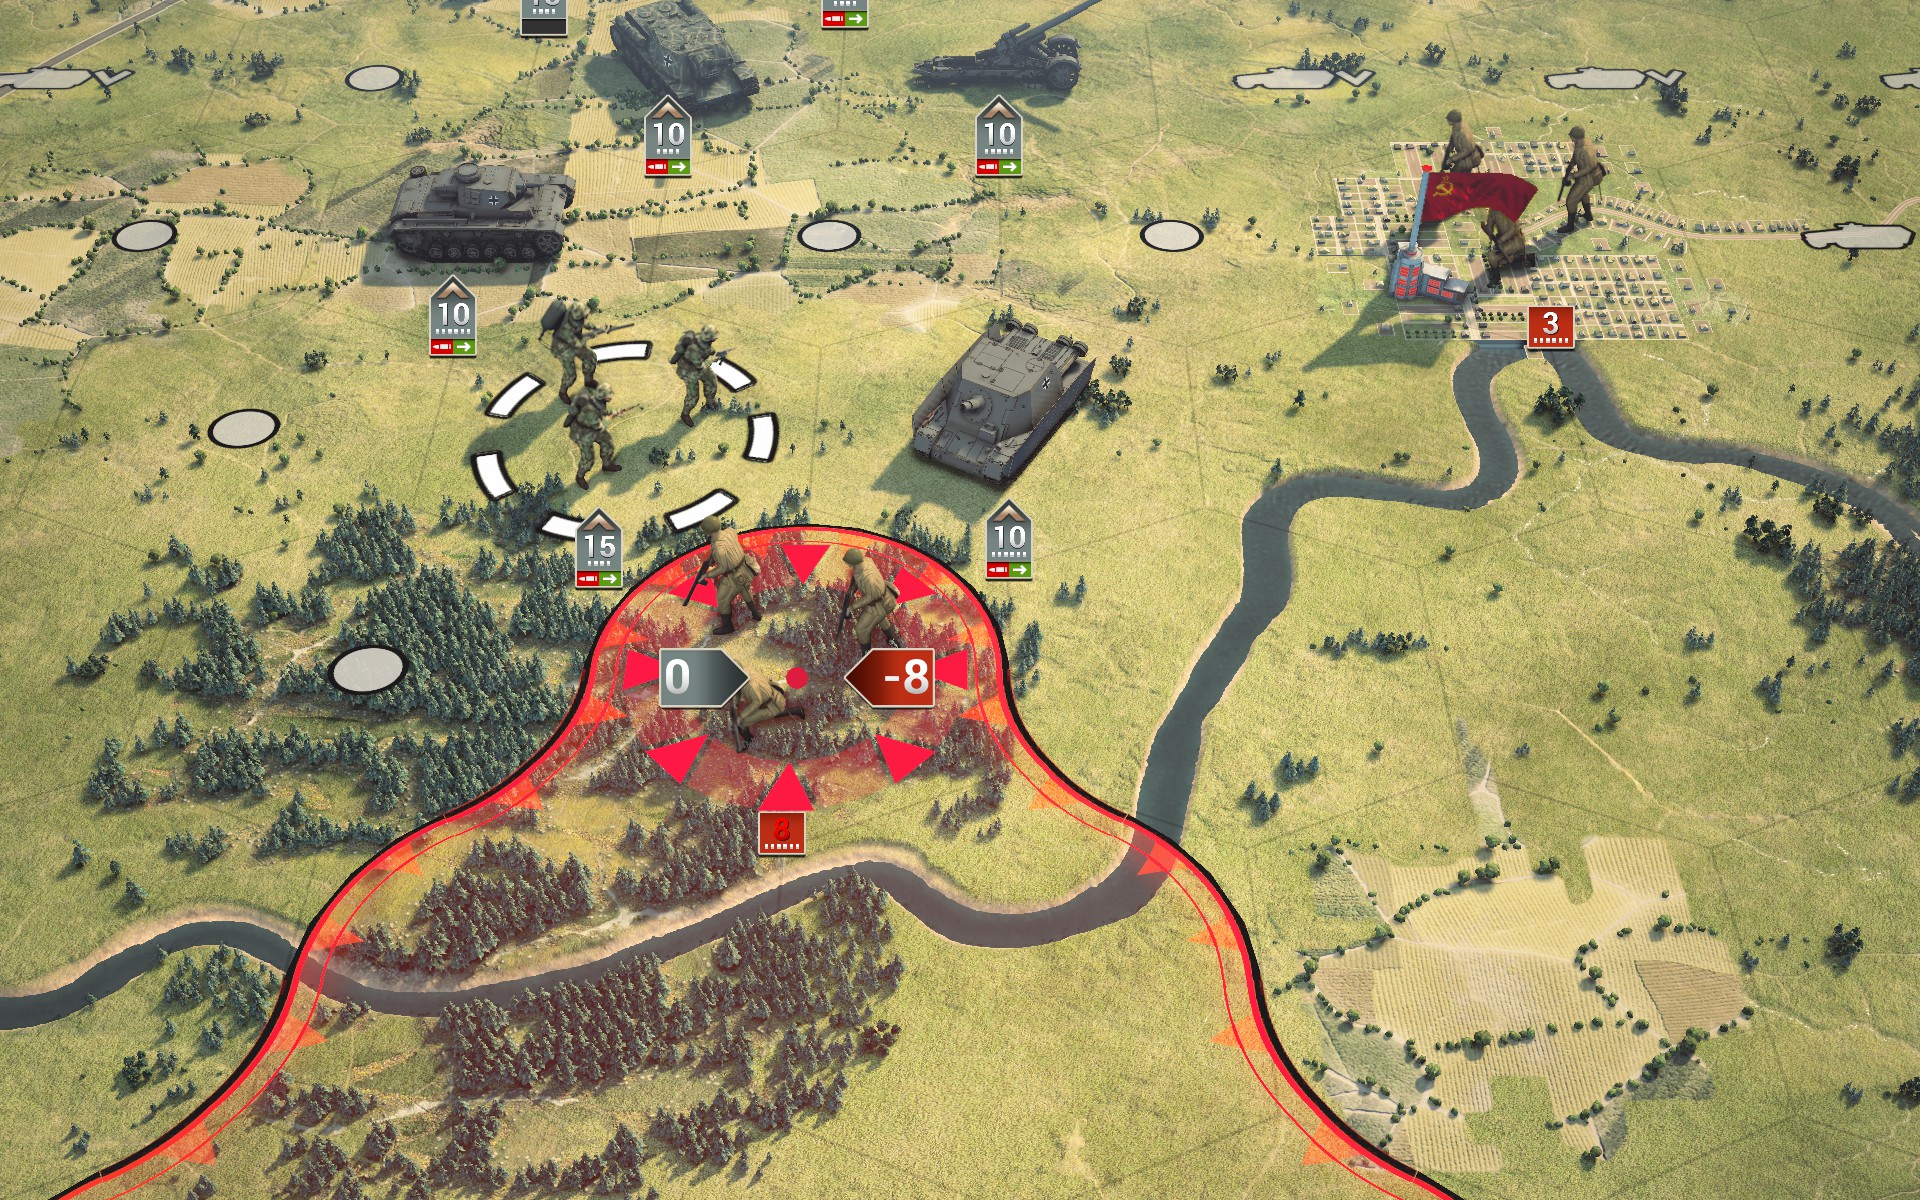
The Bridgeburners make short work of the Partisans hiding in the woods.
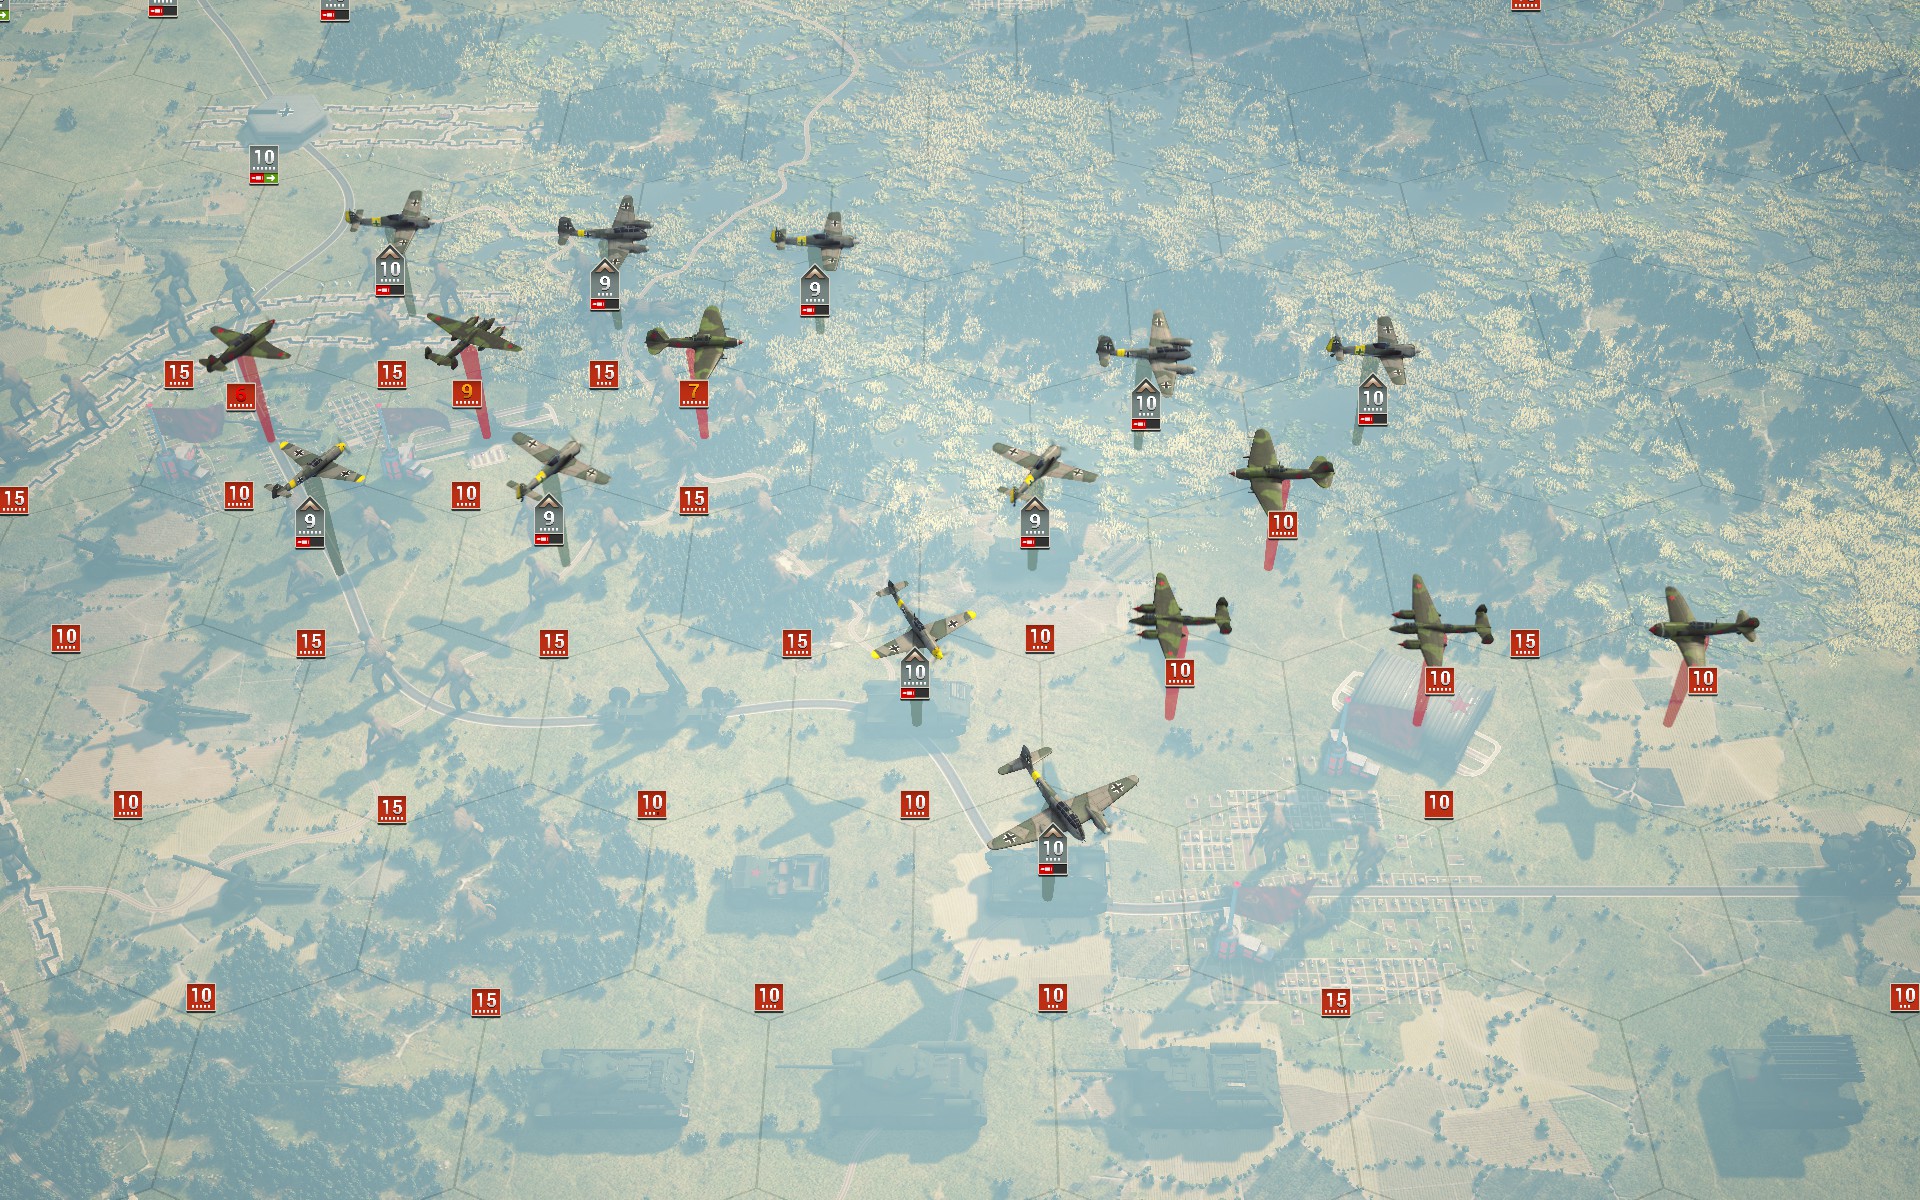
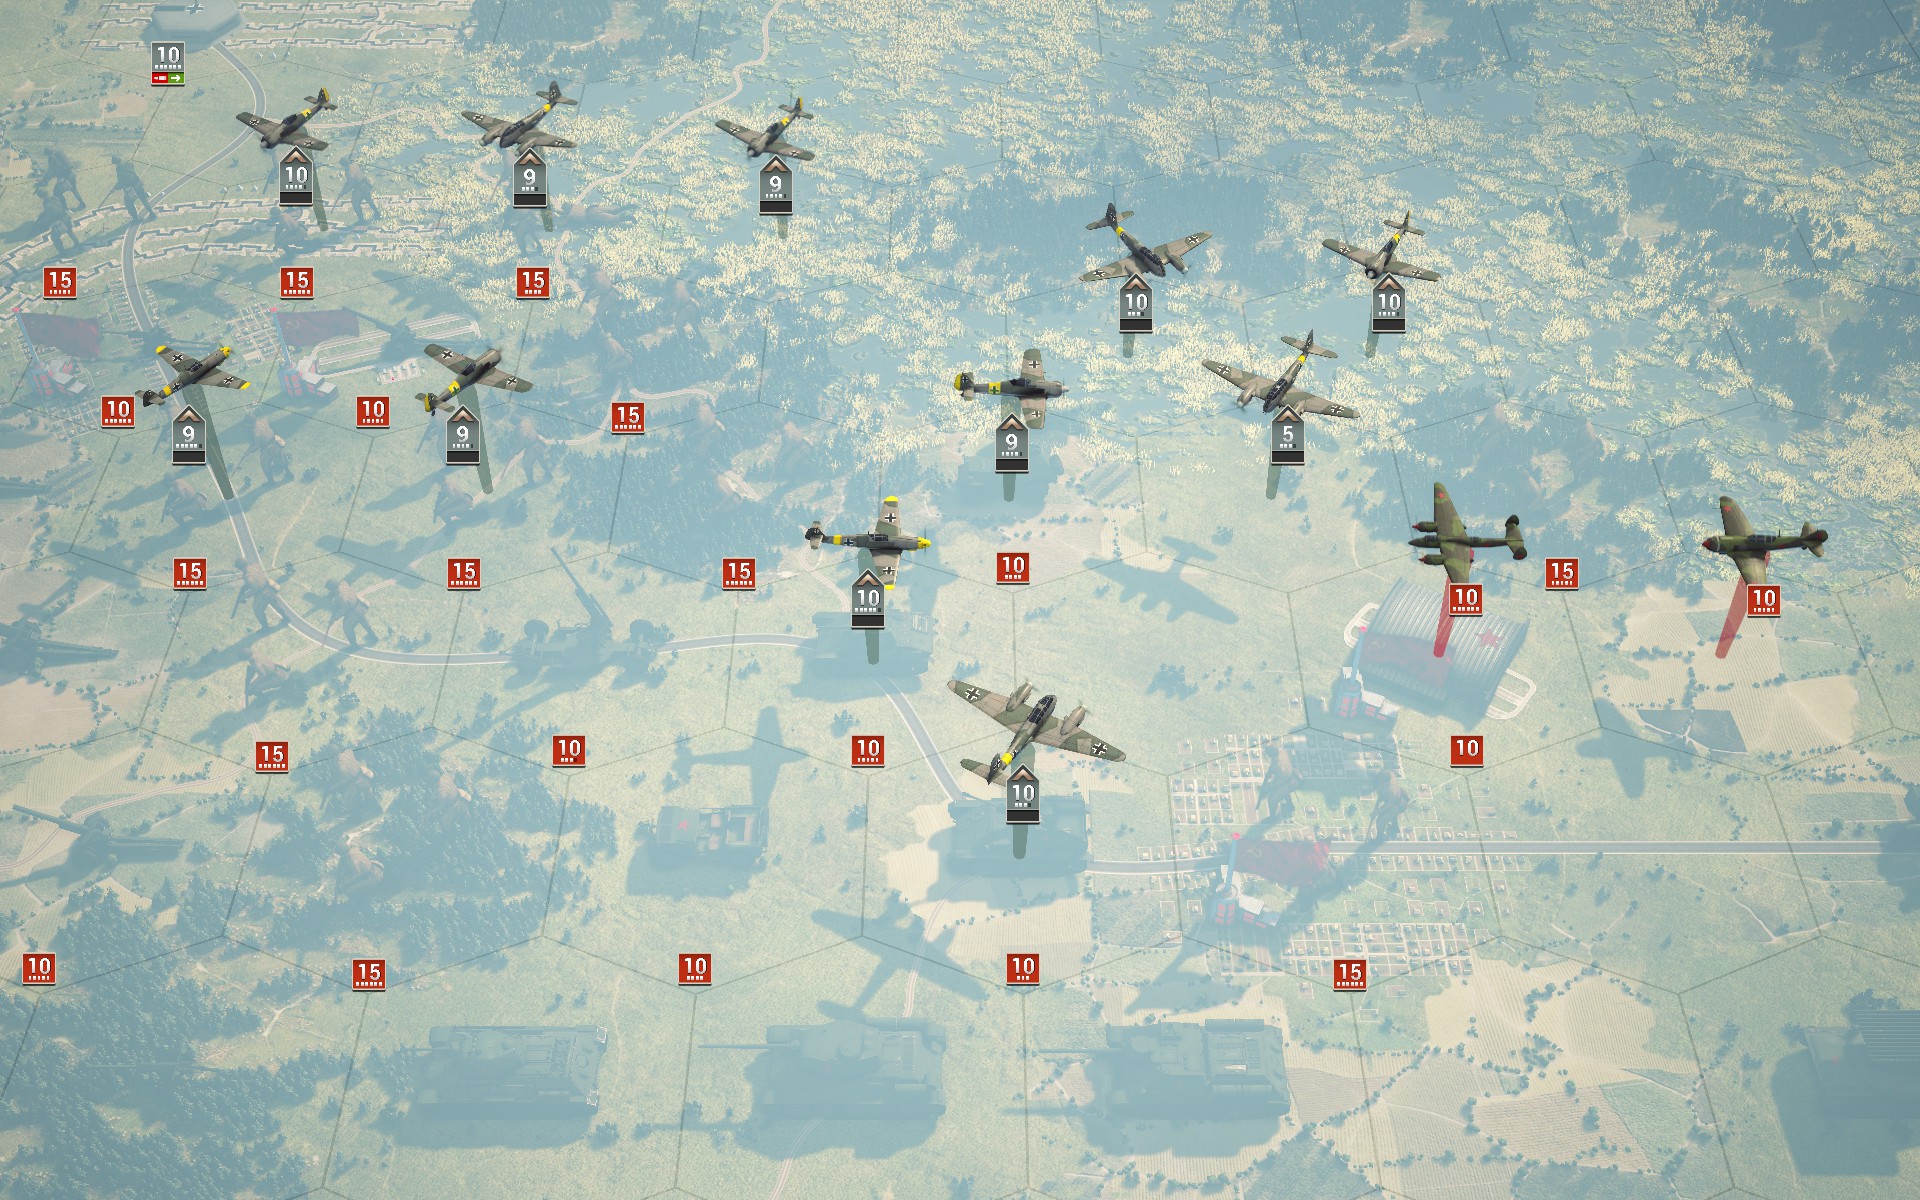
The Luftwaffe brings down an additional five aircraft, effectively crippling the Soviet air force in the south.
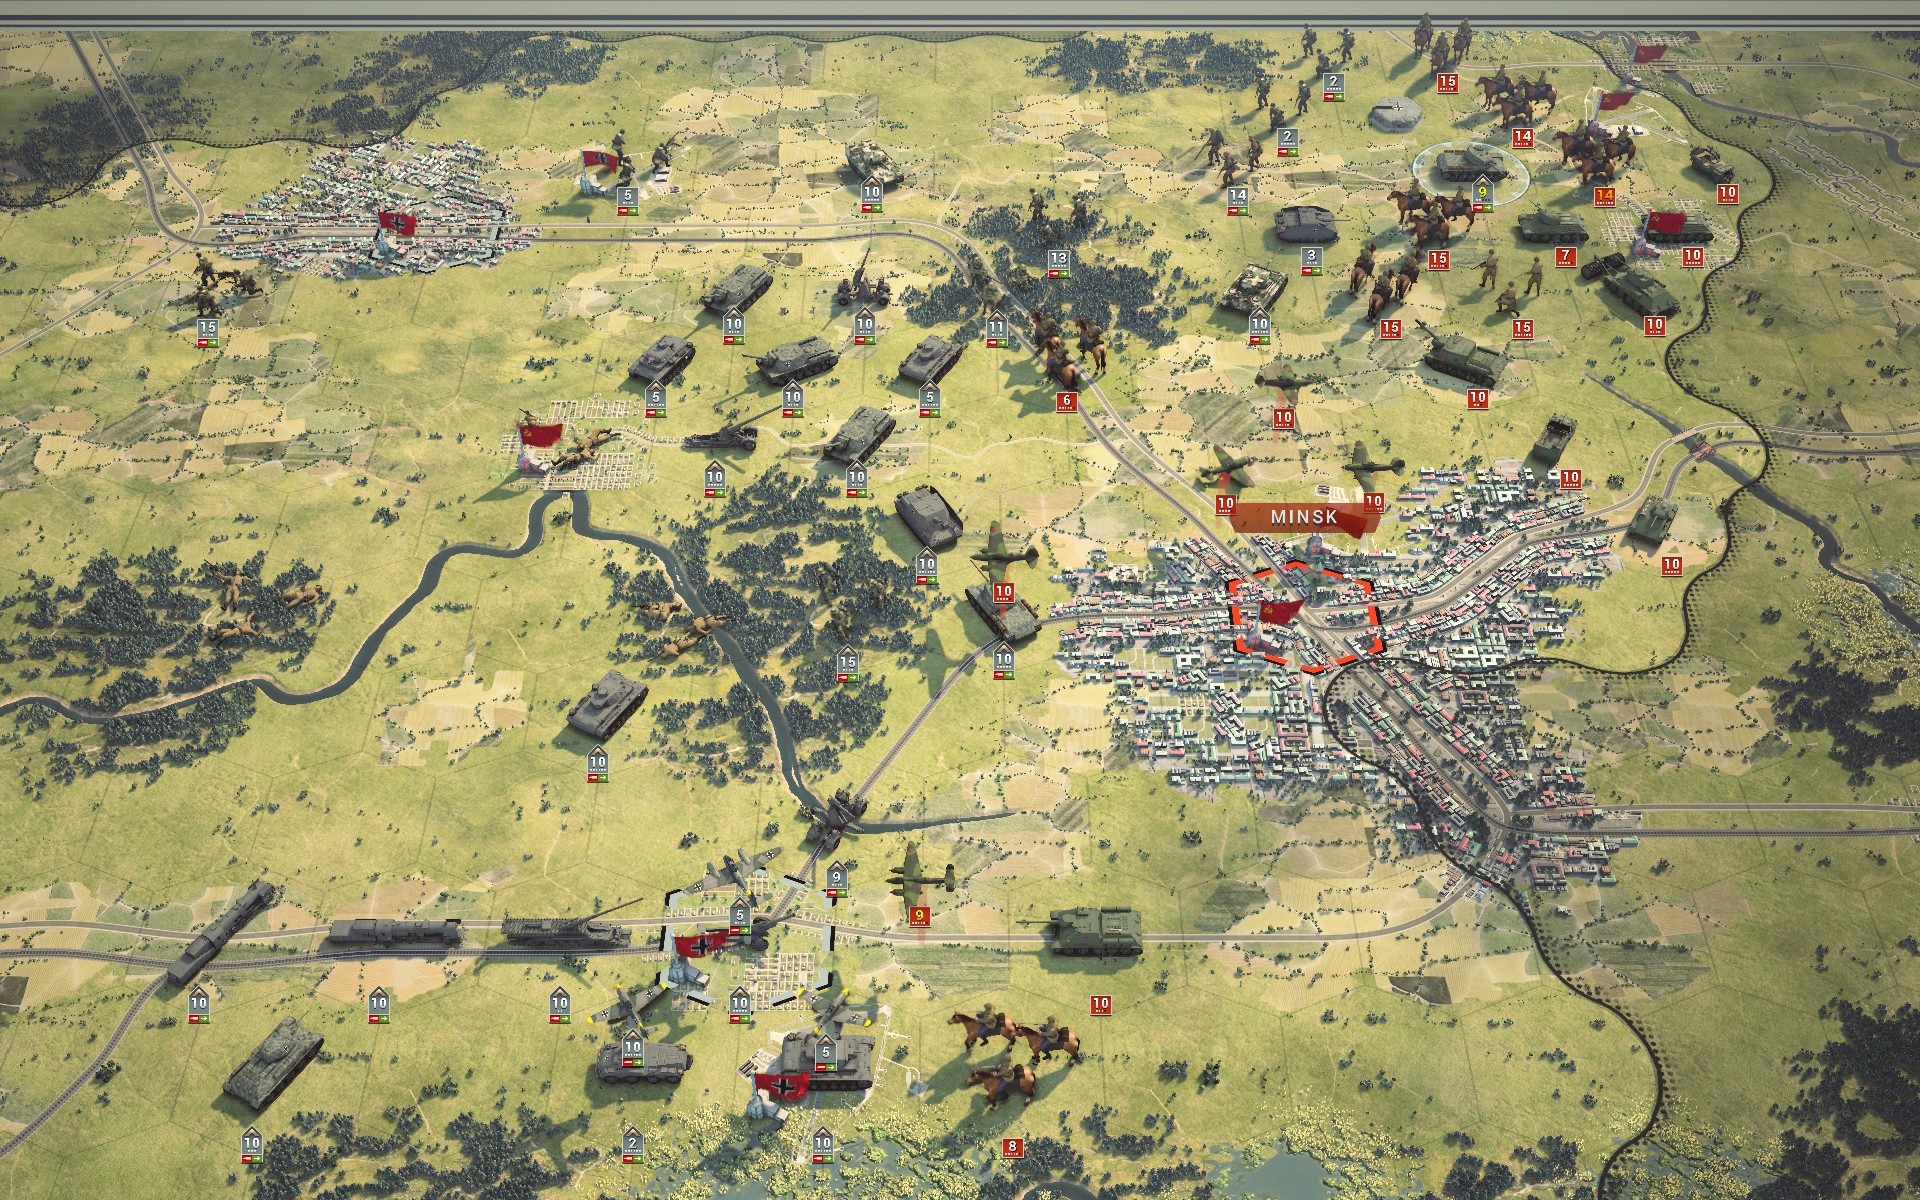
The Tiger and IS-1 battalions have temporarily halted the Soviet advance in the north, allowing the Pioniere to withdraw. The Partisans have been dealt with, and with Soviet air assets rebased to the airfield at Minsk there is an opportunity to take them out before they can engage my ground forces.
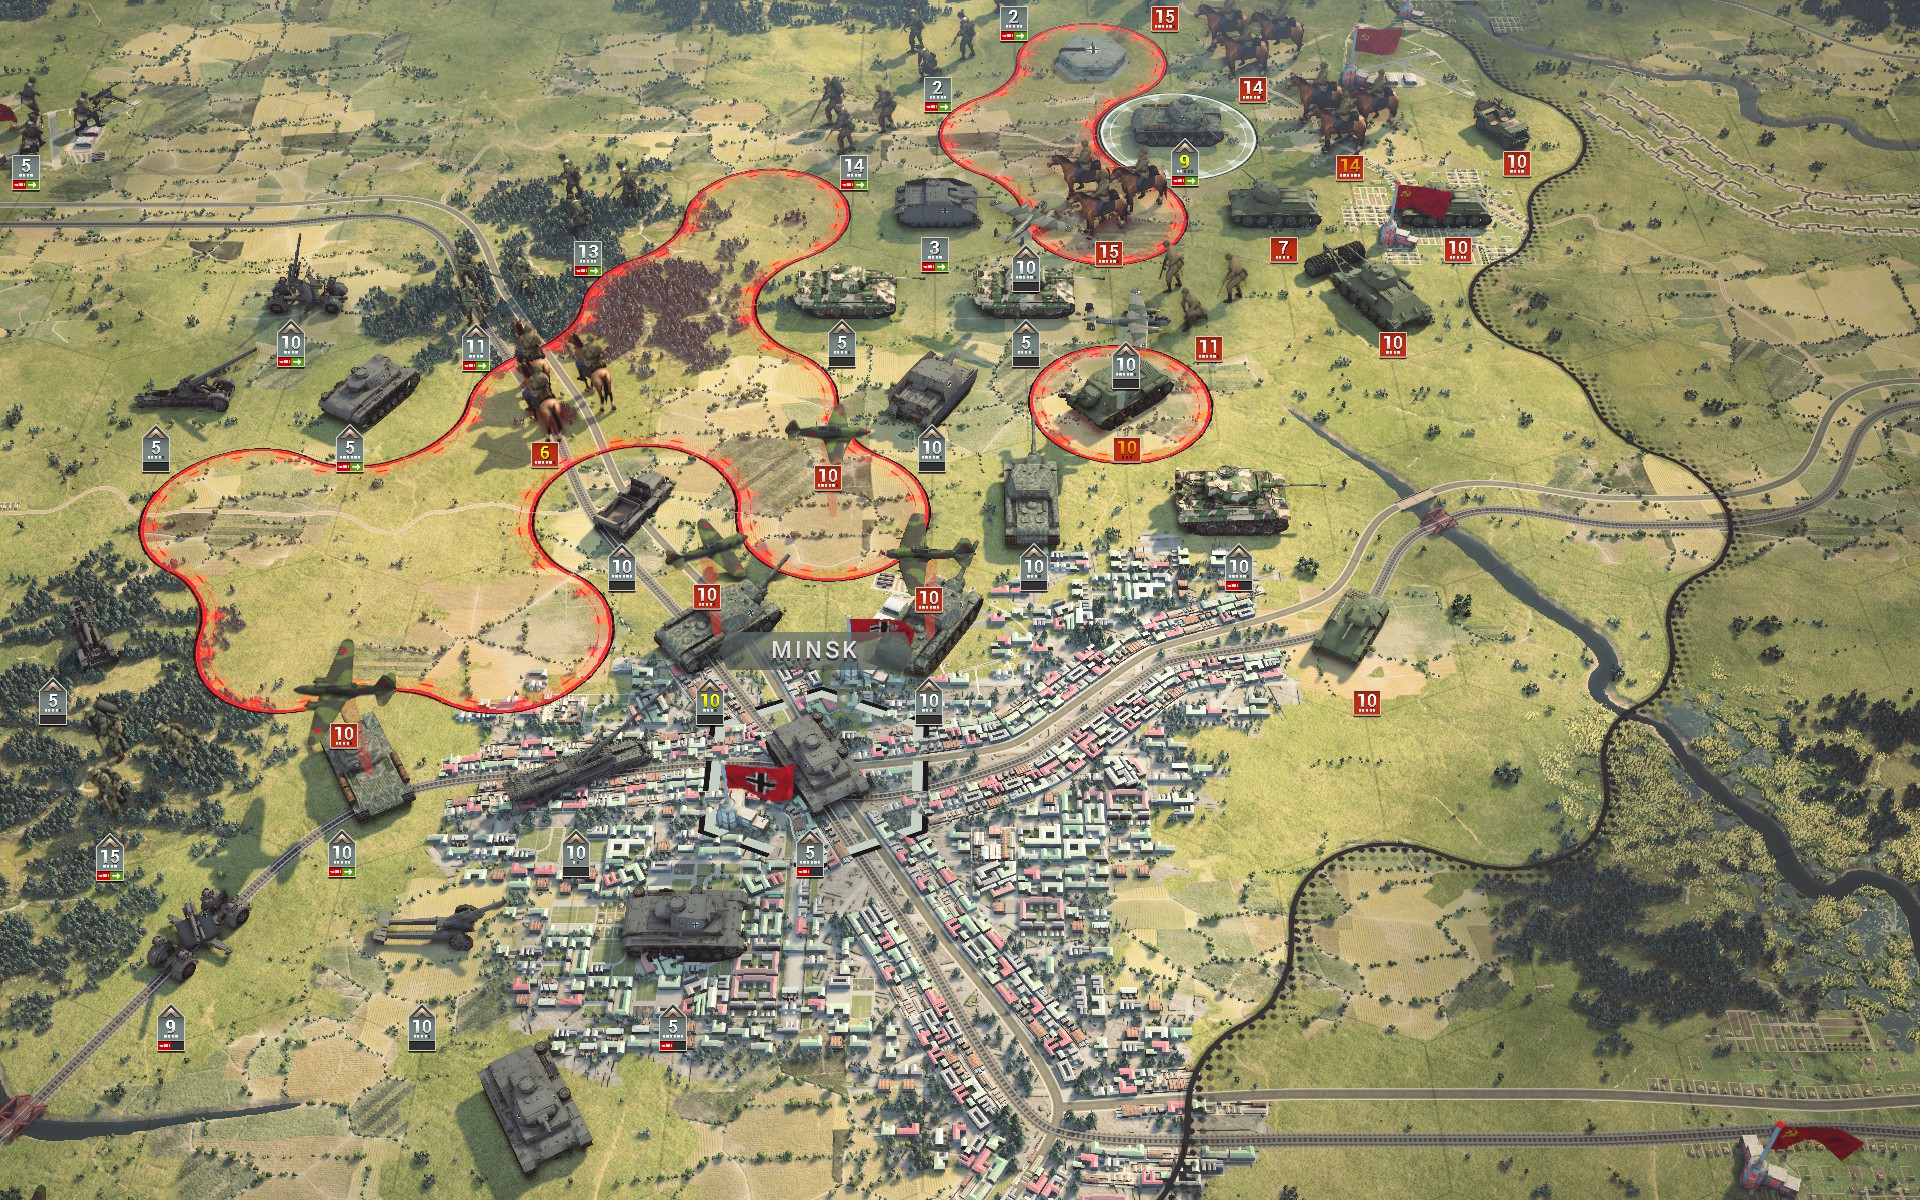
The battlegroup recaptures Minsk and surrounds an ISU-152; I believe this is the most powerful regular mobile artillery in the game -- with a Hard Attack of 25 it's almost as powerful as the 17 cm K 18 (26 HA) -- but just like its predecessor the SU-152 it's incredibly rare.
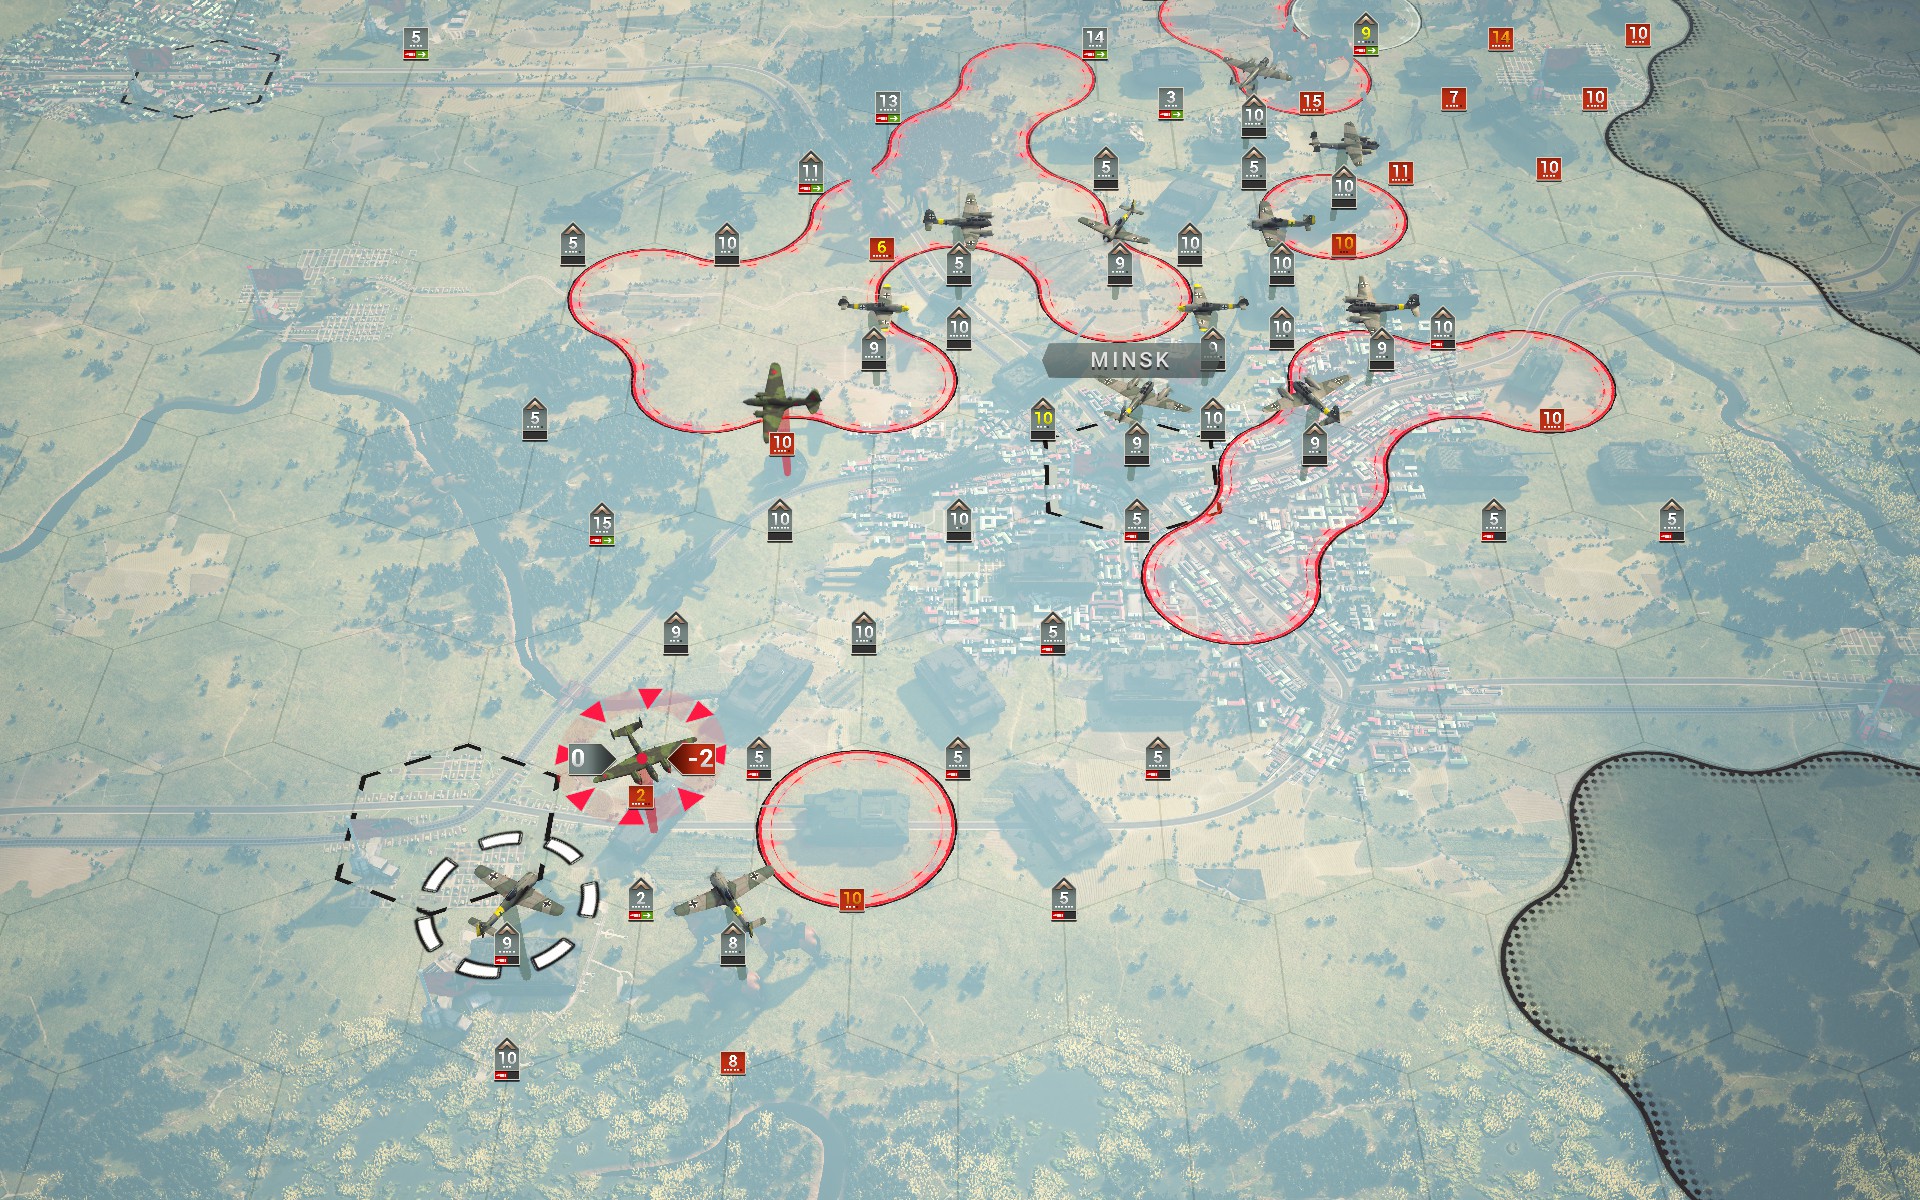
The extra accuracy allows the Luftwaffe to easily take down the Soviet aircraft over Minsk, for a total of 11 confirmed kills in just 3 turns.
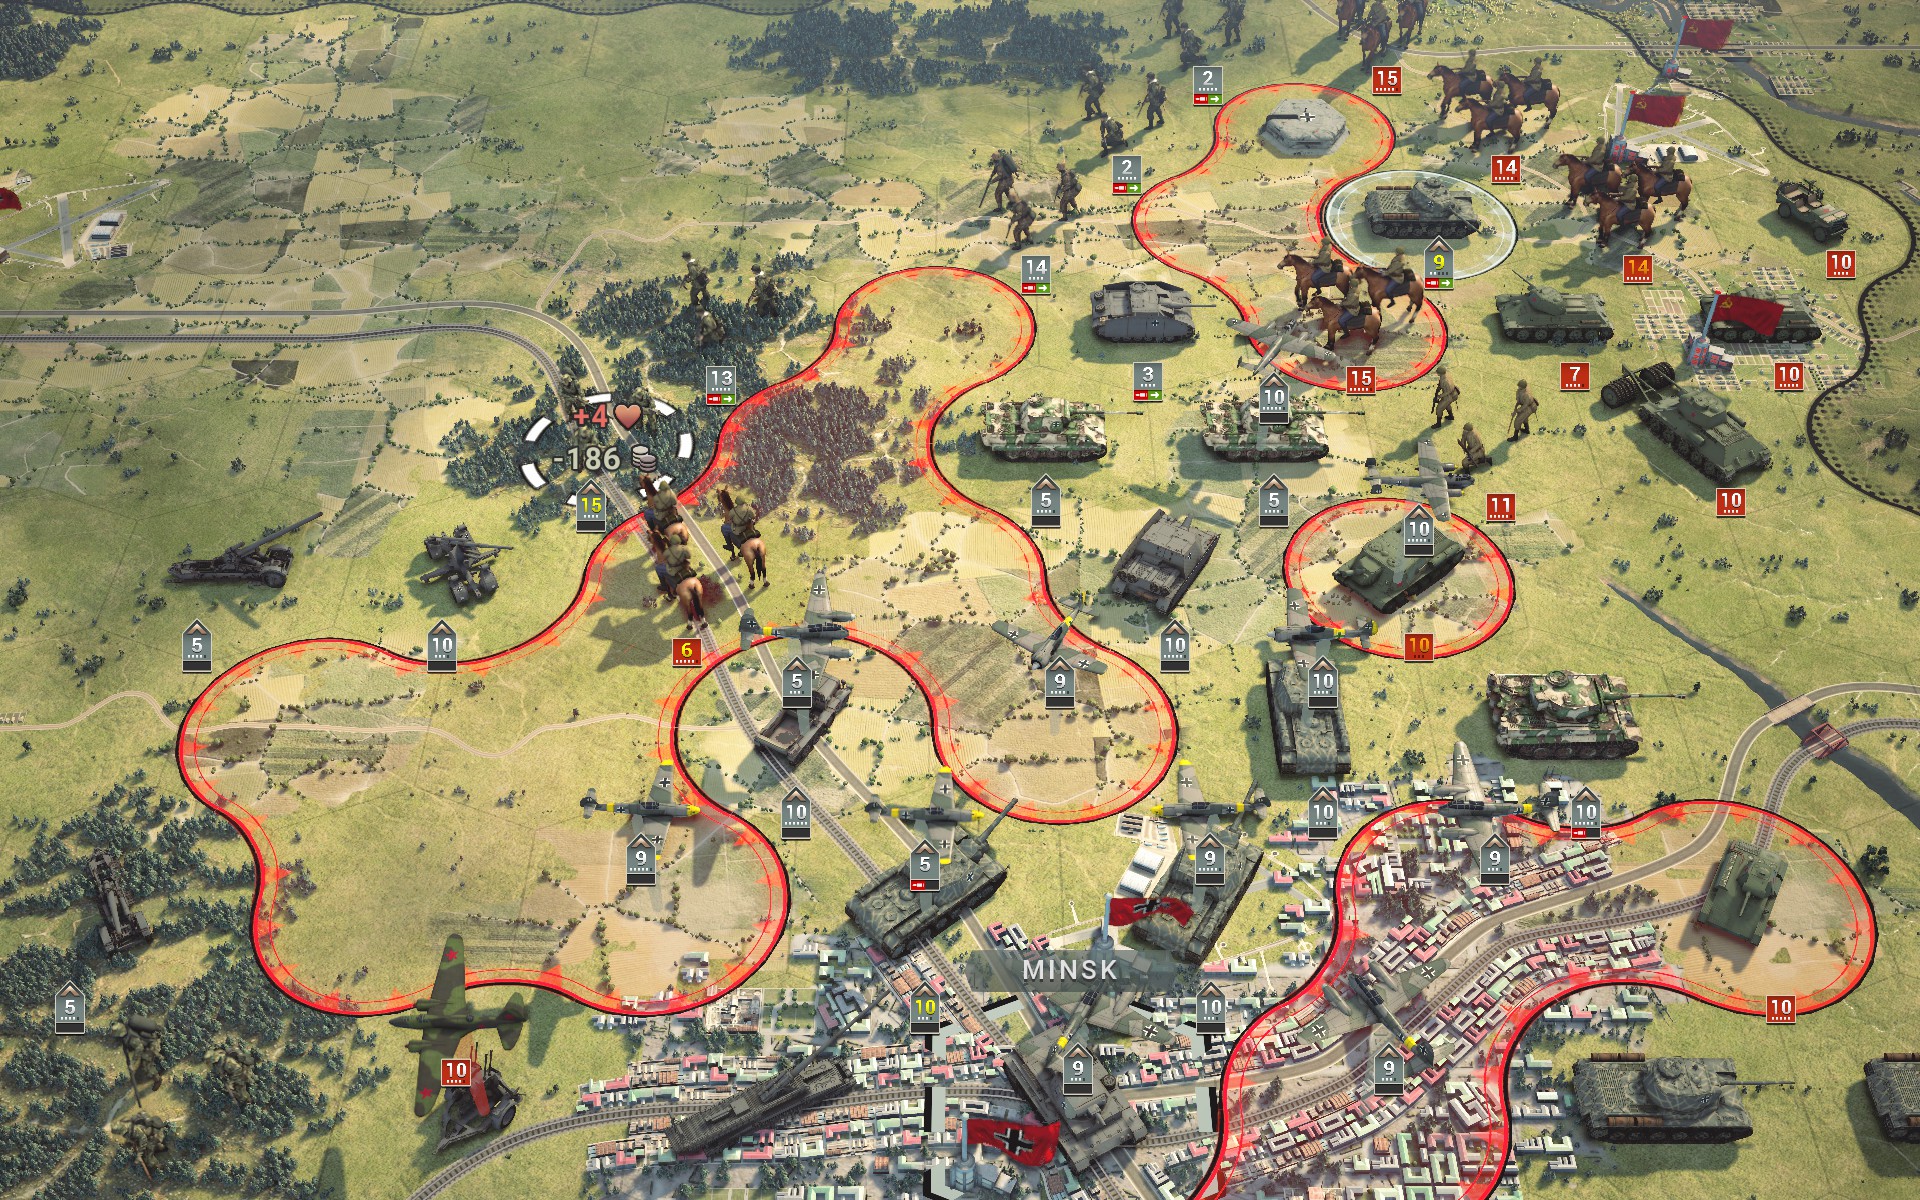
The Crimson Guard take the opportunity to reinforce.
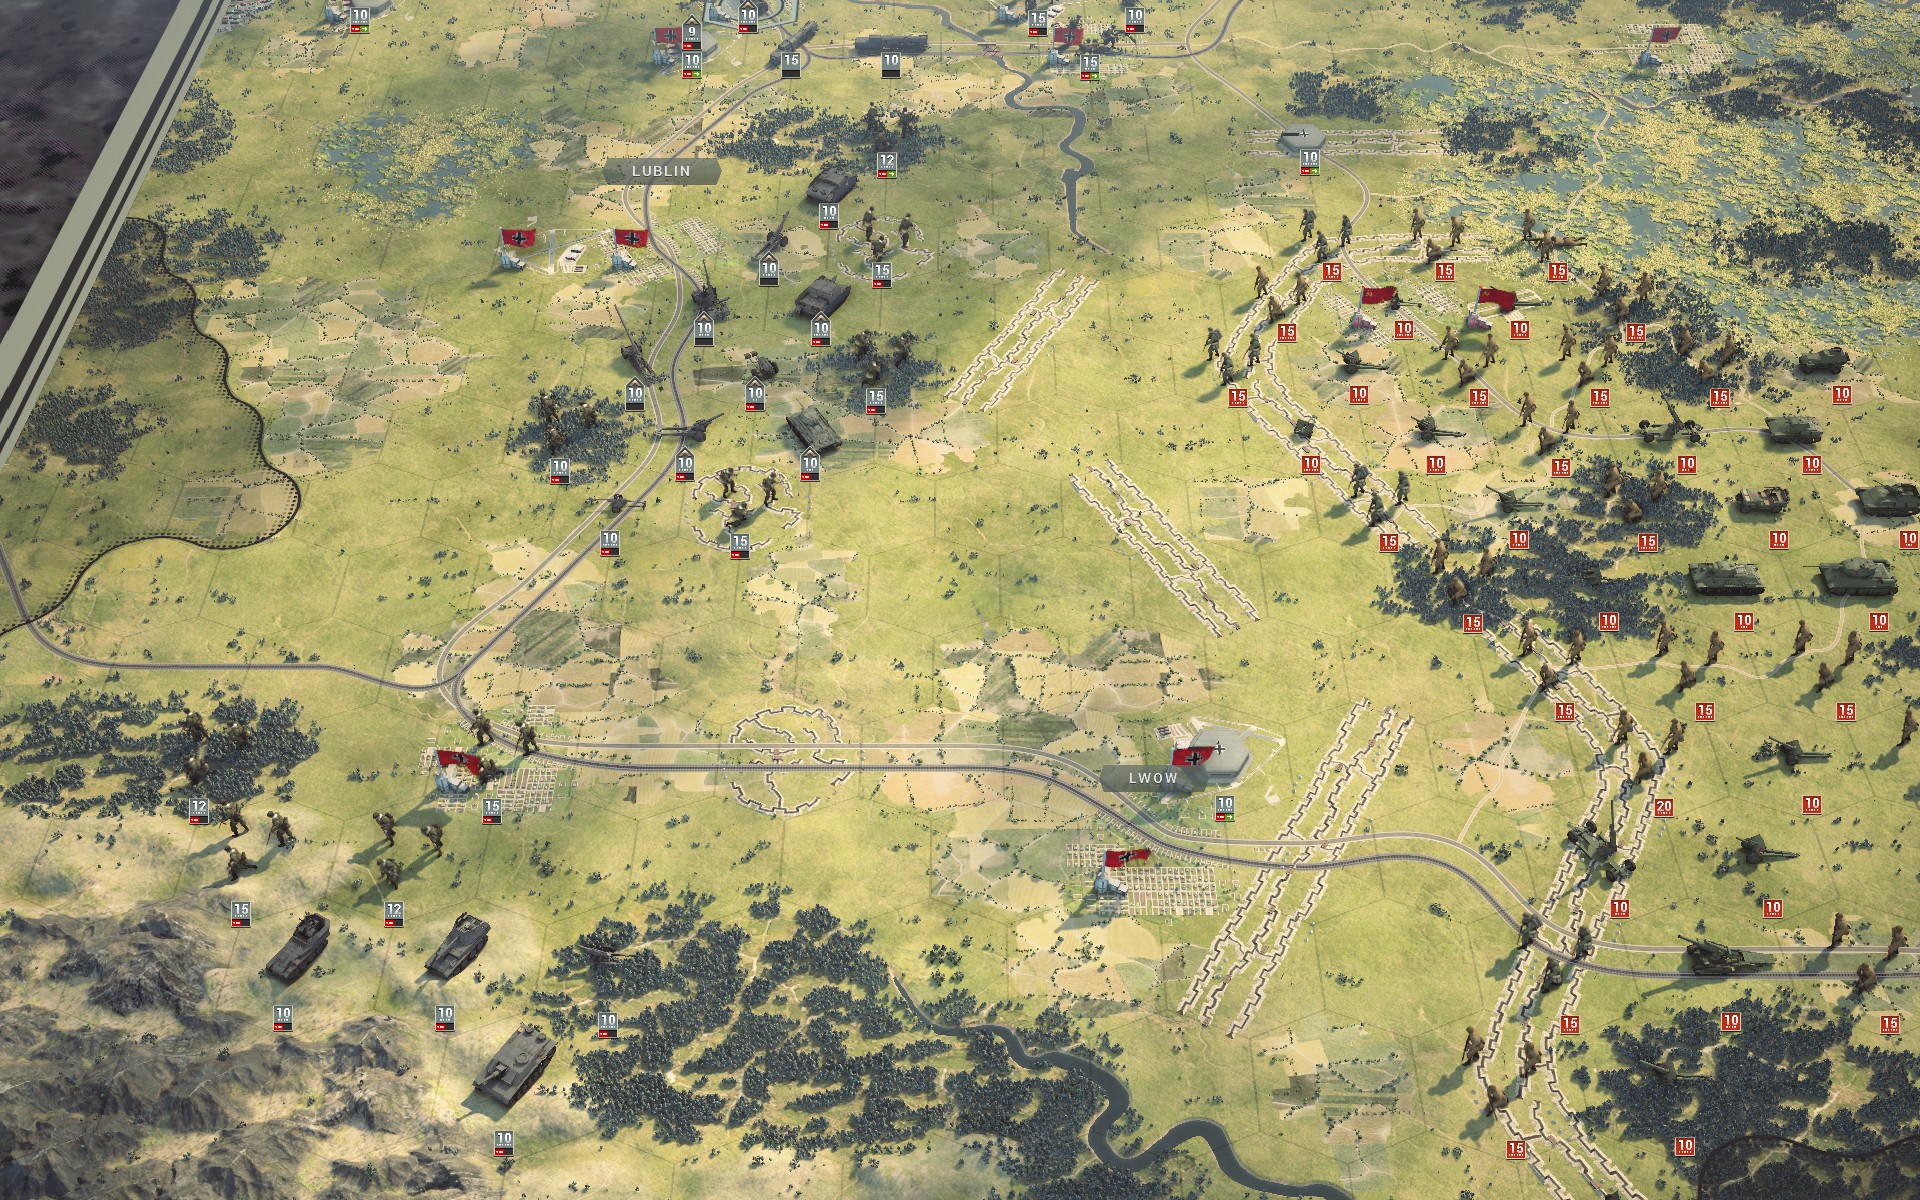
The auxiliaries have almost finished redeploying. They're going to need more support, but for now I need the heavy Panzers at Minsk.
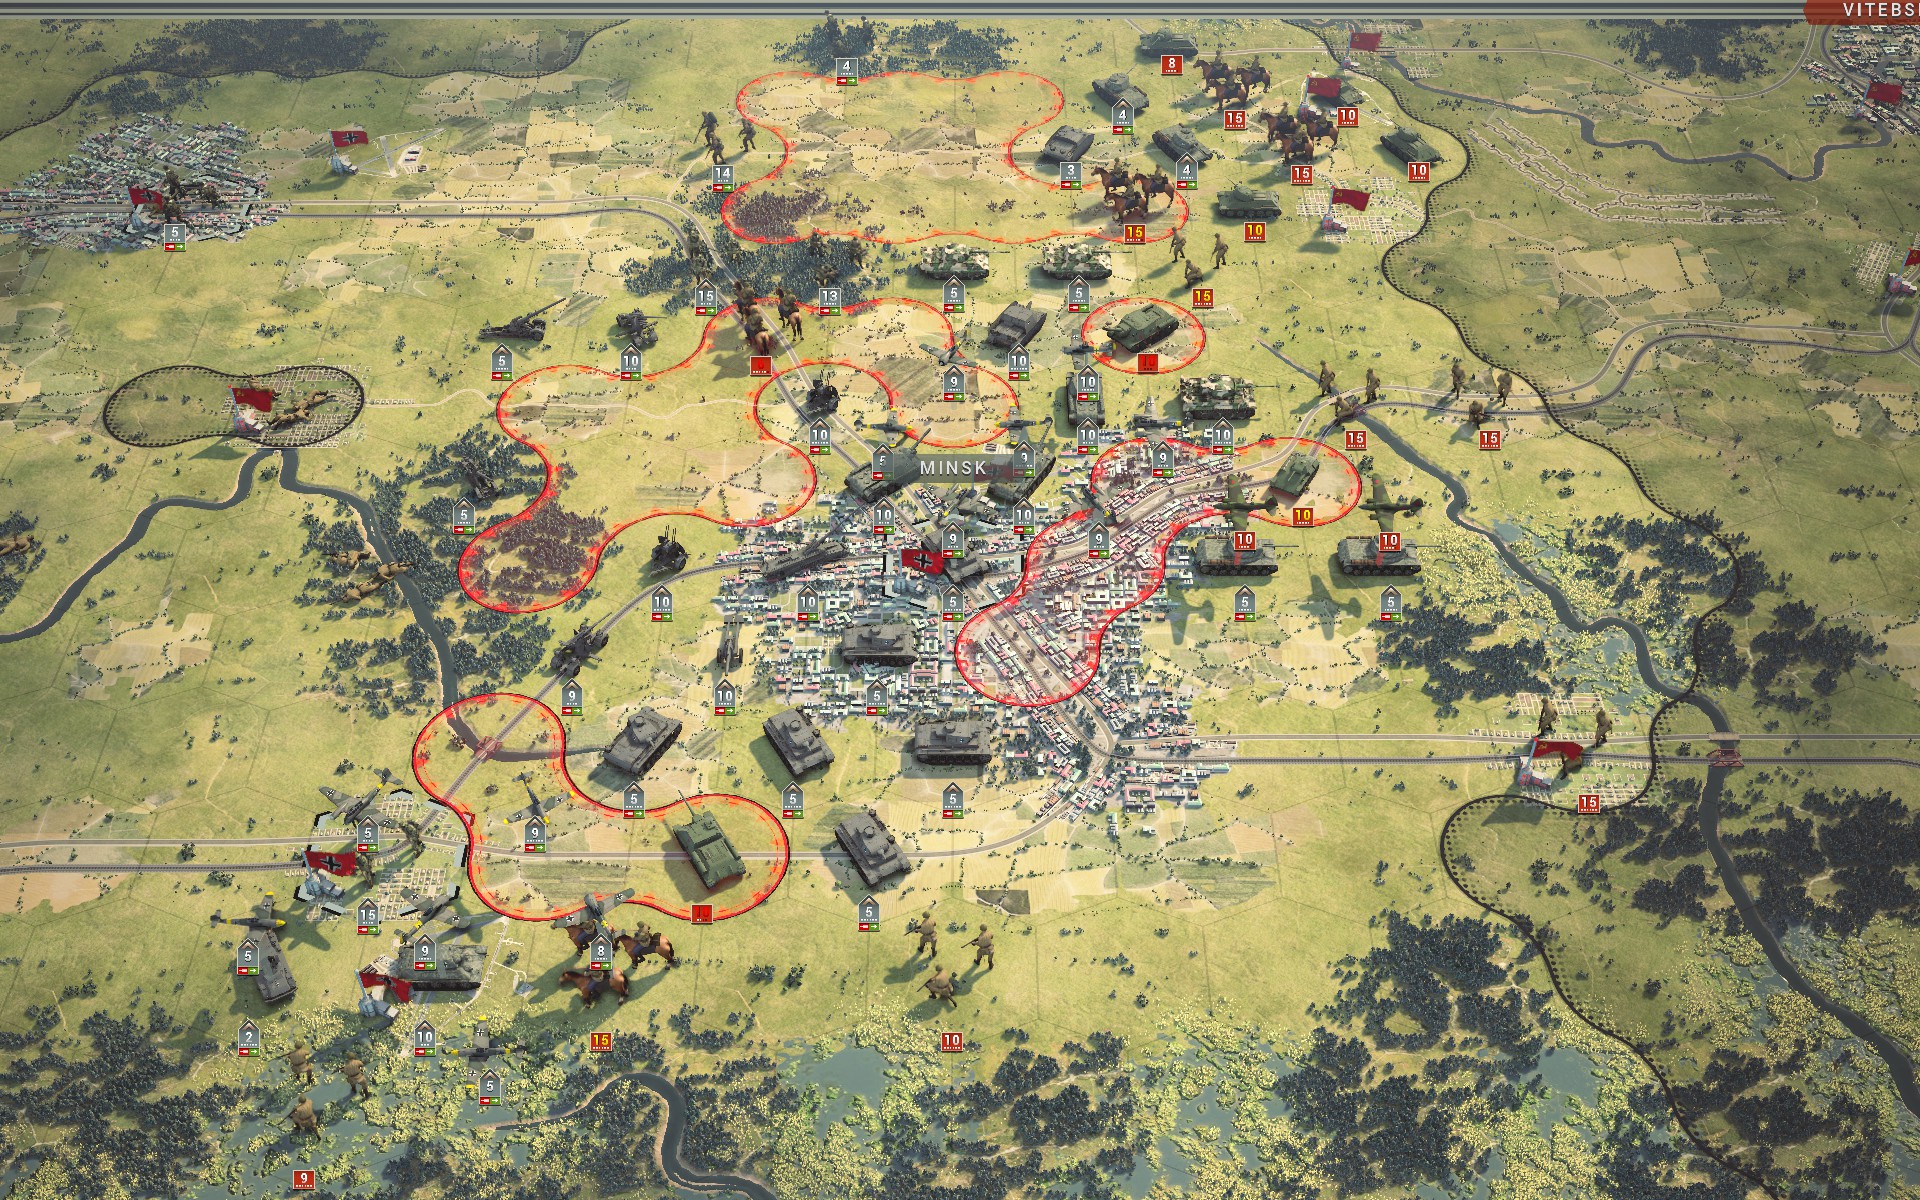
Soviet forces reinforce, allowing me to consolidate my hold on Minsk.
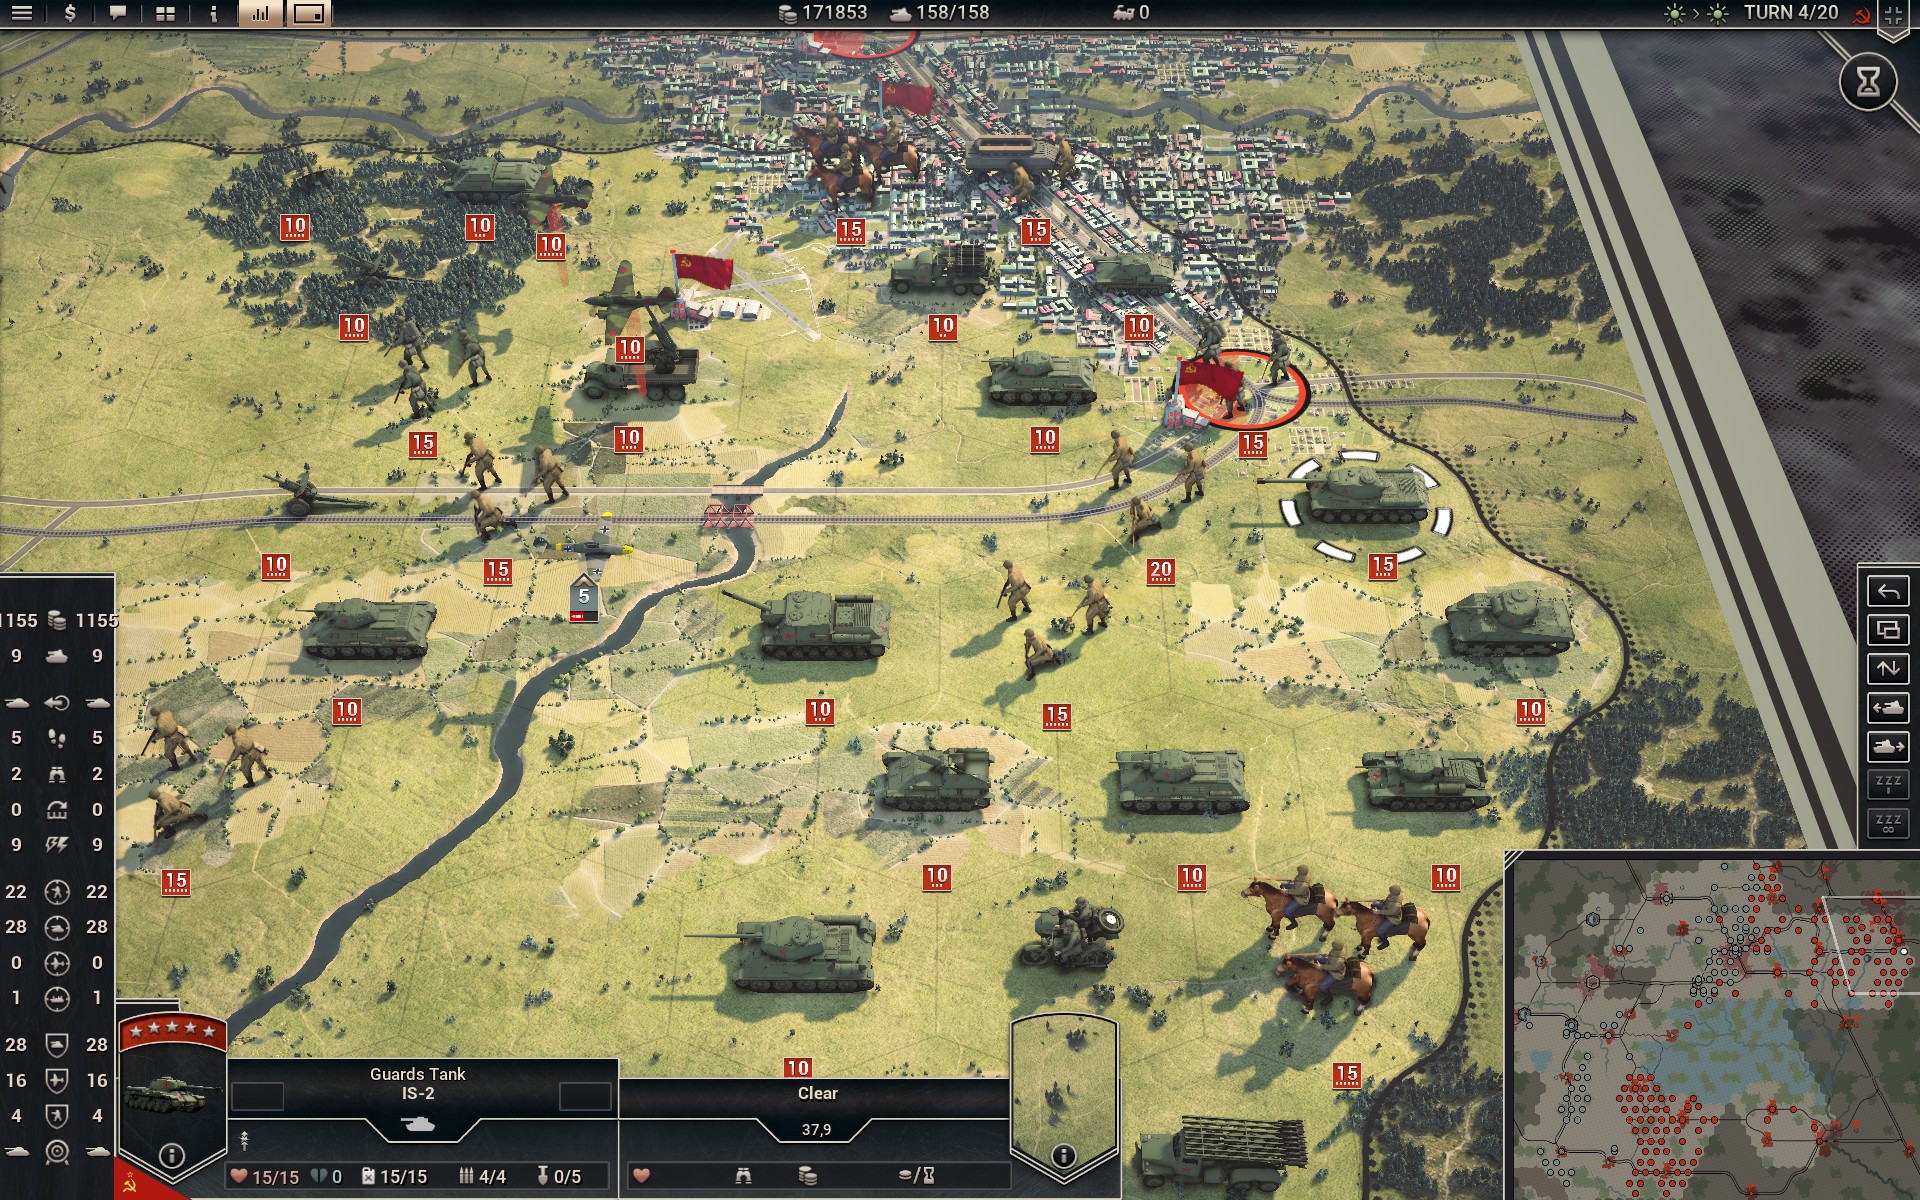
Now that is a monster -- a 5-star 15-strength IS-2. I will have to keep track of that one.

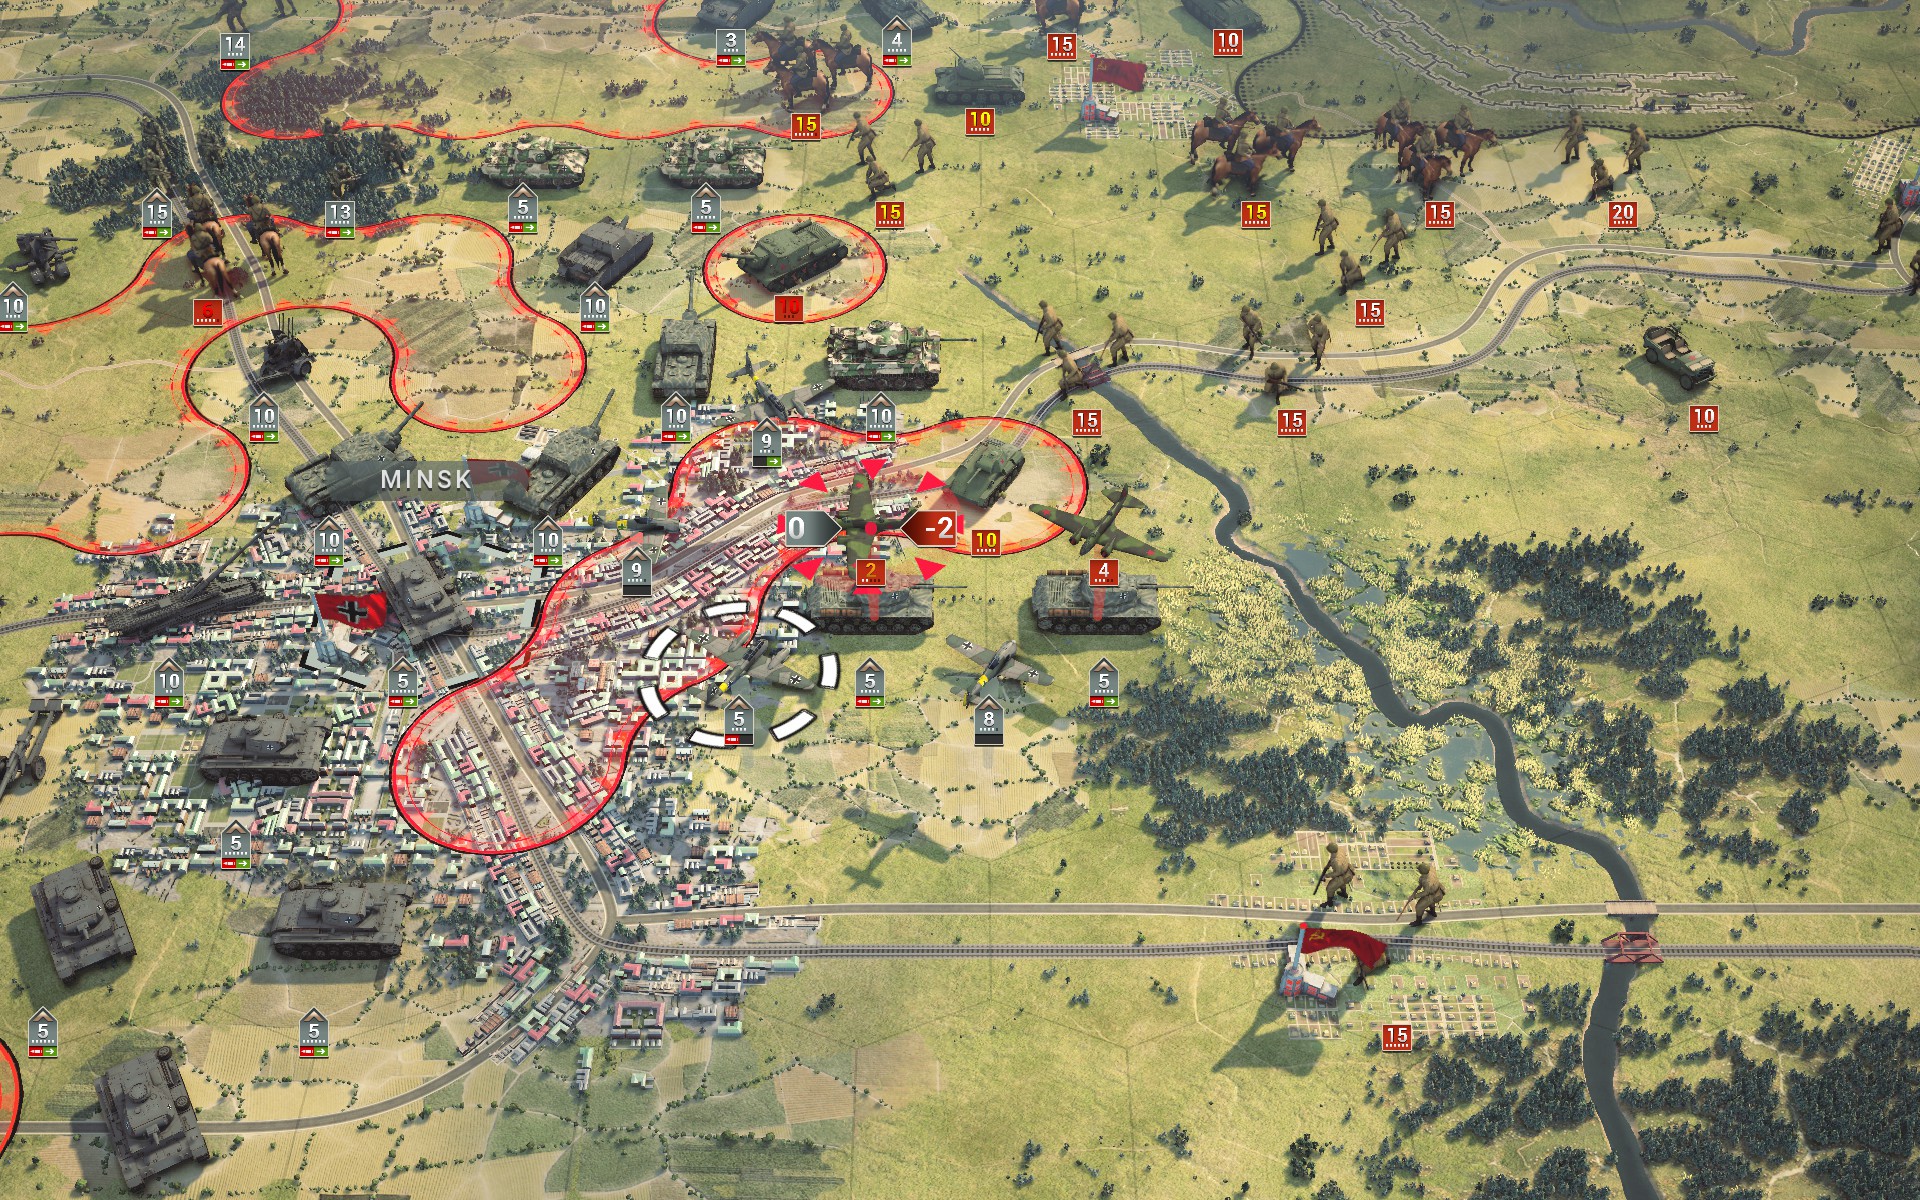
The Luftwaffe engages the remaining Soviet aircraft in range of Minsk, including the ones stationed at Smolensk.
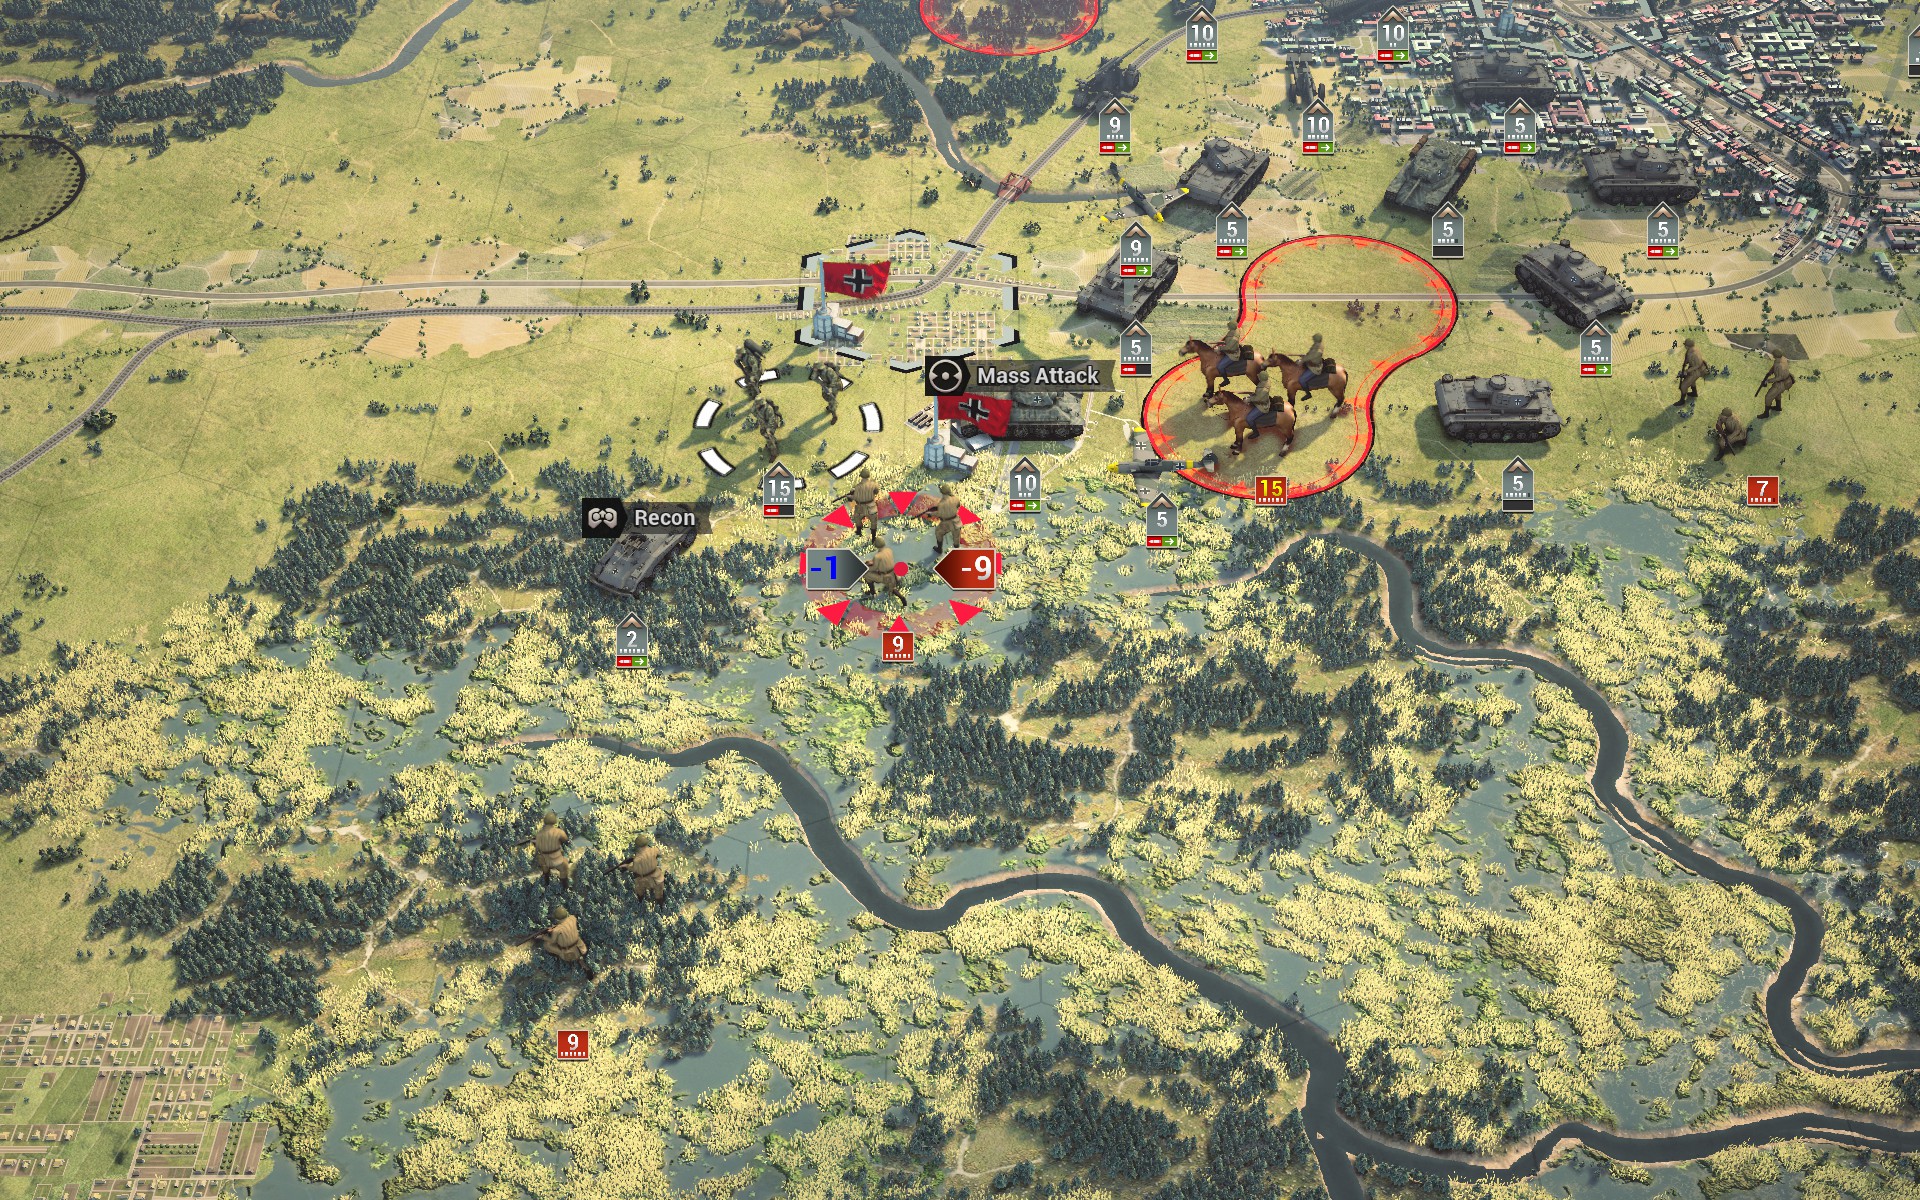
The Bridgeburners clear out the Partisans near the airfield at Baranovichi.
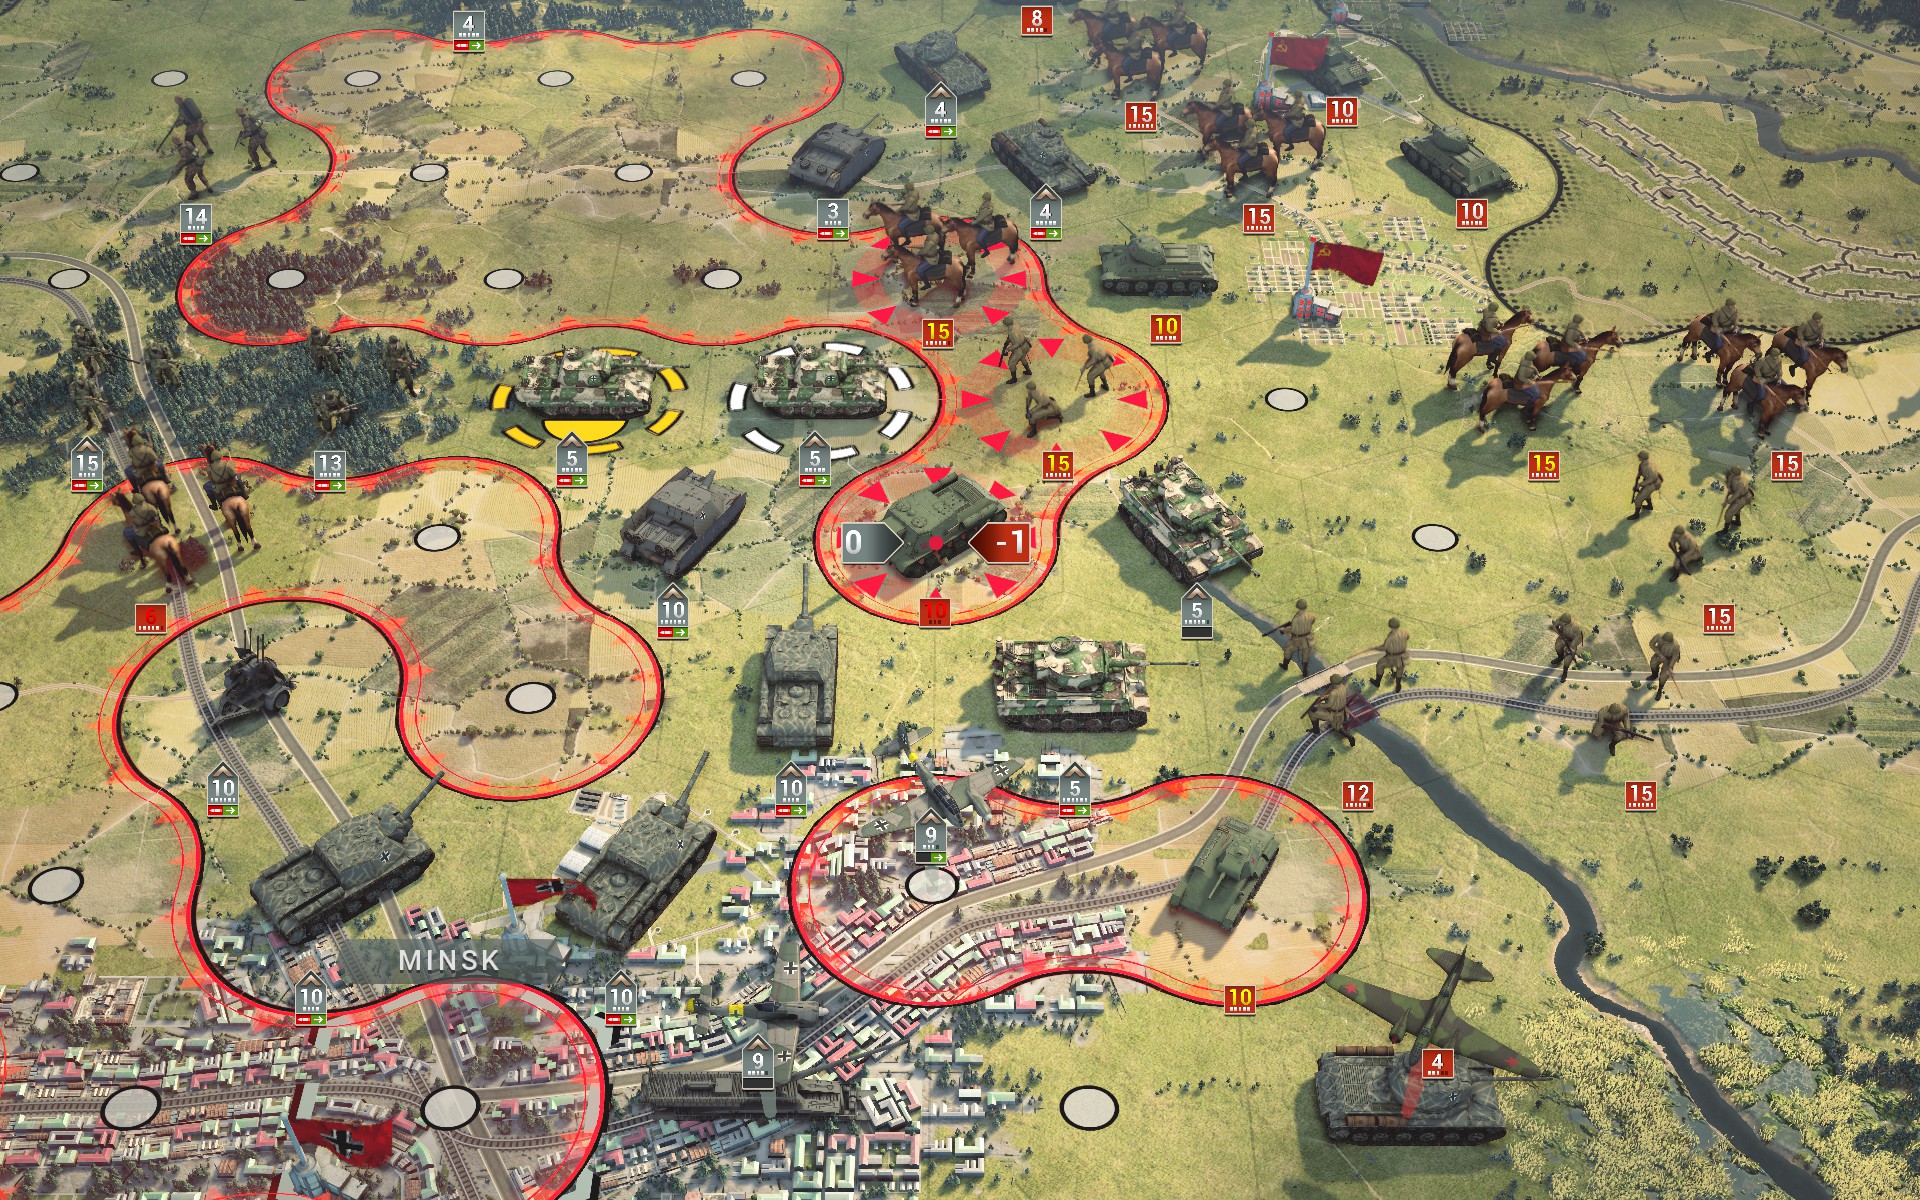
A detached Panther A captures the ISU-152.
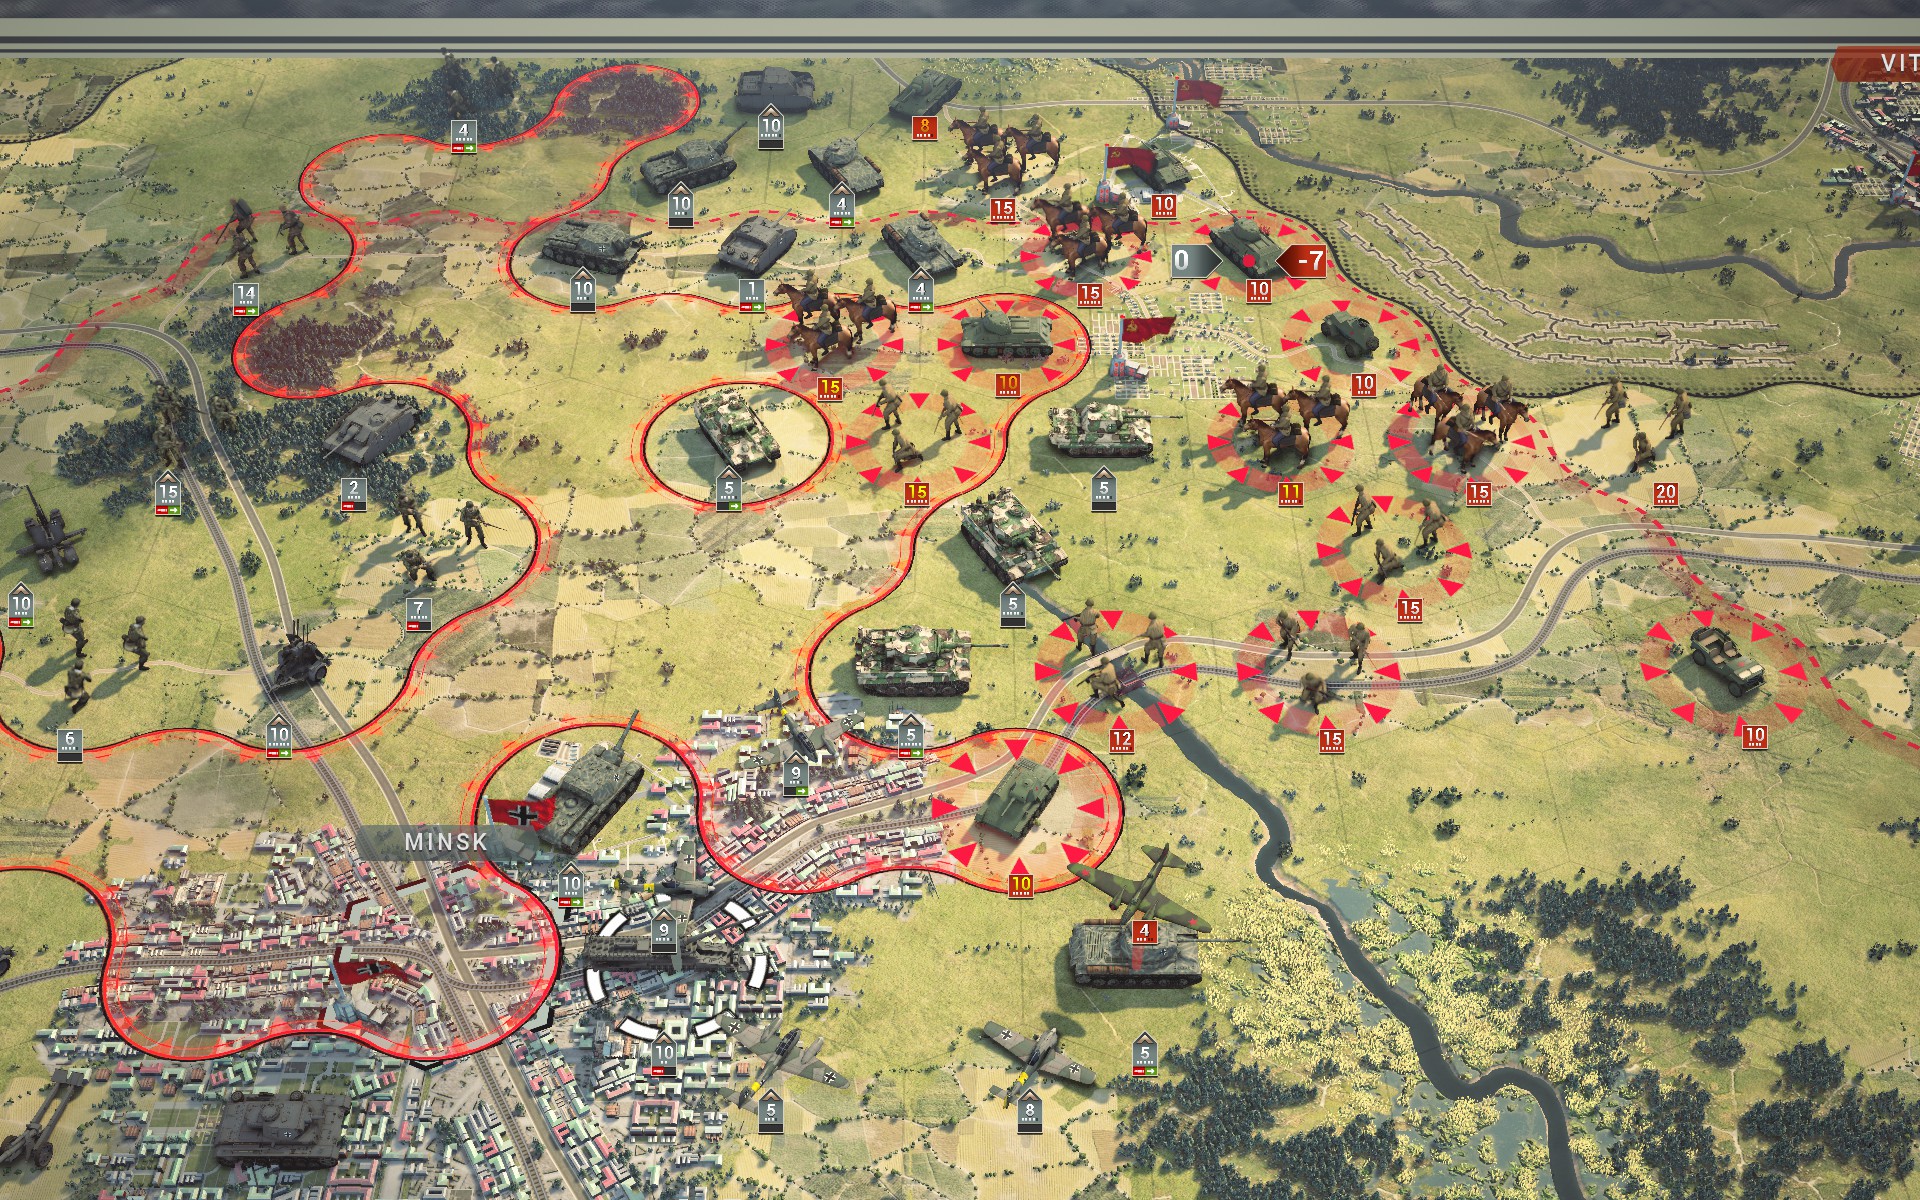
Gustav opens fire on a T-34/43 to pin it in place.
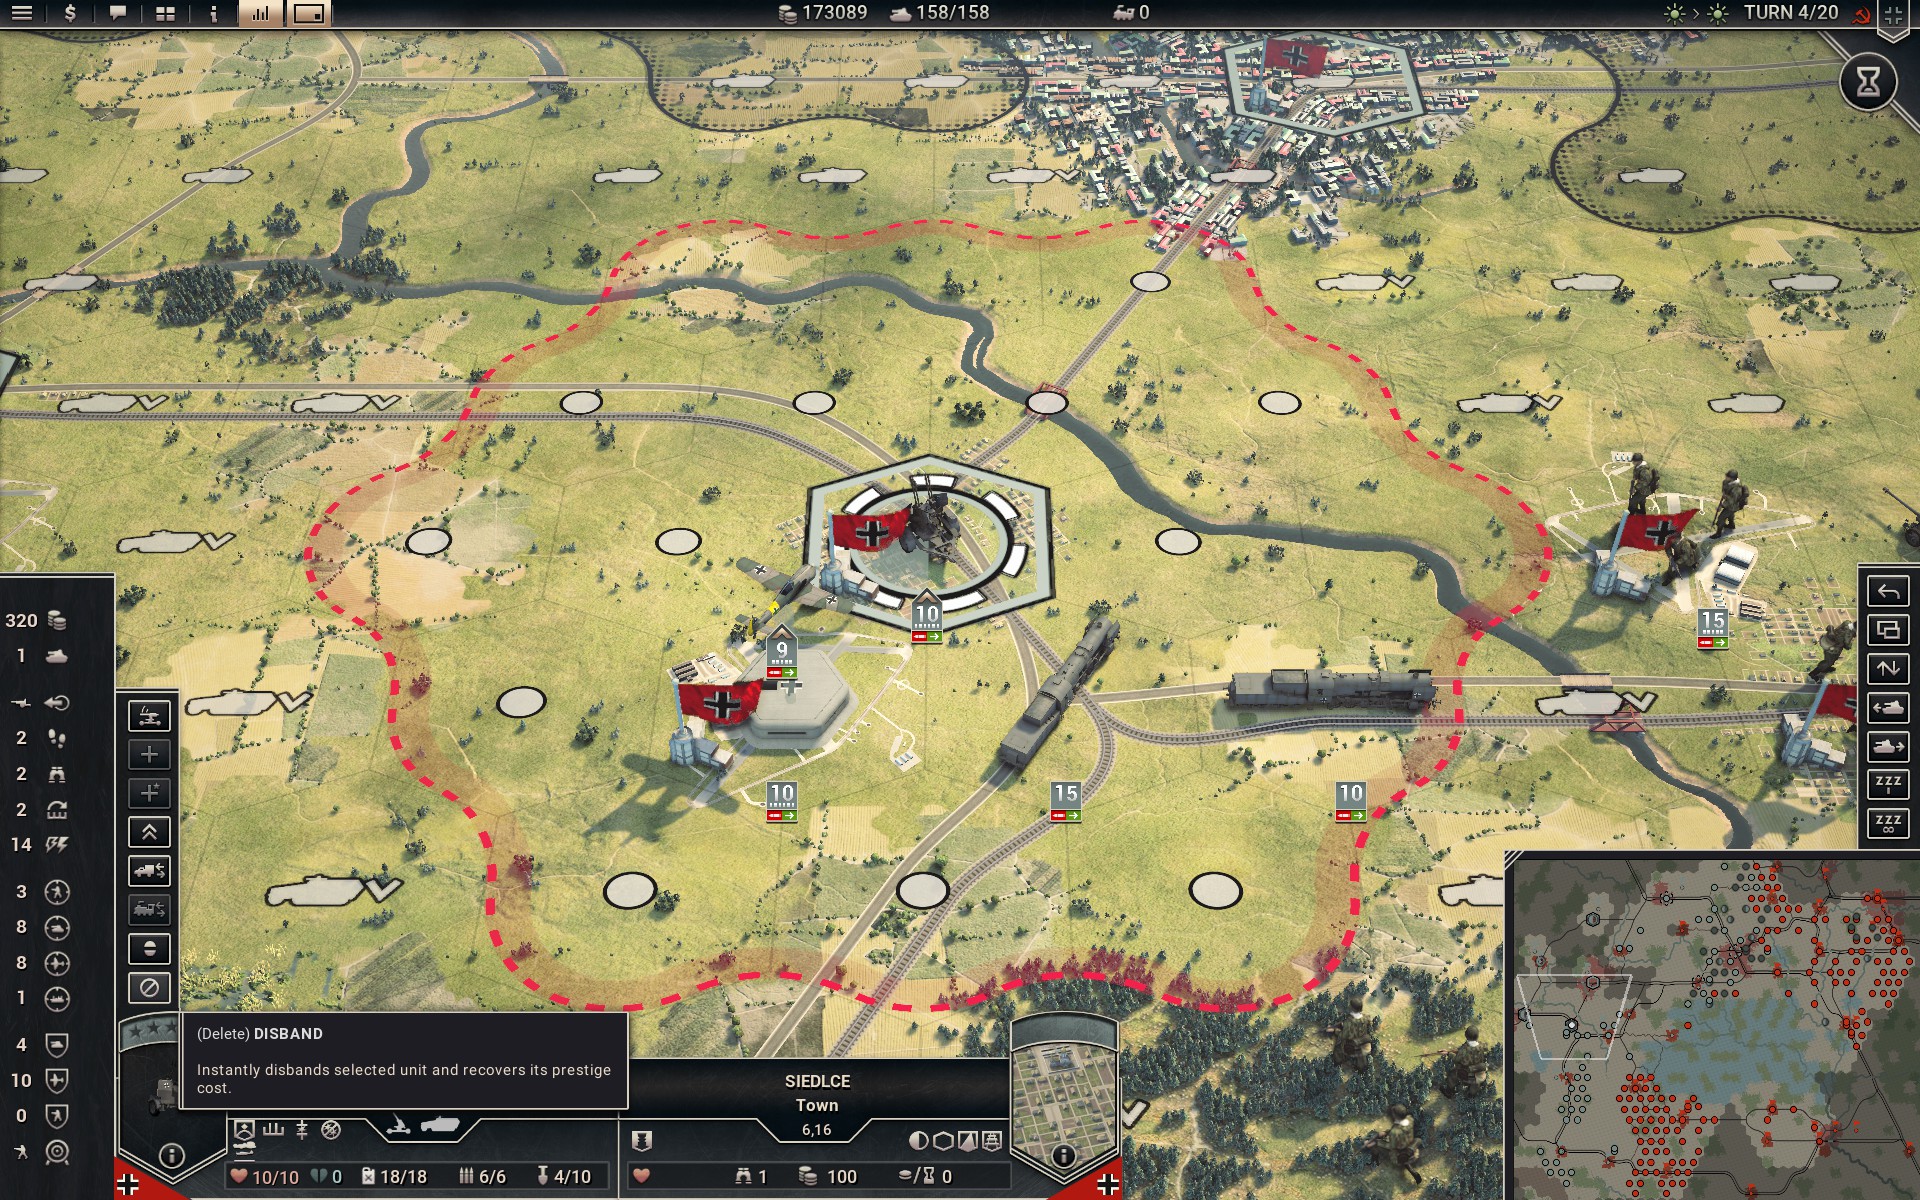
With nothing for them to do, I begin disbanding the extra AA guns.
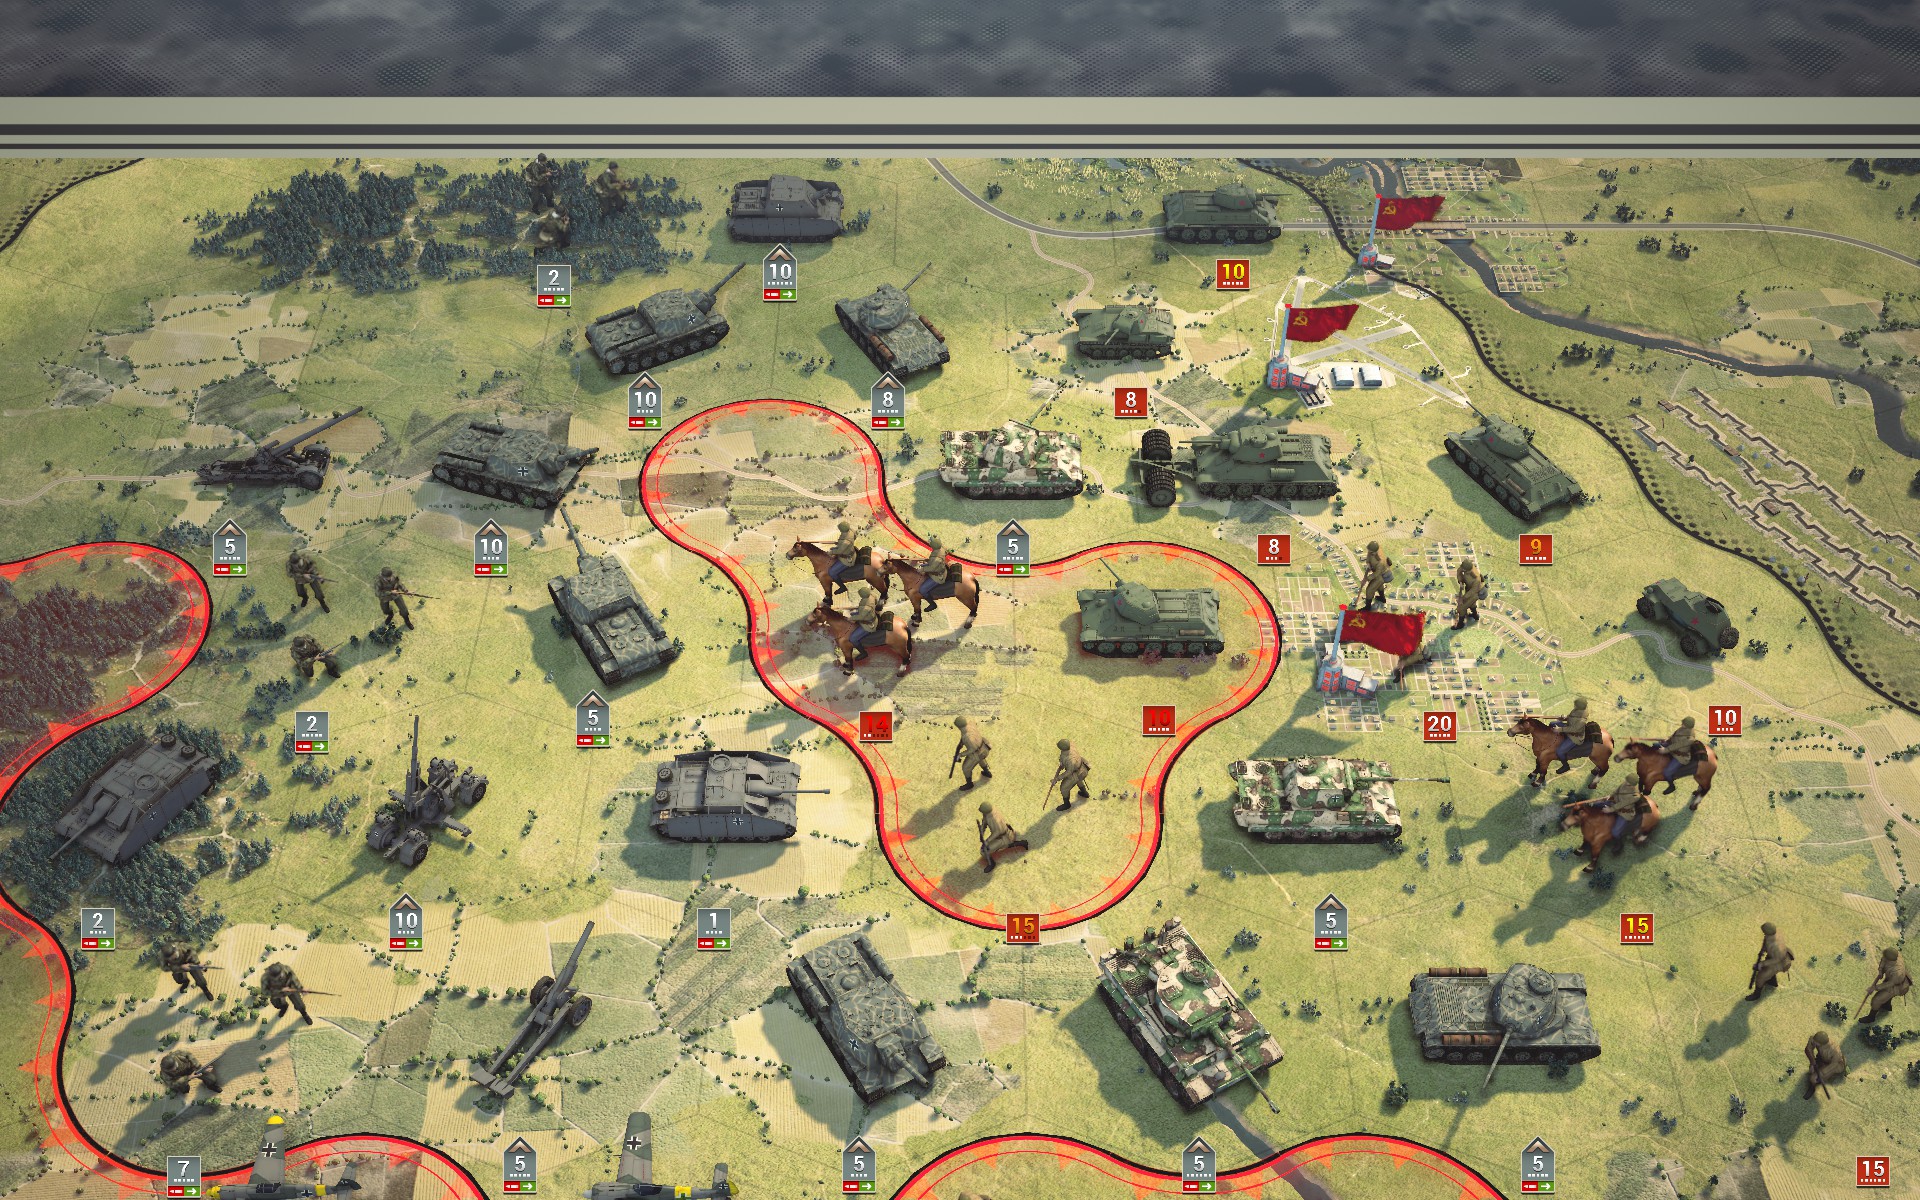
Much of the Soviet armour is now suppressed, so I begin to plan the capture of these units before reinforcements arrive.
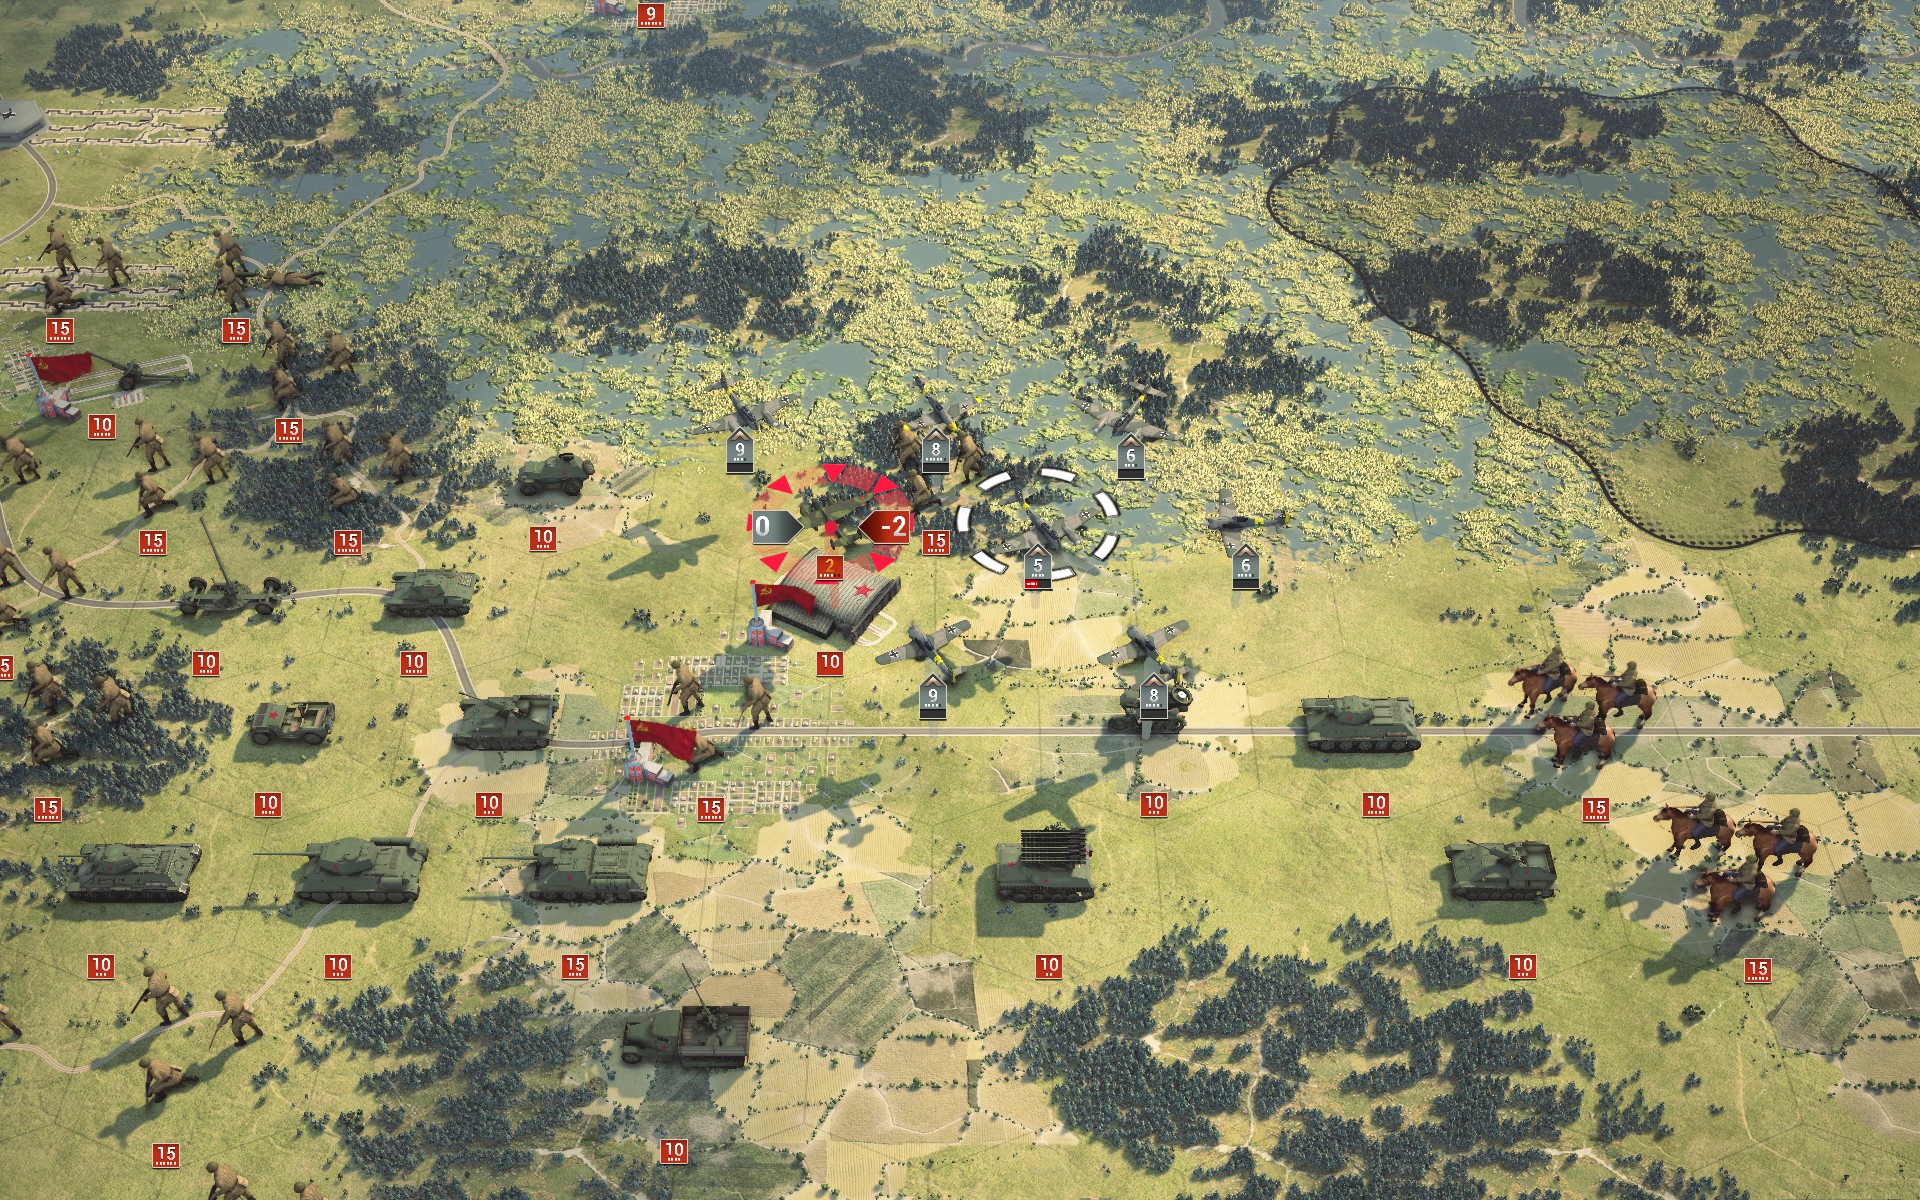
The Luftwaffe brings down the last Soviet aircraft near Rovno, thus denying the Red Army any air support in the south.
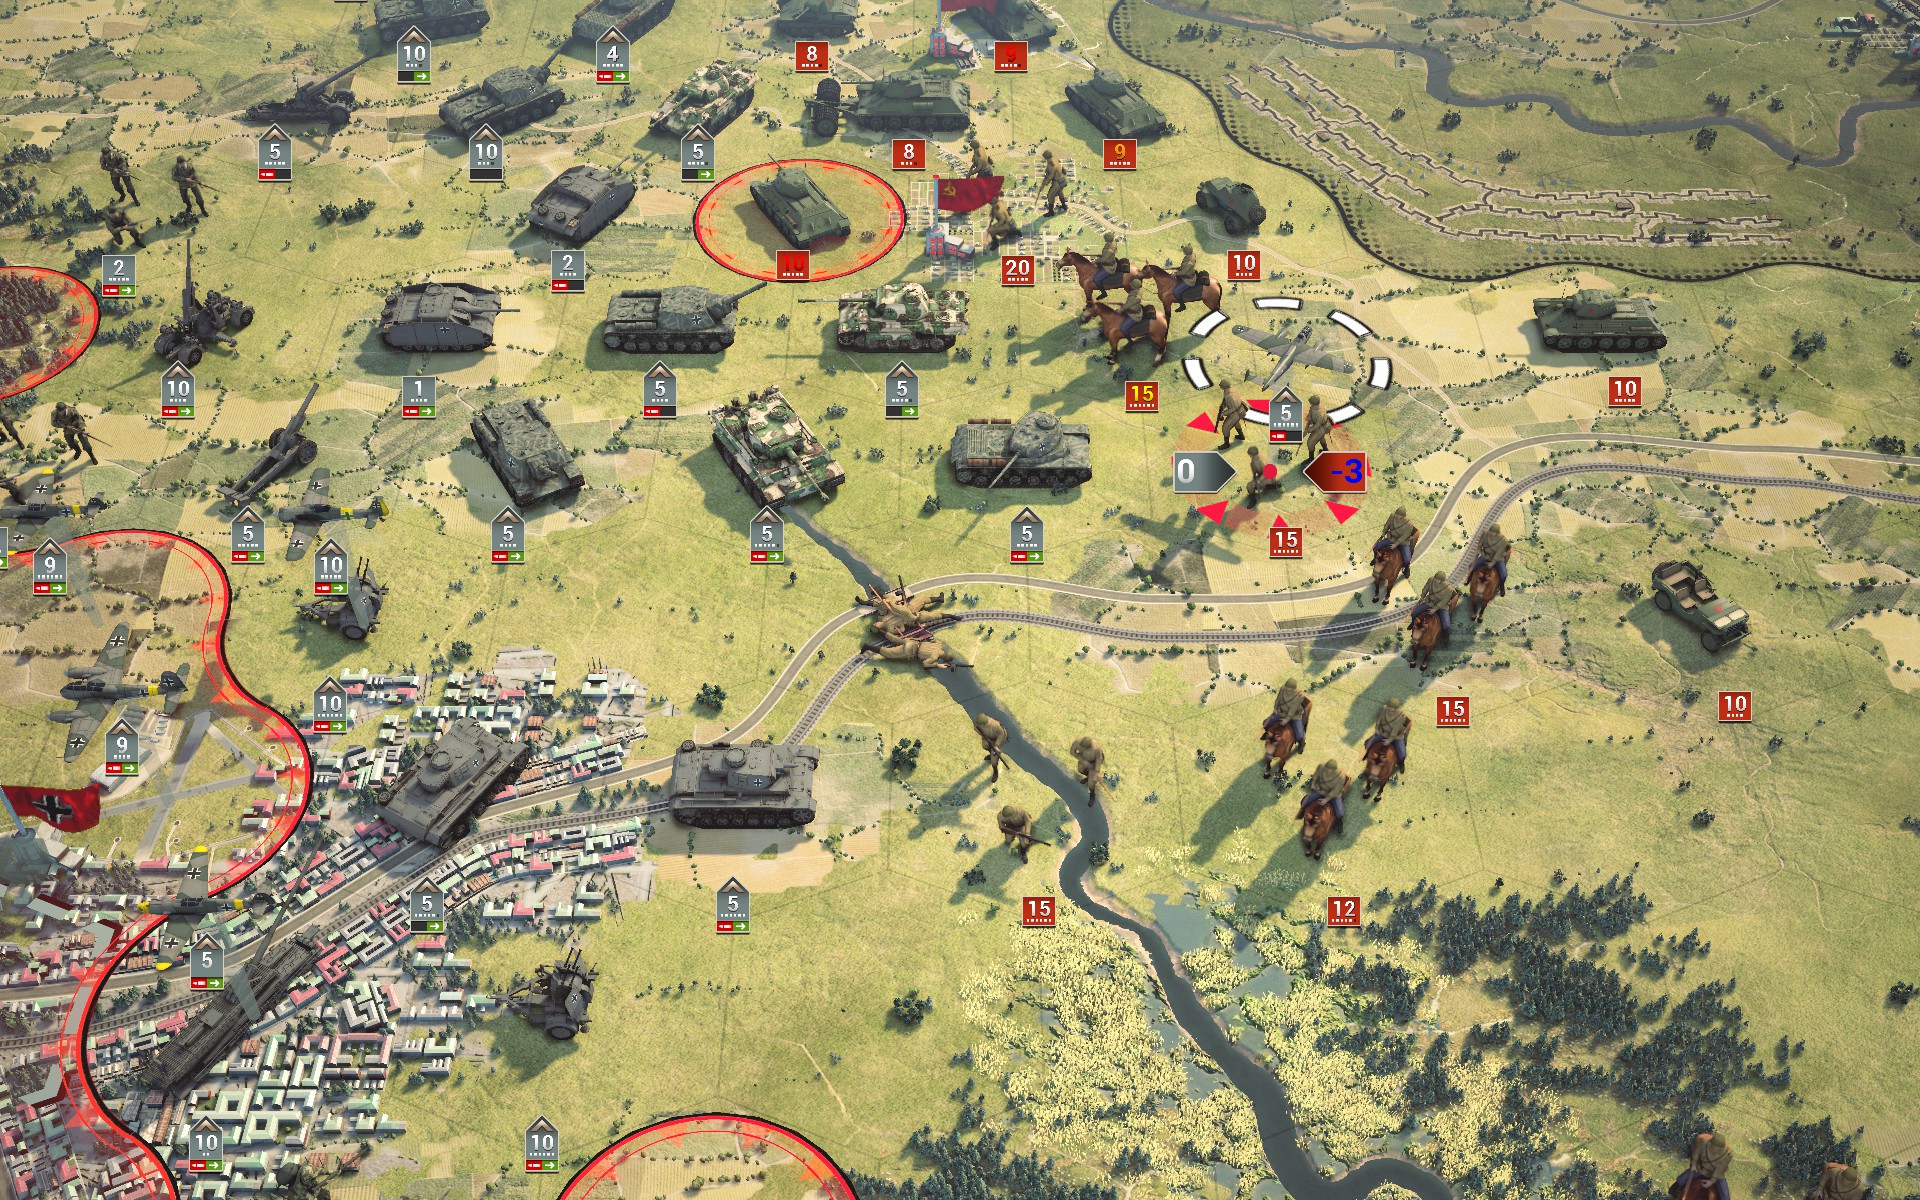

Gustav and a detached Do 217E weaken the Regulars enough for a detached IIIN to force them to retreat, allowing the heavy Panzers to move in. The presence of an entrenched AT gun complicates matters, but I should still be able to capture most of the units.
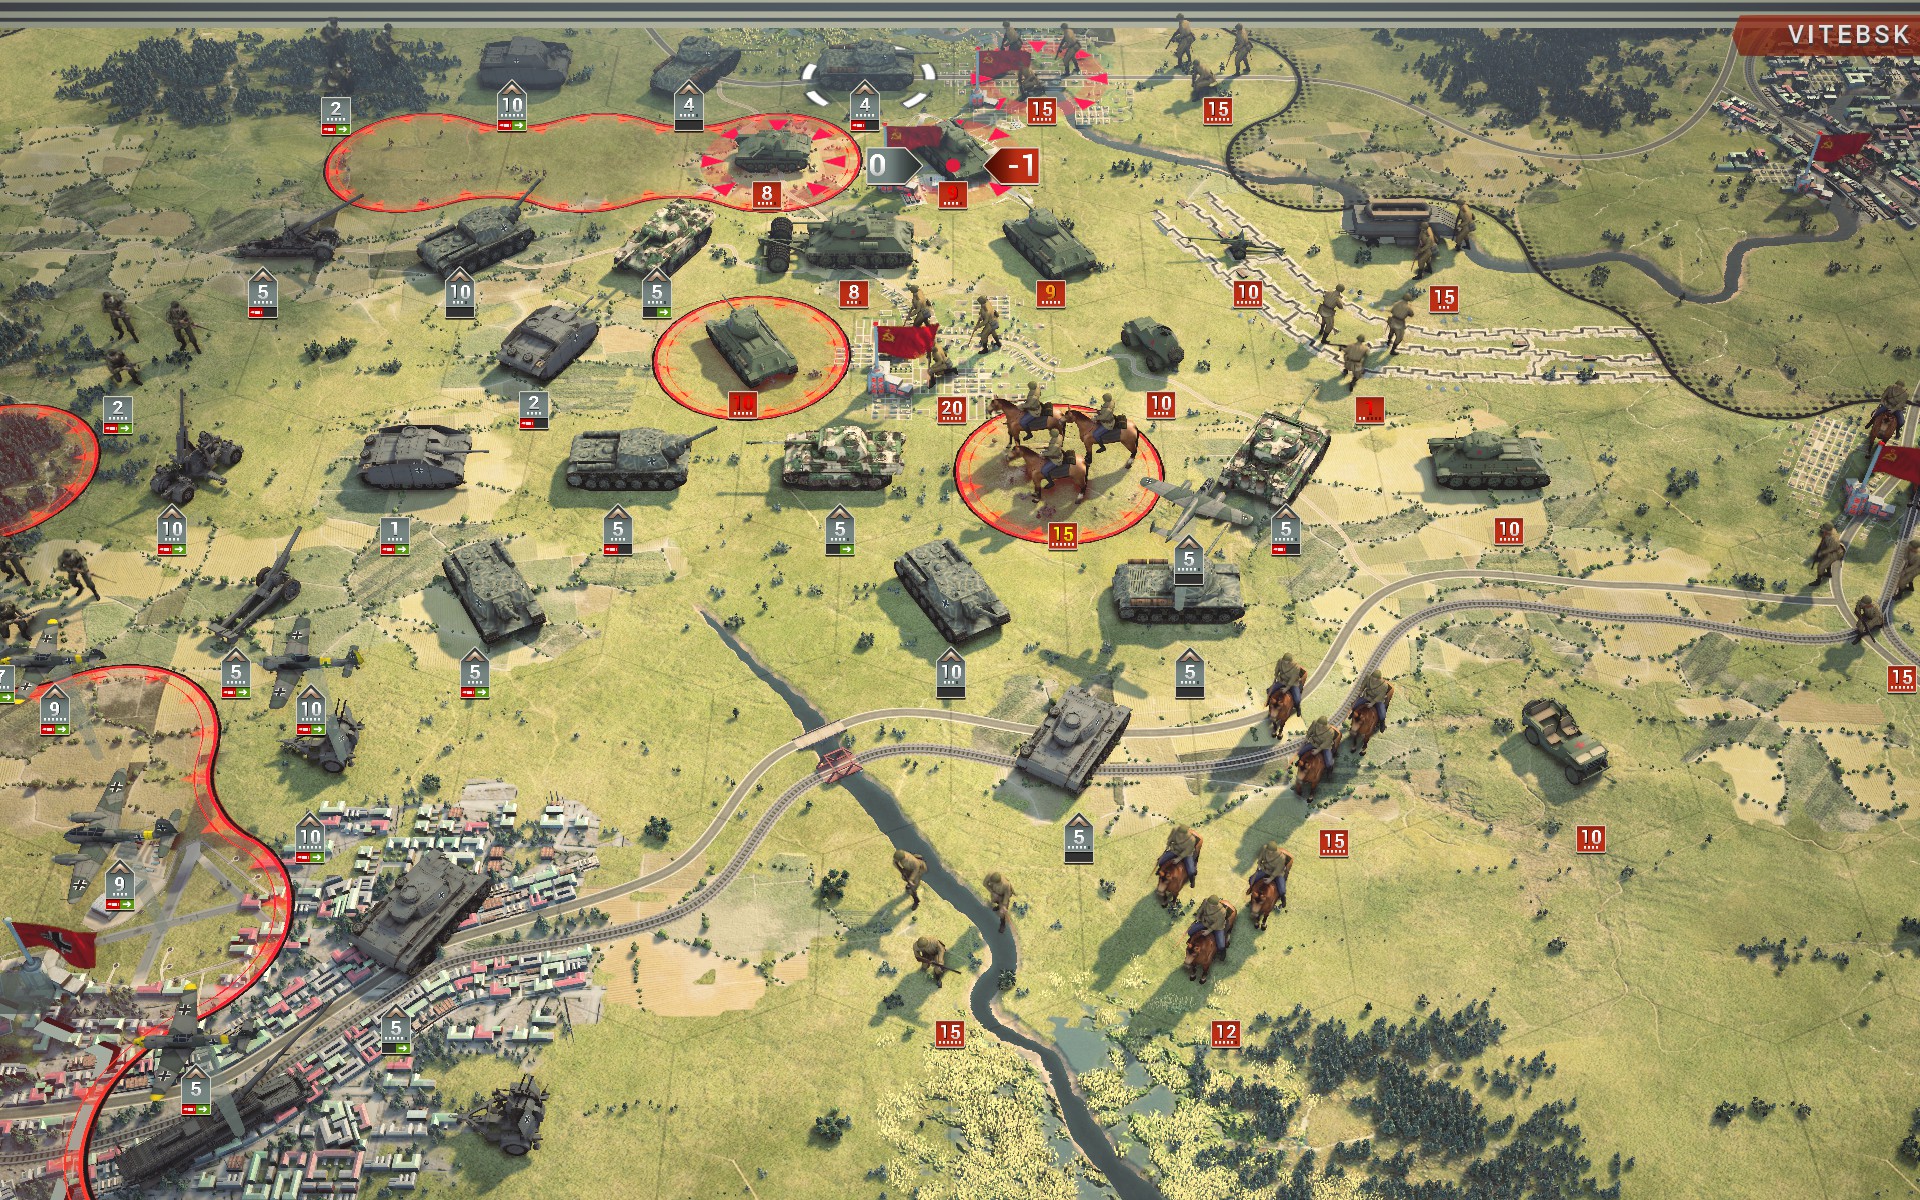
The IS-1 executes a pincer movement from the north.
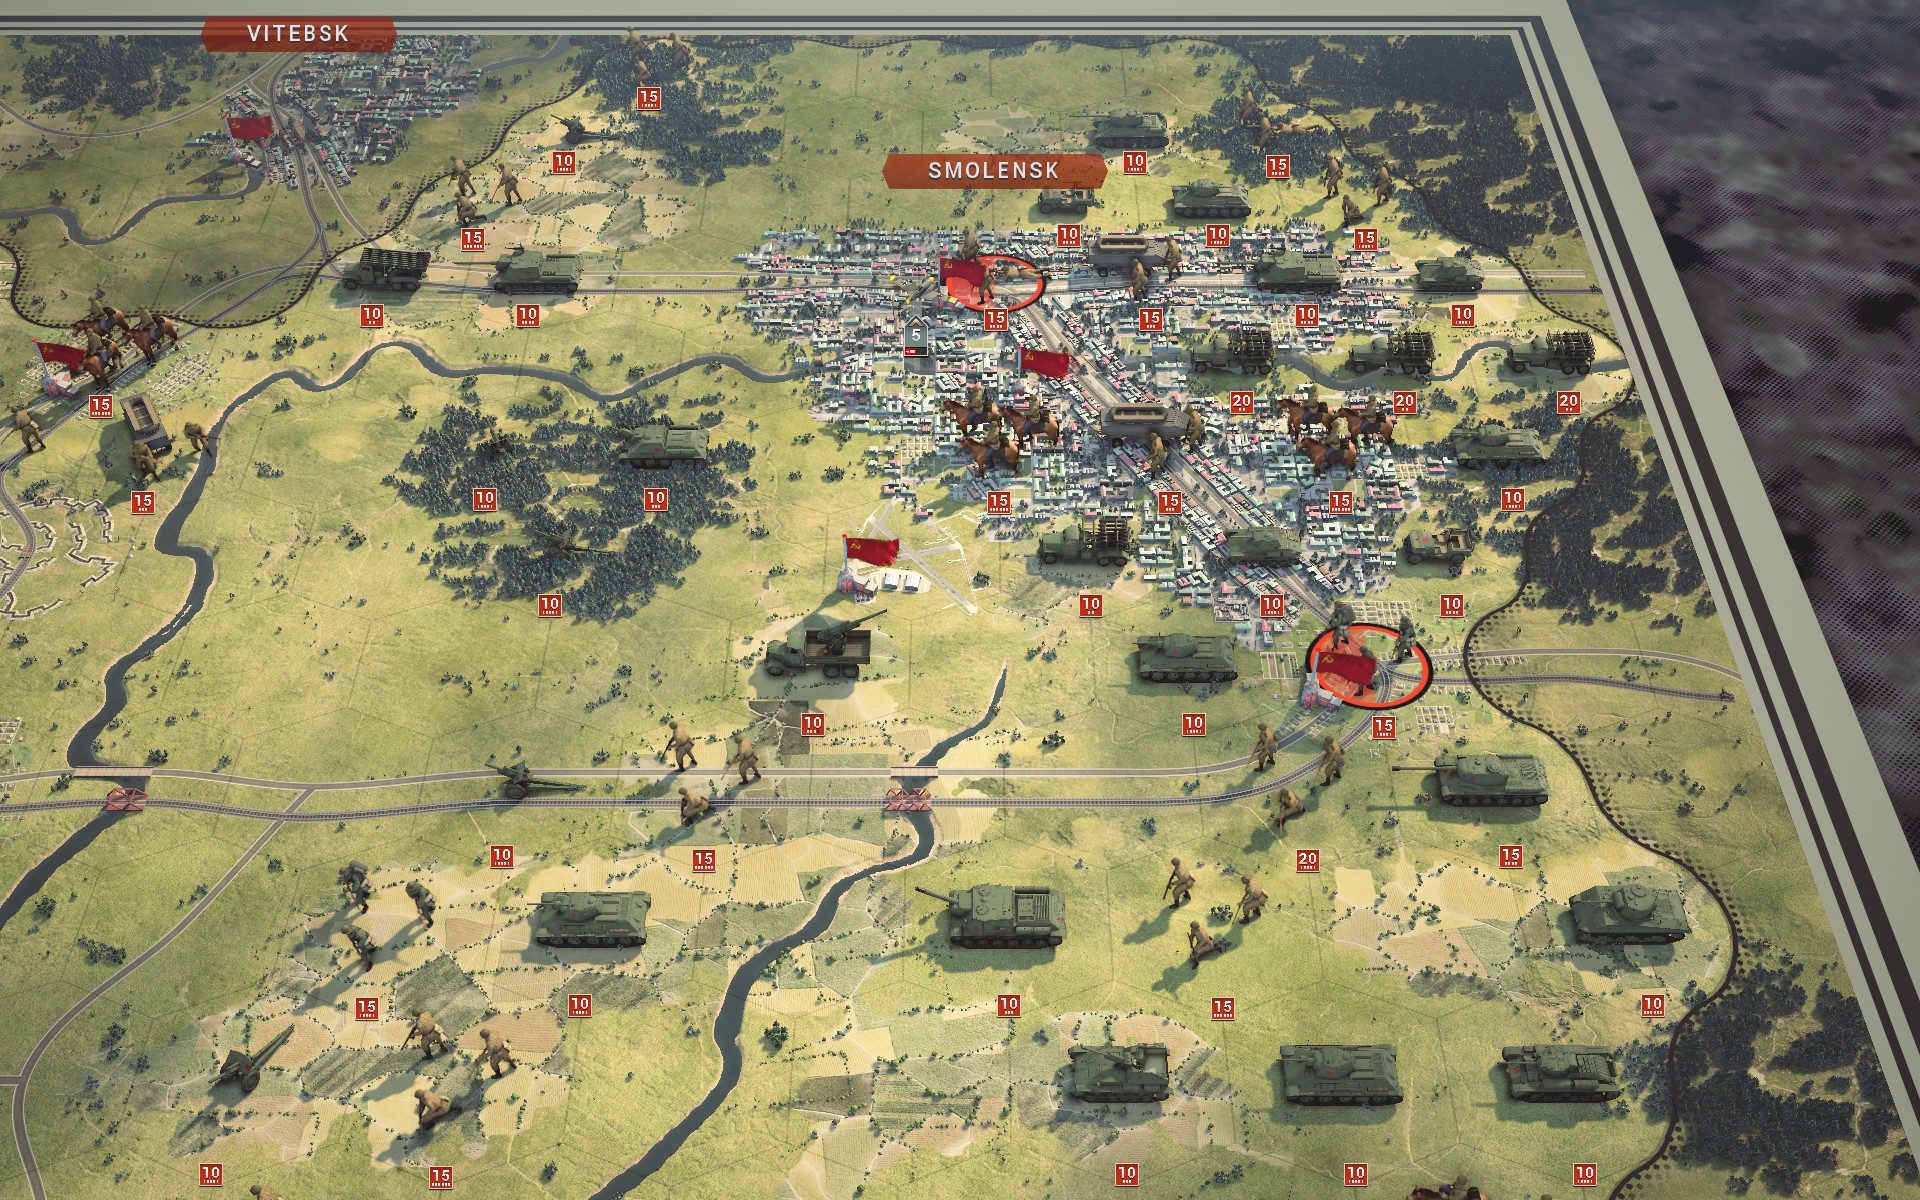
A 5-star 15-strength IS-2, a number of T-34/85s and now three 20-strength BM-31 Katyusha batteries; with Rapid Fire 2X that's 40 rockets per salvo, so I will have to keep my Pioniere far away from those. This could get ugly.
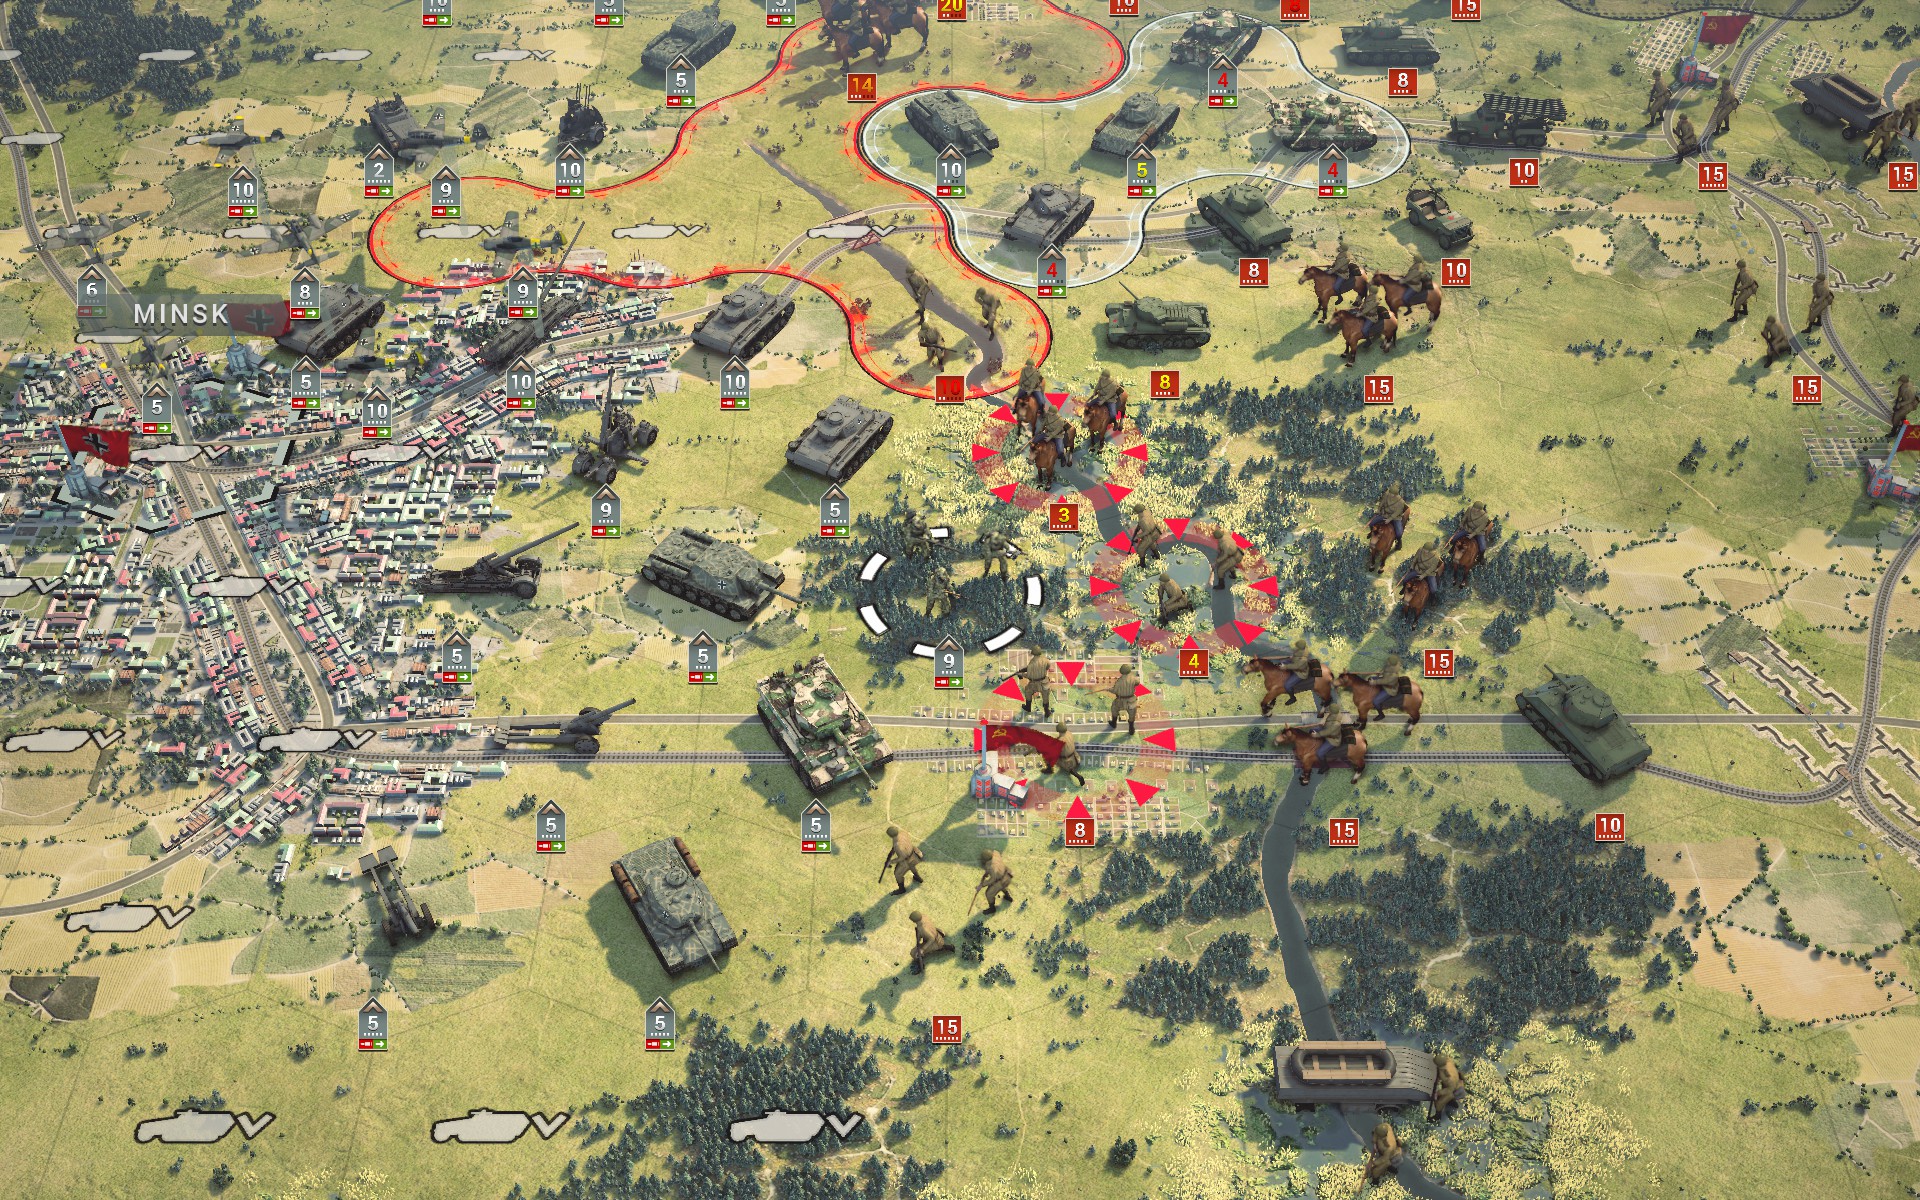
The Crimson Guard repel three battalions with some help from an SU-152, but the staggering losses appear to have had little effect on Red Army.
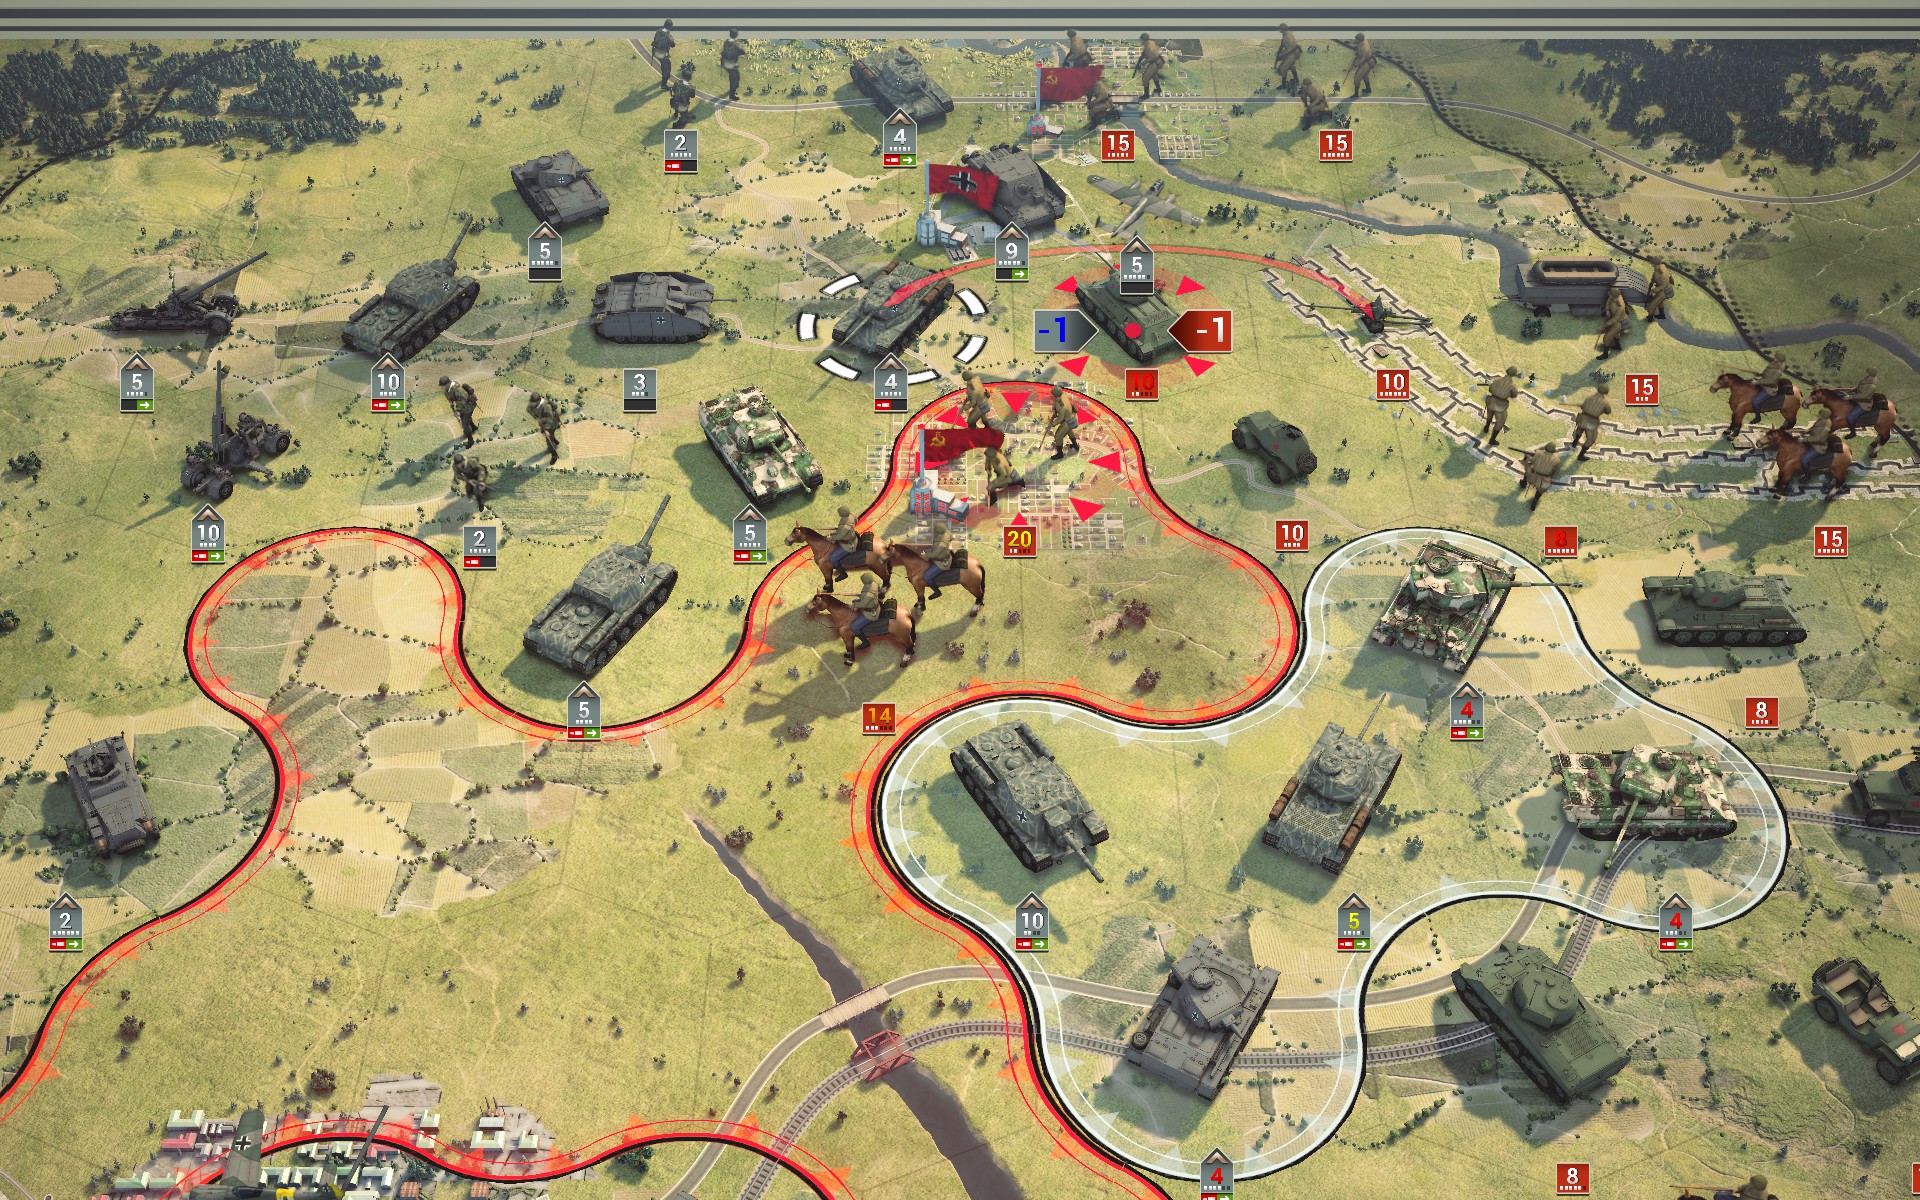

Two detached IS-1s capture a T-34/43 by forcing it into the river.
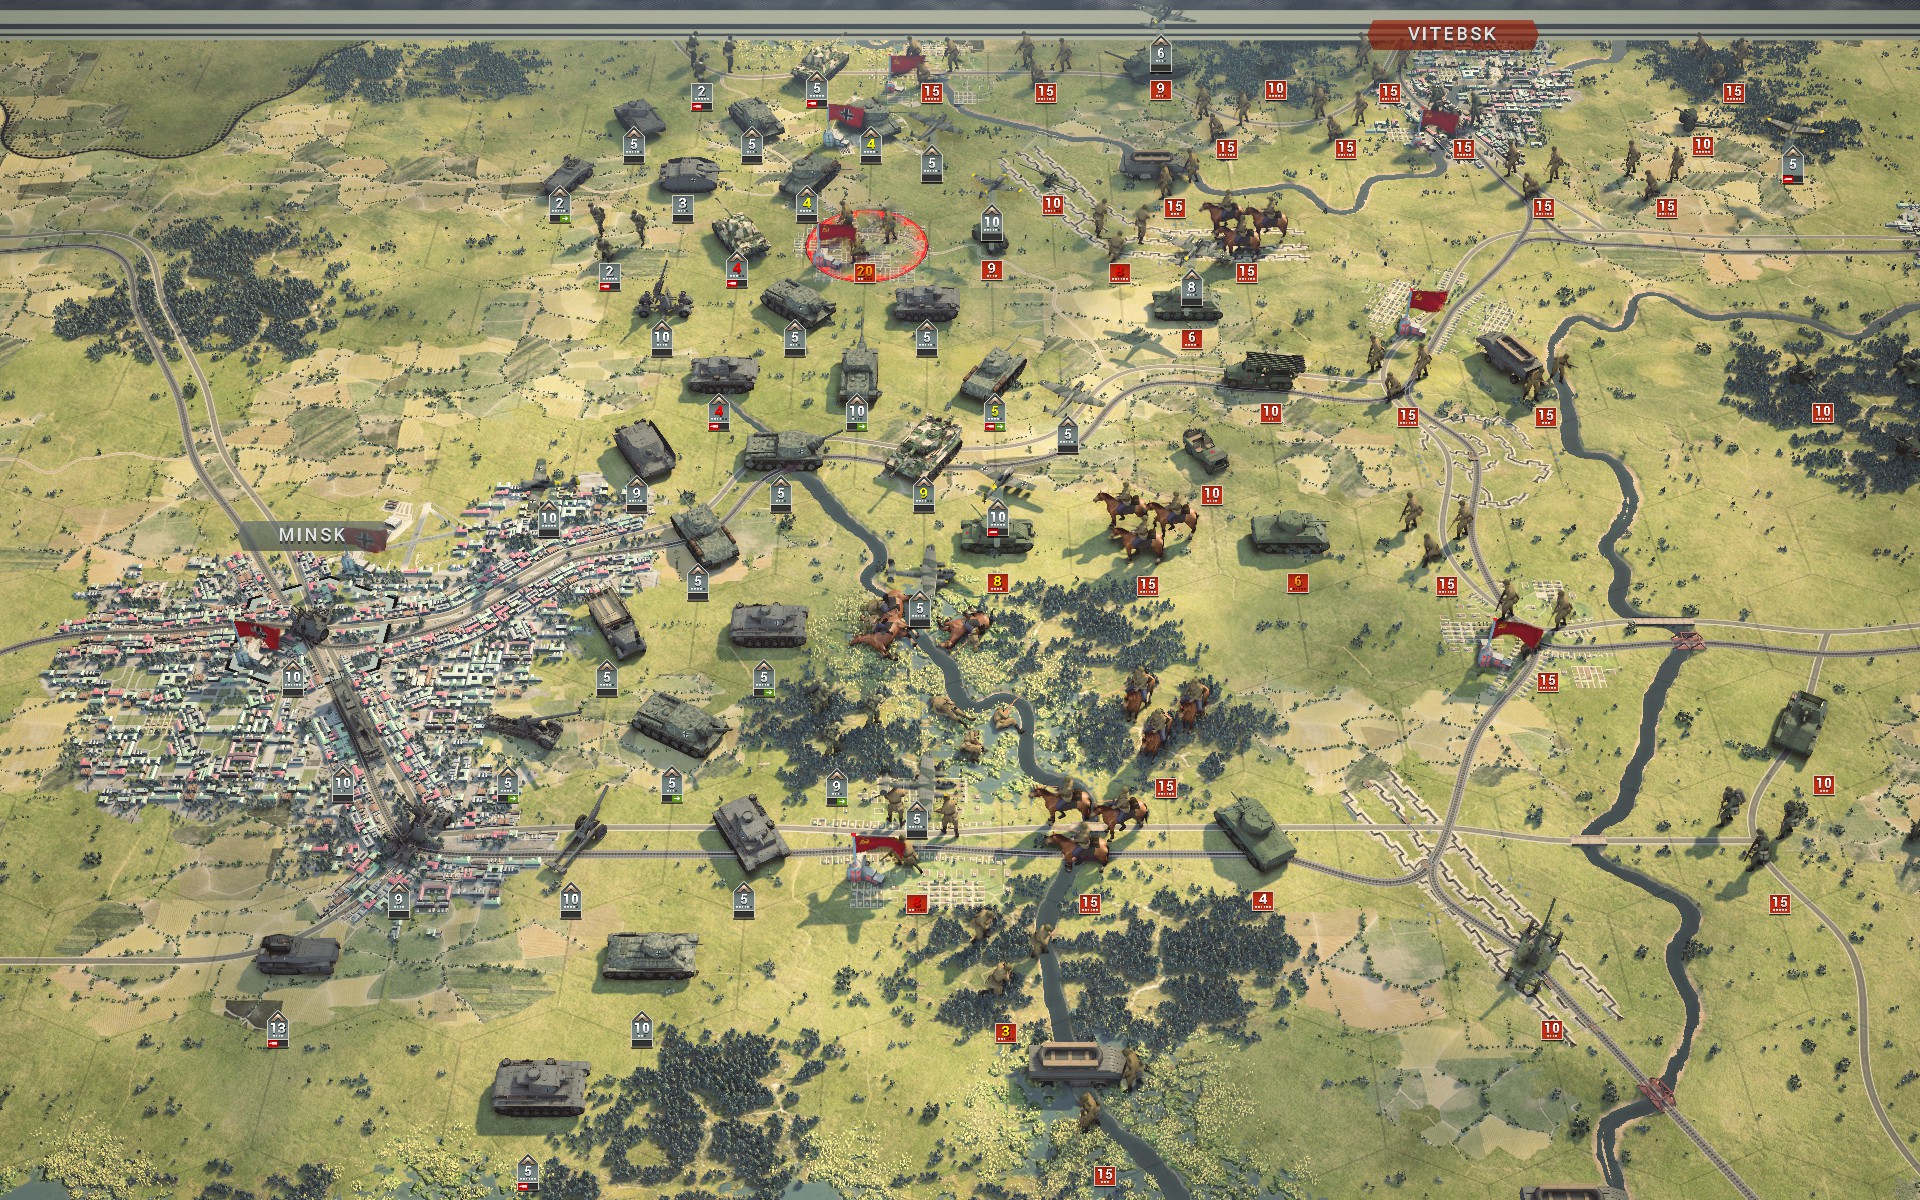
My forces successfully capture most of the Soviet units north of the Berezina, but remain unable to secure Bobruysk due to the Crimson Guard coming under heavy attack. I considered bringing up the Bridgeburners to support them, but as that would expose the southern flank I decided against it; the town isn't an objective.

More Partisans spawn behind my lines, and I belatedly realise why the briefing advised against deploying too far east. To make matters even worse the more powerful elements of the Red Army have begun to advance towards my lines as well.
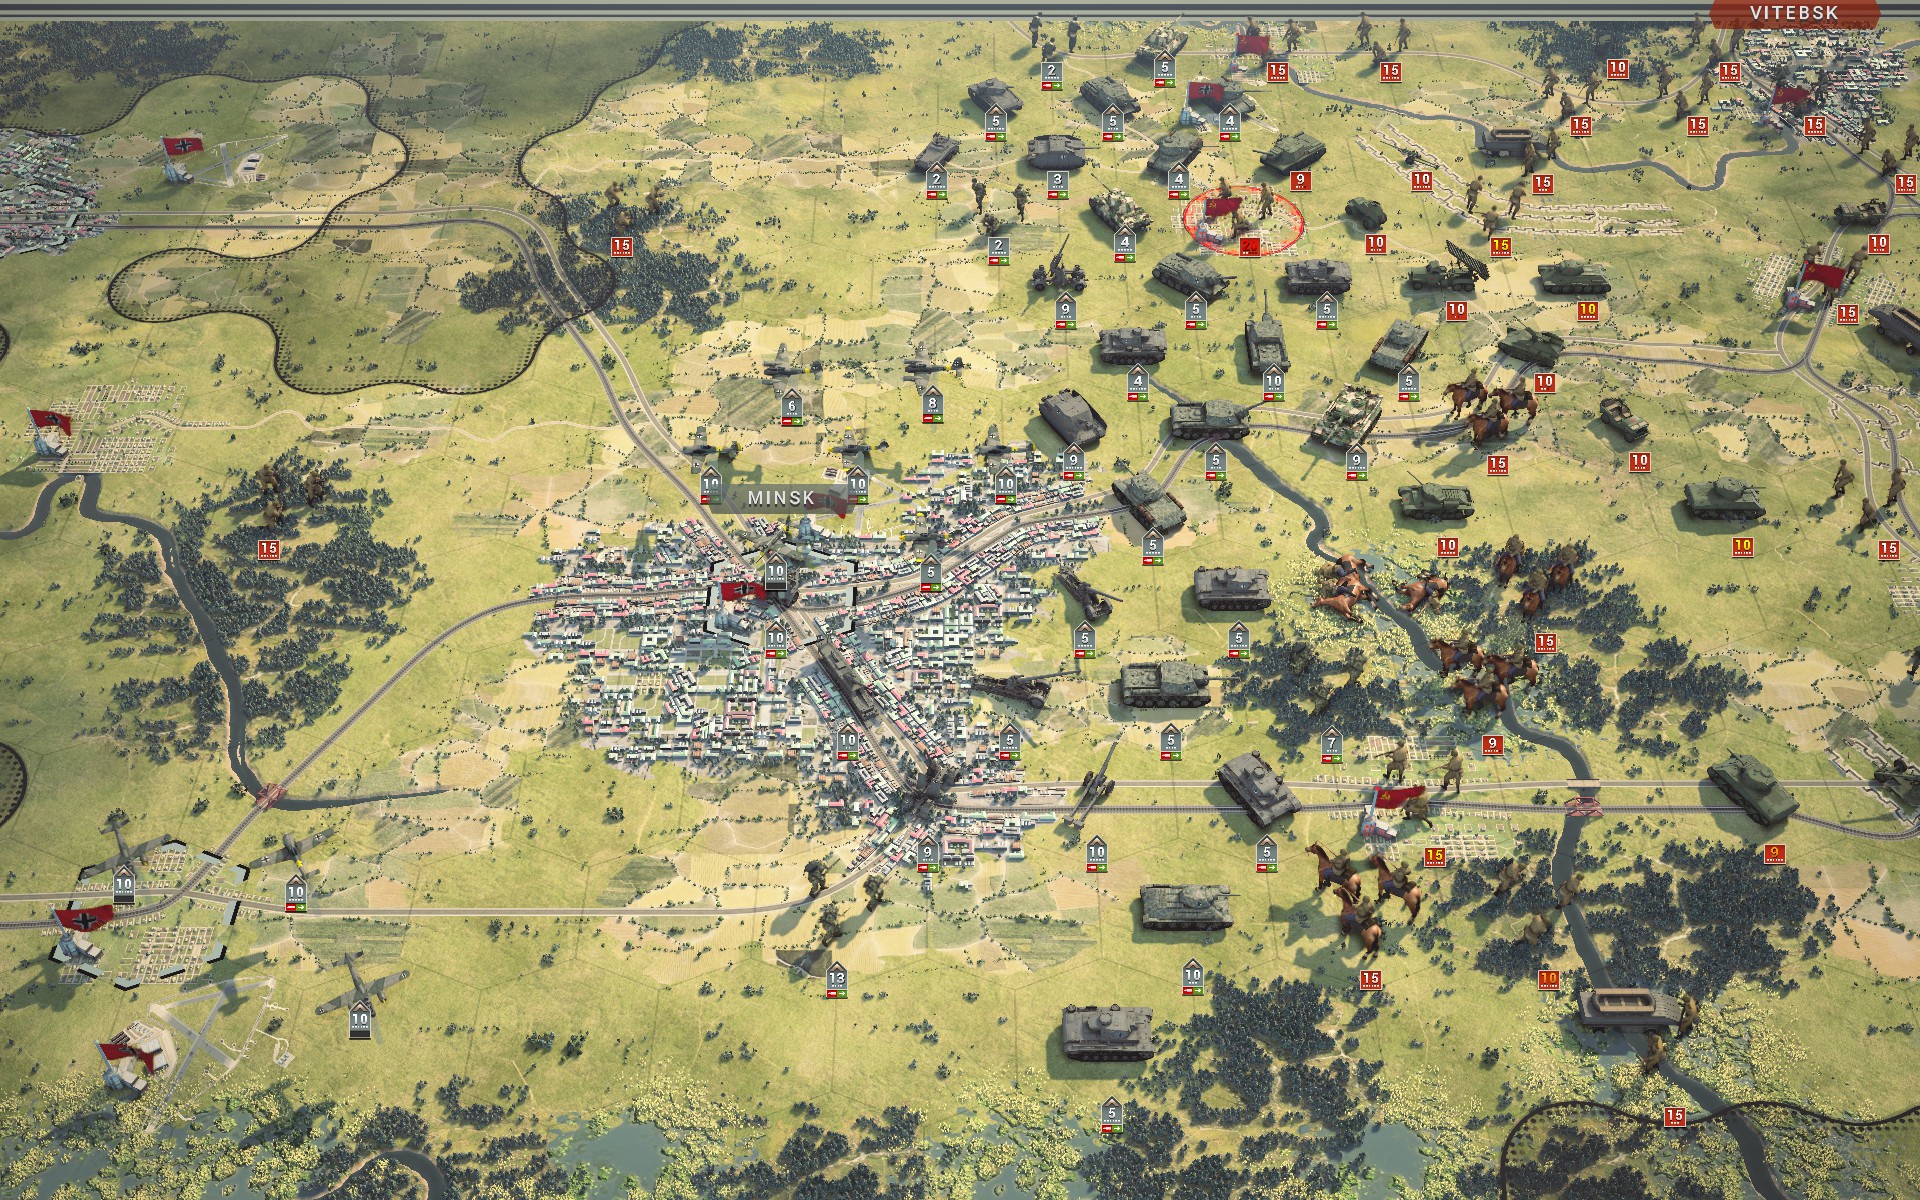
With only a few turns to go, I am forced to change my plans and decide to begin withdrawing my forces immediately -- half the battlegroup will fall back to root out the Partisans and secure the objectives as well as the railroad while the other half will defend Minsk. This will stretch my lines, but I am confident that the heavy Panzers will be able to cope.
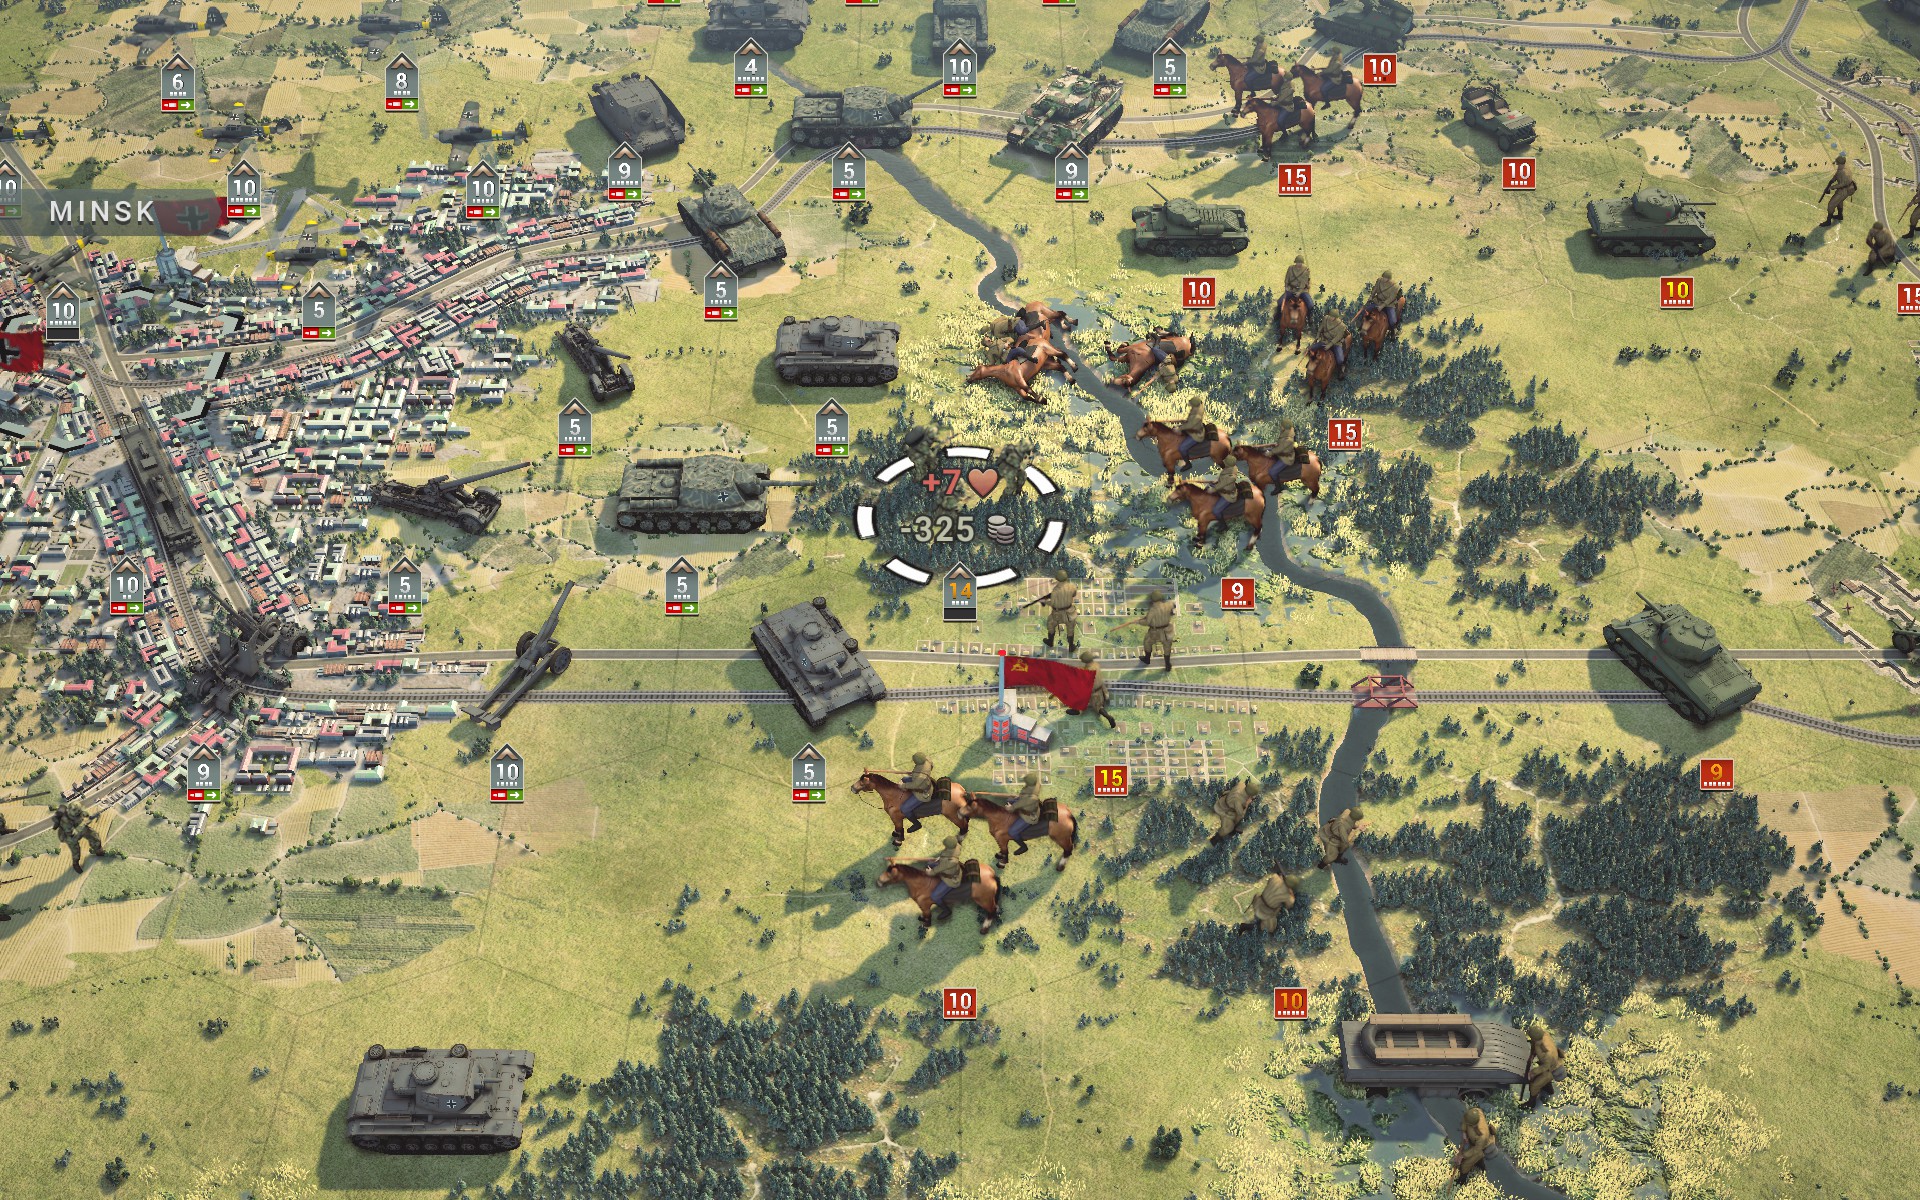
The Crimson Guard have born the brunt of the Soviet assault so far and need to be reinforced.
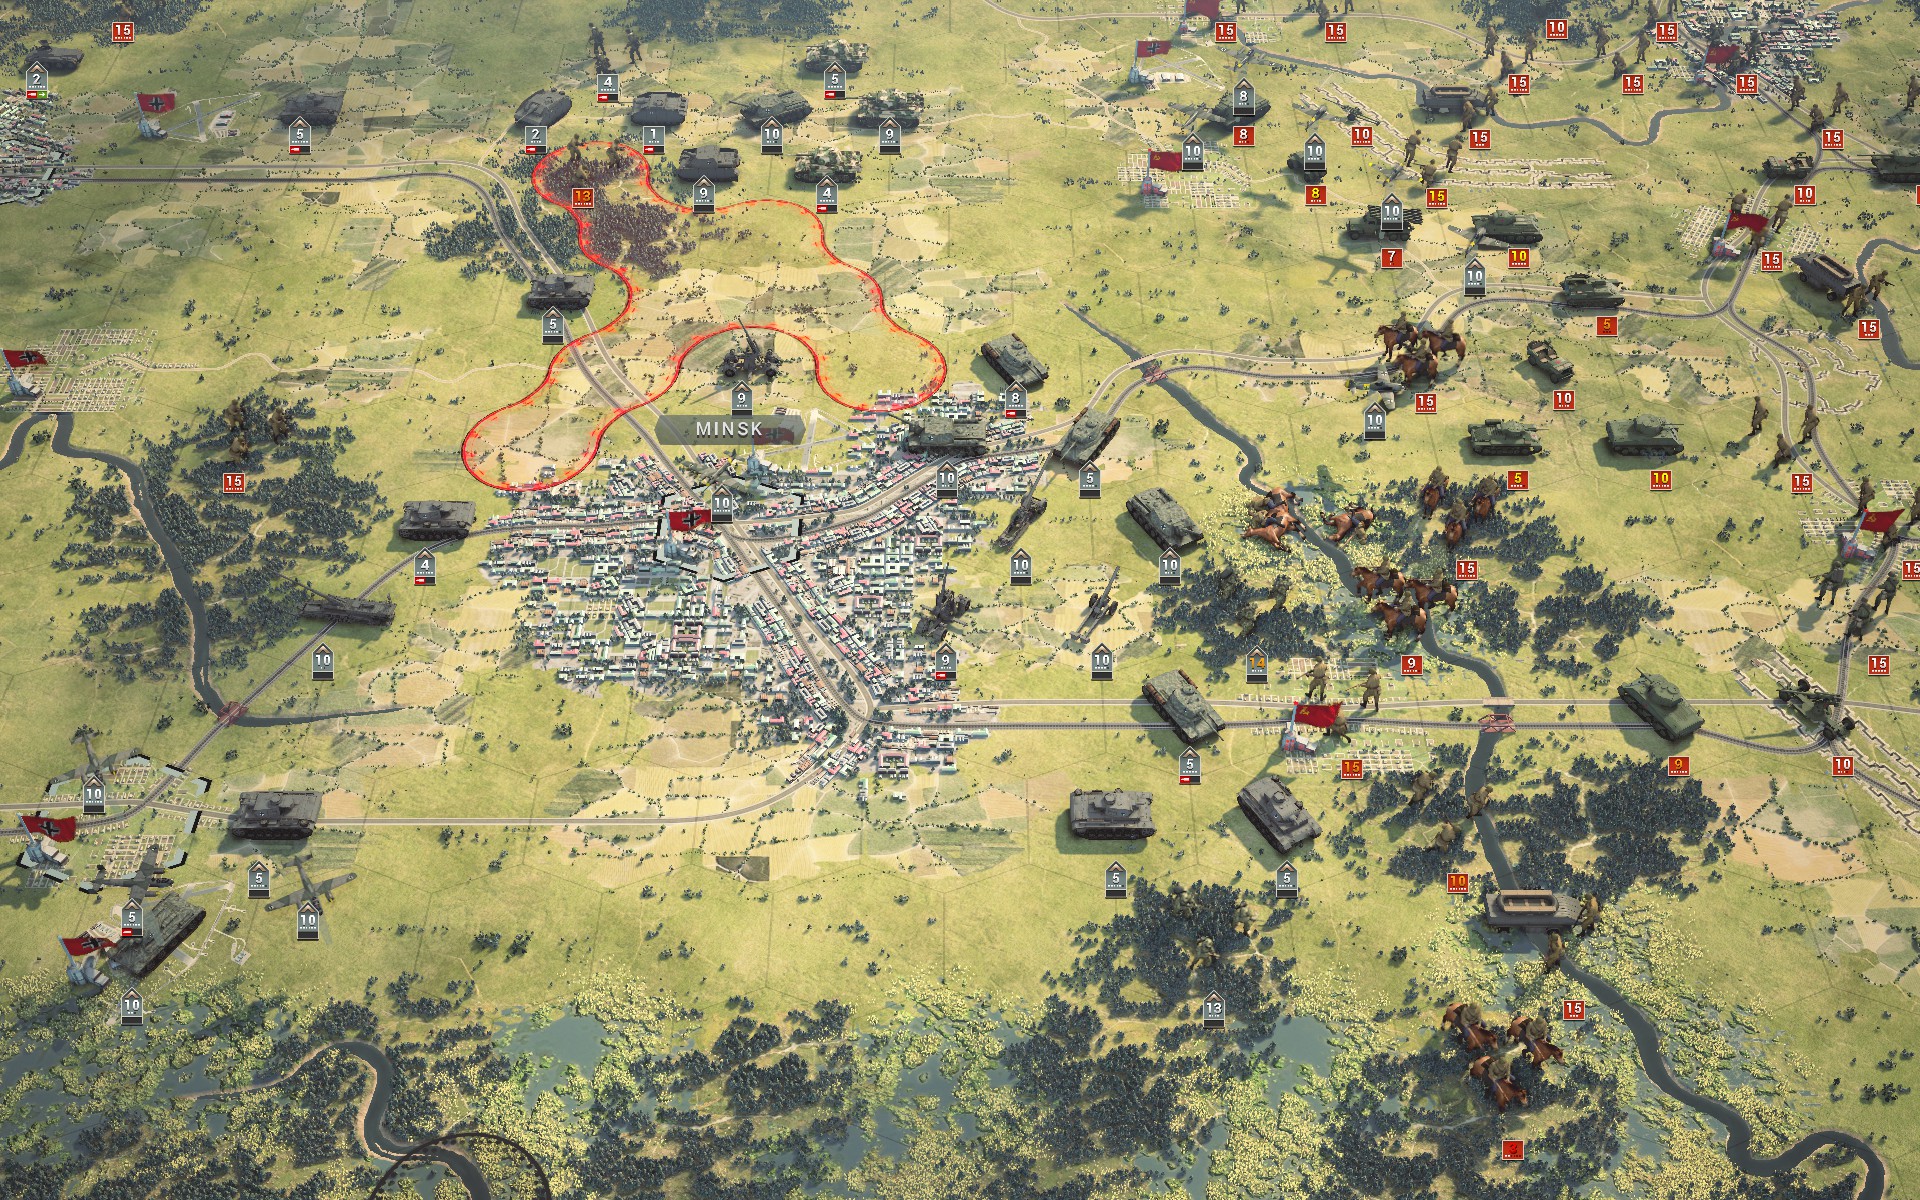
The northern elements of the battlegroup disengage and retreat towards Vilnius. The IS-1s will remain behind as they are the slowest and most resilient Panzers, so I will redeploy them using the trains once I no longer need to hold Minsk. I have also begun rebasing the additional fighters and fighter-bombers to the rear, as they are no longer needed and I need to free up the core slots.
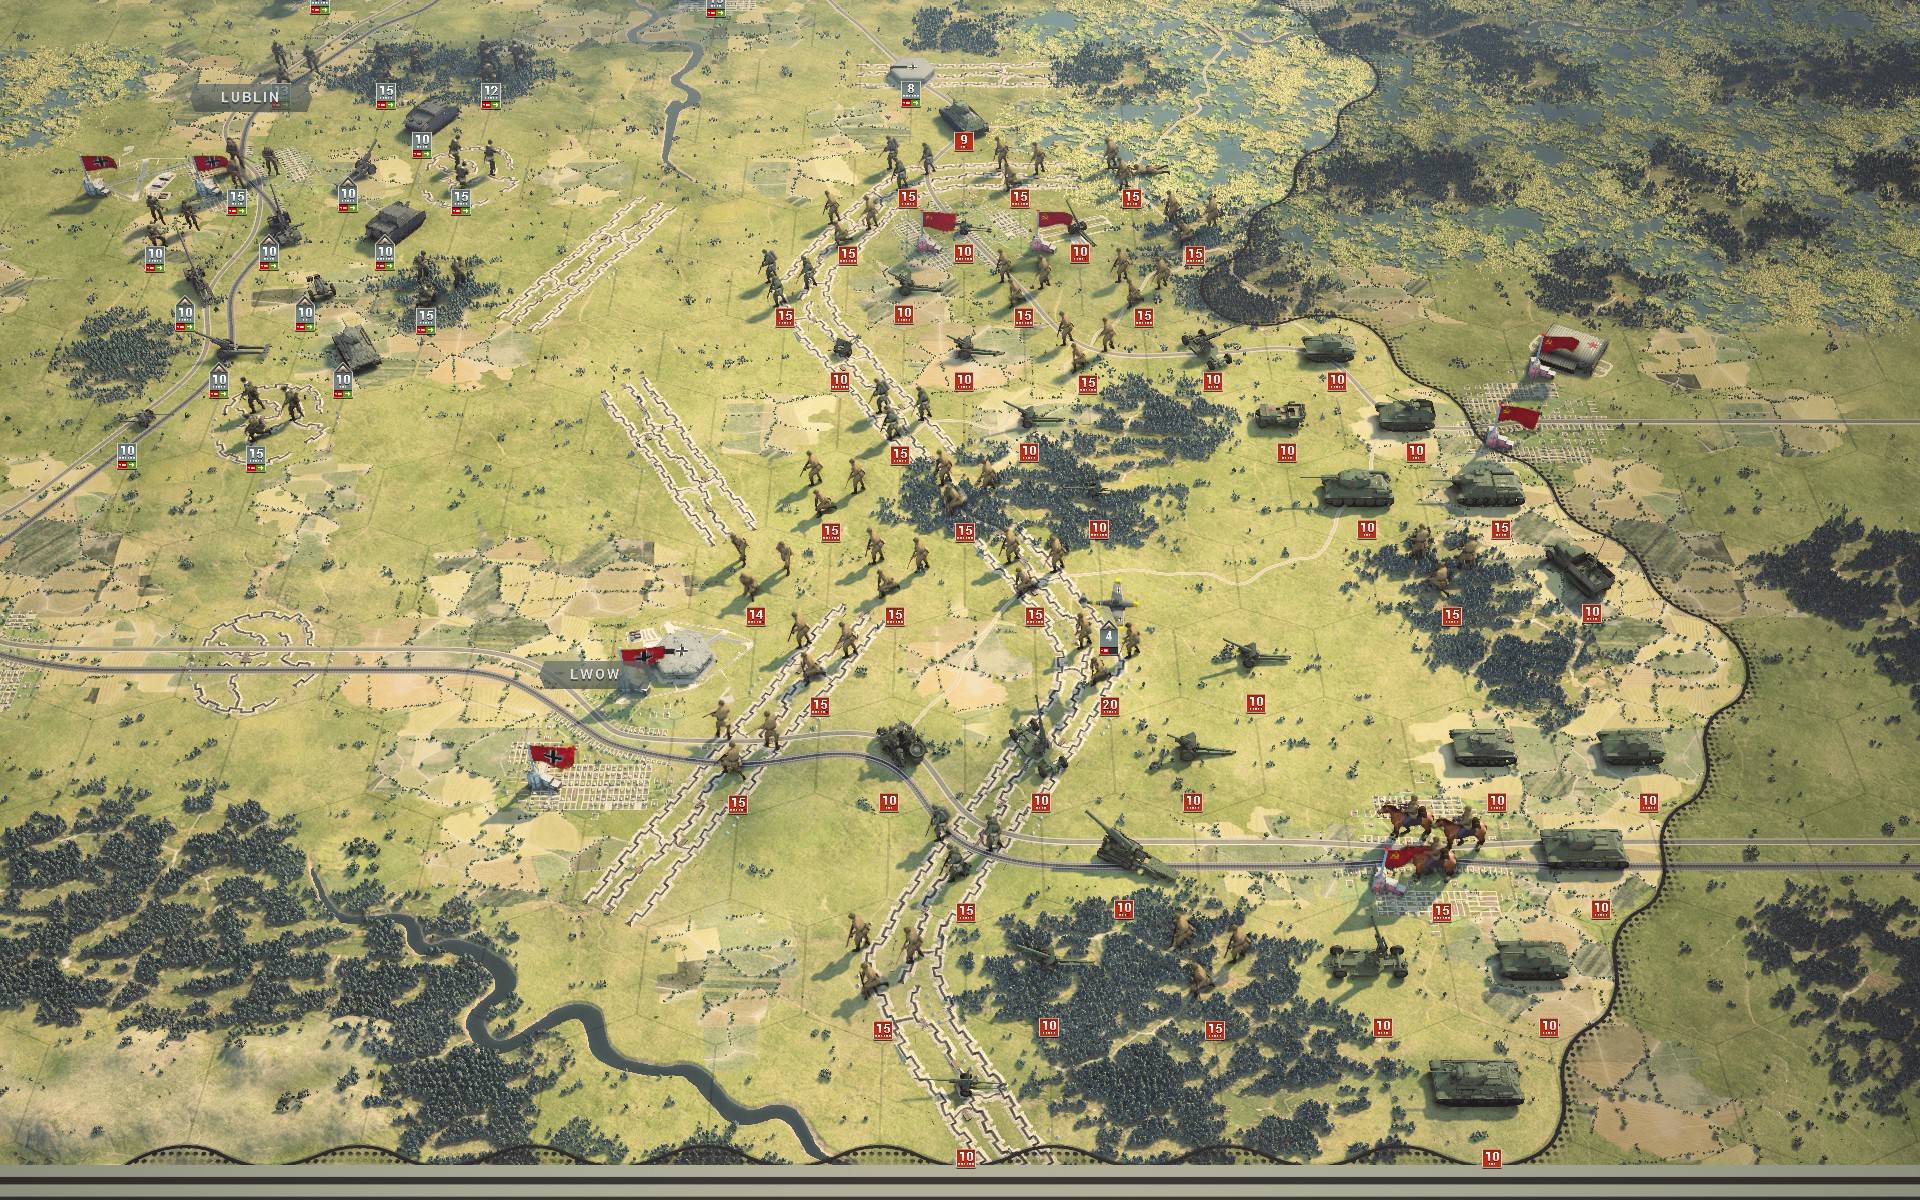
The earth rumbles as the Red Army begins to move towards Lwow -- the real Operation Bagration is about to commence at last.
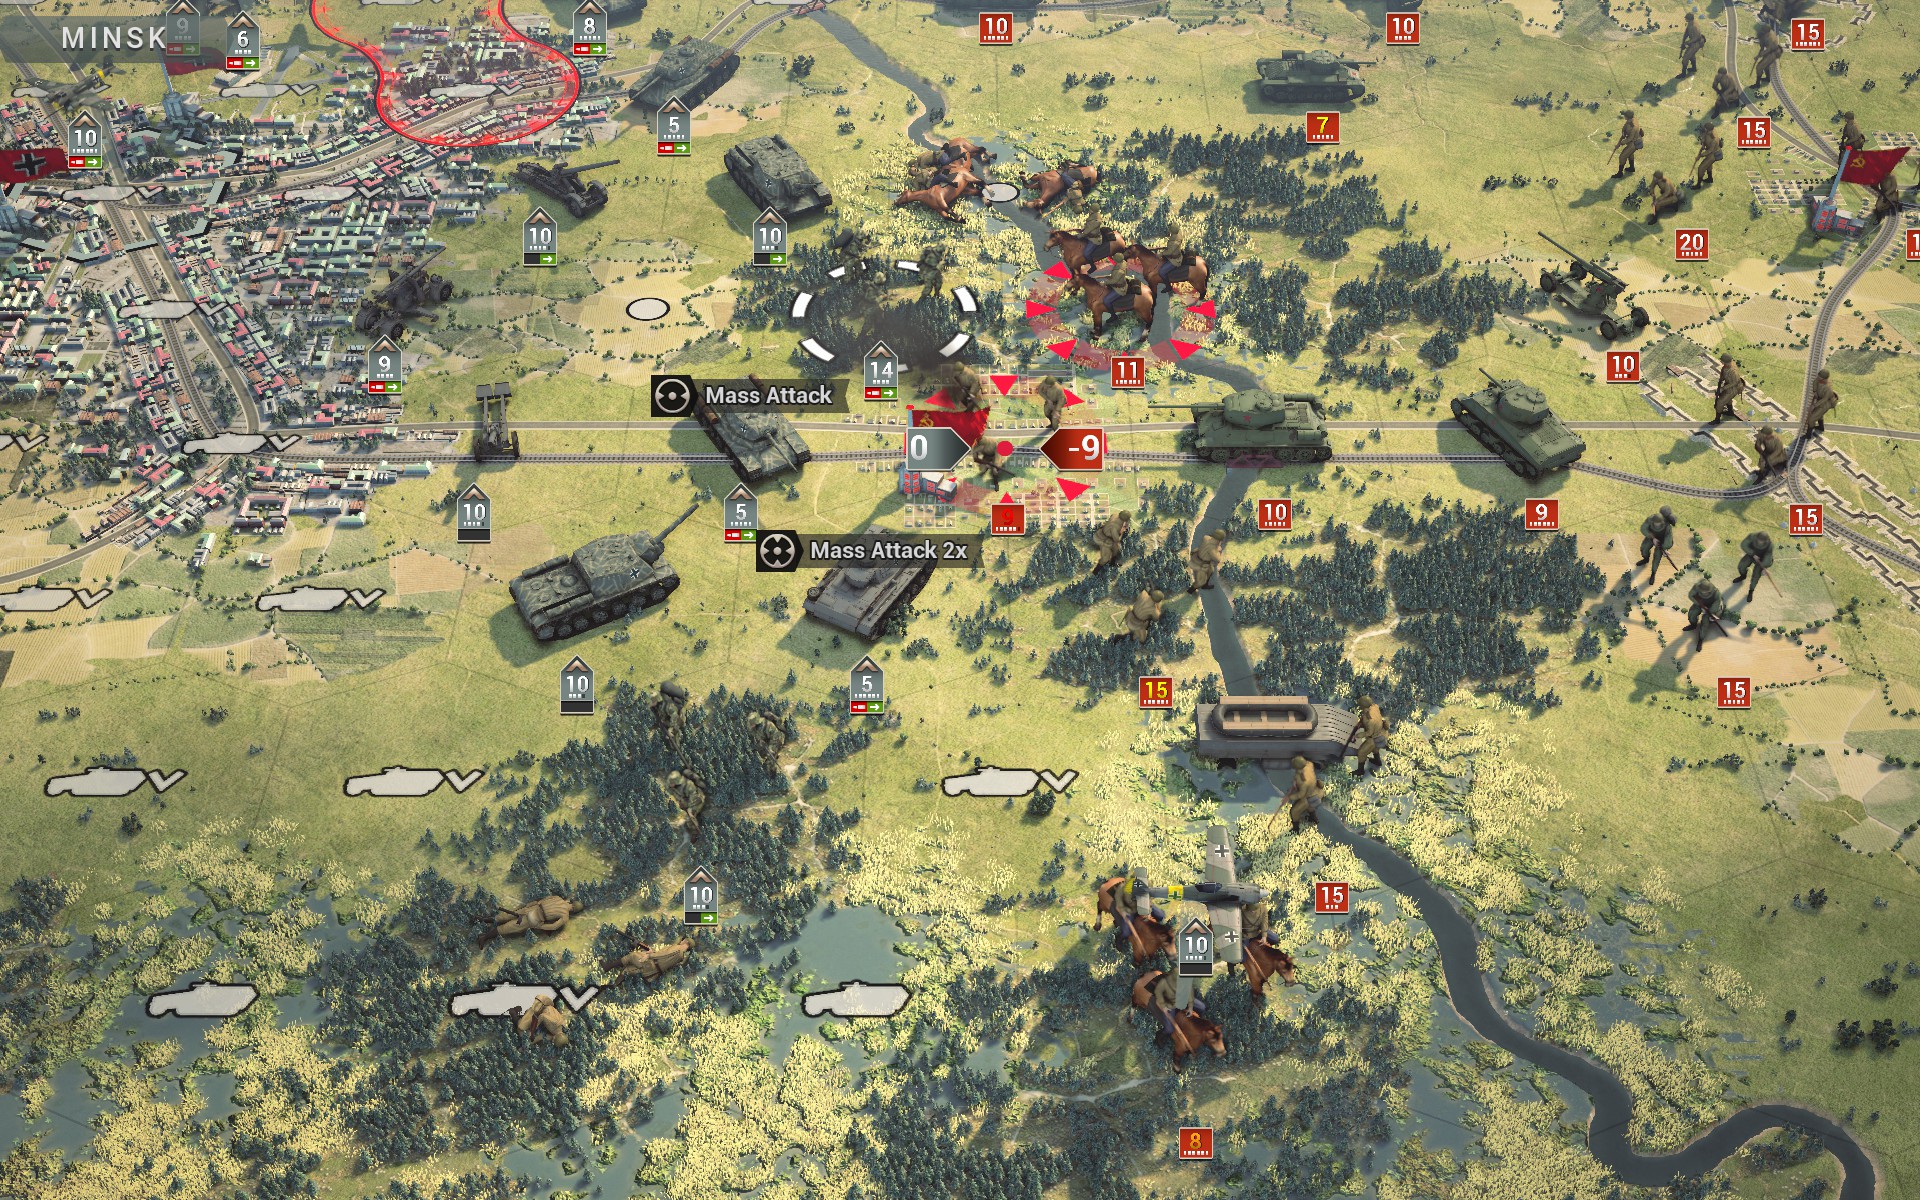
The Crimson Guard destroy a battalion of Regulars. There is a powerful T-34/85 behind the town, but regardless of whether it takes the bait I will have my forces fall back to Minsk next turn as to not lose contact with the rest of the battlegroup.
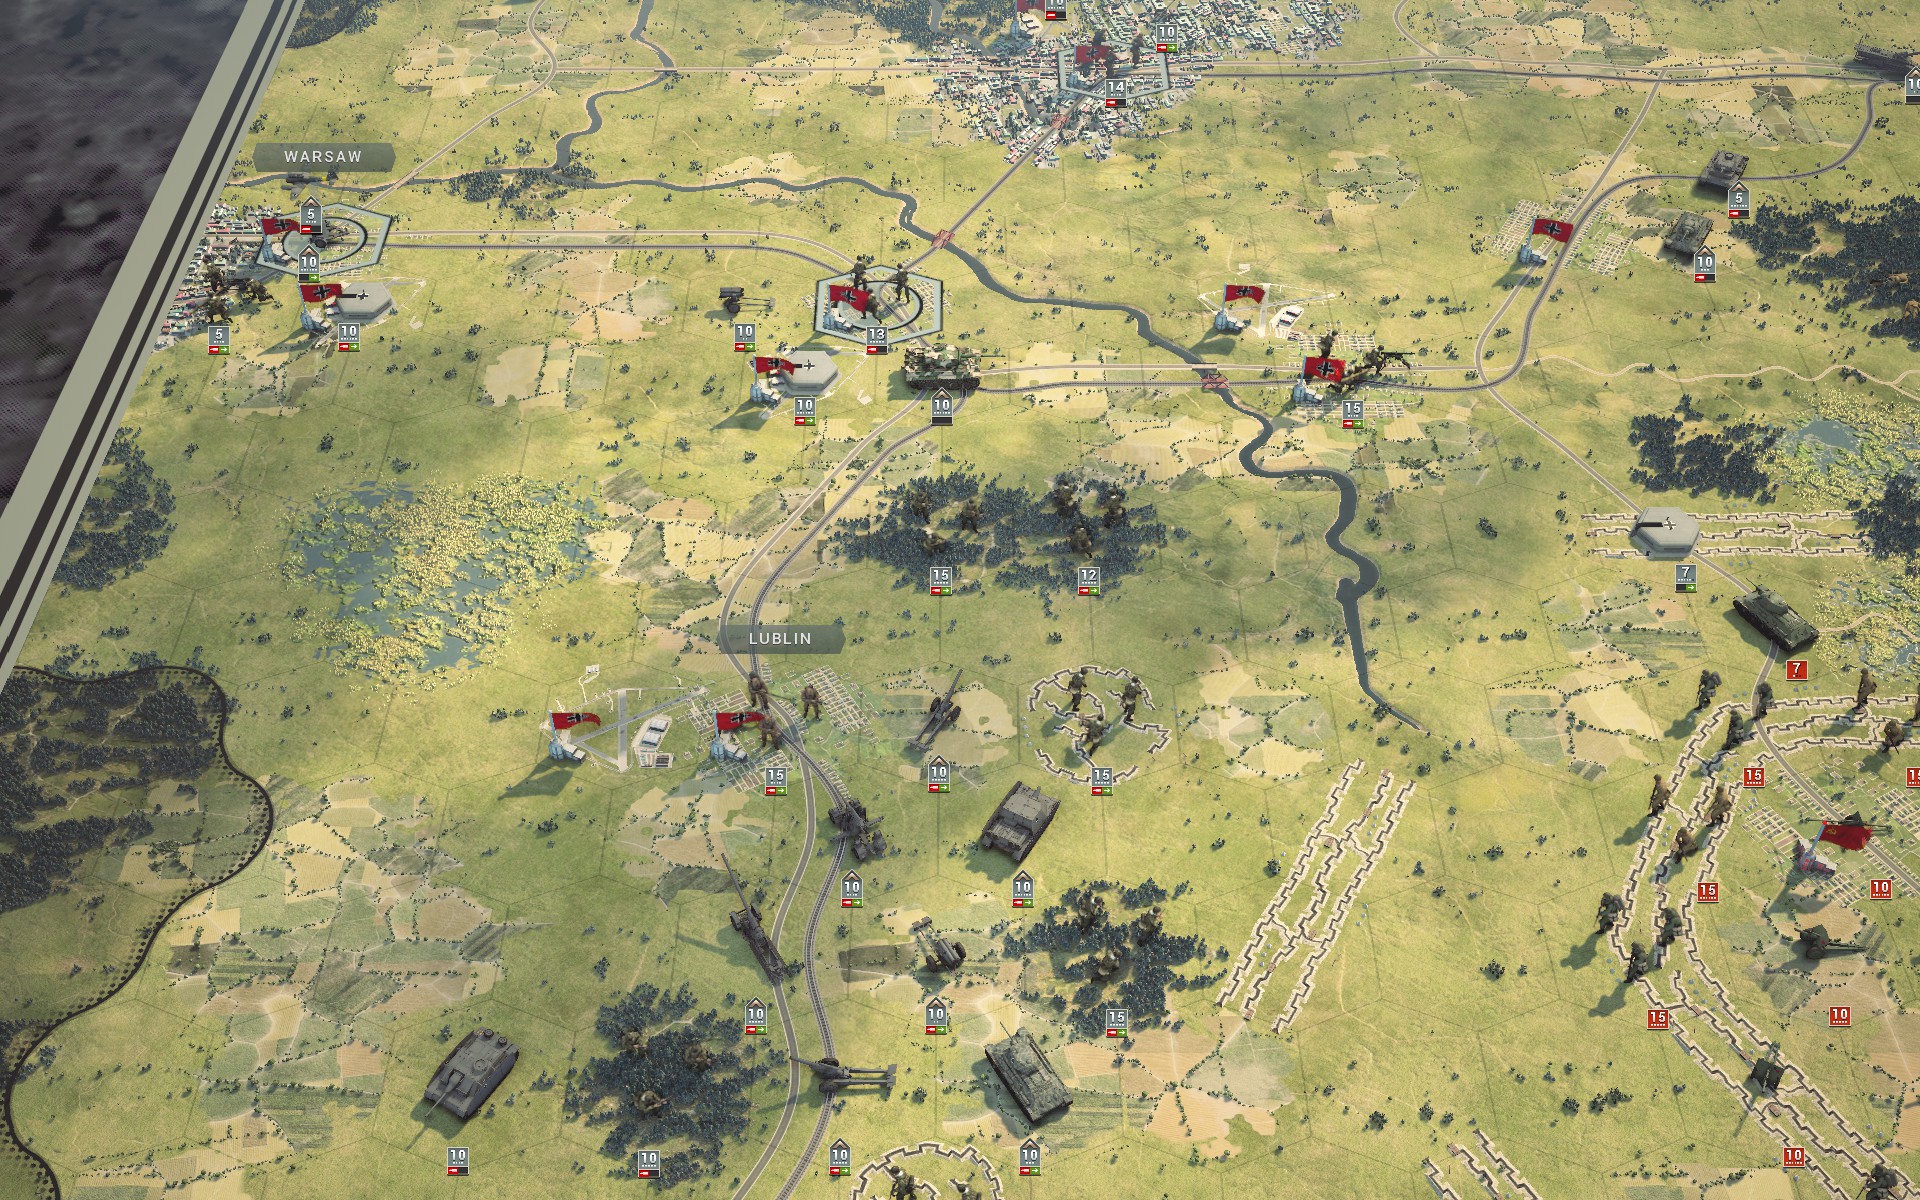
A Tiger battalion is rotated in from the reserve to support the auxiliaries.
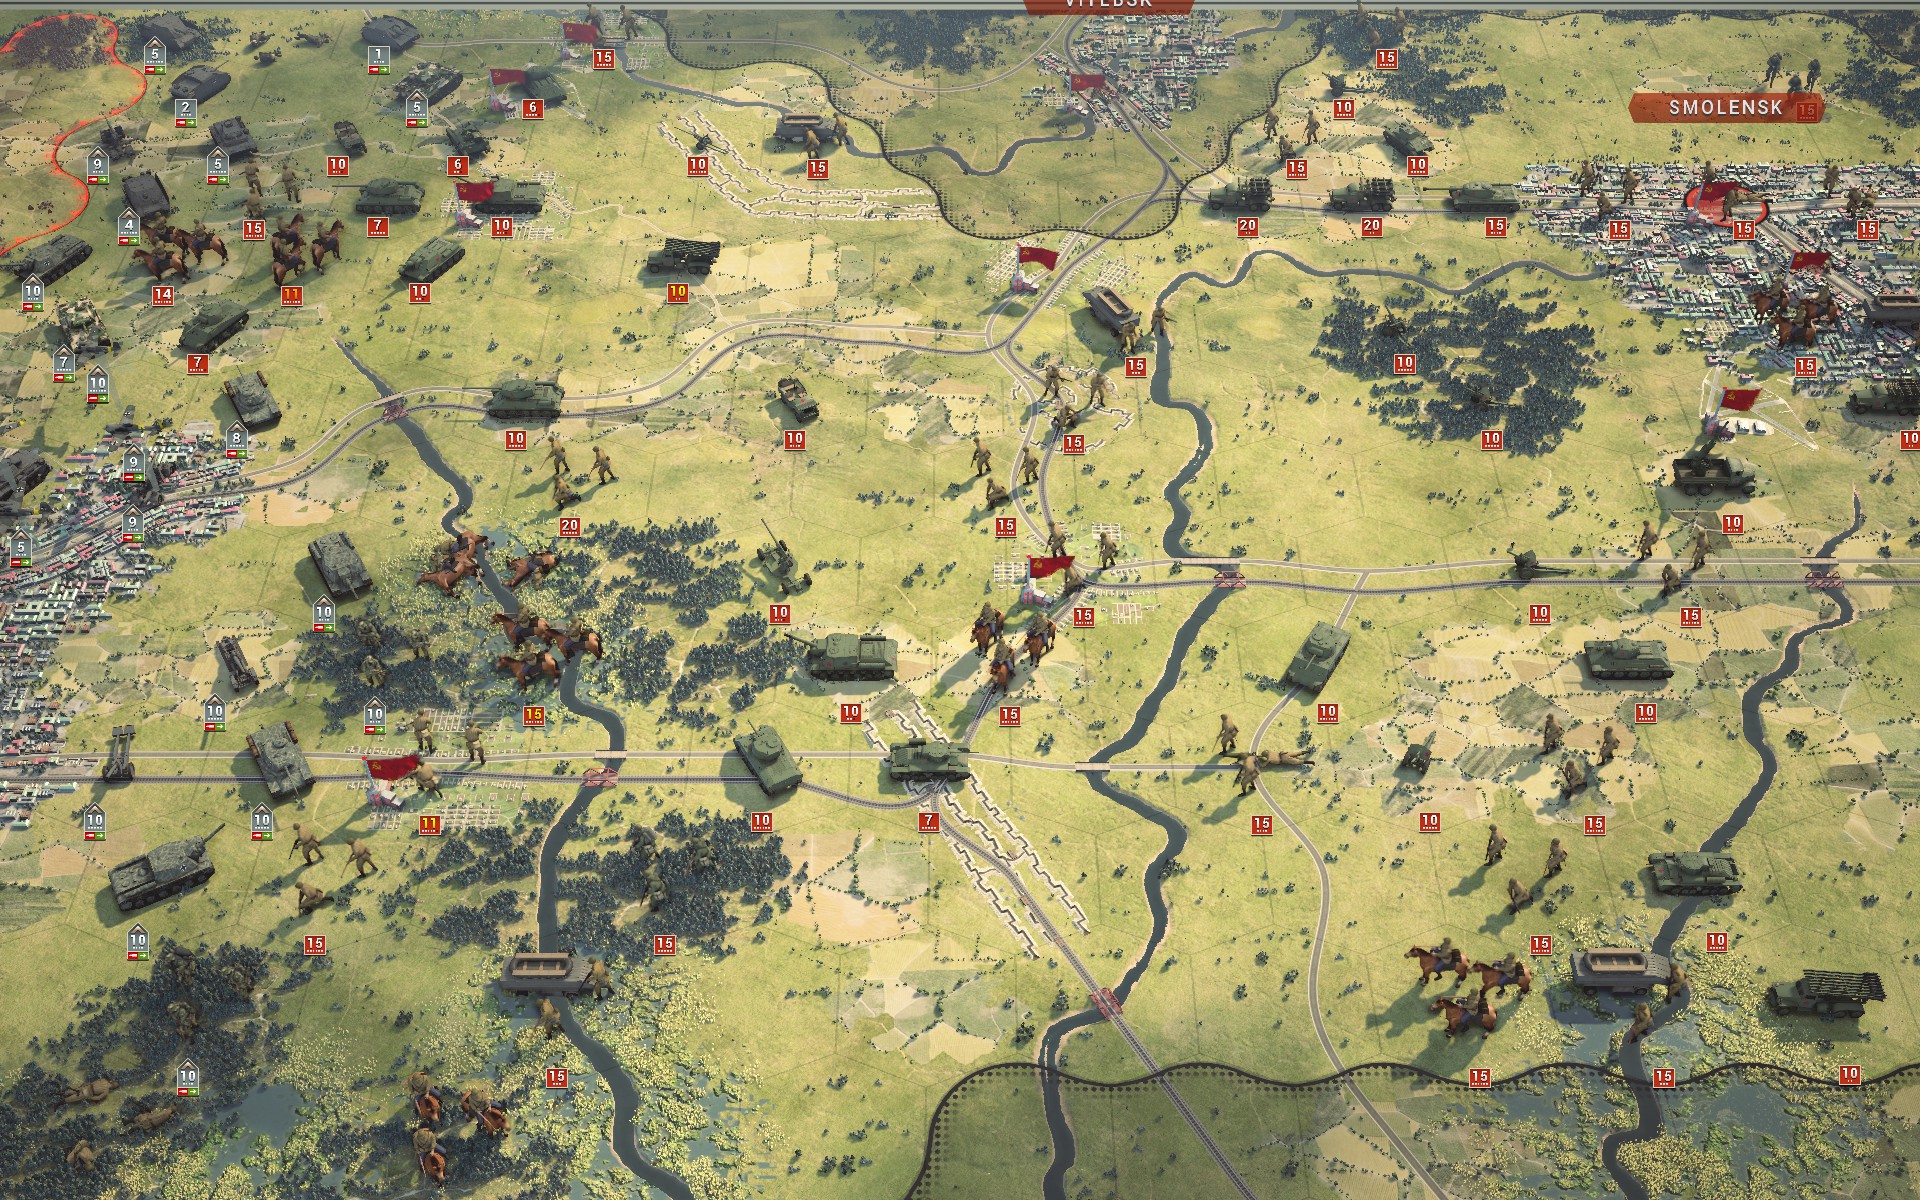
The T-34/85 opts to cross the Berezina to the north instead. The Crimson Guard suffer some damage at the hands of an ISU-152 and another battalion of Regulars, and as the overstrengthened Katyushas and IS-2 are rapidly approaching my men fall back towards Minsk.
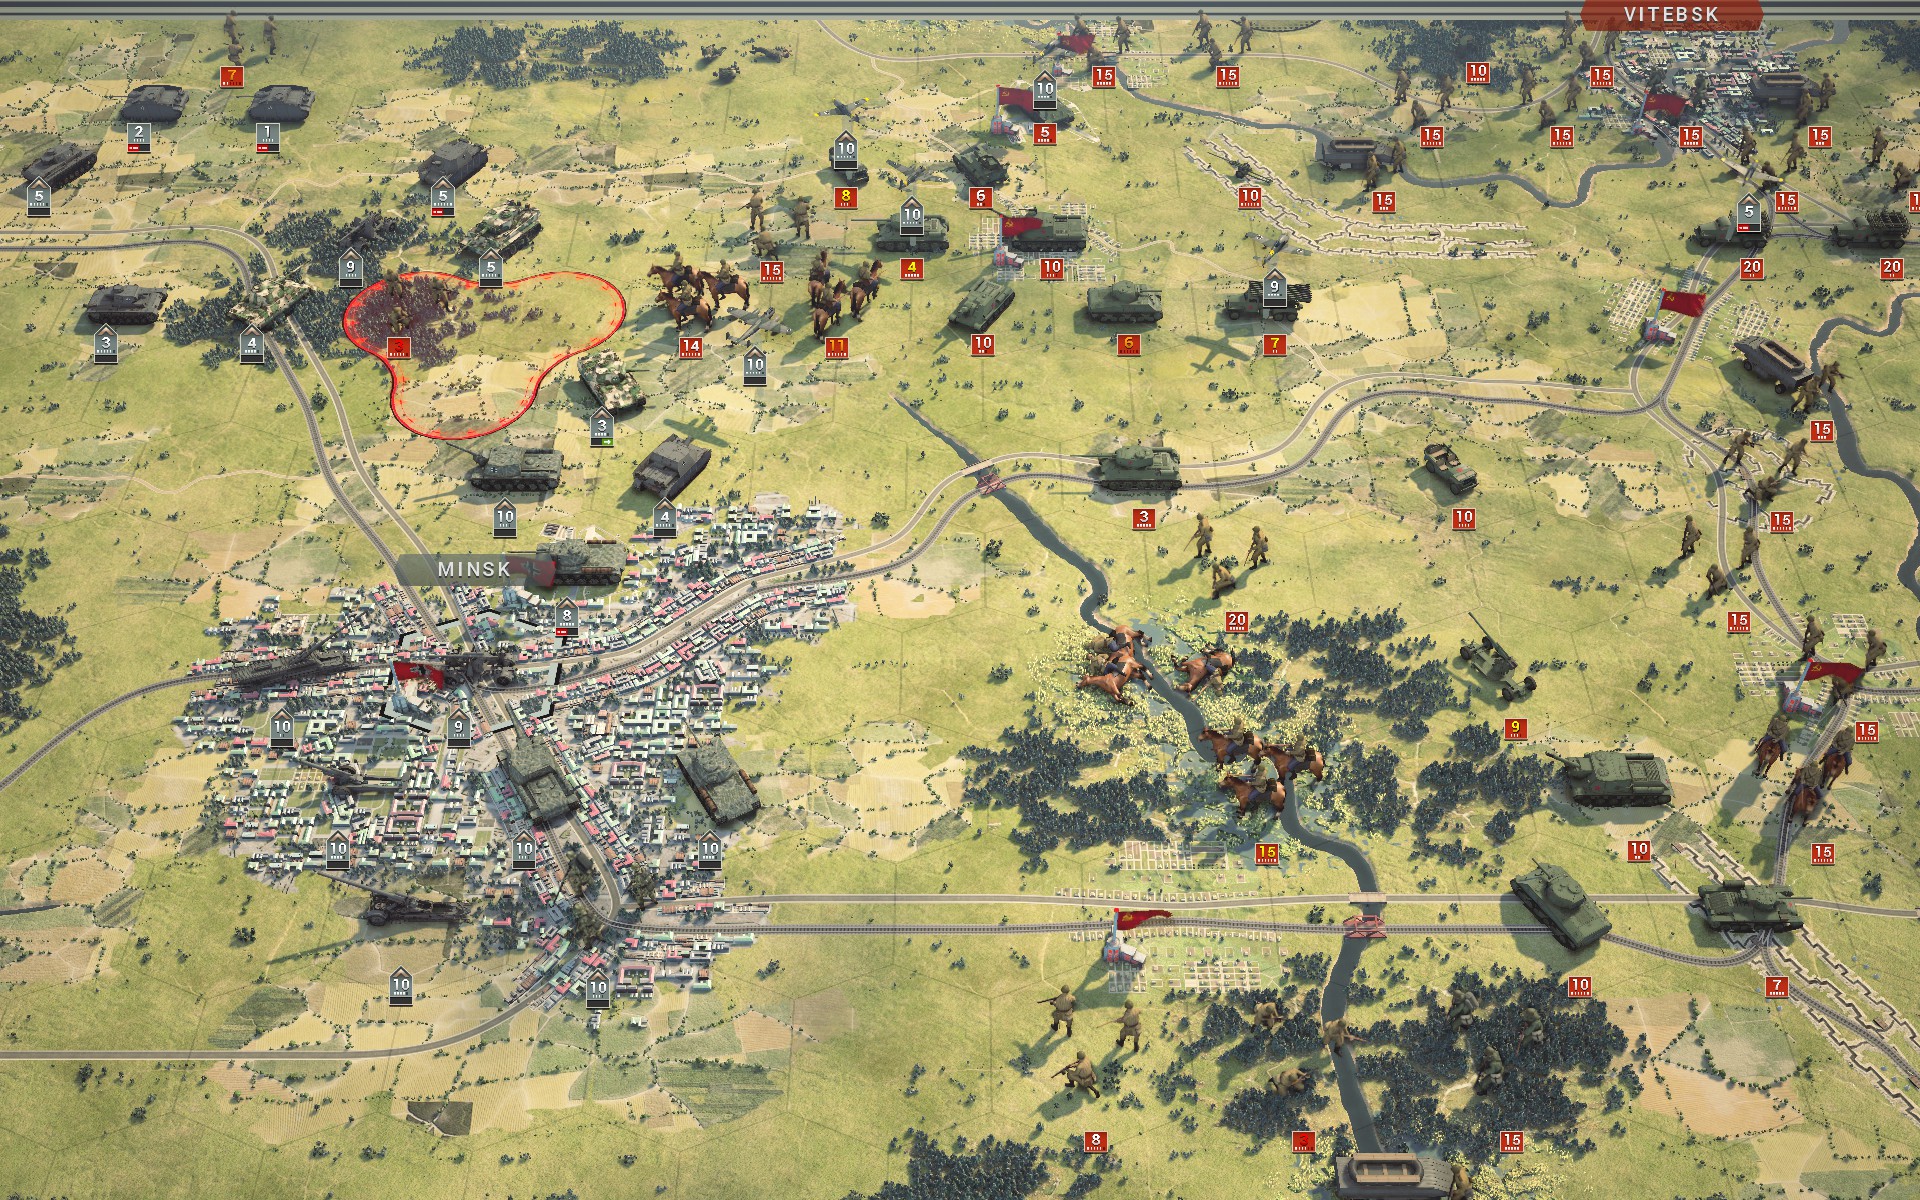
Gustav scores a direct hit on the T-34/85 and the Luftwaffe provide support while the battlegroup takes up positions around Minsk.
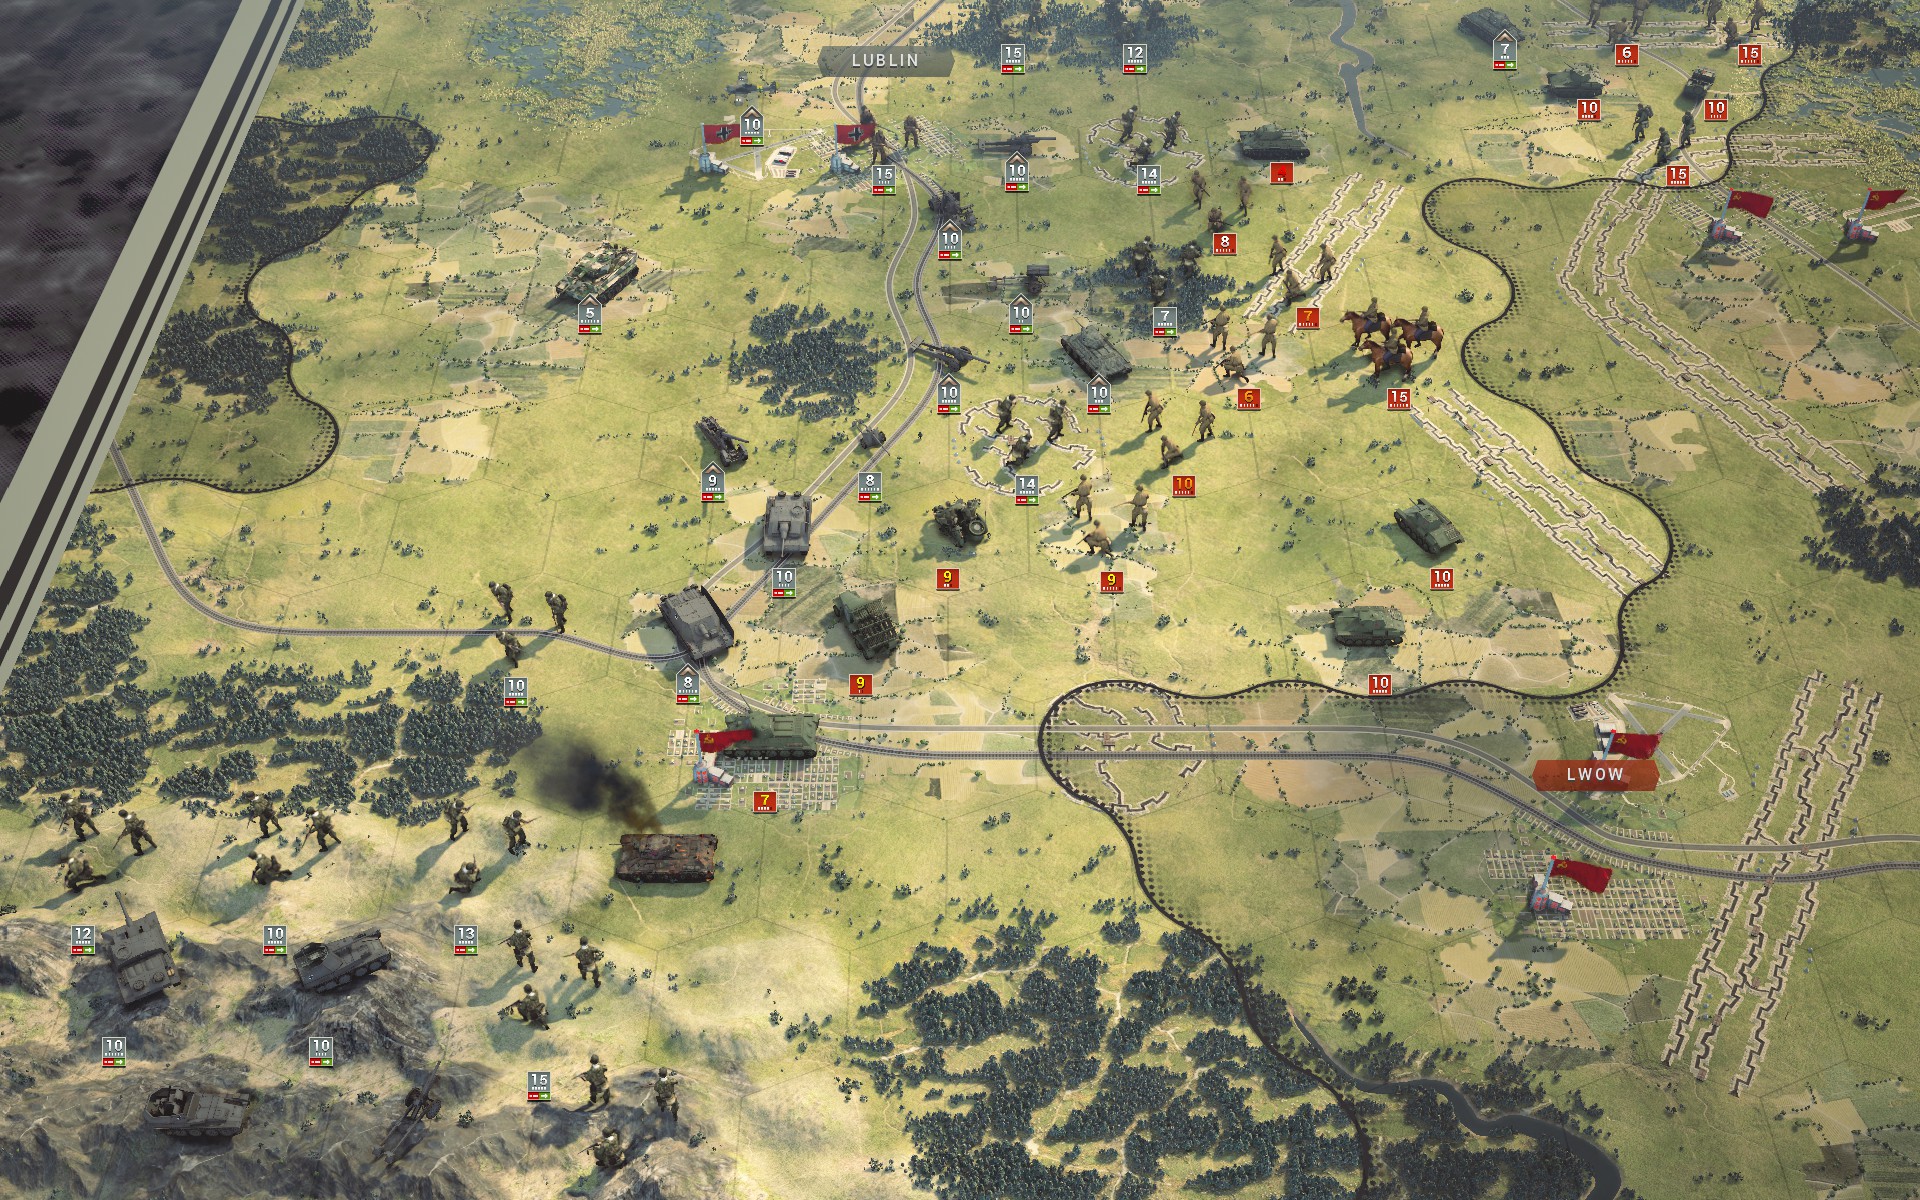
The Marder IIIM turns an OT-34 into scrap as it attempts to rout a battalion of Wehr Infanterie, but further north another battalion suffers heavy damage as its Nebelwerfer support runs out of ammunition while providing fire support against three battalions of Soviet Guard.
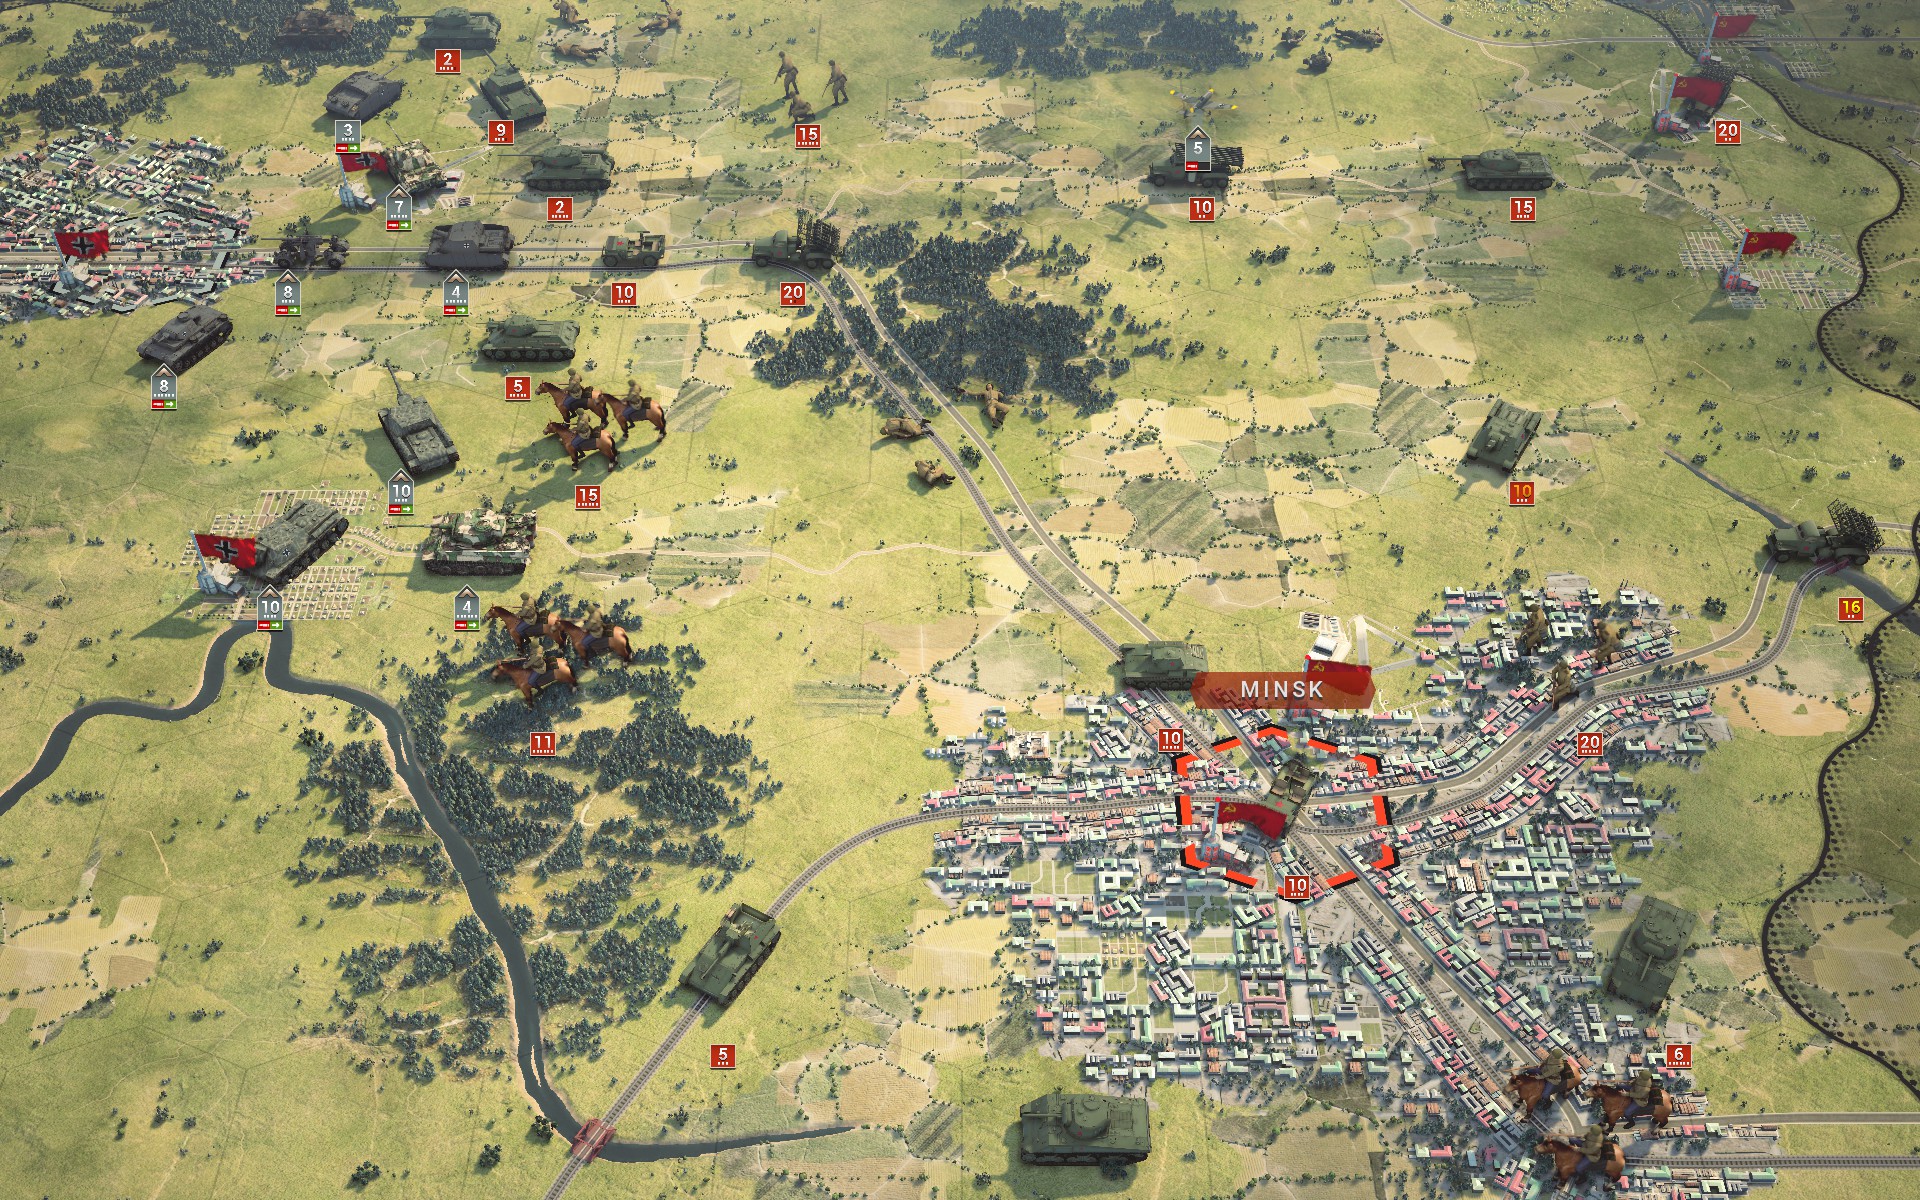
With the optional objectives accomplished, the battlegroup begins to fall back towards Bialystok in good order, but the Red Army is hot on their heels. Can the Soviet juggernaut be stopped?
Part I -- The Battle of Minsk
Initial Prestige: 171389
Final Prestige: 195024
Core
- Infantry
- Pioniere w/ SdKfz 250/1
- Pioniere w/ SdKfz 250/1
- Tanks
- IS-1 [NEW]
- IS-1 [NEW]
- Tiger I
- Panther D [NEW]
- OT-34 [NEW]
- OT-34 [NEW]
- Panzer IIIN
- Panzer IIIN
- Panzer IIIN
- Recon
- SdKfz 234/1 8Rad
- Artillery
- Schwerer Gustav [NEW]
- 21 cm Mrs 18 w/ SdKfz 7 [NEW]
- 17 cm K 18 w/ SdKfz 7
- SU-152 [NEW]
- SU-152
- SU-152
- 15 cm sFH 18 w/ SdKfz 7 [NEW]
- 15 cm sFH 18 w/ SdKfz 7 [NEW]
- 15 cm sFH 18 w/ SdKfz 7 [NEW]
- Nebelwerfer 42 w/ SdKfz 11 [NEW]
- Brummbär
- Brummbär
- Anti-Aircraft
- 8.8 cm FlaK 36 w/ SdKfz 7 [NEW]
- 8.8 cm FlaK 36 w/ SdKfz 7 [NEW]
- 8.8 cm FlaK 36 w/ SdKfz 7 [NEW]
- 2 cm Flakvierling 38 w/ SdKfz 11 [NEW]
- 2 cm Flakvierling 38 w/ SdKfz 11 [NEW]
- 2 cm Flakvierling 38 w/ SdKfz 11 [NEW]
- Fighters
- Fw 190A [NEW]
- Fw 190A [NEW]
- Fw 190A
- Fw 190A
- Fw 190A
- Bf 109F [NEW]
- Bf 109F
- Tactical Bombers
- Bf 109 PR [NEW]
- Bf 109 PR
- Me 410A [NEW]
- Me 410A [NEW]
- Me 410A [NEW]
- Me 410A
- Strategic Bombers
- Do 217E
- Do 217E
Operation Bagration is the largest Soviet offensive in the game, so naturally it features a large number of units, most of which will advance on my positions at some point. Due to the number of screenshots and the extensive changes to the roster that occurred roughly halfway through the scenario I've decided to split it into two parts. Part I will cover the first part of the scenario and focus primarily on the Battle of Minsk and the optional objectives that need to be under your control at the beginning of turn 10 in order to receive the reward of 12 extra core slots, while Part II will cover the climax of Operation Bagration as the Red Army expands the front and commits its reserves in an all-out offensive. The units marked with red text are all temporary additions to the core that I intend to disband during the battle; between these and the 12 additional core slots from fulfilling the bonus objectives, I expect to be able to rotate in an additional 34 core slots worth of untis. Part II will have the revised roster that I finished the scenario with. Note that prestige values are provided for the scenario as a whole.
As one can expect scenario bonus objectives to be designed in such a way as to allow a reasonably skilled player to achieve them, it's likely that the Red Army will only commit limited forces early on and gradually increase the pressure over the course of the battle. I intend to make use of this by deploying substantial air assets to engage and destroy the Soviet air force at an early stage, after which I will disband them and rotate in experienced units from the reserve. This should allow me to bolster the defences on the ground where it's needed while denying the Red Army air support as the full might of Soviet juggernaut is unleashed. The large number of airfields with nearby supply hexes near Warsaw and Bialystok will allow me to complete the transition quickly, as a unit must begin the turn on top of a supply hex to be disbanded (unless it has Phased Movement).
The veteran mechanized Pioniere of the Bridgeburners and Crimson Guard will protect the southern flank of the Minsk battlegroup; while I'll have access to plenty of auxiliary infantry, I want quality in critical positions and nothing beats mechanized Pioniere in close terrain. They'll also be able to clear out the city should the Red Army entrench itself there before my troops arrive. Two Panzer battalions have been outfitted with captured IS-1s, as these tanks are even more resilient than Tigers, and a battalion of Panther Ds has been requisitioned to provide more tactical options for the Minsk battlegroup alongside the heavier -- and slower -- IS-1s and Tiger.
The cost-effective IIINs will provide the necessary numbers to allow the more powerful Panzers to exploit Perimeter Control, but as my corps now allows me to deploy so many expensive Panzers Bagration may prove to be their swan song, as their defense doesn't hold up against the newer T-34 models, and I should be able to get by fielding mainly elites in the last few scenarios. For now, however, they still have a role to fill, although two battalions were outfitted with Soviet OT-34s instead, providing nearly the same resilience but offering more options for dealing with entrenched enemies; these will be deployed to assist the auxiliaries in the south. With so many Soviet units deployed I've made some changes to the camouflage; all Soviet units now have a pattern of their own while the ambush pattern is reserved for the elite German Panzers, specifically the Tiger and Panther battalions.
A part of me would prefer to rely on Panzer IVs to form a more palatable core, but unfortunately game mechanics mean that you are almost always better off using either cheaper or stronger options; the IVH is twice the price of the IIIN but offers only a minimal upgrade in resilience and isn't strong enough to easily defeat modern Soviet armour, while a single point extra gets you a Panther or Tiger, both of which are significantly more powerful. Admittedly this is with Panzer General, but sadly it's hard to see the Panzer IV being a good choice.
Only a single SdKfz 234/1 8Rad will be deployed initially, as the Luftwaffe should be able to handle reconnaissance. As my core has become more experienced the additional accuracy provided can often be detrimental as I don't want to inflict unnecessary casualties when I'm capturing units, so Recons will be scaled back whenever I expect weather conditions to allow the Luftwaffe to operate at or near peak capacity. Gustav has been rotated in from the reserve once more, as the firepower and mobility of the heavy railway gun will allow it to support both fronts, and one of the heavy batteries have been outfitted with 21 cm guns to allow effective suppression of the most powerful Soviet armour.
With the SU-152 captured at Korsun I can now field three battalions of these fantastic units, but as I'll be on the defensive during this scenario the Hummels have been downgraded to 15 cm batteries to conserve core slots. Two Brummbärs will provide resilient fire support for the auxiliaries, while the Nebelwerfer will cover the most valuable troops to prevent them being overrun by Soviet Engineers. Three 8.8s and three Flakvierlings should provide ample defense for my forces, allowing the Luftwaffe to focus on destroying the Soviet air force. Once the latter has been neutralised the Flakvierlings will be disbanded and the 8.8s switched to AT mode to provide additional support against the Soviet armour should it prove necessary. Detached 8.8s are also useful for capturing heavy armour, freeing up my own to focus on more important tasks.
The Luftwaffe has provided me with significant assets for this operation, and while the pilots are inexperienced there is no questioning the quality of the aircraft. In gameplay terms this means I'll be fielding five Fw 190As, two Bf 109Fs and four Me 410A fighter-bombers, providing me with an unprecedented fighter force. These will be used to preemptively destroy the Soviet air force, after which the newly requisitioned units will be rotated to the rear and disbanded as previously explained. I'm confident that this will be enough to achieve air supremacy, thus ensuring that the Red Army will not have any air support during the main offensive. An additional Bf 109 PR will provide vital aerial reconnaissance while the bulk of the Do 217Es have been put in reserve; once the skies are clear I intend to rotate in more of them.
Considering the number of enemies and the terrain it's unlikely that there'll be much room for finesse or sweeping maneuvers, which is why I've opted for a relatively large number of powerful Panzers that will be deployed in the north to recapture and hold Minsk. The auxiliaries near the city are already outflanked and quite possibly doomed, though I will make an attempt to save the more valuable ones. My plan is to establish a defensive line along the Berezina river east of Minsk, anchoring it with heavy armour in the north and mechanized Pioniere in the south. Once the optional objective has been achieved the battlegroup will fall back in good order, with the slower elements using the railway to redeploy towards Bialystok. With the Niemen on one side and the marshlands on the other it should prove difficult for the Red Army to leverage its superior numbers.
The Luftwaffe will focus on destroying the Soviet air force, after which additional bombers will be rotated in to provide air support for the ground forces as they begin to withdraw from Minsk. Meanwhile the auxiliaries around Lwow will redeploy further back, as they would quickly be overrun by the Red Army and I won't have any heavy armour to support them with until I can free up additional core slots. There are some quality troops among them but unfortunately none of them have transports, which will make redeploying a hassle. On the bright side, the Soviet infantry isn't motorised either. I will establish a new defensive line near Lublin and reinforce it with the Brummbärs and OT-34s. A few battalions will be deployed in the mountains to the south; hopefully they'll be able to trap the Red Army with a pincer movement, but even if that proves impossible the terrain should make them hard to dislodge.
I intend to stop the Red Army east of Bilalystok and south of Lublin, but there is enough space to allow the battlegroups to fall back should the Soviet assault prove too fierce, allowing me to stretch their lines further. This shouldn't be necessary as the Luftwaffe should've achieved complete air supremacy by then and with no air support I don't see the Red Army breaking through regardless of their numbers as long as I am able to rotate in more ground forces. Still, the solid red wall in the south is intimidating and my somewhat cavalier attitude at Korsun is a source of concern -- I will have to do better here.
The vanguard of the Red Army has already breached the defensive line east of Minsk, and many of these auxiliaries will likely be destroyed before I can even attempt to withdraw them.
Minsk, Vilnius and Baranovichi are the three optional objectives that need to be held on turn 10, but losing control of one or more of them temporarily is fine; indeed, Soviet Cavalry will most likely capture Minsk as I intend to evacuate the Grenadiers, leaving the city undefended while my forces get into position.
The bulk of my forces have been deployed as close to Minsk as possible, with only a small number of support battalions deployed further south to assist the auxiliaries. I've taken advantage of the few forward deployment hexes to deploy the Tiger and IS-1 battalions further east, but as the briefing specifically warns against this a Recon has been deployed with them to ensure that the railway is unobstructed before I attempt to bring up the artillery.
The auxiliaries will be withdrawn towards Lublin and the hills as Lwow is just too exposed. They will need some armoured support as the Red Army has at least eight artillery batteries and four Engineer battalions, and that's just among the forces along the perimeter. I'm not expecting much movement from these troops early on though, so there should be time to redeploy them. With so many airfields at my disposal I have deployed the Luftwaffe along the entire front, leaving enough free space at every airfield to split units should that be advantageous.
As expected, the Soviet vanguard easily routs the auxiliaries east of Minsk. Fortunately, I should be able to save a few battalions at least.
By splitting and sacrificing the Wehr and FlaK, I am able to withdraw the StuG IIIG and the Pioniere.
Partisans are spotted just south of the airfield at Baranovichi, so the Abwehr was correct in advising caution. As they have camouflage I will have to sweep the area carefully as I advance towards Minsk, lest I risk having them cut off supplies at a later stage, or even deny me a bonus objective.
This is worse than I thought -- there are Partisans everywhere. I decide to send a few Panzers ahead of the battlegroup to protect the auxiliaries, but the rest of my forces will engage and destroy the Partisans as they advance.
Two heavy Panzer battalions head towards the bunkers north of Minsk. The Pioniere auxiliaries could prove valuable but with no transport they are dreadfully slow.
Partisans are little better than Conscripts so a IIIN can easily handle them in the open.
The Soviet forces in the south were completely passive during the first turn -- even the artillery didn't fire on my auxiliaries -- so it seems I will have a few turns to prepare for them. The Luftwaffe engages the Soviet air force at Kowel...
... causing significant damage. A turn or two should suffice to wipe out all enemy aircraft in the region, after which the Luftwaffe will rebase to Minsk, provided I have secured the city by then.
The Luftwaffe cripples an Il-4 at Minsk, while half the Grenadier at Bobruysk form a rearguard to allow the rest of the battalion to withdraw using the train.
All right, maybe I should be a little worried after all.
The auxiliaries begin to withdraw from Lwow.
Minsk falls to the Red Army and the Partisans capture a number of locations, but with no armour or fire support the latter stand no chance of holding them.
The Bridgeburners make short work of the Partisans hiding in the woods.
The Luftwaffe brings down an additional five aircraft, effectively crippling the Soviet air force in the south.
The Tiger and IS-1 battalions have temporarily halted the Soviet advance in the north, allowing the Pioniere to withdraw. The Partisans have been dealt with, and with Soviet air assets rebased to the airfield at Minsk there is an opportunity to take them out before they can engage my ground forces.
The battlegroup recaptures Minsk and surrounds an ISU-152; I believe this is the most powerful regular mobile artillery in the game -- with a Hard Attack of 25 it's almost as powerful as the 17 cm K 18 (26 HA) -- but just like its predecessor the SU-152 it's incredibly rare.
The extra accuracy allows the Luftwaffe to easily take down the Soviet aircraft over Minsk, for a total of 11 confirmed kills in just 3 turns.
The Crimson Guard take the opportunity to reinforce.
The auxiliaries have almost finished redeploying. They're going to need more support, but for now I need the heavy Panzers at Minsk.
Soviet forces reinforce, allowing me to consolidate my hold on Minsk.
Now that is a monster -- a 5-star 15-strength IS-2. I will have to keep track of that one.
The Luftwaffe engages the remaining Soviet aircraft in range of Minsk, including the ones stationed at Smolensk.
The Bridgeburners clear out the Partisans near the airfield at Baranovichi.
A detached Panther A captures the ISU-152.
Gustav opens fire on a T-34/43 to pin it in place.
With nothing for them to do, I begin disbanding the extra AA guns.
Much of the Soviet armour is now suppressed, so I begin to plan the capture of these units before reinforcements arrive.
The Luftwaffe brings down the last Soviet aircraft near Rovno, thus denying the Red Army any air support in the south.
Gustav and a detached Do 217E weaken the Regulars enough for a detached IIIN to force them to retreat, allowing the heavy Panzers to move in. The presence of an entrenched AT gun complicates matters, but I should still be able to capture most of the units.
The IS-1 executes a pincer movement from the north.
A 5-star 15-strength IS-2, a number of T-34/85s and now three 20-strength BM-31 Katyusha batteries; with Rapid Fire 2X that's 40 rockets per salvo, so I will have to keep my Pioniere far away from those. This could get ugly.
The Crimson Guard repel three battalions with some help from an SU-152, but the staggering losses appear to have had little effect on Red Army.
Two detached IS-1s capture a T-34/43 by forcing it into the river.
My forces successfully capture most of the Soviet units north of the Berezina, but remain unable to secure Bobruysk due to the Crimson Guard coming under heavy attack. I considered bringing up the Bridgeburners to support them, but as that would expose the southern flank I decided against it; the town isn't an objective.
More Partisans spawn behind my lines, and I belatedly realise why the briefing advised against deploying too far east. To make matters even worse the more powerful elements of the Red Army have begun to advance towards my lines as well.
With only a few turns to go, I am forced to change my plans and decide to begin withdrawing my forces immediately -- half the battlegroup will fall back to root out the Partisans and secure the objectives as well as the railroad while the other half will defend Minsk. This will stretch my lines, but I am confident that the heavy Panzers will be able to cope.
The Crimson Guard have born the brunt of the Soviet assault so far and need to be reinforced.
The northern elements of the battlegroup disengage and retreat towards Vilnius. The IS-1s will remain behind as they are the slowest and most resilient Panzers, so I will redeploy them using the trains once I no longer need to hold Minsk. I have also begun rebasing the additional fighters and fighter-bombers to the rear, as they are no longer needed and I need to free up the core slots.
The earth rumbles as the Red Army begins to move towards Lwow -- the real Operation Bagration is about to commence at last.
The Crimson Guard destroy a battalion of Regulars. There is a powerful T-34/85 behind the town, but regardless of whether it takes the bait I will have my forces fall back to Minsk next turn as to not lose contact with the rest of the battlegroup.
A Tiger battalion is rotated in from the reserve to support the auxiliaries.
The T-34/85 opts to cross the Berezina to the north instead. The Crimson Guard suffer some damage at the hands of an ISU-152 and another battalion of Regulars, and as the overstrengthened Katyushas and IS-2 are rapidly approaching my men fall back towards Minsk.
Gustav scores a direct hit on the T-34/85 and the Luftwaffe provide support while the battlegroup takes up positions around Minsk.
The Marder IIIM turns an OT-34 into scrap as it attempts to rout a battalion of Wehr Infanterie, but further north another battalion suffers heavy damage as its Nebelwerfer support runs out of ammunition while providing fire support against three battalions of Soviet Guard.
With the optional objectives accomplished, the battlegroup begins to fall back towards Bialystok in good order, but the Red Army is hot on their heels. Can the Soviet juggernaut be stopped?
Last edited by SineMora on Mon Jun 15, 2020 1:08 pm, edited 23 times in total.
Mildly pretentious Swede. Goes by Path on most platforms, including Steam.
http://www.slitherine.com/forum/viewtopic.php?f=596&t=98034 -- Generalissimus AAR (no Trophies / Heroes)
http://www.slitherine.com/forum/viewtopic.php?f=596&t=98034 -- Generalissimus AAR (no Trophies / Heroes)
-
SineMora
- Sergeant Major - SdKfz 234/2 8Rad
- Posts: 641
- Joined: Thu Apr 02, 2020 4:20 pm
- Location: Sweden
Re: A Certain Panzer General's Adventures -- Generalissimus (No Liberator / Trophies of War / Heroes)
Scenario XX -- Bagration
Part II -- The Battle of Bialystok
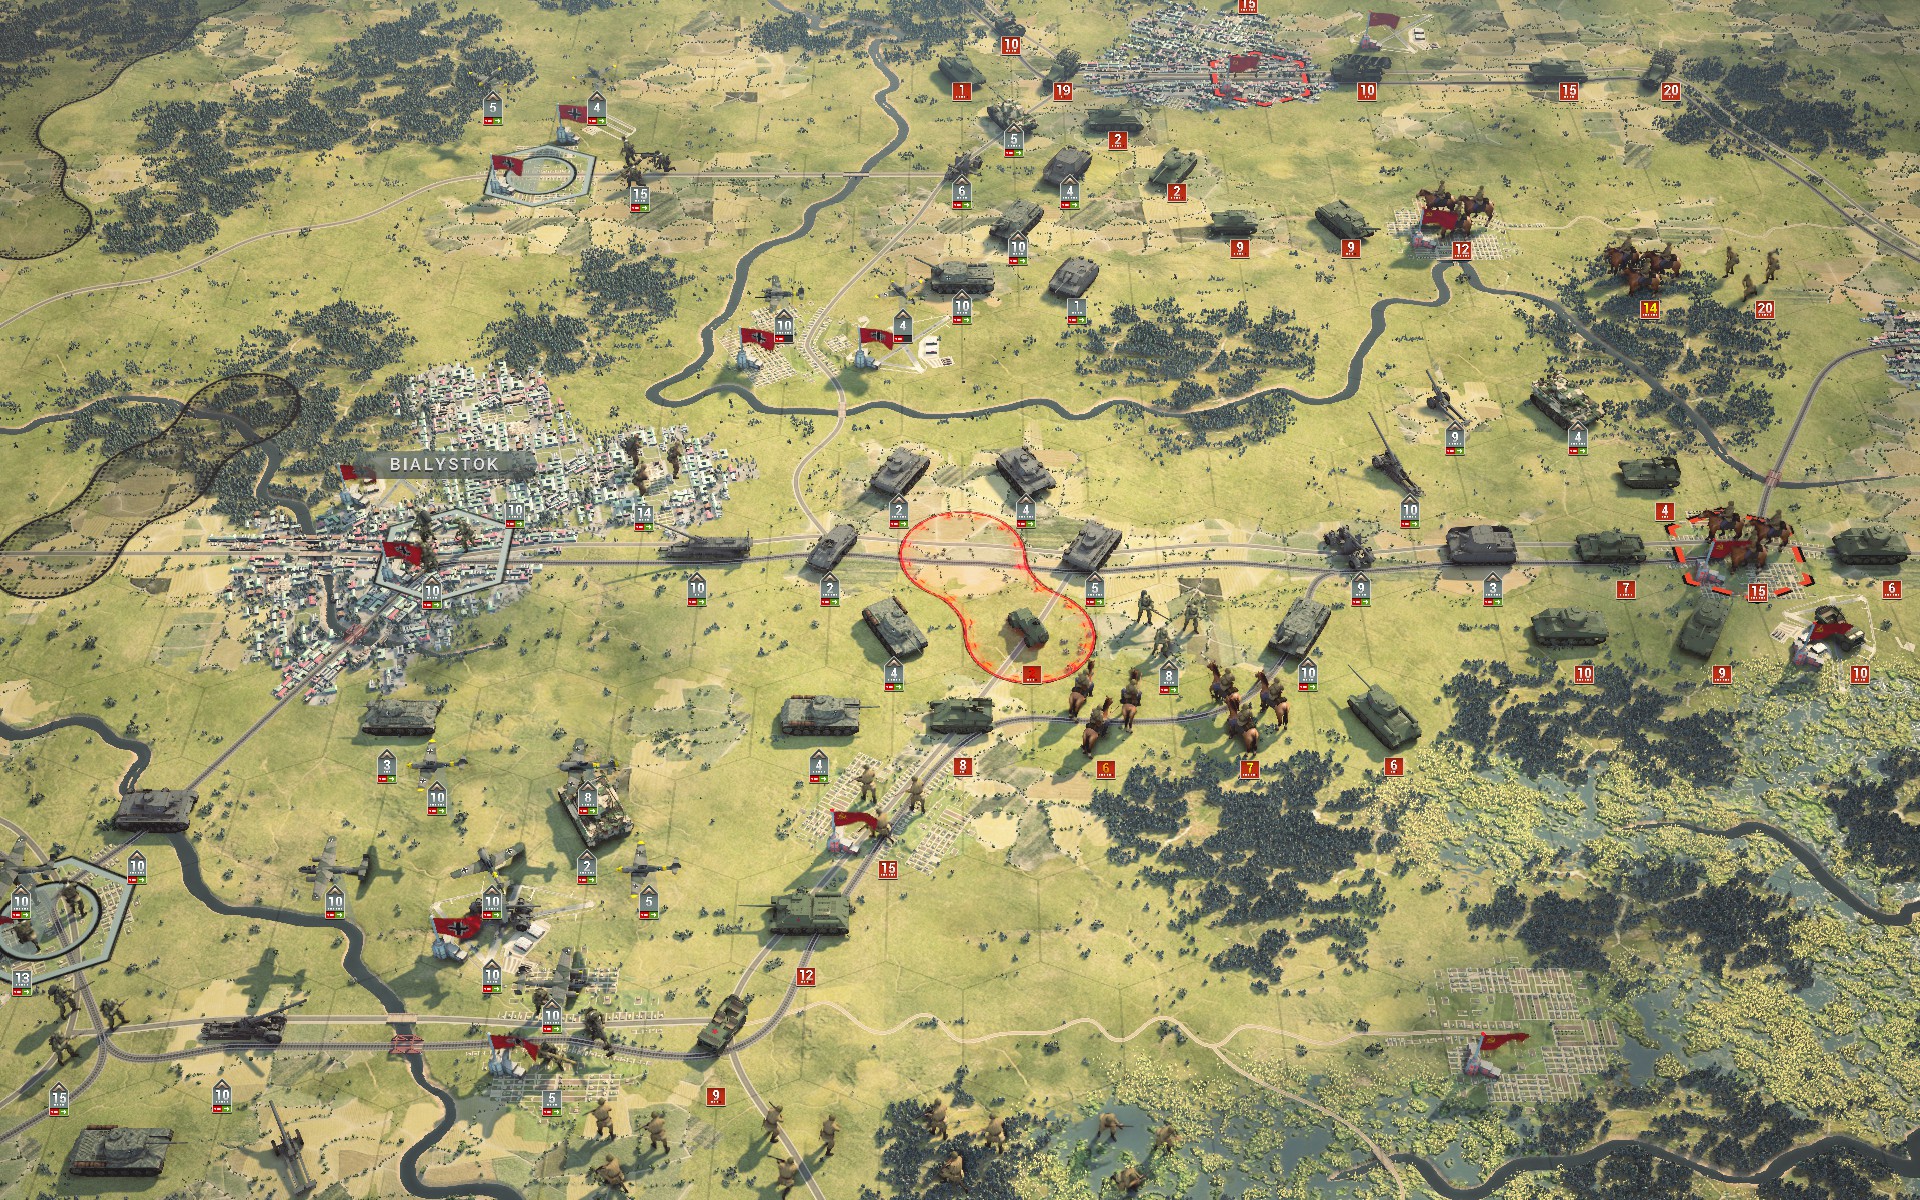
Initial Prestige: 171389
Final Prestige: 195024
Core
To be on the safe side, I have also brought in three elite battalions to assist the auxiliaries on the ground in addition to the Do 217Es; my own forces already have significant armour and artillery assets while the auxiliaries will struggle with the heavier Soviet armour and SPATs, so the Tigers will provide valuable support. The 17 cm battery can suppress Soviet artillery with its counter-battery ability, and once I am able to launch a counteroffensive the mobility of the mechanized Pioniere will provide me with additional tactical options as none of the auxiliaries have transports. I have also requisitioned an Hs 129B2, a powerful tactical bomber that together with Gustav should be able to pin Soviet armour with surgical strikes.
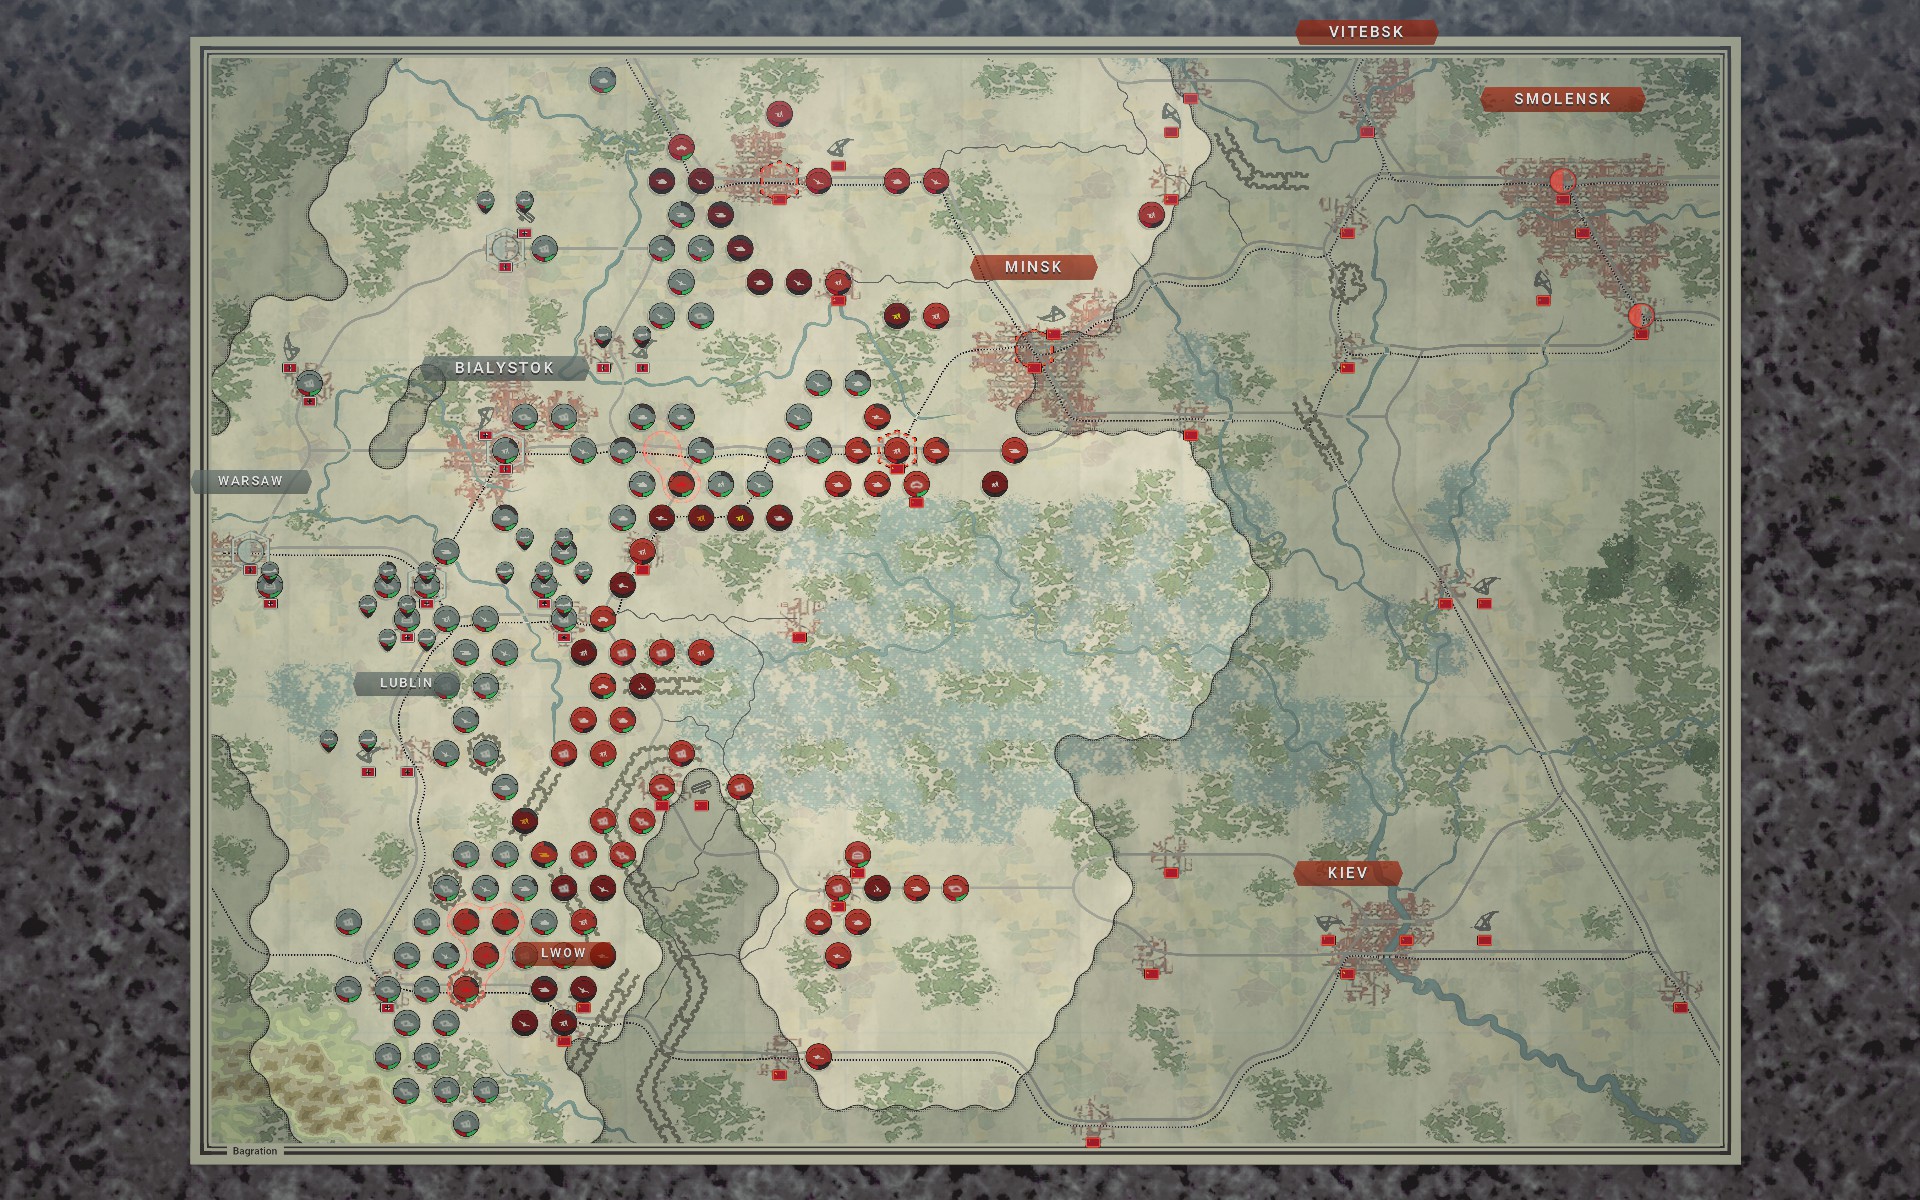
The Partisans were an unpleasant surprise, but so far events have largely unfolded according to plan; the Soviet air force has effectively been destroyed and the bonus objectives secured, providing an additional 12 core slots for the rest of the campaign. The auxiliaries have repelled the initial Soviet offensive in the south, and my battlegroup has largely finished redeploying. Granted, I should probably have stationed more troops around Brest and Kobryn as the Red Army has exploited the gap in my lines to push north towards the Niemen river, leaving the rearguard dangerously exposed. On the other hand, the same is true for the Soviet forces, as their lines lines have become stretched and no longer look quite as intimidating.
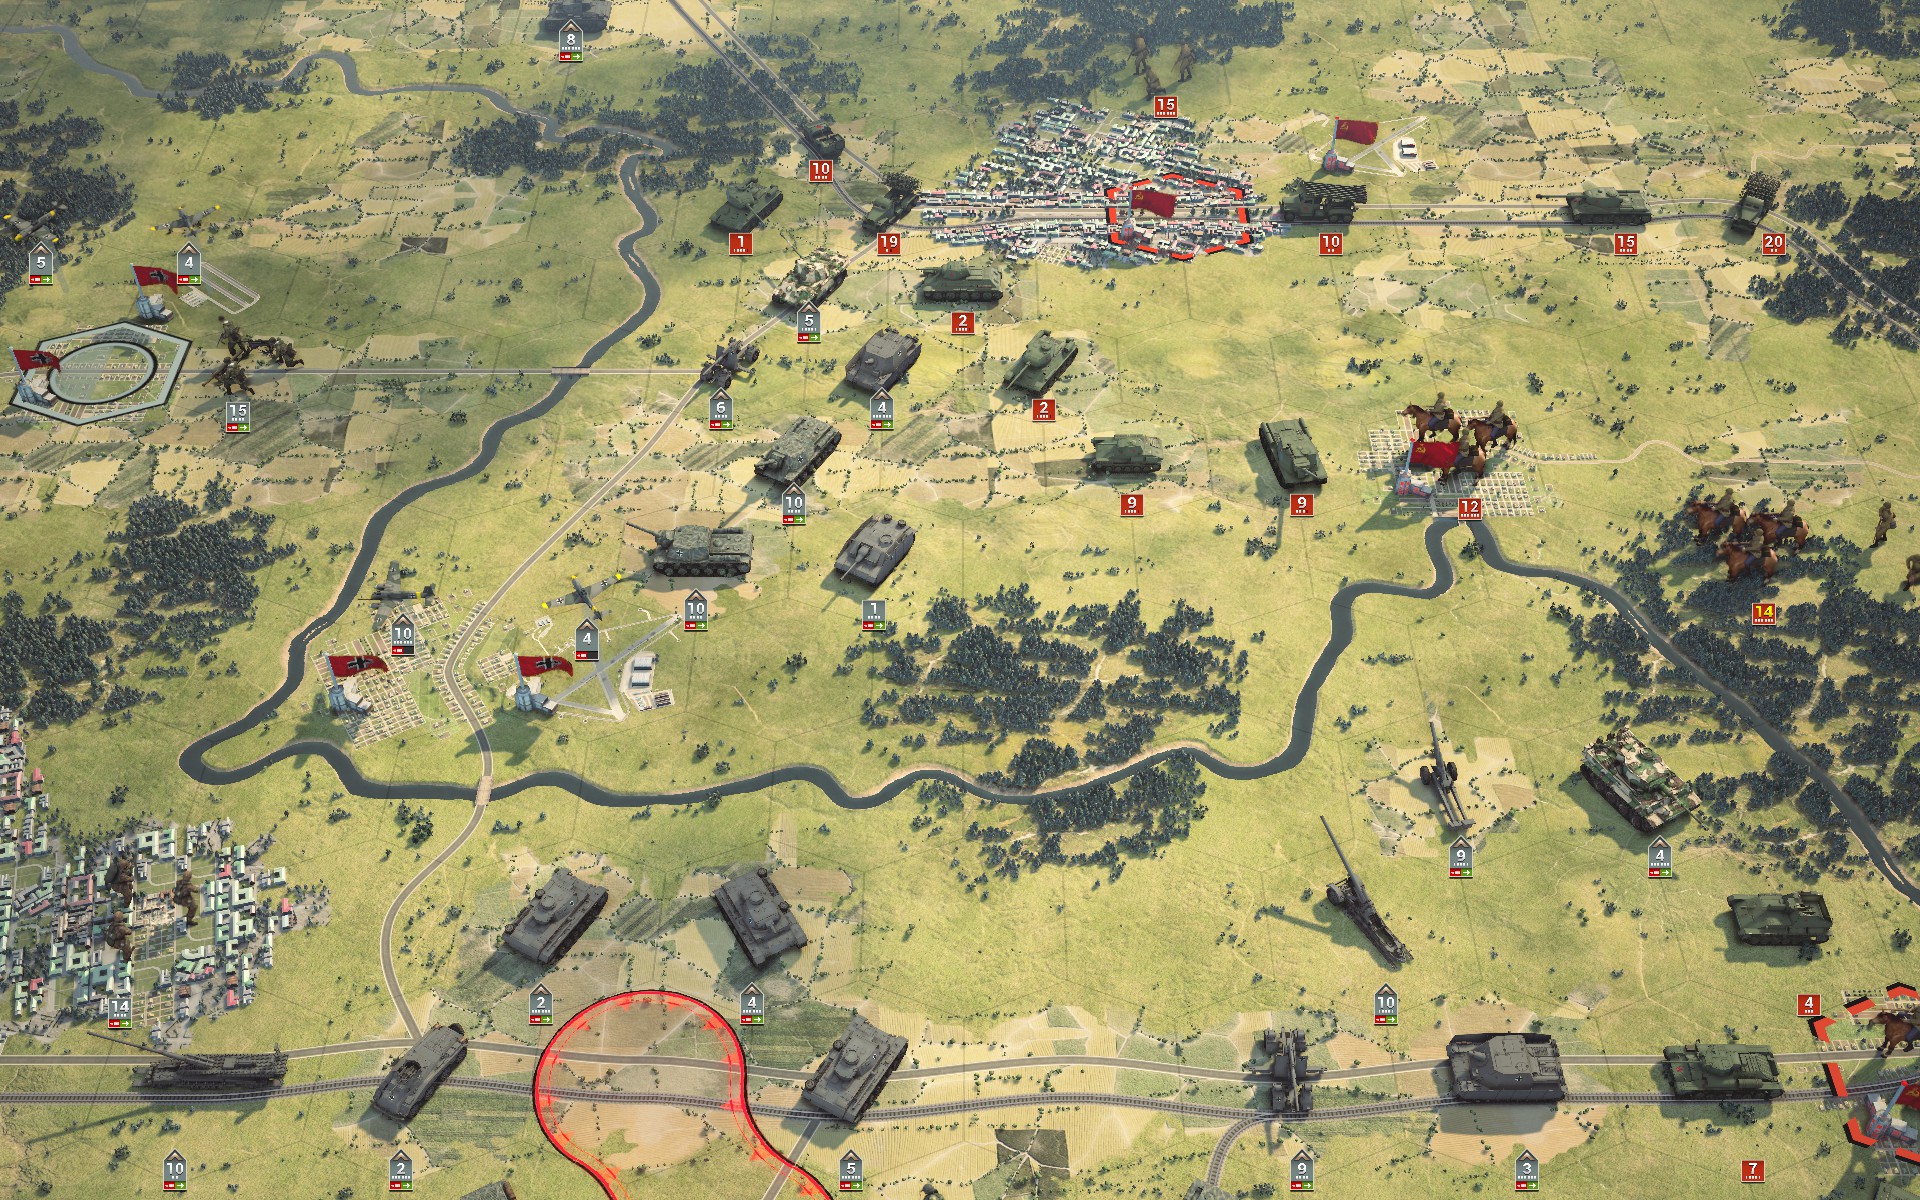
The troops north of the Niemen have born the brunt of the Soviet offensive so far, with the bulk of the T-34s and heavy SPATs converging on Vilnius; even the Tiger and Panther battalions that formed part of the reaguard have lost half their numbers. However, the Red Army has paid dearly for its success to date, and the battle may still prove to be a Pyrrhic victory if its best battalions -- including the 15-strength IS-2 -- are left with too little support to achieve anything. I will destroy the T-34s and attempt to lure in the IS-2 so it can be safely neutralised, while keeping the 8.8 away from the Kayushas; it's poor defence makes it a tempting target for rocket artillery.
NB: I played this scenario before the patch that increased the kill percentage of experienced artillery, which would have made the Katyusha batteries a lot more dangerous.

East of Bialystok the rearguard has found itself threatened by Soviet forces from the south, as the Red Army aggressively pushed north towards the Niemen. These troops were tasked with holding Minsk till the end, and so many of them were not able to evacuate using the railway. With Gustav and the slower IS-1 detachments brought up from Bialystok they are in no real danger of being overrun, as the Red Army has prioritised mobility over firepower in the centre. It seems a curious choice given that there is relatively little space in which to maneuver between the river and the marshes, but as a result losses have been limited, with the exception of the Crimson Guard, who were attacked in the open by two Cavalry battalions with only a single SU-152 to support them.
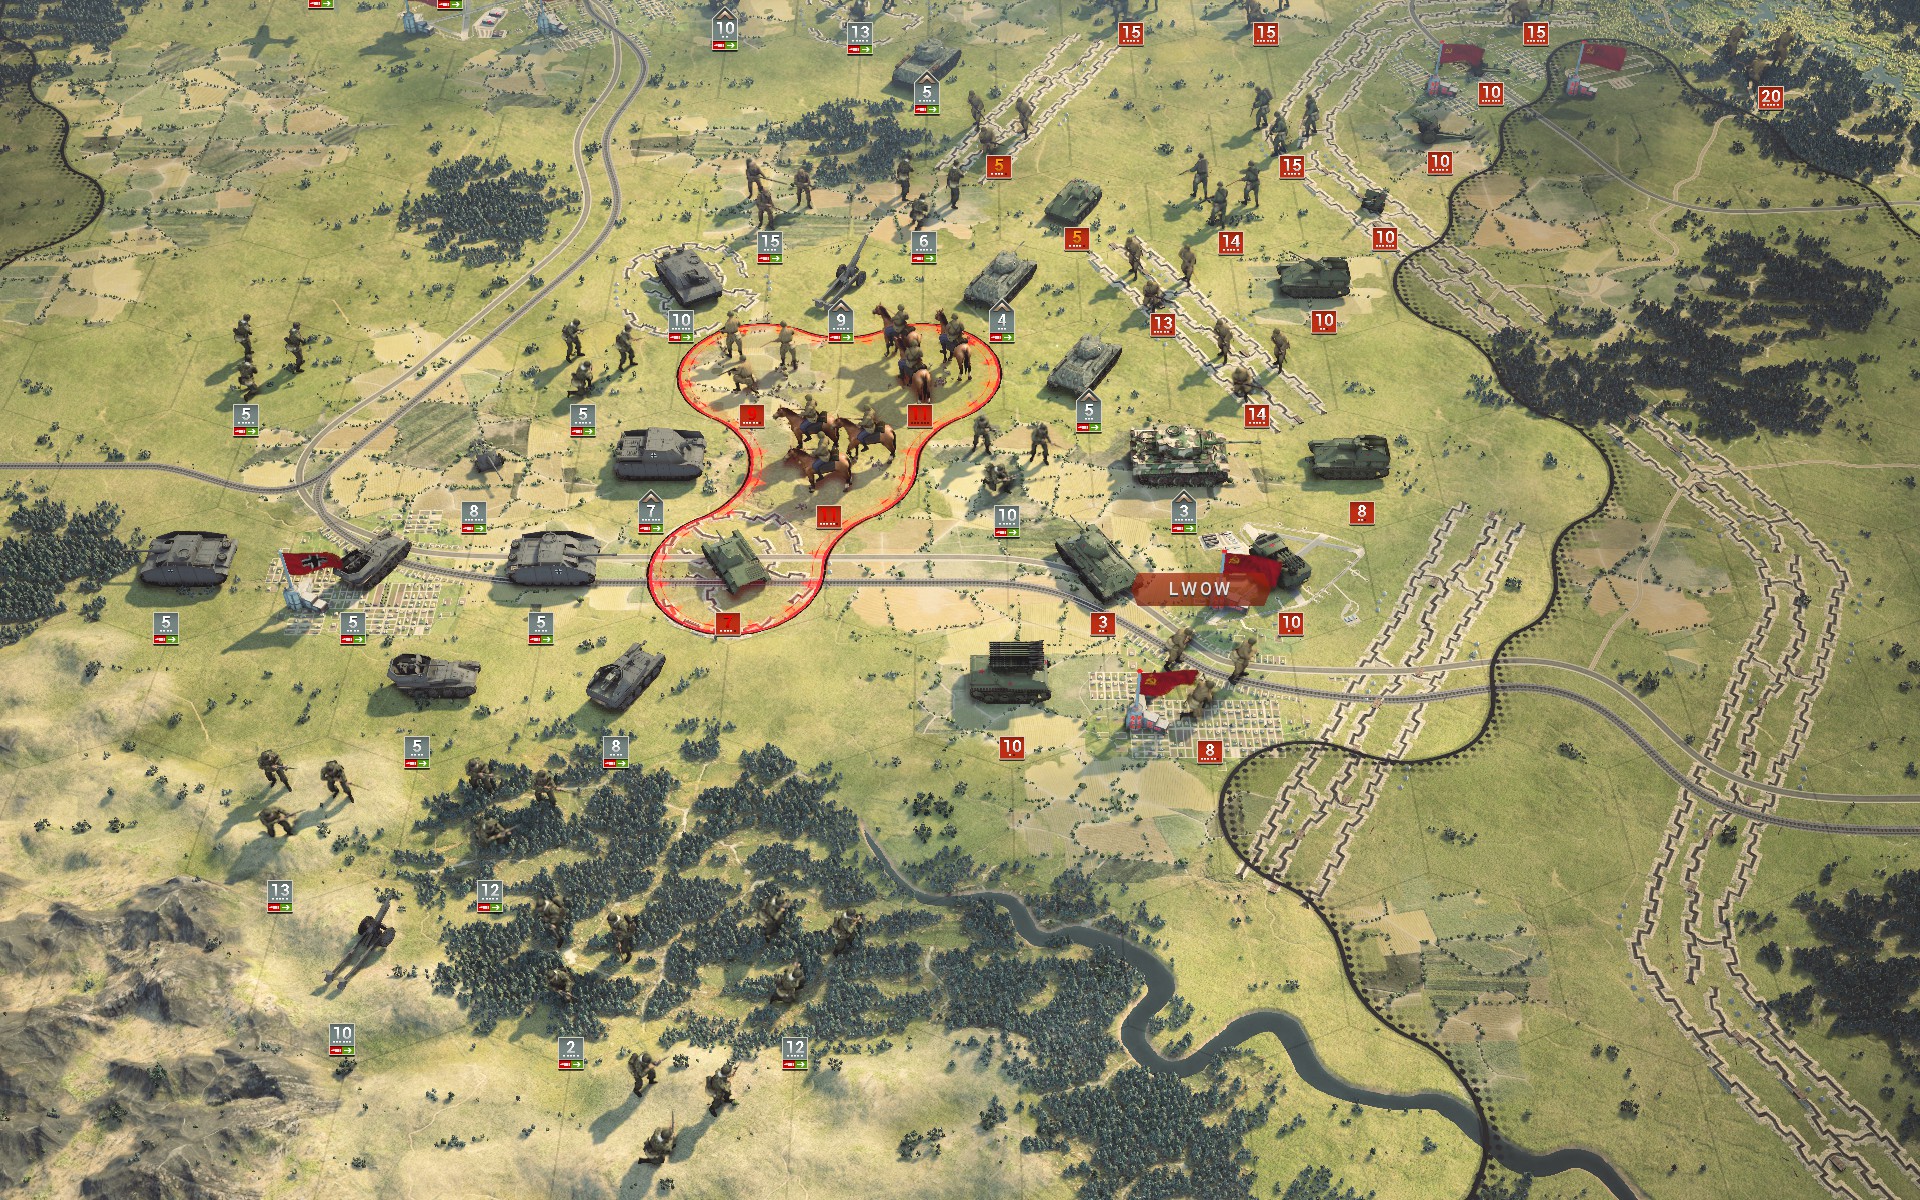
A Tiger detachment has broken the Soviet line north of Lwow, leaving the vanguard of the Red Army in a precarious position.
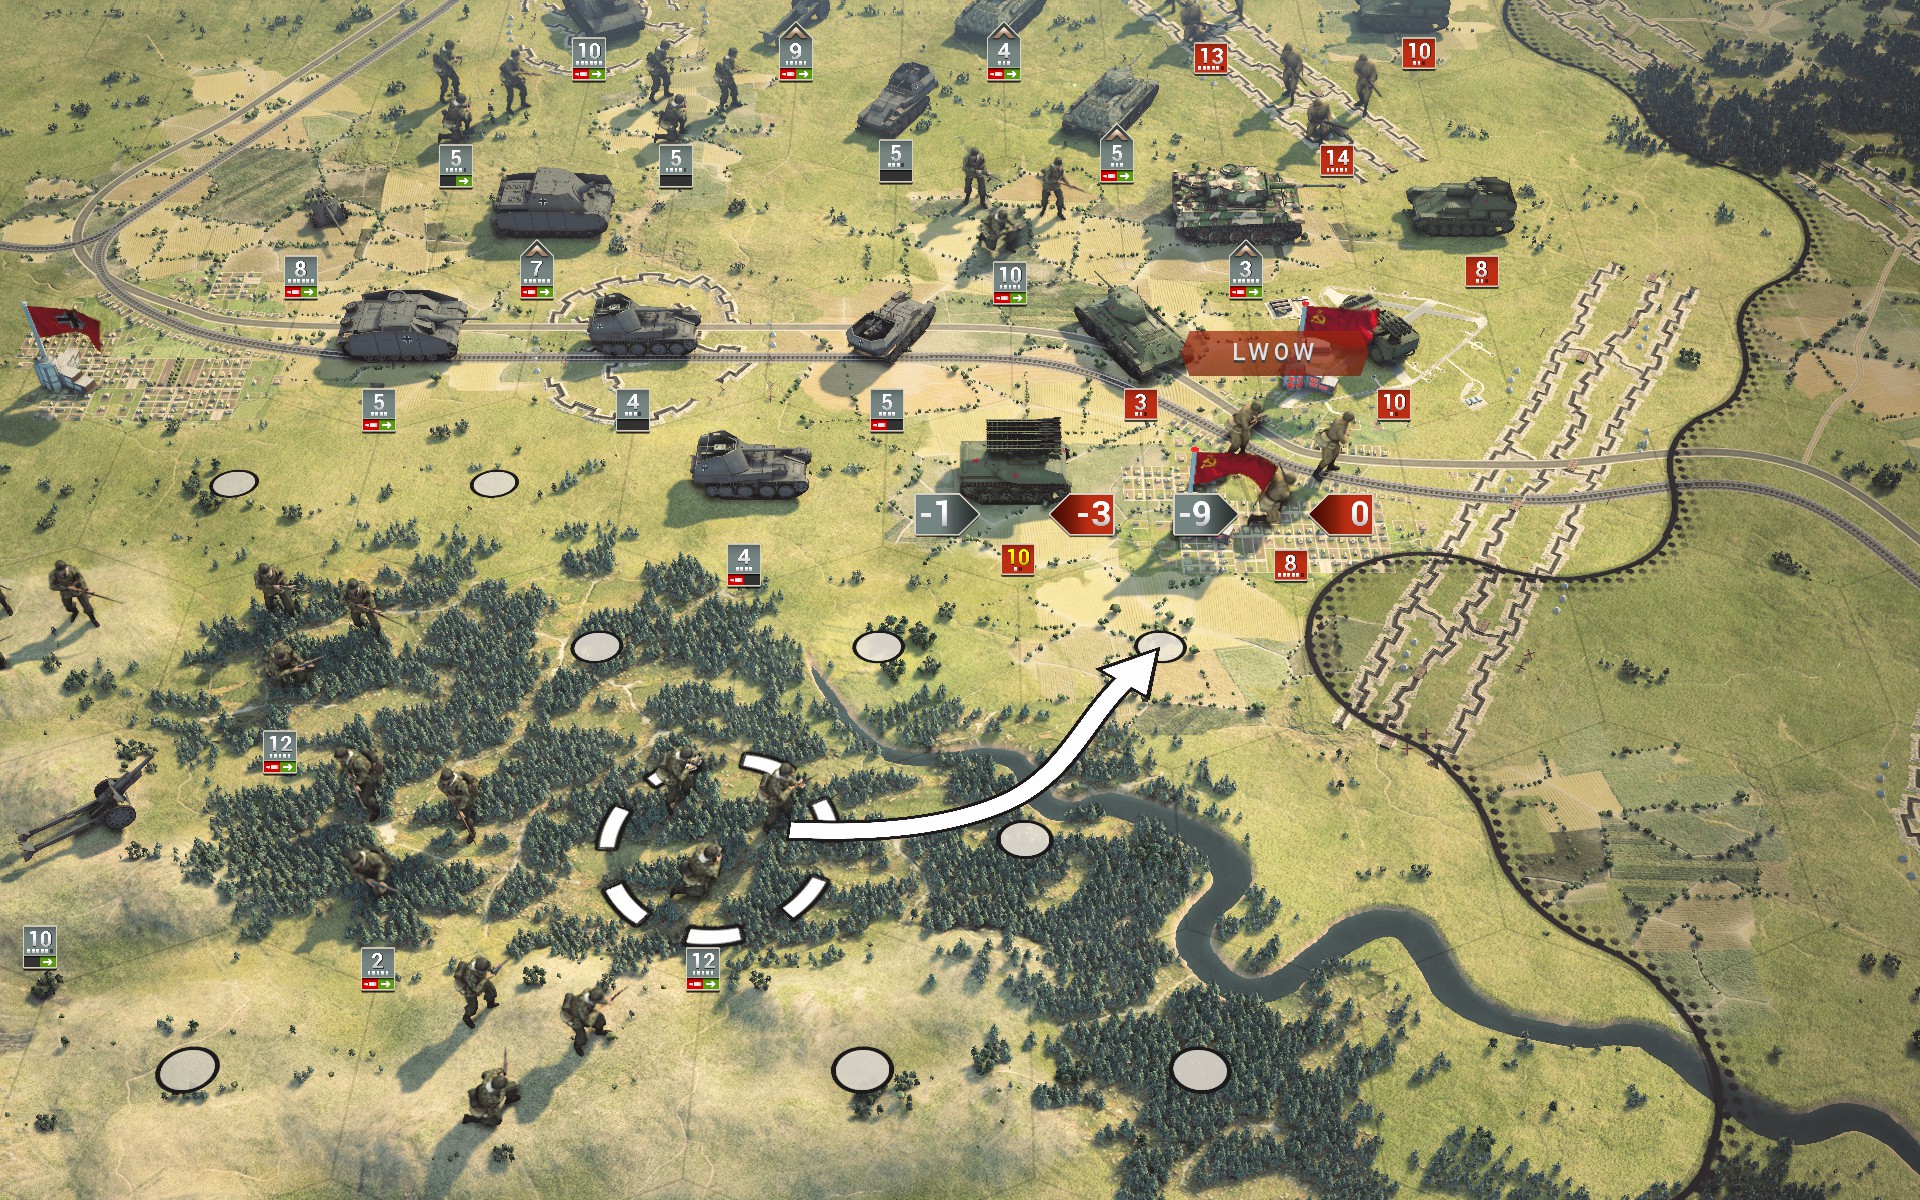
An auxiliary Wehr Infanterie use forced march to cross the river. According to the devs this is a feature, so if you see the AI doing this it's not a bug.
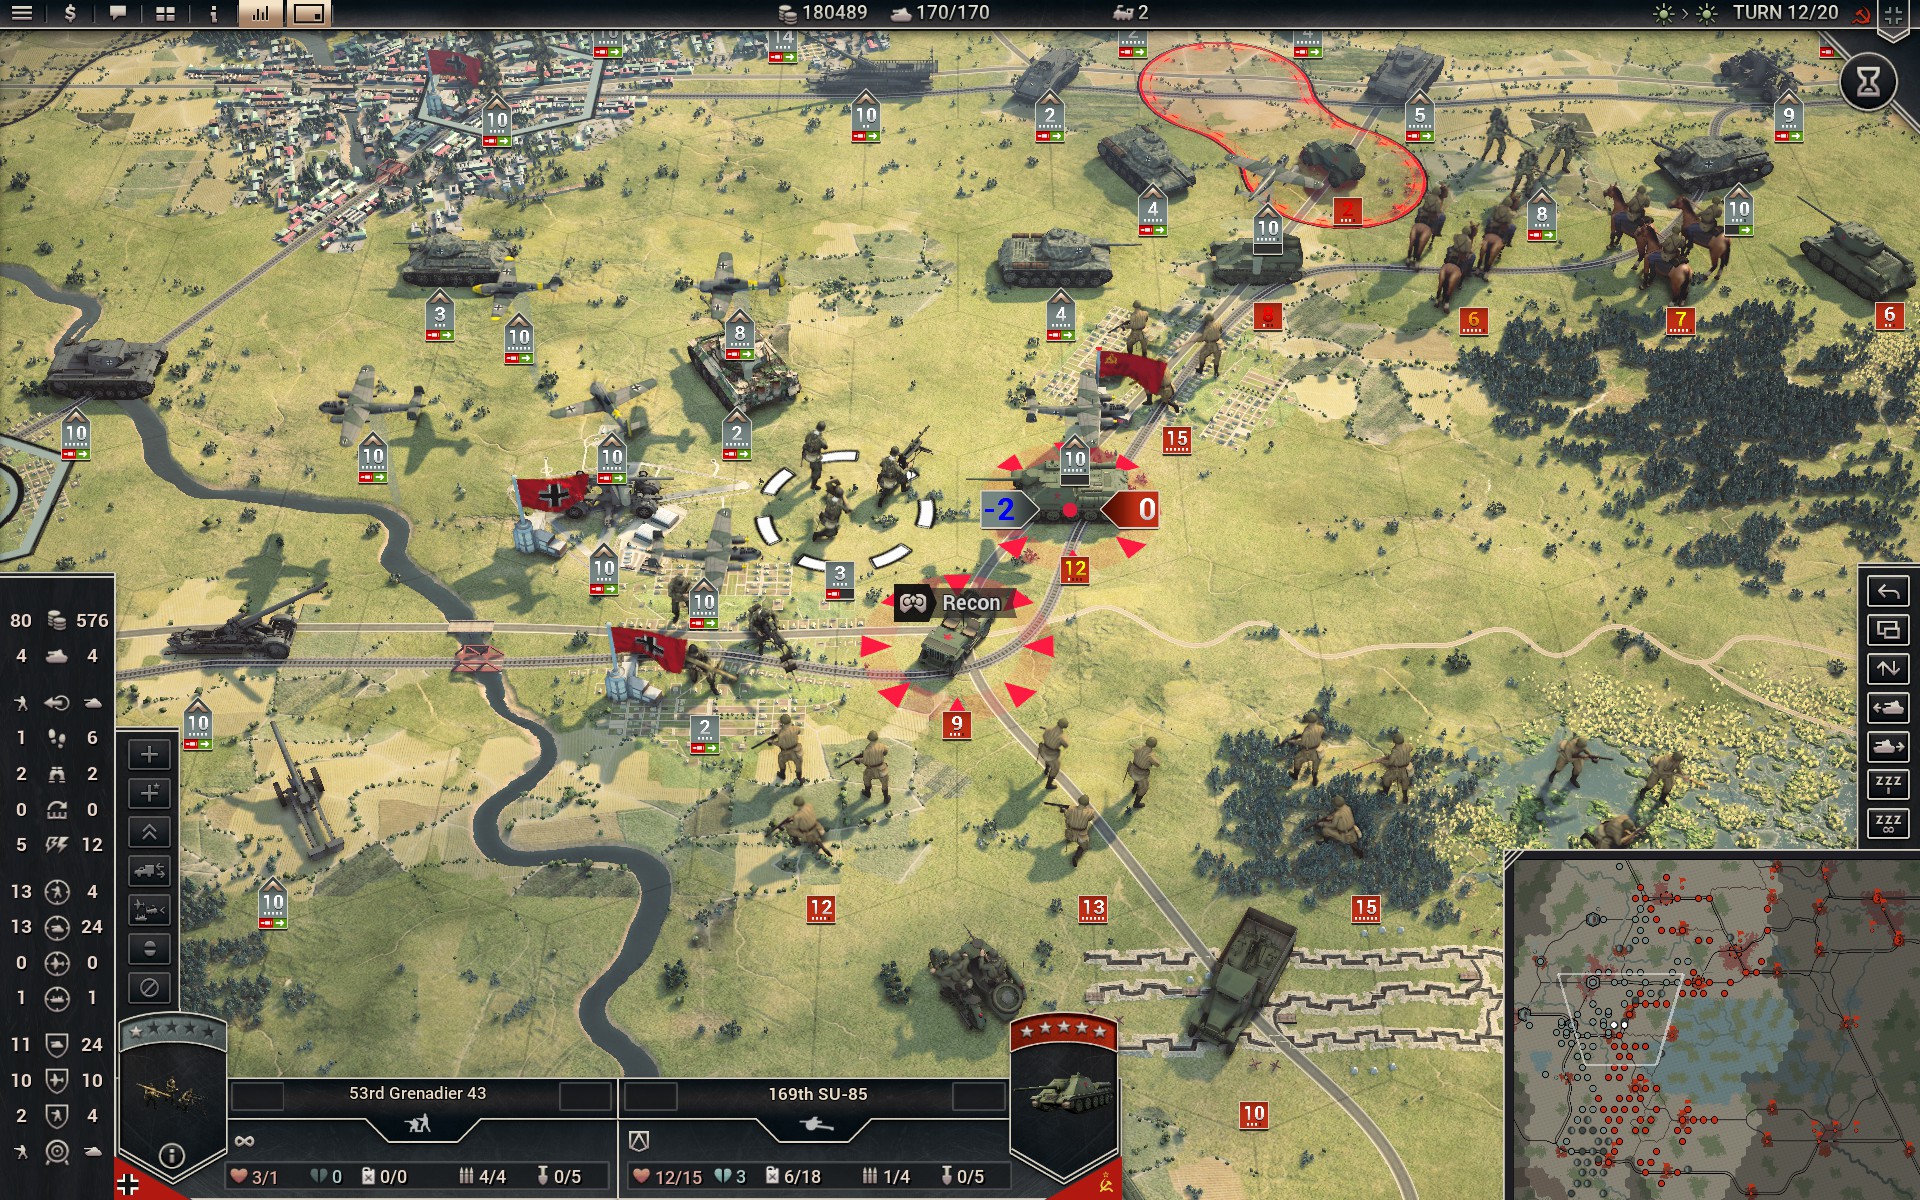
With the help of a Do 217E, a detached auxiliary Grenadier drain the overstrengthened SU-85 of its last ammunition. Now I just need to encircle it and this once potent battalion will be harmless.
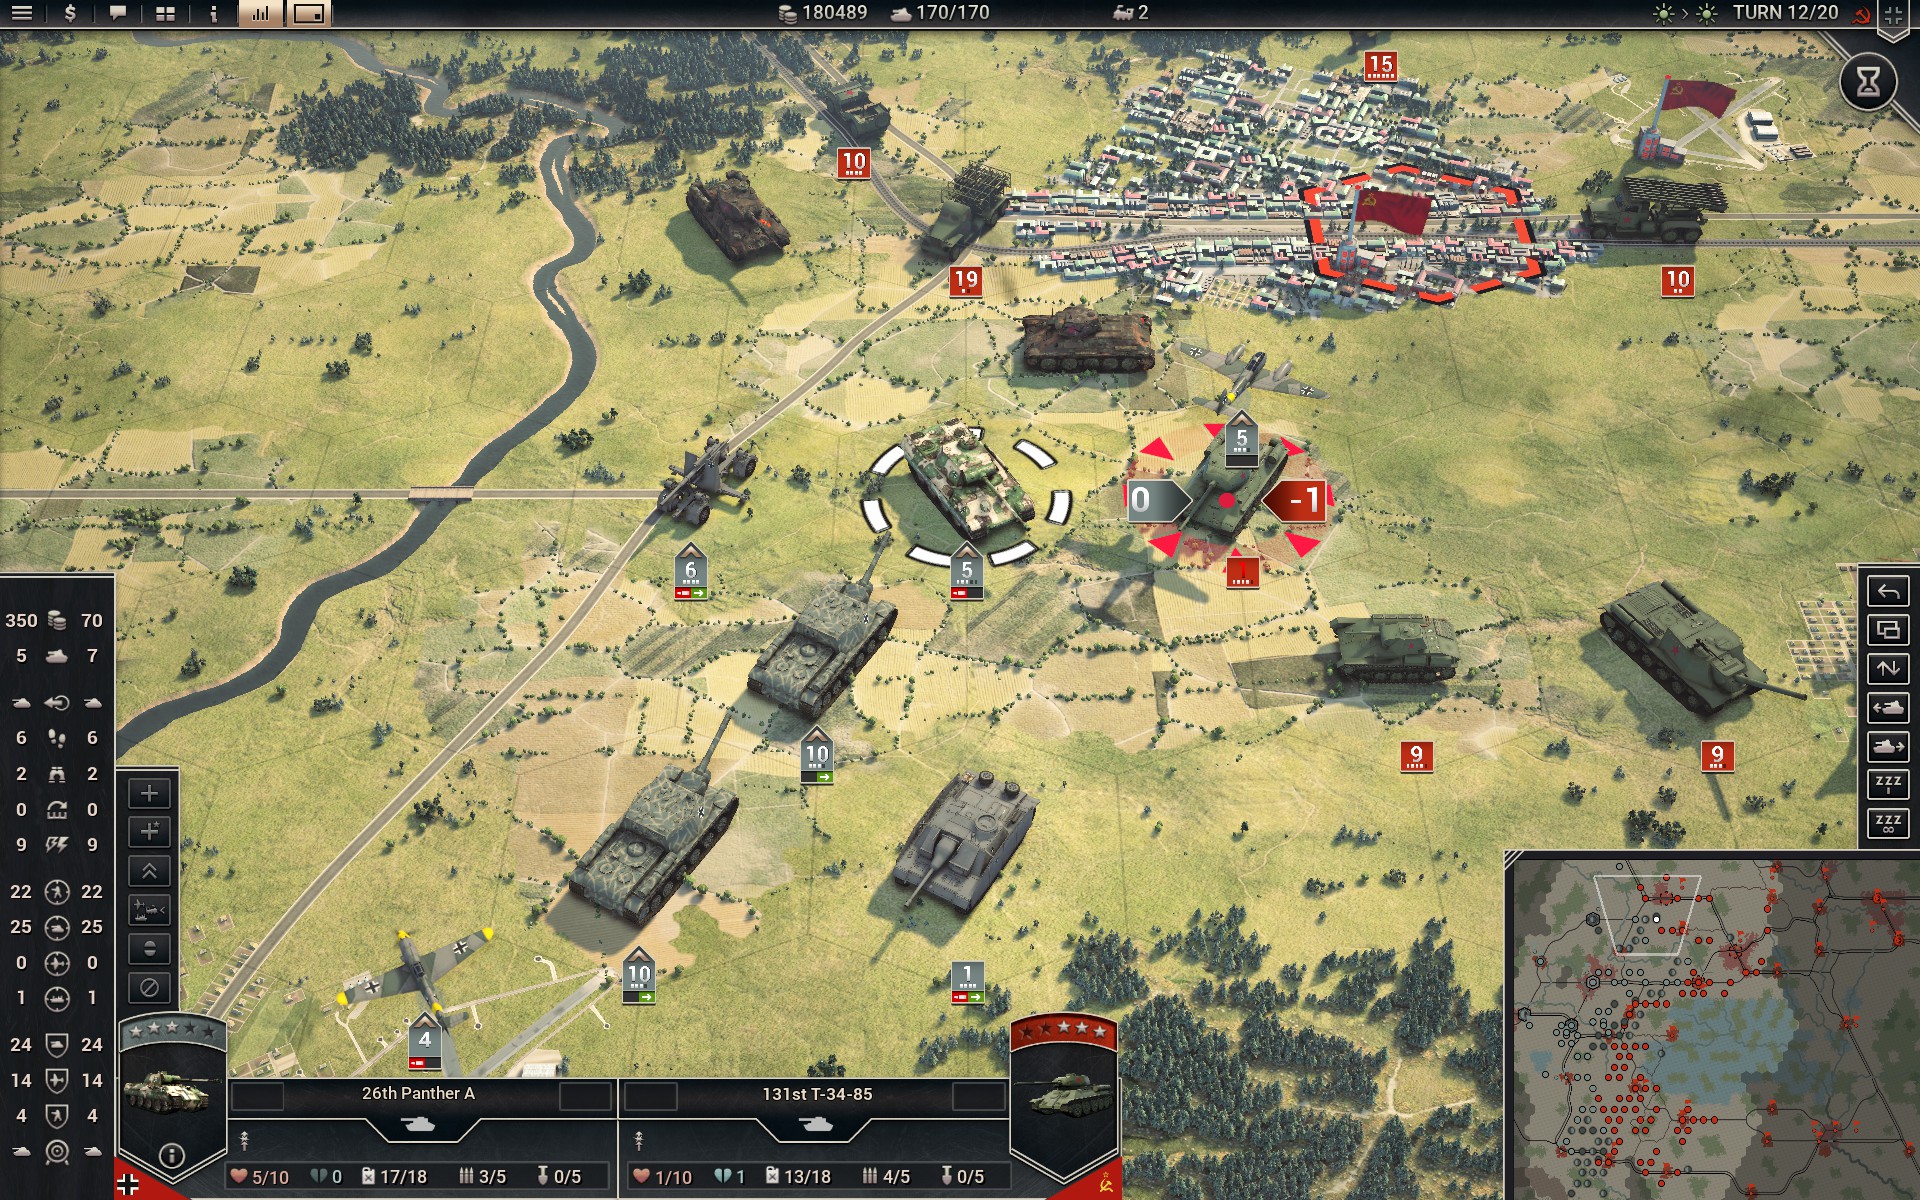
The Panther battalion avenges its fallen by destroying the remaining T-34s west of Vilnius. Note that the Panther A and the T-34/85 have identical stats; the discrepancies are due to my traits.
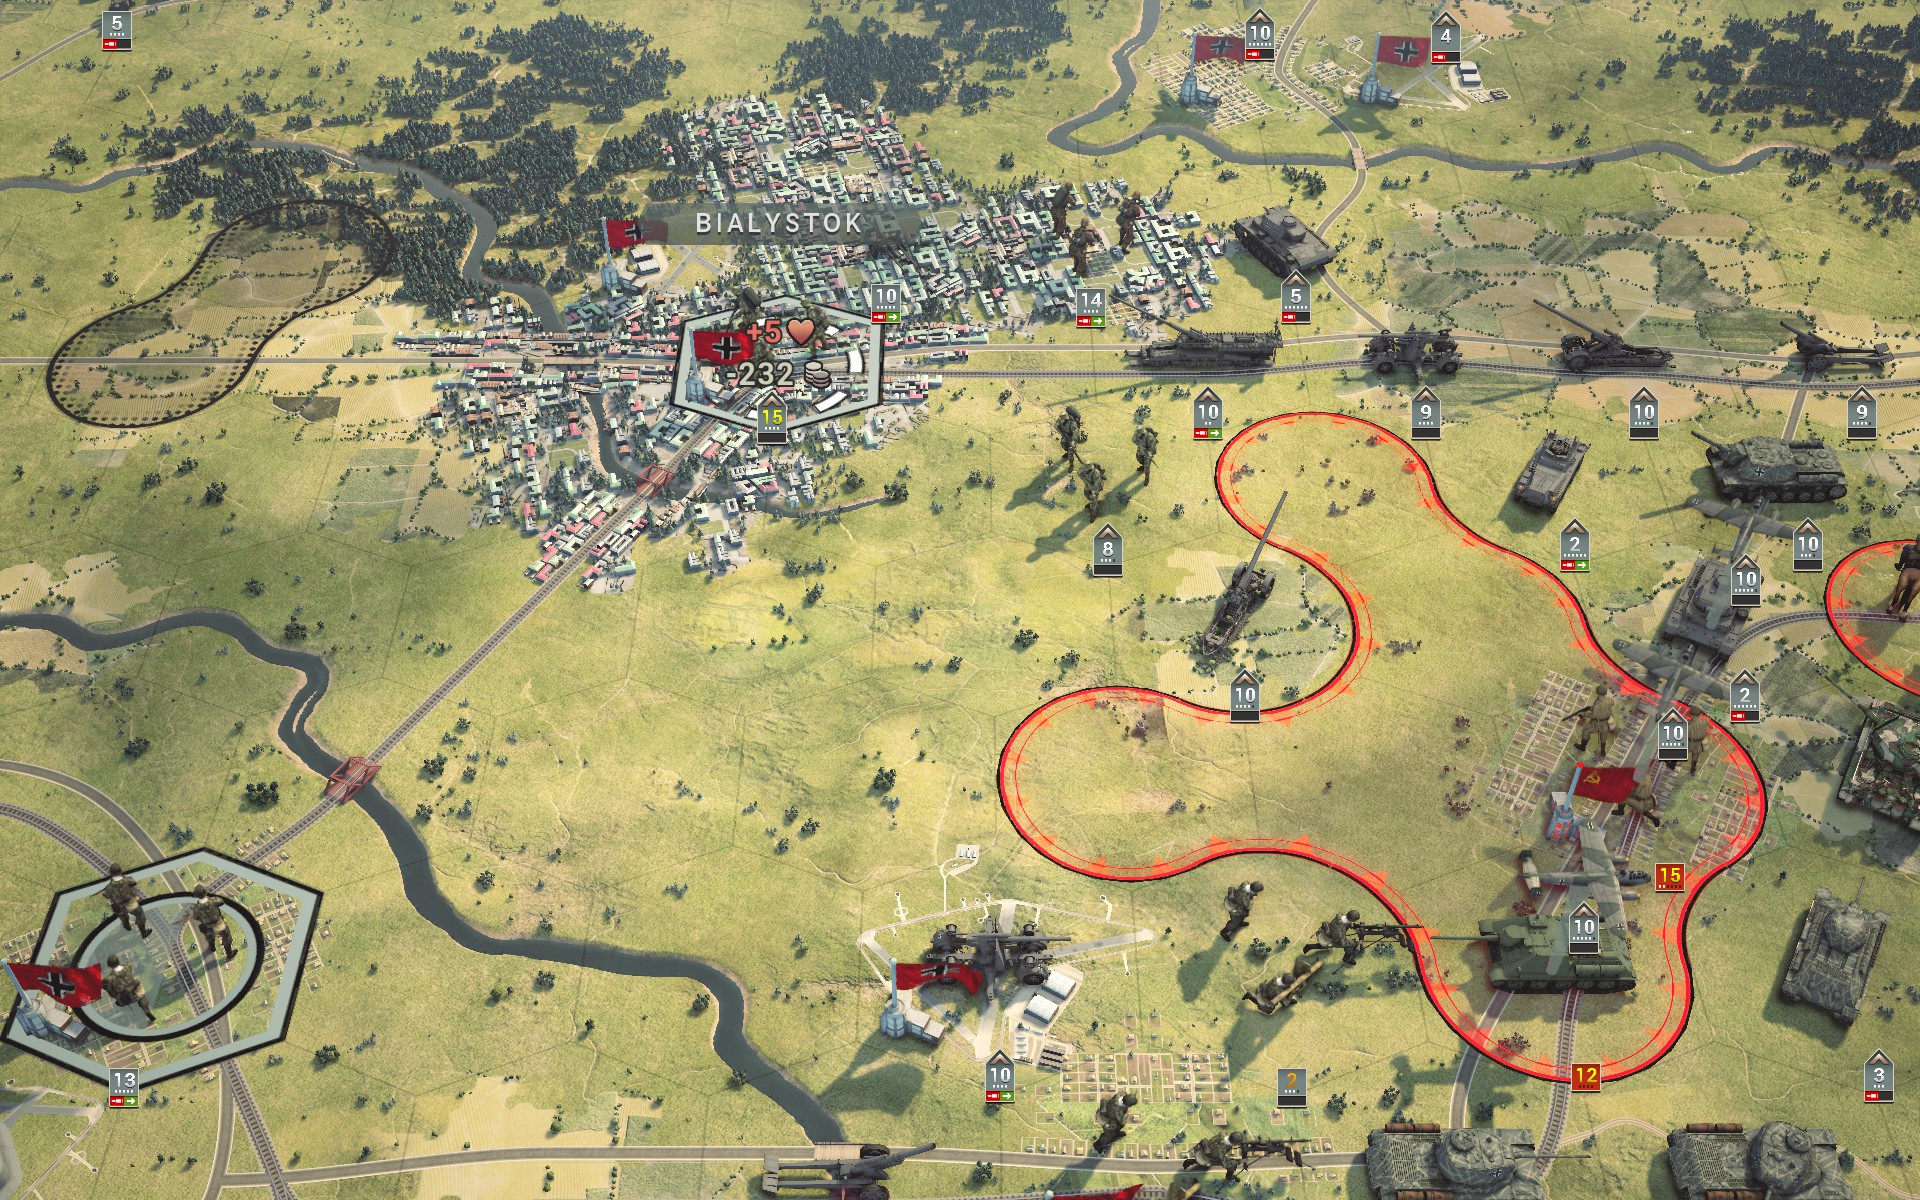
The Crimson Guard withdraw towards Bialystok while the Bridgeburners reinforce. My elite mechanized Pioniere still have a role to play.
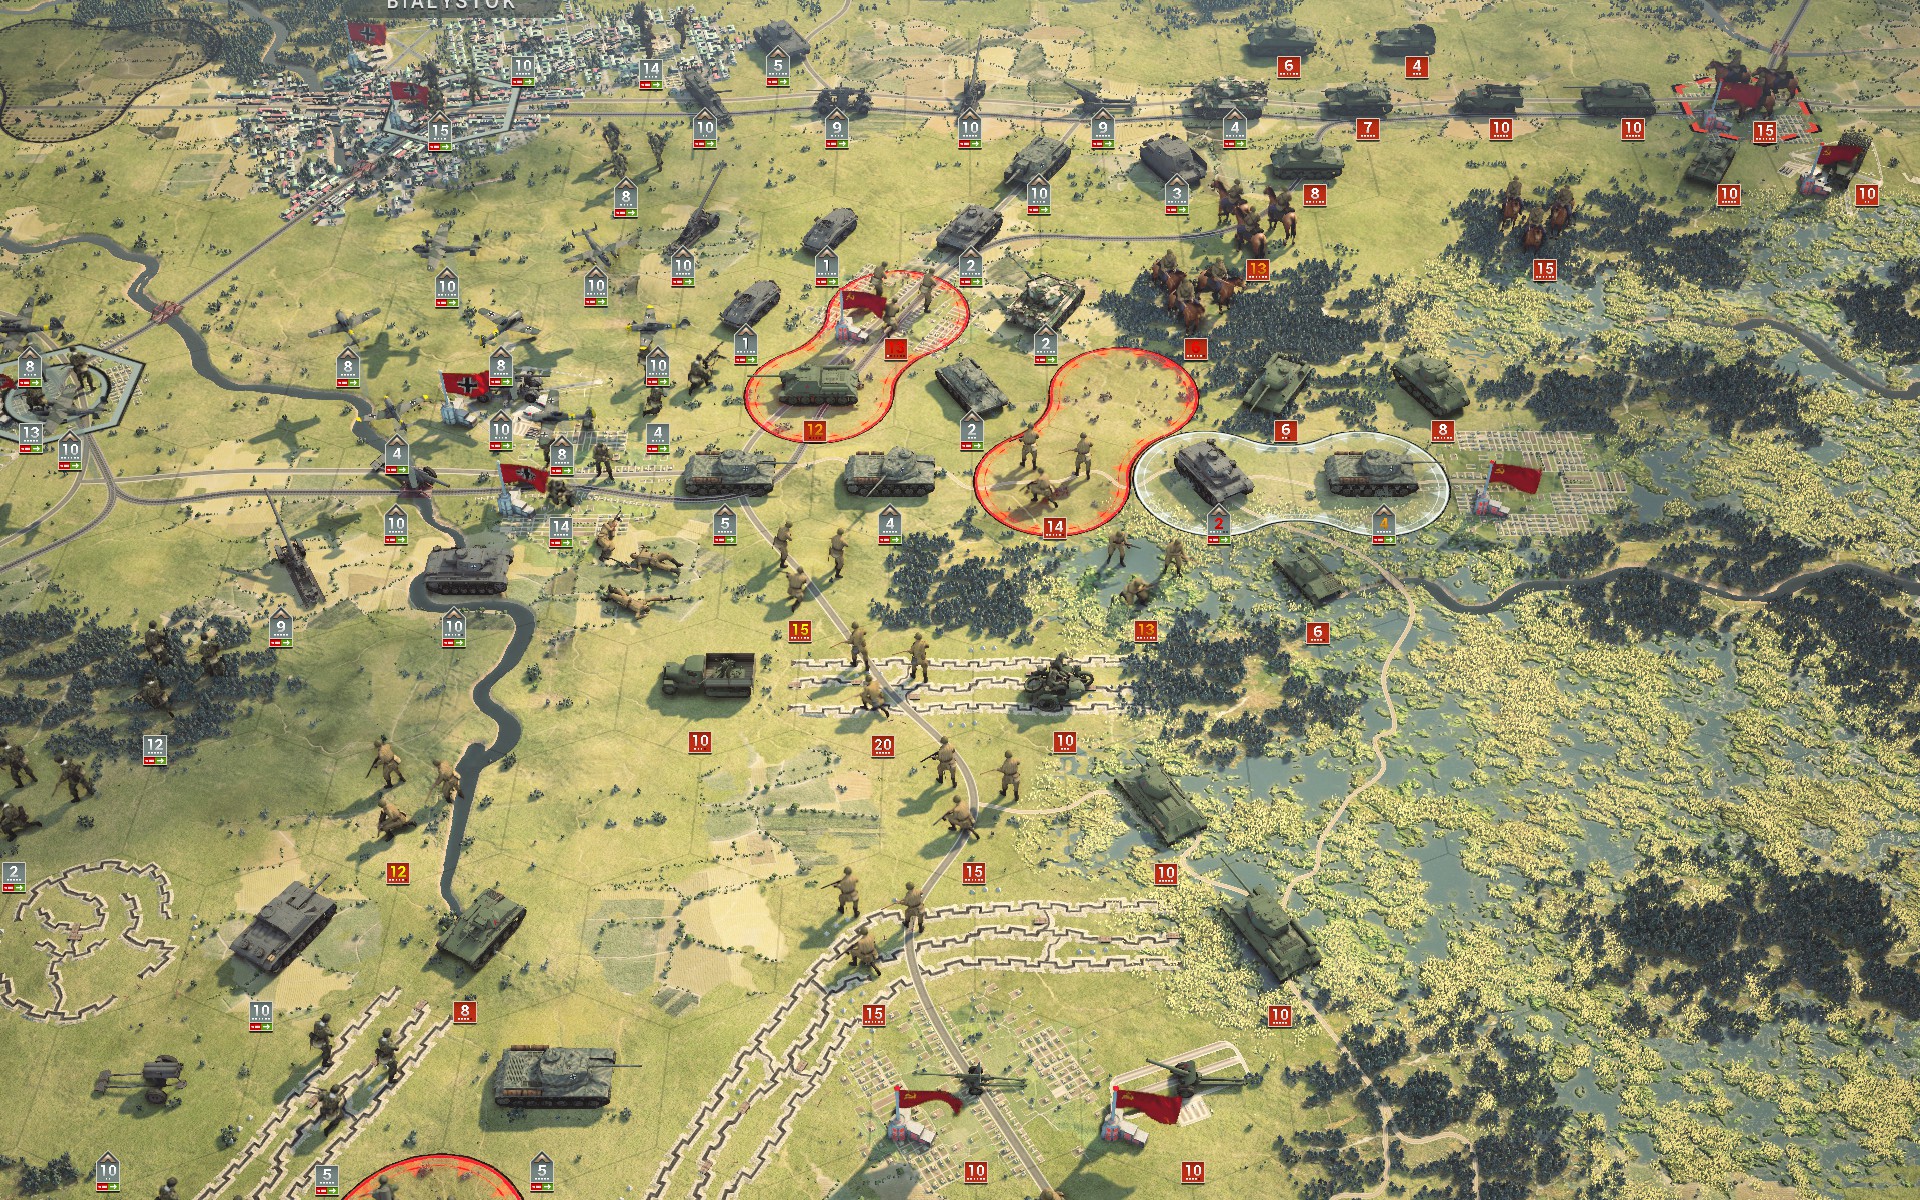
My battlegroup has regained control of the centre. The Red Army has a lot of armour to the east, but without Perimeter Control there is no easy way to pass my heavier Tiger and IS-1 detachments.
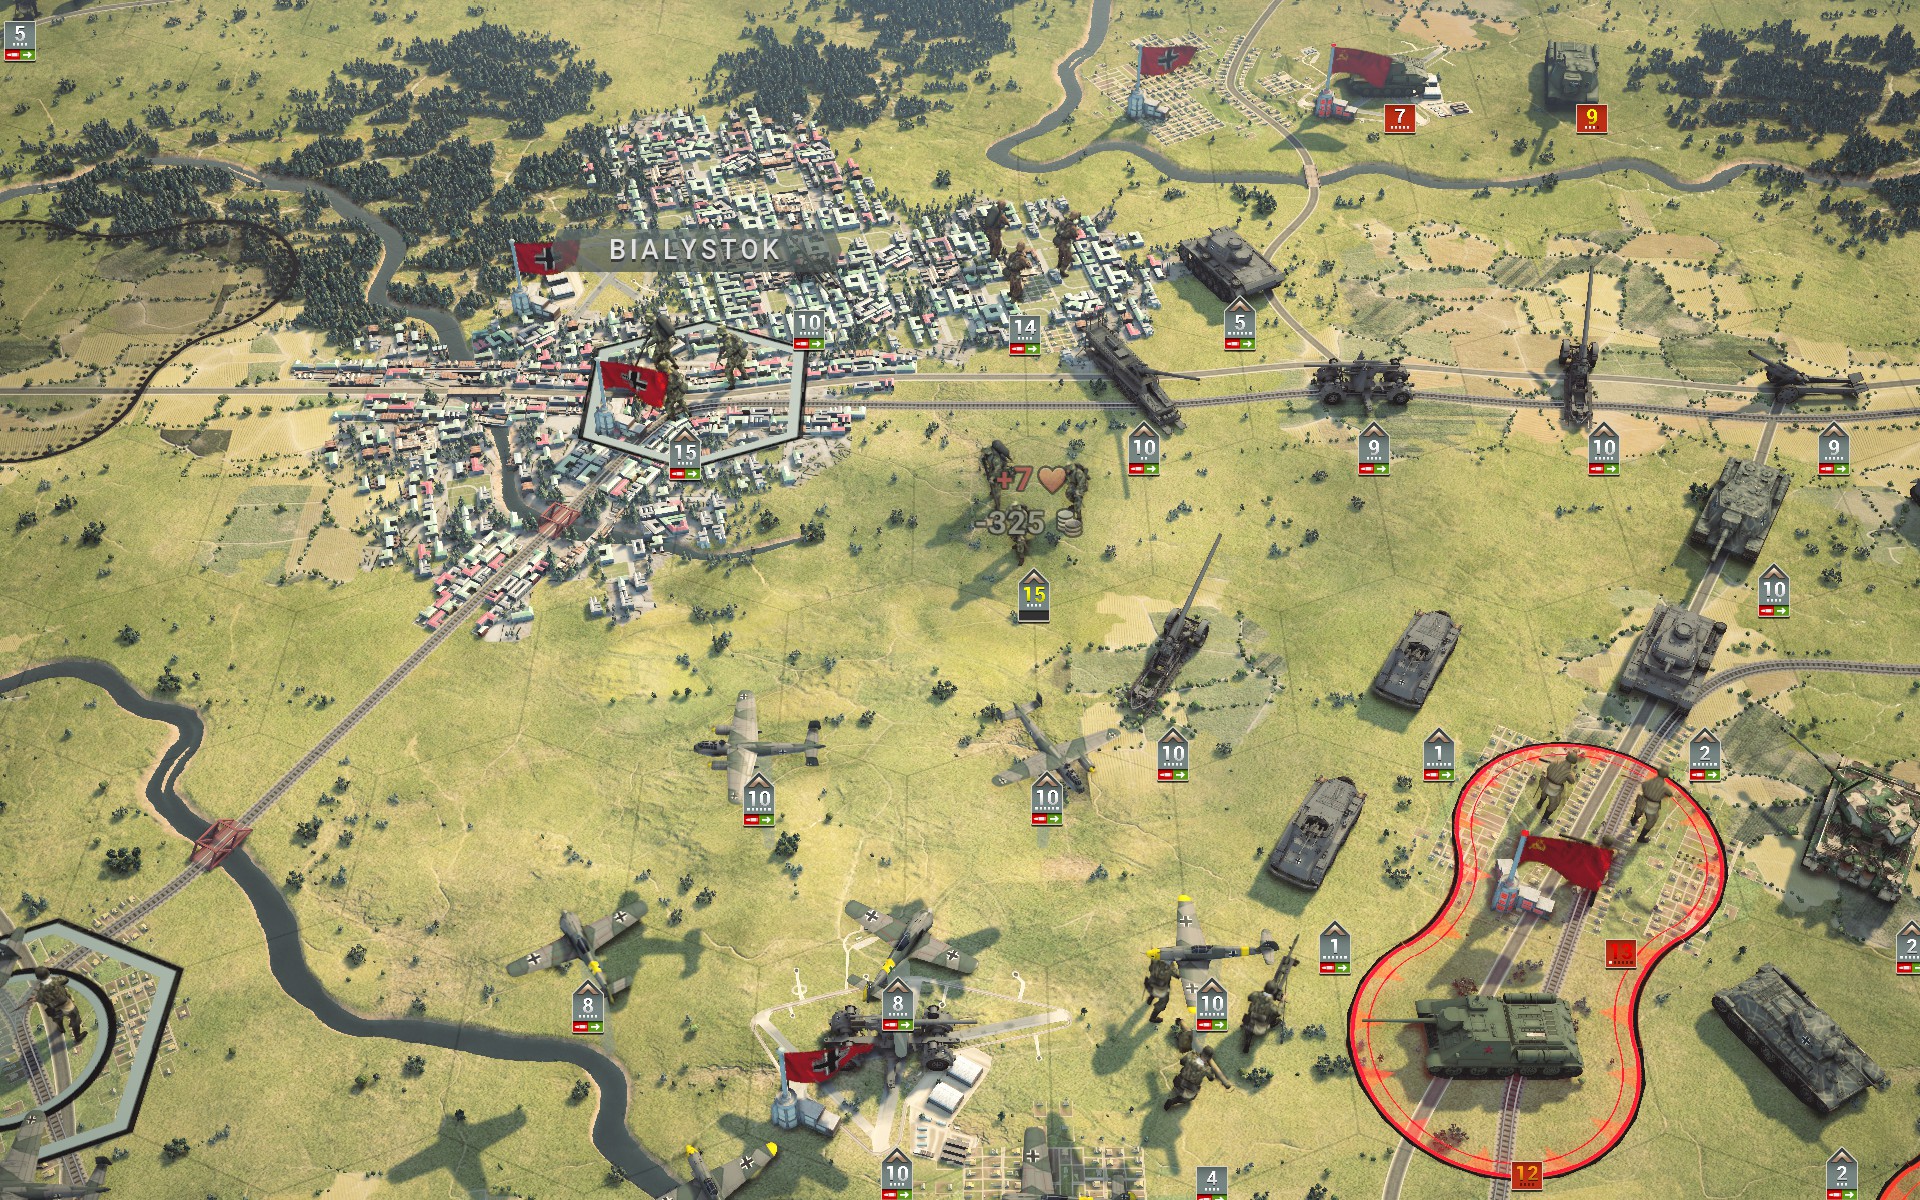
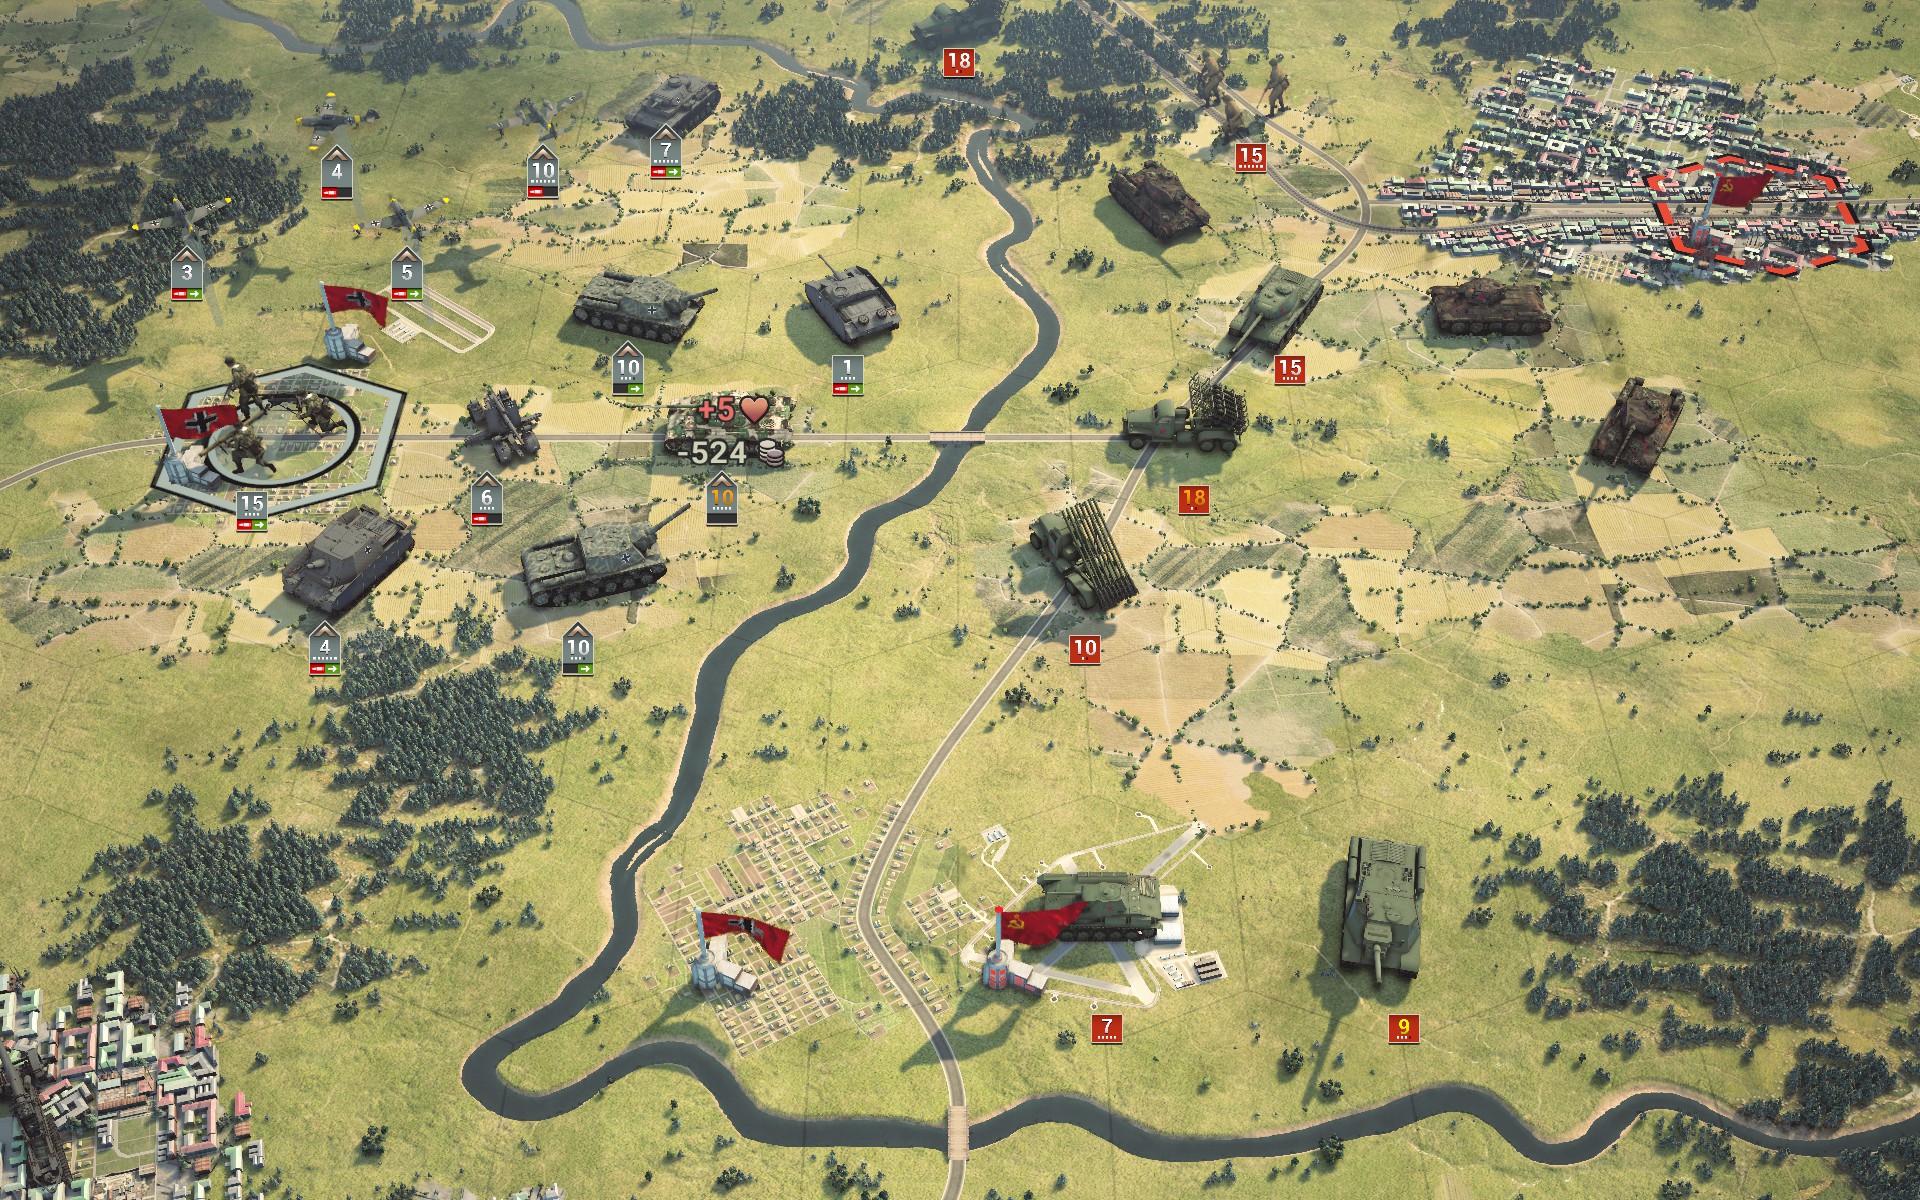
The Crimson Guard and Panthers are reinforced. I'm hoping the restored Panther and the fire support will discourage the IS-2 from attempting to cross the Niemen.
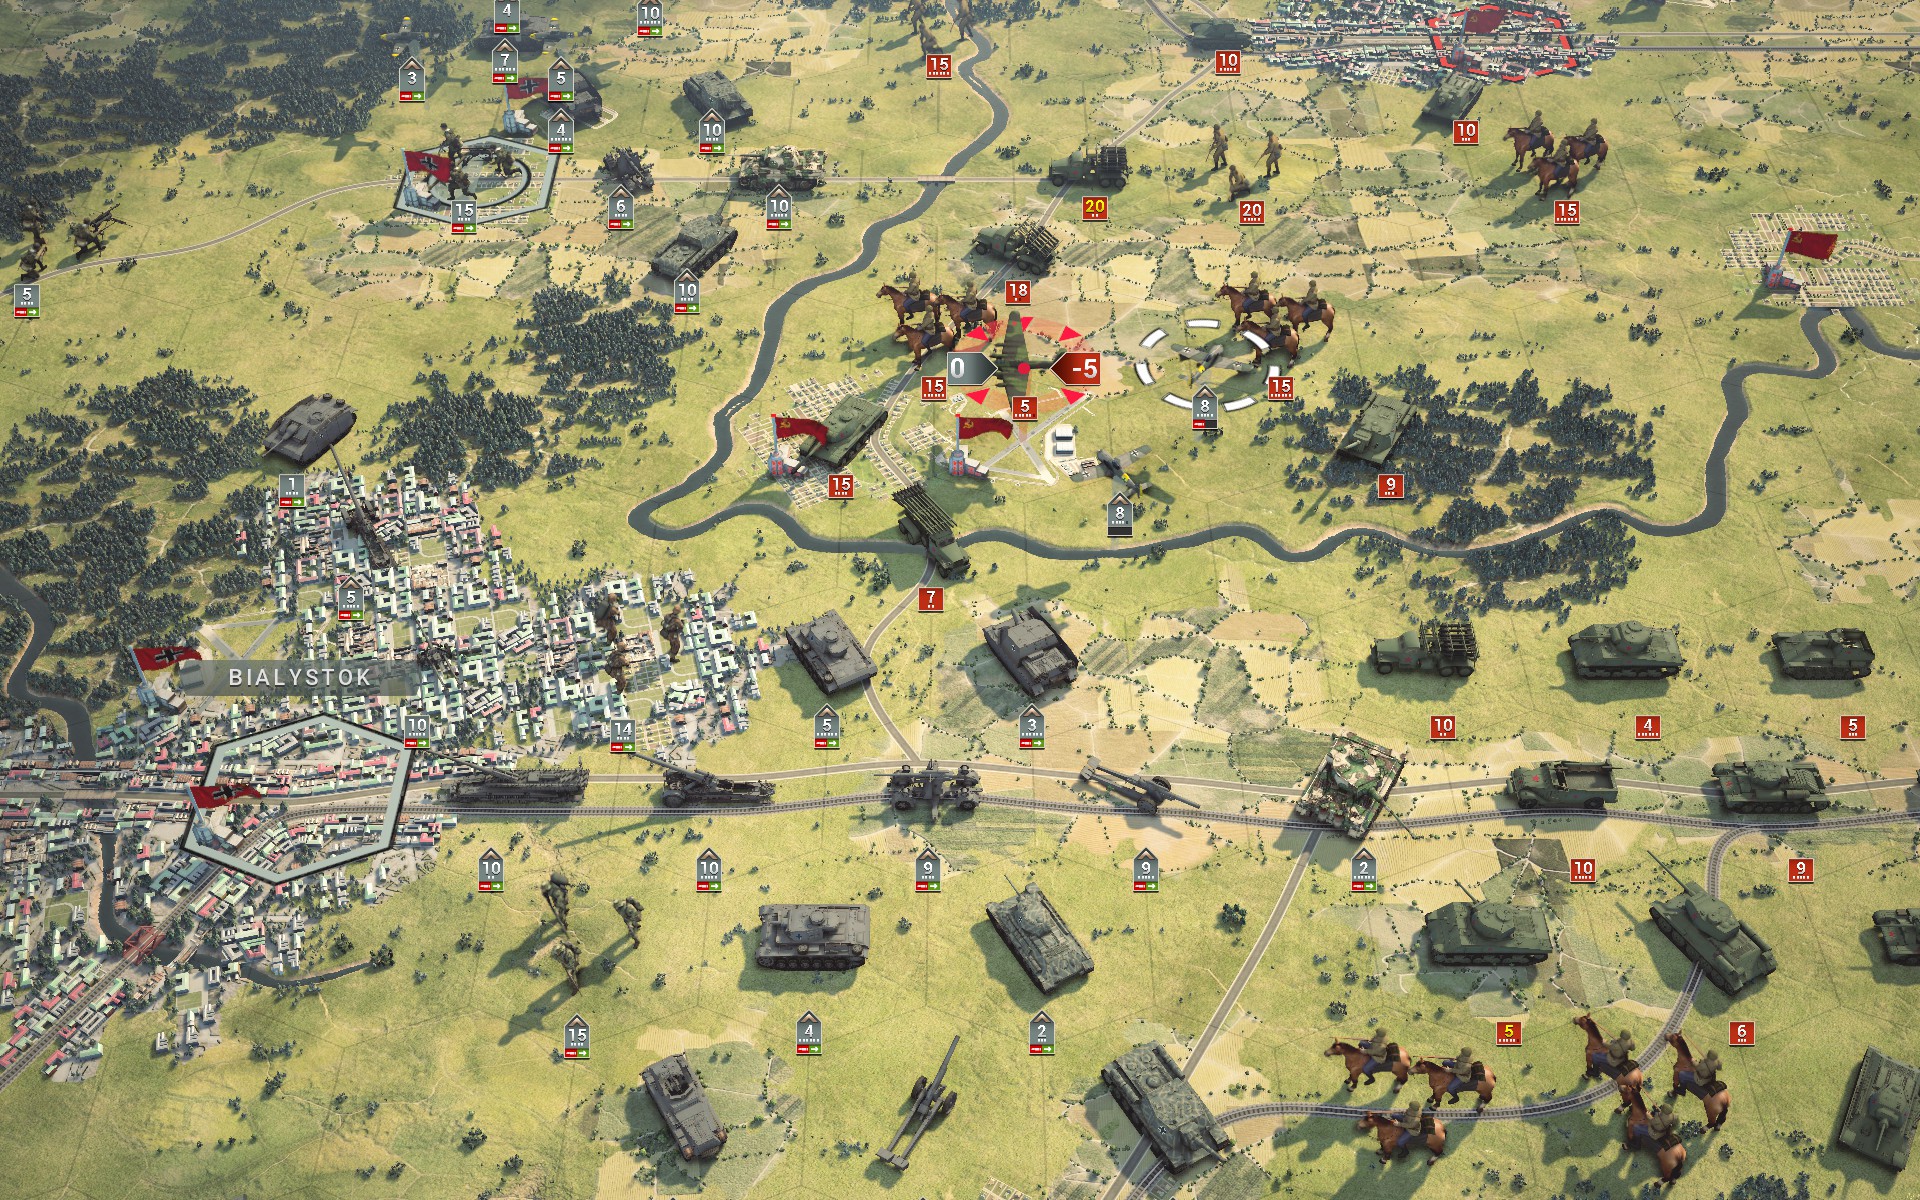
A Petlyakov Pe-8 rebases to Grodno and the Luftwaffe takes it out. The IS-2 captures Grodno, while the situation east of Bialystok is beginning to resemble a rush hour traffic jam.
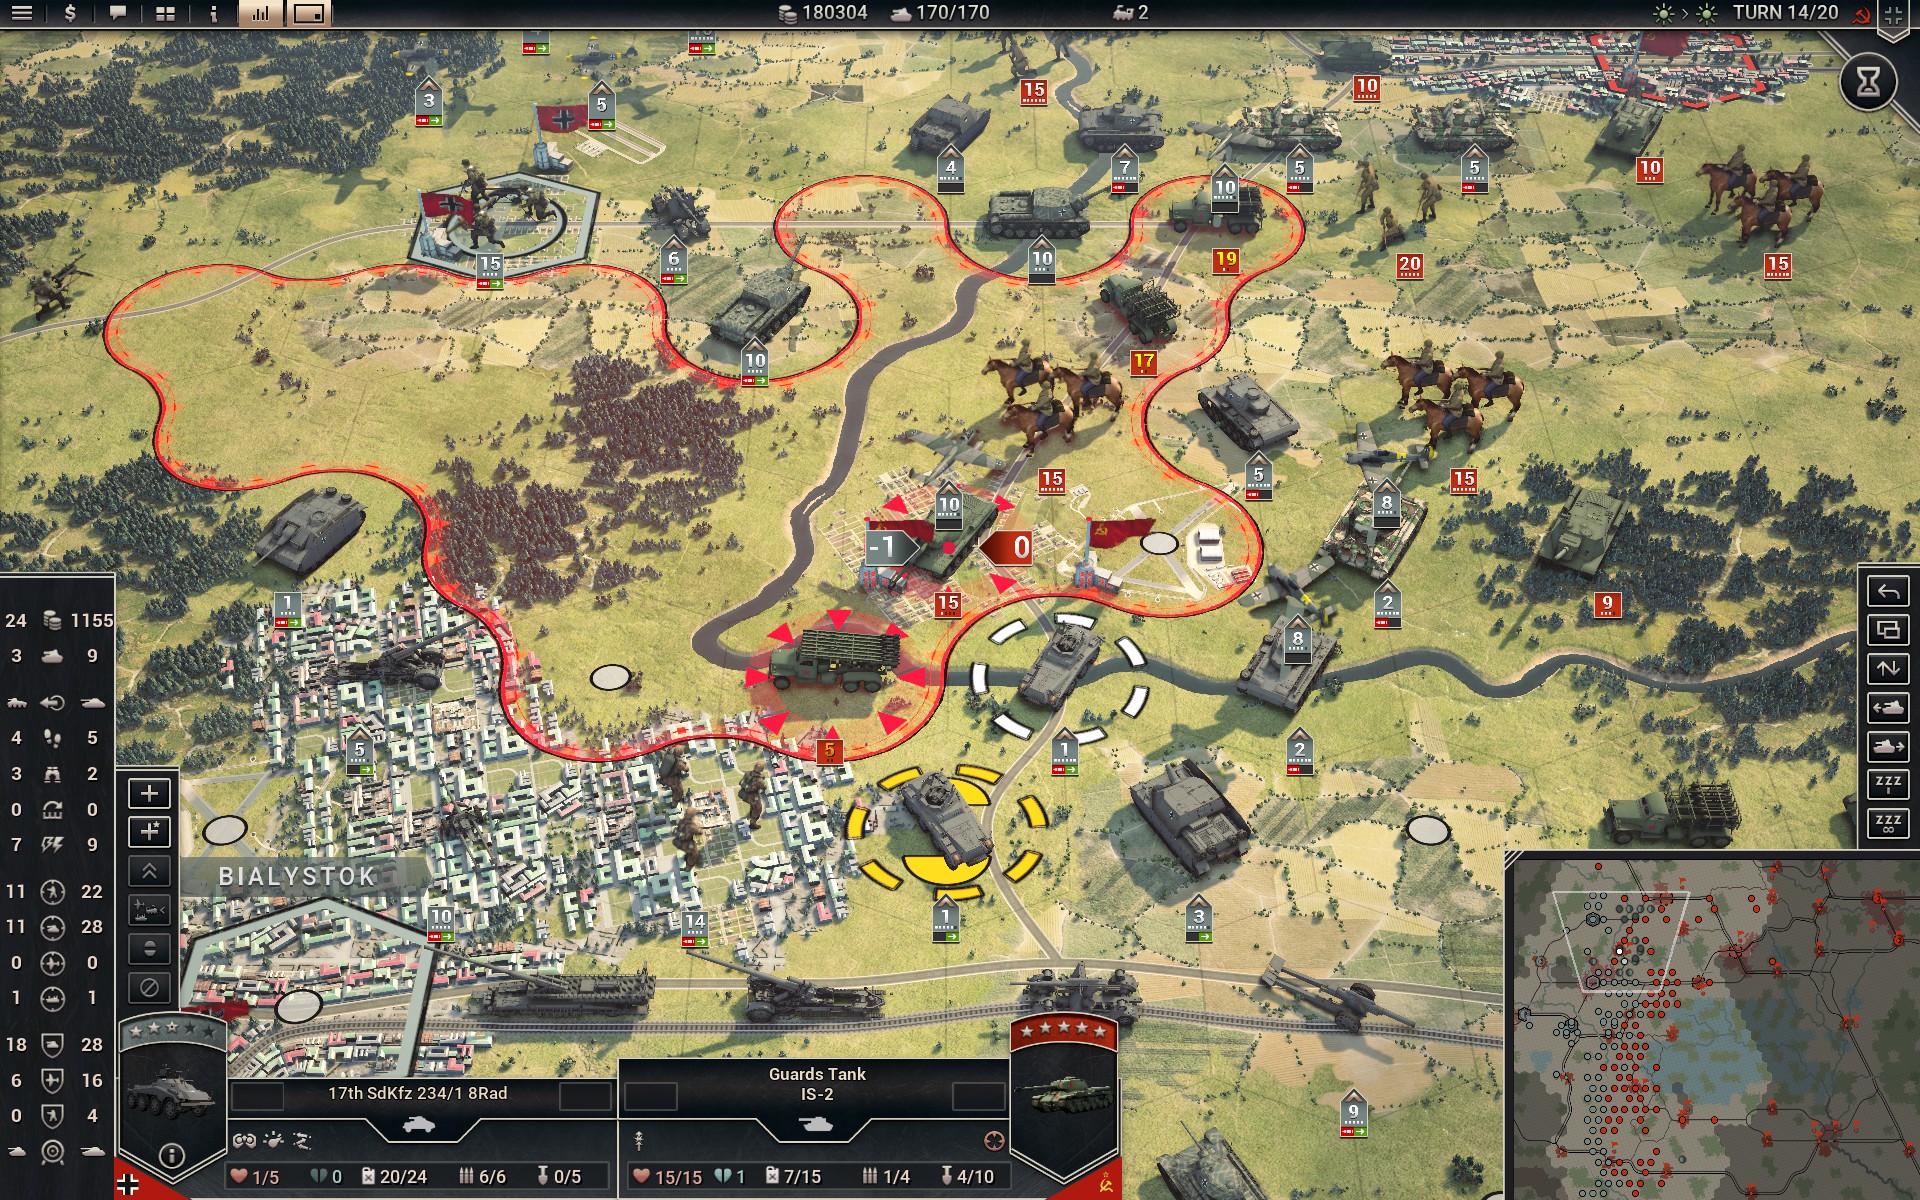
An impetuous SdKfz 234/1 detachment volunteers to brave the guns of the IS-2, ensuring that the powerful battalion won't be able to attack.
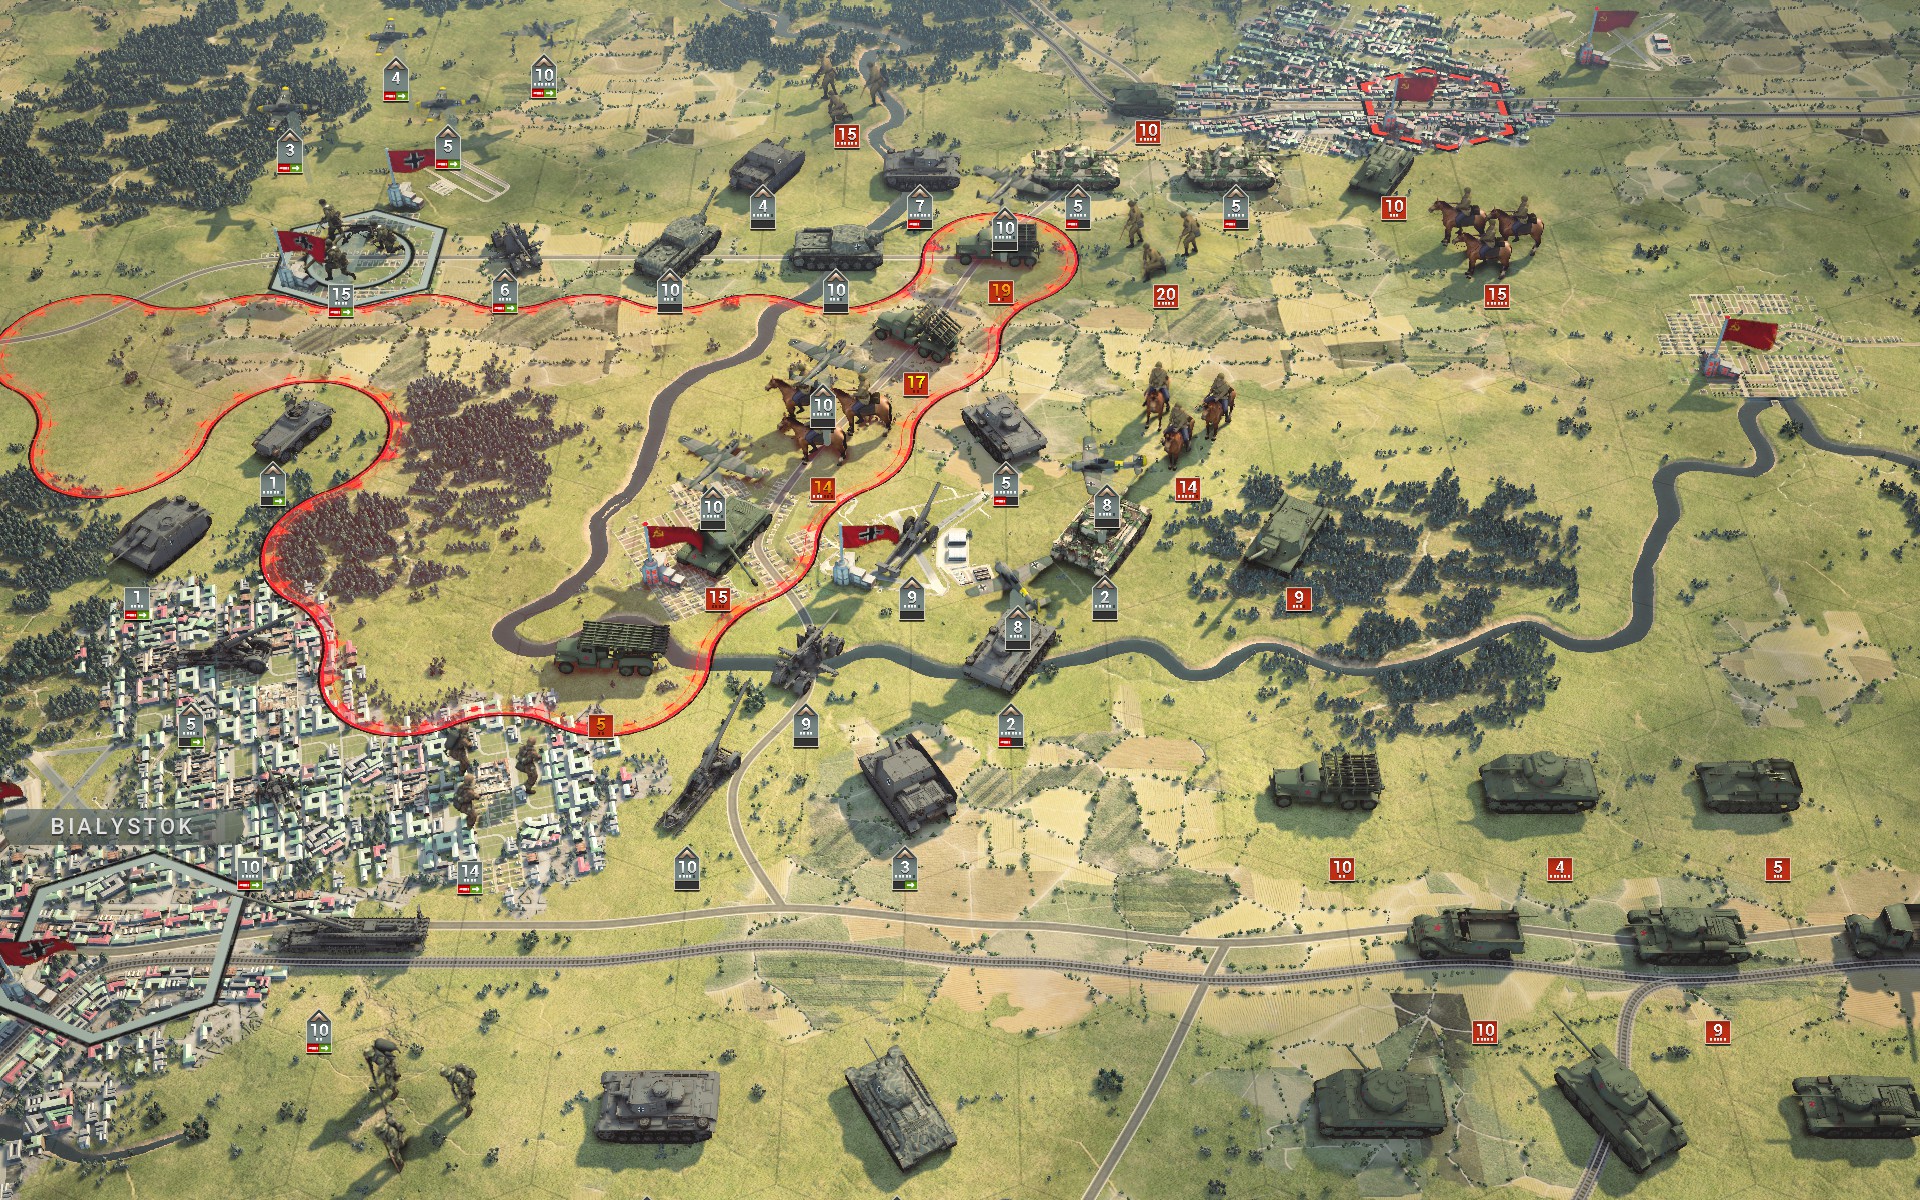
Defeat in detail remains the best way to handle superior forces; the bulk of the Soviet armour have been held in place by a few battalions while my artillery and bombers have focused on neutralising the more powerful enemies to the north.
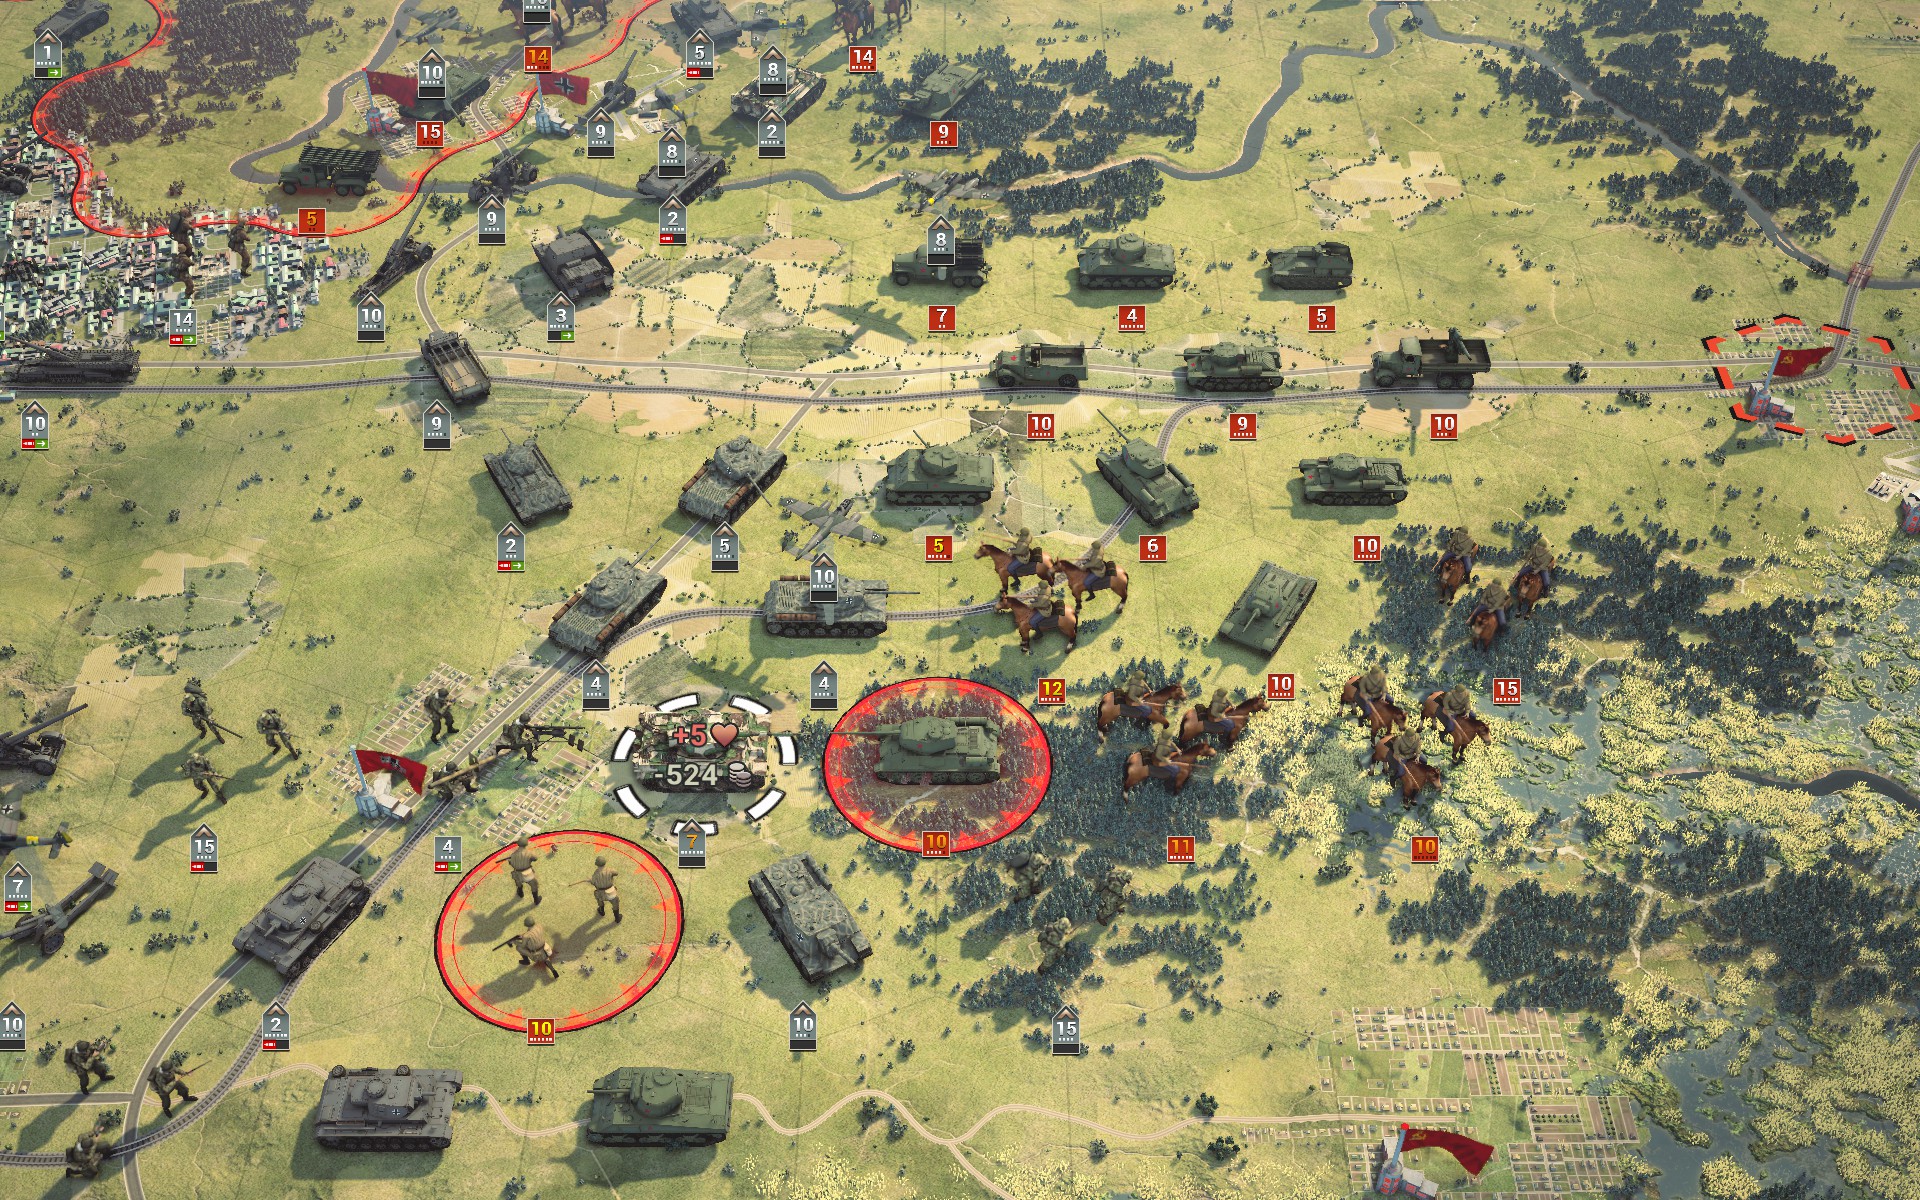
Having held off a dozen battalions while acting as a rearguard with little support, the Tigers have earned some respite and are relieved by the IS-1 battalions.
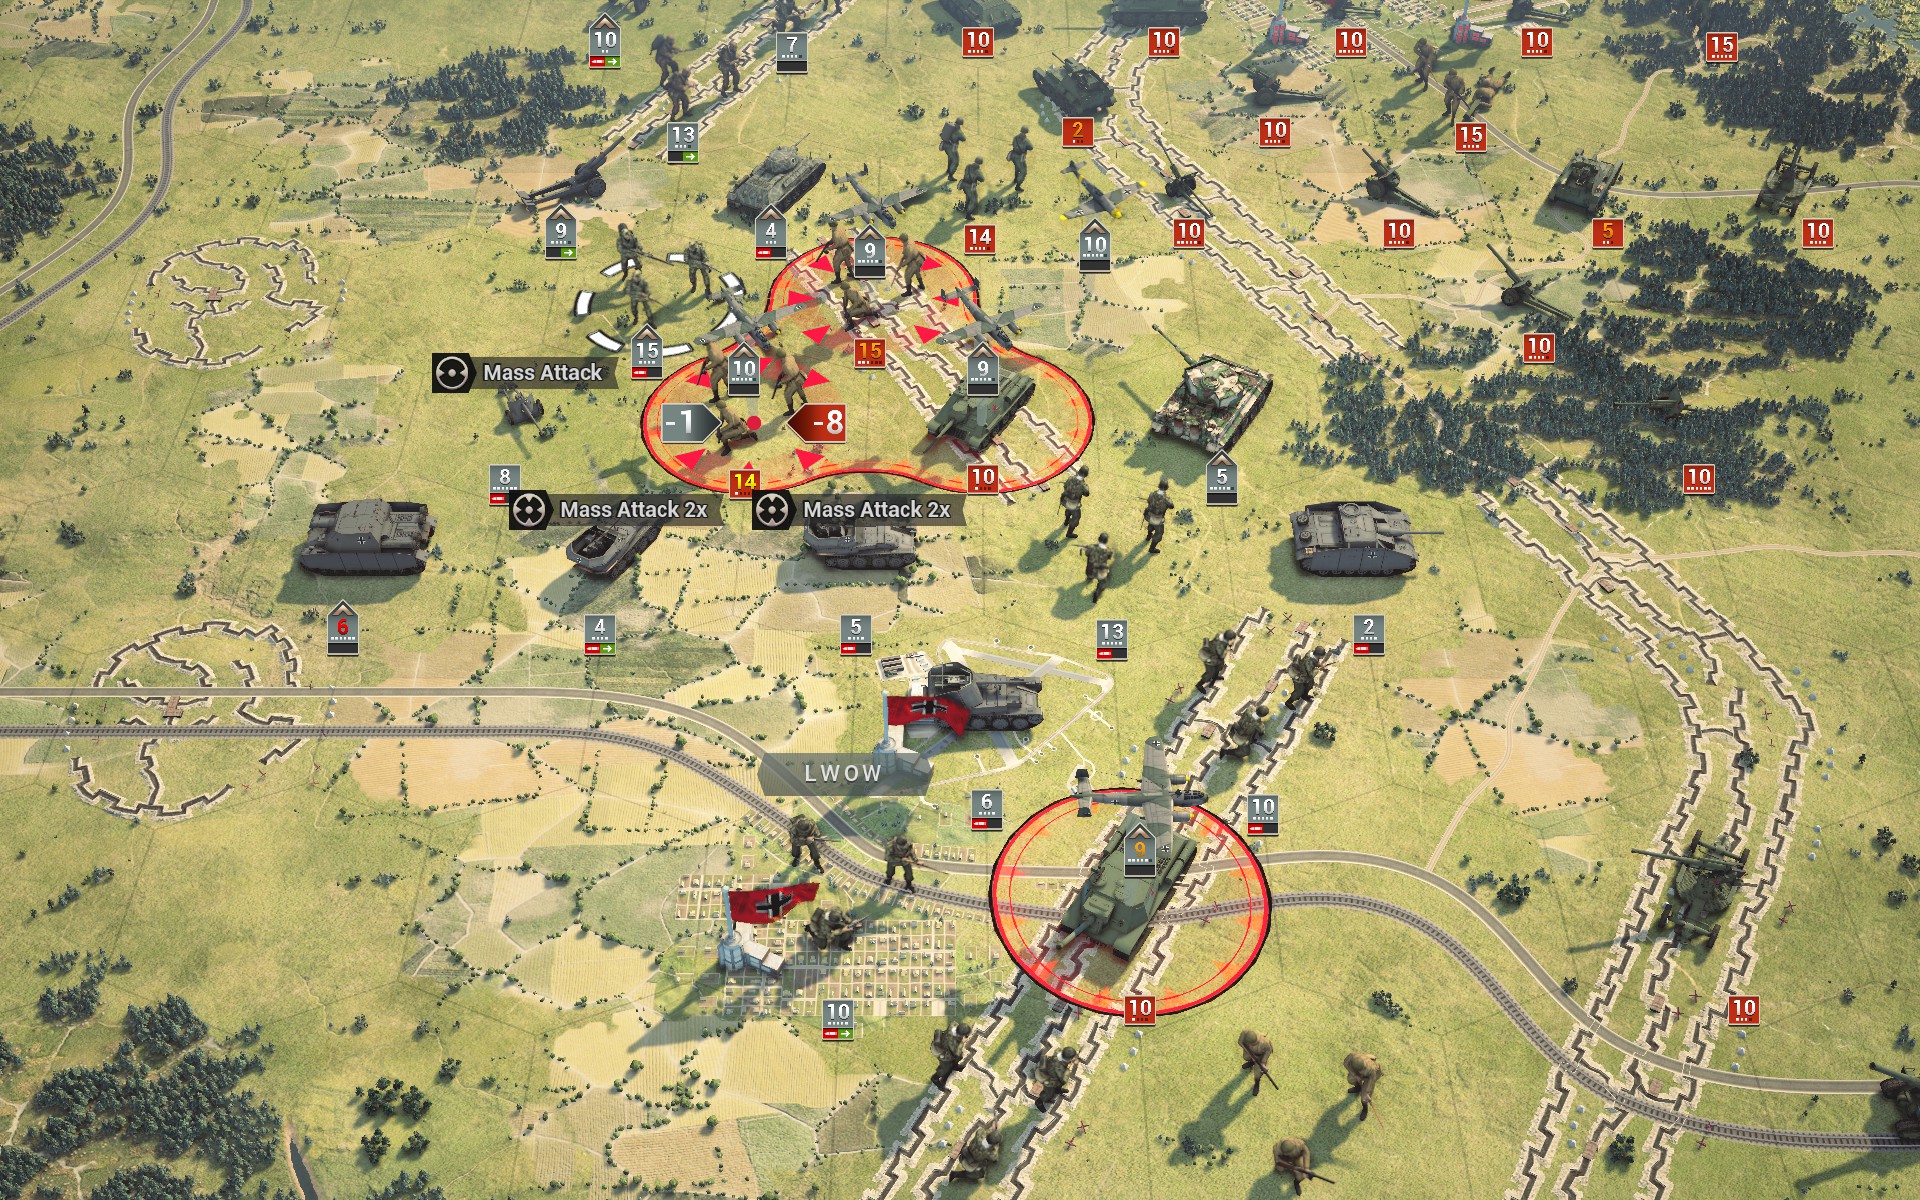
Lwow has been recaptured and the auxiliaries are now poised to assault the Soviet artillery line.
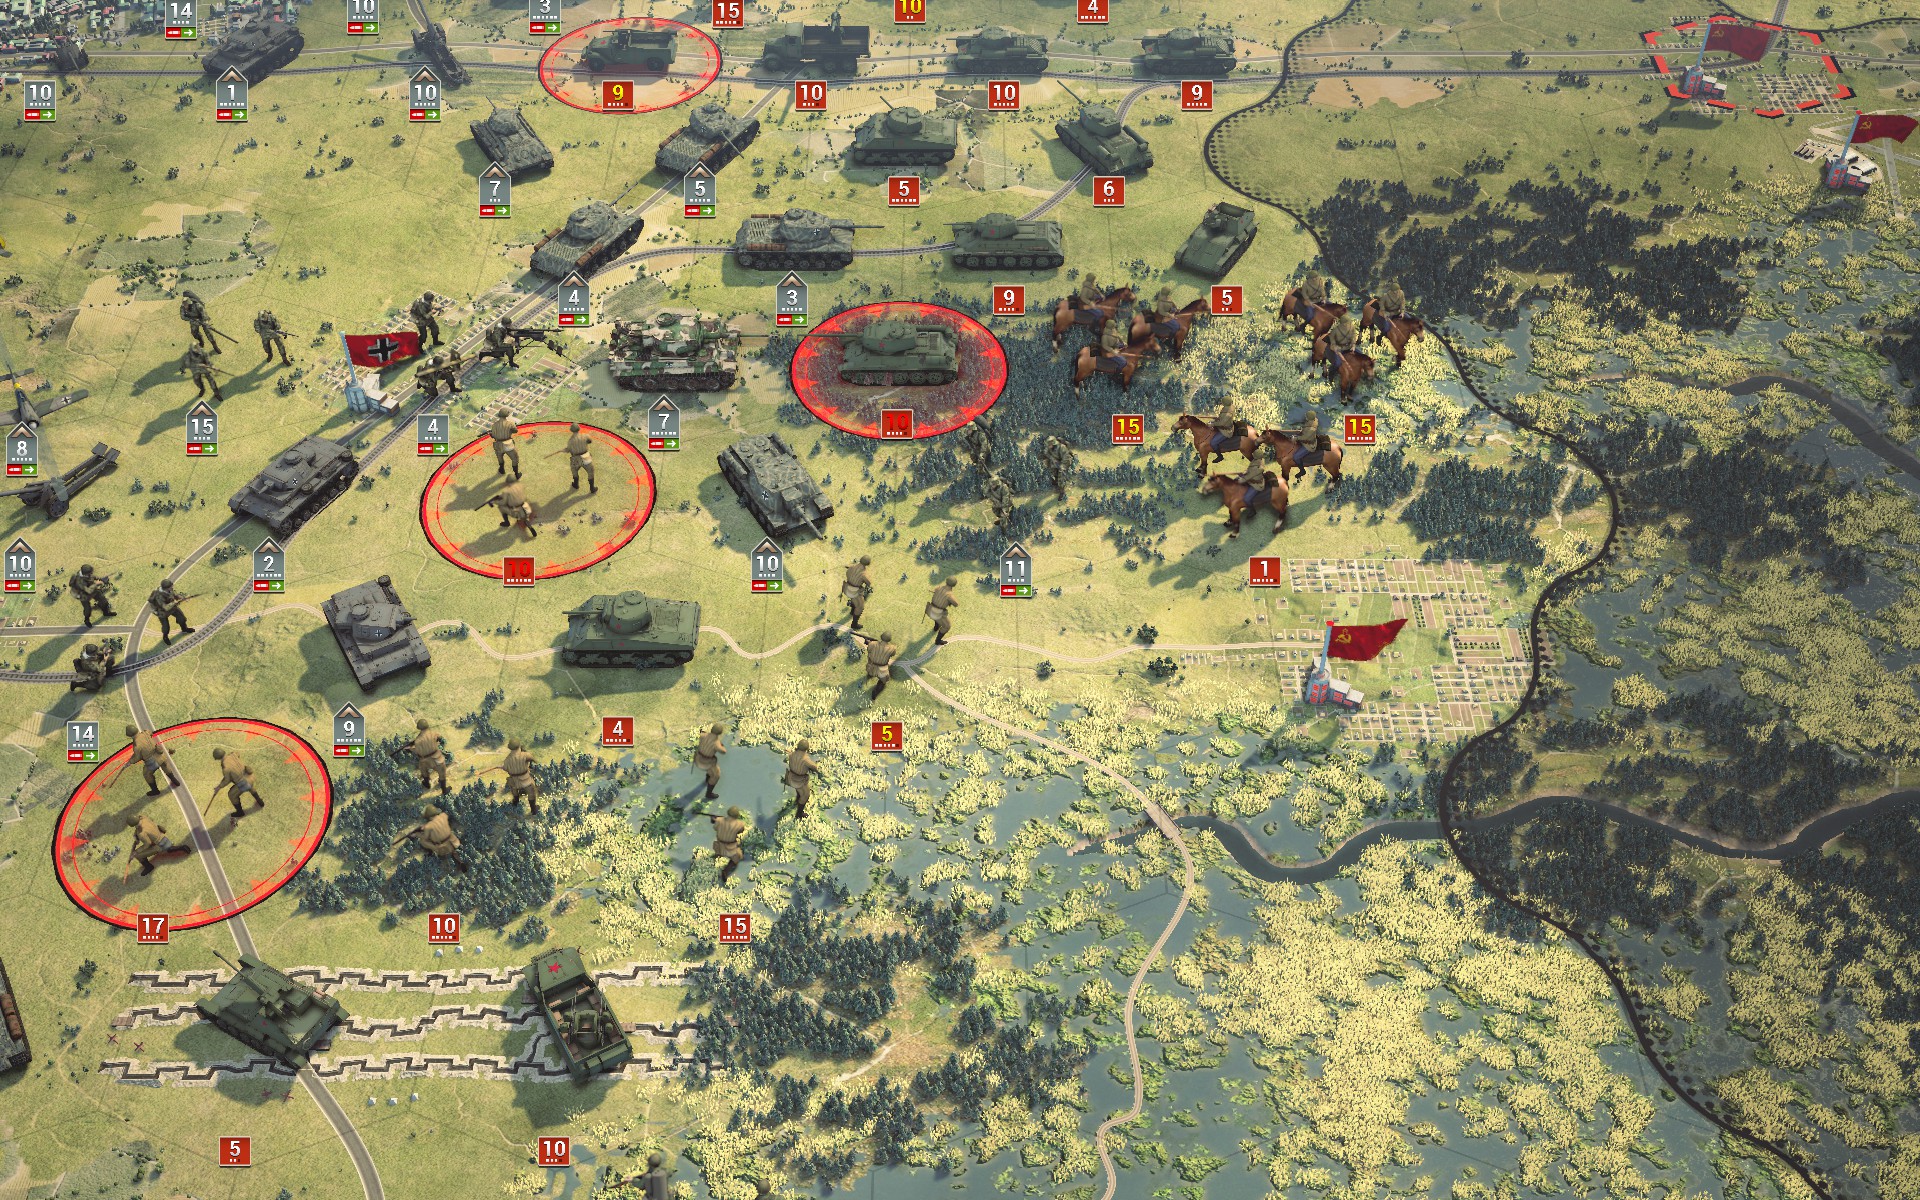
At this point quantity simply is no substitute for quality, especially not in a narrow space. The T-34/85s to the rear are unable to engage my forces as they are blocked by their own M4A3s and Valentine IVs, which suits me just fine.
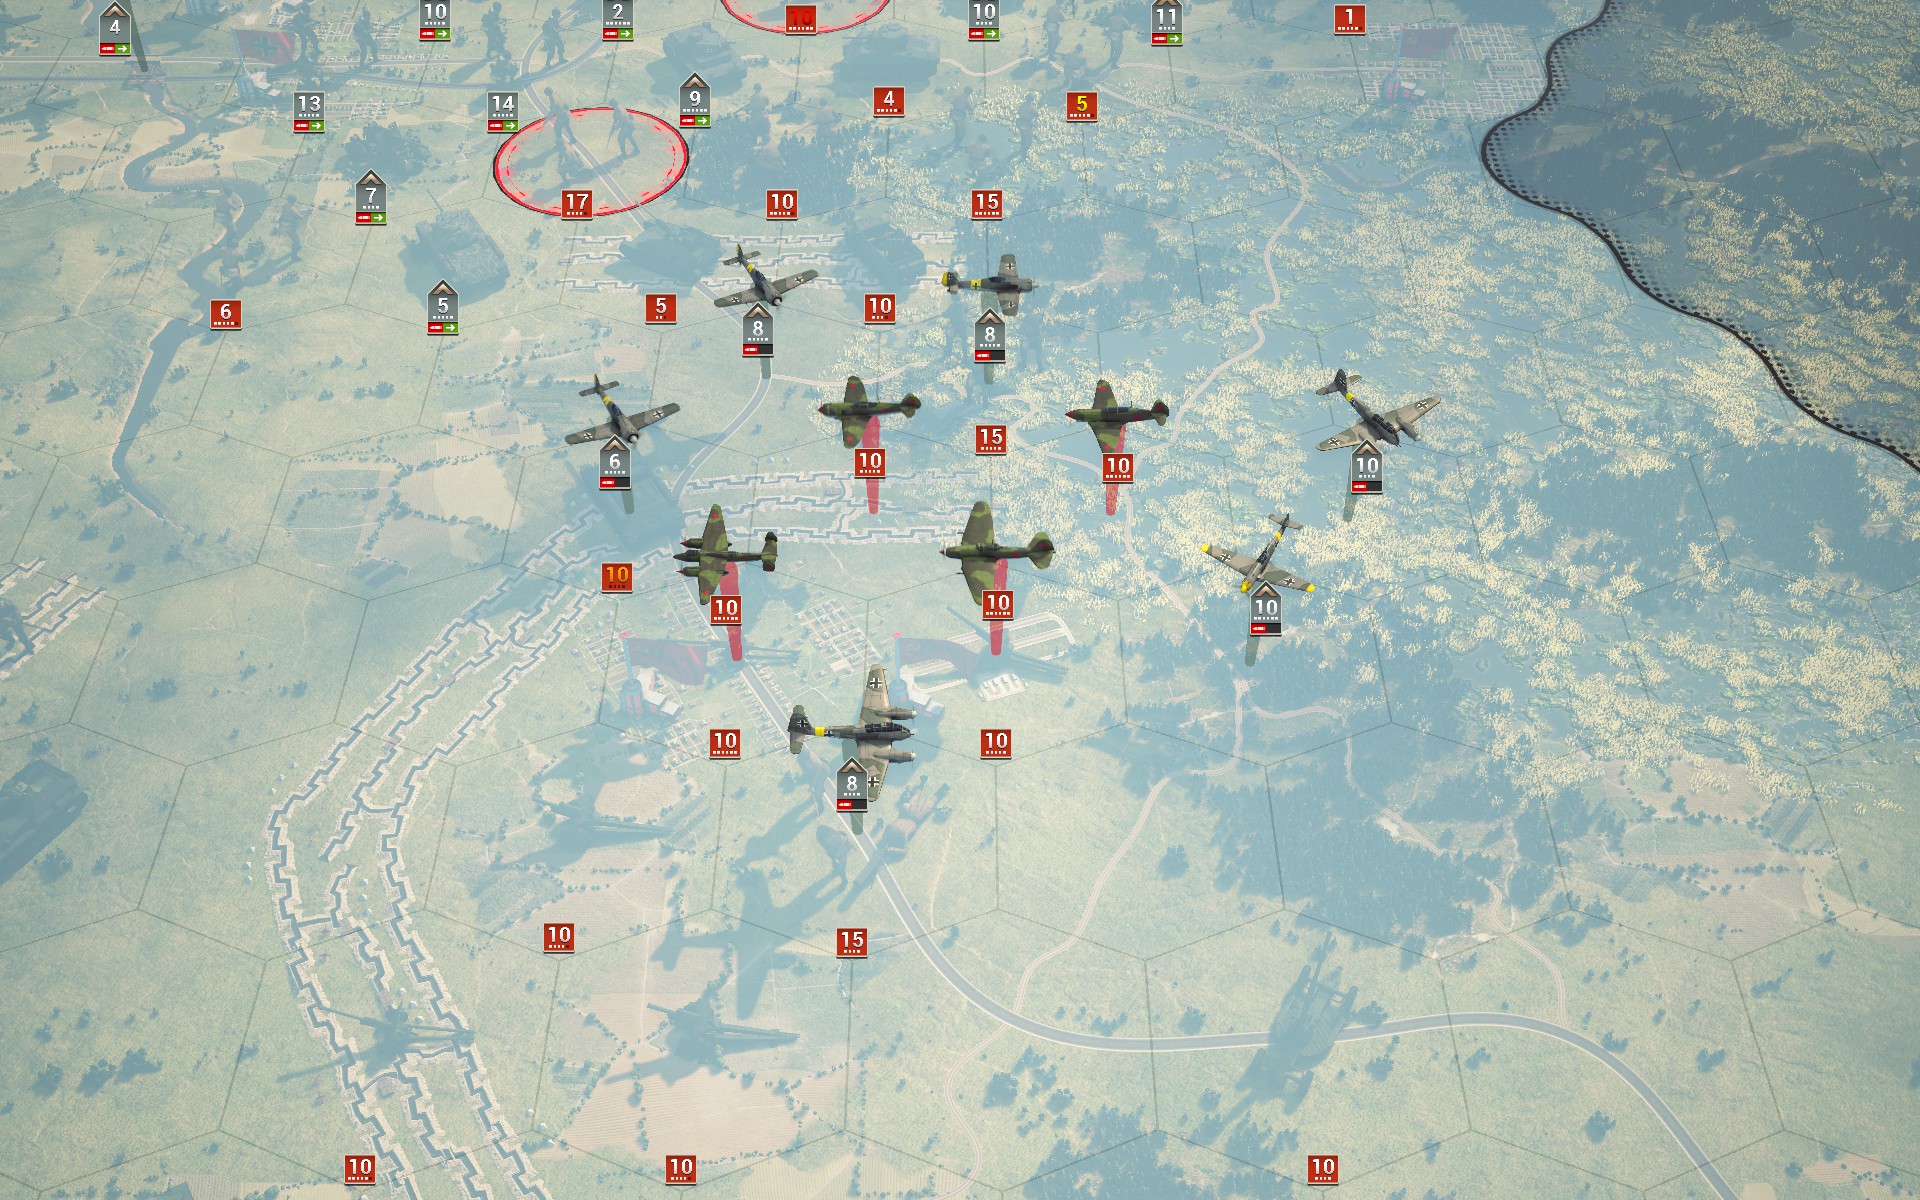
The last of the Soviet air force rebases to Kowel, and the Luftwaffe engages them...
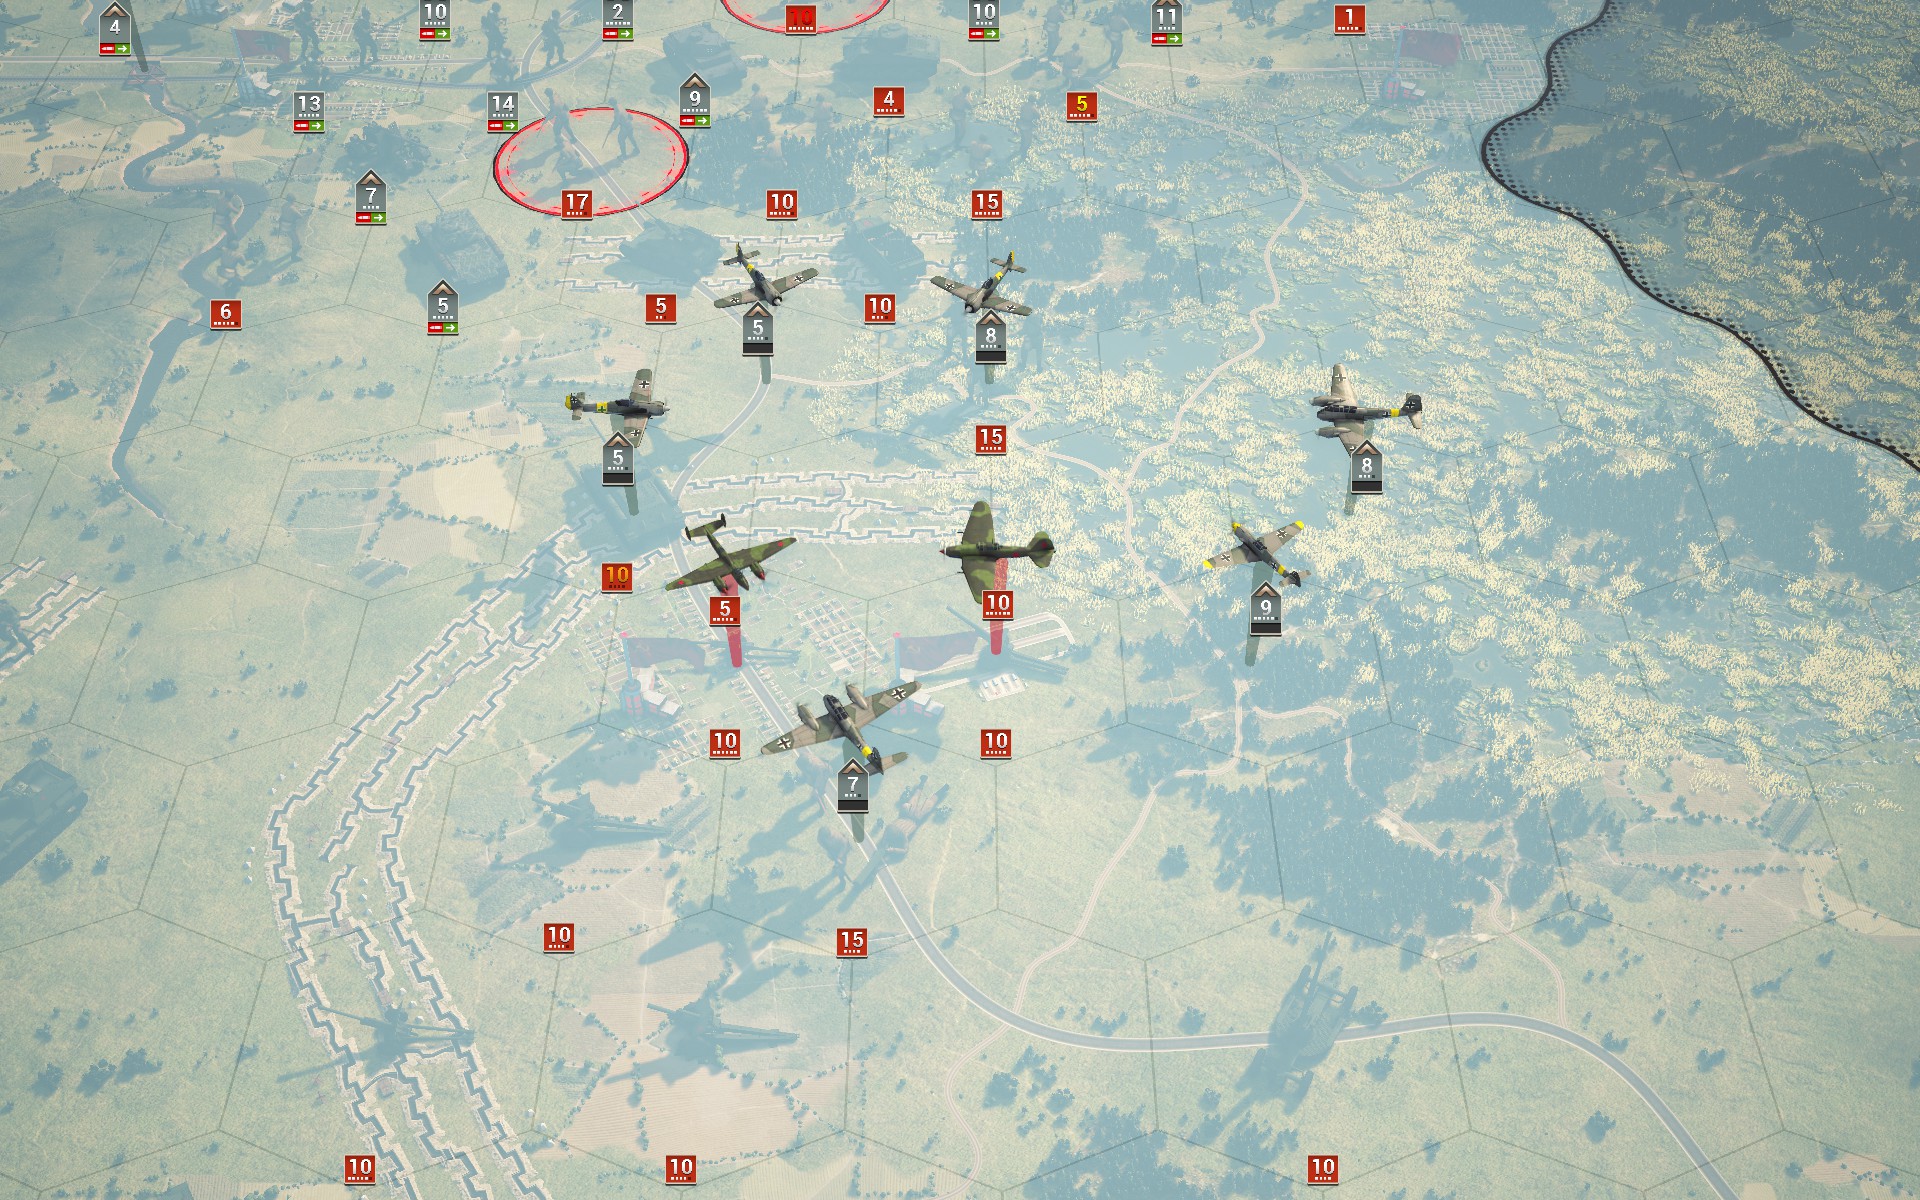
... destroying the fighters and causing heavy damage to the remaining bombers.
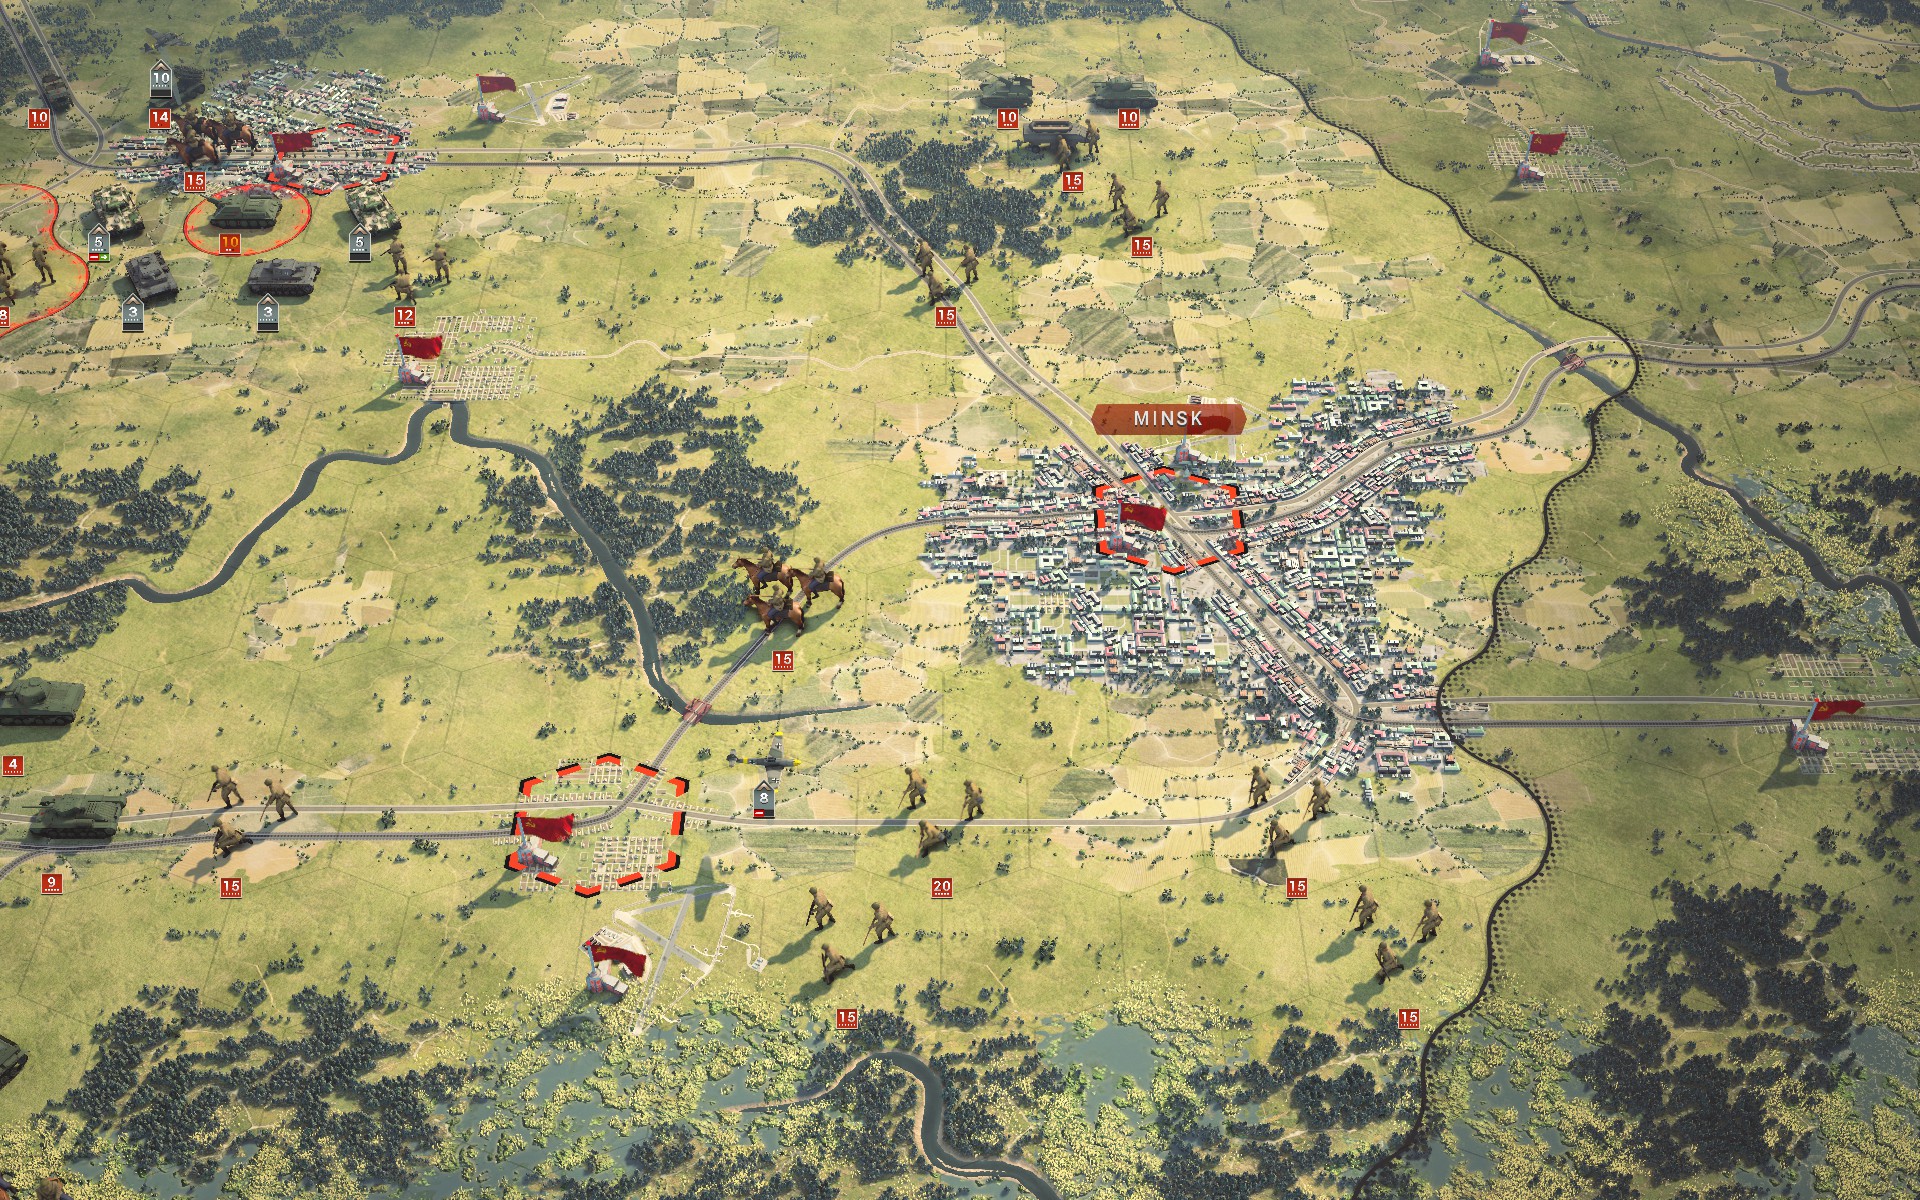
Aerial reconnaissance suggests that the Red Army may have committed its remaining reserves, as the troops now moving through the Minsk region primarily consist of light armour and Regulars, but it's too early to draw any definite conclusions.
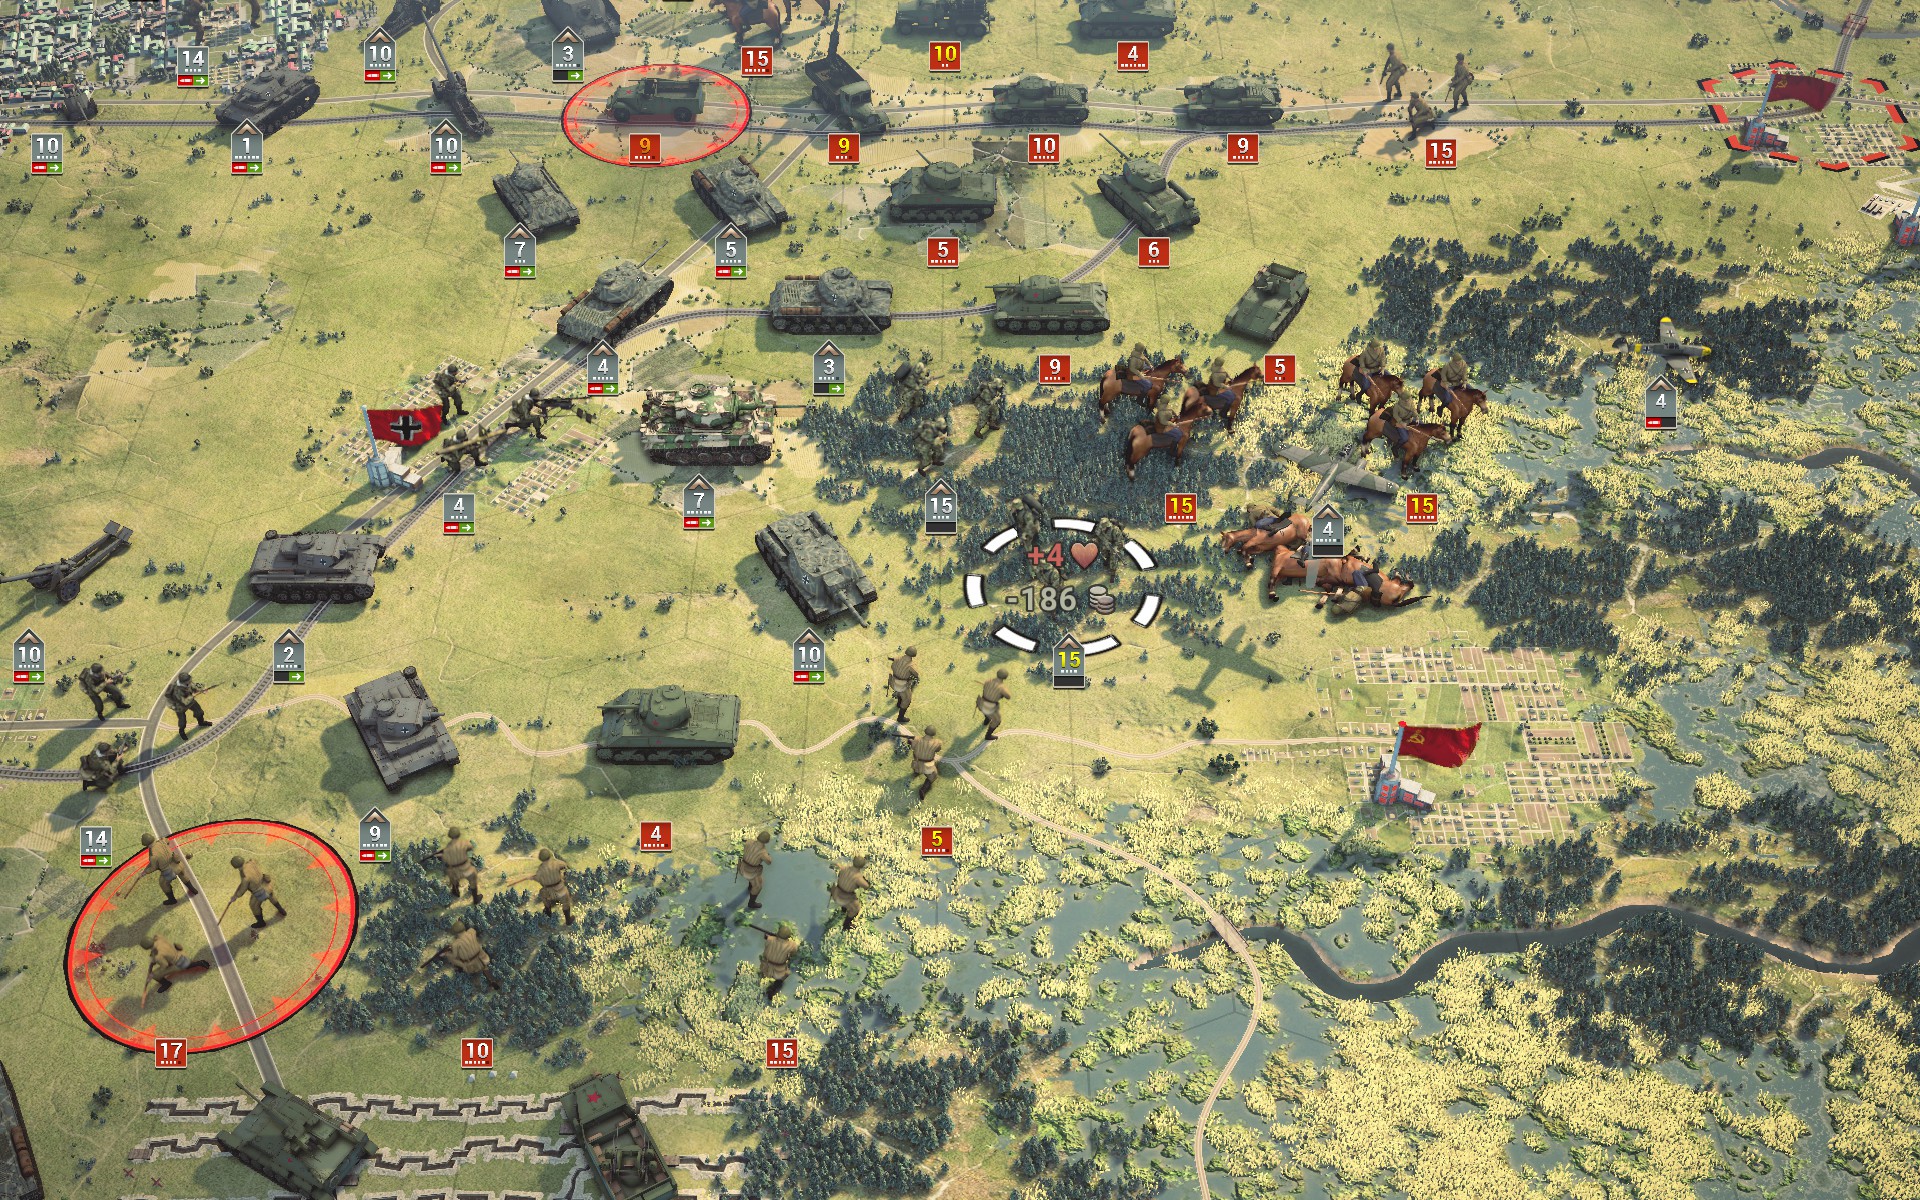
Unable to inflict any damage on the heavy Panzers and supporting SU-152s, the Soviet Cavalry and Regulars suffer heavy losses as they elect to brave the woodlands defended by my elite mechanized Pioniere. I have called on these veterans to open a path for me to flank and capture the dozen or so battalions in the centre.
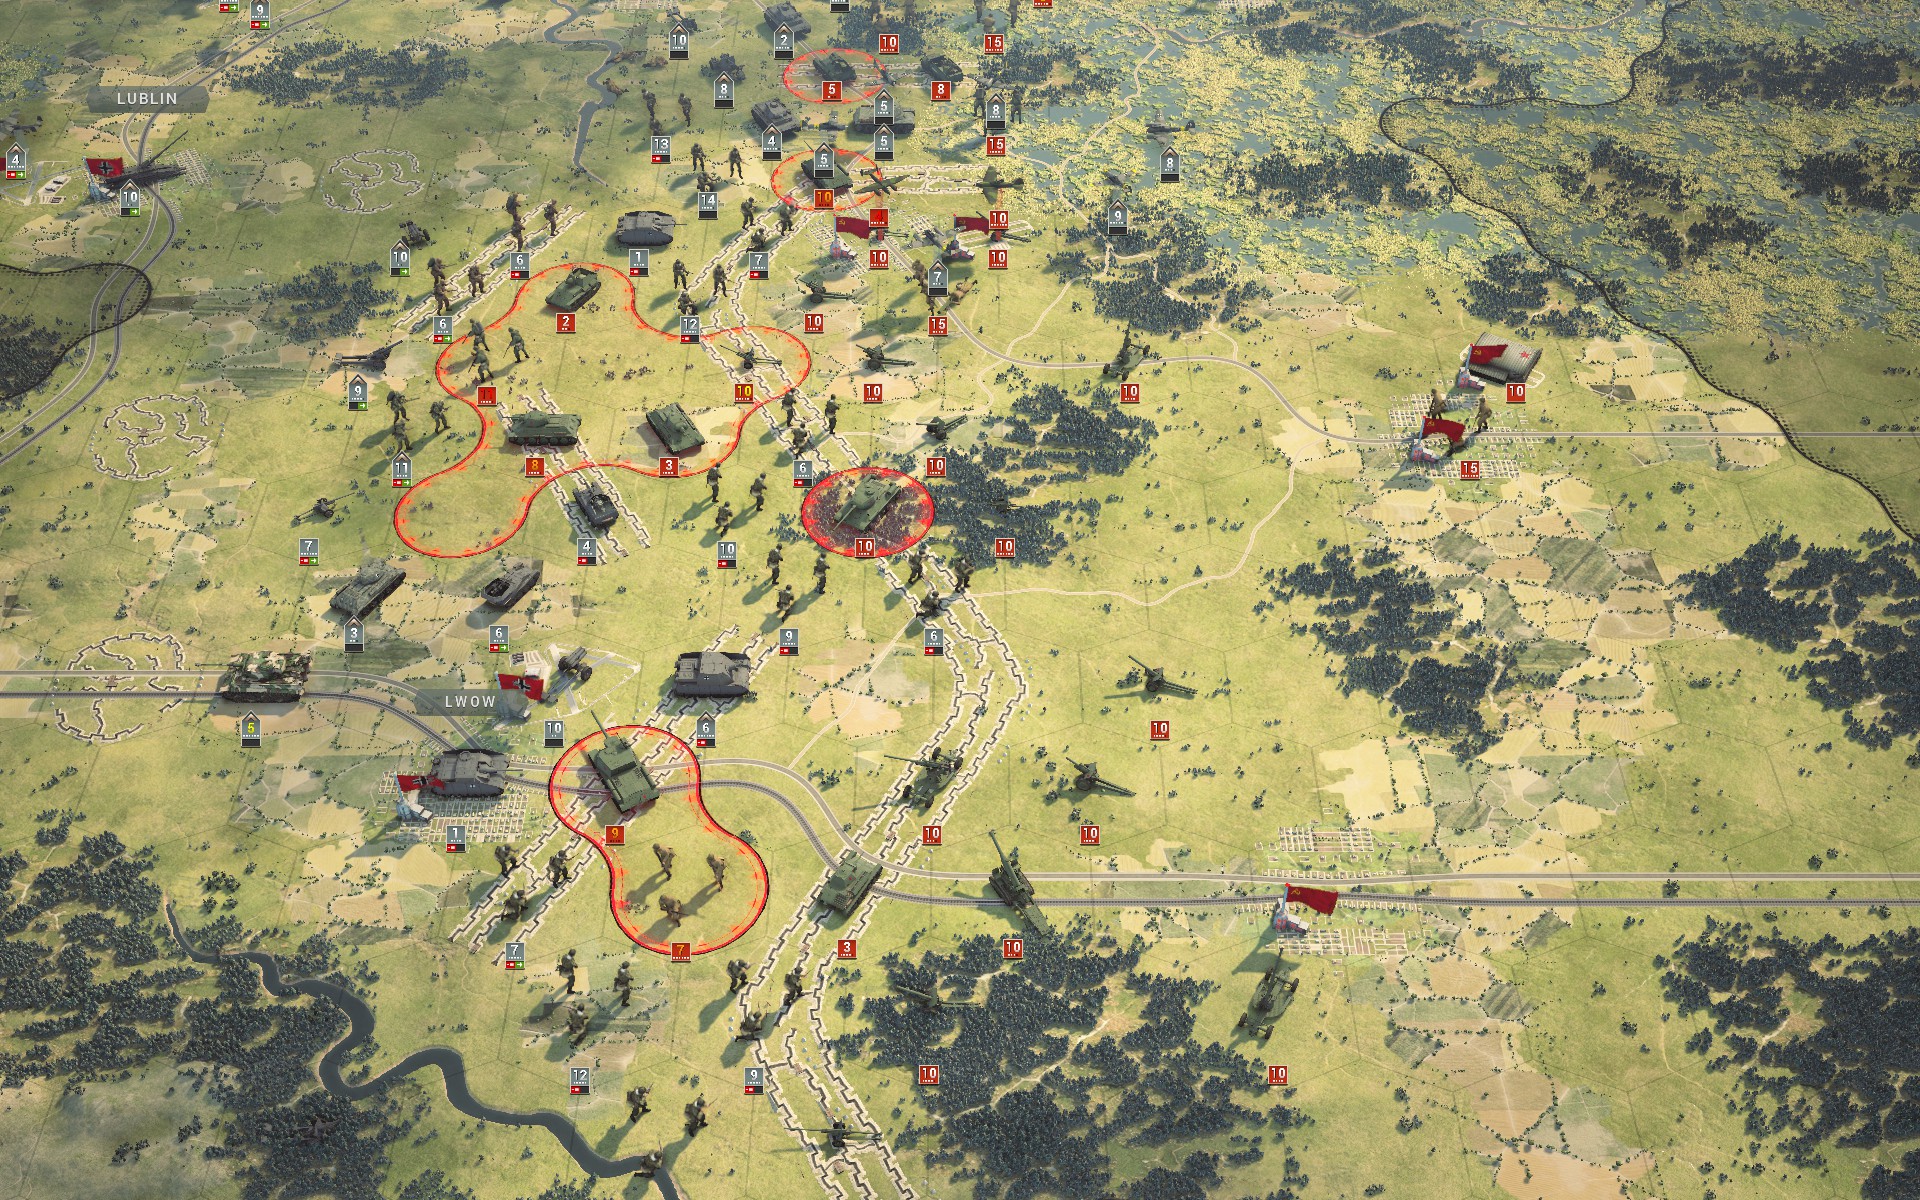
As most of my own artillery is supporting my battlegroup, the auxiliaries are struggling to break through the Soviet artillery line while adhering to my orders to suppress and capture; most of the artillery and AT guns are heavily entrenched. The remaining mobile forces have largely been suppressed, however, so the southern flank is effectively secure; the commander will have a hard time explaining this failure to Stalin.
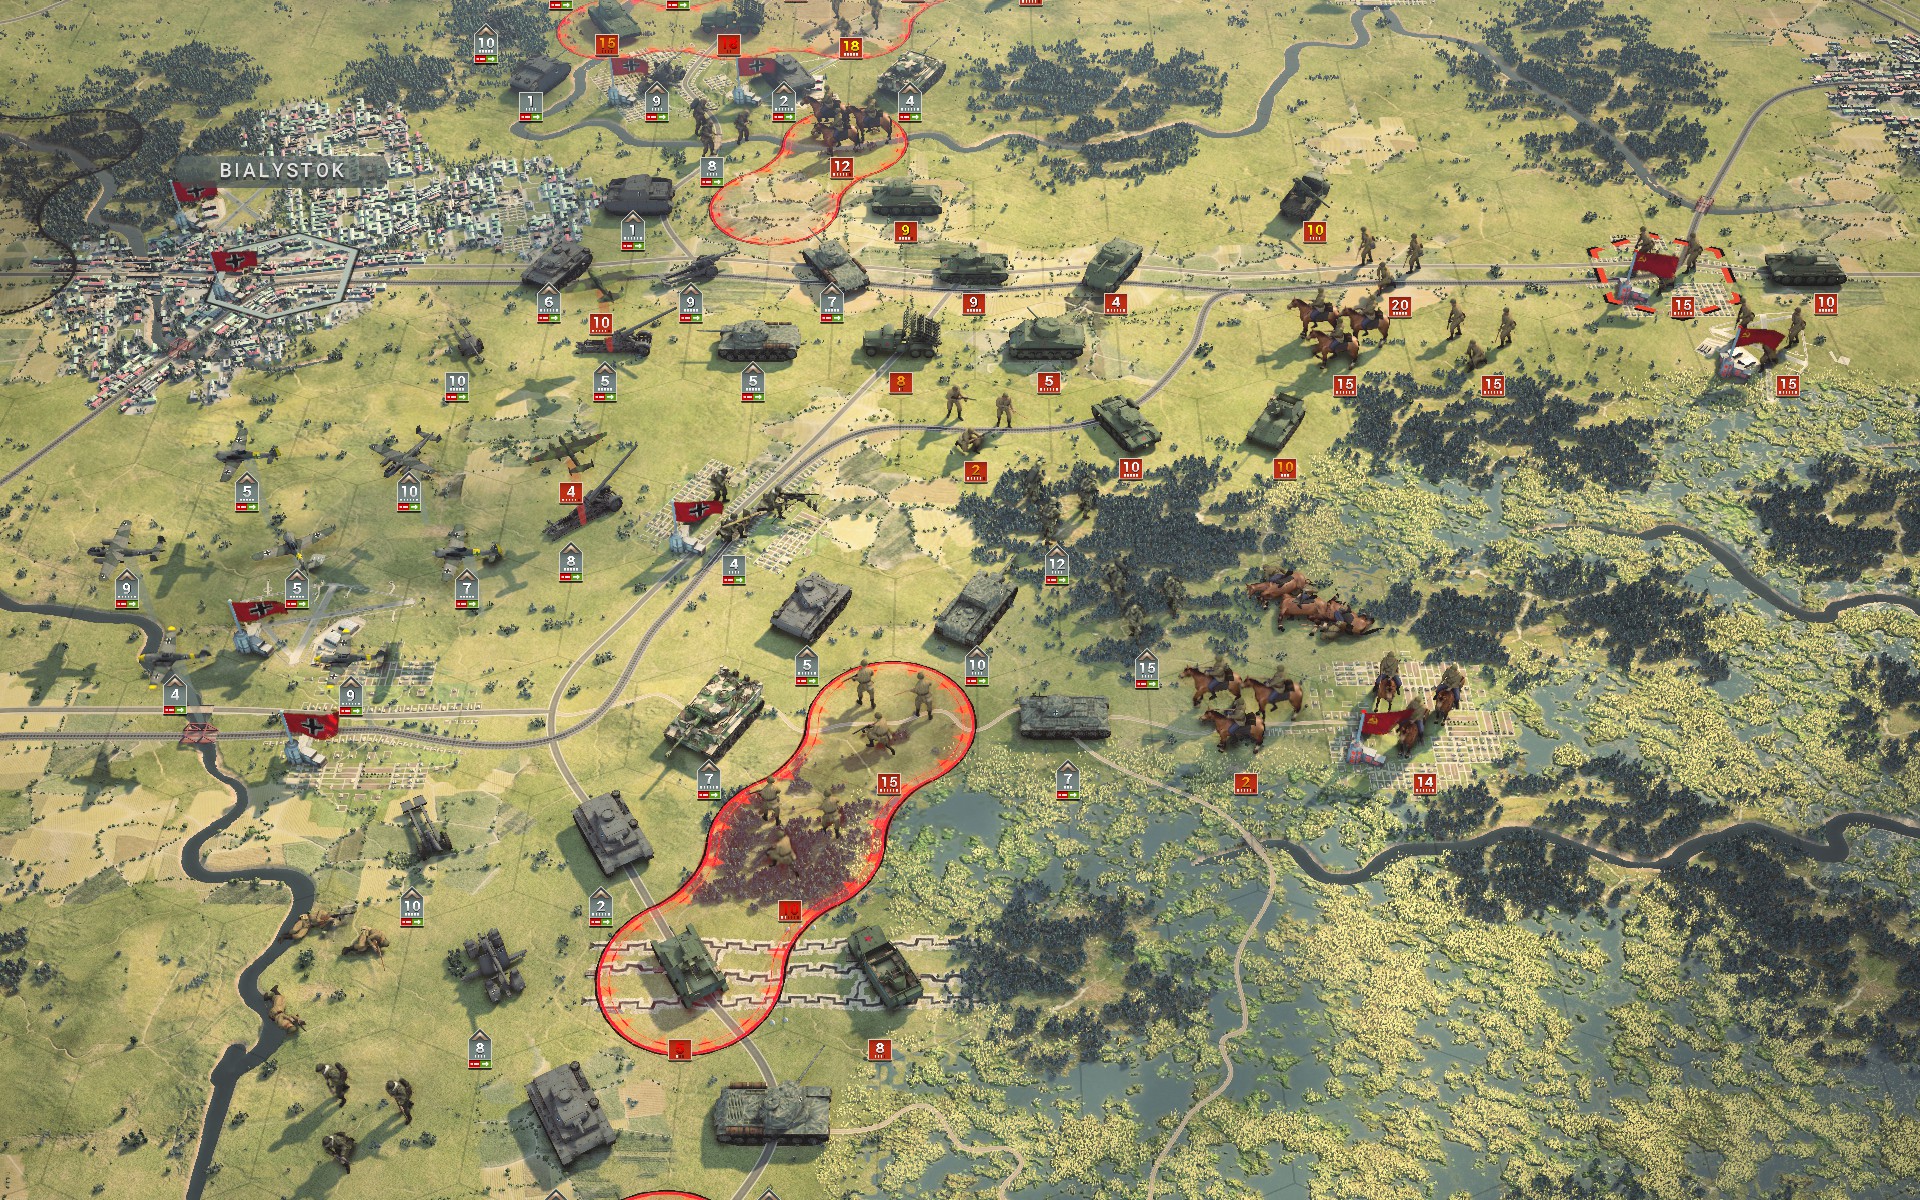
The Soviet bombers target my heavy artillery, inflicting heavy damage. I suspected this would happen, but it was a price worth paying to put an end to the Soviet air force and ensure the unsupported Gustav wasn't targetted.
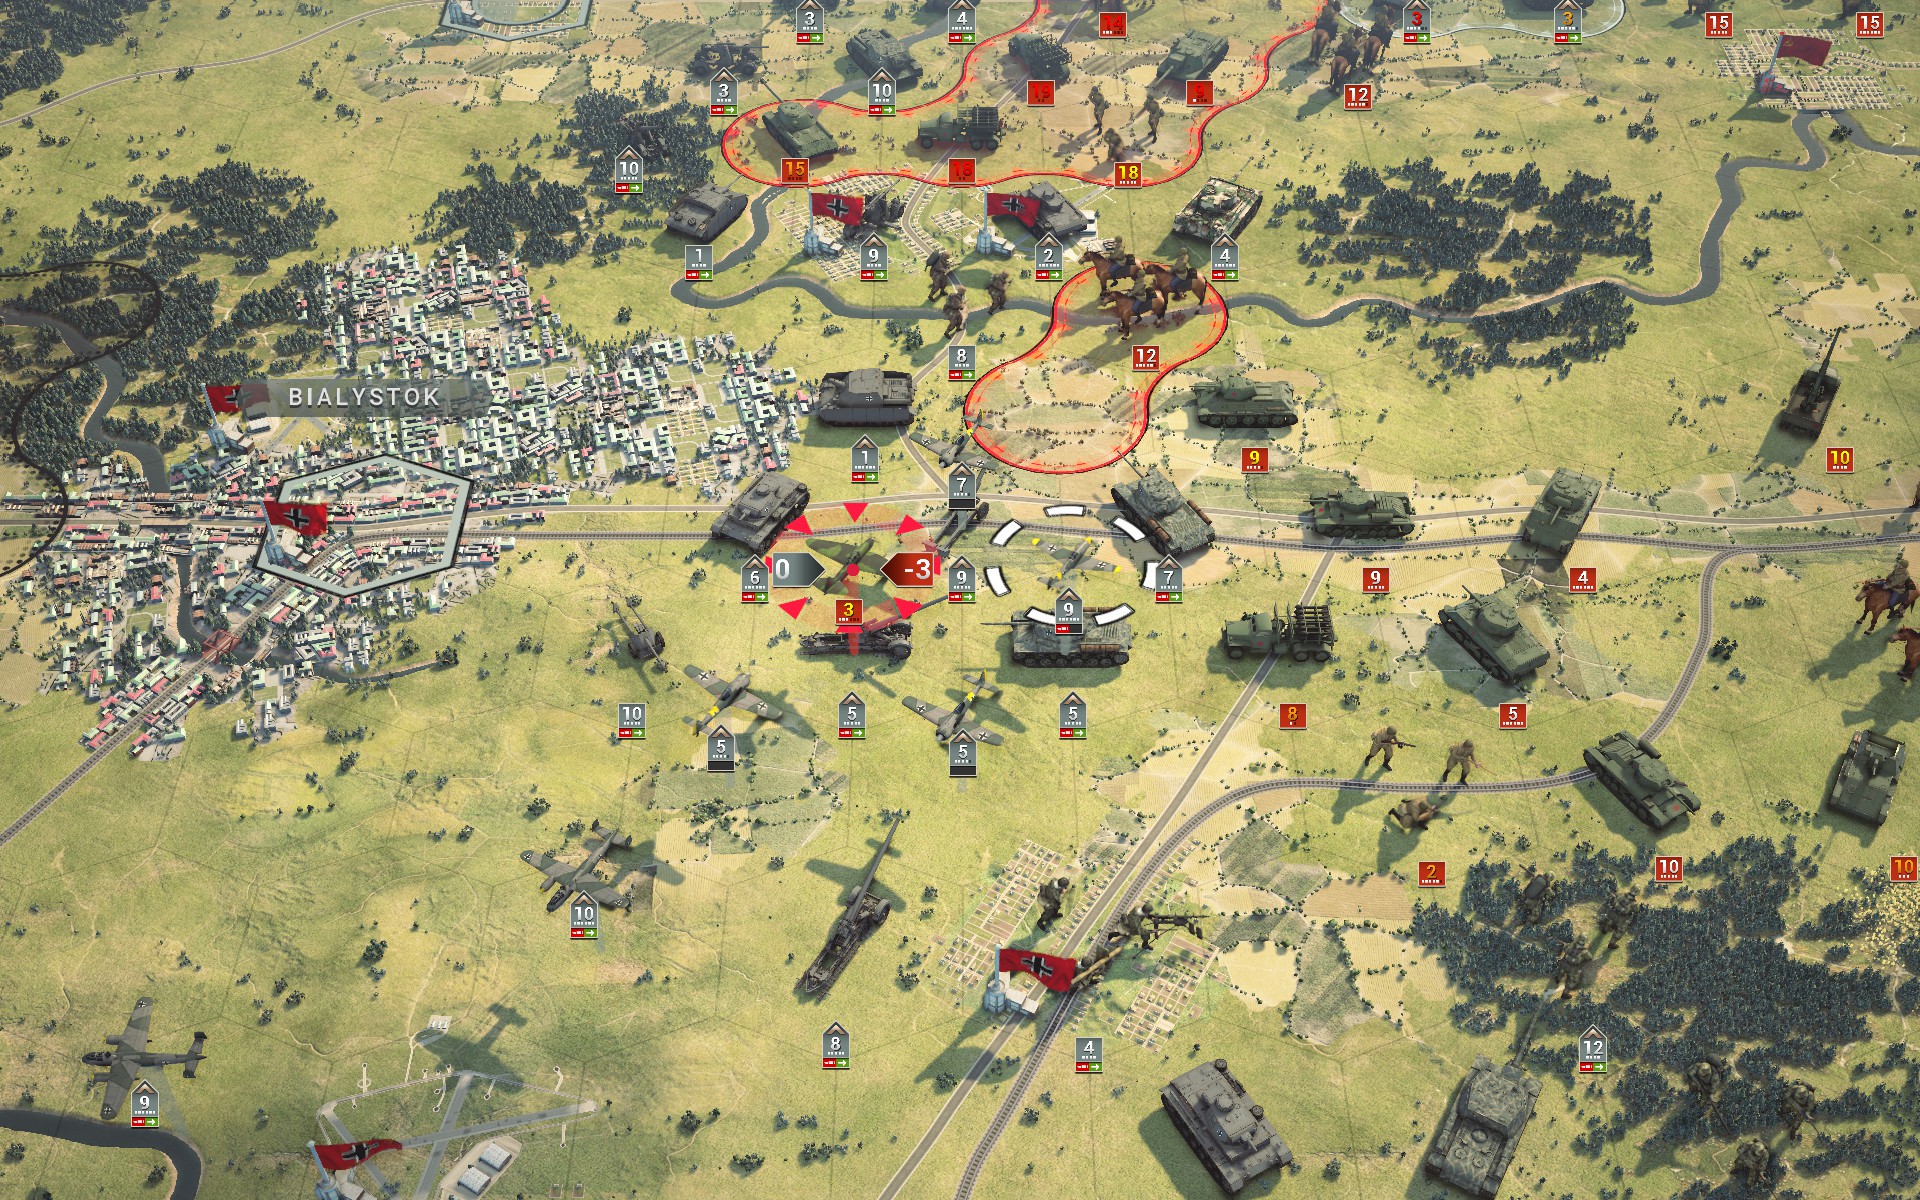
The Luftwaffe brings down the remaining Il-2M3, putting a definite end to the Soviet air force. I believe it originally numbered around 25 aircraft, and the Luftwaffe deserves recognition for limiting the losses; had they been allowed a free rein they could have caused untold damage to the artillery and heavy armour.
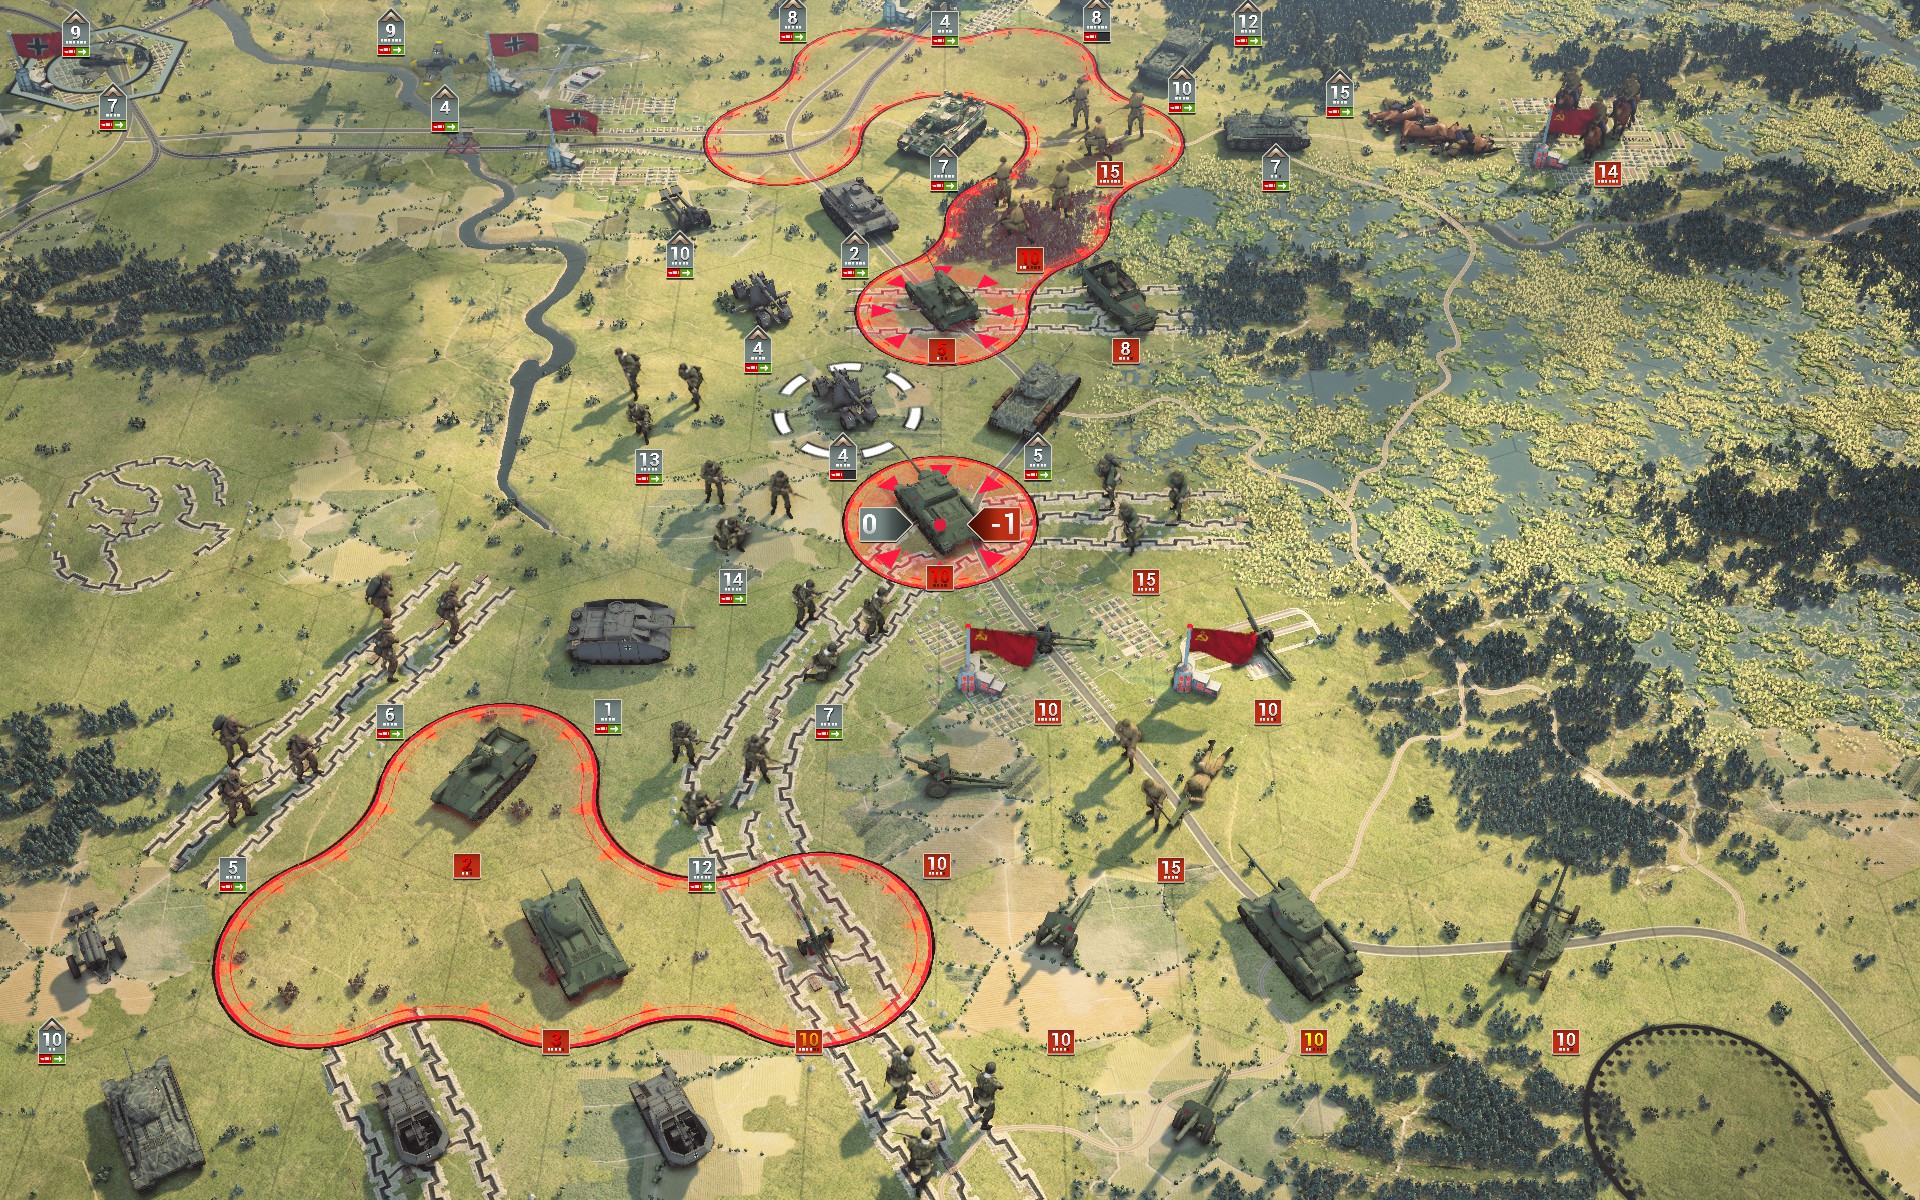
A detached 8.8 easily captures an SU-85.
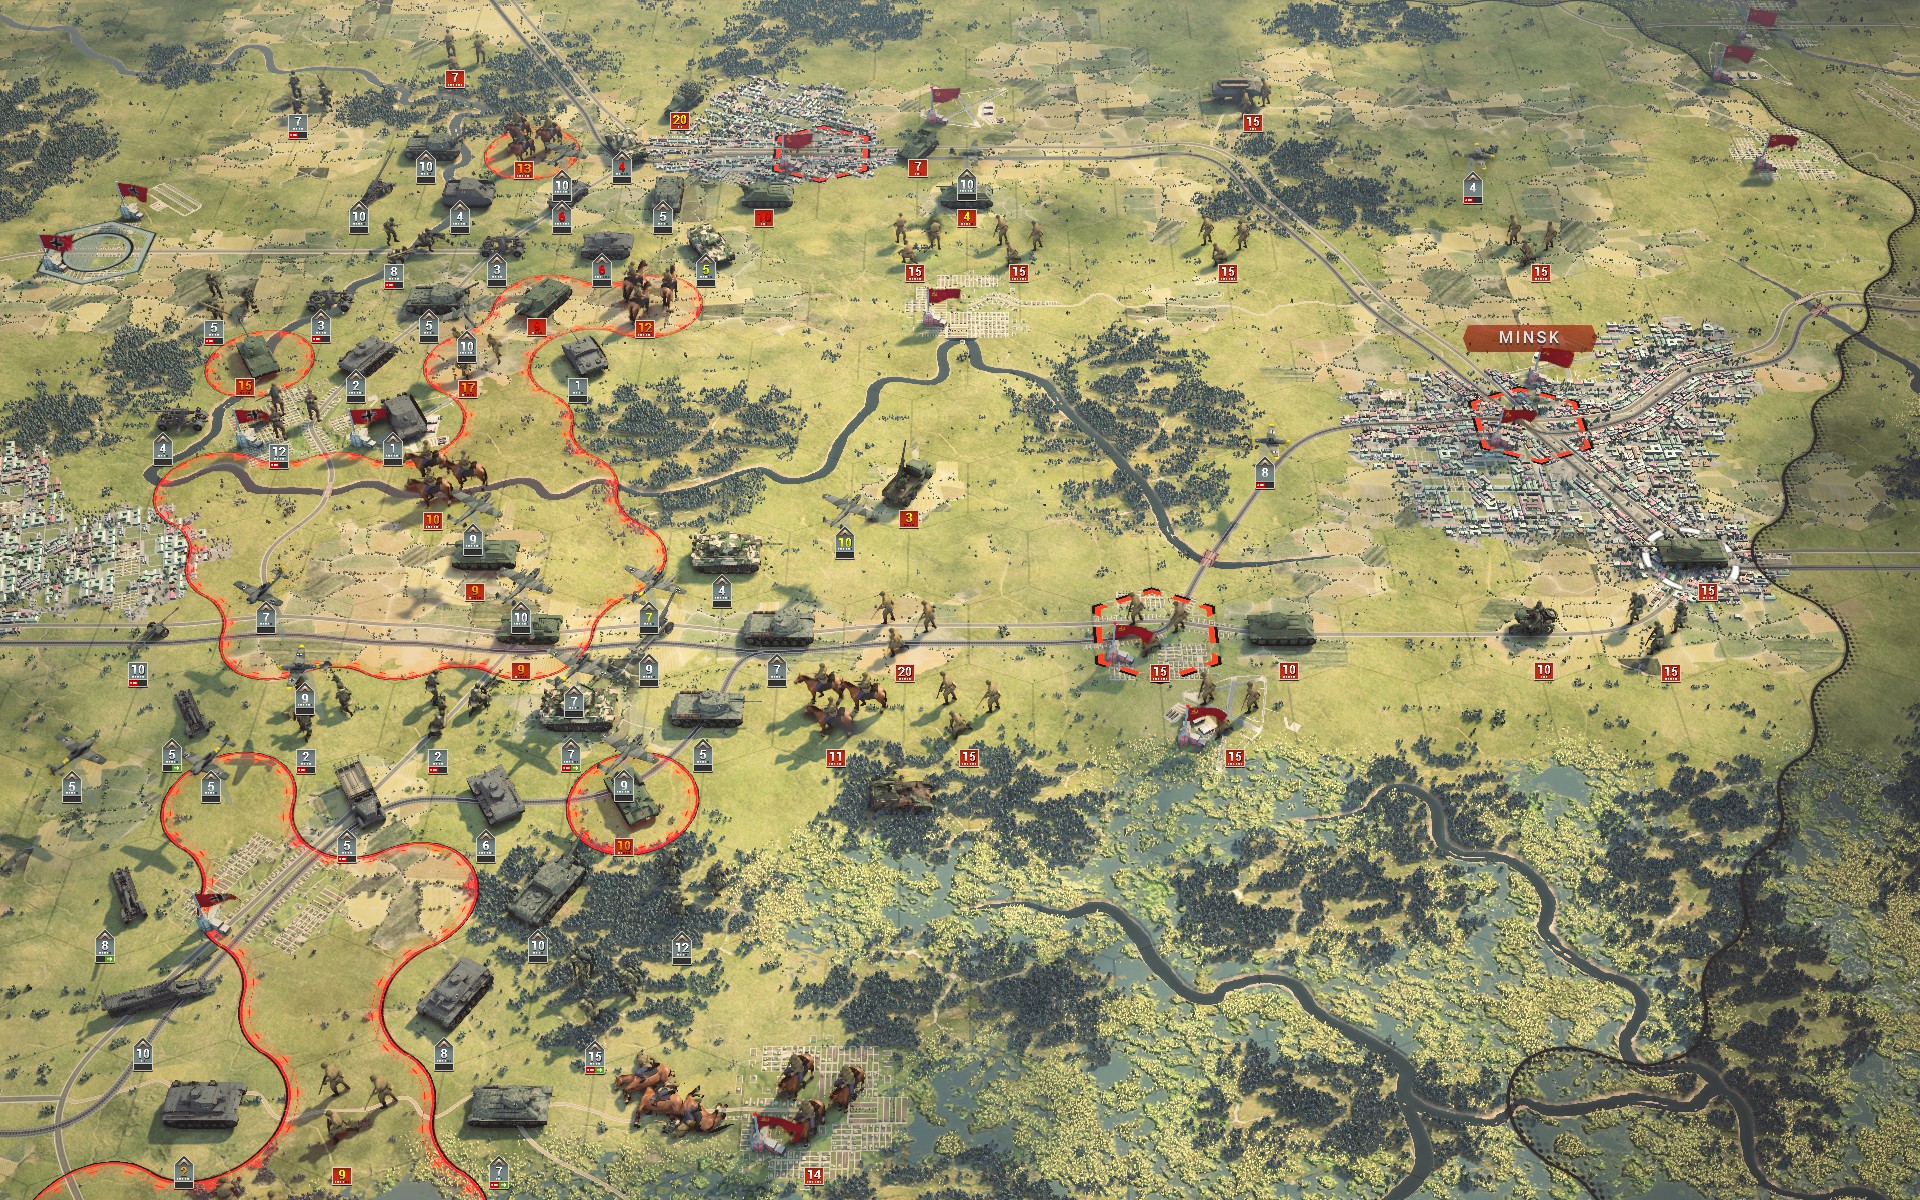
The Soviet armour in the centre have largely been captured, but a second 15-strength IS-2 has appeared at Minsk, so the Red Army is not yet done.
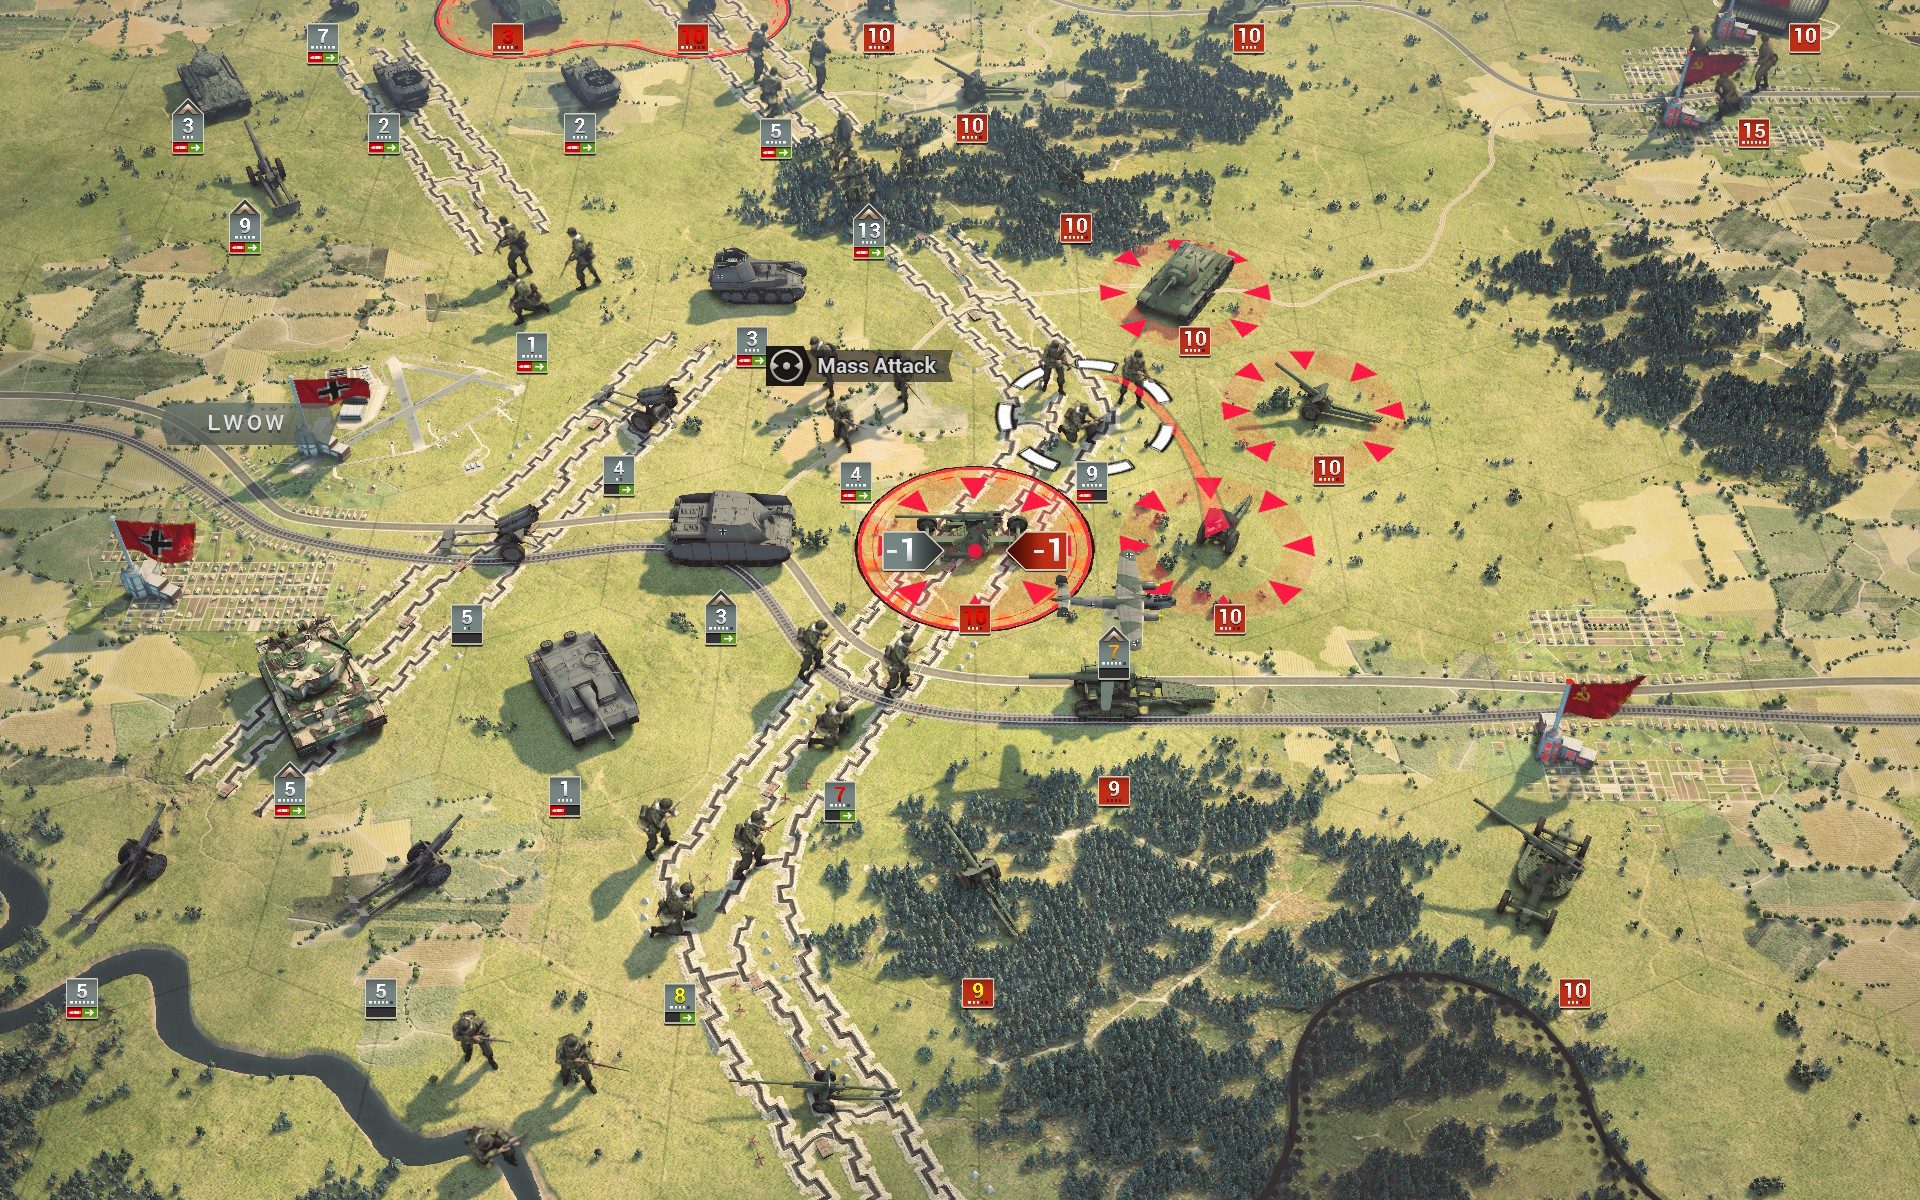
The Brummbär proves invaluable as the auxiliaries begin to capture the artillery and supporting guns along the fortified line.
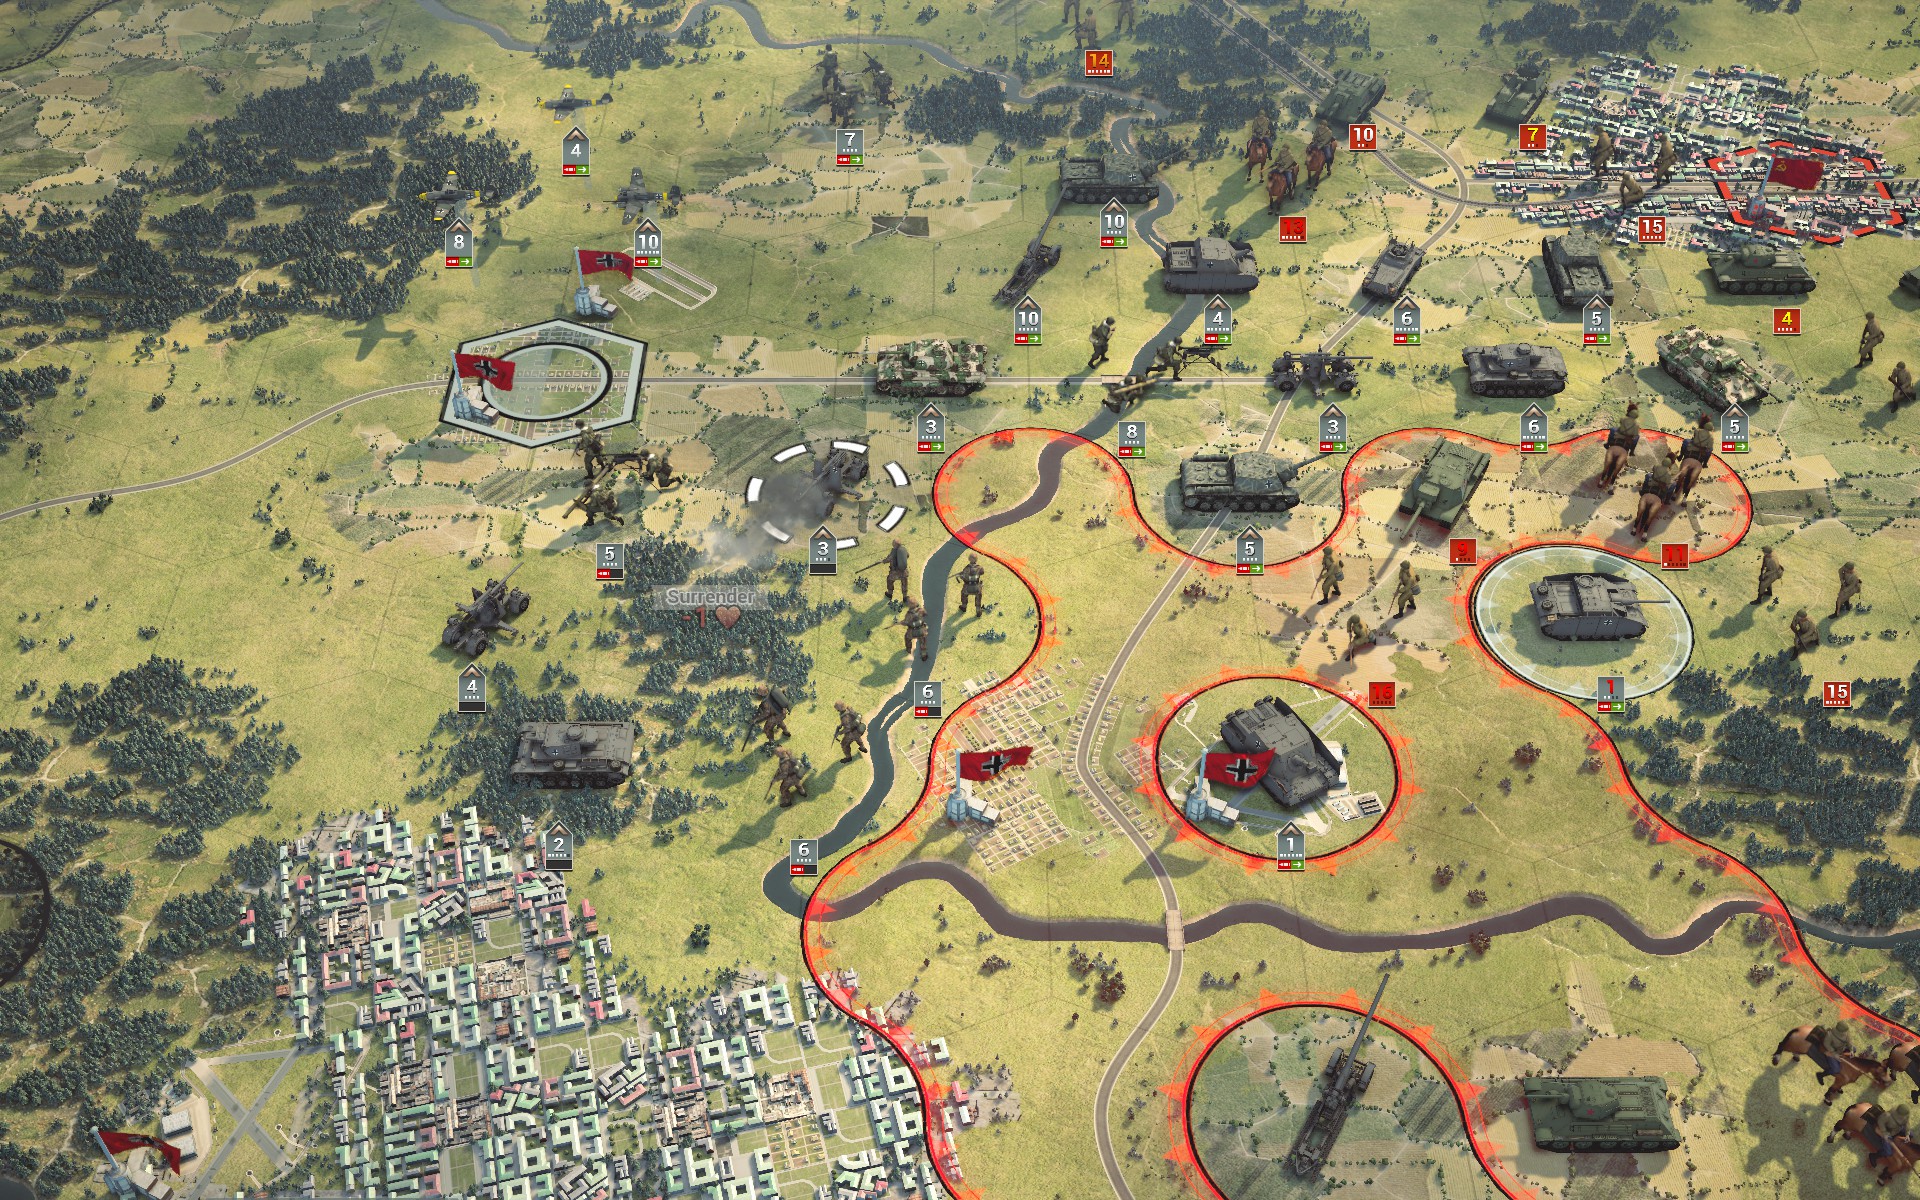
After waiting several turns for it to be fully suppressed, a detached 8.8 captures the first IS-2, illustrating how even the strongest unit is helpless without ammunition.
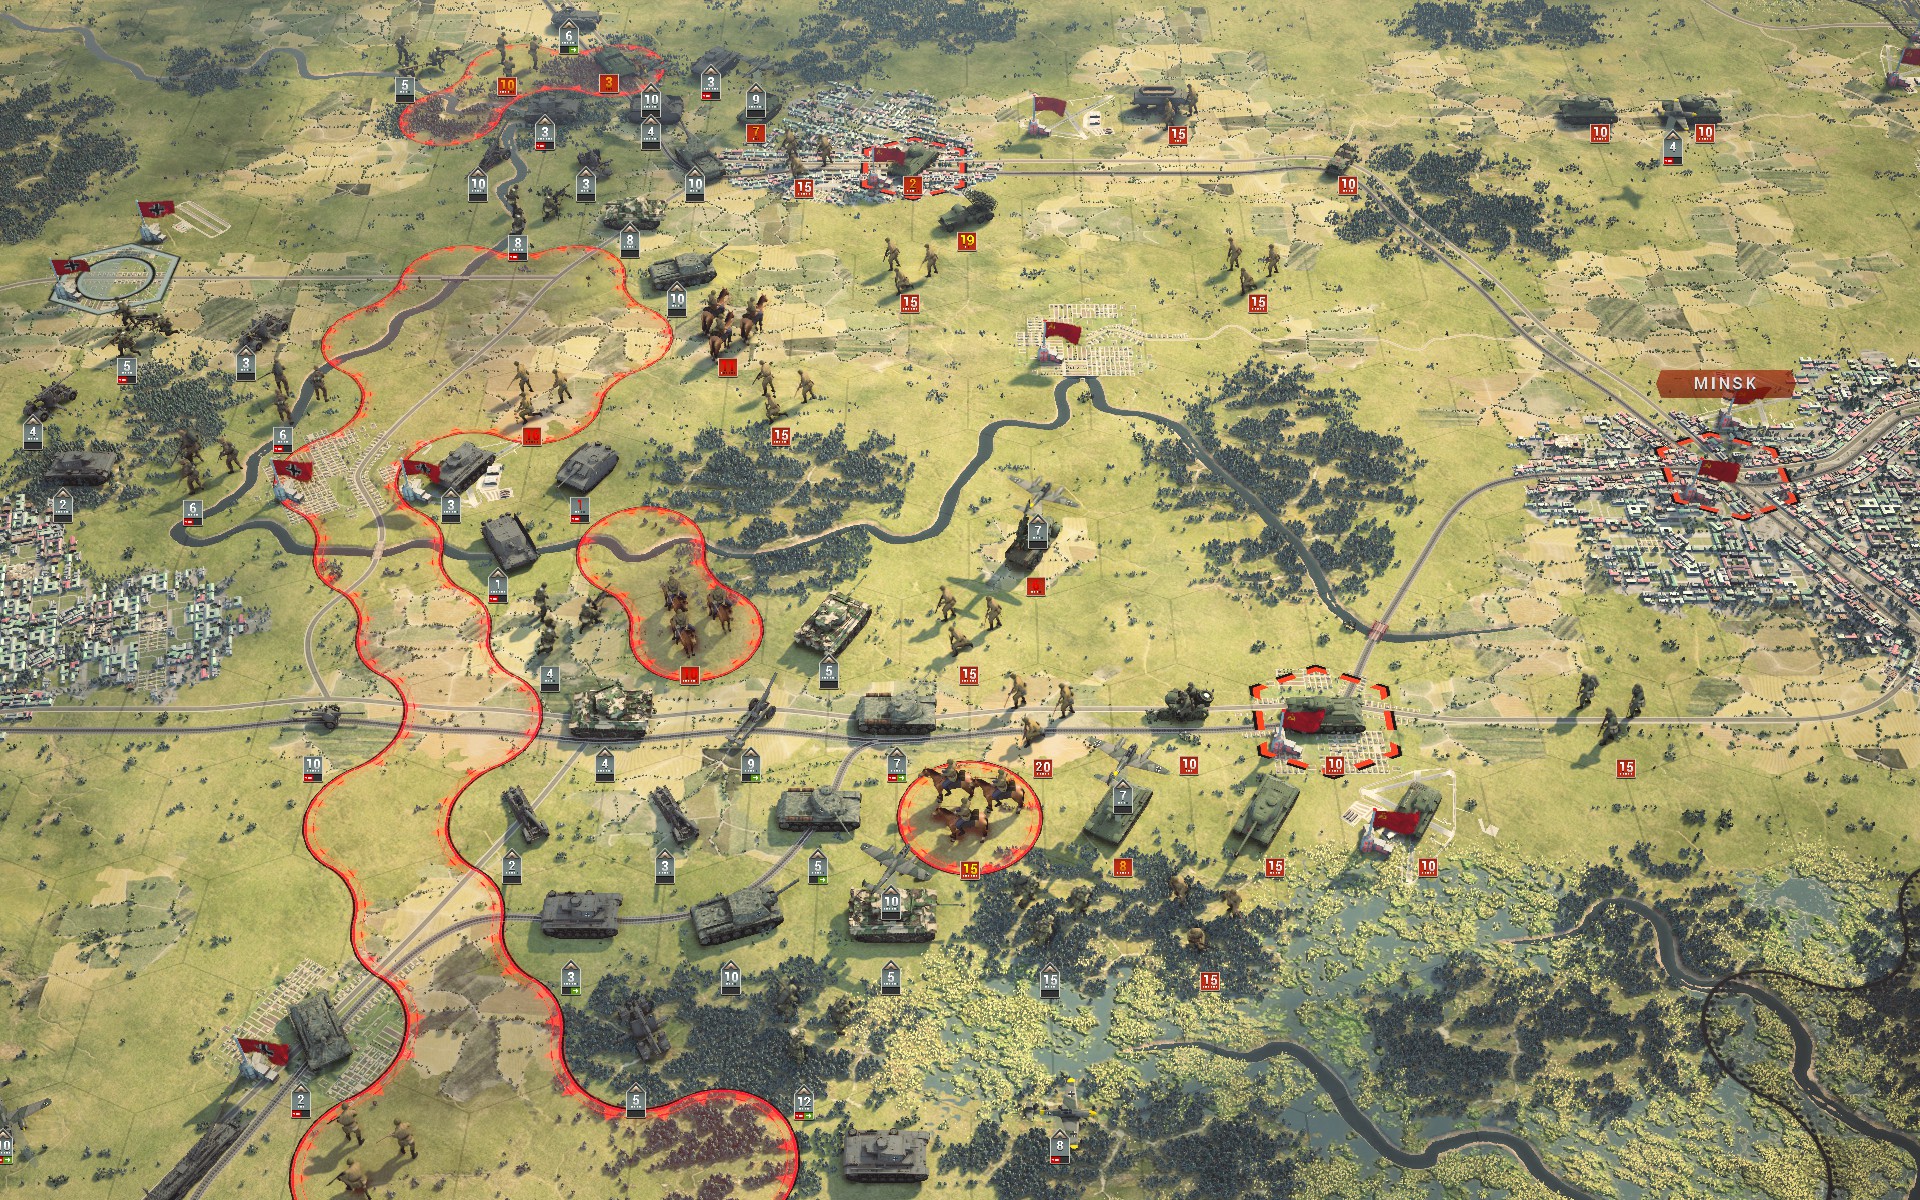
More artillery is brought up to support the Tigers and IS-1s in the centre. There are two T-34/85s approaching Vilnius, but the second IS-2 is the prize I am focusing on capturing; with stats comparable to the Königstiger I am looking forward to fielding a few of my own.
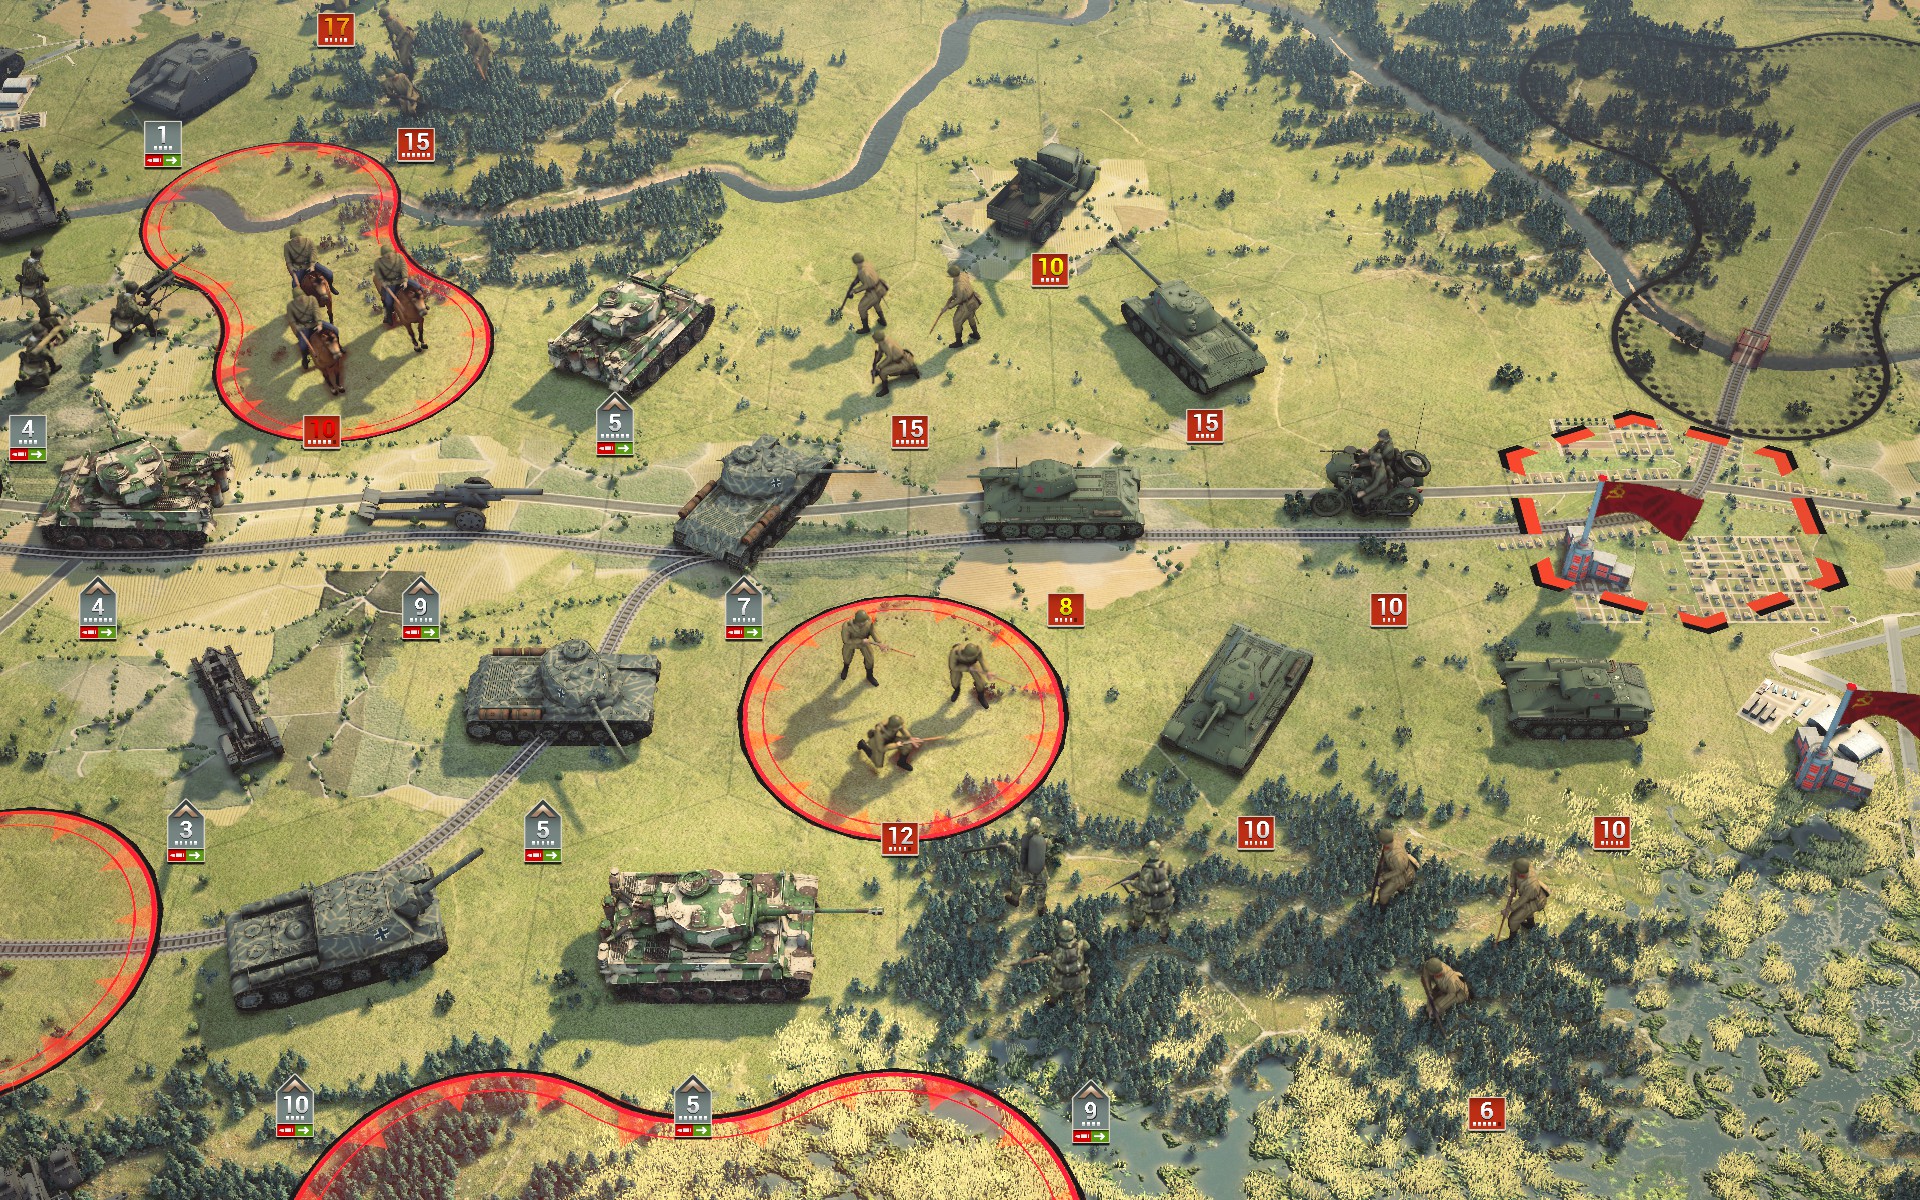
The Bridgeburners hold firm despite coming under heavy attack, prompting the IS-2 to move north instead.
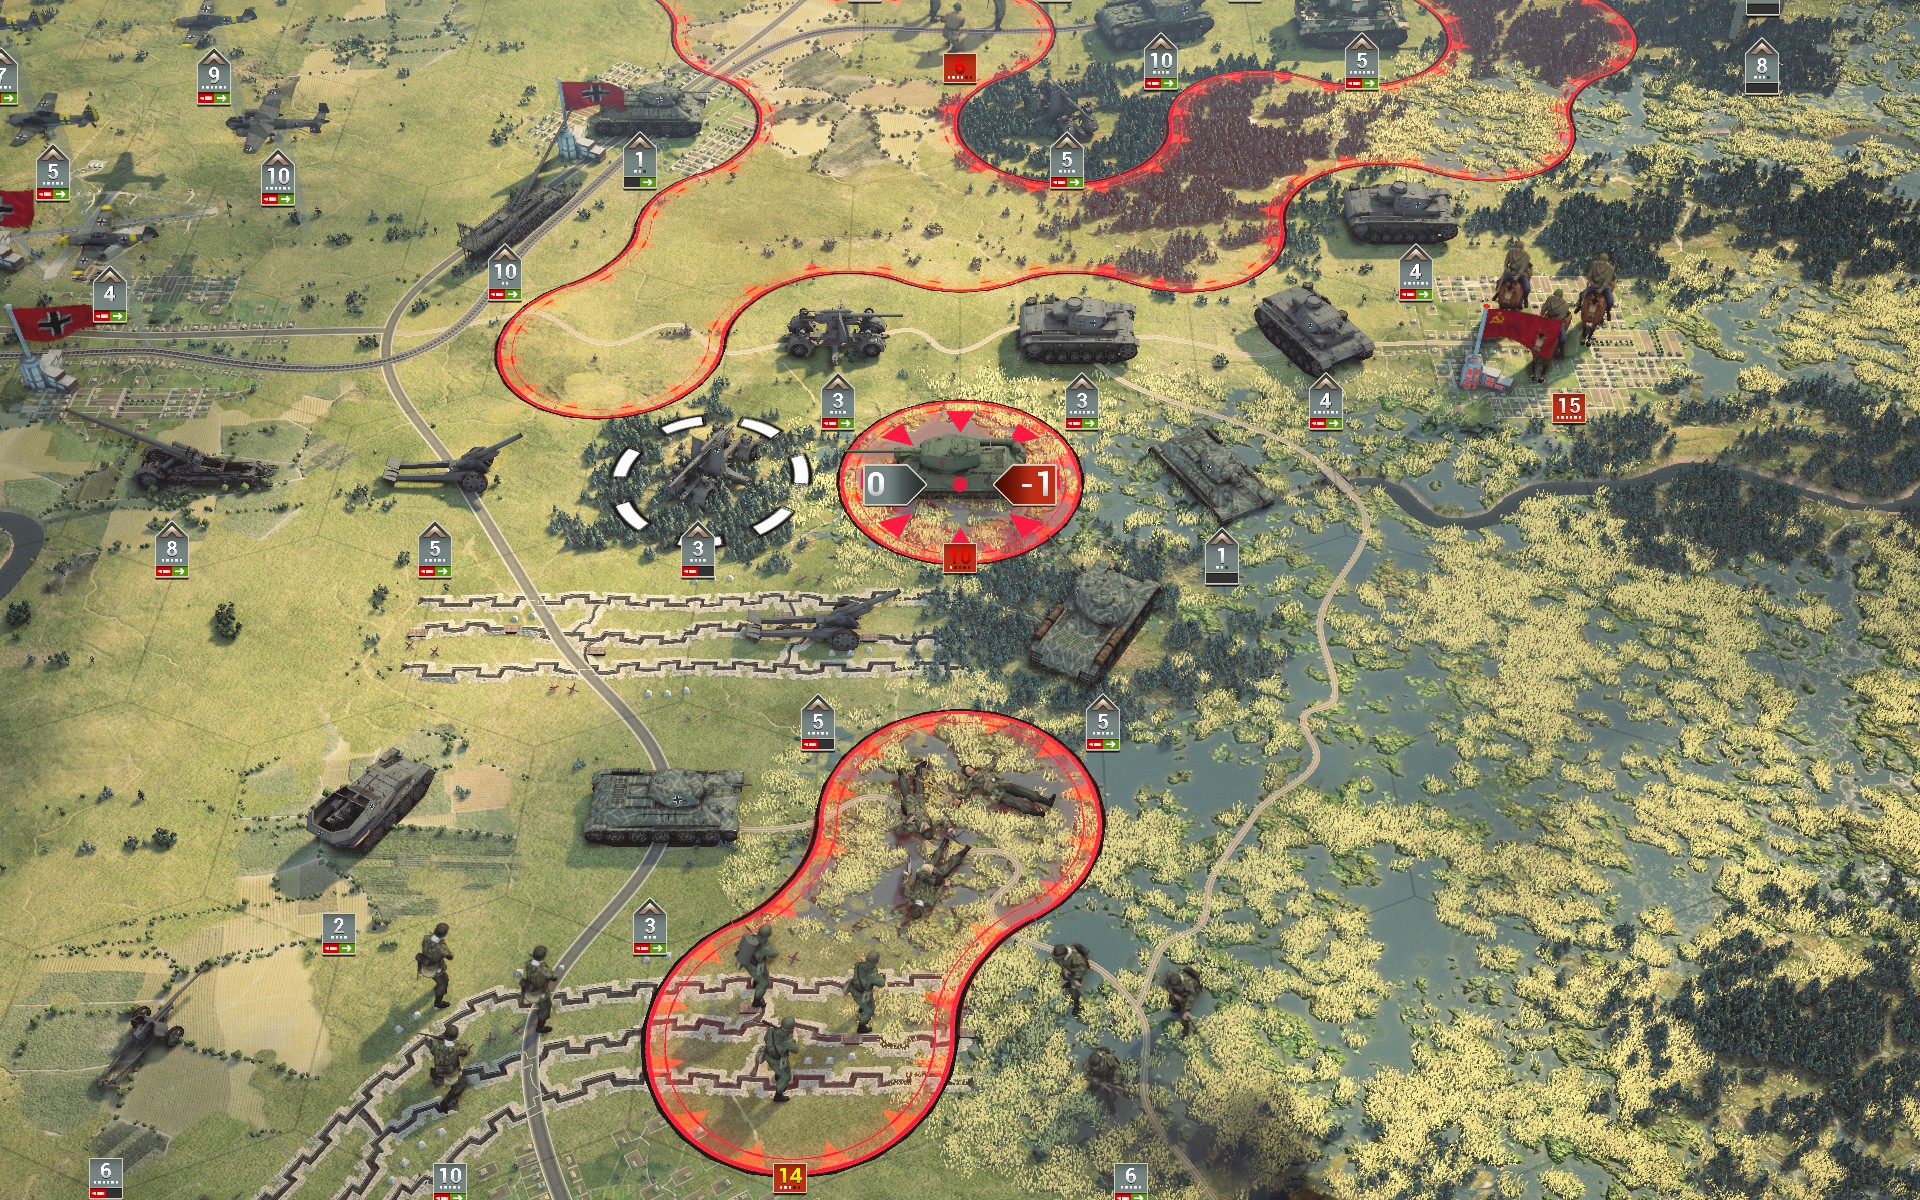
A detached 8.8 captures a T-34/85. The 8.8 might not terrify modern Soviet armour the way it did Allied armour in '40, but it's still a power to be reckoned with.
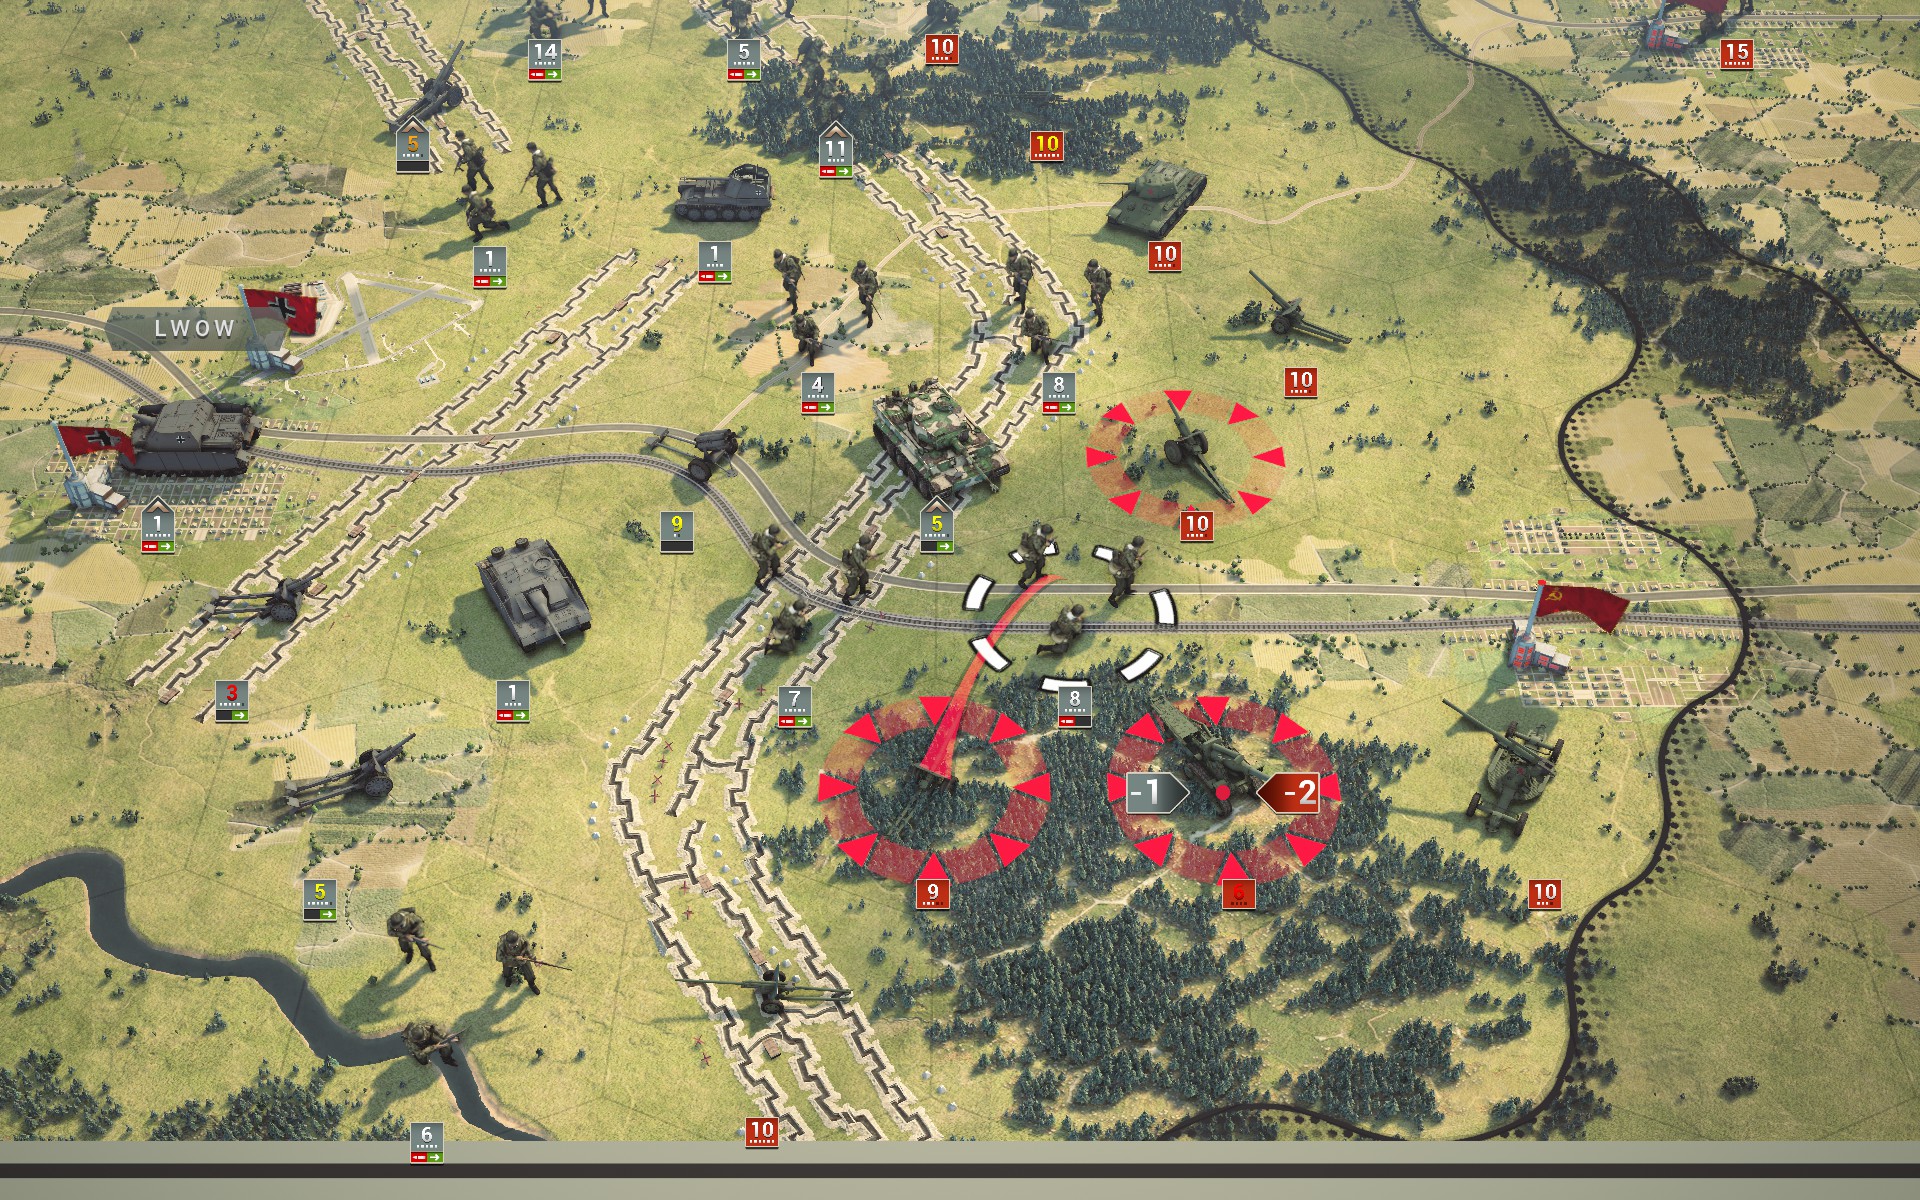
The auxiliaries finally breach the Soviet artillery line, bringing an end to the counter-battery fire from the 203 mm M1931. All Soviet artillery in the south are 5-star units, including the rocket batteries that supported the initial offensive, which makes them very accurate -- and deadly. As the accuracy bonus on Generalissimus is additive they never missed, making things all the more challenging for the auxiliaries.
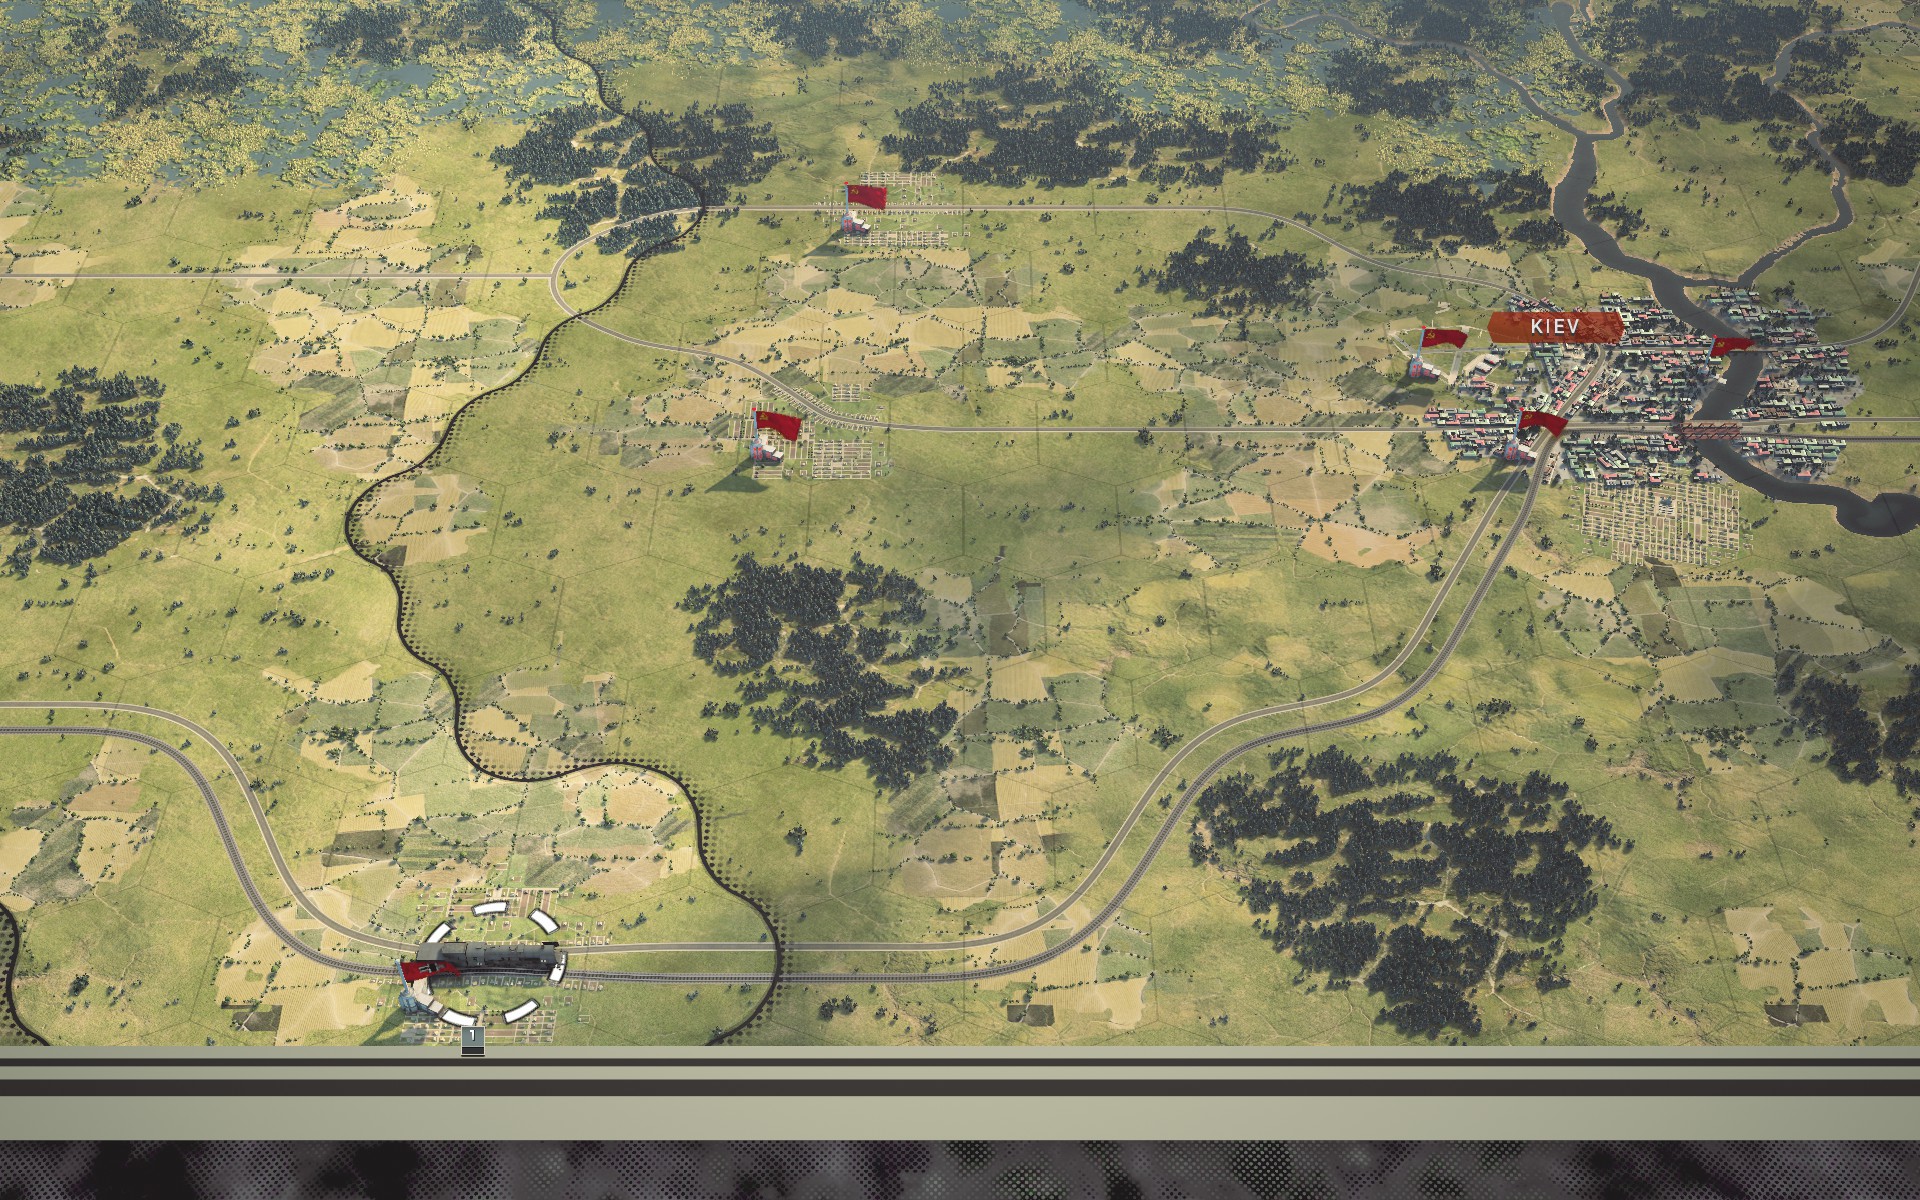
A detached auxiliary battalion captures Vinnitsa using the railroad. If I had a few more turns to work with I am confident I could have captured both Kiev and Smolensk, which would have made for an interesting end to Operation Bagration.
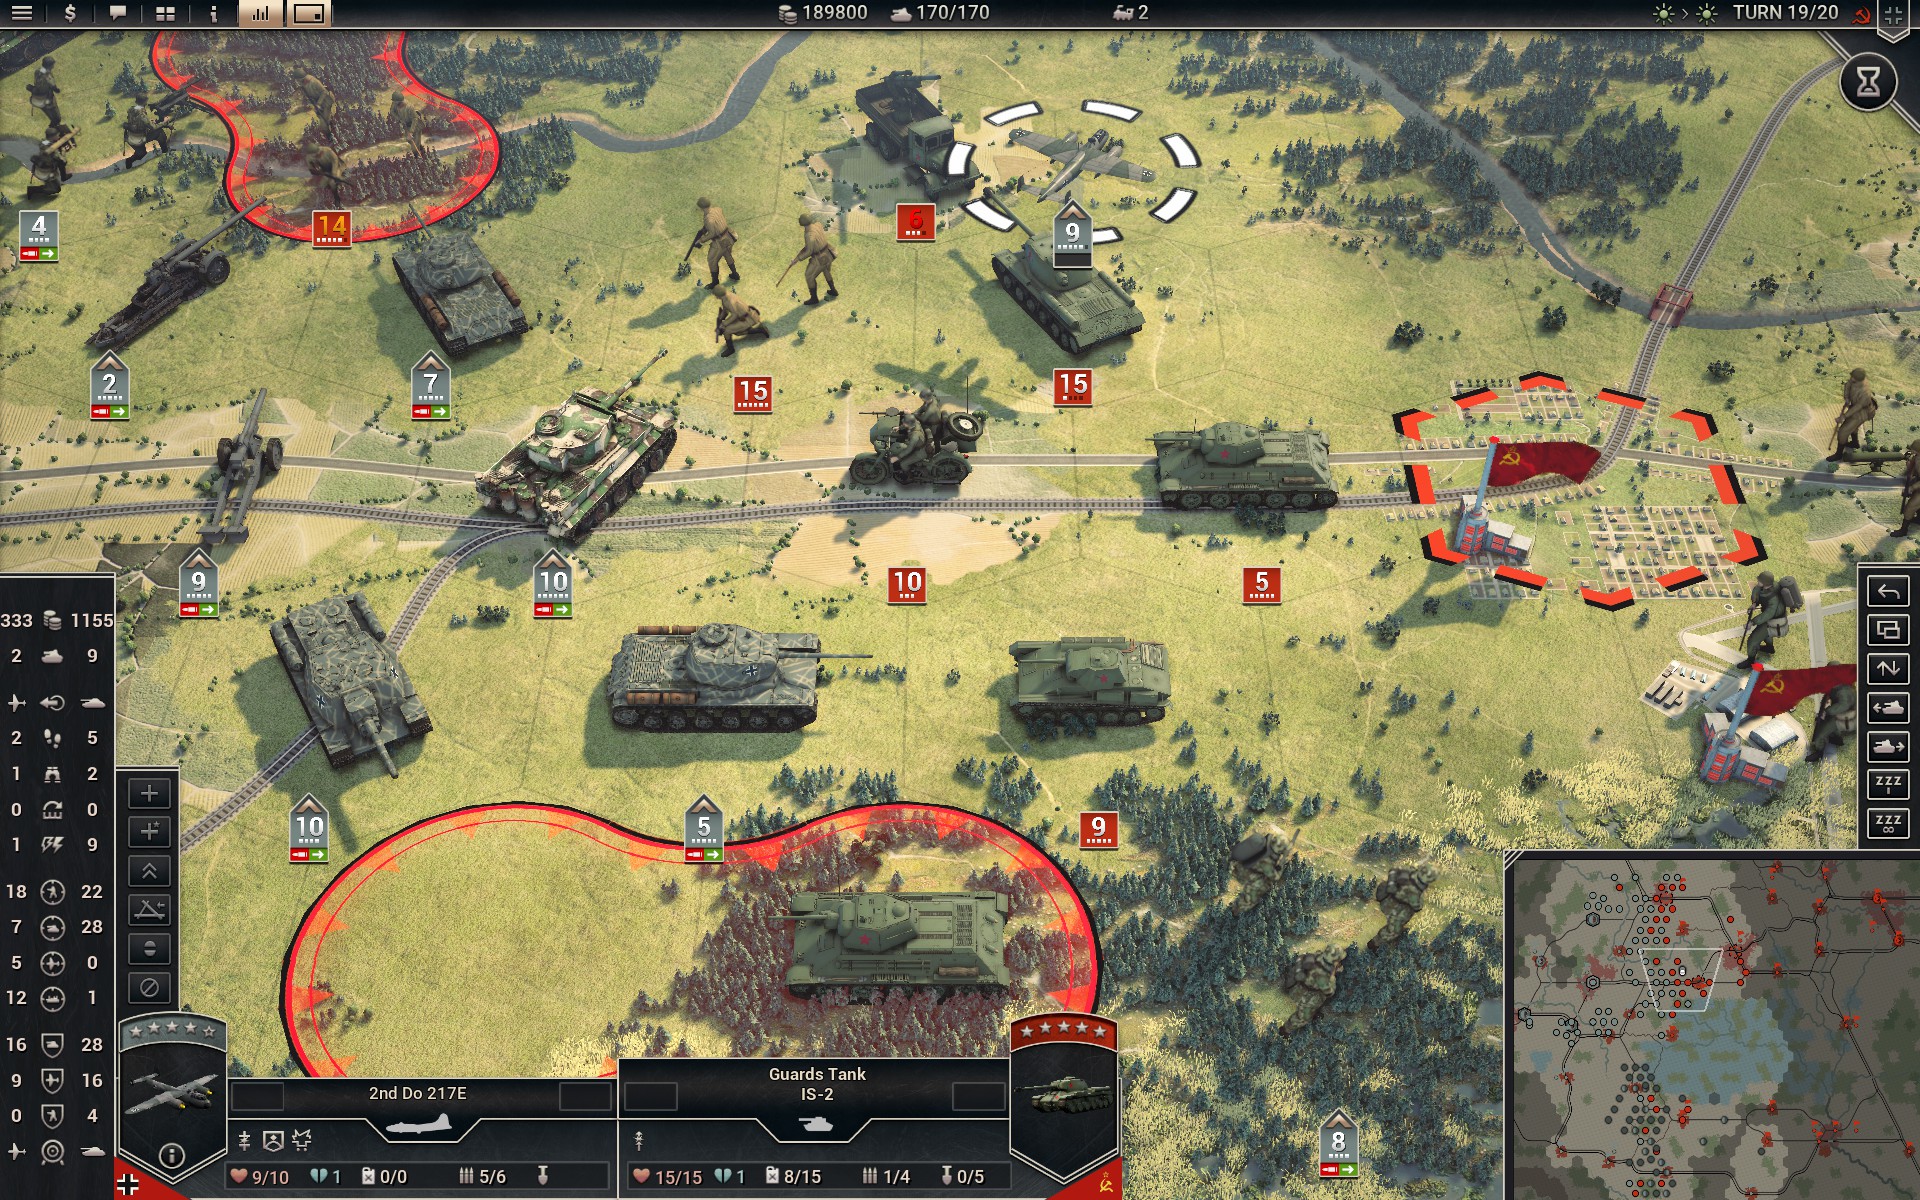
A Do 217E targets the IS-2's supplies. With only two turns left, I can't afford to wait for Deadly Grasp to kick in, so my substantial artillery assets are brought to bear upon it.
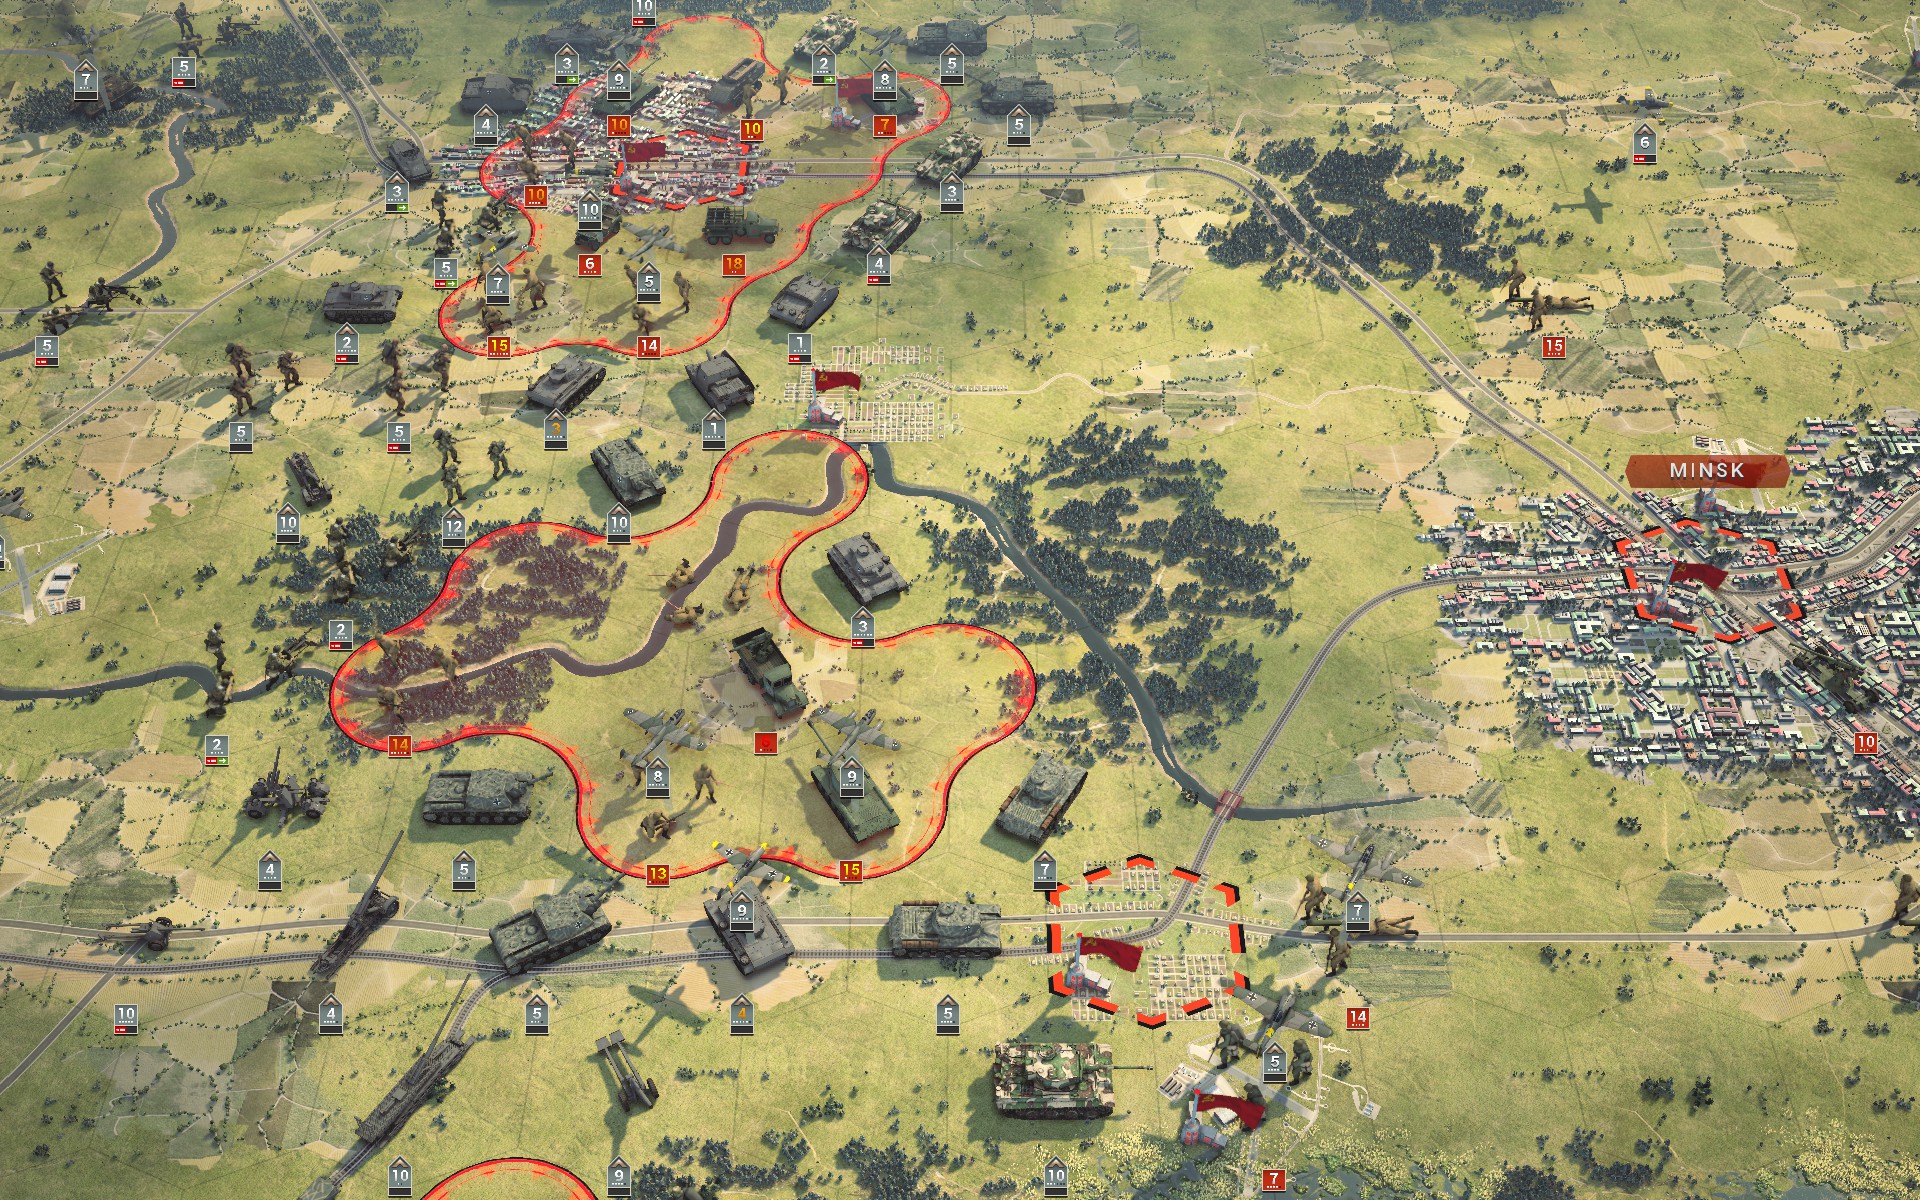
The IS-2 is encircled as 15 cm, 17 cm and SU-152 batteries all open fire on it.
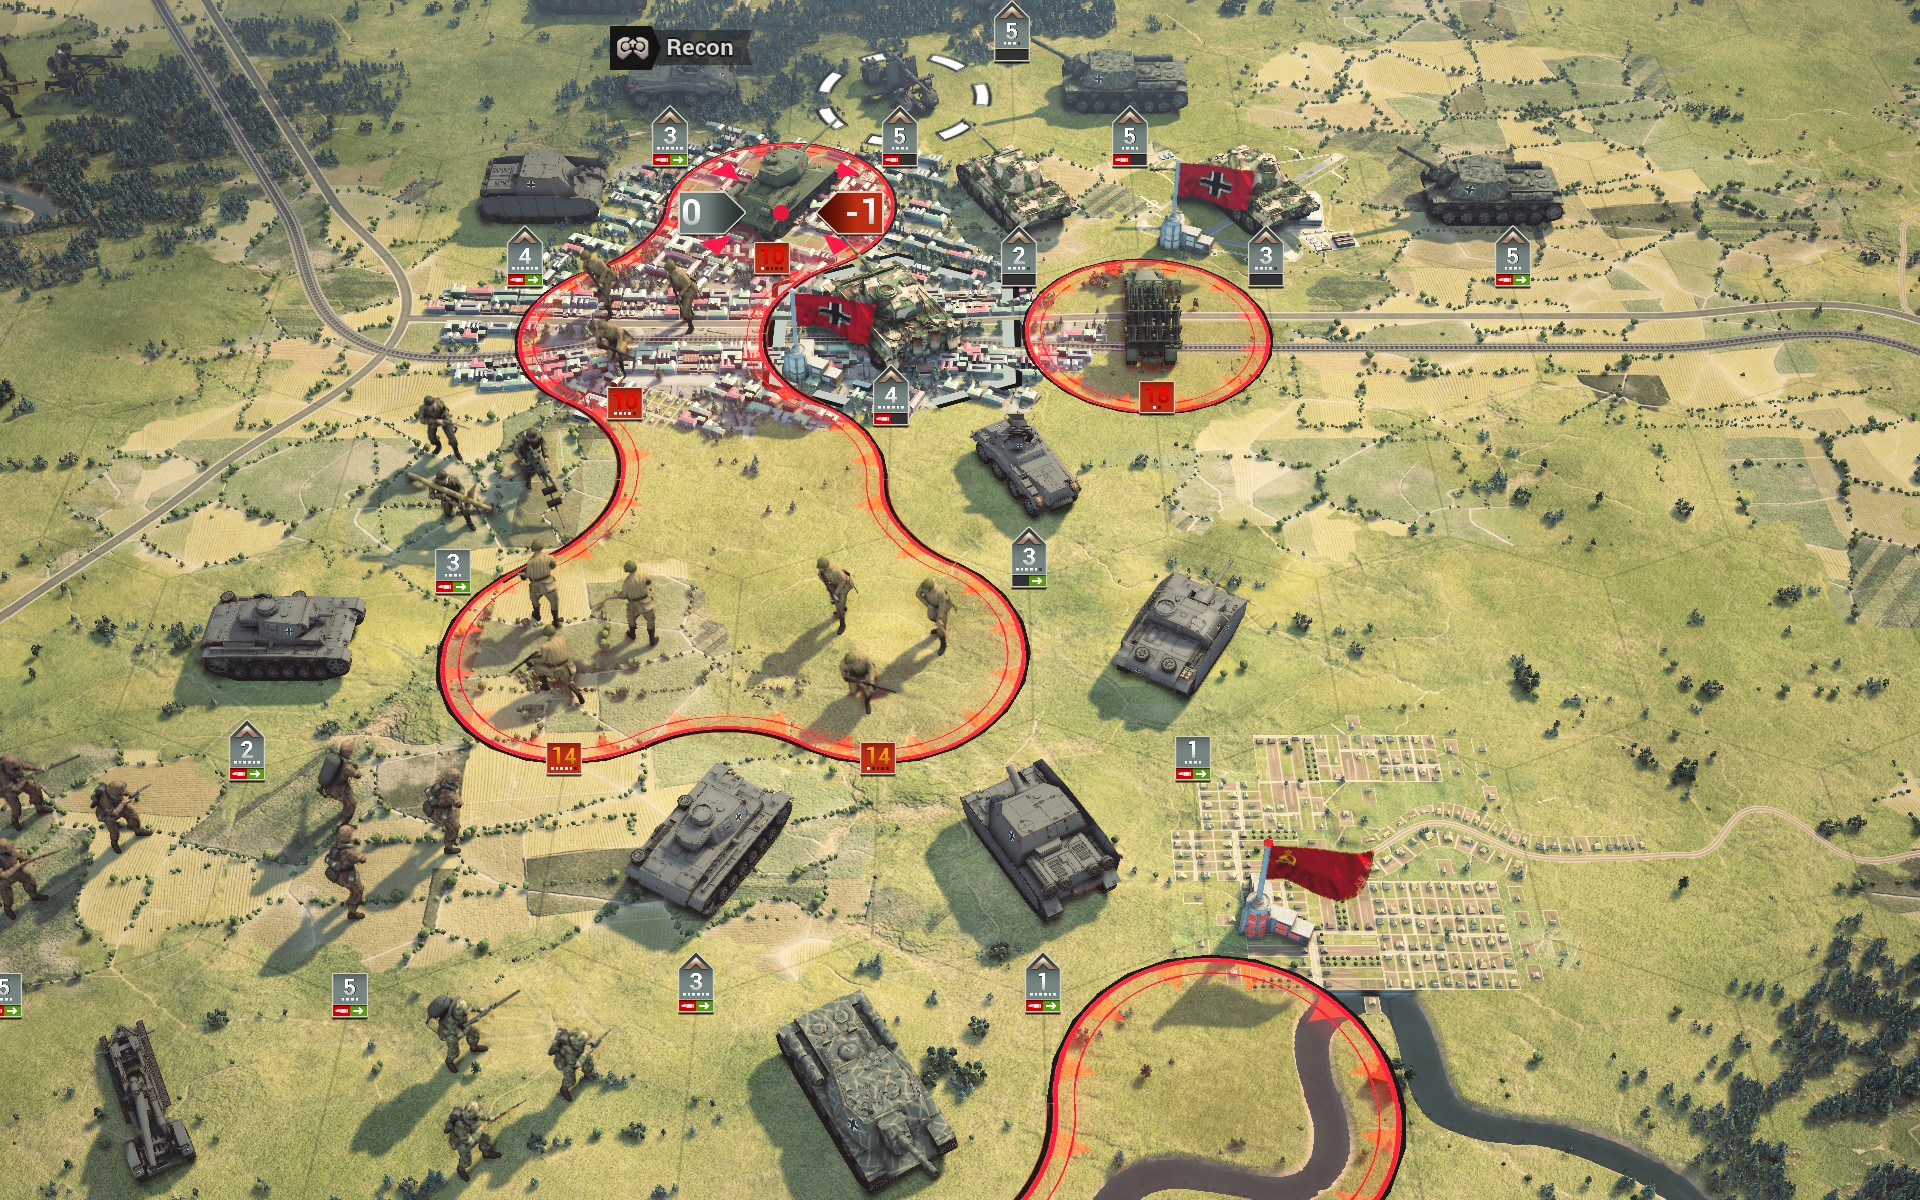
The last T-34/85 is captured by a detached 8.8.
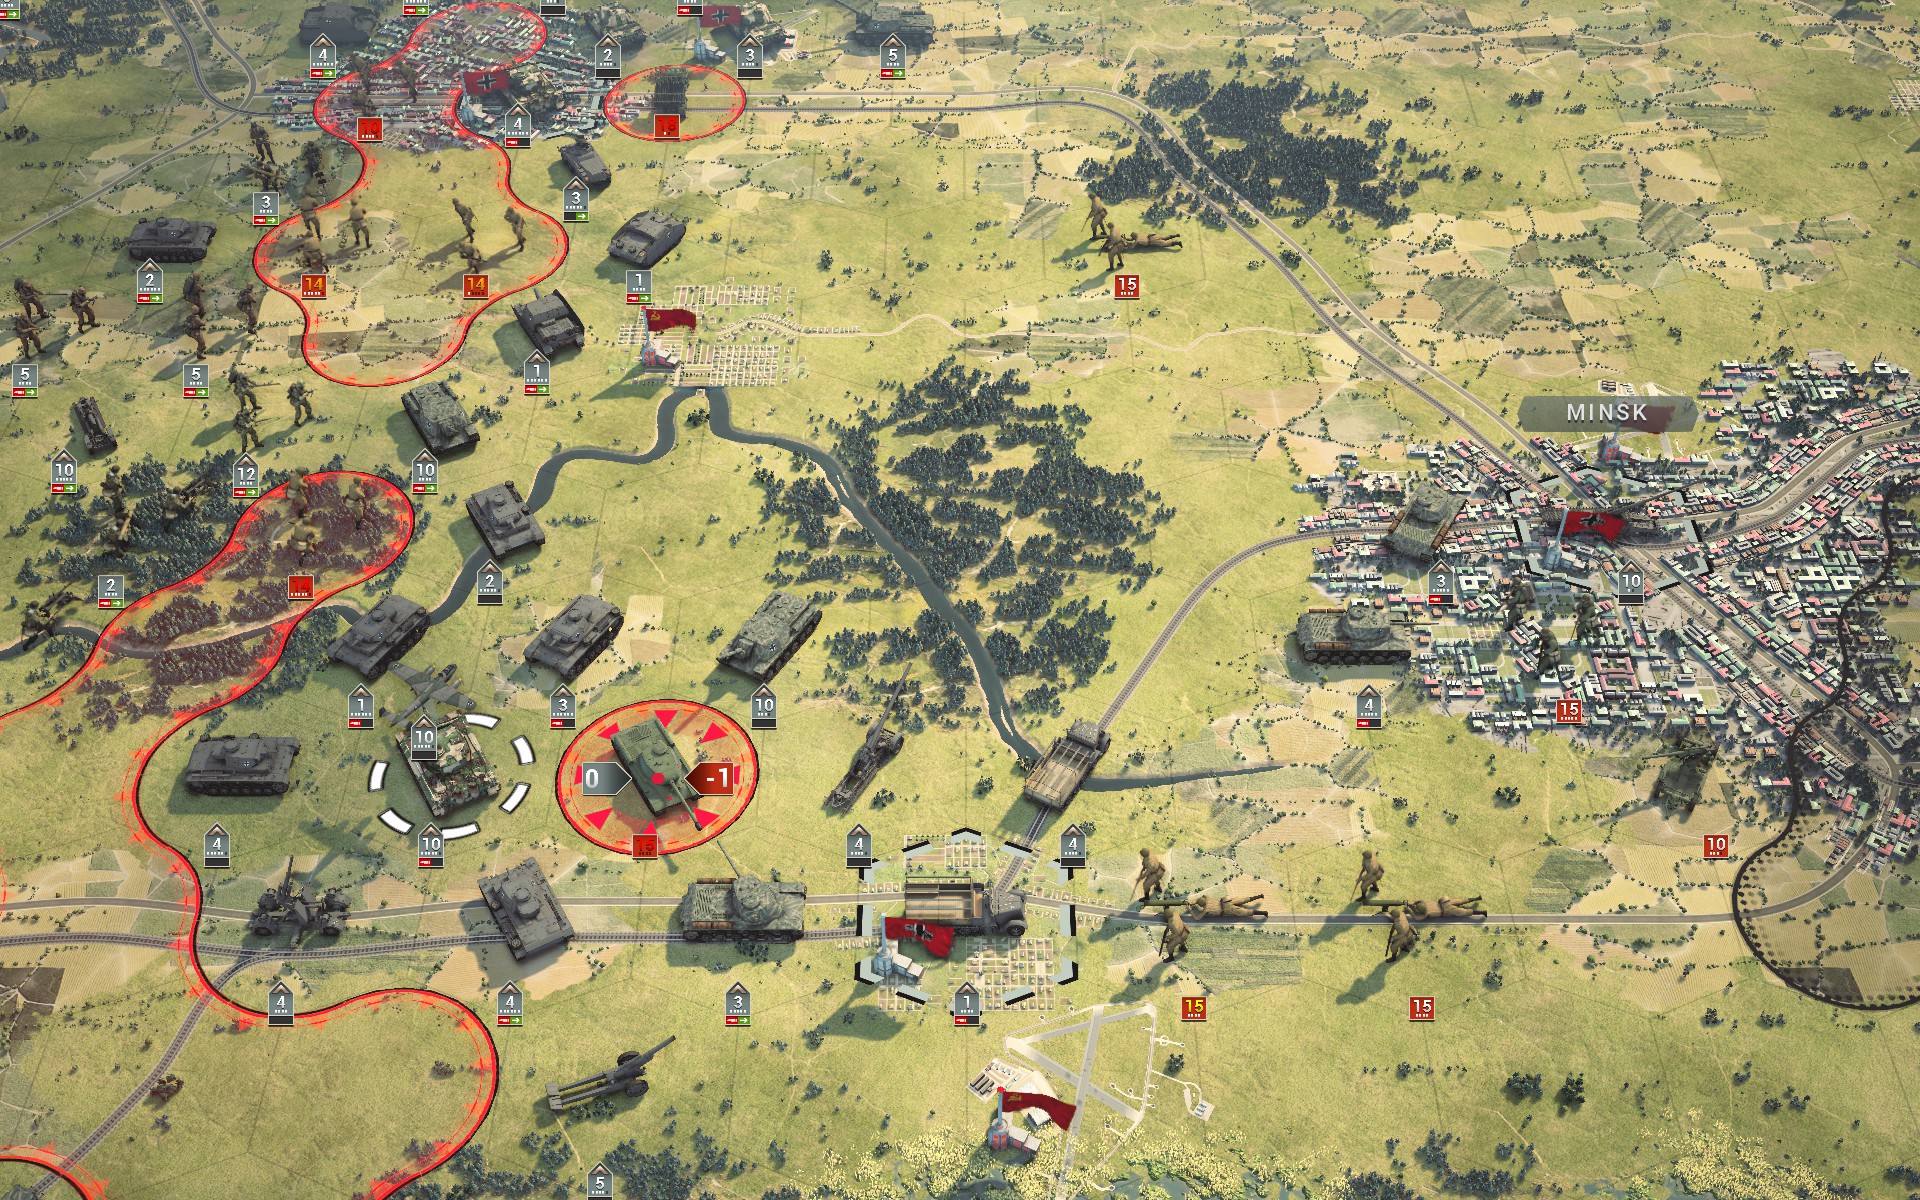
The IS-2 is captured on the last turn, and I drive Gustav into Minsk to ensure the scenario ends with the city under my control. Even at full strength the 3-star Tiger I is only predicted to inflict a single kill, as roughly a third of the attacks will miss and only 15% of the hits will be converted to kills -- the IS-2 is very resilient.
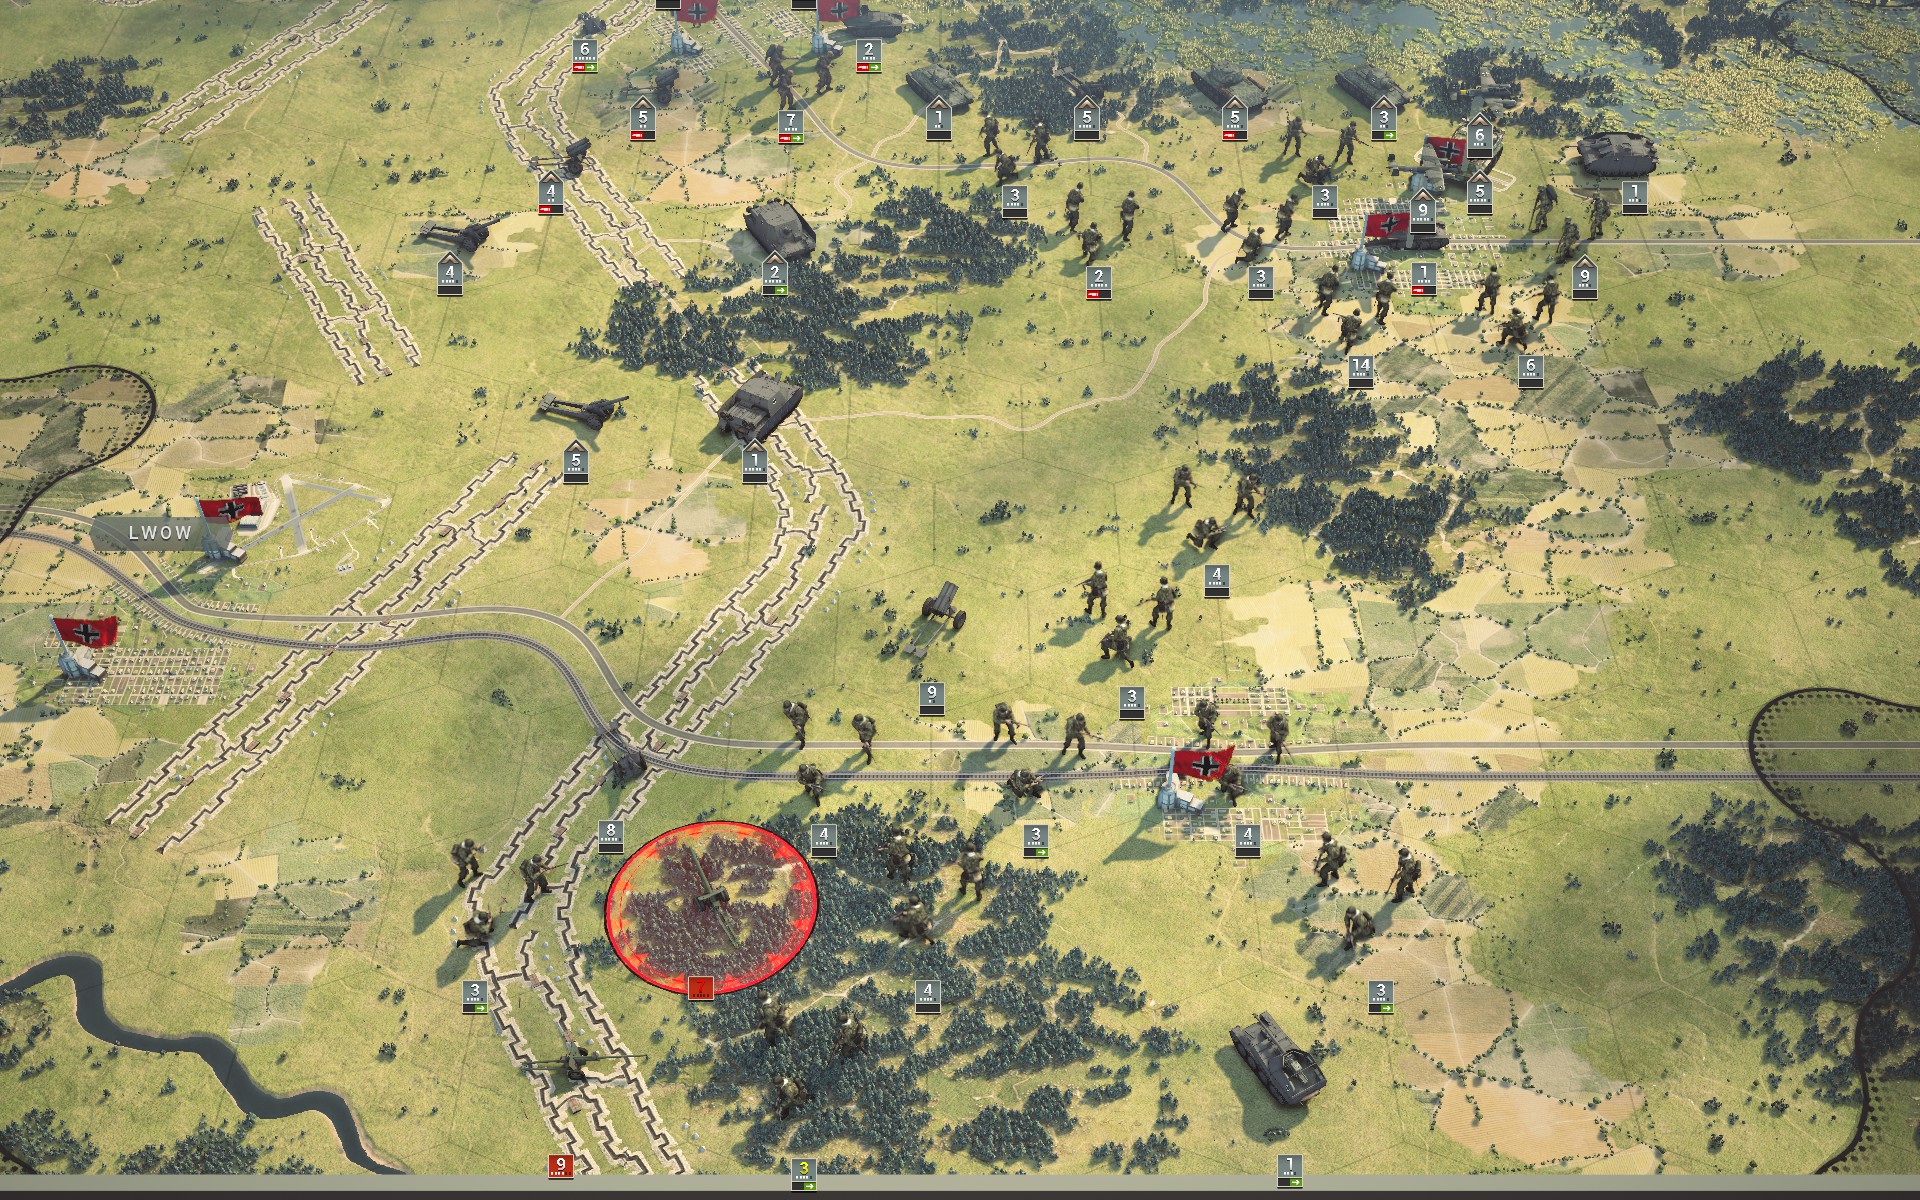
The auxiliaries have performed well above expectations; not only did they repel the Soviet offensive, they broke through the heavily fortified artillery line to capture Kowel, Rovno and Tarnopol. High Command might not be thrilled about the losses they suffered, though.
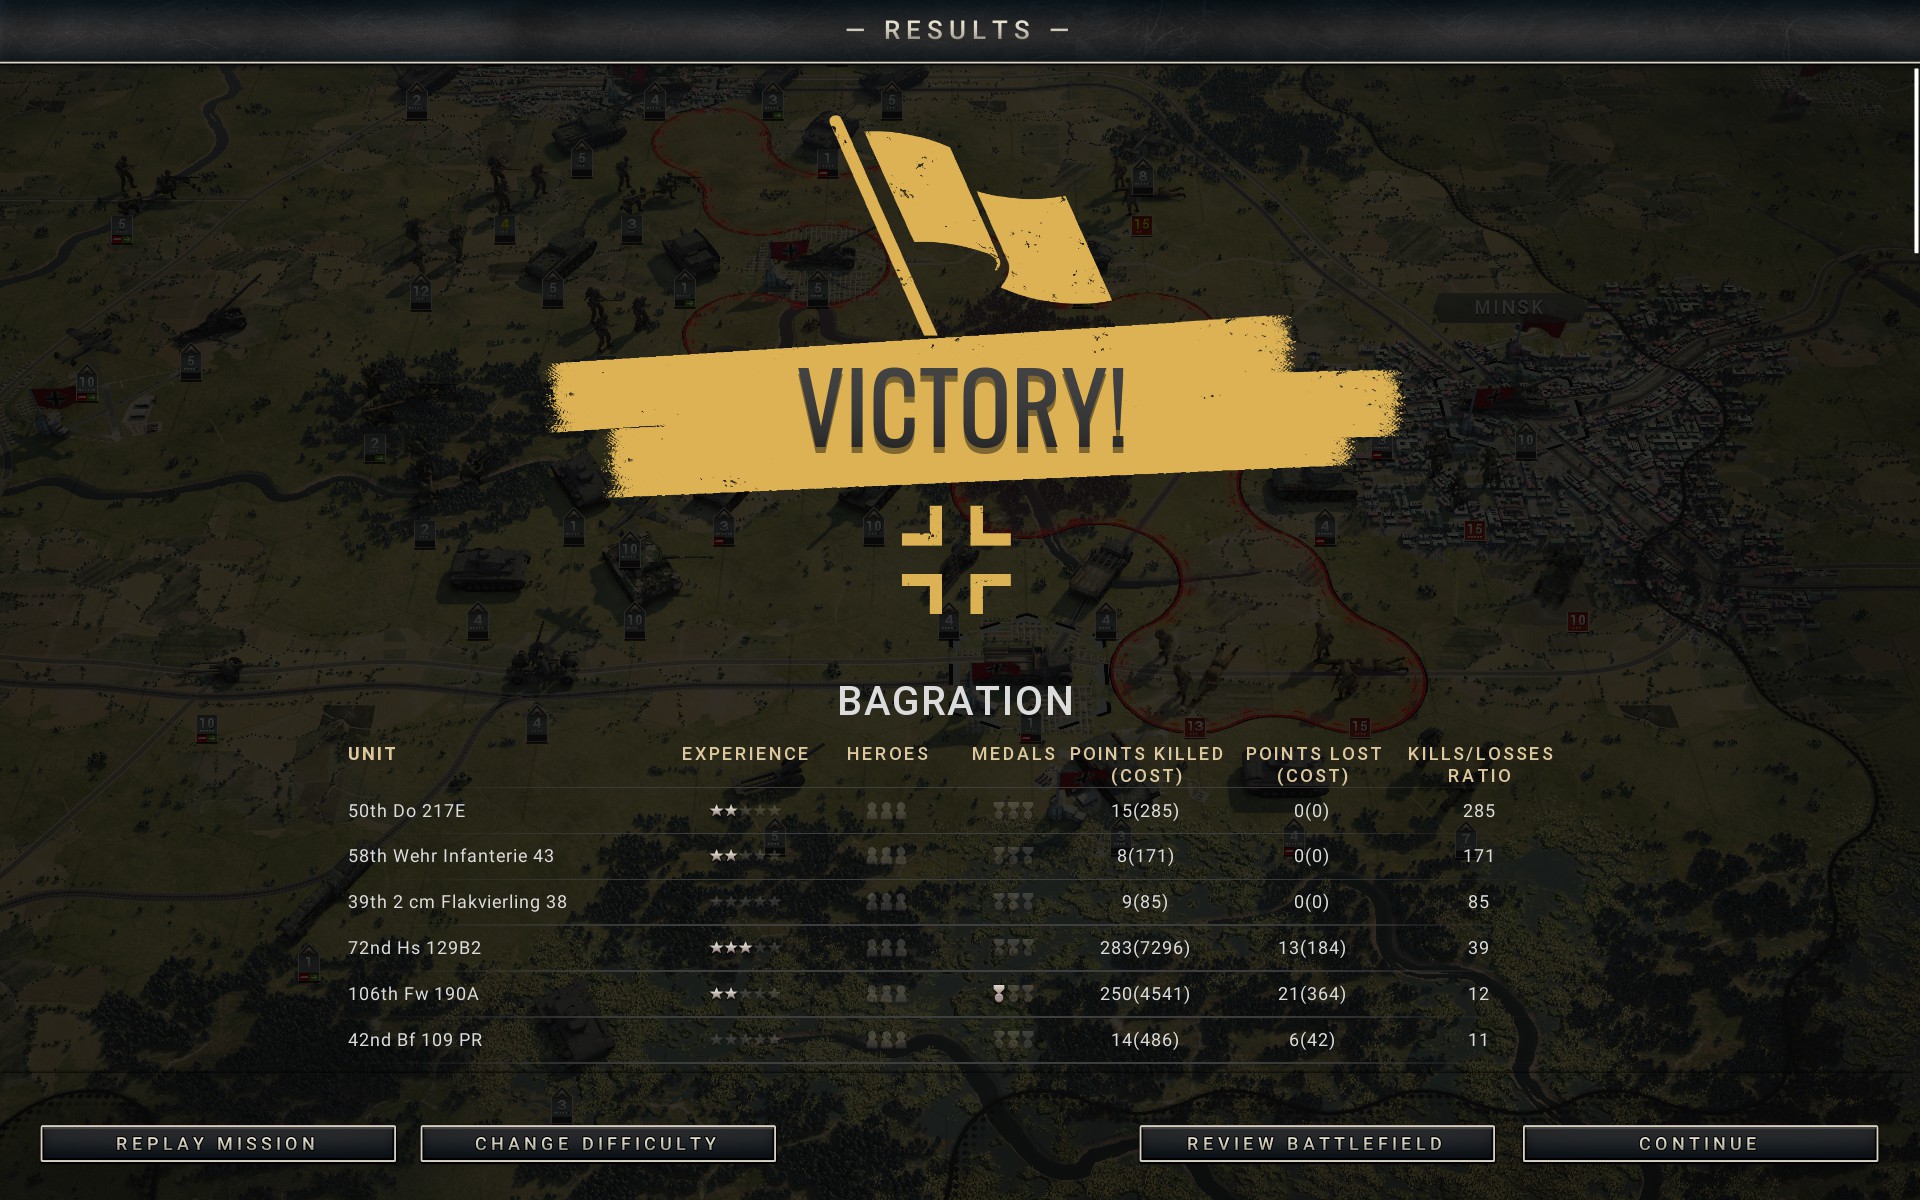
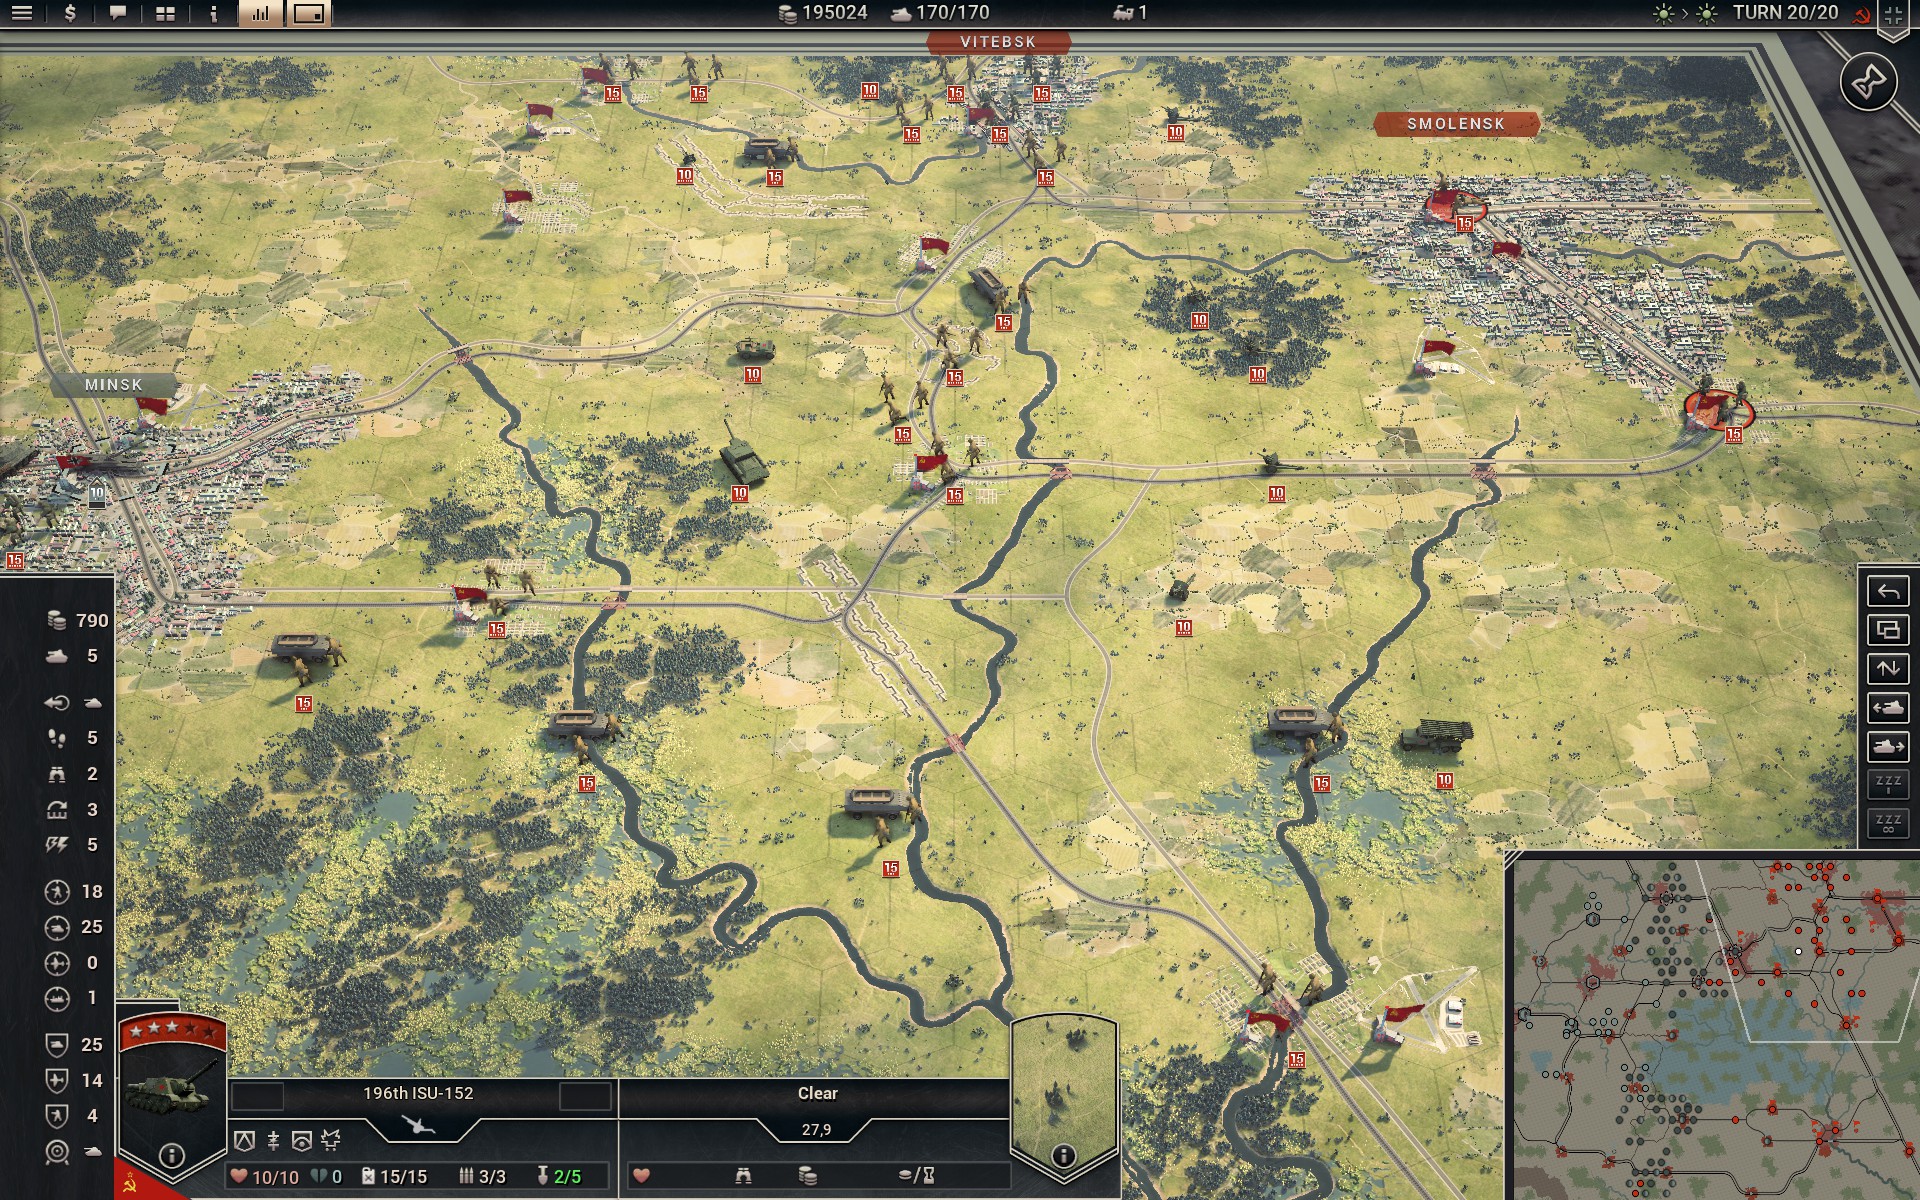
Part II -- The Battle of Bialystok
Initial Prestige: 171389
Final Prestige: 195024
Core
- Infantry
- Pioniere w/ SdKfz 250/1 [NEW]
- Pioniere w/ SdKfz 250/1
- Pioniere w/ SdKfz 250/1
- Tanks
- IS-1
- IS-1
- Tiger I [NEW]
- Tiger I
- Panther D
- OT-34
- OT-34
- Panzer IIIN [NEW]
- Panzer IIIN
- Panzer IIIN
- Panzer IIIN
- Recon
- SdKfz 234/1 8Rad
- Artillery
- Schwerer Gustav
- 21 cm Mrs 18 w/ SdKfz 7
- 17 cm K 18 w/ SdKfz 7 [NEW]
- 17 cm K 18 w/ SdKfz 7
- SU-152
- SU-152
- SU-152
- 15 cm sFH 18 w/ SdKfz 7
- 15 cm sFH 18 w/ SdKfz 7
- 15 cm sFH 18 w/ SdKfz 7
- Nebelwerfer 42 w/ SdKfz 11
- Brummbär
- Brummbär
- Anti-Aircraft
- 8.8 cm FlaK 36 w/ SdKfz 7
- 8.8 cm FlaK 36 w/ SdKfz 7
- 8.8 cm FlaK 36 w/ SdKfz 7
- Fighters
- Fw 190A
- Fw 190A
- Fw 190A
- Bf 109F
- Tactical Bombers
- Bf 109 PR
- Bf 109 PR
- Hs 129B2 [NEW]
- Me 410A
- Me 410A
- Strategic Bombers
- Do 217E [NEW]
- Do 217E [NEW]
- Do 217E [NEW]
- Do 217E [NEW]
- Do 217E [NEW]
- Do 217E [NEW]
- Do 217E
- Do 217E
To be on the safe side, I have also brought in three elite battalions to assist the auxiliaries on the ground in addition to the Do 217Es; my own forces already have significant armour and artillery assets while the auxiliaries will struggle with the heavier Soviet armour and SPATs, so the Tigers will provide valuable support. The 17 cm battery can suppress Soviet artillery with its counter-battery ability, and once I am able to launch a counteroffensive the mobility of the mechanized Pioniere will provide me with additional tactical options as none of the auxiliaries have transports. I have also requisitioned an Hs 129B2, a powerful tactical bomber that together with Gustav should be able to pin Soviet armour with surgical strikes.
The Partisans were an unpleasant surprise, but so far events have largely unfolded according to plan; the Soviet air force has effectively been destroyed and the bonus objectives secured, providing an additional 12 core slots for the rest of the campaign. The auxiliaries have repelled the initial Soviet offensive in the south, and my battlegroup has largely finished redeploying. Granted, I should probably have stationed more troops around Brest and Kobryn as the Red Army has exploited the gap in my lines to push north towards the Niemen river, leaving the rearguard dangerously exposed. On the other hand, the same is true for the Soviet forces, as their lines lines have become stretched and no longer look quite as intimidating.
The troops north of the Niemen have born the brunt of the Soviet offensive so far, with the bulk of the T-34s and heavy SPATs converging on Vilnius; even the Tiger and Panther battalions that formed part of the reaguard have lost half their numbers. However, the Red Army has paid dearly for its success to date, and the battle may still prove to be a Pyrrhic victory if its best battalions -- including the 15-strength IS-2 -- are left with too little support to achieve anything. I will destroy the T-34s and attempt to lure in the IS-2 so it can be safely neutralised, while keeping the 8.8 away from the Kayushas; it's poor defence makes it a tempting target for rocket artillery.
NB: I played this scenario before the patch that increased the kill percentage of experienced artillery, which would have made the Katyusha batteries a lot more dangerous.
East of Bialystok the rearguard has found itself threatened by Soviet forces from the south, as the Red Army aggressively pushed north towards the Niemen. These troops were tasked with holding Minsk till the end, and so many of them were not able to evacuate using the railway. With Gustav and the slower IS-1 detachments brought up from Bialystok they are in no real danger of being overrun, as the Red Army has prioritised mobility over firepower in the centre. It seems a curious choice given that there is relatively little space in which to maneuver between the river and the marshes, but as a result losses have been limited, with the exception of the Crimson Guard, who were attacked in the open by two Cavalry battalions with only a single SU-152 to support them.
A Tiger detachment has broken the Soviet line north of Lwow, leaving the vanguard of the Red Army in a precarious position.
An auxiliary Wehr Infanterie use forced march to cross the river. According to the devs this is a feature, so if you see the AI doing this it's not a bug.
With the help of a Do 217E, a detached auxiliary Grenadier drain the overstrengthened SU-85 of its last ammunition. Now I just need to encircle it and this once potent battalion will be harmless.
The Panther battalion avenges its fallen by destroying the remaining T-34s west of Vilnius. Note that the Panther A and the T-34/85 have identical stats; the discrepancies are due to my traits.
The Crimson Guard withdraw towards Bialystok while the Bridgeburners reinforce. My elite mechanized Pioniere still have a role to play.
My battlegroup has regained control of the centre. The Red Army has a lot of armour to the east, but without Perimeter Control there is no easy way to pass my heavier Tiger and IS-1 detachments.
The Crimson Guard and Panthers are reinforced. I'm hoping the restored Panther and the fire support will discourage the IS-2 from attempting to cross the Niemen.
A Petlyakov Pe-8 rebases to Grodno and the Luftwaffe takes it out. The IS-2 captures Grodno, while the situation east of Bialystok is beginning to resemble a rush hour traffic jam.
An impetuous SdKfz 234/1 detachment volunteers to brave the guns of the IS-2, ensuring that the powerful battalion won't be able to attack.
Defeat in detail remains the best way to handle superior forces; the bulk of the Soviet armour have been held in place by a few battalions while my artillery and bombers have focused on neutralising the more powerful enemies to the north.
Having held off a dozen battalions while acting as a rearguard with little support, the Tigers have earned some respite and are relieved by the IS-1 battalions.
Lwow has been recaptured and the auxiliaries are now poised to assault the Soviet artillery line.
At this point quantity simply is no substitute for quality, especially not in a narrow space. The T-34/85s to the rear are unable to engage my forces as they are blocked by their own M4A3s and Valentine IVs, which suits me just fine.
The last of the Soviet air force rebases to Kowel, and the Luftwaffe engages them...
... destroying the fighters and causing heavy damage to the remaining bombers.
Aerial reconnaissance suggests that the Red Army may have committed its remaining reserves, as the troops now moving through the Minsk region primarily consist of light armour and Regulars, but it's too early to draw any definite conclusions.
Unable to inflict any damage on the heavy Panzers and supporting SU-152s, the Soviet Cavalry and Regulars suffer heavy losses as they elect to brave the woodlands defended by my elite mechanized Pioniere. I have called on these veterans to open a path for me to flank and capture the dozen or so battalions in the centre.
As most of my own artillery is supporting my battlegroup, the auxiliaries are struggling to break through the Soviet artillery line while adhering to my orders to suppress and capture; most of the artillery and AT guns are heavily entrenched. The remaining mobile forces have largely been suppressed, however, so the southern flank is effectively secure; the commander will have a hard time explaining this failure to Stalin.
The Soviet bombers target my heavy artillery, inflicting heavy damage. I suspected this would happen, but it was a price worth paying to put an end to the Soviet air force and ensure the unsupported Gustav wasn't targetted.
The Luftwaffe brings down the remaining Il-2M3, putting a definite end to the Soviet air force. I believe it originally numbered around 25 aircraft, and the Luftwaffe deserves recognition for limiting the losses; had they been allowed a free rein they could have caused untold damage to the artillery and heavy armour.
A detached 8.8 easily captures an SU-85.
The Soviet armour in the centre have largely been captured, but a second 15-strength IS-2 has appeared at Minsk, so the Red Army is not yet done.
The Brummbär proves invaluable as the auxiliaries begin to capture the artillery and supporting guns along the fortified line.
After waiting several turns for it to be fully suppressed, a detached 8.8 captures the first IS-2, illustrating how even the strongest unit is helpless without ammunition.
More artillery is brought up to support the Tigers and IS-1s in the centre. There are two T-34/85s approaching Vilnius, but the second IS-2 is the prize I am focusing on capturing; with stats comparable to the Königstiger I am looking forward to fielding a few of my own.
The Bridgeburners hold firm despite coming under heavy attack, prompting the IS-2 to move north instead.
A detached 8.8 captures a T-34/85. The 8.8 might not terrify modern Soviet armour the way it did Allied armour in '40, but it's still a power to be reckoned with.
The auxiliaries finally breach the Soviet artillery line, bringing an end to the counter-battery fire from the 203 mm M1931. All Soviet artillery in the south are 5-star units, including the rocket batteries that supported the initial offensive, which makes them very accurate -- and deadly. As the accuracy bonus on Generalissimus is additive they never missed, making things all the more challenging for the auxiliaries.
A detached auxiliary battalion captures Vinnitsa using the railroad. If I had a few more turns to work with I am confident I could have captured both Kiev and Smolensk, which would have made for an interesting end to Operation Bagration.
A Do 217E targets the IS-2's supplies. With only two turns left, I can't afford to wait for Deadly Grasp to kick in, so my substantial artillery assets are brought to bear upon it.
The IS-2 is encircled as 15 cm, 17 cm and SU-152 batteries all open fire on it.
The last T-34/85 is captured by a detached 8.8.
The IS-2 is captured on the last turn, and I drive Gustav into Minsk to ensure the scenario ends with the city under my control. Even at full strength the 3-star Tiger I is only predicted to inflict a single kill, as roughly a third of the attacks will miss and only 15% of the hits will be converted to kills -- the IS-2 is very resilient.
The auxiliaries have performed well above expectations; not only did they repel the Soviet offensive, they broke through the heavily fortified artillery line to capture Kowel, Rovno and Tarnopol. High Command might not be thrilled about the losses they suffered, though.
Last edited by SineMora on Tue Jun 16, 2020 2:39 am, edited 10 times in total.
Mildly pretentious Swede. Goes by Path on most platforms, including Steam.
http://www.slitherine.com/forum/viewtopic.php?f=596&t=98034 -- Generalissimus AAR (no Trophies / Heroes)
http://www.slitherine.com/forum/viewtopic.php?f=596&t=98034 -- Generalissimus AAR (no Trophies / Heroes)