

Now historically this battle was won by the Bohemians, the side which we play as. It is stated (on Wikipedia so who knows how true it is) the main advantage they had was superior artillery fire. Which is great to hear as I love raining down some heavy fire power! However, as the briefing points out we try to win before night falls else their forces can retreat safely. Therefore, we are under a time pressure to get to the enemy and force a pitched battle.
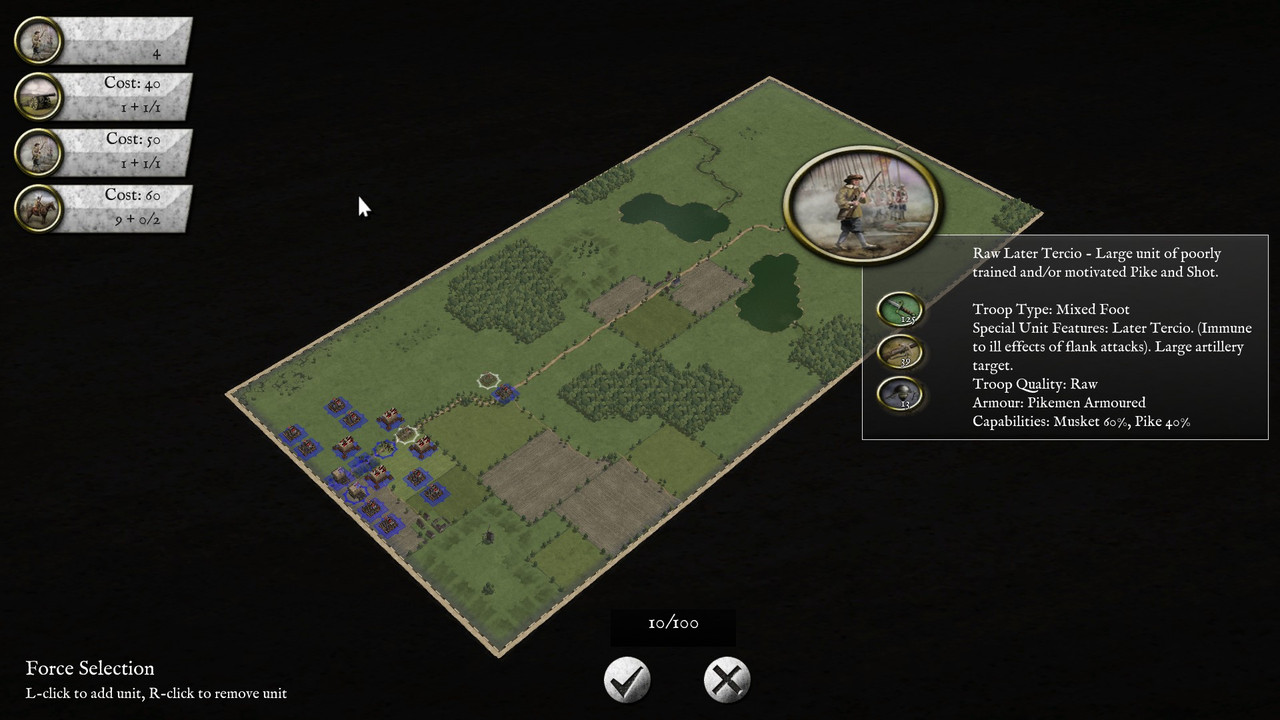
Now because of the difficulty I am on, I have to decide on some choices on what to bring to the battle, I choose:
- Medium Guns - 1
- Raw Later Tercio - 1
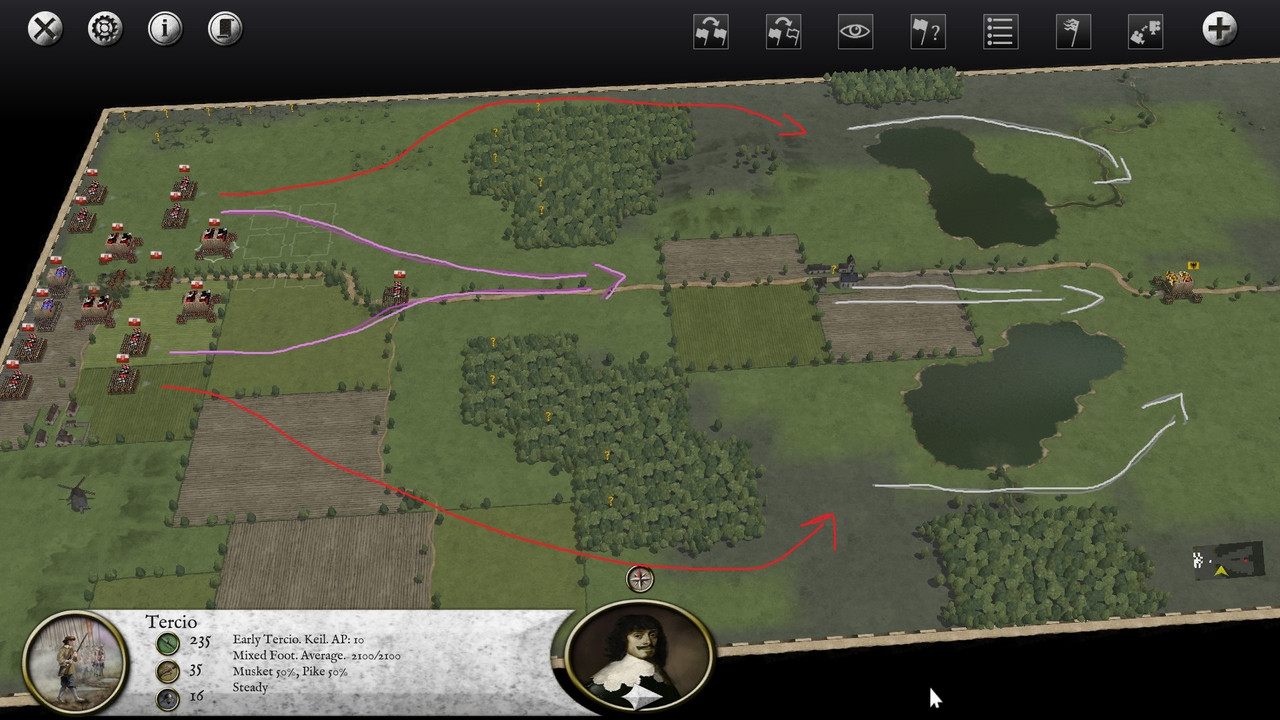
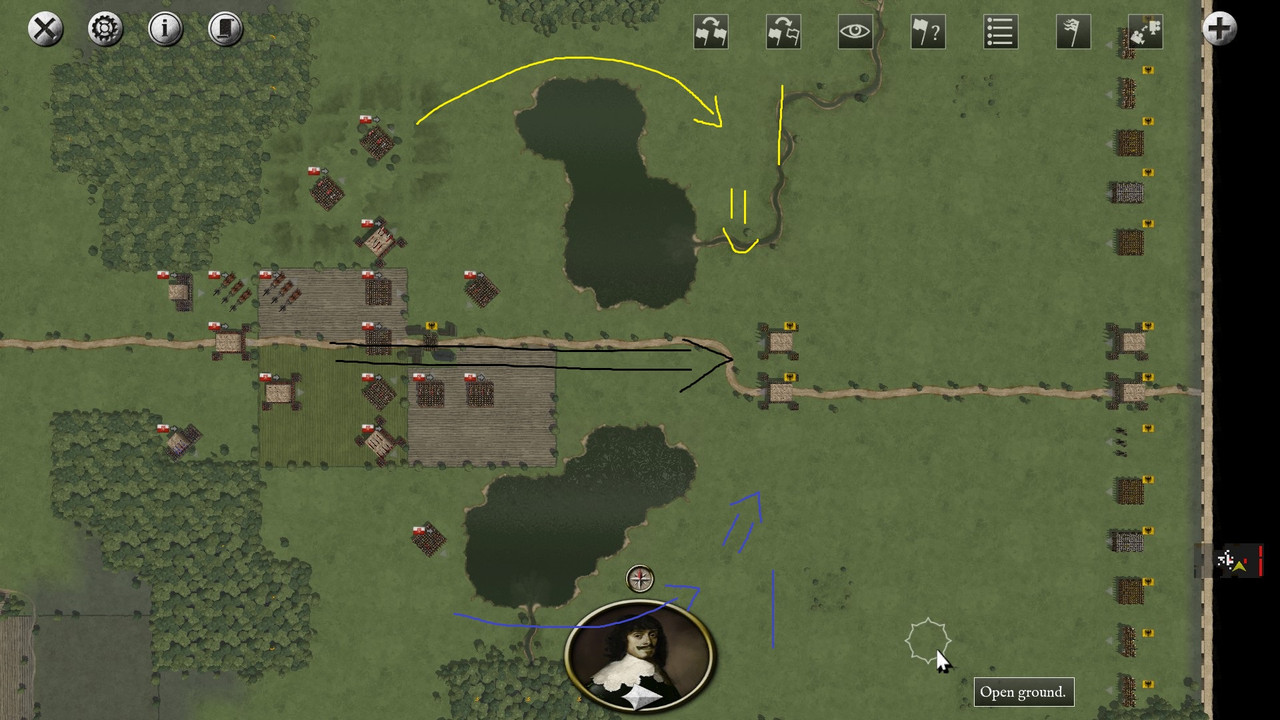
As I take a look around the battlefield it seems very quite... almost suspiciously so... Therefore the general plan will be to have some cavalry go around the forest to scout ahead and the rest as a screening unit for the artillery and infantry. At least until we get to the bodies of water where we will set up the artillery on top of the hill, regroup our forces and adjust which units need to go attack through the center and which ones will go around the lakes. But as they say, no plans survives contact with the enemy so let us see what they have in-store for us.
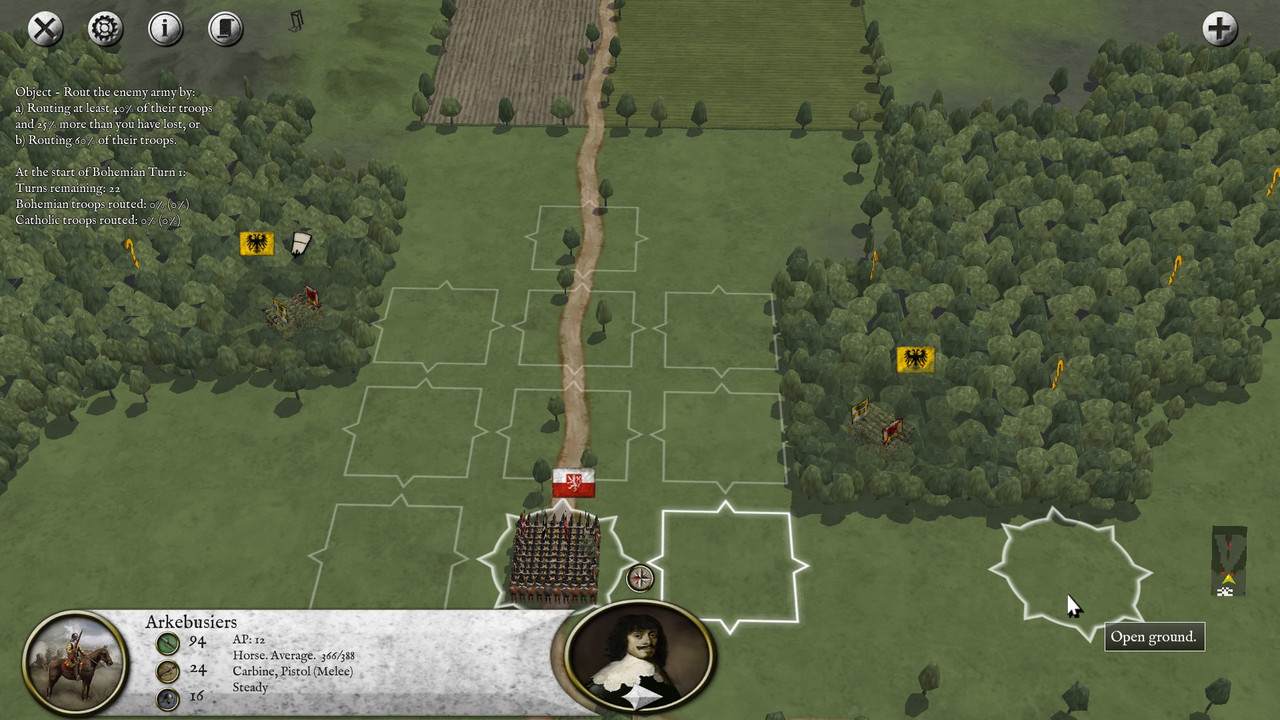
This saying is proven almost instantly as I move the most forward unit of cavalry into enemy fire! Two detached muskets are waiting in the forests! No doubt to slow us down and deal damage where they can. I still stick to the plan outlived above but will use most of my cavalry to shoot down these tricksters to make the road safe for our wagons. After a few turns of firing at them with 3/4 units of arkebusiers each, and the scouts on the flanks manage to secure the rest of the area.
Outside of a lone musketeer unit camping out in town, which we also promptly destroy with overwhelming carbine fire.
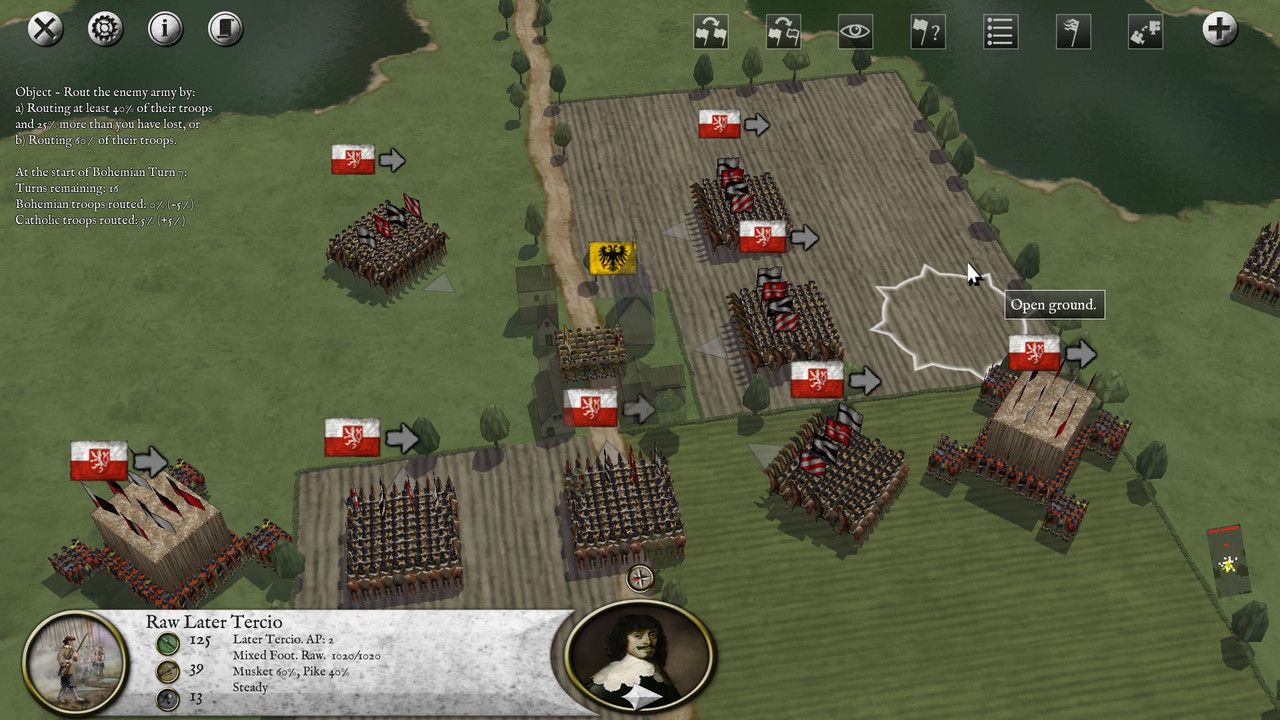
Now that we have a better view we can see how exactly our enemy is set up (and no more pesky units hiding like rats) I believe the plan should compass trying to rout the forward elements of the enemy forces as quickly as possible and then attack the rest. Two of our early tercios will go through the center, advancing slowly and firing upon the enemy with artillery support. Meanwhile we send an early tercio and later tercio alongside 3-4 cavalry units to each flank for a pincer maneuver to, hopefully, destroy the two enemy early tercios before reinforcements arrive. Our cavalry will engage their cavalry, they will most likely lose as the Catholics have kuirassiers, but our units just need to buy time. The later tercio will also join the flanks as reserve units and help out with shooting their cavalry. Two units of arkebusiers will stay back to protect our artillery and be emergency hole plugers.

After a few turns of shooting and positioning we are ready to engage the two enemy tercios from the flanks in melee, however they are also sending their reserve tercios straight at us. Since the later tercios aren't doing much as most of the cavalry is engaged in close combat (and sadly the later tercios cant charge cavalry unlike the early tercios) I will send them to help shore up our flanking tercios to make sure they dont break first.
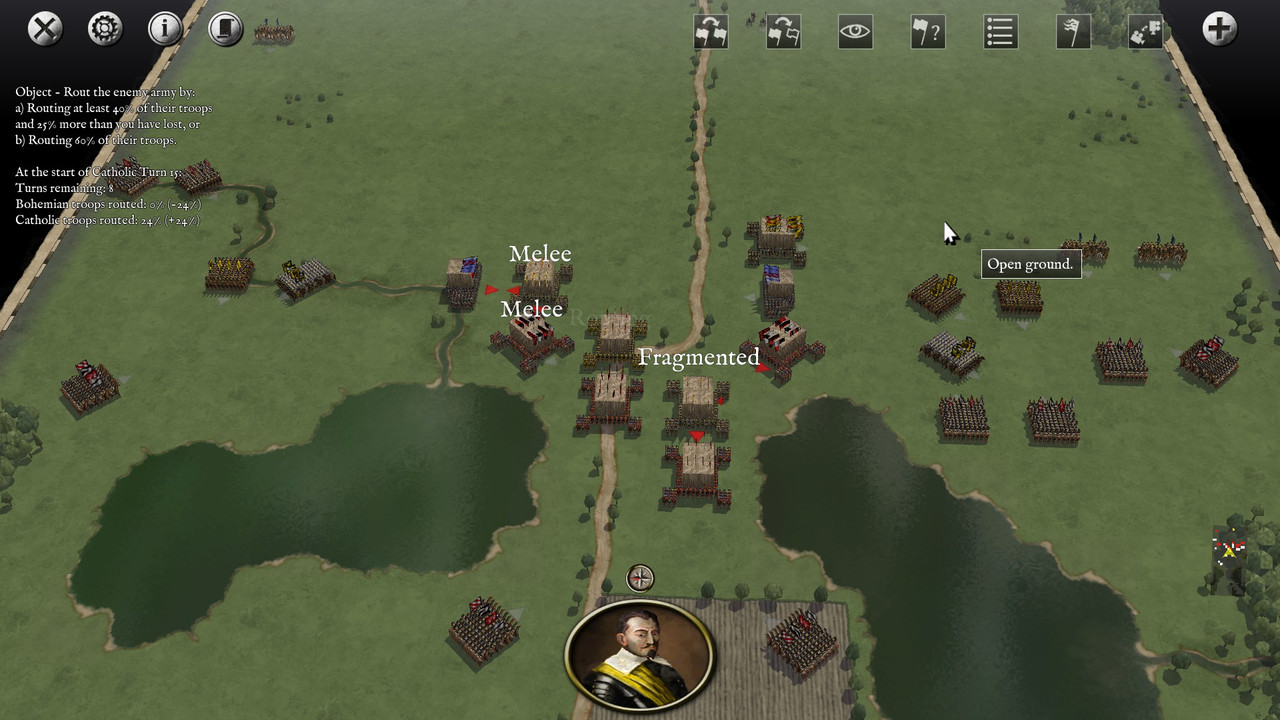
After some very lucky rounds of close combat we break one of the tercios which leads to a chain of morale checks which we win! No chain routs yet... and these routs better come soon as the cavalry situation on the left is in complete chaos (which is somewhat good for us) whereas the right side is just engaged along a line that we will clearly lose and potentially led to a chain of routs of our own
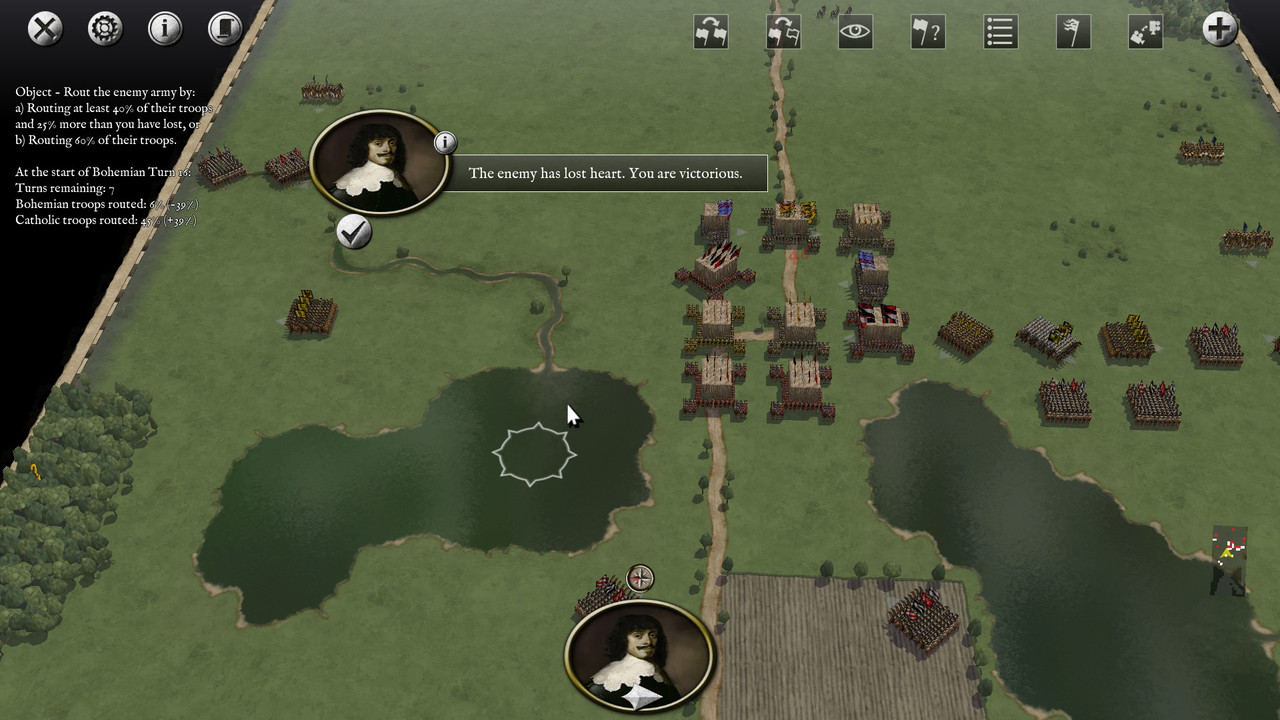
Fortunately, we managed to damage another tercio enough to rout it and this time causing a mass of routs of their infantry. This is enough to bring them up to the 40% rout condition of victory condition a) while we manage to stay at a brisk 6%!!
I fear that will be out best performing campaign... Not sure how I would be able to top that. None-the-less the scenario was great fun! Having the hidden musketeers in the forest and town teaches you to be aware of the possibility that enemy units are hiding out and that you should screen with your cavalry. The scenario also teachs the pros and cons of these behemoth early tercios, while they can perform a lot of damage and are immune to rear and flanking attacks, get some artillery and you can easily shred through their numbers and morale. Death by a thousand paper cuts, they really are a focus point for your fire. Otherwise I feel like I need to understand how ZOC works a bit more and understanding how it could be used offensively/defensively.
Thank you for reading! Hope to see you next time where we will have to snatch victory from the jaws of defeat in the Battle of White Mountain!