The “Toulon” scenario marks the end of the campaign branch in eastern France. Our attack finally reaches the Mediterranean coast. In this mission, the player encounters a very tough French defense that is not easy to overcome. This time, I myself was wonderfully unsuccessful. Exactly, I wasn't able to fully achieve the primary mission objectives. Unlike “Lyon”, it wasn't a narrow failure, but a clear miss. Below is a brief description of what happened.
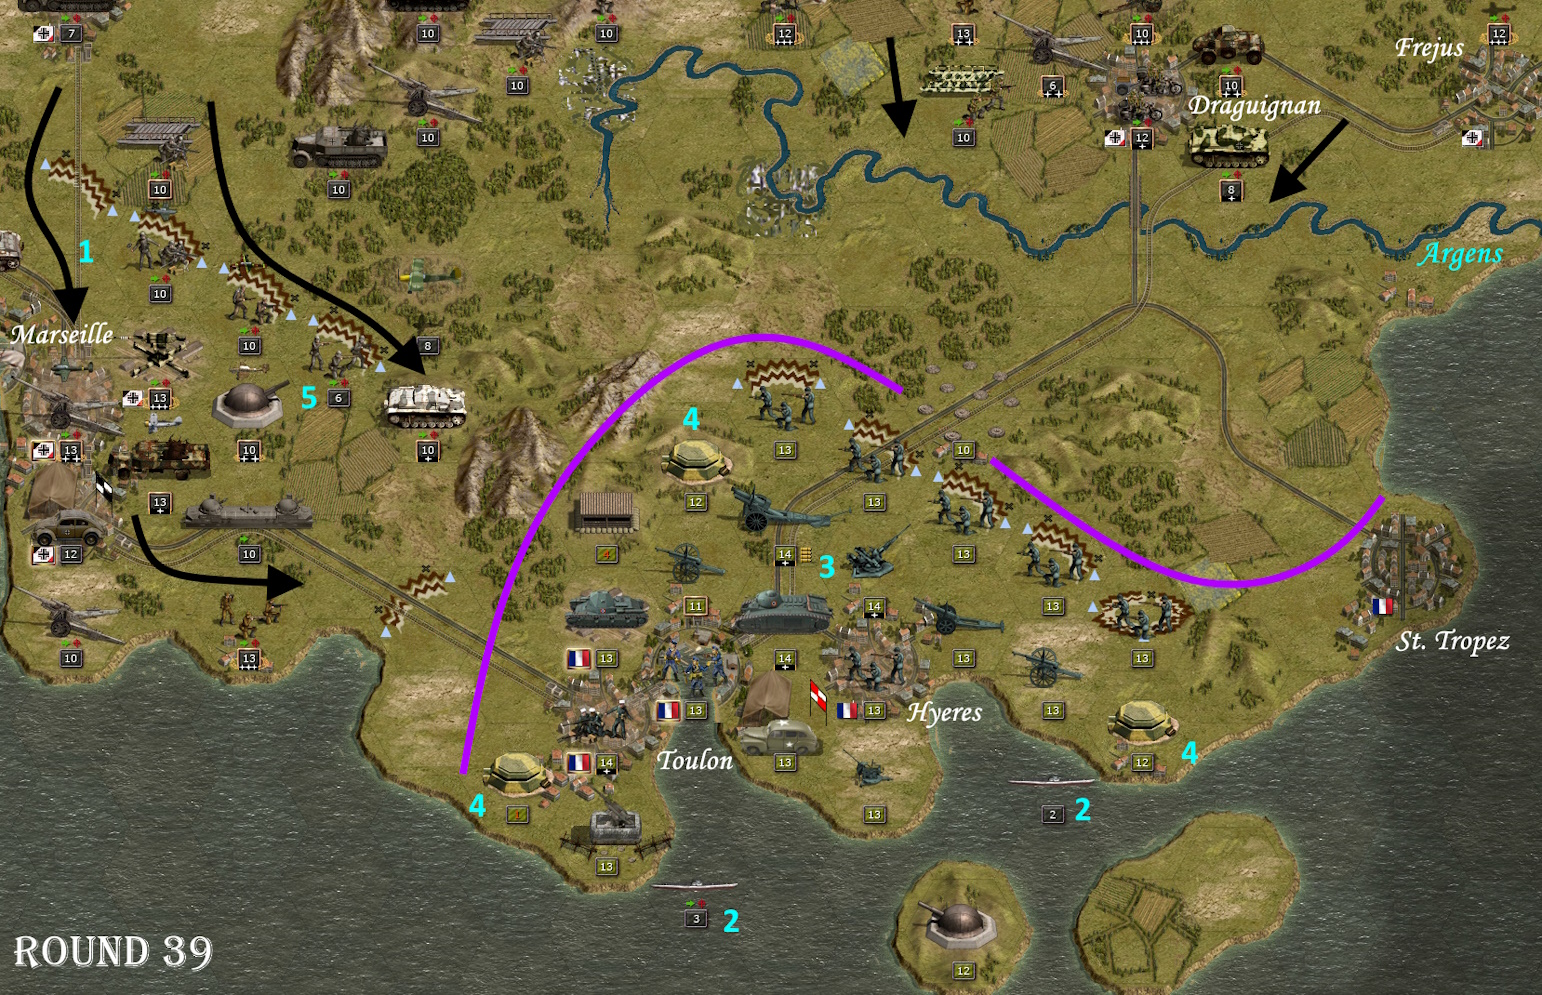
- Toulon-39.jpg (941.5 KiB) Viewed 7892 times
In the first picture you can already see the final situation at the end of the 39th turn. My units had conquered Marseille on the western edge (1) and turned east towards Toulon. 2 heavily battered submarines (2) reconnoitred the coast off Toulon. A Fieseler Storch circled over the northern area. In the center of the enemy defense there are still 5 very strong units (3) (Foreign Legion - HW infantry, Char-B1, 155 mm Art., 47 mm Flak, HQ). Especially the artillery, the flak and the HQ, each with a range of 5 hexes and high attack values, are very strong obstacles that inflict heavy losses. In addition, there are three fortresses with a visual range of 4 hexes at the corner points (4). It's no coincidence that my units keep such a wide distance. In the final turns I had started to reduce the ammunition of the enemy artillery with a decoy (5) on a good cover hex. Thanks to the good cover, the infantry only lost a few strength points. At the same time, I was able to considerably weaken the western defense of Toulon. The best way to overcome such a defense is a well-coordinated mass attack that overloads the strong enemy cover. I was able to successfully complete this scenario in 32 turns during the test runs 7 years ago. However, that was on “General” difficulty level at the time.
Strategic map: My core units on both sides of the Rhone begin their attack south towards Nimes and Avignon (6). Further east, Aux units advance slightly towards the coast (7). After taking Montpellier (8), I throw all my core units to the east side of the Rhone and start attacking Marseille (9). I'm still well on schedule. At the same time, mountain infantry start their attack on Nice on the eastern edge of the map. The attack on the coastal region triggers the French evacuation. A total of 12 transport ships make their way south to the two escape hexes (10+11). To achieve a DV, at least 9 transport ships must be sunk. However, I only manage to destroy 5 of these ships, the rest escape. Afterwards I manage to conquer the coast between Cannes and Nice (12). In the end, time is too short for a final attack on Toulon.
I think I could have scored an MV with a better game, even at this difficulty level. But it wasn't enough this time. For the next scenario, I will reduce the difficulty setting by 3 levels. After all, I skipped a campaign exit due to the lost scenario, which, together with the rapidly dwindling prestige, justifies 3 levels. I already outlined at the end of May that I would keep the exits disabled in this variant. I hope to bring the downward spiral to a halt soon. After all, the missions from Toulon onwards (Toulon, Orleans, Paris, Sicily, Tunis, Gabes) are extremely hard and difficult to play.
Let's see how the next mission goes.
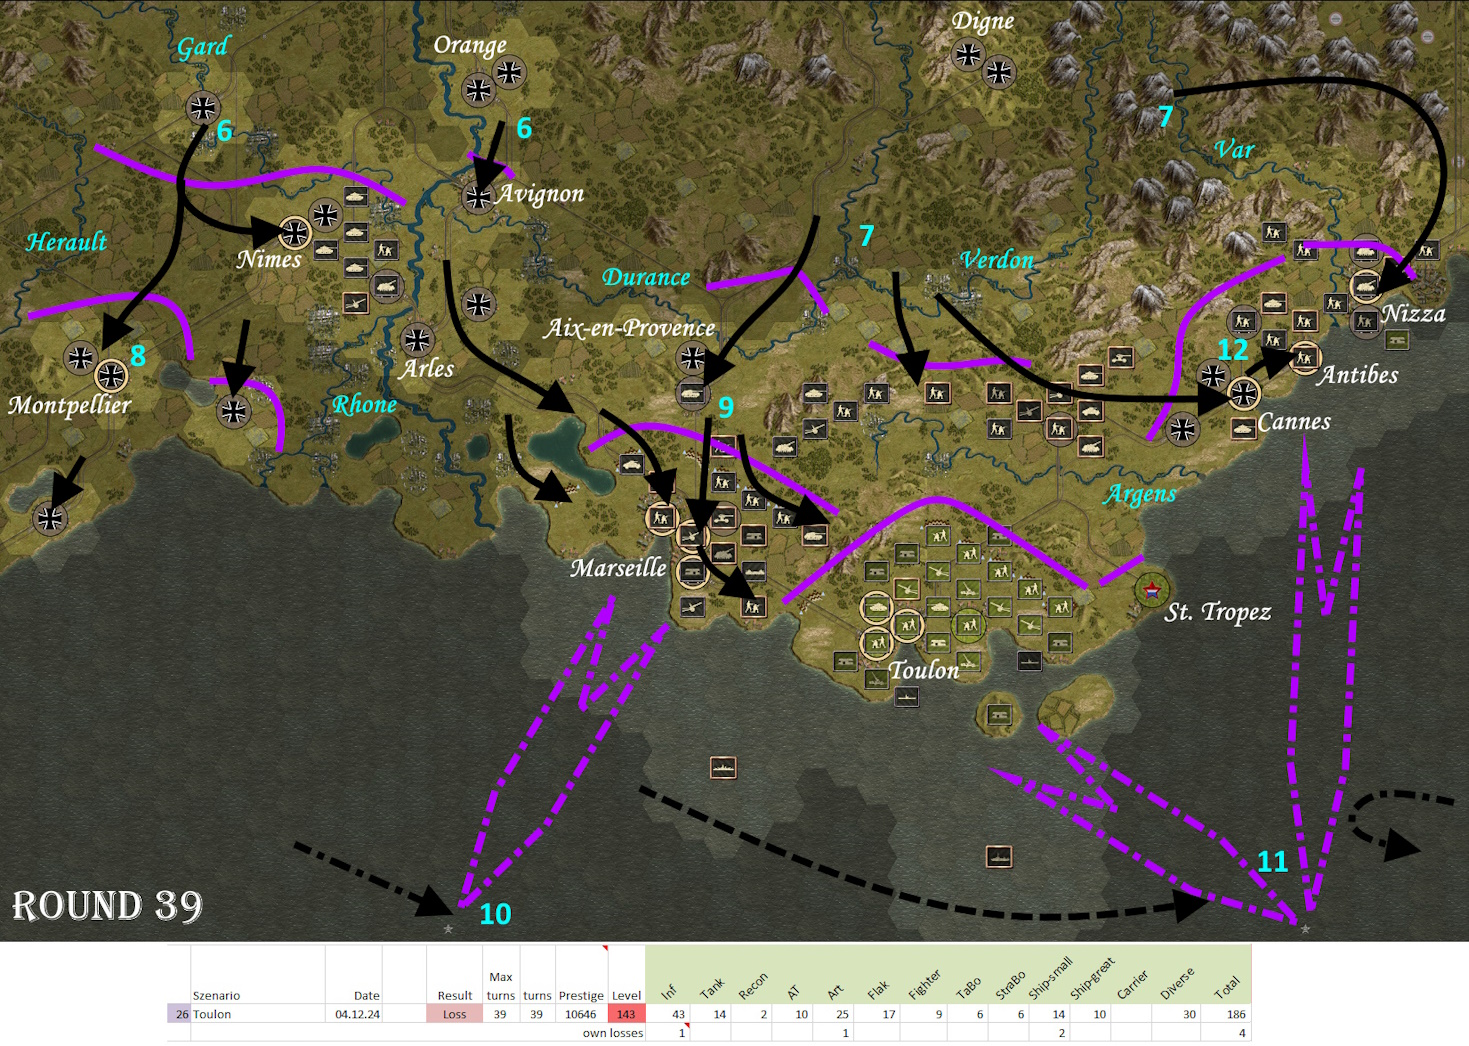
- Toulon-39S.jpg (835.33 KiB) Viewed 7892 times


