Page 1 of 2
Temp League - Game Three - Early Carthage vs Sparta
Posted: Tue Jun 12, 2012 1:27 am
by massina_nz
This time against the classical Spartans – I expect lots of armoured hoplites and light troops and few cavalry. So I’ve learnt from my first game I need to go the other way and pick an army heavy on MF and cavalry.

Weirdly enough the best map I get to chose by winning initiate is the same one I’m playing against the Dacians in game four, except this time I want to hold the hoplites on the rough terrain on the hill. My plan is to hold on my left and use my MF on the right to push on the flank.
Turn One
Posted: Wed Jun 13, 2012 10:10 am
by massina_nz
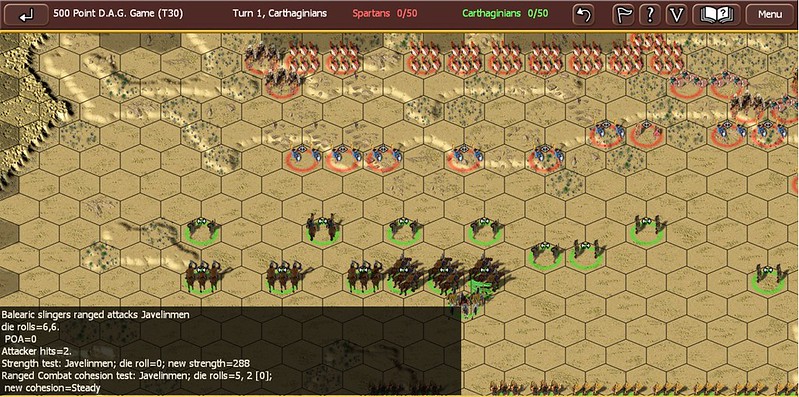
Spartans make a bee-line for the flat open plain, I send out my skirmishers and cavalry to slow them down (reduce the Spartan double moves)

Whilst my MF on the right advance rapidly
Turn Two
Posted: Thu Jun 14, 2012 11:50 pm
by massina_nz

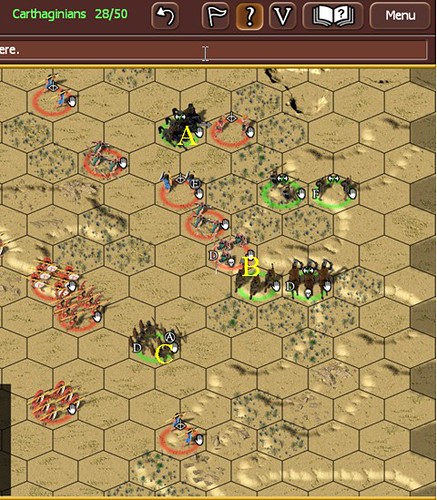
Some minor skirmishing starts, I’m wondering if the hoplites will get off the hill before my MF can interfere, if so then my hoplites can’t really afford to get engaged.

My flanking force gains the ridge. Note how the Spartans are usign the same ploy with skirmishers to slow down my (double) movement.
Turn Three
Posted: Fri Jun 15, 2012 7:26 am
by massina_nz
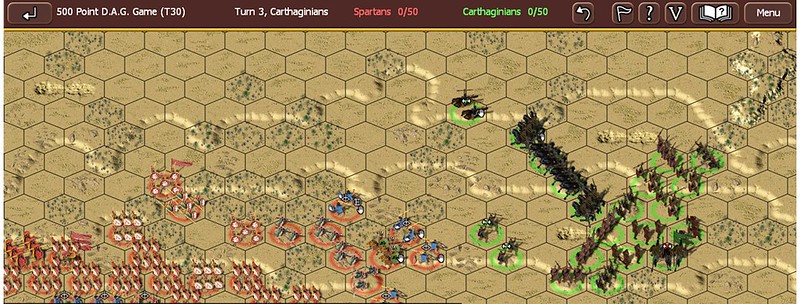
I begin to circle round as the Spartan hoplites move forward tentatively, normally it’s a really bad idea to split your forces, but in this case the MF & cavalry, if they get behind the Spartans they should be able to cause significant problems.
Turn Four
Posted: Mon Jun 18, 2012 9:24 am
by massina_nz

Hmm, I split my forces again, but this time there is a good chance to turn the flank. Meanwhile my hoplites head right. There is a risk here that all the Spartans get into open terrain and my flanking force can do nothing about it.
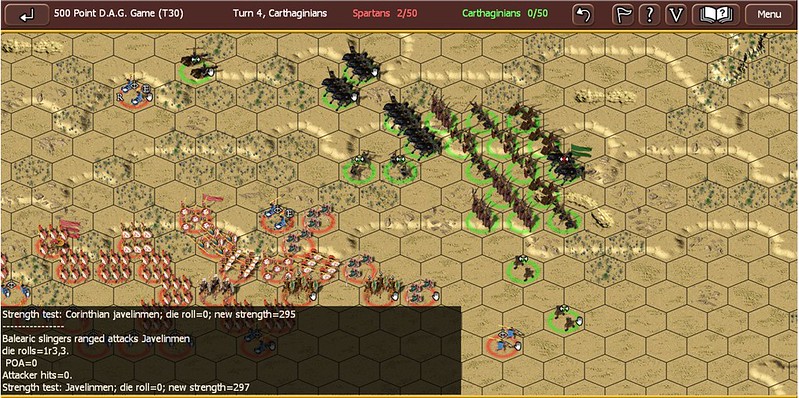
Speaking of which the flanking force has caught one LF out, and is beginning to look threatening. Will it arrive in time? If not, I still have a chance of a giant pincer attack on the Spartan left. One reason for moving my hoplites to the right, they may turn out to be the anvil to the MF/Cav hammer.
Turn Five
Posted: Tue Jun 19, 2012 9:55 am
by massina_nz
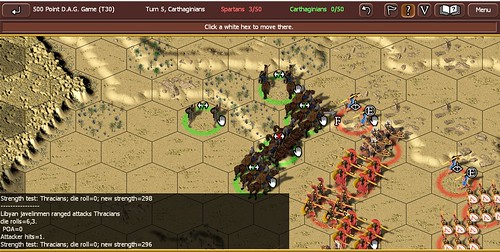
I manage to catch one LF, and station a cavalry on some uphill scrub – looks like I can get around this flank.
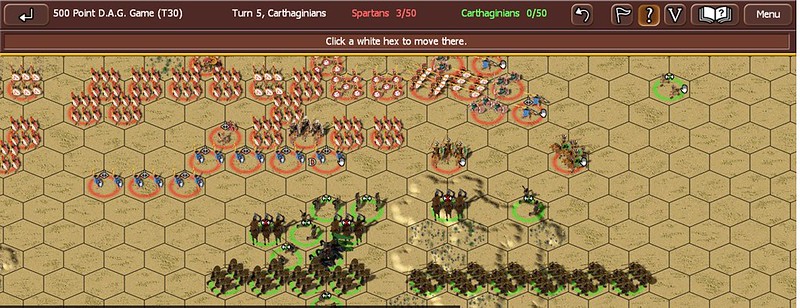
I continue to pull to the right in the centre as all the Spartans arrive on the flat plain. In hindsight I’ve done this a couple of turns too late.
My flanking force is almost ready to strike. But it’s too late, the Spartans are in the clear. Tactically I’ve made a real bumble of this.
Turn Six
Posted: Wed Jun 20, 2012 9:51 am
by massina_nz

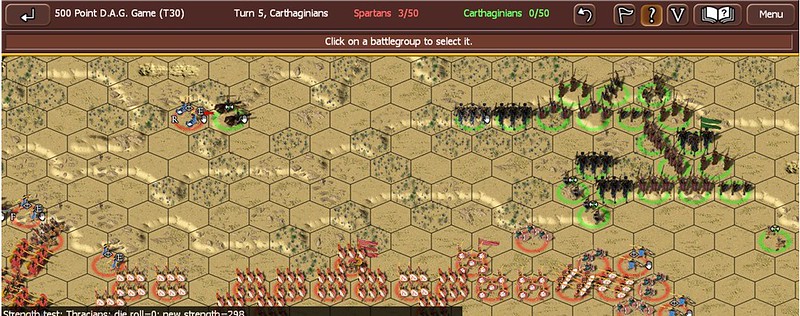
I manage to get around the right flank, thankfully my cavalry survive the combined assault by enemy cavalry and hoplites.
I think I can still extricate my spearmen, and begin to develop my pincer move. Little do I know.
Turn Seven
Posted: Fri Jun 22, 2012 2:15 am
by massina_nz
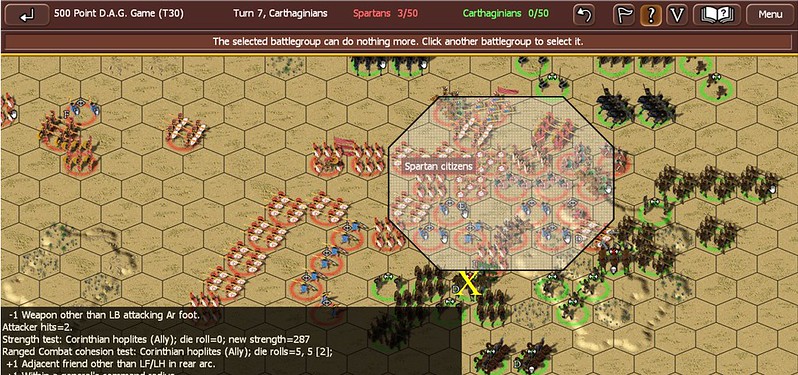
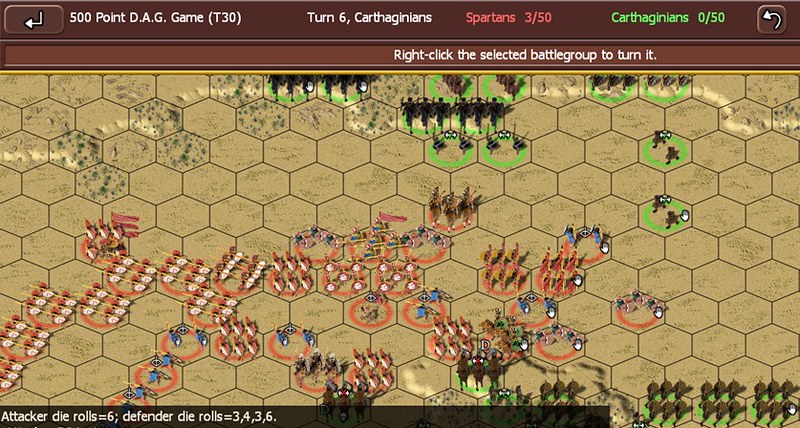
Unfortunately my C-in-C who was protecting the rear of the retreating Sacred Band, actually disrupts a hoplite unit it was fighting, so it’s won’t break away as I wanted. To protect it, I turn my Sacred band back, it will probably be the death of them, but I don’t want to lose my C-in-C so early in the game. The Spartans have gained the open plain, but my plan is to squeeze them, if any of their troops rout then it is likely to cause a domino effect within the circle of envelopment
Turn Eight
Posted: Sun Jun 24, 2012 9:57 am
by massina_nz
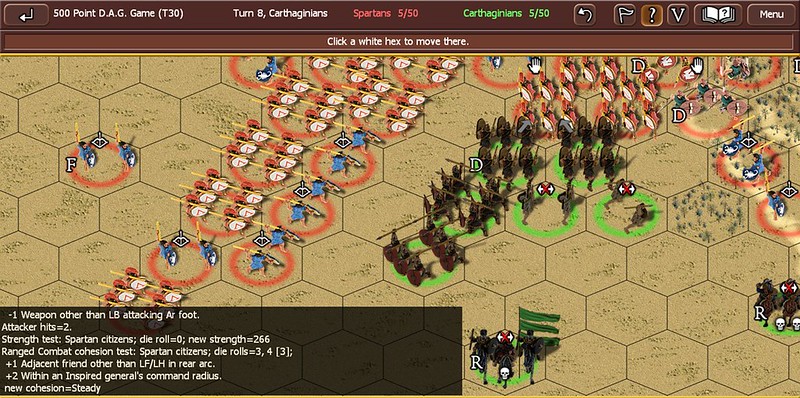
It was all in vain. My c-in-c routs, now the sacred band will be sacrificed, that was a poor tactical decision.
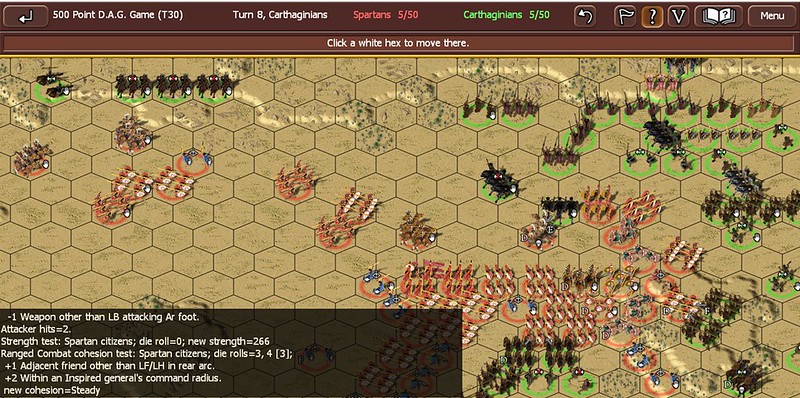
Heartened by how a Spartan cavalry unit breaks off and disrupted three Spartan units. I decide rather than just retreating to the hills with my MF, I will instead still attempt to make a game of it (most of the time that ends in failure) and mass my flanking force to attack.
Turn Nine
Posted: Sun Jun 24, 2012 11:50 pm
by massina_nz
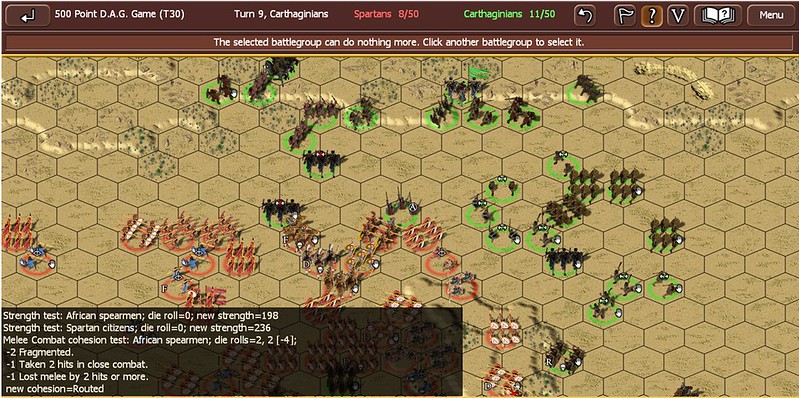
Next turn I flip-flop, the sacred band will be easily wiped out, I work out that I can sacrifice a few units, and still send my MF into the hills; I’m now playing for a draw.
Turn Ten
Posted: Mon Jun 25, 2012 3:27 am
by massina_nz
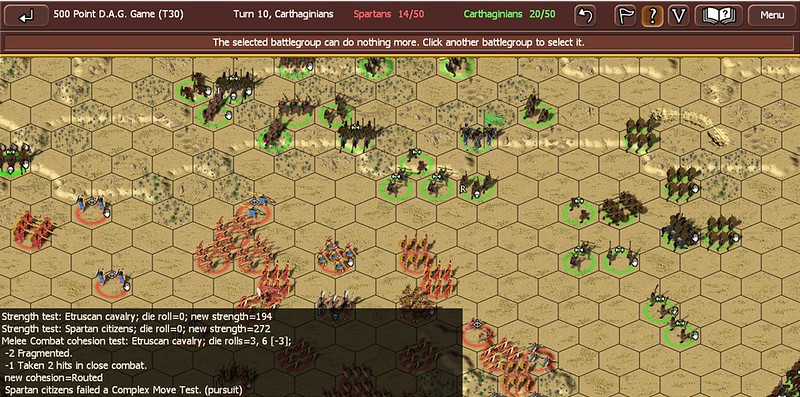
The sacred band are almost eliminated, but I extricate my remaining light troops and send the rest of my troops to the hills.
Turn Eleven
Posted: Tue Jun 26, 2012 6:49 am
by massina_nz
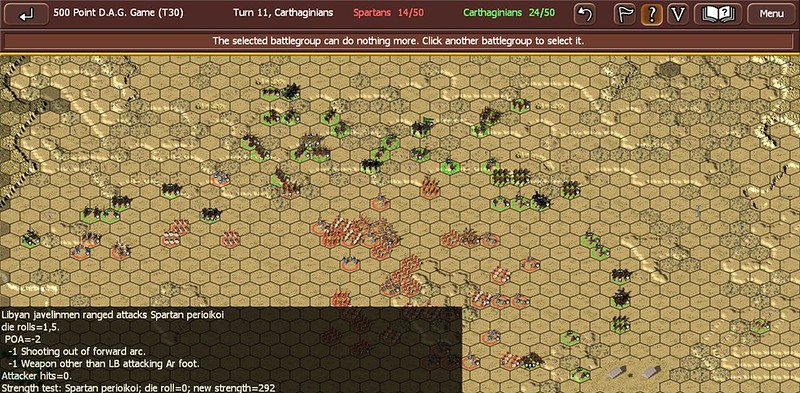
My sacred band are no more, I’m continuing to head to the hills, at first I was going to head for the upper right, but the upper left may actually be safer, it may depend on what the Spartans do next turn.
Turn Twelve
Posted: Wed Jun 27, 2012 1:01 am
by massina_nz

Looks like the best plan is to head to the left.
Turn Thirteen
Posted: Thu Jun 28, 2012 1:43 am
by massina_nz
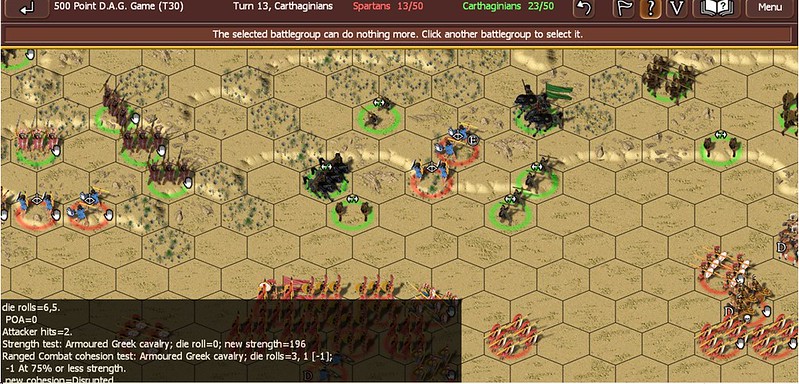
I almost trap a couple of enemy LF. Their hoplites will be able to free them next turn.
My camp is looted at the end of the turn. Can I keep my remaining 22BPs intact for another eleven turns? I’m not used to playing this type of game and I think it will be a near run thing.
Turn Fourteen
Posted: Thu Jun 28, 2012 11:43 pm
by massina_nz
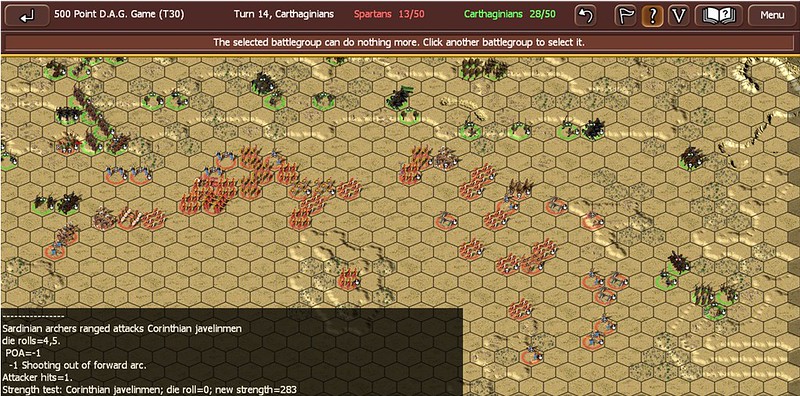
The Spartans leave the left side of the map open, I just have to be careful with my troops on the bottom right, I made a mistake with my mouse and did’nt face the Poeni foot in the right direction, so I had to cover it’s rear, I now will have to send some cavalry that way to help in the withdrawal.
Turn Fifteen
Posted: Tue Jul 03, 2012 12:48 am
by massina_nz
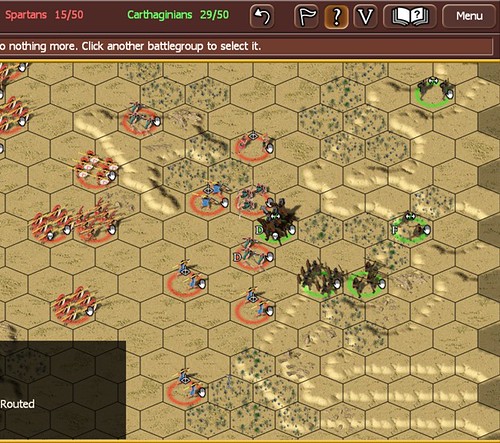
Bottom right looks precarious for me. I being to start writing this AAR with large dollops of hindsight. I'm struggling in this games to leave behind sacrifical untis so that others survive, by doing so condemning more units abd hastening my defeat. The two LF units and single Cavalry unit might have been saved, but the MF & HF untis were definitely expendable for the greater good.
Turn Sixteen
Posted: Wed Jul 04, 2012 5:18 am
by massina_nz
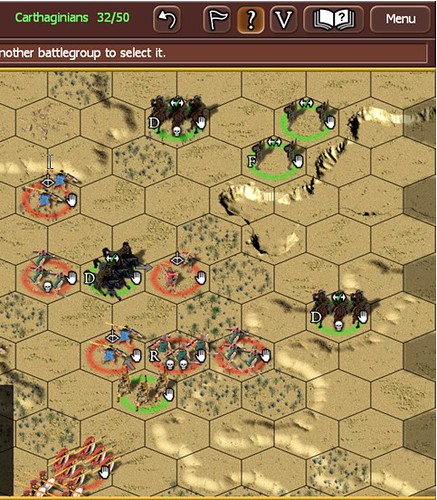
A) A foolish charge by my cavalry put s them in a predicament, they didn’t even win their combat versus the LF.
B) The Scutarii will at least sell themselves dearly
C) The Poeni foot decide that suicide is the best way out and anarchy off the hill.
Turn Seventeen
Posted: Wed Jul 04, 2012 9:09 pm
by massina_nz
Some how my rear-charged cavalry survived, but my Poeni foot didn’t and now my Scutarii will be ambushed as well.
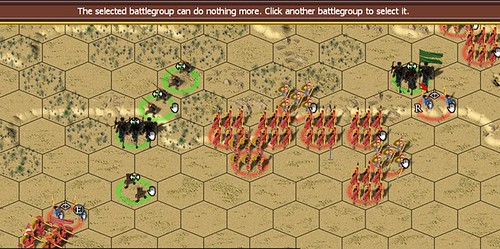
I spot what I think is a useful gap in the Spartan lines, but really thuis is a silly move, if I'm playing for a draw then I should stick to teh hills, not go galavanting onto theplain. My remaining commander routs some LF that contacted it ‘s rear last turn, and is bound to get surrounded as well.
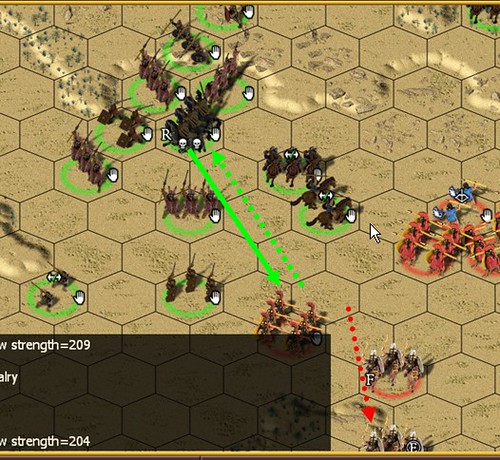
And now for my dumbest move all game, and probably the game-breaker. I have a lapse of reason and think I can rear charge a fragmented enemy cavalry unit. Completely forgettign it will easily evade away. Instead the understrength Etrusan cavalry smash into a unit of Holites and rout instead. That was just so stupid, d'oh!
Turn 18 to 24
Posted: Thu Jul 05, 2012 3:36 am
by massina_nz

The last screenshot I bothered to do.
My retreat to the hills has been a mediocre effort. Unable to resist probing attacks or committing troops to save others, I lose in the very last turn. I would have probably easily gained a draw if not for a couple of very stupid cavalry charges.
Upon reflection I still think I choose the best map that was offered, but I mistimed my withdrawal of my spearmen and was too passive with my MF and cavalry early on. I just didn't expect the Spartans to clear the hills as quick as they did, and once they did, the game was over for me.
Re: Turn 18 to 24
Posted: Thu Jul 05, 2012 8:00 am
by stockwellpete
massina_nz wrote:My retreat to the hills has been a mediocre effort. Unable to resist probing attacks or committing troops to save others, I lose in the very last turn. I would have probably easily gained a draw if not for a couple of very stupid cavalry charges.
I was in a similar position to this in a game in Eric's tournament. Sharkall was absolutely trashing my army in the first phase of the game so I counted up how many units I would need to withdraw to save the game and I used the rest as a rearguard to delay him. The rearguard was eventually destroyed too but the rest of my army got away and I avoided defeat with 2 or 3 break points to spare. Very interesting AAR - I enjoy following these.
