My Play-Through of the Thirty Years War (6): Battle of Lützen
Posted: Fri Aug 01, 2025 3:38 pm
Ah, the battle of Lützen. One of the more consequently battles fought during the thirty years war, the Swedes lost their king in the fighting but manged to secure a narrow victory. Seems like they manged to push the imperials to just 60% while they were at 55%. I had a gander at this once to figure out how the fog of war worked and subsequently got my ass kicked. So I will now try again with a little bit of hindsight, knowing what to generally expect and a better idea of where the enemy units are situated.
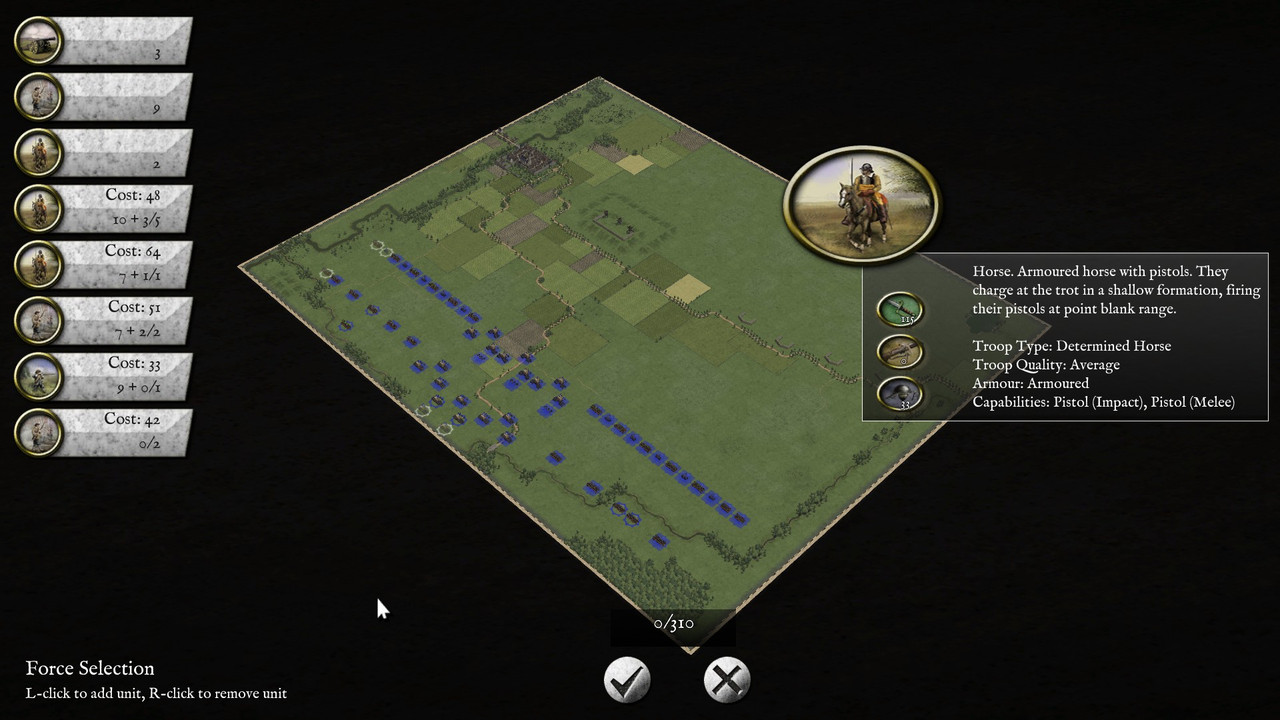
Before we start, the game goes over the scenario and it mentions that reinforcements for another army will show up, so we should try to keep that in mind. Afterwards we get to choose what we wish to bring in, I choose:
My reasoning for no extra detached muskets is because while they are useful, we already have quite a handful of them and I think having any more would come with diminishing returns. There are also some normal pike and shot units I could have chosen instead of cavalry but I feel like we have enough infantry with the extra LG units. Furthermore, the extra mobility offered by cavalry will be nice large battlefield and how extensive the cavalry is with the Imperials (alongside the fact that the eventual reinforcements are mostly cavalry). Also, the points fit perfectly so that also a nice touch.
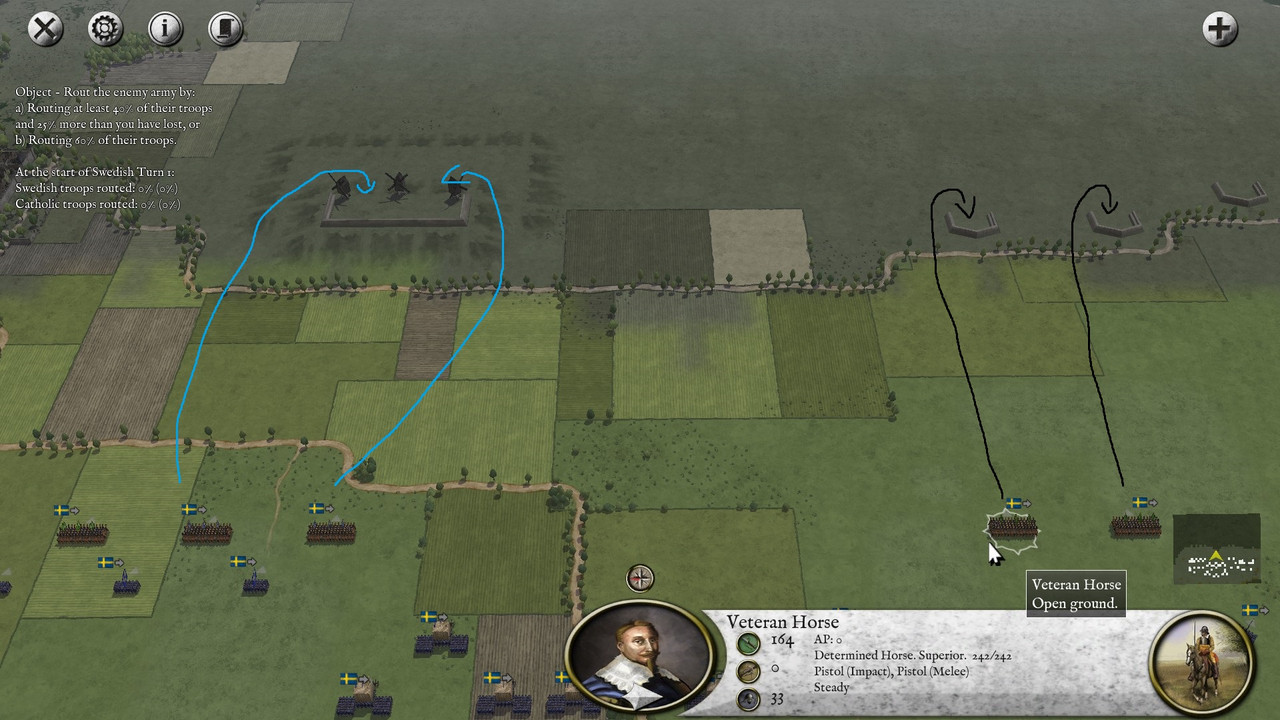
Now, I will be playing with the knowledge I acquired from my trial of this battle. We can just say a mystic told me . Now on top of the hill, behind some fortification, are some enemy cannons that will fire upon us, so the left flank's first aim will be go around the fortification, avoid being turned to Swiss cheese by the enemy infantry and destroy these guns to secure the hill. Leading to the general plan for our center, which is comprised of all our infantry, they just have to move up as quickly as possible so that we can utilize the hill to our advantage against the enemy infantry line in close combat. Our right flank will try and destroy as many of the pockets using the small fortifications scattered around on the right flank, additionally the muskets will focus fire try to focus fire on what Imperial cavalry elements there are to soften them before our horse can then overrun them. But the first two turns just consist of moving up, finally on the third turn we spot some enemy units!


Upon the hill there are two cannon units and a unit of hussars bunkered down by the fortifications. These fortifications are very annoying to try and rout out as you have to be completely behind and then initiate a charge which can take up to three rounds as you have the move the unit into position, turn them and only then can you charge .
.
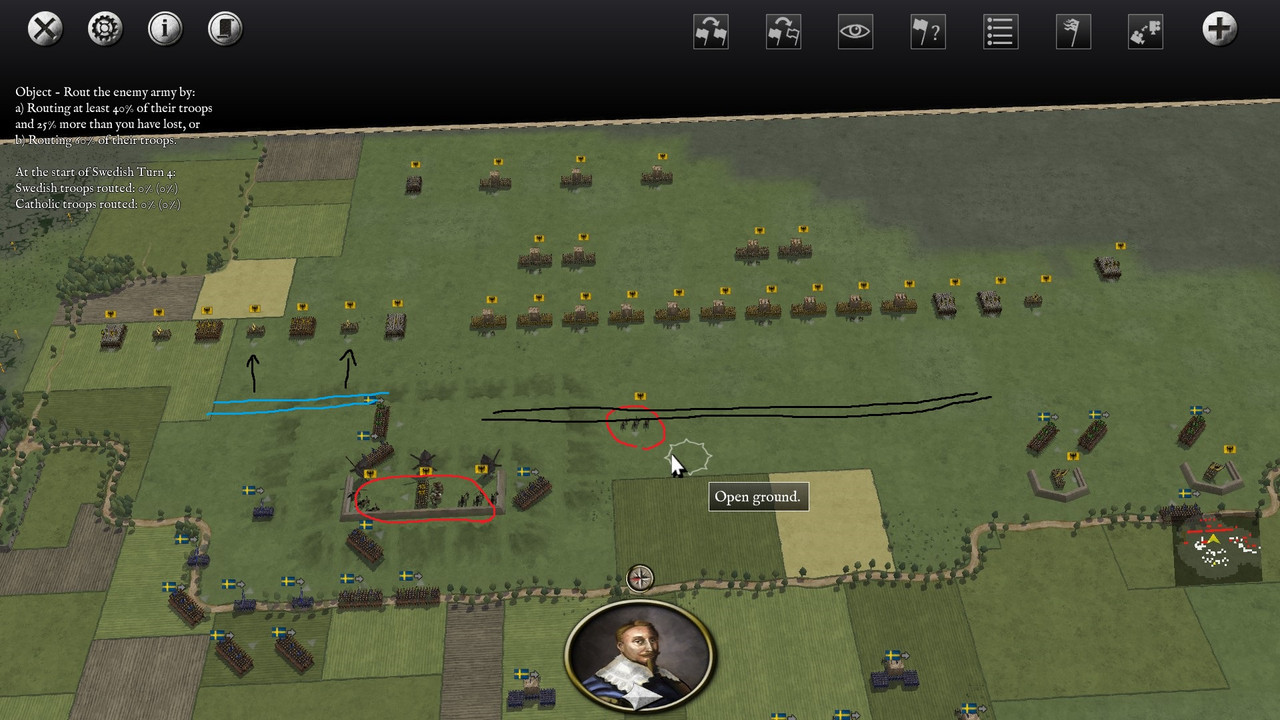
On the fourth turn the fog disappears for a while and we can see the general formation that the enemy has set up. All artillery units are high priority targets for our horses to take out so that our infantry losses are minimized as these Swedish salvo units will be our path for chain routing the enemy to win. I want to set up my muskets on the left to weaken the enemy and take some fire before we send in the horses to hopefully clean up the enemies left flank. The center will match the enemy's formation as a straight line and will try to utilize the hill as best as possible. I will leave a hole open in the middle as we march up to them to have our canons some targets to shoot as we march to battle.

For the next few turns its only light skirmishing that happens on the right flank, I sadly got into a bad position with one of my horses that was trying to catch up to an evading hussar but otherwise we seem to have the upper hand. On the left there is one musket unit being shot at to complete pieces but is somehow still holding. The Swedish Salvos have reached the edge of the enemy's range so before we commit to fight I shall move some units around to set us up for successful, the biggest point is trying to focus fights on where they have normal pike and shot units. Hopefully causing the vetern pike and shots to rout without us getting bogged down fighting to (what feels like) the last man.

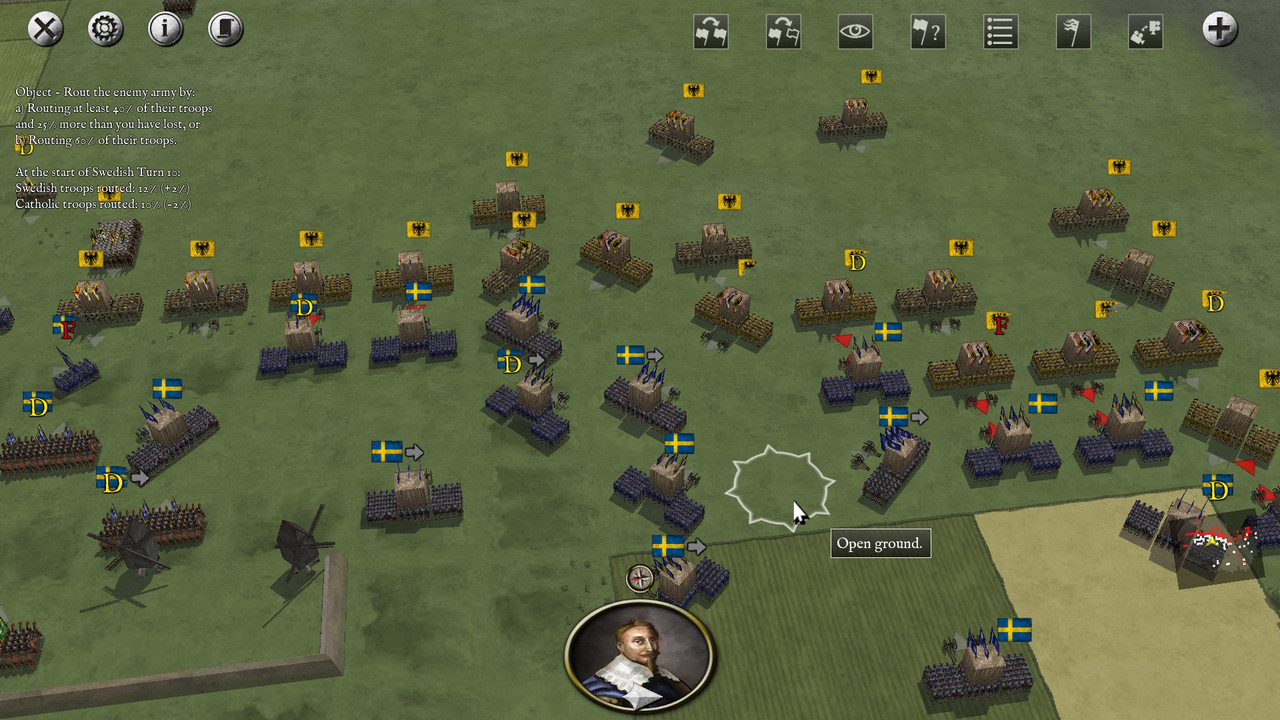
By turn 8 it seems the enemy is tired of waiting and they advance upon us! Which is great news as that means we get to use the hills height POA. We must match the Imperial advance and meet the enemy with our fisticuffs! However, they additionally advanced with their right flank and our cavalry units on the right are very much out of position there. Good thing we got our general line in good position so that we can easily move some units and cover the main infantries line. We will try and focus fire on the Catholic pike and shot with LG so we can have an easier time charging the remaining units.
We have lost a few cavalry units, seems the reinforcements have arrived en-mass on our right flank and will envelope it ASAP. In light of this, I will try and organize a 'tactical' retreat and have the remaining horses stay close to our infantry lines and support them. I especially hope get our Finnish Hakkapeliitta out alive as they are the best cavalry units we have access to.
Otherwise in the center the first initial charges are going well! Will try and soften a few more targets up first and then charge some more later. Although some of our infantry have become disrupted which annoys me as it disrupts some of my planned charges but that is why it was nice to get those extra pike and shot units as they can fill in for some extra damage and as a backup unit to make sure not enemy units in our back line have free reign. Notable is that an enemy veteran pike and shot with LGs unit is not even disrupted at 219/495! And for some reason the Catholics charged one of my pike and shot with LG up the hill? Great for us!
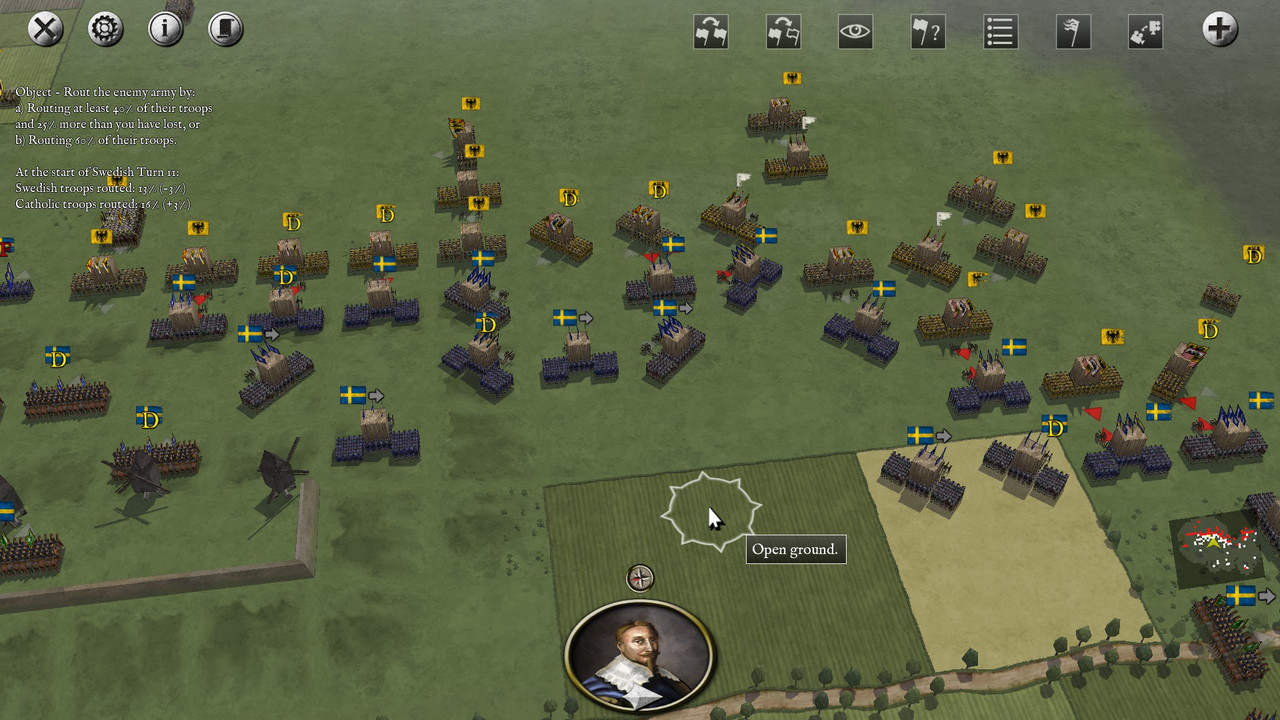
on turn 11 we manage to get some good follow up charges and are continuing to press the enemy lines! While the rout information does say that there is only a 3% difference in routs, it feels like we have a bigger advantage as most of the melees we win. A lot of doing 10+ dmg to the enemy unit and taking <10 ourselves.

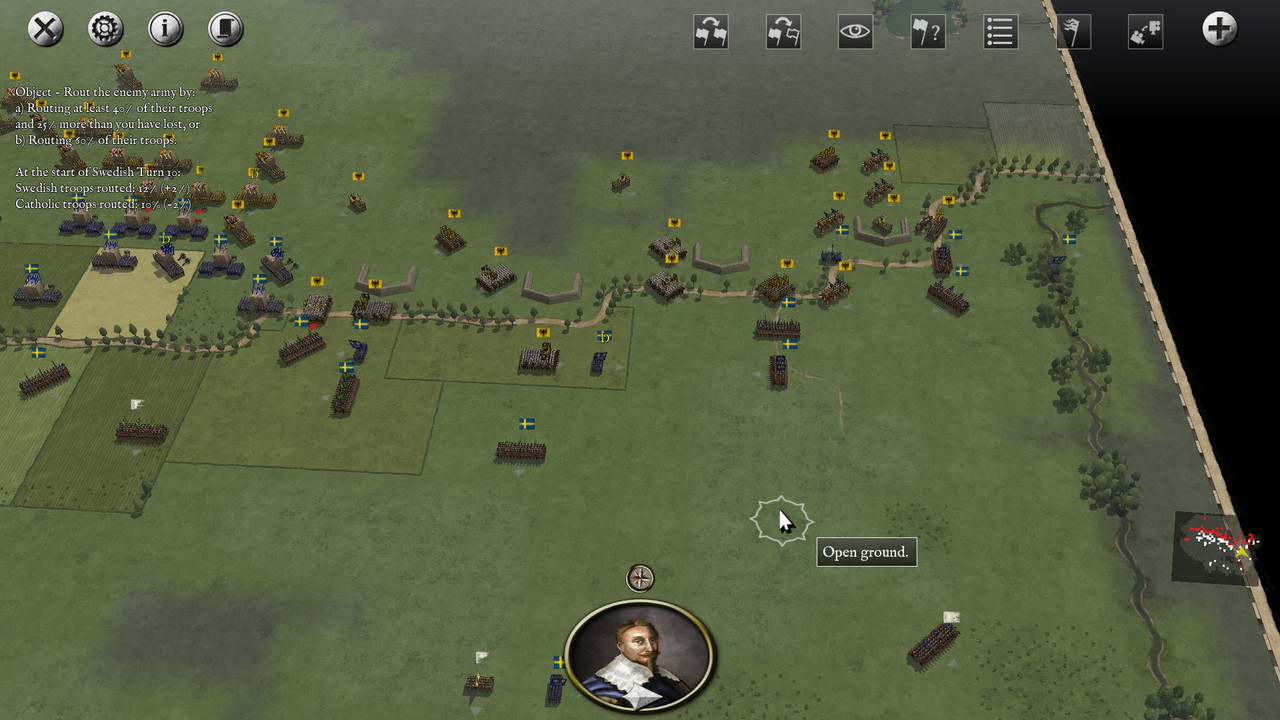
By the next turn though, the enemy's central infantry all rout! Leaving us able to focus down the remaining Catholics and while we are still at 3% difference, this comes from the cavalry/muskets that I have used as distraction to get what cavalry units I can save to get the hell our before they are overrun. The left flank has also had some muskets units rout but hopefully some charges should change that now. So the rout difference should go up in our favor way more for the next few turns and hopefully lead to a win! The only big issue right now is that with all my infantry units winning the melee and pursuing the enemy units, they leave themselves very open to the Catholic cavalry on the right, which is the flank that they have just won.
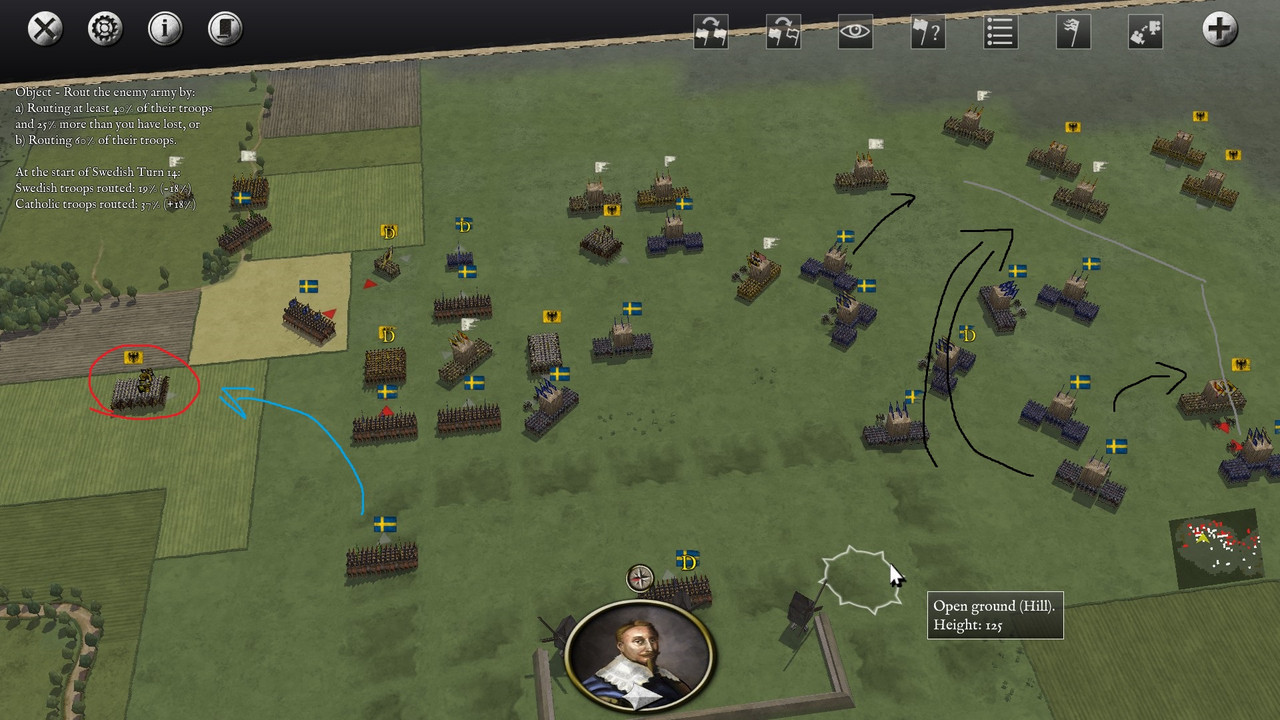
Turn 14: The left and center are now completely destroyed. Just have to watch out for the unit of Kurassirs which is looking at some of our units as easy flank/rear attack targets. I will try and set up a line as best as I can to meet up the last remnants of the Imperial infantry. We have also jumped up on the rout difference numbers with a 18% difference now!
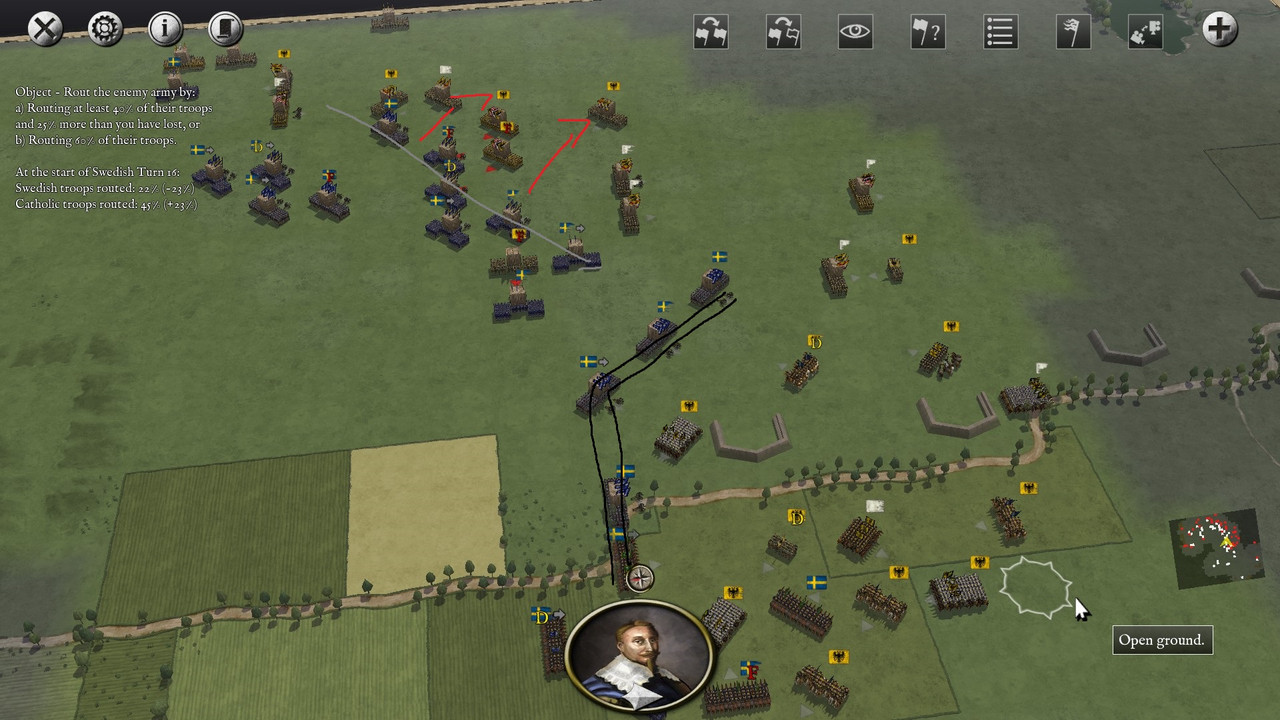
2 turns later I have completed my shift to have most of our infantry to either charge the last few bits of infantry and the remaining units will protect these units from the cavalry on the right flank. We also just need 2% more before we win! Which is what happens the turn afterwards
  .
.

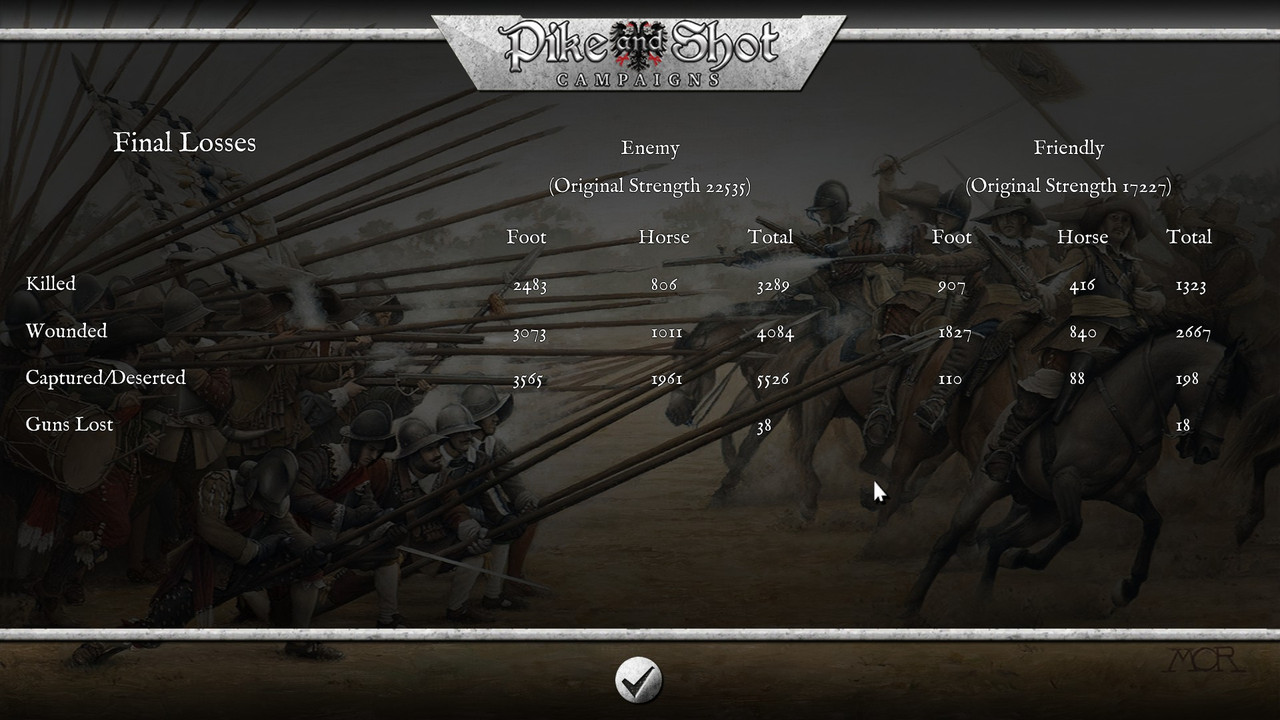
And just look at these causalities:
This battle was a lot of fun! It really showed me the power of the Swedish salvo when given the ability to charge the enemy. Although the shooting abilities leave a lot to be desired, which Is what I understand to be there largest weakness if you can keep them at a distance and just fire upon them. Otherwise for this scenario specifically I would say the right flank could be done better by just sending enough cavalry to destroy the units in the fortifications and the muskets to shoot at the hussars. I would say to then use the leftovers to stick with the infantry and support them. But that brings this particular battle to a close and we will now move to the pivotal battle of Nördlingen.
Before we start, the game goes over the scenario and it mentions that reinforcements for another army will show up, so we should try to keep that in mind. Afterwards we get to choose what we wish to bring in, I choose:
- 2 pike and shot with LGs
- 1 veteran horse
- 3 normal horse units
My reasoning for no extra detached muskets is because while they are useful, we already have quite a handful of them and I think having any more would come with diminishing returns. There are also some normal pike and shot units I could have chosen instead of cavalry but I feel like we have enough infantry with the extra LG units. Furthermore, the extra mobility offered by cavalry will be nice large battlefield and how extensive the cavalry is with the Imperials (alongside the fact that the eventual reinforcements are mostly cavalry). Also, the points fit perfectly so that also a nice touch.
Now, I will be playing with the knowledge I acquired from my trial of this battle. We can just say a mystic told me
Upon the hill there are two cannon units and a unit of hussars bunkered down by the fortifications. These fortifications are very annoying to try and rout out as you have to be completely behind and then initiate a charge which can take up to three rounds as you have the move the unit into position, turn them and only then can you charge
On the fourth turn the fog disappears for a while and we can see the general formation that the enemy has set up. All artillery units are high priority targets for our horses to take out so that our infantry losses are minimized as these Swedish salvo units will be our path for chain routing the enemy to win. I want to set up my muskets on the left to weaken the enemy and take some fire before we send in the horses to hopefully clean up the enemies left flank. The center will match the enemy's formation as a straight line and will try to utilize the hill as best as possible. I will leave a hole open in the middle as we march up to them to have our canons some targets to shoot as we march to battle.
For the next few turns its only light skirmishing that happens on the right flank, I sadly got into a bad position with one of my horses that was trying to catch up to an evading hussar but otherwise we seem to have the upper hand. On the left there is one musket unit being shot at to complete pieces but is somehow still holding. The Swedish Salvos have reached the edge of the enemy's range so before we commit to fight I shall move some units around to set us up for successful, the biggest point is trying to focus fights on where they have normal pike and shot units. Hopefully causing the vetern pike and shots to rout without us getting bogged down fighting to (what feels like) the last man.
By turn 8 it seems the enemy is tired of waiting and they advance upon us! Which is great news as that means we get to use the hills height POA. We must match the Imperial advance and meet the enemy with our fisticuffs! However, they additionally advanced with their right flank and our cavalry units on the right are very much out of position there. Good thing we got our general line in good position so that we can easily move some units and cover the main infantries line. We will try and focus fire on the Catholic pike and shot with LG so we can have an easier time charging the remaining units.
We have lost a few cavalry units, seems the reinforcements have arrived en-mass on our right flank and will envelope it ASAP. In light of this, I will try and organize a 'tactical' retreat and have the remaining horses stay close to our infantry lines and support them. I especially hope get our Finnish Hakkapeliitta out alive as they are the best cavalry units we have access to.
Otherwise in the center the first initial charges are going well! Will try and soften a few more targets up first and then charge some more later. Although some of our infantry have become disrupted which annoys me as it disrupts some of my planned charges but that is why it was nice to get those extra pike and shot units as they can fill in for some extra damage and as a backup unit to make sure not enemy units in our back line have free reign. Notable is that an enemy veteran pike and shot with LGs unit is not even disrupted at 219/495! And for some reason the Catholics charged one of my pike and shot with LG up the hill? Great for us!
on turn 11 we manage to get some good follow up charges and are continuing to press the enemy lines! While the rout information does say that there is only a 3% difference in routs, it feels like we have a bigger advantage as most of the melees we win. A lot of doing 10+ dmg to the enemy unit and taking <10 ourselves.
By the next turn though, the enemy's central infantry all rout! Leaving us able to focus down the remaining Catholics and while we are still at 3% difference, this comes from the cavalry/muskets that I have used as distraction to get what cavalry units I can save to get the hell our before they are overrun. The left flank has also had some muskets units rout but hopefully some charges should change that now. So the rout difference should go up in our favor way more for the next few turns and hopefully lead to a win! The only big issue right now is that with all my infantry units winning the melee and pursuing the enemy units, they leave themselves very open to the Catholic cavalry on the right, which is the flank that they have just won.
Turn 14: The left and center are now completely destroyed. Just have to watch out for the unit of Kurassirs which is looking at some of our units as easy flank/rear attack targets. I will try and set up a line as best as I can to meet up the last remnants of the Imperial infantry. We have also jumped up on the rout difference numbers with a 18% difference now!
2 turns later I have completed my shift to have most of our infantry to either charge the last few bits of infantry and the remaining units will protect these units from the cavalry on the right flank. We also just need 2% more before we win!
And just look at these causalities:
This battle was a lot of fun! It really showed me the power of the Swedish salvo when given the ability to charge the enemy. Although the shooting abilities leave a lot to be desired, which Is what I understand to be there largest weakness if you can keep them at a distance and just fire upon them. Otherwise for this scenario specifically I would say the right flank could be done better by just sending enough cavalry to destroy the units in the fortifications and the muskets to shoot at the hussars. I would say to then use the leftovers to stick with the infantry and support them. But that brings this particular battle to a close and we will now move to the pivotal battle of Nördlingen.