October 25, 1940. Greece Falls! Huns Invade Yugoslavia! Winter in the Atlantic. German U-boats Sinking Merchant Ships at Will.
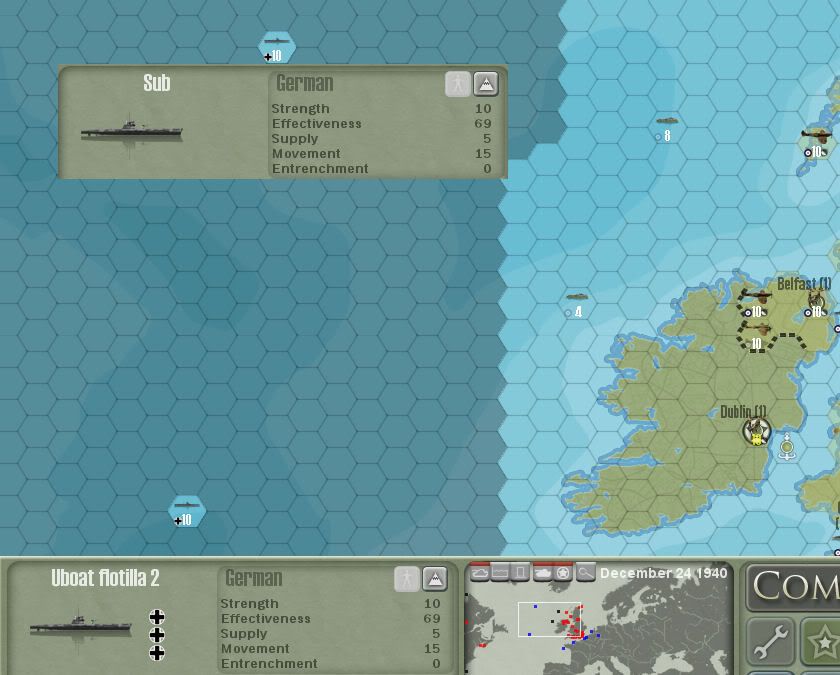
Before I get into the major events this turn I’d like to cover a tactical error I made last turn, which was not to stage the RAF strategic bomber to Northern Ireland to cover the convoy that UF-1 and UF-2 sunk this turn (
Picture 20). If I had then I would have gotten one air attack at one of these u-boats. I noticed this error last night shortly after posting that turn. It was frustrating to know that I was going to miss out on this opportunity. If you review the
Picture 19 (post above) from last turn it’s obvious that the German will likely attack the convoy, which is well within the 6 hex spotting range of UF-1. The lesson learned is that I need to be more careful about going through my checklist, which is (1) Check/assess for needed repairs, (2) Review research for potential of adding of new labs, new tech upgrades and upcoming tech upgrades, (3) Movement / combat / rail moves / transport, (4) Tech Upgrades, (5) New Builds, (6) Cycle through all units (i.e., Page Up / Page Down). Of course there items are not considered individually but must be considered in combination.
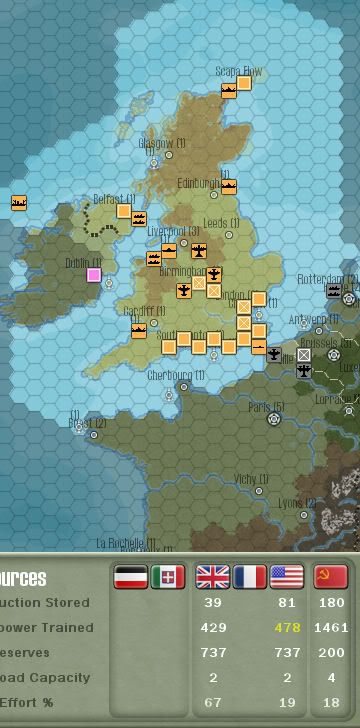
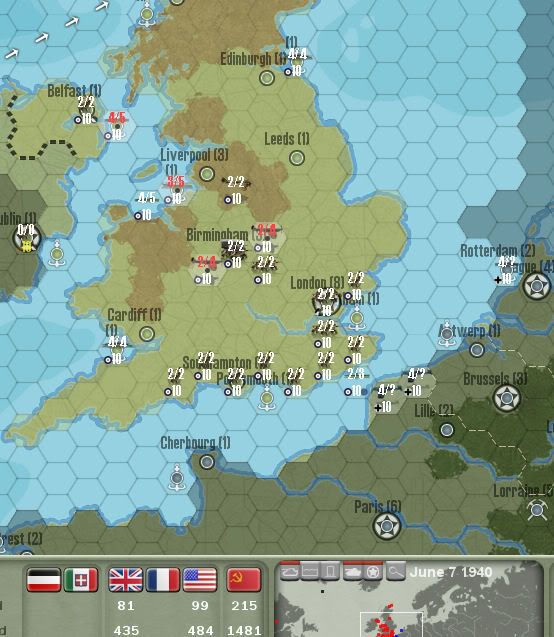
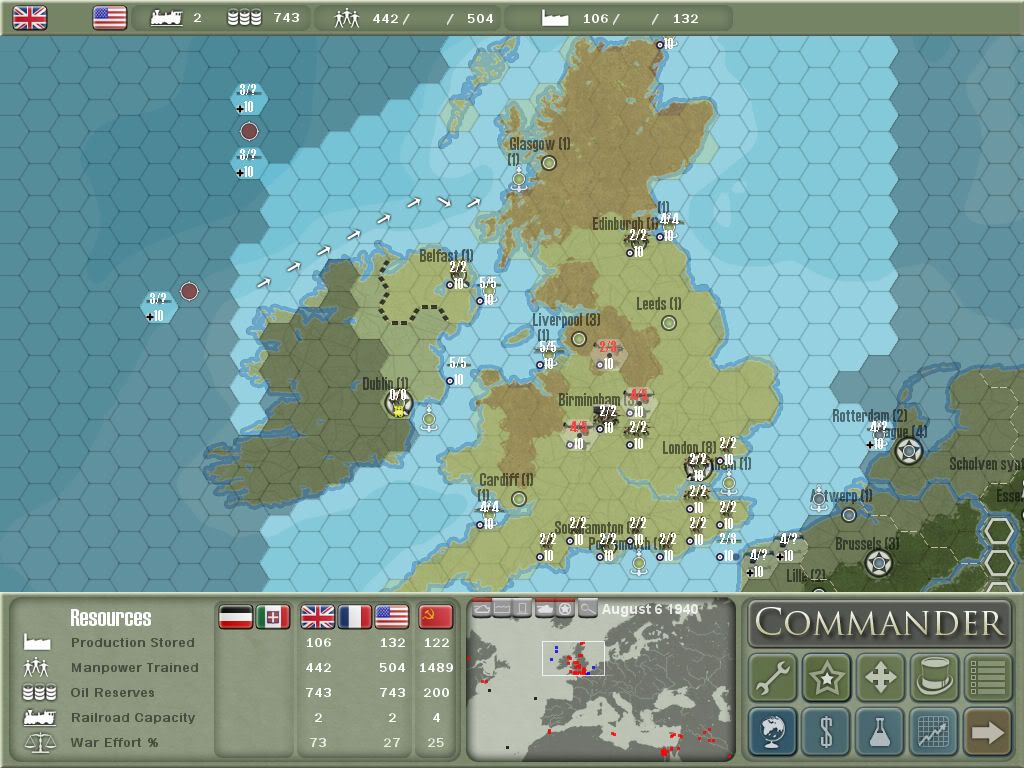
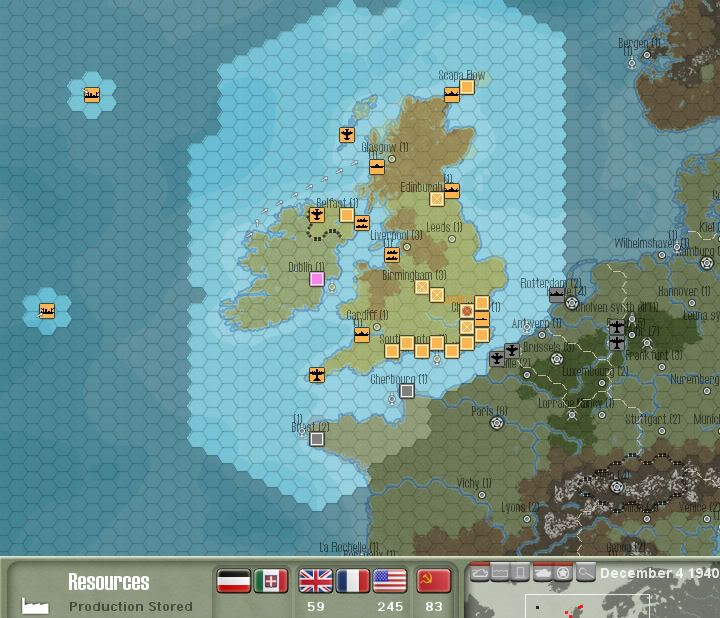
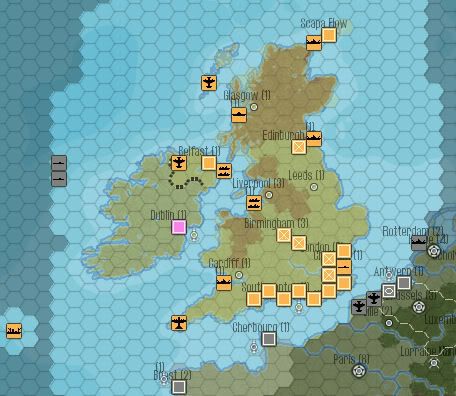
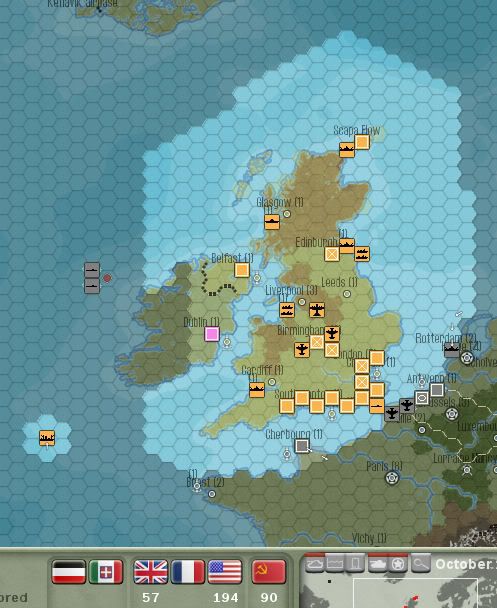 Picture 20. UK at the start of the turn.
Greece Falls!
Picture 20. UK at the start of the turn.
Greece Falls!
As well as the Greeks fought last turn and held out against the Axis they were overcome this turn by them. They lasted 60-days (2-months), which is more than I could have expected; especially given the good fortunate of occupying Crete and taking off 4-steps from a German tactical bomber unit, which translates into 26 PPs for repair.
Huns Invade Yugoslavia!
The Axis launched their invasion of Yugoslavia this turn. Three Yugoslavia units in the northwest counterattacks and took 1-step off a German infantry corps and 1-step off an Italian infantry corps. No units in or around Belgrade attacked. The UK paid 2 PPs to add 4-steps to the depleted garrison southeast of Belgrade bringing it up to 9-steps. The corps in Sarajevo was moved up to try to interfere with Axis movement west of Belgrade. The rationale for not attacking with these four units in and near Belgrade is the calculation that they are likely to cause more losses to the Germans on defense than by attacking. Also, attacking would have left them seriously depleted and would guarantee the fall of Belgrade next turn. Even so the odds are low that Belgrade can hold out next turn. The situation in Yugoslavia at the end of the Allied turn is shown in
Picture 21.
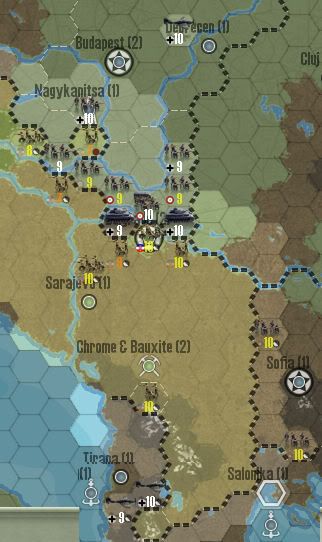 Picture 21. Yugoslavia at the end of the turn.
Picture 22
Picture 21. Yugoslavia at the end of the turn.
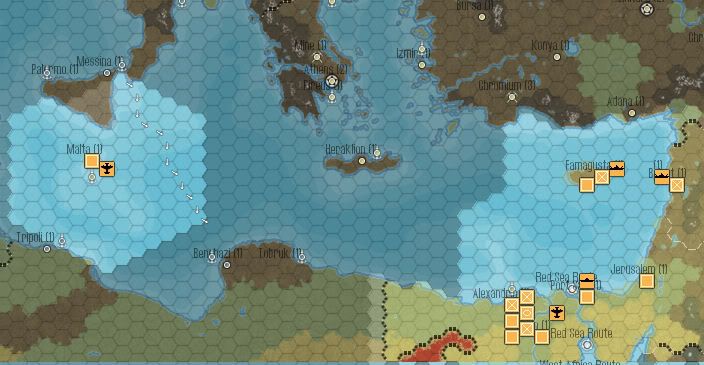
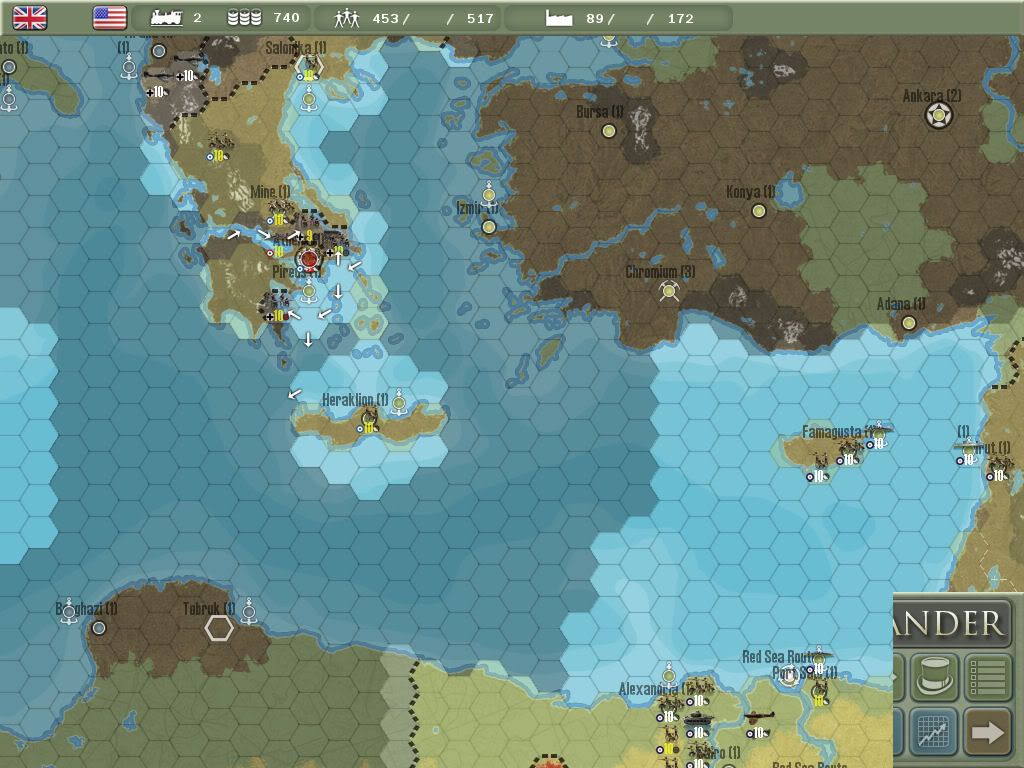
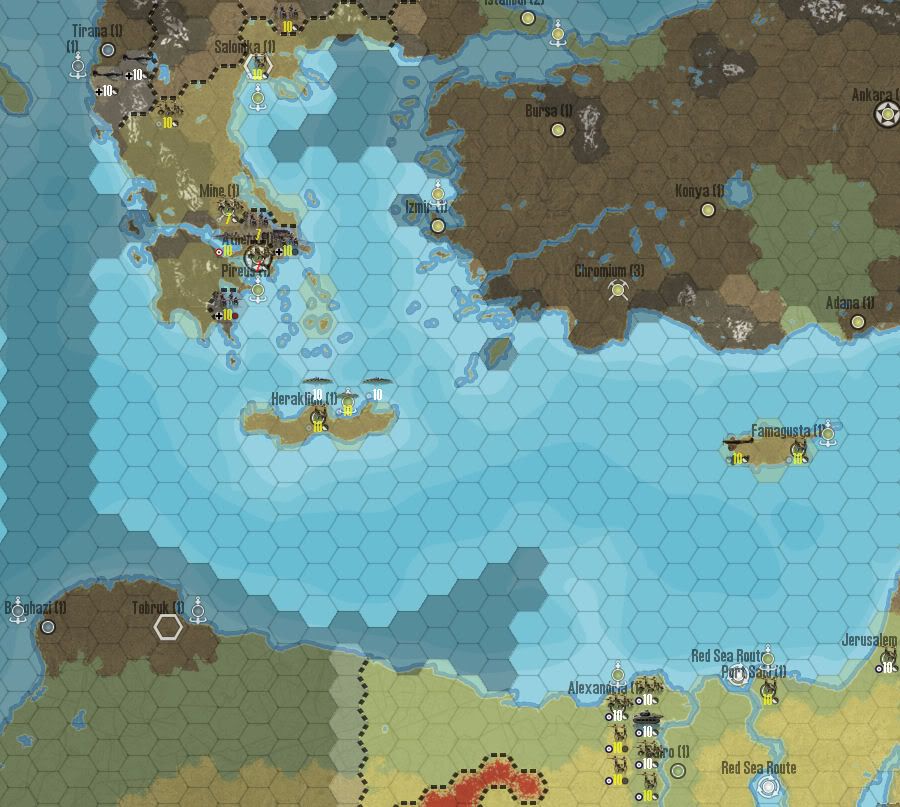
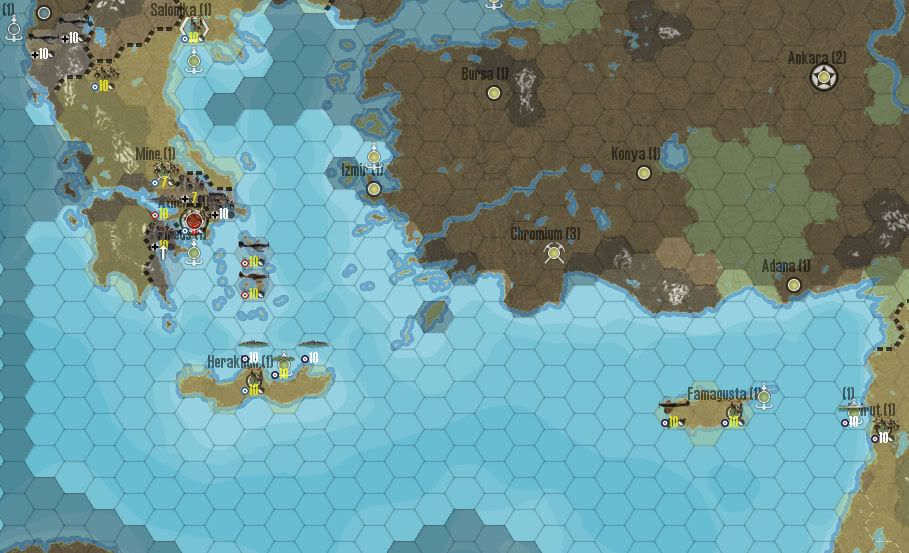
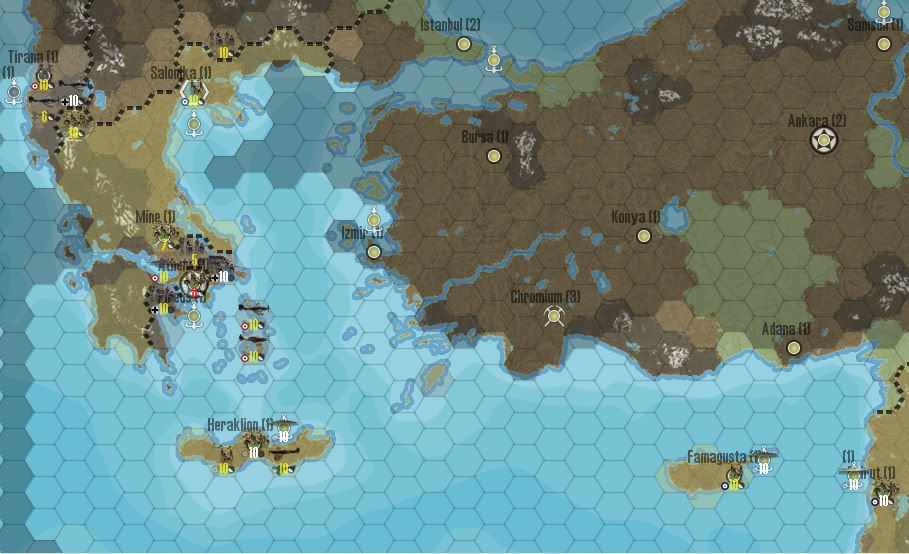
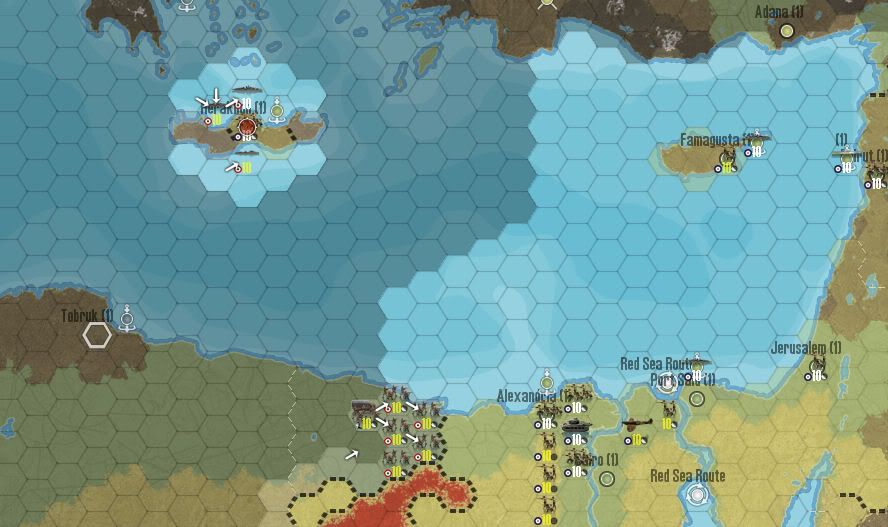
Picture 22 shows the situation in the Med at the end of the Allied turn. The fighter on Crete got a tech increased. The BB fleet was withdrawn to Egypt to get it out of harm’s way. The risk to the RAF fighter left on Crete shouldn’t be that great as long as there aren’t two Axis fighter units within range. I can’t image the Axis leaving Create alone so I expect another fighter or two to show up within the next couple of turns.
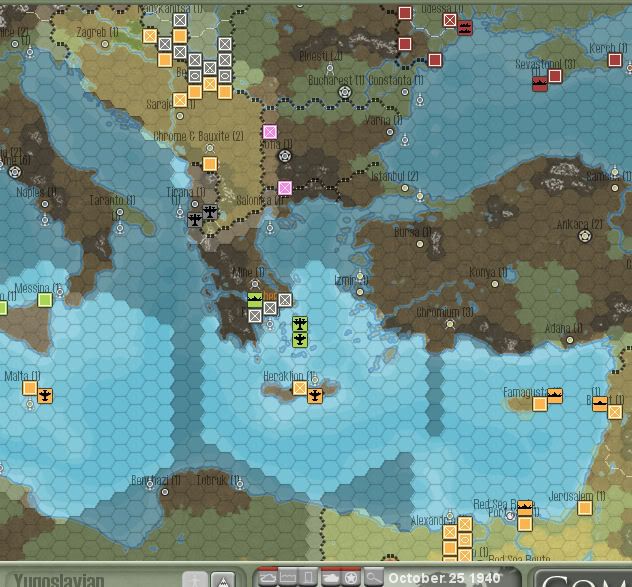 Picture 22. The Med at the end of the turn.
Winter in the Atlantic. German U-boats Sinking Merchant Ships at Will.
Picture 22. The Med at the end of the turn.
Winter in the Atlantic. German U-boats Sinking Merchant Ships at Will.
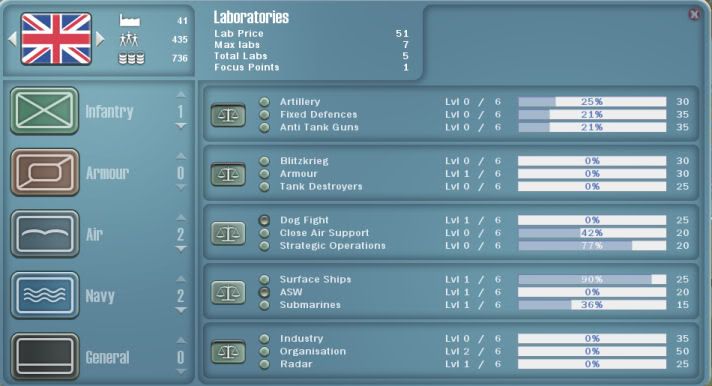
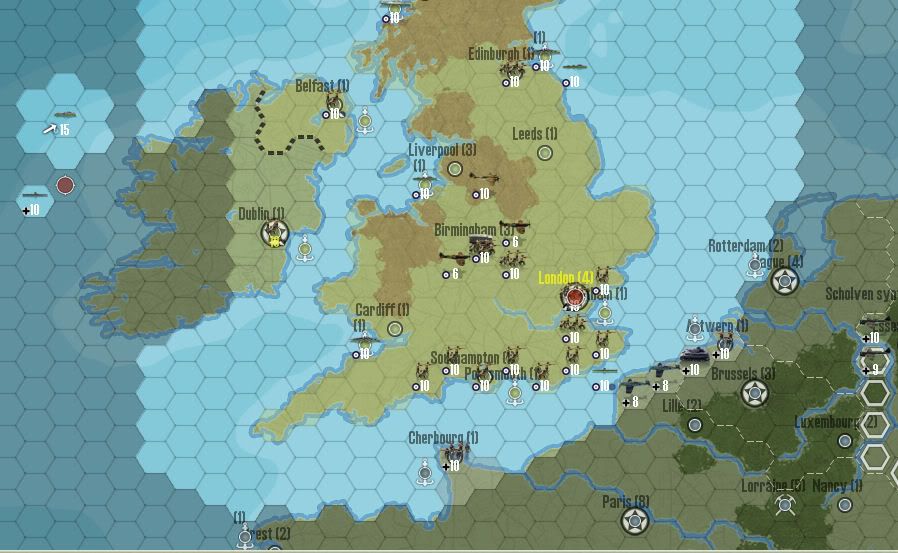
The arrival of November at the start of the next Axis turn means that England is safe from invasion for the next four months. As such, Britain used their PP reserve to built their seventh lab (UK.Lab(7)=General->Industry(1), reinforce a depleted garrison in Yugoslavia and to upgrade the tech level of their fighter unit on Malta. The UK began the turn with 57 PP’s and ended it with -6.
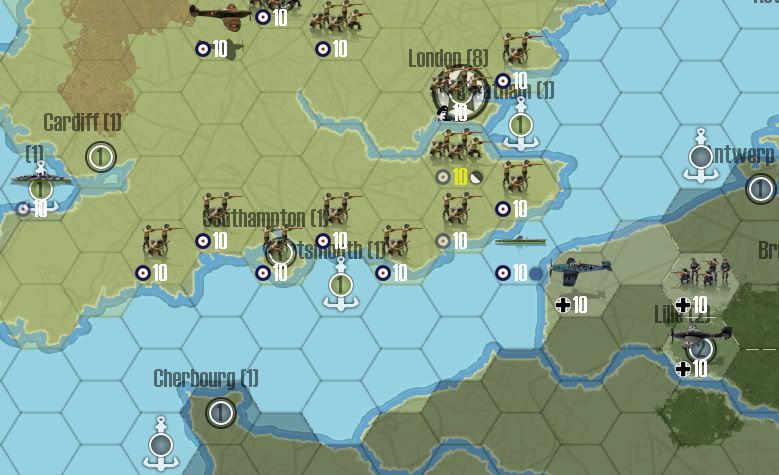
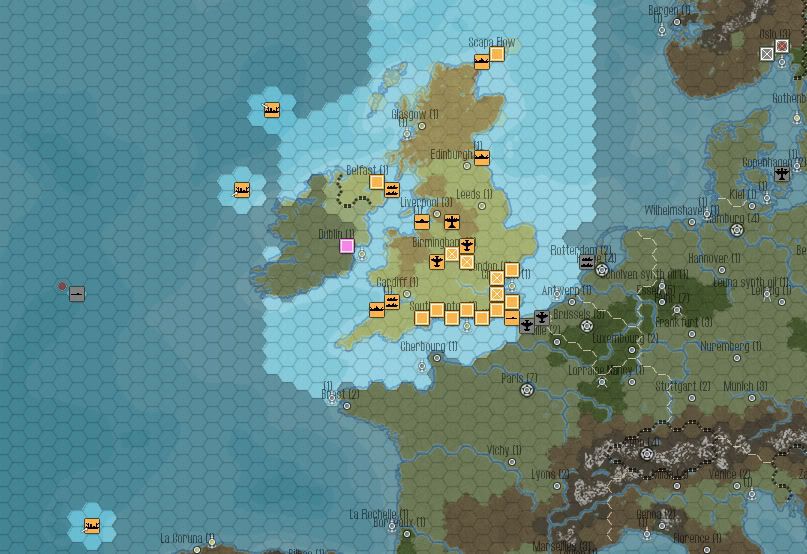
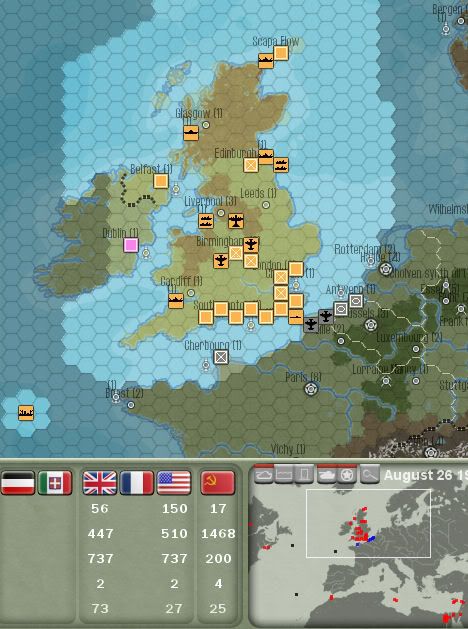
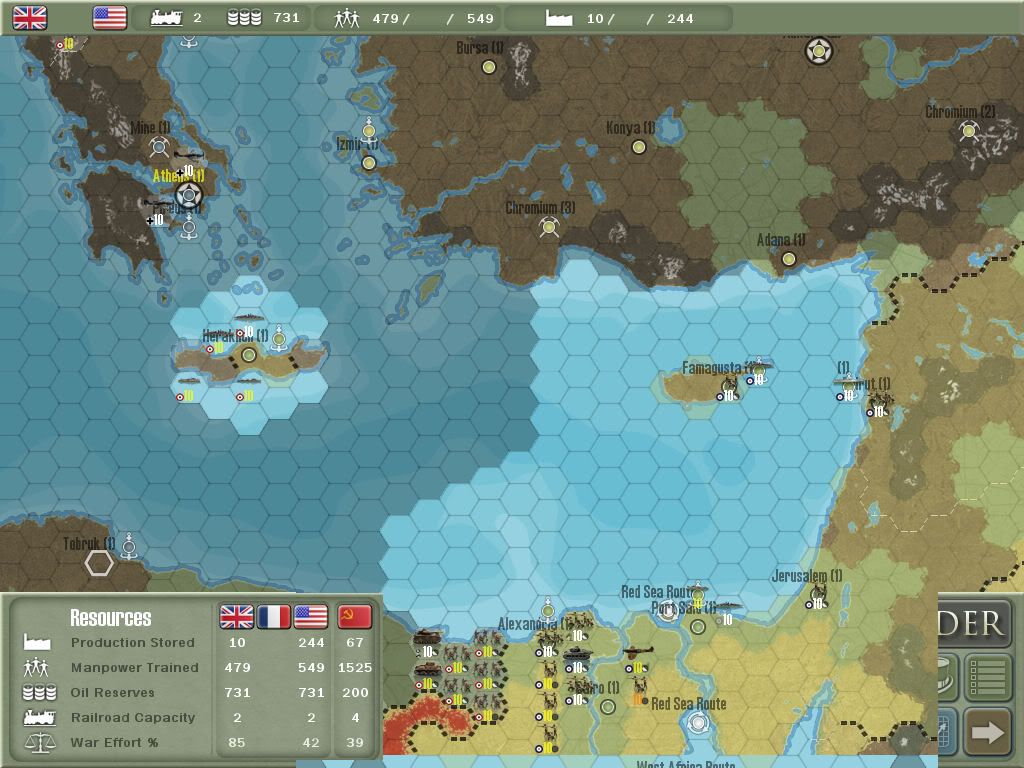
 Picture 23. UK at the end of the turn.
In the area of research the UK switch to balance research in air (away from focus on dog fighting).
In both
Pictures 20 & 23 note that the infantry corps that was in Cherbourg and one of the two tank corps that was in Antwerp have been replaced with garrisons. The staging of the RAF strategic bomber to the southwest tip of England, to cover the convoy nearby, also shows that Brest in occupied by a garrison. The implication is that Germany is transferring troops to the east and the Med.
The Germans elected to repair their two fighter units (which were at 8-steps each) instead of risking a bad air to air outcome with full strength UK fighters. So no air combat over England took place this turn, which was very much to my liking.
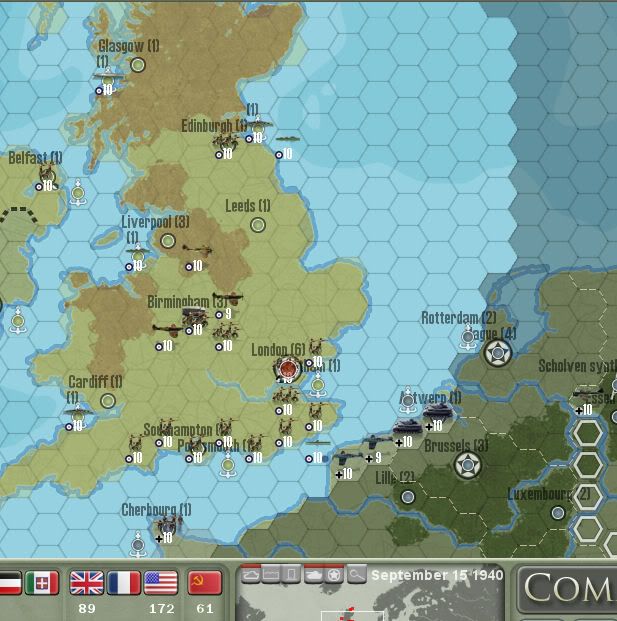
With no risk of Sea Lion for four months, the two UK fighter units were redeployed (i.e., withdrawn) from north of London to Northern Ireland and Outer Herbidies. This was done in the hopes of getting a chance to get an air attack of two against any German u-boats that venture too close to these bases.
Though the risk of Sea Lion come spring has diminished it's not gone. Even if all the channel ports are occupied by garrisons the Germans could still mount a "raid" on the southeast coast of England (close to London) with corps from ports not visible to allied air. I have no doubt that German subs are keeping a watch for any military transports leaving England and headed to North Africa. And if he were to pick up the transfer of one or both of my fighter units along with one or two ground corps then the Germans might give this raid a go. So the Brits plan to sit tight until the Germans are at war with Russia. And, they won't transfer the two fighter units to Egypt until German is at war with the USA. While this maximizes the Sea Lion defenses this leaves Egypt and the Suez Canal vulnerable. That's where the infantry corps and fighter on Crete come in. Hopefully the time it takes the Axis to dislodge them will delay the timing and execution of his North Africa strategy. The infantry corps on Greece is expendable (I will try to save it if I can) but the fighter unit is not. If and when he shows up with multiple Axis fighter units then it will high tail it back to Cyprus and then to Egypt. The primary goal in the eastern Med in the early game is to keep the Axis out of the Iraqi oil fields. While a pain, loss of the Suez Canal is acceptable to achieving this goal. That is, the British will not take a stand to save the canal. They will to save the oil fields.