Page 1 of 1
Add a New Skin - Step by Step
Posted: Thu Aug 06, 2020 1:36 pm
by asuser
It is interesting to play in OOB with units which has (somelike historical correct) own skins.
As a small guide for me and also as a possible addition to the modding guide, I have made a small explanation.
For this I chose the Japanese Type 95 tank from the "Rising Sun" campaign (image 1).
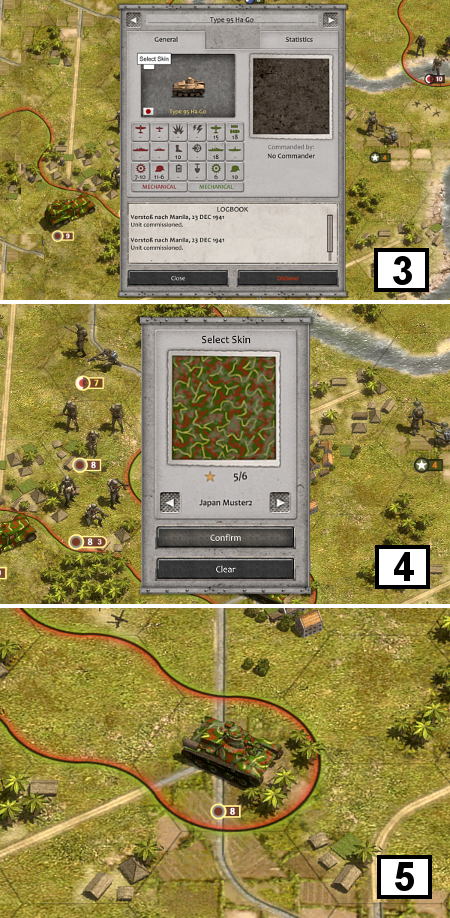
The tank should become a nice camo pattern with a typical Japanese camouflage color (image 2).
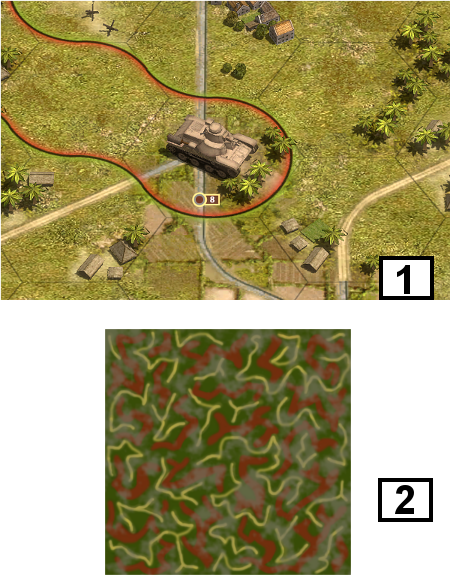
- pic1.png (455.5 KiB) Viewed 2845 times
The camo pattern can be created in a drawing program such as Photoshop or GIMP with the dimensions 512x512 px.
These colors should not be too bright, otherwise it will look like a toy afterwards.
The new skin file (named:
japan_4.png) is to put in the directory of the game:
…/Order of Battle Pacific/ Order of Battle – WWII_Data/Content/Graphics/Skins
Next Step...
Re: Add a New Skin - Step by Step
Posted: Thu Aug 06, 2020 1:36 pm
by asuser
Further additions are now required in the system files for recognizing and naming the skin.
In the directory ...:
…/Order of Battle Pacific/ Order of Battle – WWII_Data/Content/Data
... an entry must be made in the
skins.txt file to identify the new skin, which should be based on the consecutive id number of all skins.
The nation must also be entered here, as an example it looks like this (headline text is an internal definition, id is consecutive number, _4 is the 4th Japanese skin in that directory):
[3_COLOR_SQUIRREL1]
id = 18
texture = japan_4
factions = japan, ijn
category = land
Next in the directory ...:
…/Order of Battle Pacific/ Order of Battle – WWII_Data/Content/Language
... in the file
english_16.txt (or
german_16.txt or whatever is the right language for you, the number is not so important) the new skin name is entered like this:
skin_18 = Japan Muster2
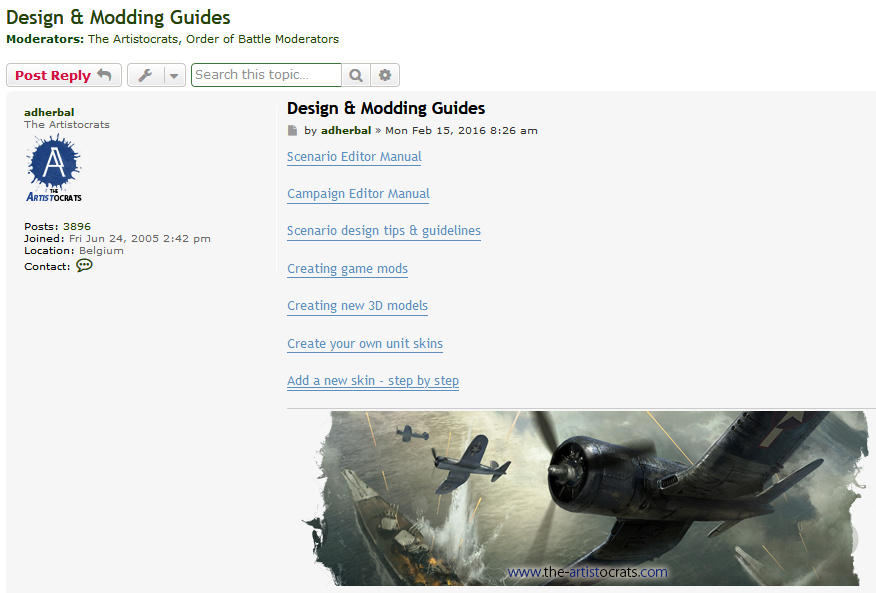
Now you can start the game and in the respective scenario click on the unit (here my tank). The corresponding unit info panel can be opened with a click on the bottom right edge
and the unit image appears with the skin selection option on the top left edge (image 3). After clicking, the possible skins appear. Now the new skin can be assigned (image 4) and the tank got now the new skin (image 5).
- pic2.png (974.42 KiB) Viewed 2843 times
The game should now be saved so that the tank keeps the new skin.
Comments and tips are welcome!

Re: Add a New Skin - Step by Step
Posted: Thu Aug 06, 2020 2:18 pm
by Mascarenhas
This is a very good addition to the knowledge base. If one I'd suggest you to add more details in the skin camo creation process. Regards!
Re: Add a New Skin - Step by Step
Posted: Thu Aug 06, 2020 3:32 pm
by bru888
Mascarenhas wrote: Thu Aug 06, 2020 2:18 pm
This is a very good addition to the knowledge base.
Indeed. So much so that I have added a link to this thread in the first post of Design & Modding Guides. Now it will enjoy perpetuity, despite the thread itself moving down the board and away. Thanks, asuser!
- Image0492.jpg (141.67 KiB) Viewed 2819 times
Re: Add a New Skin - Step by Step
Posted: Thu Aug 06, 2020 3:48 pm
by bebro
Nice tutorial, and a very nice skin
Just a hint: people who use or create custom skins, but still want to have those that come with the game without much hassle may want to change IDs of their custom skins to higher ID numbers.
The skins in beta right now hit ID 30, and we may add even more over time.
We probably don't add hundreds more, so I guess something like ID = 70 or 80 and higher is safe.
Re: Add a New Skin - Step by Step
Posted: Thu Aug 06, 2020 5:33 pm
by asuser
Thanks for feedback! It was my pleasure.

Additional info:
This workflow goes not for all vehicles and not for all nations. Time is our friend, so future patches brings hopefully more possibilities to make nice stuff like that.
Re: Add a New Skin - Step by Step
Posted: Thu Aug 06, 2020 9:03 pm
by GabeKnight
There's also a more convenient way to install new skins, and it works in either a mod or vanilla gameplay:
adherbal wrote: Thu May 17, 2018 11:18 pm
For those interested in adding your own unit skins/camouflage patterns:
• Create a folder "Skins" in "<my documents>/My Games/Order of Battle - WW2/"
•
Optional: Create subfolders in this Skins folder to group your skins (ex: .../Skins/Germany)"
• Create 512x512px PNG image files in the Skins folder or subfolder(s) using the following filename format:
<skin name>_<category>_<nation>.png
For example:
My Skin_land_germany.png = A skin called "My Skin" which will be available to land units for Germany
Another Skin_land_all.png = A skin called "Another Skin" which will be available to land units for all nations in the game
IMO there's only a need to edit any (game) text files if you want some fancy name for your skin (i.e. other than the skin's filename).
For example renaming your skin to "Japan_Muster2_land_japan.png" would accomplish the same thing as editing the skins.txt and language.txt files.
PS: And I think you forgot to mention what name the skin-file should have in your example. Pic1.png?

Re: Add a New Skin - Step by Step
Posted: Fri Aug 07, 2020 5:25 am
by asuser
Ah, ok... another way to the target.
Thanks for these infos, I add the skin file name in the first post.
Re: Add a New Skin - Step by Step
Posted: Thu Aug 13, 2020 7:24 am
by asuser
I'm experimenting with new camouflage colors for tanks. For the English vehicles, the coloring does not work for all vehicles yet, but it works fine for the Matilda II tank.
Are someone interested in using the famous 3-color camouflage especially for the "Desert Rats" or "Arika Korps" campaign? I try to create also a captured version that was used by the German army.
It could also use as a bonus unit or with the "set skin" function with the editor.
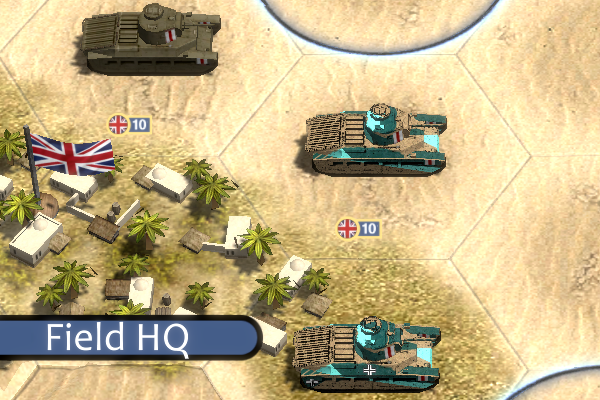
- Matilda_DR.png (437.11 KiB) Viewed 2685 times
Re: Add a New Skin - Step by Step
Posted: Thu Aug 13, 2020 10:01 am
by GabeKnight
There're many cool skins in this thread:
Skins Pack
Maybe you can get some pointers for your own creations...
Most of the skins I'm using are from there.