04Sendai-2 is in your folder.
Changes:
• Adjusted the primary objectives to be a line of towns in the north.
• Oddly enough, by chance two of those chosen towns were both named "Tashio." This was confusing (even though, who knows, maybe it was true?) so I changed the one furthest east to "Yusui."
• Adjusted the Japanese supply roads objective as follows:
- Made it "supply routes" to take the railroad into account.
- Paved the coastal road north of Akasegawa to conform with the objective description.
- Placed two bunkers to guard the paved road and railroad near Mochii; these bunkers must be destroyed.
- Four bridges must also be blown by the player in that area, so I moved your Bridge-3 trigger to a bridge just east of Togomachi (after connecting the nearby rivers).
• Added supply route guards and town garrisons.
• Placed AA units in their AI team slot, but left these empty: 330 Inf, 329 Inf, 328 Inf, 351 Div misc. They are all set for Local Defense = 5 to begin and I did not move any of the Jap units that would comprise these four teams.
• What I did do was to provide a mechanism for each of these AI teams, 330 Inf, 329 Inf, 328 Inf, 351 Div misc, to fall back and defend the primary VPs. These are AI Teams 2, 3, 4, and 5. Here is how it works:
- At Turn 5, AI Team 2 (currently 330 Inf) merges into AI Team 9 Defend Akune.
- At Turn 5, AI Team 3 (currently 329 Inf) merges into AI Team 10 Defend Tashiro.
- At Turn 5, AI Team 4 (currently 328 Inf) merges into AI Team 11 Defend Maratsuka.
- At Turn 5, AI Team 5 (currently 351 Div misc) merges into AI Team 12 Defend Jonodan.
- As each of those towns fall, their assigned team moves toward the last two VPs, Utsura and Yusui, and join their defenses. (Don't forget; for the enemy AI to win, it only has to hold onto one VP so, if by chance, the player walks in to Utsura and Yusui early, then he will have less time to take the other four VPs. Otherwise, Utsura and Yusui will be the Japs' last stand.)
- So, now that you know where each AI Team is going to, I suggest populating AI Teams 2, 3, 4, and 5 so that each team is closest to Akune, Tashiro, Maratsuka, and Jonodan, their assigned destinations. Also, maybe place these teams closer to the front for some initial resistance, whereupon they fall back (Turn 5) and make a stand along the Akune-Tashiro-Maratsuka-Jonodan-Utsura-Yusui line.
• Changed "Do not lose any landbased aux air units" objective to "Do not lose any land-based aircraft," the important change reflecting all of these planes being core, not aux. I gather that, even if you tweak the composition of the air fleet, core vs. aux, the point would be to not lose any of them merely because they ran out of fuel. I wrote the trigger accordingly.
• Regarding the "Locate and destroy HQ/supply" objective, it's the three concrete bunkers that you had placed on the map. I randomized their locations a bit. Prize: +50 Marine resources — see if that is suitable according to your schedule or alter it as needed.
• Redirected the railroad to run with the coastal road between Nagayama and Otsu because it bugged me that a train would have to pass through a coastal gun emplacement. Certainly, the proximity would be feasible in real life but in the game, it would bother me.
• Accordingly, changed Bridge-1 trigger from "Road Bridge" to "All."
• Tweaked a road south of Okawa to allow another coastal gun at a logical point (Fiery Death).
• Accommodated a hex north of Akasegawa that was just begging for a fifth and final coastal gun (Hail the Emperor).
• Added your orginal coastal guns to AI Team 1, bringing the total in that team to 10: 5 coastal guns, 2 supply route bunkers, 3 HQ/supply.
Additional Notes:
• You have in mind the schedule of commanders (including same commanders in each scenario on one junction level?). So please continue to check, consider, and edit my choices of commanders accordingly, including the two offered in this scenario.
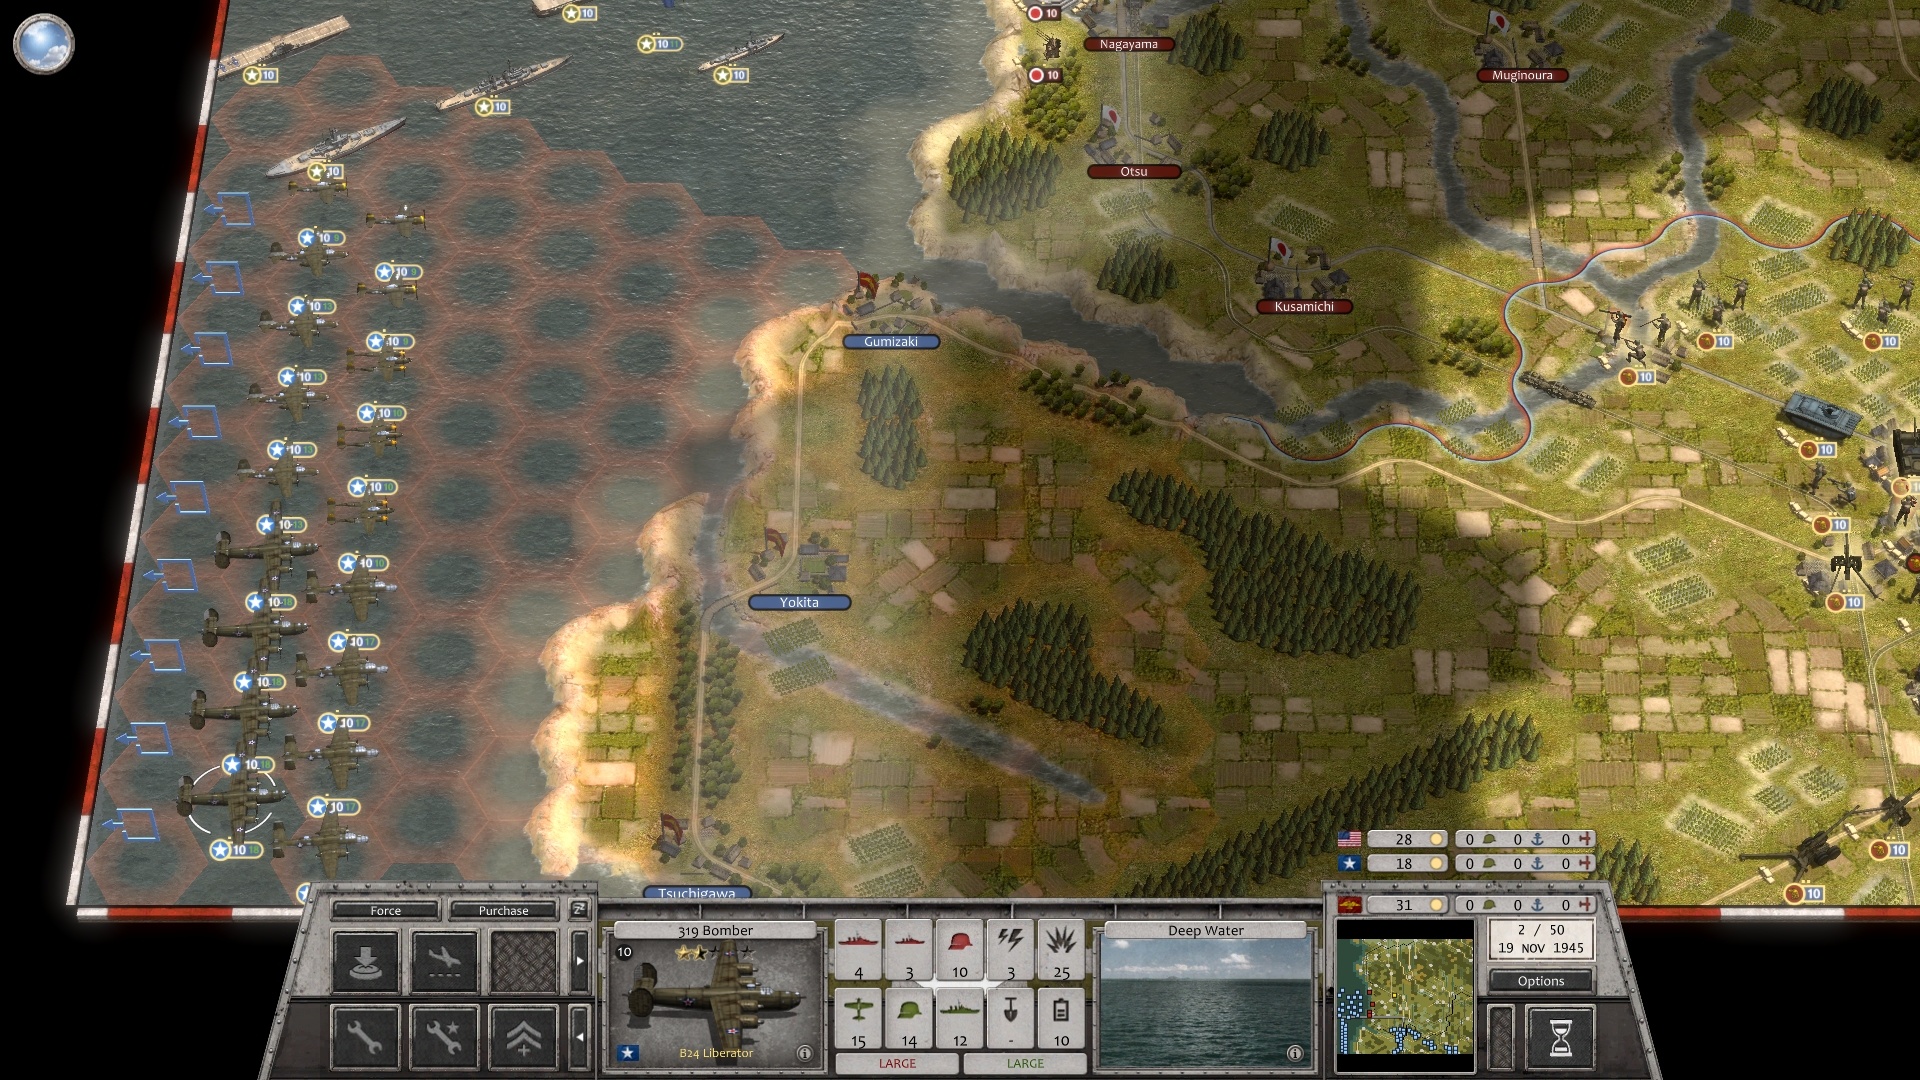
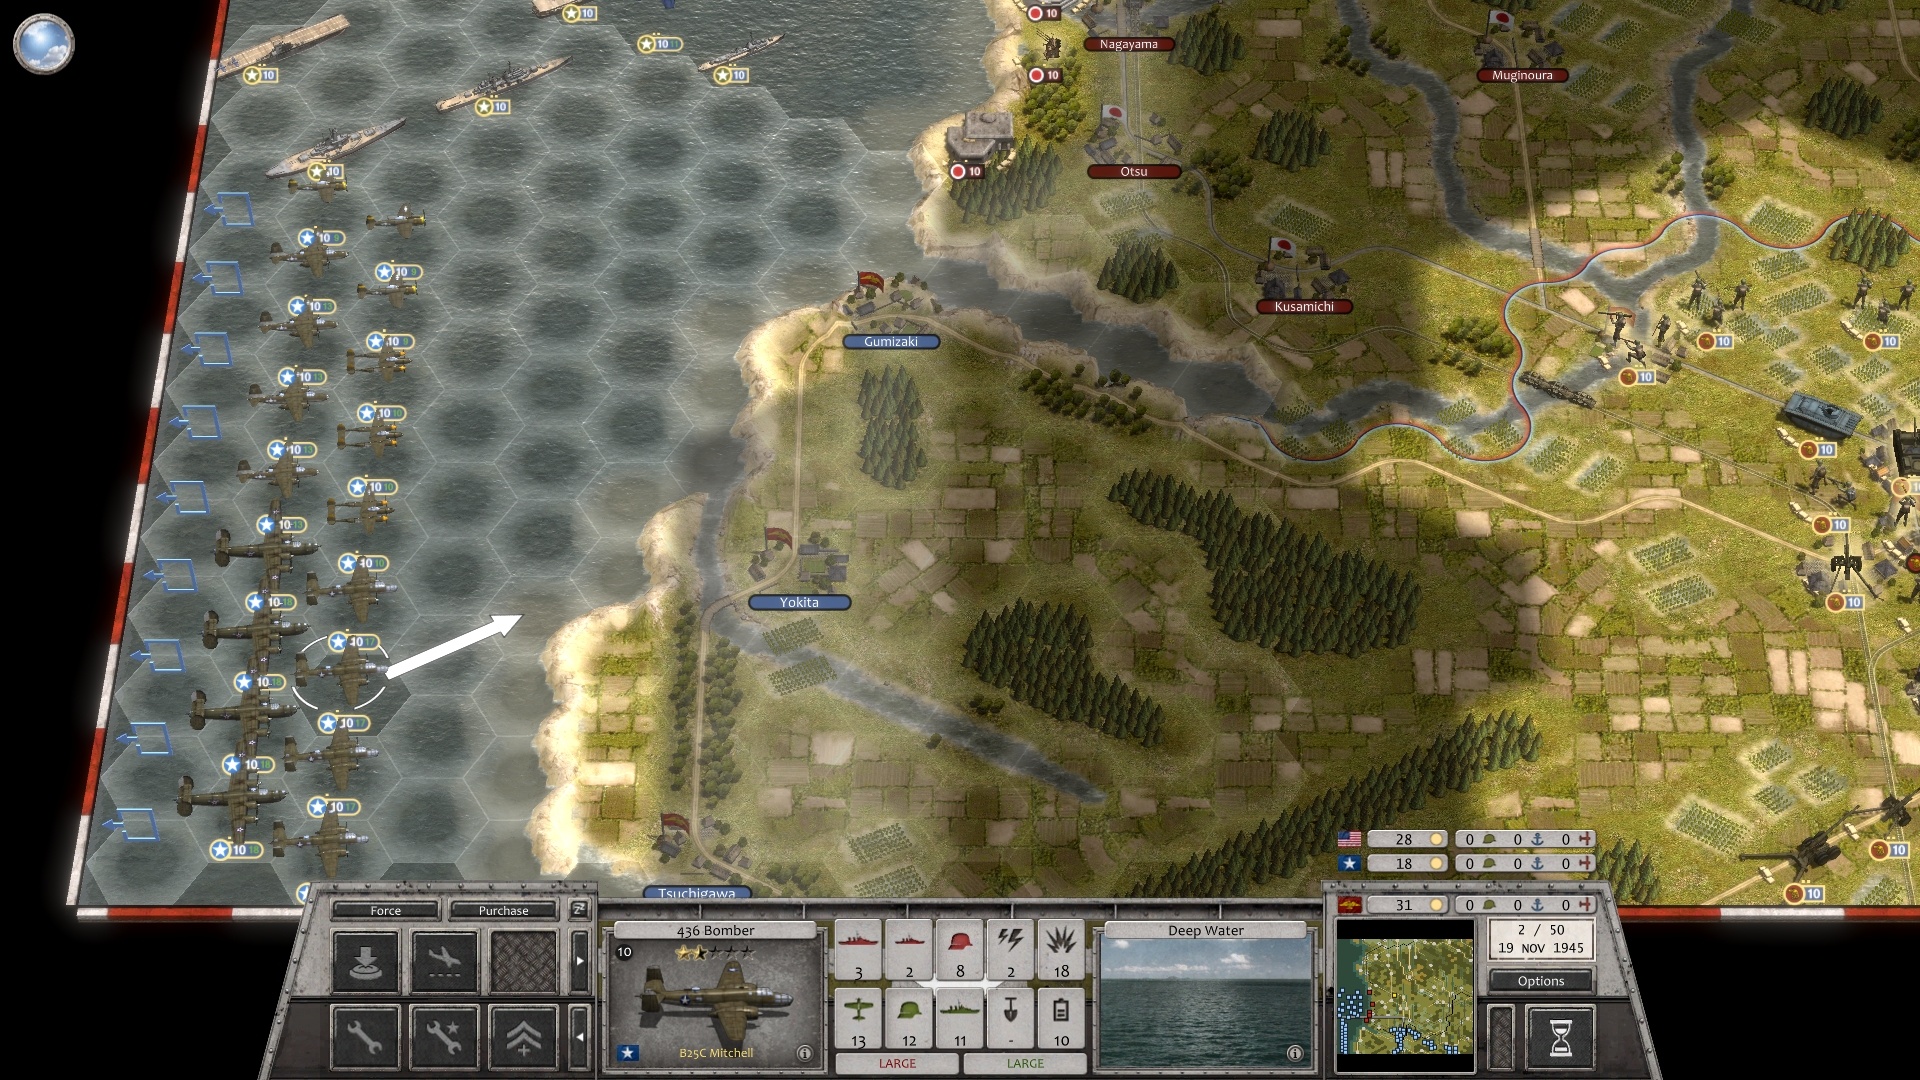
• I know that you go back through each scenario to adjust gameplay balance in order to provide a modicum of challenge. With that in mind, I call your attention to 28 American fighters and bombers versus 0 Japanese planes and 6 AA guns. Similarly, 3 U.S. battleships, 5 cruisers, and 5 destroyers against 0 Japanese vessels and 5 coastal guns. The Japanese, defending their homeland, would still have some aerial and naval resources left, even if just kamikaze planes and converted gunboats. They surely would have more AA guns. Also, this being speculative, maybe think about Jap "secret weapons" toward the bitter end.
• I don't know what was wrong with this; perhaps the wrong faction for the exit hexes?
- Screenshot 2.jpg (943.51 KiB) Viewed 4531 times
Alliance should matter, not individual faction, but when I replaced all of these with Blue U.S. Army exit hexes, the planes at least are not faced with immediate out-of-fuel danger:
- Screenshot 3.jpg (946.19 KiB) Viewed 4531 times
Now, apparently the fact that those hexes are one-way (no redeploy allowed) makes all of these land-based planes low on fuel to start — the low-fuel indicator comes on every turn. If you are familiar with this, then fine.
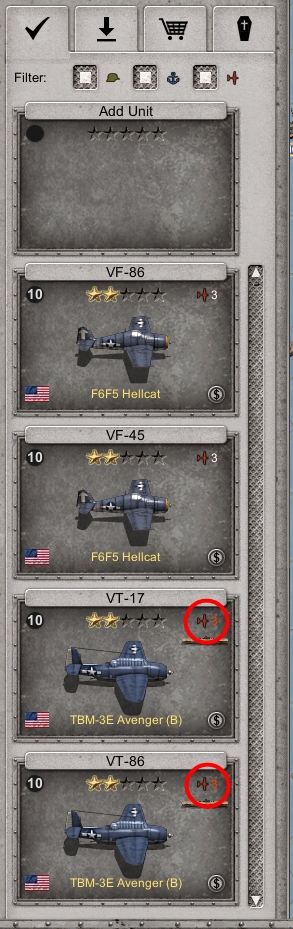
• Here is something else that I noticed. With the exception of a few infantrymen and one priest, all of the U.S. units are core. You are handling the core situation on the campaign level and adjusting CPs accordingly. Don't, then, forget about these carrier-based planes. As you know, you don't need any CPs if core units are already on the map. That being the case, everything would be fine except for 8 U.S. Navy planes that begin the scenario based on carriers. Without air CPs, they will not be able to take off.
- Screenshot 1.jpg (233.72 KiB) Viewed 4531 times
• The scenario description mentions tunnels so you may want to add a few (but not on the desination hexes for the randomized HQ/supply bunkers, please).
• In this scenario, and a couple of other recent ones, the Japs have no income. Intentional?